Chebacco News 36

How to get the Best out of your Chebacco-20

image002

Fraser Howell

Jamie Orr

Tim Smith

Bill Samson

Background

These days, probably over 95% of 20 foot sailboats are rigged as Bermudan sloops, with a tall mast, supported by shrouds and spreaders, a triangular mainsail and a jib or genoa foresail, with, possibly, a spinnaker for downwind work.

In contrast, Phil Bolger’s Chebacco-20 is a cat-yawl, with a short, unstayed mast, a high-peaked gaff mainsail with a relatively long boom, and a jibheaded mizzen sail with sprit boom.

There are loads of experienced sloop sailors around, but very few experienced cat-yawl sailors to advise Chebacco owners how to get the best performance out of their boat under a variety of conditions.

The authors have pooled their experience of sailing their Chebacco-20s to produce this little document. We don’t necessarily agree on everything – Chebaccos tend to vary a little, depending on how they were built, how the sails are cut, and so on. Anyway, here goes!

First of all, a table of the rig arrangement that works best for various wind speeds:

Beaufort Number Wind speed (knots) Mainsail Mizzen
1, 2 and 3 1 – 10 no reefs set
4 11-16 One reef set
5 17-21 One reef furled
6 22-27 Two reefs furled
7 and up >28 Furled furled (use OB)

Notes:-

1. You may want to reef earlier (by one Beaufort number) if sailing single handed. The body weight of a crew can make a great difference to how the boat handles.

2. You might be surprised to read that the mizzen should be furled when the main is reefed. You might think that this would lead to lee helm, but in fact we have found that the tendency for the heeled hull to round up into the wind counteracts this and even gives some weather helm.

3. Leaving the mizzen set in strong winds makes the boat heel a lot, adds little to forward drive, and generally makes her harder to handle.

4. Under most circumstances it is perfectly OK to leave the mizzen furled, but you then lose the possibility of heaving to using the mizzen.

Heaving to

The mizzen sail helps you to heave to. All that needs to be done is to release the main sheet and centre up the mizzen so that the boat weathercocks. She won’t lie with her head directly into the wind, but will still lie pretty close, which is helpful if you want to drop the main to take in a reef. If you want to make sure she heaves to on starboard tack, shove the tiller to port – The boat wants to sail backwards when hove to, and this makes sure she settles down on the tack where you have ‘right of way’ – handy when reefing!

Reefing

It’s much better to reef before setting out, than doing it on the water – especially single-handed. In other words, look at the weather forecast before setting out and reef according to the worst weather you’re likely to encounter on the trip. If you’re caught out, reefing is most easily done by heaving to, using the mizzen to hold the boat head to windward or, if you’ve got a crew, putting on the OB and heading to windward while one of you ties the reef in.

Furling the mizzen

The mizzen is very easy to furl and unfurl. Most people simply slacken off the snotter (the sprit tensioning line), line the sprit up along the leach of the sail (leaving it attached to the clew), then twirl the sprit so that the sail wraps itself around it. The end of the snotter can then be used to tie a half hitch or two around the mast and sail to keep it tidy. Unfurling is even easier; undo the half hitches holding the mizzen furled, and let it unwind (- the wind will help you). Be careful that the sprit doesn’t whack you on the head when eventually it comes out! The final step is to tension the snotter.

The Centerboard

The Chebacco-20 behaves just like a large dinghy. You’ll get the best out of her by lowering the centerboard for beating and reaching, and raising it for running before the wind. With the Chebacco being shallow hulled, though, a little bit of board left down, off the wind, can improve handling.

Partially raising the centreboard can help, too, when heavy weather helm develops.

Of course the Chebacco has a shallow salient keel, and is well mannered even when beating with the board up. She does make a lot of leeway in these circumstances, though.

Sailing Backwards!

If you live among crowded moorings, you might want to master the trick of sailing backwards from your mooring to get into clear water. This is achieved by letting the mainsail fly, and backing the mizzen. You can steer using the tiller – tiller to port to move the back-end of the boat to starboard, and vice versa. Once you’re in the clear, you can harden in the mainsheet and you’re sailing!

Sail trim

The Chebacco is capable of pointing pretty high, and should tack through 90 or 100 degrees in reasonable sailing conditions. It is fatal for performance, though, to strap the mainsail in tight. Remember that the boom is very long and that the main should lie at an angle rather like that of, say, a genoa on a conventional sloop. So the end of the boom should never come inboard of the corner of the transom or all you’ll get is a heeling effect with little forward drive.

The mizzen should be trimmed to give just a little weather helm. When the weather blows up you’ll find that the mizzen needs to be let out to such an extent that it’s flapping. That’s the time to furl it. Some of Phil Bolger’s designs have used fully battened mizzens, on the theory that they can be feathered without slatting. He has had varying reports on how effective this is. This would call for a halyard and other expenses and handling complications.

Using a jib?

It is possible to fit a jib to a Chebacco. Fraser Howell has added a short bowsprit and flies a 60 sq. ft jib which counteracts weather helm nicely, as well as giving extra drive. It is hard to manage the jib without a crew though.

Under Power

Maximum speed under power (4.5 hp) is 5.5 mph. Efficient speed under power is 4.5 mph, at which you’ll get approximately 9 mpg with a 4.5hp motor. The point being made is that a 5hp motor is perfectly adequate for reaching hull speed.

Short shaft motors are OK, but if you are sailing single handed and go forward to adjust things at the mast end, the prop will lift clear of the water. The same will happen in steep seas. If you’ve no worries about the OB grounding, then a long shaft motor may be preferable.

Summary

The above notes were prepared by a group of sailors with actual experience of sailing their Chebacco-20s in a variety of conditions. Anybody else with actual experience in a Chebacco is very welcome to add their two cents worth to this document.

***

Dear Richard,

First of all thank you very much for taking up Bill Samson’s newsletter and setting up such a wonderful new chebacco website. I found the new articles very interesting and looking forward to the next one.

Maybe a nice addition to the site would be some kind of Chebacco registry. It could have basic information (and maybe a picture) of the boat and contact info of the owner.

After a long gestation, KITTY HAWK our lapstrake chebacco, finally hit the water of the Venice lagoon.
She has been built as specifed in the plans except for the mast tabernacle (as designed in the “cruising version”) and a bridge deck (a-la-Story). Hull is painted black with cream deck, stained cabin sides and coamings, teak rub-, toe-rails and trims.

I am in the process of learning to sail her (playing around with halyards, outhauls, etc.) to get the most out of the sail). It seems to me that she could use a little more sail area-around here it is mostly light winds (or too  much wind) and  KITTY HAWK has a little trouble keeping up with the local fleet of flat bottomed traditional luggers. One of these boats of size comparable to a chebacco spreads about 300 sf of canvas! So far I have not been able to break the “5 knots wall” even in 15-20 knot winds”. She does have a bit too much weather helm in stronger breezes, so I think I’ll experiment with a jib (around 50-60 sf) on a bowsprit.

Nevertheless, I’m really impressed by the stability and maneuverability of the boat under sail. She is also great for camping, except for the gloop-gloop-gloop chortle on the laps that resonates in the cabin and takes some getting used to! She is a real beauty and is receiving a lot of attention from the other members of the sailing club where I keep her, which, aside from some handsome trad luggers is mainly populated by ugly duckling fiberglass boats. The tabernacle set up is essential for passing under bridges in and around Venice. It was made according to Bolger’s plans, but the whole thing is awkward to set in place single-handed and might have to be modified. On Sunday Kitty Hawk posed for a photo session under sail and will send you photos as soon as they’re developed.

keep in touch,
Vincenzo.

***

Chebacco News 35

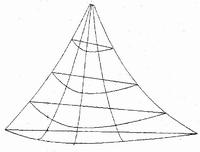
Jib

Main

Mizzen

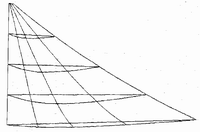
(computer drawings of Chebacco sails courtesy Sailrite)
Been doing some research on sails for the Chebacco I’ll be building.
(wife says “I would have started it different…” So, Hi, I’m your editor. My name is Richard Spelling, I make boats. Among other things. I’m making a machine shop from scratch right now. I’ll post an article about me later. I have the plans for the Chebacco light cruiser (the one with the pilot house that kind of makes it look like a car) and will be building it. I’ve been doing some research on Chebacco sails…)
As I understand it, there are basically two options if you want good dacron sails for your Chebacco. Well, there are actual three options, but I did say “good sails”.
The first option, the one I have concerns with, it to have your local sail maker make you some sails for your new Chebacco.
I have two minor issues with going this route for my boat. The first is price, which from what I’ve heard, would put this option on the high side. Never actually asked for a quote from one, though. I’m a guessing it would be high. This would be a custom, one of a kind, never made this type of sail before job for your local sail maker. 99.9%ish of the sails made around here are the familiar triangle, high aspect, sloop rig sails. Which brings me to the second issue I have with going this route. It appears that cutting gaff sails, and mizzen sails as well, is something of a lost art. The cut of the sails is nothing like the cut of the main or the jib on a sloop. I find it unlikely the sail makers here in Tulsa, Oklahoma know the proper way to cut a gaff and a mizzen sail. Actually, at the local lake, I had one person comment that my AF2 Entropy was the only boat on the lake with a gaff rig.
Also, I’ve seen Micros, the venerable Bolger cat-yawl, with to much draft in the mizzen. The higher entry angel on the mizzen causing the boat to self-steer about 15 degrees lower than the Micro can go.
So, if the local sail makers are out, where does that leave one? There is one firm I’m aware of (there may be others) that make a lot of the sails for Bolger boats. Bohndell.
To see if they were up to speed, I sent them an email asking for the specs on their Chebacco sails. Here is what they wrote back:
The Chebacco is not a stock sail. Price for the gaff sail plan is $978 and $850 for the sprit plan. Please allow four to six weeks for delivery. Please call or write if you have any questions. Sue Chace
Can you send me the specs on the Chebacco sails, the gaff version?
What weight sailcloth?
How much hollow in the leach?
How much round in the foot, luff, and head?
Where is maximum draft located?
Same for the mizzen.
What kind of provisions are on the sail for connections to the mast hoops?
What kind of grommets?
Available in any colors other than white? If so, what price?
What kind of warranty comes with them?
Dear Mr. Spelling, Here are the specs you requested. Please understand that gaff sails cannot be designed on a computer, they must be done by floor layout, so these figures are approximate. Main: 3/4″ head round, 3″ foot round, and 2″ on the luff. Leech hollow about 4″. Maximum draft will be about 40% aft of the luff. Mizzen: 2″ leech hollow, 1″ luff round and 2.5″ on the foot. That sail will be fairly flat. We would be installing #l brass spur grommets on the luff for lashing on the hoops. We do not provide hoops. We would not recommend colored Dacron for these sails. The gaff main will be leech planked, the best fabric for this purpose is warp oriented, and is not available in colors. Furthermore, it would be difficult to match colors in two different weights, the main is quoted in 5.1 oz. and the mizzen in 3.9 oz. As for the warranty: We guarantee that if you have built the spars to plan, the sails will fit. After that, owner use and abuse will have the most effect on the longevity of the sails. Sail covers, or removing the sails will greatly increase the life of any sail. At this point, our earliest delivery date is August 15th. Thank you for your inquiry, Sue Chace
So, it appears, to my admittedly limited experience, that Bohndell knows what they are doing. Ignoring the part about “gaff sails cannot be designed on a computer”. I assume that means “gaff sails cannot be designed on a computer on the software we have”.
The next option I’m thinking of is a Sailrite kit. I went that route for the main on my AF2 Although, next time I won’t do it on the floor. OUCH!. I bothered Jeff at Sailrite for a couple of months with emails, finding out EXACTLY how he would design the sail for Entropy. Actually, I got enough information out of him to cut the sail myself if I had wanted to. The kit price was reasonable, not a whole lot more than the price of the raw dacron.
So I bought the kit, for about twice the amount I had already thrown away on poly tarp sails. It went together easily with the seam stick tape, and I sewed it on my cheap Wal-Mart sewing machine. At one point I was punching through 11 layers of dacron, with no problem.
I have to say that I am happy with it, and with the experience of making it., so, a Sailrite kit for the new boat was definitely a consideration. I wrote Sailrite, and asked them basically the same questions I asked Bohndell. Here is their reply:
Thanks for your questions, Richard. If you have not found our web pages on the Chebacco, check out the following:

<divclass=section1>
The fabric is 4 oz Dacron from Challenge. The shape of the sail can be anything you desire, i.e., leech hollow, edge round, draft location. But these are not matters that can be easily described without the 15 or so pages that the computer prints out on each sail we do (output that you receive when you order a kit). I hope you will just tell us for this first sail that you want the sail a bit fuller or flatter than normal or the draft a bit further forward or aft of normal or the leech hollow a little more or less than normal.

We provide #2 spur grommets in the kit for use in securing the sail to its spars. These sails are normally laced in place but you can use hoops if you desire.
Dr. Richard Burnham of Cummington, MA, just finished a set of Chebacco kits. You can reach him at dick@talkingcrow.net.
Jim Grant at Sailrite

So, basically he says “we can make it any way you want, buy it and we will tell you how it’s made, see our web page”. Kind of a disappointment, especially as how their web page says “Gaff mainsail made from 5 oz. white Dacron© using the designer’s plans”, and I was wanting to get info on the “designer’s plans” for these sails.
Also, Sailrite has the sail kits available in various colors. Perhaps they aren’t aware of “We would not recommend colored Dacron for these sails. The gaff main will be leech planked, the best fabric for this purpose is warp oriented, and is not available in colors” Actually, I think the leech on the Sailrite kit either uses tape, or is folded down a bunch of times like on the sail for my AF2. Maybe that is what ”leech planked” means? Have to ask.
Leech planked: The panels are parallel to the leech of the sail rather than the foot (cross cut), eliminating the need for battens. Let us know if you have any other questions. Sue Chace
So, it appears the Sailrite kit is “cross cut”. Wouldn’t’t “Leech hollow about 4″ eliminate the need for battens?…
Still, I had such a good experience with them doing the sail for my AF2, I decided to give them the benefit of the doubt. I contacted Dr. Burnham and picked his brain.
He even volunteered to write a couple of paragraphs for the new Chebacco!
Here goes on putting the sails together:
Sailrite kits were suggested to us by Phil Bolger who said that the Chebacco needed a full main and that he had information that Sailrite did it right. My wife, Ulla, and I got the three sail kits in the dead of winter and were looking things over when we called Jeff at Sailrite who suggested an order of making: mizzen, jib, main. The mizzen is flat and easy to make, the jib has a steel cable and some draft, and the main is the most challenging.
I must mention the “why” of the jib. My wife and I like to sail together but she is not about to be a knitter at sea — she too wants to be part of the sailing. In years past tending the jib on a racing sailboat was her part as I handled the main and the tiller. We hope to carry on this good working relationship aboard our Chebacco-to-be.
We used our venerable home sewing machine which handled every single job that Sailrite suggested for it — patches, edging, seaming, hemming of boltrope and cable, reef points. The machine is a Husqvarna some 23 years old and when we had it serviced as we started the sewing adventure there were some broken gears but the machine had a 25 year warranty! The after-sail servicing showed that the machine did the job without stress. The material for main and mizzen was 4.9 oz. dacron and the jib was 4.0 oz. Sometimes we sewed through 7 or more layers of cloth — clunk-clunk-clunk went the Husqy.
The way we built the sails was this: I used the sticky-tape to stick the seams together. Patches were given to Ulla who ran them through the machine. The sail panels were sewn using a Sailrite genius-stroke: we got a 10′ long 4″ diameter cardboard tube from a local carpet supplier (free), cut it longitudinally so we could slip a rolled up sail inside it. I would hold the tube on the port side of the machine while Ulla guided the taped seam through the machine (she rolled up a small amount of sail by hand and ran it under the machine’s arm. She didn’t care for sewing on the floor so mostly she stood up at the table feeding the sail through while I slow-walked the tube along.
Whenever we had questions, Jeff at Sailrite’s 800-number was there with more than enough information to keep us on the right path. All ingredients were supplied for the sails although we bought a small die set and rented the large #6 set for a week. Now the sails are in the loft, Ulla is looking after her weaving and sheep, and I’m building the boat.
Cheers,
Dick

Well, that’s about it. I think both Bohndell and Sailrite will give you a good set of sails. If you have more money than time/skill, the Bohndell sails are a good deal. For me, though, I’m thinking the Sailrite kit for the new boat. The deciding factors over going the Bohndell route being the much lower price, and the availability of the colored versions, and the fact I think they do the best design work on gaff sails.
***

A letter from Gil:

Joan and I spent June 25-29 at the New England Brass and Gas Meet, a biennial gathering of pre-1916 cars. Our 1912 Buick was one of 120 brass-bound beauties, and we drove it about 350 miles with a lot of shaking and rattling but no major convulsions.

The first day’s tour was to the Massachusetts coast, specifically to Gloucester with an ongoing spur to Rockport and back. Rather than go to Rockport through heavy shore traffic with our two-wheel brakes, leather cone clutch, square-cut gears and no stop lights or turn signals, we decided to try to find Philip C. Bolger and Friends. This is easier than it used to be. Most people in Gloucester, even in boat-related places, had never heard of Phil. But his concession to modernity, to the extent of getting a telephone (hooked only to a FAX line, and not used for speech), resulted in PCB&F being listed, complete with street address, in the directory. After we had chugged a few miles down a side road, we came to Resolution, Phil’s old liveaboard boat, moored in the front yard of a house. We parked in the street, went to the house, and walked all around it looking for the most likely door to knock on. Eventually, Suzanne appeared on an upstairs deck. After I told her we were the Fitzhughs who were building a Chebacco, that we were in town and wanted to meet her and Phil (who by then had also appeared), we were very cordially welcomed and invited in for tea and conversation.

And what wide-ranging conversation! The car, of course, was an ice-breaker. Suzanne is very knowledgeable about cars, having rebuilt a favorite station wagon and having worked extensively in auto mechanics in her native Germany (I hadn’t realized she was born abroad). She said there just weren’t many really old cars in Germany, since they didn’t survive the war; I said many of ours had been melted down in scrap drives during the war and used to make the bomb casings that helped ruin the ones in Germany. Phil had fond memories of growing up with Model Ts, but had owned two Crosleys in his youth. The Crosley was an American car almost as big as an English Morris Minor, and not at all related to the British Crossley (two esses) that was older and much more substantial. What mostly impressed Phil about the Crosley was how roomy it was; was this the beginning of his nonconformity?

Maybe the origin of the name Philip C. Bolger and Friends (plural, when most of the world knows the company as only Phil and Suzanne) is his comment: “I married six cats.” Indeed, there was always something furry in view, and one of Phil’s ongoing concerns is keeping the inside cats inside and the outside ones outside.

The current flap about licensing naval architects, recently discussed with various degrees of vituperation in both WoodenBoat and Messing About In Boats, has Phil and Suzanne well and truly exercised, and for good reason. A lot of well-known and highly regarded boat designers don’t have the technical academic background to design big ships, and so couldn’t pass the proposed licensing tests. If I want a custom-made aircraft carrier, I’ll go to a naval architect. If I want a sailboat, or something to catch fish from, I’ll go to PCB&F and damn the licenses.

In politics, Phil votes Libertarian. (Why am I not surprised?) We agreed he was the Libertarian equivalent of a Yellow Dog Democrat (for those overseas, that’s someone who’ll even vote for a yellow dog as long as it runs as a Democrat). Phil has no particular regard for Ralph Nader and “that guy with the ears” (Ross Perot); he thinks they just wanted an ego trip. The Libertarians are trying to build a party that believes in smaller and less intrusive government, oxymoronic as that may sound.

Phil said he owed Bill Samson a letter. He was very complimentary about Bill’s efforts with CN and hoped someone would be found to take it over. This was before either of us knew of Richard’s succession.

We ended the visit by taking P&S for a ride in the Buick. It was altogether a delightful interlude, and no doubt much more pleasant than the drive to Rockport and back would have been.

Our tour on the last day took us to Newburyport, where I visited a small maritime museum. The price of my ticket entitled me also to visit Lowell’s Boat Shop, the oldest in the country, founded in 1793. We had a good tour, and I said I was building a Chebacco. One of the boatbuilders said a friend of his, Brad Story, had built several. But, he said, Brad has gone back to his roots – being an artist, which he was before he got into boats – because of health problems. He has serious back trouble and has also had both ankles fused. This, folks, is a real shame. Remember, Brad commissioned the design in the first place, so he’s the cause of what many of us are building as well as the builder of what not a few of us are sailing.

Best regards to both. Richard, welcome aboard.

***

A letter from Jamie:

Hi Richard

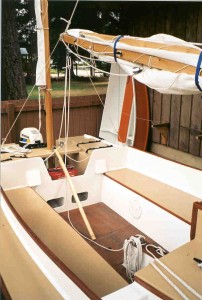
I’ve fixed up my cockpit so I can raise the floorboards to seat level, for sleeping.  I sent a note to Bill Samson about a recent cruise, and he thought this idea might be of use to other Chebacconists, so I’m sending it to you for the new Chebacco page, if you want it.  I’ve attached pictures of Wayward Lass showing these, and a couple of other additions.  Feel free to edit as needed.  These modifications have all been tested in use and worked just fine.

Floorboards

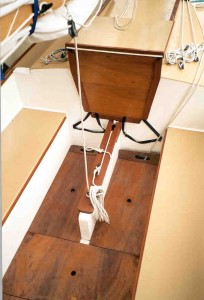
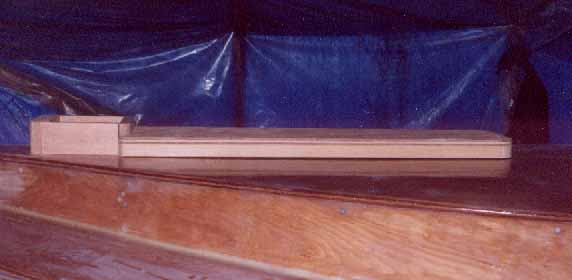
My floorboards are 1/2 inch plywood, all cut to the same length, including
the two that run up along the centerboard case.  (The small gaps this leaves
at the end of these two are filled with spacers of the same material).

floorboards

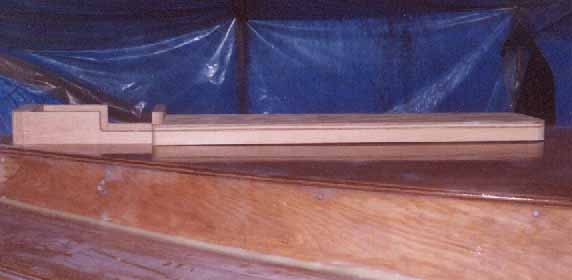
I used a jig made of the floorboard material to mark where the upper edge of
the supporting cleat, or rail, should come to.  The rails themselves are
made of leftover trim, an African mahogany of some description, finishing
about 5/8 square.  I screwed these to the seat fronts, bedding them in
polysulphide so they can be removed if need be.

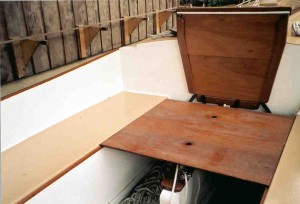
floorboards-halfway

To span the cockpit safely, the 1/2 inch ply has to be reinforced underneath
— I used fir, 3/4 x 1 1/2 inch, on edge.  This can cause complications, as
the reinforcing pieces have to be positioned to clear the centerboard case
and mainsheet block while the floorboards are raised, as well as the bottom
of the boat and anything stored in it while the floorboards are in their
usual position.  A 3/4 inch ply might work without reinforcement, but better
test it first.

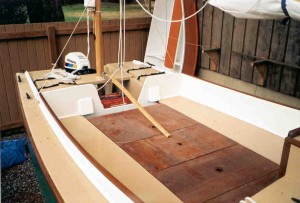
floorboards-sleeping1

Note that the mainsheet has to be out of the way for sleeping.  I loop it
over the end of the boom and let it run from there under the platform.  The
boom is held steady by the two short lines to the quarters.  (I also use
these when anchored or motoring as the mainsheet alone lets the boom wag
back and forth a bit.)

mainsheet

I’m thinking of adding extra boards for use as seats at either end of the
cockpit, or as a table.  These would be narrower, and could be stored under
the seats (reached through the cabin) when not in use.

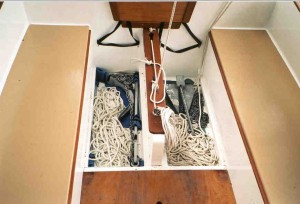
While I had the boards out, I thought I might as well take a picture showing
how I use the space below for storing my anchors (8# danforth and 25#
fisherman).  With the rope flaked (piled) as shown, it pays out without
kinking.  Beer is stored under the next board aft where it will stay cool
(but not icy) – a very useful space all round!

anchor locker

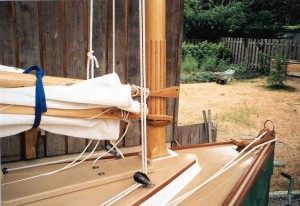
Mast collar

Since my mast is square at the bottom, when the halyards were slacked off
the jaws used to jam and the boom couldn’t swing.  To make it easier reefing
and furling, I added the collar shown on the mast.  The collar lets the boom
roam around without damaging the jaws.  It also keeps the boom up when
anchored with the tarp set up for a tent.  The vertical strips above the
collar are for the chafing when sailing — my mast was starting to get a bit
chewed up by the jaws — I also leathered the jaws.  The rope at the bow is
for the danforth, it’s left like this so that the anchor can be dropped
quickly from the cockpit.  (The Jonesport cleat on the bow is made as drawn
on the plans, works very well too, holds the anchor rope right on the
centerline, is worth the time and effort.)

mast collar

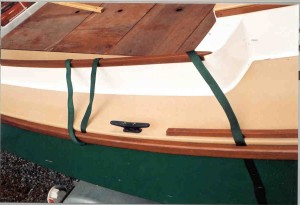
Finally, I’ve shown the slots in the gunwales, designed to hold 1″ webbing
for tying down a boom tent.  I’ve got a slot every 2 feet or so, from just
behind the cockpit to just ahead of it — these need to be cut before the
rubbing strip is fastened on.  I haven’t made a real tent yet, but the slots
work fine with the polytarp tent!

tie down straps

That’s the lot.  Good luck with the newsletter, looking forward to your
first issue.

Cheers,

Jamie

Chebacco News 34

Chebacco News 34-June 2001

So long – and thanks for all the news!

Well folks, this is to be the last issue of Chebacco News under my editorship. It started in September 1994, printed on a dot-matrix printer with my old Atari ST computer, and has evolved into the current Webzine.

My heartfelt thanks are due to all of you who, over the years, have shared your Chebacco experiences via Chebacco News – but most especially to Gil and Joan Fitzhugh, not only for their insightful articles, but as the North American distributors of the printed version of this newsletter.

There are two reasons for me giving up the editorship. The first is that my interests have moved on, primarily to kayaking, and I’m not using Sylvester as she should be used. The second is that NBCI is going to start charging for the use of its webspace and I’m, frankly, not prepared to pay for a service that brings me no income.

SO – IF YOU WANT TO HAVE COPIES OF CHEBACCO NEWS TO REFER BACK TO, YOU’D BETTER START DOWNLOADING THEM BEFORE THEY DISAPPEAR ON JULY 15 2001.

If anyone is keen to take over the editorship and set up Chebacco News with their own ISP, please contact me and I’ll be pleased to help them get going.

Sylvester is for sale:

I’m offering Sylvester for sale at £4500 to include a galvanised, braked Snipe road trailer and Mariner 4hp outboard. Please contact me if you are interested, atbill.samson@tesco.net


Cabin Windows – Jamie shows us how it’s done!
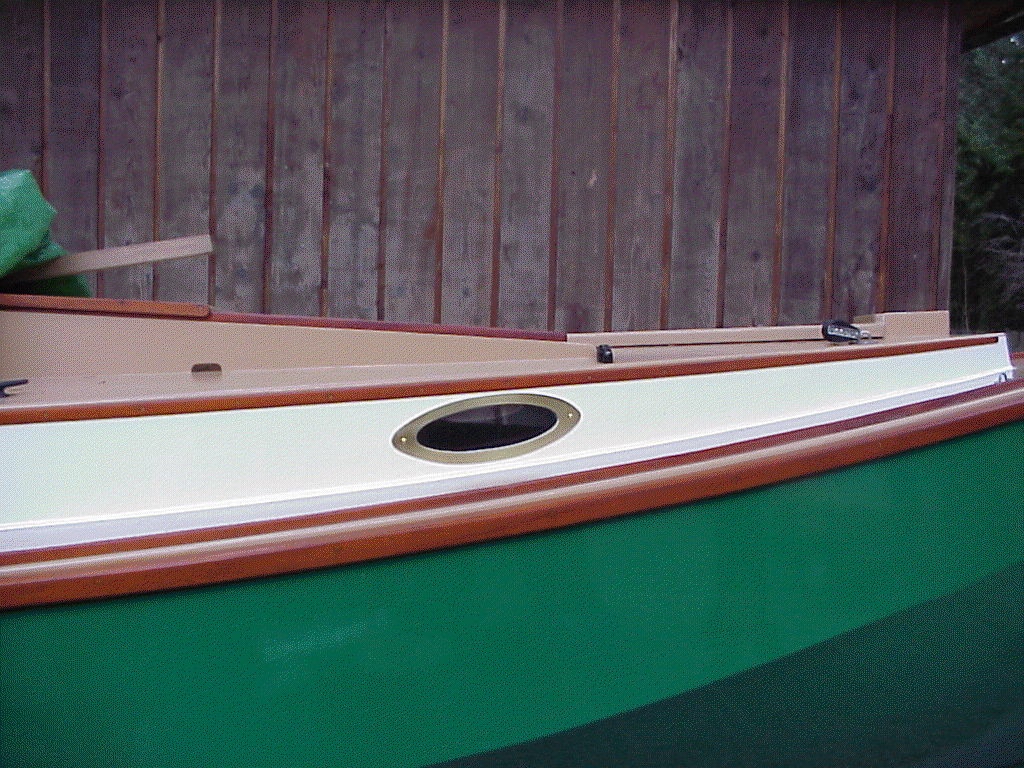
cabin windows

Brass-bound cabin window on Wayward Lass

Jamie Orr writes:

I just borrowed a digital camera, took some quick shots of the new windows.
They’ve turned out fairly nicely, I think, all things considered. I used
1/8 flat brass stock. The inside was the most trouble, I drilled a hole
then used a sabresaw (jigsaw) to cut to the line. The outside I cut with a
bandsaw — wonderful tool, just used the regular blade and some eye
protection for the flying filings (brassdust?). I didn’t cut as close to
the line as I should have because I was afraid to, so I had a lot of filing
to do afterward, but it was pretty straighforward stuff. They’re held in
place with one brass roundhead bolt at either end, the curve of the cabin
sides put enough pressure on the middle. Seated the whole works in Boatlife
sealer. The cabin side is routed for the lexan panes — that was done way
back before the sides went on. (That was the biggest problem — predicting
the placement and cutting the holes before anything was actually there.)

Jamie

Wayward Lass struts her stuff at Depoe Bay

Jamie Orr trailered Wayward Lass to the boat show at Depoe Bay, Oregon. Here’s what he had to say about it:

Hi

Yup, we’re back, had a great time. Went over to Port Angeles, 45 miles west of Port Townsend on Thursday afternoon, and drove to Alan’s place [ Alan Woodward, that is]. Got a little lost, but were saved by a Chebacco silhouette stuck on a pole at his driveway. Left about 9:00 next morning after breakfast (eggs from Alan’s chickens, very fresh!) and drove and drove and drove.

We followed the Hood Canal, the big fjord that almost gets back to the sound at the other end, then turned west somewhere short of Olympia. Reached the coast at Longbeach (I think) and stopped for lunch shortly after. Then we crossed the Columbia river mouth on a very long bridge and entered Oregon at Astoria. From Astoria to Pacific City the road wound around a bit, going inland a lot. This was the hardest part of the trailering, as the trailer and boat go back 25 feet from my rear bumper, and the boat’s just under 8 feet wide, as you know. I did a lot of concentrating, caught only glimpses of scenery for about two hours. The last stretch was more relaxing again, and we got in around 6:30.

Launched Wayward Lass and tucked her in, then went for dinner at the Spouting Horn with Larry Barker and John Kohnen. (Our party was myself, Dad, Alan and John Ewing). Then back to the motel, where Alan and John cunningly managed to get the suite (the motel had overbooked the cheap rooms so upgraded one of ours) that Dad and I had had our eye on, and so to bed.

Spent all Saturday, which was good weather after the first couple of hours, looking at and talking about boats. Depoe Bay is a small boat show, mostly on dry land. The harbour entrance and the bar outside make going out difficult except under good conditions. I talked to the guys at the Coast Guard station, and learned that on that day there was a “26 foot limit” which left us out. And I’m sure that they meant 26 footers with big dependable diesels! We did put up the sails and go out for a sail up and down the harbour — about 150 feet each way, with light to non-existent wind, coming from almost any direction due to the eddies. That was just to satisfy some kids that begged a ride.

Lot of interesting small boats — a Chamberlain dory skiff, same as I have the frames sawn out for, a Joel White faering, a whitehall, an immaculate Wayfarer, lots of river dories, several nice skiffs, including John Kohnen’s Pickle, and a bunch more. Also saw Dan Pence’s electric powered Ginger again, plus a Microtrawler with a big tugboat superstructure on it — looked just like a small working tug, right down to the dogs on the stem (sawtooth edge to give a grip on logs so you can push them around). I spoke to one of the owners, who said that unfortunately they couldn’t get up on plane with all that weight, even with their 50 horse Honda! They’re going to try some trim tabs at the back, I think.

Of the Port Townsend Bolgerites, we saw John and Larry, plus Jim Chamberlin. I wanted to say hello to Pat Pateson from the current list, but didn’t meet him. I see from his Friday note that I did see him, or at least a guy with a neck brace beside the red elegant punt, but never spoke to him.

Sunday we woke to sheets of fine rain blowing by. The ocean and surf looked even more exciting than on Saturday. Went down to the show after a good breakfast, and saw that a lot of folks were packing up and leaving. So after a look around and quick chat with the organizer, we hauled Wayward Lass and did the same. The micro tug was already out, and I saw Dan headed towards the ramp too, so I think Ginger was right behind us, although I could be wrong. The lousy weather on Sunday was really a blessing for us. We’d done it all the day before, and had a long drive ahead. We took the freeway route to Olympia this time, and cut an hour off our time — got in to Port Townsend about 8:00. Back in the tent about 10:30. Up on Monday, breakfast again courtesy of Alan’s “girls”, then we followed him into town while he dropped off his wife’s car, whose starter didn’t. Had a quick look in at the wooden boat school, dropped Alan at home and headed for Port Angeles again. Got back to my own house about 5:00, just in time for dinner.

I don’t know what it cost, and I’m not going to work it out. Had a good time and that’s enough. Not sure we’ll ever do it again, but I’m glad we did it this time.

I didn’t take a lot of pictures — I guess I’m a dead loss that way, but Larry, and of course John, were both snapping away, and I expect we’ll see theirs on the web pretty quickly.

Very pleased with the trailering. We covered 1,356 kilometres from start to finish, of which 1,318 were on US soil. I didn’t track the gas mileage (kilometerage?) either, but we filled up 4 times, the last time in Port Townsend coming home.

Chuck [Merrell], sorry we couldn’t fit in a visit. Didn’t realize just how big a distance we had to cover and how long it would take. See you another time!

Cheers,

Jamie

Jamie gives himself a fright!

Jamie (again – What’s happened to everybody else?) writes:

Hi Bill,

I went for a little trip on Friday night, which turned into a “learning
experience”. If I wrote it as a story, I could call it “Heavy Weather
Sailing and Stupidity, or Why You Should Listen to the Weatherman!”

I wanted to go over to the US side to drop in on a Traditional Small Craft
Association messabout at Bowman Bay, about 30 miles due east of Victoria.
To get there for Saturday, and catch the tide, I planned to leave right
after work on Friday, hopefully arriving about midnight. I figured that
with all the lights on the south side of the San Juan Islands, I should have
no trouble finding my way (true). I launched on Friday morning, and parked
Wayward Lass in Victoria’s Inner Harbour for the day, just a minute away
from my office. At lunch time I went down and did the smartest thing of the
whole trip, I tied in two reefs in preparation, then furled the sail away
again. The forecast was for winds of 15 to 25 knots from the southeast, so
I was thinking that I would probably cancel the trip.

I got away from the dock at 5 p.m. By then the weatherman said there should
have been winds of 5 to 15 knots, but it was dead calm, with no waves
outside the harbour. So I thought I would go east for a while and see how
it went, before I quit and went home. I fiddled around putting up my
battery operated nav lights, getting the anchor line ready and generally
straightening things up, then motored off, pulling Alan’s elegant punt,
Creamsicle. For a couple of hours it continued calm, with only scattered
cloud. As the light went, some waves appeared from the east, with a light
wind. Even once it was dark, there was still a lot of light from various
towns on the San Juans, and Whidbey Island, plus isolated house lights, in
addition to the lights shown on the chart.

Things started to get more lively. The waves built up very quickly, and I
had to throttle back so we wouldn’t pound. (I was still motoring because
the wind was right in my face.) Then the wind picked up quite a lot, so
that I was getting a lot of spray blowing back even when we weren’t
pounding, which we were starting to do every third wave, or so. I estimated
that I was about 1/2 way there or a little less, and since guesstimated
headway was almost nothing, I decided to turn for home — about 9 p.m. now.
I would say that was the second smartest thing I did, except there wasn’t
really any choice by now. I considered sheltering behind Lopez Island, but
I wasn’t sure I could even get that far, and I didn’t have a large scale
chart of the area if I did.

So, I put the motor out of gear, and let the mizzen hold us head to wind
while I raised the double reefed main. The dinghy nuzzled us while I did
this, to the detriment of my paint. Then I shut down the motor, and turned
downwind. The boat took a while to turn, it seemed quite happy to point
just a little upwind of broadside on, but once I got her moving, she turned
okay. Then talk about having a tiger by the tail! I had my hands full just
steering downwind. Every wave tried to push the stern around. Wind and
waves were mostly from astern, but just a little bit on the port quarter. I
let the mizzen weathercock so it wouldn’t help push us around so much. It
felt horribly out of control, but gradually I realized the boat was handling
it, at least.

I don’t know if a larger rudder would have helped, as it was mostly the
waves pushing the stern around, not the wind — although the wind was doing
its bit as well. Once or twice we broached completely, swinging 90 degrees
to our course, and taking the next wave broadside. I thought about raising
the centreboard to see if that helped, but the lanyard hadn’t been fastened,
and it had gone down the hole, so I don’t know yet if that would have made a
difference. Then I thought I’d try motoring, and see if I had more control,
so again the mizzen held us into the wind, more or less, while I furled the
main and the dinghy nuzzled us some more. The I undid the dinghy painter
and pulled it out of the motor’s bottom half. But when I went to start the
motor, the motor that never takes more than 2 pulls, it wouldn’t go! And
after half a dozen pulls, the recoil mechanism wouldn’t either. (It just
came out of the shop after having that fixed, too!) So now I was firmly in
the 19th century for my technology, whether I liked it or not. I got the
main up again, and got back to sailing. About the same time (I stopped
keeping notes some time before) I took down the mizzen, mast and all,
pushing it as far as it would go into the cabin. I also moved the dinghy
painter to the midships cleat on the lee side, as it had drifted downwind,
and I thought it as hindering me when I tried to turn downwind again. I
noticed there was some water in the dinghy, but it didn’t seem enough to
worry about, compared to the general state of the world. By this time the
wind was probably 20 knots anyway. The waves were huge, to me, and short
enough that they were very steep. Some of them were breaking at the tops.
I could hear them hissing and rushing up behind me, and was happier not
looking at them. Later, I estimated that they were probably no more than 5
feet from trough to crest, but from crest to crest was probably only 40 feet
or less — the wind was against the tide, which I should have considered.
At least it wasn’t raining.

I was able to control Wayward Lass a little better now. I was hoping my
troubles were over, but about then the dinghy painter snapped. I heard it
and felt it go, but by the time I’d picked up the spotlight and turned into
the wind, I couldn’t see it anywhere. I guess it picked up so much water
that it became too heavy for the rope. The painter broke right in the
middle, maybe it had a kink or knot from when I had to undo it to clear it.
Anyway, that simplified things even more, and the rest of the trip was
relatively uneventful, except that I succumbed thoroughly and completely to
the sea sickness that had been hovering at the edge of my consciousness —
try dealing with that at the same time as not broaching! Sometime after
midnight the wind dropped rapidly and the waves downsized to a well behaved
swell. I took both reefs out, but even then it was suddenly very slow
going. I let the sheet go and drifted around while I took off the engine
cover and wound on the “emergency” starter cord. I pumped the gas up
carefully, choked the engine, and it started first pull! So it was down
sails for the last time, and motored in — had to dodge a lot of wood in the
water, including one large log dead in my path. The storm probably washed
them off the beaches, they only seemed to be a problem near shore. I had to
motor about 5 miles along Victoria south shore, but there was enough light
reflecting off the water that the logs showed up well.

I got into Fleming Beach just after two a.m., never so glad to get ashore as
I was then. Took a while to pack up and recover the boat, I was literally
staggering with tiredness and feeling lousy. Stopped at a doughnut shop for
a snack, there were several police there on their break, and I wondered if
they would think I was drunk! (They didn’t, or at least left me alone.)

So I’m a little bit smarter now, I hope. I’ll pay attention to the weather
forecast, even if there’s nothing in sight to bear it out. I never, ever,
want another night like that one. On the plus side, I now have tremendous
confidence in the Chebacco. Even when we broached, she never threatened to
go over. When I was taking down the mizzen, we were “lying ahull” I guess,
and she moved about pretty briskly, but again she felt “safe”. Mind you,
after a while you get used to being terrified! We never took any green
water aboard, from any direction. I think that flared bilge panel deflects
most of a sideways wave under the hull, like a big wedge. And both ends
seemed to ride up and over anything. I got a fair amount of spray over the
bow when I was motoring into the wind, and a few good shots sideways, but
none to speak of when running or hove to. (I feel like a real sailor when I
use that!) The mizzen held us well up to the wind despite (or because of?)
it being quite strong.

And that was it for the night. There is a happy postscript to it all,
though. After I broke it to Alan that I’d lost his punt, I called the Coast
Guard to report it in case it should show up. After several transfers, I
spoke to a very helpful fellow in Rescue Coordination, who took all the
details. And then this morning (Sunday), in the middle of typing up a
“lost” notices to put up at marinas and boat launches, I got a call from the
same people to say that a dinghy of that description was being picked up by
the Victoria Clipper, the catamaran passenger ferry from Seattle. Ten
minutes later someone on the ferry called to say they had it, and I could
pick it up at their dock when they arrived, in about 4 more minutes! So I
went right down, and there she was, the paint a little dinged up on one
gunwale, but otherwise none the worse for it all.

So that’s my news today, guys. I feel moderately dumb for virtually
ignoring the forecast, and I’ll probably regret telling anyone about this,
but I probably learned more in the three hours between 9 and midnight than
in 10 years of normal sailing, so it wasn’t all for nothing!

Cheers,

Jamie


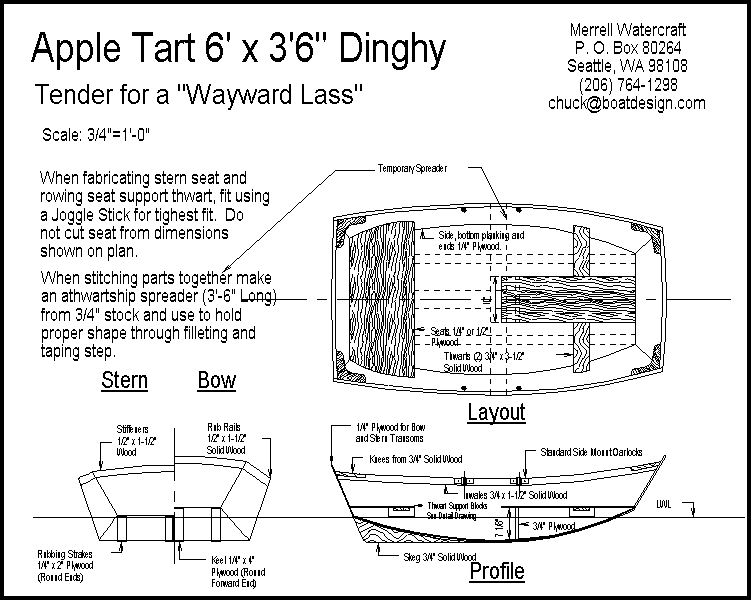
A purpose-designed tender for a Chebacco:

Chuck Merrell has designed a tender for Chebacco, to Jamie Orr’s specifications. Jamie will be building the prototype of Apple Tart.

Apple Tart is designed to fit inside the cockpit of a Chebacco, for trailering, and can then be towed behind the boat when sailing, allowing the sailors to get ashore when the shoreline is unsuitable for running the Chebacco up onto the beach.


Apple Tart is the smallest of a series of three prams that Chuck has designed, the others being Apple Pie (7’6″) and Peach Pie (10’). Bill McKibben has prototyped Apple Pie and Bill Samson is building the prototype of Peach Pie, which will have a spritsail rig.

Contact Chuck at chuck@boatdesign.com for further details of these pretty little boats.
 

atbom


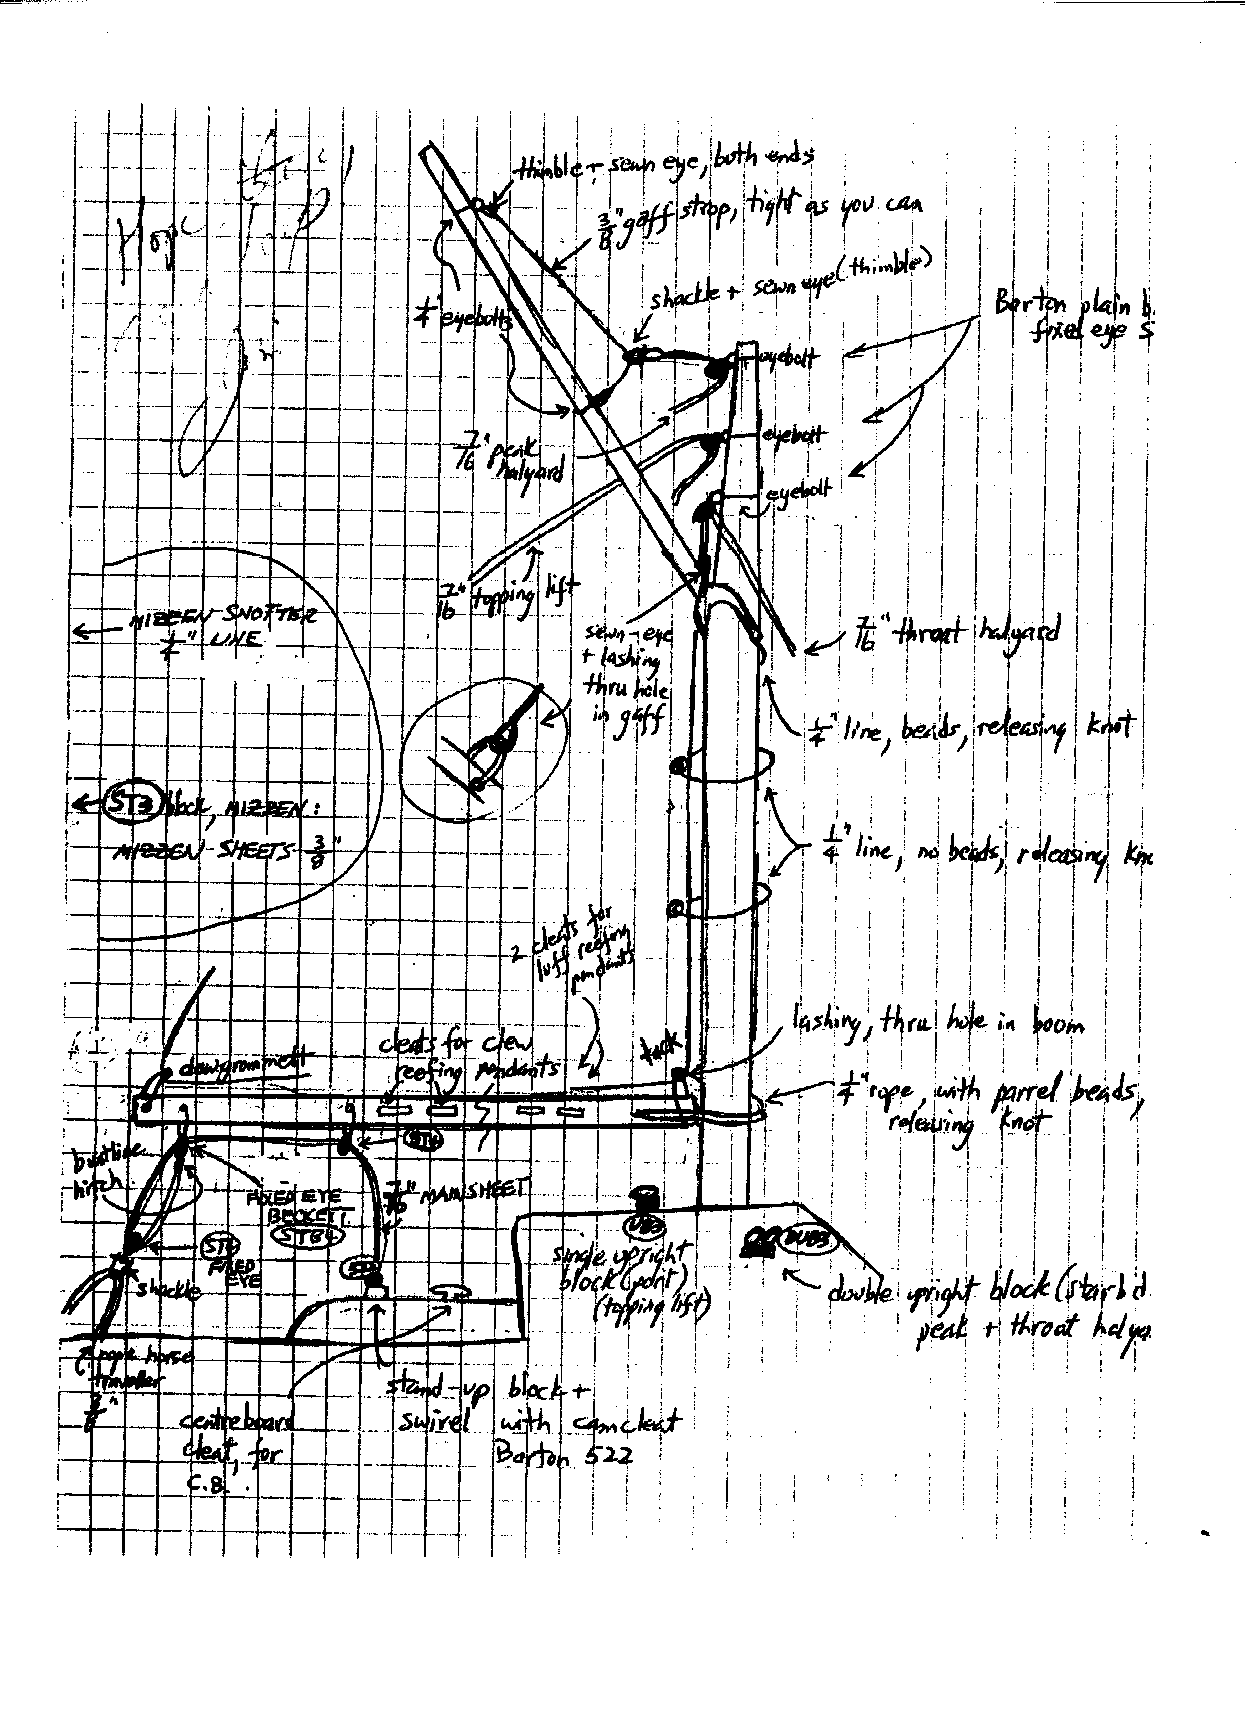
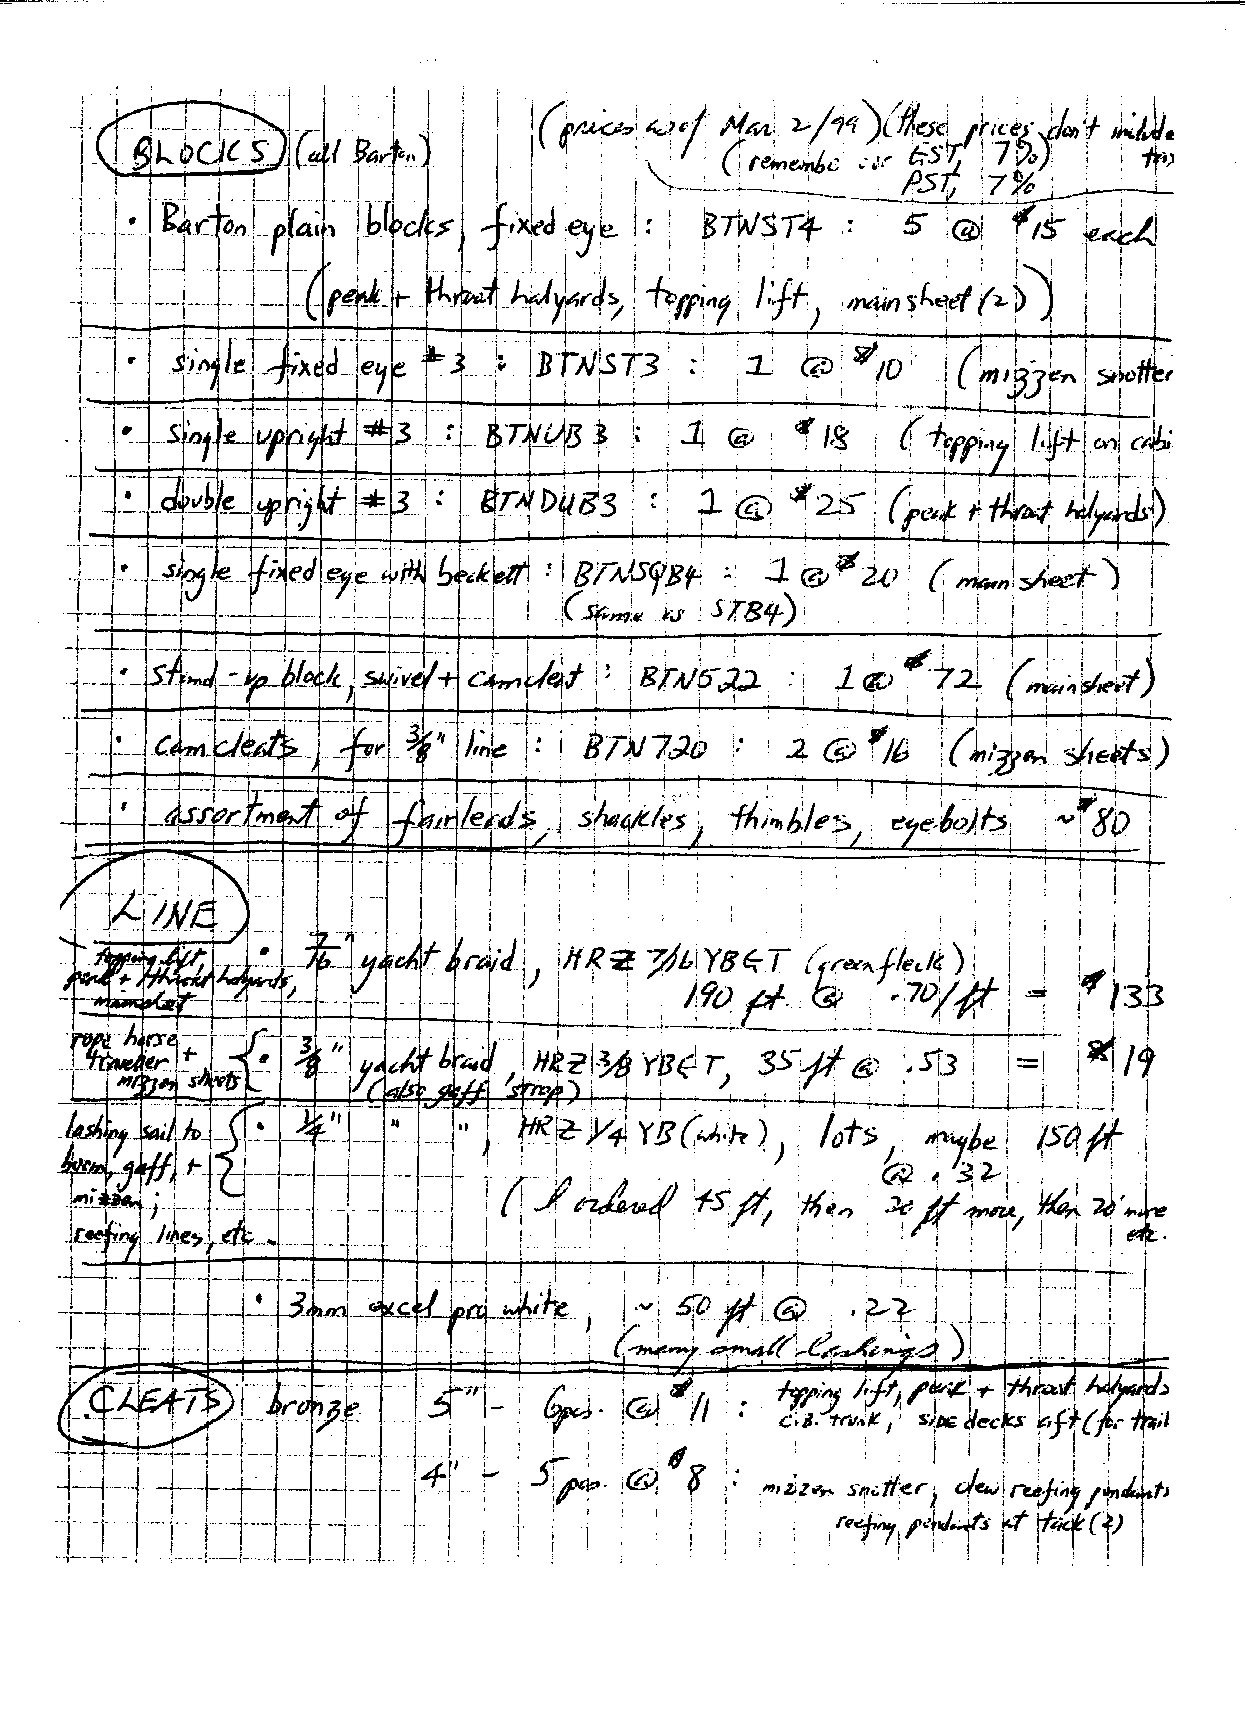
Jim Slakov’s rigging sketches:

Dick Burnham was kind enough to pass on Jim Slakov’s sketches and specifications of the rigging he uses on his immaculate lapstrake Chebacco, Kelani Rose.
sldrwg1


sldrwg2

So there you have it!

Of course I hope you’ll all keep in touch and let me know how you are getting along with your projects.

I also want to thank you all for helping to keep Chebacco News going for 7 years.

Bill Samson, 88 Grove Road, Broughty Ferry, Dundee DD5 1LB, Scotland

bill.samson@tesco.net

Chebacco News 33

Chebacco News 33 – February 2001


A New Chebacco Motorsailer

ChebMS1

Bill and Beth McKibben of Sidney BC, Canada – the prolific builders of many Bolger boats, including the Breakdown Schooner and the Fast Motorsailer, are turning their thoughts to a Chebacco Motorsailer, and have built this model as their starting point. The keen-eyed among you will notice that they’ve raised the topsides a smidgen, and have used the Solent Lug rig in preference to the more usual gaff rig. It looks wonderful, and will make a great addition to the growing fleet of British Columbian Chebaccos.


A Swedish Chebacco

edstrom

Björn Edström writes:

I have built a Chebacco 20 in sheet ply coated with epoxy and fabric
both in and outside because I used only 9 mm plywood on the whole
construction. The boat was launched in September this year, so far it
has only been one weekend sailing this year, the interior is not
completed.

Built: 1999 – 2000
Launched: September 2000
Name: WOODY
Owner/builder: Björn Edström, email: bjorn.edstrom@posten.se
Location: Stockholm/Sweden

I will send more pictures from the launching when the film is developed


Mary-Beth, Too

Mvc-004f

Dave Neder has made a great ‘gold plater’ job of his sheet ply Chebacco, “Mary-Beth, Too”. He writes:

. . . The mast is hollow. It consists
of a marine ply box section sheathed with Sitka Spruce and Red Oak at the
gaff throat position.


The tiller is from a 26′ “Lancer” sail boat. It was contributed by a
friend of mine. The coaming is made of ribbon stripe mahogany ply and
mahogany lumber. I cap all exposed ply edges and I built narrow hand rails
all around into the coaming. The drawings show flush sides, but since I
need a better grip, I added the rail.

The hatches are water tight. The out board motor’s gas tank is under the
port hatch. The motor will be old 9.9 Johnson from the “Lancer”. The 12
Volt battery is under the starboard hatch. Their centers of gravity are
equidistant about the centerline.

The cabin hatch cover is shown closed portions of the cover, trim and pen
boards are made of red oak. It is common here and I like to work with it.
The two cleats are for the peak and throat halyard.

I am going to trailer the boat. I have a wide choice of sailing lakes
including Lake Michigan. Lake Michigan is about twenty miles from my front
door. One comment about sailing on Lake Michigan; it is about 90% Ho Hum
and 10% sheer terror. Moorings in my area are filled up and expensive even
if you can find one for sale or rent.


I am presently building boom crutches to hold the masts and booms while
trailering the boat. I will send photos as things progress
Our goal is to sail this spring.
Regards Dave

Yet another Chebacco growing in BC!

Randybow

Randy Wheating writes:

Hi Bill

It was my pleasure to have finally met you in person at the Port
Townsend Wooden Boat Festival last fall. I turned my hull over this
past June. I went the brute force method with the help of six friends.
Before the ‘flip’ I cut out a notch in the cross pieces of the strong
back. I added a little padding to the notches and when we turned the
hull we set the keel into these notches and there she stood – upright
for the first time! A little shoring up and leveling and the hull was
for me to climb aboard.

As you may be able to see from the attached photos, I have made some
minor alterations. I have increased the width of the cabin about six
inches per side – flush with the cockpit coamings. The cabin top was
raised two inches.

The forward bulkhead I made one inch thick (laminated two half inch
pieces of plywood) as this will be the main support for my mast
tabernacle. I cut a square hole, for no particular reason, rather than
the round one as shown in the drawings.

The space under the cockpit seats will be sealed with air tight
inspection hatches for dry storage and floatation.

I added an eight inch bridge deck and made some cut outs in the main
bulkhead, from the cabin, for extra storage.

Like Brad Story’s boats (I believe) the aft cockpit is not cut through
to the motor well. A one piece stern deck with port and starboard
hatches with cover this area. There will be a small access hatch in
this deck just forward of the rudder post that will just allow me to
drop a 3 gal fuel tank into this space. A second tank will sit just aft
of the mizzen.

The rudder and post are aluminum. I fabricated an epoxy/cloth/mat tube
just larger than the rudder post OD which was then bonded between the
hull and motor well floor. This should create a nice water tight
passage for the rudder post.

Since taking the photos I have temporarily reinstalled the original
forms into the cabin and have started on the cabin sides.

With luck I will get her into the water later this year.

As always I enjoy the CN and appreciate your fine work. You must come
back to the West Coast in a couple of years for a cruise when all four
BC Chebaccos are in the water!

Take care,
Randy Wheating
Port Moody, BC, Canada

Pete has flipped

Upright

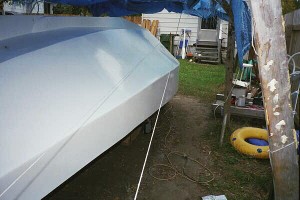
You’ll remember Pete Respess’s ‘poor man’s laser level’ from the Chebacco News #32. Pete has now flipped his hull, and I must say that waterline looks fantastic!

Skip flips, too

skipflip


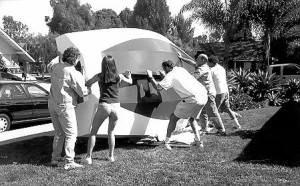
Skip Pahl, in Southern CA, has flipped his handsome sheet-ply hull. In case you’re wondering, about half of his helpers are on the other side of the hull!

Skip writes:

So. Cal.’s apparent “one-and-only” Chebacco is not dead, however, progress
has been mighty slow.

A few weeks ago we had our annual neighborhood block party, an event that
provided me with lots of horsepower for turning the boat. We kicked-off the
party with the boat turning and everyone was delighted to be a part of the
effort. They have been watching the building for nearly three years now! By
scheduling the turning early in the picnic (before the beer), we accomplished
our task without a nick or scratch.

A note about striking the waterline: Last year I found the world’s cheapest
laser level for $39.95 in the Radio Shack Christmas catalog. It produces a
fine laser line as well as the standard spot! I mounted the level on a piece
of plywood attached to the top of a camera tripod and then leveled the
platform north, south, east and west) with a mark on the cutwater were I
wanted the waterline to start. After the first arc gave me a series of dots
from the cutwater to midships, I rotated the level on its leveled platform
and marked dots from miships to stern. I the stretched 3M fine line (1/4″)
tape along the pencil marks and arrived at a clean and satisfactory
waterline. This is a good system if you don’t have a great deal of work space
around the boat.

Best wishes to all!

Skip Pahl
Carlsbad, CA

pahltejeda@aol.com

That’s all for this issue

Not a terribly technical one this time – just a showcase of the fantastic efforts that are going on around the world. It seems to me that the number of Chebaccos is growing at an ever-increasing rate, as of course, a beautiful design like this deserves.


Keep in touch, everyone!

Bill Samson,

88 Grove Road,

Broughty Ferry,

Dundee DD5 1LB,

Scotland

bill.samson@tesco.net
Chebacco News 32

Chebacco News 32 – November 2000


Roll Call!

I don’t know about you guys, but while I know there are a fair few Chebaccos out there I have only the vaguest idea where most of them are.

If you own a Chebacco – whether on the water or at any stage of construction, why not drop me an email or a line telling me what type you’ve got (sheet-ply, lapstrake, long, ‘glasshouse’, cruising . . .), when it was launched (or is due to be launched), its name (if any), name of builder, and location. I’ll publish the list once you’ve been in touch, and it can be updated as and when new Chebaccos are launched. Of course, I’ll respect anyone’s privacy if they’d rather not be included.

Completed Chebaccos I know about are:

LARK

WAYWARD LASS

KELANI ROSE

GRAY FEATHER

SYLVESTER

KATTEPUS

Apologies to folks I’ve forgotten. Anyway, complete details on all (including the above) will be most welcome!

Hollow Masts

John O’Neill writes:

Dear Bill,

Regarding ‘bird’s mouth’ masts. First, my understanding is that hollow spars should be about 10% fatter than the same spar that’s solid. Second, as I discovered, you can use more than 8 staves. If you do, you get a more even cross sectional thickness. That is, if you look at it on end, the hollow space won’t have the outline of a stop sign, but more of a true circle. I used 12 staves on the 16′ masts of my two Bolger Cartoppers, mostly as a way to more efficiently use the nearly pristine 3/4″ Dour Fir stock I had on hand, and that I didn’t want to search out and buy any more of. (Despite the added kirf waste, i.e. sawdust, I got better use of the wood). But I think the more even cross section using 12 staves provides a real strength/weight advantage, and might be worth it regardless. The width of the staves (given a perfect ‘bird’s mouth’ cut) solely determines the maximum thickness of the finished spar. To determine the width figure the circumference of the mast, and divide that by the number of staves you want. My 2 1/2″ mast worked out to 0.65″. Then divide 360 by the number of staves to get the angle for the bird’s mouth cut. For 12 staves it works out to 30 degrees. I’d recommend making a short section of test mast just to be sure of your numbers. I had my first crude one rubber-banded together in about an hour (altogether I made three!). Plus they’re fun to show off to friends of an engineering bent.I used a carbide wobble blade on a table saw for the bird’s mouth cut. It worked perfectly (with a lot of featherboards and support for the work piece, and a lot of test cuts. Make extra staves!). I used epoxy for glue-up, but instead of hose clamps I used waxed twine (epoxy won’t stick to wax) in a hand-tight spiral wrap down the length of the spar. It kept good, even pressure on the joints, with no risk of squeezing any joints dry, and as an added benefit it was easier to sight down to see if the spar was straight, without hose clamps in the way.
After a host of frustrating attempts at dry fitting my even dozen of staves (fitting the last one was always the kicker!) I finally hit on rolling them up around a core. It works like this. Arrange the staves in the order you want them, with the outside face down. Place a thick dowel a foot or more long, or a stiff cardboard roll, almost anything with the approximate diameter of the hollow interior, on top, and roll the staves up around it. It’s a ridiculously easy, one-person operation, even with a dozen slippery, slithery, epoxy coated staves. I felt like an idiot when I figured it out, that I hadn’t figured it out sooner! Just rubber band it up and pull out the roll (make sure you leave some of it protruding, I learned that too) and the base is assembled. The rest of the assembly almost falls into place. I used a plug from the base, up past the partner to where the fittings where screwed in. I drilled a fat hole clear through to avoid turning the mast’s interior into a moisture trap. Then I coated the hole walls with epoxy to minimize moisture induced dimensional changes, which I figured might sooner or later cause splits in the mast. To deal with the ‘hard spot’ at the top of the plug, I drilled down into it using two big Forstner bits. The first bit was barely smaller than the plug, and was drilled about 2 inches into the top. The second was a bit smaller than the first and drilled in as far as it would go. Not the best but I think it will do. It does add weight but it’s low where it doesn’t count.

Another plug option I’ve seen, much better for interior halyards, is to make what is essentially a tiny, hollow, second mast, to fit inside the first as a plug. The staves of this ‘second mast’–towards the top–are tapered, but not glued together, such that the plug is of constant thickness top to bottom, but ends at the top in stiff, individual, tapered fingers, almost like one side of a tall finger joint. I don’t know that I’d run interior halyards on a mast where any thickened epoxy was used during glue-up. There might be some protruding dried bits that could cause chafe.
Great newsletter by the way! You and your contributors almost have me talked into a Chebacco as my next project. Probably hard chine. But Bolger has so many great boats! I’m really torn . . .

John O’Neill, Fairfield,
CA


Meanwhile, Gil Fitzhugh has completed his hollow spars:


I’ve built the masts, boom and gaff using the birdsmouth method, with the mast modified in way of the partners as described in Chebacco News #31. I wrapped the whole mast with a layer of 6oz glass, with the weave running straight up the mast. Then I spiral wrapped the lower 4.5 feet (enough to get above the boom jaws) with another layer, with diagonal weave. The overlaps, loose strands and whatnot were as ugly as sin. I sanded everything smooth with 40 grit and then progressively sanded it down to 22o grit. And it looks damn good! It’s roundish, straightish and strongish. I’m now epoxy coating and sanding off the mizzen, boom and gaff, which won’t be glassed. Then I’ll add the fittings. Next spring I’ll varnish them.


I’ve built almost everything on this boat myself, but Joan was invaluable putting the masts together. I’d mix up about 3 squirts of epoxy at a time, stir, put in Cab-o-Sil, stir some more and then give the can to Joan. She’d paint the birdsmouths while I mixed the next batch. It must have taken half an hour, working fast, using WEST with slow hardener. Then we rolled up the spar and got about 25 automotive hose clamps around it and tightened them up. Being careful, of course, to keep shoving everything back toward straightish as it tried to sag, until we had it really tight. The guy at the auto parts store looked at me pop-eyed when I bought 20 5-inch and 20 4-inch hose clamps. I cleaned out his whole supply.


Drawing a Waterline? Try Pete’s “Poor Man’s Laser Level”

Image321

Pete Respess’s beautiful Chebacco hull

Pete Respess writes:

Dear Bill,

I have been reading your newsletter for about a year now (have been building 11 months) and finally have something that may be of use to your readers. It has to do with striking the waterline – a nebulous, scary task which all boat building books seem to brush casually by. In one place in the newsletter I read that I was “on my own” when it came to doing this. That made me ask a friend who proposed, “Hey just launch it and get down there with a magic marker and draw it in”. My pride did not let me opt for that idea though. Instead I decided upon the “poor man’s laser level”. What I did was run two parallel strings (about ten inches apart) along the boat’s length close to whre the water line should be. The strings and the boat should both be level before beginning. Then at night fall, use a flashlight to cast the “two” string’s shadows against the hull, making sure they hit the correct place on the stem and near the stern according to the plans. When the shadows of the two strings coincide, there’s your line to be drawn.
Actually, you just mark tick marks every few inches at this point and wait for daylight to fill in the actual tape line with a batten. That’s it. Of course I have not launched the boat yet to prove this theory. You will have to judge whether or not to wait for that test before you decide to include this technique. I just liked how marvelously simple and “cheap” this
method was. No laser to buy or other complicated stuff. I got the idea from building my privacy fence around the back yard. When three sticks line up “by eye” along your property, then that is your “true”fence line.

I am including the most recent picture of my boat in it’s primer coat (Epoxy Barrier-Kote). It now has a coat of Interthane Plus on it which I have just finished wet sanding with 220 and 400 grit paper (second coat this weekend). I was fortunate to have met a guy a couple of miles from me who retores wooden runabouts professionally. The things he told me about his painting and finishing techniques are priceless. I coupled his ideas with a few things from your newsletter – the results are beautiful. I am told a slight orange peel is acceptable, at least it is with me. You only see that when you get real close anyway.

Pete Respess
Hopewell, VA

For the technical thinkers out there, I have thought of the following geometric stuff. The two lines act as a horizontal plane which slices the boat in the same way the water does. When that plane lines up with the two points, fore and aft on the hull according to the plans, you have a water line. And “figures don’t lie”. Plus it kind has the ring of common sense too.

Image322

The Poor Man’s Laser Level in action


“Wayward Lass” continues her adventures . . .

Jamie Orr writes:

I had a great sail on the weekend, drove to Nanaimo and went over to Sechelt to see Jim Slakov. This was the only weekend I could do it, but we’ve had a lot of gales and stormy winds over the last week or two, and prospects didn’t look good. The forecast said things would improve, but on Saturday it still predicting up to 40 knots of wind. I was getting antsy sitting around home, so I drove up in the afternoon to have a look — yup, lots of
wind. Spent a couple of hours rigging up and fiddling with the new reefing stuff I’ve added, then launched late in the day. The Nanaimo launch site is very well sheltered, behind Newcastle Island, so I thought I’d stick my nose out and see what it was like on the open water. Even with 2 reefs it was more than I liked, so I tacked and let the sail out to reach back. I was immediately startled by a loud Whoossh! and water frothing by at high speed — we were surfing — with 2 reefs! That’s the quickest acceleration I’ve ever had sailing — really got the heart started!

Spent a not very restful night at anchor at Newcastle Island marine park, lots of slapping and noise, but at least no sailing around the anchor with the mizzen up. After breakfast on Sunday I thought I’d go for a bit of a sail around Snake Island before I packed up and went home. However, once I got out there it wasn’t bad, things were much quieter — then the radio weather report predicted good conditions (only up to 15 knots) for the nest 48 hours, so I just kept on going. Sailed for 2 hours, then the wind backed until it was right in my face (sound familiar?) so down came the sail and Honda came to the rescue. Took another 3 hours to finish the 16 or 17 odd miles across Georgia Strait (Sechelt is on the mainland).

Spent the night at Jim Slakov’s. Unfortunately, when I didn’t arrive on Saturday, they ate the dinner I would have had (Greek, one of my favourites!) but I was very well looked after anyway by Jim and his wife, Rose. Had a good look at Jim’s boat — beautiful. He put up the mast to show me the system he has worked out for raising and stowing everything, very smooth and well thought out. I stole a few ideas for later
consideration, but I’ll never touch the quality of Jim’s work.

We called at Gary Foxall’s but missed him. Had a look at his boat though, looking good and could be ready for next September, with luck — maybe a fleet of Chebacco’s in Port Townsend yet!

Got a good start Monday morning, left the dock about 3 minutes before 8:00, with the sails already hoisted. Caught the wind as I passed between the breakwaters, killed the engine right then and didn’t use it again for the whole trip home! Felt like I’d found the grail! Had a fairly steady wind 3/4 of the way, before it started to fade. After 4 hours I was within maybe 2 miles of the dock, but it took another hour to cover those 2 miles. Got a bit of breeze that took me nicely through the ferry channel, then it went back to a whisper that let me sail right up to the dock and just step off with the mooring line.

So I had a good time. My dad couldn’t make this trip, as he had an old friend visiting, and the pair of them are gallivanting off in Prince Rupert. I had a few difficulties single handing, but have some better ideas now on how to manage. Upside was that I had his Cruiser suit, and stayed warm and comfortable.

Jamie

P.S. Jim and Rose are great hosts, but take care when he offers you a hot
toddy — a generous man….

That’s all for this issue

. . . but if you have any news, questions or stories, please drop me a line:

Bill Samson,

88 Grove Road,

Broughty Ferry,

Dundee DD5 1LB,

Scotland

bill.samson@tesco.net
Chebacco News 31

Chebacco News 31 – October 2000


The Big Trip!

Image38

Bill Samson, Jamie Orr and Les Orr

Jamie Orr writes:

Hello Bill

The big adventure is over now, we’re all back home, and life is settling back into the normal routines. I thought I’d try and record our (Wayward Lass and crew’s) trip for Chebacco News, with my impressions of how the boatperformed.

This was a watershed event, the first trip in Wayward Lass. This was her fourth time in the water, and the second time the sails were up. It’s about 35 miles from the most Southeastern point of Victoria to Point Wilson, near Port Townsend. Adding another 3 miles to the Boat Haven in Port Townsend, and a bit more to Fleming Beach where we launched, and we probably covered some 85 miles in total, crossing and recrossing the Strait of Juan de Fuca between Vancouver Island and Washington State.

We got away from the launching ramp at 9 am on the 7th. When we left, the weather was overcast, with light to moderate westerly winds. There was a small craft warning at the (western) entrance to the Strait, but conditionswere okay at the eastern end. The forecast was for stronger wind from the south by late afternoon. I hoped we could sail southeast at first, then east along the Washington coast when the wind shifted. We started out on a direct course for Point Wilson, along the Victoria shore until we felt confident that everything was working properly, then changed to a more southerly course to cross the strait, and be able to take advantage of the expected wind change. However, the wind dropped fairly soon, and when it came back it was right on our nose. The sails came down and we got down to some serious motoring.

Visibility wasn’t too great, maybe 3 or 4 miles at this time, but we felt we could find our way with chart and compass – we also had a Garmin II GPS that a friend insisted on lending us, although neither Dad nor I felt comfortable relying completely on that as we hadn’t done much with it. We had 1 to 2 foot waves most of the time. With the fog and overcast sky, it felt chilly until we opened the thermos and had something to eat. (I’m a believer in keeping the furnace fuelled.)

After an hour or two we could see the land well enough to identify Dungeness Spit, which sticks out into the strait from the US side, and turned onto an easterly course for Point Wilson, or at least where the chart and compass said it ought to be. After a while more we identified Protection Island at the mouths of Sequim and Discovery Bays. It took a long time to bring it nearer, but eventually we were level with it, and had definitely identified Point Wilson ahead. About here we tried sailing again, but the wind was just too much from the east to make our course. Since the forecast was for strong southerly winds, and we wanted to get in early enough to find a berth and have a quiet night, we went back to motoring again.

At Point Wilson the wind and tide were both against us, and the GPS, which had reported some 4.5 knots most of the way, dropped until it was only 1 knot right opposite the point. The wind by this time was getting close to the predicted 20 knots, I think. Once around the corner, we hugged the shore to Point Hudson, 2 miles on. Port Townsend is built on Point Hudson, so once there, we had more or less arrived. Around that corner and another mile and we were at the Port Townsend Boat Haven, a big marina well sheltered by a long breakwater. We called US Customs, who were extremely helpful and patient with the rookie skipper, and were assigned permanent vessel identification and PIN numbers, along with a clearance number for this visit. The trip over took 8 hours from dock to dock.

We got the tarp over the boom, and mopped up the cockpit – between the spray and the rain, things were pretty wet. With the tarp up we were quite comfortable, but I was glad we had the cuddy to keep our gear dry. It also provided some shelter under weigh, keeping spray in the cockpit to a minimum.

Image39

Wayward Lass at the dock in Port Townsend


I’ve included the pictures that Chuck Merrell took in Port Townsend and e-mailed to me. I haven’t got any others at this time. The blue tarp shows up nicely, and that’s me on the boat. There are a lot of strings hanging everywhere because I haven’t entirely worked out the best way to attach all the sails and blocks. I’m trying to keep it all low-tech, but things will be evolving as we learn. I’m pleased to say the sails, also made by yours truly, seem to have the right shape.

I’d asked previously around the web about VHF radios and navigation lights. Before we went off, I bought a handheld VHF that will accept either rechargeable nicad or throwaway alkaline batteries, and a set of lights that operate off a single D cell each. I’m not sure how far the lights can be seen, but the choice in battery powered lights is limited. The VHF was almost entirely used for weather reports. So far I’m happy with my choices.
Alan Woodbury met us at the marina and gave us some local knowledge about restaurants and Port Townsend in general. After some fish and chips, Dad and I crawled into the cuddy for the night. We are both 6 feet and close to 200 lbs each, but found we could both sleep comfortably in the cuddy, using air mattresses. At the bow end, the mattresses turn up at one corner, but we put our feet at that end so it didn’t matter.
We spent the 8th walking the floats at the Festival, saw dozens of beautiful boats from big schooners to tiny canoes. We said Hi to Craig O’Donnell, on hand with the CLC folks, and took in talks by Brion Toss, rigger, and Carol Hasse, sailmaker. Both excellent. Craig dropped by for a quick chat just before we turned in. Unfortunately Jim Slakov didn’t make it down as planned with Kelani Rose – I understand he injured his back. Hope you’re better now, Jim – looking forward to seeing you another time.
On the 9th, Dad thought he’d stay at the Boat Haven while I went back to the show to meet all the Bolgerphiles at 10 am. We had a good turnout, and after talking for a while we all went to the coffee shop and talked some more. Thanks to Alan for the cinnamon buns! After that the group split up to see the exhibits. Alan and I tried to hear Carol Hasse on sailmaking, but were at the back of a large crowd, so crept out after a short time. Alan wanted to see some more boats, but I’d seen them all the day before, so I thought I’d go back to the Boat Haven for a while. I mentioned this to James McMullen, who’d said he wanted a look at Wayward Lass, and he wangled a ride down there in Ginger, a beautiful electric cruiser created by her owner, whose name I can’t quite remember – I think it was Dan, but the last name is gone.
When we arrived, we stepped into a regular Bolger seminar. Between Ginger and Wayward Lass we had our own mini boat show. More talk, then things thinned out a bit and that was the end of the Festival for us. Dinner that night was Dad and I, with Bill Samson and Alan Woodbury – more fish and chips. Bill went off with Alan to sleep at his place, and Dad and I hit the cuddy again.
Next morning we were up before dawn to get an early start. Alan brought Bill down at 5:30 (did I mention Bill was to sail back to Victoria with us?) in a fairly heavy rain. Luckily it stopped again, and we got away at 6:15, motoring between all the boats anchored off the shore. The early start was partly to take advantage of lighter winds in the morning (expected to be on our nose again) and partly to let me try out my tiny navigation lights (they worked just fine.)
We got a considerable boost from the ebb flowing past Point Wilson, the GPS reported 7 knots over the ground, or about 2 ½ knots of tide. This stayed with us for quite a distance into the strait.
After an hour or so, we put up the sails. We couldn’t hold our course to Victoria, but the wind was great and we had a good sail, enough for everyone to take the tiller for a spell. But the wind strengthened to the point where I thought we’d try a reef, and there I had a problem. The sails are only lashed on, without proper provision for tying in reefs. My lashing didn’t give the foot enough tension, and I haven’t got reef points in the sail, only the cringles at luff and leech. I was told by a professional sailmaker that points were not necessary in a sail this size, but he must have been thinking of a sail with a really efficient outhaul for the leech cringle. The sail was like a big bag with the reef – no way would it sail properly close hauled, so it came down and we went back to motoring.
We could see the southern San Juan Islands, and had a lively discussion about what was where. We also saw a buoy in mid-strait, which triggered more discussion. (It was fairly poor visibility again) Based on the buoy, we felt we were just a bit north of our course, probably due to having to point north of it to use the sails. The GPS batteries had died on us, and I couldn’t find the spares (they weren’t on board) but it revived enough to confirm our position, which was nice. Just as well we weren’t relying on it, though.
Shortly after, visibility improved and Victoria appeared. Since it had been foggy going as well, we had no idea just when to expect to see it, and couldn’t believe at first that it was there already. However, when it took another 3 hours to actually reach it, we believed. We went into Victoria Harbour to clear Customs (by phone) and announce Bill’s arrival in Canada. Canada Customs were just as easy to deal with as their US counterparts, although they only gave us one number. A last short trip back to our launch ramp, and that was that. The return took only 6 ½ hours.
Wayward Lass behaved excellently. I am pleased as anything with her performance over the Strait. She handled the wind and waves with complete aplomb – the motion was smoother under sail, but even motoring I thought she did very well. Being as light as it is, the hull leaps around a bit, but always felt stable and safe, and wasn’t stopped by the 3 foot waves on the way home. Performance at the dock was equally good, although without a tarp it might be another story with more than one aboard. The motor is a 5 horse Honda short shaft with a 3 gallon remote tank – this combination is heavy, and I thought the stern was down a bit when the engine was running. When sailing, though, it wasn’t as low, so maybe I can adjust the motor angle and improve things. We didn’t know how much fuel we’d burn, so carried an extra 6 gallons. We found that we used under 2 gallons each way (imperial gallons – it was just about 2 US gallons.) The sail set quite well, as mentioned, but I’ve got to fiddle with the attachment to the spars. I’ve also got to put in those reef points.
We carried all the prescribed equipment, plus the GPS and VHF. I think I’ll buy my own Garmin GPS next year, for the extra security it gives. Even not knowing how to use all its features, we found it helpful – the most important information, your position, comes up on its own – all you do is turn it on.
The Bolgerphiles that I met in Port Townsend were Chuck Merrell, Bill Samson, Alan Woodbury, John Kohnen, Larry Barker, Jim Chamberlain, Gary Foxall, Craig O’ Donnell, Randy Wheating, Jerome MacIlvanie and James McMullen. Apologies to any missed or misspelled. I had a great weekend and plan to do it all again next year. (If I can swing it, I may go back in November for a sailmaking/repair seminar at Carol Hasse’s loft.)
Jamie

I’d like to add my own thanks to Jamie for his kind invitation to accompany him and Les back to Victoria, and also to Alan Woodbury for his hospitality.

Image40

Some of the Bolgerphiles at Port Townsend – It was great to meet you all!

Hollow spars

Fraser Howell recently built a hollow (birds mouth) mast for his Chebacco “Itchy and Scratchy”. One day while he was out sailing, the mast failed just above the partners! He sent me this pic of the mast:

Image41

He reports that it seemed to flatten slightly, just before it broke. He says there were no solid parts inside the mast – so that the halyards could run inside. Maybe they might have prevented it? Anybody else out there using a hollow mast of this type? We’d love to hear from you. On the subject of masts, Gil Fitzhugh is building a birds-mouth-type hollow mast for his Chebacco. When I mentioned to him that Fraser had met with this trouble, he suggests:

The objectives are 1. Strengthen the mast in way of the pressure point generated by the mast partners; 2. don’t create a hard spot somewhere else that will break; 3. salvage the birdsmouth strips I made at vast cost in time and money; 4. don’t add more weight than necessary; 5. given that building this boat has pushed me to the brink of certifiable insanity, don’t come up with a solution so complex that it pushes me over the edge. Here’s what I’ve done.


Image42If I could add a strip of shaded cross-section to each birds mouth strip before I roll the whole shebang up into an octagon, I’d have a much thicker cross section. There’d still be a hole in the middle for halyards, wires for a masthead light or whatever.

So I made 8 strips that look like this:

Image43I basically made them on the bandsaw . A table saw would have worked, but not as easily I think. Hand tools would have worked, but would have violated Objective 5 above. The width of the strip at the top isn’t critical, but depends on the thickness of the stock from which you cut the strips. If the stock is so thick that the top becomes a razor edge, you no longer have a hollow mast at that point.

Cutting order: 1. Make strips 2 feet long by a wide by however thick the wood is.

2. Make the diagonal cuts, but don’t go all the way through. The still-attached tails are good guides, clamping surfaces etc.

  1. Bevel both sides.

Glue the strips in place. Then cut away the shaded areas in the above drawing and clean up the Image44

surface with a few swipes of a hand plane. When gluing, clean up as much squeezeout as possible. these are mating surfaces, and what you neglect to clean up sooner will be a bitch to clean up later.

All this assumes that you cut your birdsmouths with rocket-science precision. I didn’t. Some of mine are a tad thicker on one side than the other. If you use this idea to create eight auxiliary thickening strips all exactly the same, your mast won’t work. (Guess how I learned this fundamental truth?) Not to worry. Label (number) your birdsmouth strips, so you predetermine which one is going to mate with which. Then determine the width of each auxiliary strip so it will fit properly. Sounds hairy. Isn’t. I did the whole thing in a couple of hours and made my auxiliary strips in a couple more. After everything’s glued up and the excess epoxy cut away, you test fit each pair of strips before the final glue-up. If it’s tight, whack it with a chisel or rabbet plane a couple of times. It really will work.

When the mast is done and rounded I’ll do two special wraps with glass cloth, in opposite directions, in way of the partners. My son, the engineer, tells me this will add strength.

We won’t know whether this works until we’re out in a howling gale and the mast doesn’t break. I prefer to avoid the howling gale.

Speaking of howling gales . . .

Phil Bolger was interested in my report in Chebacco News #30 about being caught out in a blow. He suggests:

Next time you’re caught out in a breeze (not necessarily that strong!) it’d be interesting to see what she will do under mizzen alone. I haven’t tried this in a Chebacco, but I wouldn’t be surprised if she could make good at least a beam reach, under good control.

I haven’t had a chance to try this out, yet, and Sylvester is now tucked up in my drive for the winter. Nevertheless, I’ll try it out next season, and would be interested to hear how any of the rest of you fare under similar circumstances.

And finally

Many thanks to those of you who wrote to me and sent photos. No more room this time. Maybe next . . .?

Bill Samson can be contacted on : bill.samson@tesco.net
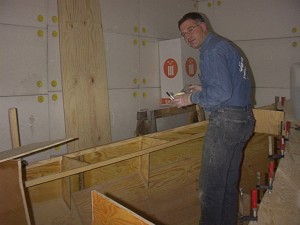
Chebacco News is at http://members.xoom.com/billsamson

Snail mail to Bill Samson, 88 Grove Road, Broughty Ferry, Dundee DD5 1LB, Scotland.

Chebacco News 30

Chebacco News 30 – June 2000


Number One . . .

Chebacco_1

The first Chebacco

Peter Vanderwaart writes:

This is Chebacco number one being introduced to the world by Brad Story at the Small Boat Show in Newport, Rhode Island. This is the original cold-molded boat. Visible in the picture are several features that have been changed in the later, more-refined designs: outboard rudder, bolt on outboard motor bracket, rope traveler across the cockpit. The workmanship on this boat was absolutely first class and museum quality. The hull was molded and the frames fitted afterward, and the fits were perfection. As was the varnish. As was the paint. I can not say who is in the boat in the picture, but went I got on the boat, the persons aboard were Brad Story and his wife, and Peter Duff. I’m still sorry that I did not climb right into the cabin to see what it was like when I had the chance.

Peter Vanderwaart


And the latest . . .

shed1

The stocks are set up . . .

From Paul DiPasquale

Hi Bill,

Well, I’ve taken the first steps toward construction of a new Chebacco.
The plans are in hand and the shed (see attached photos) is built.

I took two weeks to build the shed, which is approximately 30’x12′. It
will serve as a boat building shed when needed and a garage
extension/carport when not otherwise occupied. The backbone was part of
the construction project also…built with pressure treated 4×4’s, 12ft.
in length and “scarfed” together with steel construction brackets.
I might add, for anyone thinking of such a project, the cost of shed and
backbone was under $500.00 U.S.

I started laying out bulkheads and frames this week and hope to have
bottom and sides done in a few days. I am planning to use AC plywood and
Epoxy Resin throughout the boat. One thing worries me a bit and that is
the ambient temperature in this area. We are near Myrtle Beach, South
Carolina and in summer the temps, even at night are close to or above
70%F. I guess we will see what happens when I start mixing batches of
resin and hardener.

I have to admit my anxiety level is kind of high, but I keep asking
myself “what is the worst thing that can happen” (other than waste a
bunch of time and money)? This is balanced by pictures (in my head) of
me and my new Chebacco sailing happily around the beautiful islands and
clear blue water of the Florida Keys.

If there is a Chebacco owner anywhere in the southeast U.S who is
willing to let me have a look at his/her boat please let me know. My
time is my own and I am always ready to travel.

Anyway, enough rambling for today! I’ll keep you posted as things move
along and hopefully will be able to share some construction photos too.

Best regards,

Paul DiPasquale
Conway, South Carolina, U.S.A

email: d4951@sccoast.net


Chebacco Motorsailer for sale

Bob Cushing writes:

Hi Bill,

Just a note to let you know my Chebacco Motorsailer is for sale  -I
want to keep building so I have to keep selling. We sold our Microtrawler to
a local jewelry store owner and he loves it. If you know of anyone who might
be interested please send them to us and we will be as flexible as possible
on pricing. It is essentially a new boat -very little use and professional
build quality w/new honda 9.9 w/remote controls and new galv trailer ,
thanks,

Bob Cushing     315-687-6776    rbrtbobcat@aol.com

There’s a write-up on Bob’s superb motorsailer in Chebacco News #17 and #24. That should make your mouth water.

Aussie sleeping arrangements

Tim Fatchen (AS29 owner) writes

In discussions about sleeping arrangements, I haven’t seen the following
mentioned, yet it makes the smartest approach to sleeping accommodation
in an overnighter or yea, even within the floating luxury of an AS29. It
is—

—the traditional Oz swag (as carried by suicidal kleptomaniac musical
swagmen) or its more recent incarnation. For those unfamiliar, the
traditional form is a large oblong of proofed heavy canvas (truck
tarpaulin standard) cunningly folded about blankets, pillows, thin
mattresses etc, suitable for rolling out on ground of any condition.
The more modern variants come with a pre-sewn semi-bag shape, zippers,
flyscreens, God-wot things.

Lurking within my own swag, which doubles as work bedding when in the
arid interior, are a continental quilt (doona), sheets, a backing
blanket, 4 inches of foam as mattress, a space blanket, two pillows. All
are weatherproofed by the canvas, and easily carted about, hurled into
sleeping cabins etc.  Looks neat, is very warm, won’t get wet with the
occasional watchkeeper  taking off wet oilskins in the galley, or for a
Chebacco, the canvas will shed the occasional splash.  Much more elegant
and effective than soggy sleeping bags and the hopeful wet blanket. Buy
one if buyable (NZ, Oz). Make one if not.

Tim Fatchen

Sounds interesting, and very practical! Now, if I could just get some of the junk moved out of Sylvester’s cuddy . . .

A Cautionary Tale

I went mad on Monday, and took out Sylvester in a blow of wind. A scary
experience!

When I rowed out it was an F4 and I decided, prudently, to put in two reefs.
Boy! Am I glad I did? The wind kept on rising, and even with the two reefs
in, she was soon on her ear, with the lee gun’l under, water lapping over
the coaming, and quite hard to steer – probably because the rudder was
mostly out of the water! She was very sensitive to the way the mizzen was
set – probably because the mizzen is getting nearly as big as the main, when
two reefs are in. Steering had as much to do with working the sails as the
rudder. I’ve heard Light Schooner folks saying this, too.

The nice bit was that she could be balanced to go to windward without any
weather helm, though a little weather helm is nice to have in these
conditions.

I started getting seasick (getting up to F6 by now) and started the OB,
dropped the main, and motored back to the mooring. I approached the mooring
from downwind, but whenever I slowed down on my approach, the head fell off
and I had to start another circuit. BTW – one feature of the Chebacco I
don’t like is how far away the OB is from the cockpit; with boom,
boom-crutch, mizzen and what not in your way when you want to get at it to
throttle back, switch off, steer or whatever.

At the third attempt, I approached the mooring under full power, grabbed it
on the way past and hooked on. I was wrestling my way back to the OB to
turn it off when the prop snagged the mooring strop! I had to resort to a lot
of foul language to get it untangled.

I was thoroughly seasick by the time I had her all squared away, and rowed
ashore.

It’s not an experience I’d care to repeat, at least not single handed, but
it is comforting to know that the boat behaved herself in these conditions –
even making decent headway to windward!

BTW – the wind strength increased further that night. Gusts of 80mph were
recorded on the Tay bridge!

Bill Samson

And finally

I did have another couple of contributions, but haven’t been able to clarify the images that came with them. Amybe next time . . .

Bill Samson can be contacted on : bill.samson@tesco.net

Chebacco News is at http://members.xoom.com/billsamson

Snail mail to Bill Samson, 88 Grove Road, Broughty Ferry, Dundee DD5 1LB, Scotland.

Chebacco News 29

Chebacco News 29 – January 2000


“Masts and sails not included”

launch2

Jamie Orr’s ‘Wayward Lass’ afloat for the first time

Jamie Orr (Victoria, BC) writes:

Big news day! Boxing Day, 1999, finally saw Wayward Lass launched, albeit as a motorboat. There’s a bit of trim to be added and/or finished yet, but I wanted to get into the water before the new year. For convenience, and to avoid having to flush the engine after, I thought we’d go in at Elk Lake, just outside Victoria. We had quite a bunch of spectators, with both my family and Maureen’s on hand for Christmas. We backed the boat down to the water’s edge, and my daughter Lindsay christened her, smacking the bow with a (plastic) bottle of Sprite, then spraying it thoroughly with the contents. After that, though, complications set in — the boat couldn’t be pushed off the trailer as the lakeshore shelves very gradually and I couldn’t back far enough in. After a quick discussion, we went to Plan B, and drove another few miles north to Sidney where the boat launch can handle much bigger boats than Chebacco. This time all went smoothly, and Wayward Lass floated off easily. The motor started on the first pull, and after a short warm up, six of us went out for the maiden voyage. She goes like a dream. The engine is a 5 h.p. Honda, and I think we must have reached hull speed at half throttle – at full throttle the stern wave just got a lot bigger, made me feel like a BC Ferry. At idle, the motor gradually turns itself to one side, but at anything higher, it stays centred and I can steer with the tiller. We confirmed that the hole for the centreboard pin is indeed at or below the waterline, and had to cut a quick plug to hold the inflow to an acceptable amount. We also found that the ocean squirts up through an empty centreboard case quite easily, at any decent speed. However, both of these were more or less expected, and didn’t spoil the fun. We didn’t go far as the crew found it pretty cold and we were by now behind schedule for the celebration lunch. The recovery was as easy as the (2nd) launch. The trailer was made locally by a welding shop, and they did a great job. I’ve only adjusted the side bunk heights very slightly, and I have make one more small adjustment to raise the roller where the keel starts to rise to the bow. Boat and trailer follow the van so well that I’ve no worries about going anywhere, now. (I’d only ever used a boat trailer once before, about 30 years ago.) She’s back under her shelter now, waiting for the finish work I mentioned, and her sailing gear. I’ll be going as hard as I can on those now, except for the good weather days when we go for a power cruise! Chebacco’s rule!

Jamie also has advice on raising the Chebacco to get the trailer under it:

slings1

‘Wayward Lass’ in webbing slings

Jamie writes:

We put the boat on its trailer last Sunday, December 19. My dad (85 years old) and I (an aging accountant) managed the job ourselves, much to my surprise, without jacks or other lifting gear. I’ll describe in case it might help someone else with the same job. The boat was supported by three crosswise 4 x 4’s, resting across two lengthwise 6 x 6’s, with the bow and stern firmed up by separate supports. We started by knocking away the bow and stern supports, then I was able to lift up the ends, while Dad repositioned two of the 4 x 4’s about 3 feet apart, either side of what we guessed was the balance point. (Which is, I think, about a foot behind the midships bulkhead.) Then, as I lifted up each end (now quite light) in turn, Dad built up a criss-cross tower under the boat until it was almost 2 feet off the ground. The wide keel was enough to keep her balanced, although we had a strap under the bow end for insurance. After all, if she tipped, I’d have lost the boat, and either my canoe (stored on one side), or my dad (crawling around on the other)! More about the strap in a second. Once we had the boat up high enough, we still couldn’t roll the trailer under her because of the supporting tower of 2 x 4’s and 4 x 4’s. So we built up a pile of blocks, bits of wood and wedges under the tail of the skeg, and supported the bow with the strap, which was hung from a gigantic saw horse sort of affair across the foredeck, about a foot and a half or two feet above it. This saw horse is a 2 x 12 plank with 2 Black and Decker metal brackets, designed to accept 2 x 4 legs, and easily adjusted for height, length, width of plank etc. Very useful brackets, but I’ve no idea what they’re called or if they’re still being sold. The strap itself was seat belt webbing, wrapped 3 times around the plank and tied with a couple of half hitches. We pried the bow up an extra inch with a lever to try to allow for the stretch of the webbing, when we tightened it for the last time. We were then supported front and back, so could take the tower out, and remove the remains of the cradle. The trailer now ran in under the keel quite nicely. Once we had it positioned, I untied one end of the strap, and let the bow down. I had to take off one wrap, the remaining two provided enough friction to control the bow on the way down. Then we lowered the tongue of the trailer until the support under the skeg could be removed. The boat was then completely on the trailer.

Comfortable sleeping arrangements

Bob Branch writes:

Bill:

Hey, Merry Christmas from Michigan! I just read the comment in vol 28 about one owner buying an airmatress and pump. THERE IS A BETTER WAY!!! And it eliminates the pump (a special peeve of mine in semiwilderness camping). The solution is the self inflating air mattres. “Camprest” is the primary manufacturer and they are available in a variety of lengths and widths from backpacking and camping goods stores. And they are indeed self inflating. The “deluxe” versions are about 2 inches thick and lest anyone think that will not do the job, I’m here to tell you it doesn’t matter if you are sleeping on rocks or limbs, you will not feel the ground. They roll up into a roll that stores very easily. When they are inflated I adjust mine by adding a puff or two of air just so when I am rolled on my side my hip bones do not bottom out to ground. They have a layer of open cell foam in them as well as the air and besides being comfortable absolutely provide total temperature isolation from what is under you. In winter camping almost no heat loss occurs into the ground! We use them on the boat as sunpads. The 25 inch wide version is wonderful if you have the room for it because when you roll over you do not roll off. Owners should check the width of their floor space. A back saving addition is an overcover that forms the “Crazy Creek Chair”. This is a cover over the pad slides into with a few straps and a few battens that allow the pad to become the most comfortable rocking chair ever created. It can be adjusted to firmness, angle, and I don’t know how to explain how many more ways but it provides you with absolutely as much back support as your reclining rocker at home. It is wonderful after a day of no back rest on a wilderness canoe trip to lean back into one of these things and rock the evening away. On my canoe trips I have to be sure to have the tent up and camp totally made before sit into mine cause often I’ll doze off before dinner even gets made. These things will absolutely allow a wonderful night’s sleep on a rock hard surface…. and ply and epoxy sleeps that hard. Ain’t we all been there, done that, bought the tee shirt?

Bob Branch

Reassurance from Phil Bolger & Friends regarding Chebacco anxieties

Dick Burnham writes:

I wrote to Phil Bolger on some of my lingering concerns about the Chebacco and he swiftly put them to bed. I just received his letter today and rush to let you know about it. You must, though, if you’re inclined to publish some of the comments below, gain Bolger’s permission before doing so [Done that – No objections from Phil.]. For me they are comforting and offer me guidance on those things that have perplexed me some. For other, I have no way of knowing.

Maybe this is old hat for you guys. On my concern about flotation in the event of a capsize: “We’re not aware that any Chebacco has capsized. It would take a combination of very rash handling and bad luck to do it. The boat is unsinkable as designed. Any added buoyancy will float her higher if flooded.” (If you recall, Bill, I was wondering about sealed compartments and/or auto innertubes half blown up fore and aft….)

On my interest in possibly providing cross-planks to span the cockpit from seat to seat thus creating a nice sleeping platform outside: “Flush panel over the foot well is reasonable but its stowage needs study.” (My thought was to have 6 planks some 3′ long and a bit over 1′ wide so that the sum would cover from cuddy hatch aft to tiller. 3 would store under an openable seat on each side where the centerboard well is located — keeping weight low and in the center when sailing.)

On sailmaking and shaping of the sails: “We hear that the Sailrite Kits for homesewn sails are very satisfactory. Urge any sailmaker to build a deep draft into the mainsail. Too-flat sails are too common and degrade performance of gaff-rigged boats especially.” (Sailrite is “sailrite.com” on the internet and when I visited them some time back their graphics indicate cut, canvas weight, and price for mains’l, mizzen and an optional jib along with fixings such as thread that will be needed.)

He ends with a short note indicating that consultation on plans purchased from others (mine come from HH Payson) is “very limited.” I appreciate that as the price was most affordable. Yet it was a very nice consultation, indeed. [In his letter to me, Phil adds “Policy on consultation is to do the best we can to keep correspondence from biting too deeply into design time; that is the answers may be a bit abrupt at times.”]

Oh, found and instantly bought an 8′ long Papua New Guinean paddle. Wonderfully carved blade, and the whole length of the paddle from one piece of wood. The length will suffer a slice through it on a lengthy diagonal when we pack up to go home, but I’m thinking it will make a nice poling paddle when rejoined with epoxy, and with a boat or gaff hook on the upper end it might be a pretty useful memento.

Best, Dick Burnham


‘Itchy and Scratchy’ goes from strength to strength


iands

‘Itchy and Scratchy’ flying along on a close reach

Fraser Howell, of Nova Scotia, continues to enjoy sailing his strip-built Chebacco and has had considerable success with a large jib attched to a longish bowsprit. He tells me that he’s currently making a replacement hollow mainmast, using the ‘birdsmouth’ type of construction that was written up in WoodenBoat magazine #149, 1999.

Old-style Chebacco Boats

Craig O’Donnell draws our attention to a picture of historical Chebacco boats at http://www.photolib.noaa.gov/lb_images/historic/nmfs/figb0080.htm

Craig’s own pages are, incidentally a fantastic resource for all things boaty – http://www.friend.ly.net/~dadadata

And finally

Bill Samson can be contacted on : bill.samson@tesco.net
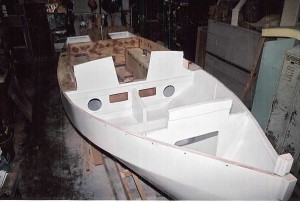
Chebacco News is at http://members.xoom.com/billsamson

Snail mail to Bill Samson, 88 Grove Road, Broughty Ferry, Dundee DD5 1LB, Scotland.

Chebacco News 28

cropped-image1.gifChebacco News 28 – October 1999

Kelani Rose is Launched!

ch283

Jim Slakov’s KELANI ROSE struts her stuff.

Jim Slakov, of Sechelt BC reports:

Well we launched the Kelani Rose (daughters Kelly and Annie and wife Rose) near the end of May, and have sailed about a dozen times since then. The weather in June was abysmal and not what we call summery at all, but July and August so far have been great! As I’m just learning to sail, we pick our days, and miss the windiest ones, perhaps saving them for later. One day the wind blew about 15 knots and that was very exiting, the boat took it well and didn’t show any signs of stress. I didn’t know about lifting the centre board when running with the wind…of course we’re commiting some of the classic errors for beginners . .. like getting into irons after a failed coming about, and ending up sailing backwards for a spell ( I know now to sheet the mizzen to correct that)… the transom does drag a bit sometimes, there is a 6 horse, 60 lb. outboard on the bracket, I think I’ l l throw a little more weight up front and see what happens, it’s not serious in any case and doesn’t seem to affect the performance… the Kelani Rose will self steer when the conditions are right, and some very experienced sailors have been aboard and complimented her on her handling ability. All in all I can’t think of anything I would change were I to build another, except to put a better quality line on the centre board ( I used a cheap 2nd hand prawn line and saved maybe 50 cents), so that will have to be removed in the fall.

There is a wooden boat show in Vancouver at the end of August, in which Kelani Rose will strut her stuff and hopefully do the name Chebacco proud! Am going to get some pictures taken under sail , soon I hope, and send them off to you… signing off for now, Jim Slakov… my email address is woodventures@uniserve.com

As it happens, Jim did do us proud and won first prize in the ‘Best New Construction’ category! Kelani Rose also got an excellent writeup in the ‘Coast Independent’ newspaper. Readers of Chebacco News will be interested to know that Jim made extensive use of cherry wood in her construction, and very beautiful it looks, too. The masts are of yellow cedar and the other spars of Douglas fir. He reports that the mast is up and the boat ready to go within 15 minutes of arriving at the slip.


Itchy and Scratchy goes from strength to strength:

ch286

Itchy and Scratchy . . .

Fraser Howell continues to experiment with the sails on his strip-built Chebacco Itchy and Scratchy:

Hi Bill

It is too windy to go out today. I’ll catch up on correspondence. Last time I wrote about the set of my mainsail, leech possibly too tight, too much depth for anything but light breezes. I tried a couple of things. I replaced the mast hoops with lashings that hold the luff closer to the mast, except at the tack. This pulled material out of the “pocket” and reduced the depth of the sail quite effectively. I also restrained the boom as if with a down haul to put more tension than the weight of the boom into the luff. That tension is set by the main hoist which has a 2:1 purchase.

These measures have flattened the sail, and reduced weather helm. I think it is faster, but I haven’t sailed in company, so cannot confirm it. I increasingly enjoy experimenting with the sail shape in different wind strengths and tacks. Varying tension on the foot, luff, the angle of the gaff, size and sheeting of the headsail. By the numbers Chebaccos should be fast, but I have not found that is always easy to achieve. Some days it is no fun at all, and my boat seems reluctant to do anything easily. Other times it is a joy to sail, balanced and fast.

Cheers;

Fraser


Jerome McIlvanie makes progress:

ch287

Jerome’s Chebacco . . .

Jerome McIlvanie of Yakima WA reports:

. . .I put an extra 1/4″ ply on the bottom, glassed, sanded and painted for six months. Turned it over, fitted out the inside, moved the cabin aft six inches, put an extra bulkhead clear across between aft cockpit and seat bulkhead. I enclosed it and built in an insulated ice box as shown in WoodenBoat magazine. It doubles as a seat also. I raised the sides of the cabin 2″ and put on 1″ or so more crown in the top. I used 2 layers of 1/4″ ply glued and screwed to 4 laminated bows out of long, thin 1 3/4″ square. I cut eh hole out for the hatch and used it for the sliding hatch. I glassed the top. For the centreboard and used 1 1/4″ thick black polyethylene. It’s tough but machines nicely and is a little heavier than the leaded ply CB.

Hopefully next year it will be in the water.


Another Epic Cruise in Lark

ch284

LARK heads north to Cape Cod . . .

Tim Smith of New York City reports:

I suppose a literal-minded person would say that our Chebacco cruising season stopped for the winter, in the sense that the boat was hauled and wrapped, and the children had a school year, and there was Christmas, and snow. But all that was really an interlude between voyages, one that gave us barely enough time to work on our wish list. Item one on the list was good bedding, so we bought two Coleman air mattresses and a battery-operated pump. Next we located a pre-fab galley box, with compartments to hold pots and pans and drawers for cutlery. I had thought for a while that a rudimentary electrical system would be nice, and lo and behold, there in the West Marine catalog was a 12-volt battery, sealed in a plastic case, with two ports for cigarette-lighter-style connectors. Turns out that it fits in the well beside the mizzen step; with an extension cord run into the cockpit, it can power the GPS, lights, VHF, what have you.

Next we ordered a new mizzen. The old one had tried to commit suicide at the mooring in a gale, when the clew, which had a bronze fitment on it, came loose and beat itself to pieces.

Then we decided we needed a tender, and so built an Auray Punt during the cold months. I picked the design because it looked good for t owing and could carry four, and promised to be easy to build. It went together with no surprises, though I made the botttom out of 3/8 inch ply instead of the 1/4-inch specified. Of course the punt wasn’ t quite finished by the time the provisioning season was over.

Our Chebacco, called Lark,went back in the water toward the end of June. It’ s an easy job for one person, now that the mast-stepping slot is installed and the trailer has extra bunks. I rigged a brailing line through the beehole in the mizzen mast to help keep the new sail secure: furled it by grabbing the clew and rolling it up into a sausage against the mast, then belayed it, and lashed the brailing line in a descending spiral around the whole works. It seemed tight, though the very top of the sail was too stiff to lie down properly. Left Lark on the mooring feeling pleased.

That night a storm blew in, and it stayed for the morning. I drove down to the dyke with my son just to have a look. The mizzen had stayed furled all right, but Mother of God – the wind had lifted the whole works, mast and sail, up out of the step and halfway out of the partner, and the rig was swinging around drunkenly, wedges scattered like broken teeth. We got the mess under control, my boy learning some brand new words along the way. Evidently the small stiff spot at the head of the sail had caught enough of the gale to pull everything loose. There is one other yawl in our local waters that has a sprit-rigged mizzen, and more than once I’ ve seen the sail flapping forlornly at the mooring after a big blow. Does this mean simply that there is room in one small town for two morons? Or is there a lost art of spritsail furling that other readers may know about? We addressed the problem by winding the mizzen around an d around the mast and cleating a line to the clew, which seemed to do the trick. I’ d love to hear what others have done.

Howling wind was a theme of the early part of the summer, and we had lots of practice sailing the boat single and double-reefed – a boon , actually, because we learned a lot about her limits. One fine blustery afternoon I had three experienced dinghy racers aboard and one very game novice, and we decided to leave one reef in when we should have had two. We sailed out into Nantucket Soun d into the teeth of a 20-knot southwest wind kicking up 4-to-6 foot waves. The boat was stable and fast; the sail was exhilarating, wet, and not too alarming. Crawling forward to secure the anchor on its sprit, I got a good look upward along the mast, and couldn’ t quite believe the bend it was taking. Under those conditions the rudder seemed small, but we were pushing it. One nice thing about this kind of sailing in the Chebacco, as opposed to a conventional cat: I find this boat much easier to jibe in a big wind. We used to dread the maneuver in a Marshall 22, but now don’ t give it a second thought, and that ‘ s a handy thing in a crowded harbor.

The strong southwest wind prevailed, but we were bent on cruising and constrained by a schedule, so one Frid ay morning in July we loaded our new gear aboard and took off, intending to head for Nantucket Island, about 25 miles to the south. We decided to tow a dinghy. Big mistake. The Auray Punt wasn’ t yet launched, so the dinghy we took along was an old family warhorse, a relatively heavy design by F. Spaulding Dunbar with little rocker and a lot of wetted surface. It towed nicely as we left the harbor, then slowed our progress perceptibly as we nosed out into the sound. Then we stopped thinking about it for a while because a quite amazing wind blew up and stayed up, making a wicked short chop against the falling tide. We weren’ t traveling anywhere far in those conditions, so we turned tail and ducked into the lee of some local barrier islands for a daysail.

Near sunset we anchored by the beach, spotted couple of guys digging clams, bought some, cooked them up with garlic and white wine, and ate them as the sun went down. The new air mattresses were a great success. With the cooler on one side of the centerboard trunk and the galley box on the other they were amply supported, and we slept snugly under the boom tent, kids in the cuddy. The next morning it was still blowing like hell. With a double reef in, we headed back out into the sound to see what progress we could make.

Towing the dinghy it was tough going to windward, wet and slow. I don’t recall what the currrent was doing, but the GPS said we were making little more than 2 or 3 m.p.h., and that was up hill and down dale. When we gave up at last and reached back for the harbor, our speed didn’ t improve much: I’ d guess that the tow cut our speed in half on all points of sail. “Maybe next time we should leave the dinghy behind and take advantage of the boat’ s sailing ability,” my wife suggested. I thought of some suggestions in return, but stifled them.

Three weeks later we had another stretch of vacation and another shot at a Nantucket trip. We got provisions together and waited for fair weather, which wasn’ t long coming. On a Friday morning with a 10-15 knot breeze we tucked in a reef and headed south – a glorious sail with the wind on the port quarter, the boat happy as a mallard. With the dinghy left at home on the beach, we made the trip in about five hours. The children played blackjack in the cuddy, declining to tell us how they had learned the game.

Nantucket is an island choking on its own wealth, a Yankee playland for the gilded age. Which means, among other things, that its harbor is jammed full of fabulous boats. As we were going into the harbormouth, Endeavor, the J-boat, was coming out. And once we were well inside it was like a crowded parking lot. We picked our way easily through the fleet, sailed up to a beach at the foot of Main Street, found room enough to swing among the Boston Whalers in a couple feet of water, and waded ashore. We spent the night with friends who have a house there.

Morning came, and the weather report was discouraging. The day itself promised fair weather with a Northeast breeze, but the next couple of days were to be gray and wet. Rather than turn the children off to cruising, we decided to head for home. We wandered down to the beach – steps ahead of Bill and Hillary Clinton, in town for a fund-raiser – and found Lark aground. She wasn’ t hard aground, just stuck in the sand, bow afloat, a couple of extra inches of waterline showing at the stern. But the tide was falling, and would be for another four hours. My wife, my son and I stood backwards against the transom and heaved. Nothing. We got our hands under her, lifted, and heaved some more. She moved. Four more good grunts and she was afloat.

It was a long close reach home, a sail of about six hours in a 10-12 knot breeze and bright sunshine. The kids tried their hands at sailing. The boat hummed along; the trip was sublime. For the record, we did, finally, get the Auray Punt painted and launched. She’ s the fourth Bolger in our fleet: besides Lark there’ s a long Diablo and an Elegant Punt. The Auray Punt is a really nice rowboat, swift and steady. I’ d say she’ s a little bit less stylish in three dimensions than in two, although when she’ s coming at you head-on, showing her flare, she’ s got real panache. Towed behind the Diablo, she tracked nicely. She’ s light, so maybe next year we’ ll try towing her somewhere with the Chebacco. Or maybe not. Lark has a big heart, but she’ s no tugboat. Which means, I suppose, that my wife was right. Happily, she doesn’ t know how to find this URL, so she’ ll never know.

ch285

Tim Smith’s stretched Diablo and Auray Punt . . .


Jamie Orr and Bill Samson talk boats

Jamie Orr of Victoria BC was visiting Scotland in August and dropped by to see Bill Samson and to go for a sail in Sylvester. The ‘sail’ was more of a ‘motor’ due to lack of wind, but we O.D.’ed on boat talk and had a great time. Jamie’s sheet ply Chebacco is nearing completion and should be in the water next year. Jamie left these photos of his mast slot, which has a neat sliding cover:

ch281

Cover closed . . .

ch282

and open.


New email address and URL for Chebacco News:

Bill Samson can now be contacted on : bill.samson@tesco.net
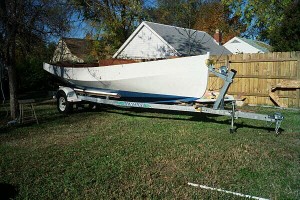
Chebacco News is at http://members.xoom.com/billsamson

Snail mail to Bill Samson, 88 Grove Road, Broughty Ferry, Dundee DD5 1LB, Scotland.

Chebacco News 27

cropped-image1.gifChebacco News

Number 27, August 1999

picnic

Sylvester anchored in Balmerino bay, Scotland, May 1999

It’s some time since the last Chebacco News hit your postbox/computer. There’s not been a great deal of news from you, so there isn’t much to report. Remember, this is yournewsletter – so keep telling me about progress, voyages, ideas . . .

Sail Trim and Crew Balance on a Chebacco-20

Judging by the email correspondence I get about the Chebacco, there seems to be a nagging worry about sail trim and crew balance. This is entirely understandable, since most of us have cut out teeth on conventional Marconi-rigged sloops. There’s a wealth of knowledge out there about how to get the best out of a Marconi rig, but not a lot on cat yawls. I hope this will help to redress the balance to some extent.
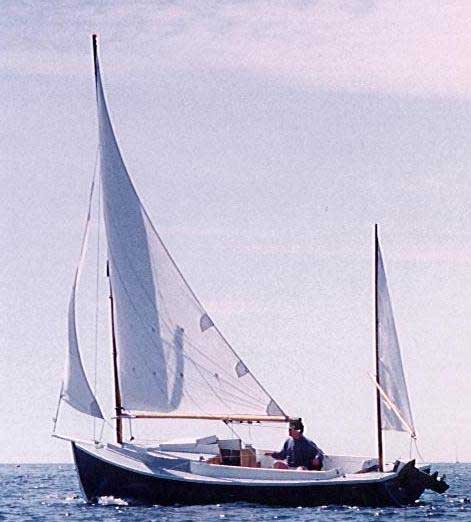
It has been mentioned in Chebacco News before that the mizzen should be cut dead flat – no draft at all. Likewise, when it is set, the snotter should be hardened in to keep the sail flat. Any appreciable draft there will result in a tendency to imbalance. The mainsail, on the other hand, should have good draft, with maximum depth no more than 40% of the chord aft of the luff. You need this to give you the drive to get the best out of the boat.

One other detail about sailmaking – the reefing points should be set more or less in a straight line, to help give a flatter sail when reefed. A baggy reefed sail is unhelpful, to say the least!

Given this as a starting point, then, how do we get the best out of the boat?

Like all catboats, the Chebacco has a beamy hull – not as extreme as some, but still quite wide. This means that as she heels, the underwater part becomes increasingly asymmetrical, with a tendency to round up into the wind. I find that in light winds, I can lash the tiller and steer Sylvester simply by moving my weight around to give more or less heel – so it’s pretty sensitive! The effect of extreme heel is powerful weather helm, which gets to be too much to handle (for me anyway) when the lee gun’l is awash (probably around 20 degrees of heel). It is sometimes argued that a little weather helm is a good thing because the rudder tends to ‘lift’ the boat to windward. On the other hand, it also creates drag and slows the boat down. Certainly large amounts of weather helm are bad.

The trick, of course, is to move your weight, and that of your crew around to keep her sailing almost upright, so the underwater part of the hull is symmetrical. If the wind is still heeling the boat too much, you can help a little by raising the centreboard to about the half-way point, allowing the boat to make a little more leeway, but ultimately a reef (or two) must go in. So if you are sailing single handed, you need to reef sooner than if you have a hefty crew along. I find that a reef is necessary with force-4 winds, single handed, and force-5 with a couple of crew aboard.

I’ve never found the Chebacco to be very sensitive to fore-and-aft trim, though it’s not a good idea to weigh down the aft end so much that the transom drags. If the crew are distributed along the side benches, then you shouldn’t have to worry about it.

Sail trim is pretty conventional – I simply sheet in the sails until the luff is just full. Hardening them in too much is counterproductive and the Chebacco certainly doesn’t respond well to ‘pinching’. She’ll point within 45 degrees of the true wind direction, though taking leeway into account she’s really sailing about 50 or 55 degrees off the wind. Like all boats, the bigger the chop, the less well she does to windward – though she’s a lot better in this respect than most sharpies, for example.

The centreboard also needs a bit of thought. With no CB you make too much leeway – getting blown sideways across the surface of the water. On the other hand, the CB all the way down will resist leeway but add drag. As I’ve mentioned above, it’s sometimes not a bad idea to raise the centreboard a little to allow more leeway to absorb gusts. I find that the Chebacco will sail tolerably well on all points of sail with the board about half way down. For peak performance, though, it should be raised for running before the wind, and all the way down when getting to windward in a moderate wind.

It’s a wonderful experience to have everything set just right. You have a powerful feeling that the boat has settled into a ‘groove’ – She’s smoking along, and only minimal adjustments to the tiller and mainsheet are needed to keep her like that. That’s the kind of sailing that makes it all worthwhile.

Motorsailing a Chebacco

There are times when the weather doesn’t cooperate with your sailing plans – especially when there are very light winds and progress is slow. At such times I frequently ‘motorsail’ Sylvester. I keep the sails up and sheeted well in, start the outboard and set the throttle to a little faster than a tick-over. The hull is so easily driven, especially in flat conditions, that there’s little point in running the outboard flat-out – the tiny amount of extra speed just isn’t worth the extra noise and fuel consumption involved.

If you’ve never done this, it’s a revelation. The small amount of true wind, combined with the apparent wind generated by forward motion fills the sails and provides more drive than the outboard alone would generate; resulting in pointing higher and good progress to windward.

Reprints of classic boating books

David Goodchild is doing some great, excellent value reprints of classic, out-of-print boat books. Have a look at for further details at

http://www.anyboat.com/books/

News from Papua New Guinea

Dick Burnham, currently in Papua New Guinea, sent me his ideas on stopping water from entering the mast hole:


I’ve been whittlin’ away this late afternoon — making the little masts for
the model. This gets me thinking and I’ve also been going over the
CNewletters and studying the details of the mast penetration of the roof.
I’ve noticed that just about all who report on it say they are conditioned
to sponging up the leaks from this joint. I guess a rubberized boot
doesn’t work, especially if one is demounting and resetting with
regularity? Here is what might be a small improvement, I really don’t
know. I’d like your thoughts.

Build out a square collar of wood with epoxy and screws — possibly 2″ —
around the mast so that it covers a raised strip of wood that surrounds the
opening in the roof/removeable panel. This is a curb that will keep water
from the roof out of the hole. I’d think it would be 2″ high and the width
of the 4 individual curb pieces would be 3/4″ or so. (I’ve not looked yet
at the detailing of the curb at the roof/removeable panel joint, so be
cautious….) Water coming down the mast will be diverted outward by the
collar (which would have a slight bevel to the outside) and will drop to
the roof, as there would be a saw cut underneath the collar to stop water
from running back to the mast on the underside.

I looked at the possible problem of the collar being in the way during mast
raising — using a half-completed mast on a model without a cabin structure
— just the molds/bulkheads in place — and it seems that the mast heel
will rest and glide down the inner stem without a collar gouging into the
cuddy roof. Ideally the collar would have a closed-cell foam insulation
strip underneath which compresses against the curbs when the the mast is
set. Or there could be multiple grooves to inhibit water passing through.
This might inhibit driven water.

The collar doesn’t need to be square, but the curb does. The collar could
be circular if that pleases the eye.

The idea comes from the Parker book which I enjoy for its practical
construction suggestions.

Image14


Sorry for all the words. As Mark Twain (was it?) once said, I’d have
written a shorter letter but I didn’t have the time.

Dick

And finally . . .

That’s all for this (slim) issue. PLEASE keep in touch and let me have news, views, hints, tips, stories, pictures, . . . There are a lot of people out there who deluge me with complaints when Chebacco News is late. I’d rather have stories, please.

Bill Samson, 88 Grove Road, Broughty Ferry, Dundee, DD5 1LB, Scotland

wbs@sol.co.uk