Chebacco News
Number 21, June 1998
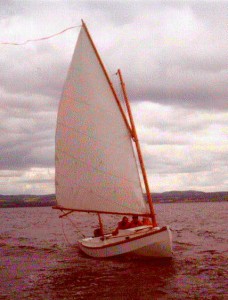
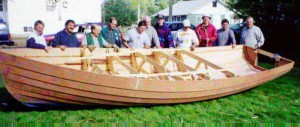
SYLVESTER scoots along in a sea breeze
Why so late?
You’ve probably noticed that this issue is about a month later than usual. The explanation is that there wasn’t enough material from our readers to fill an issue until now. Anyway, there’s some good stuff now, so I hope you’ll find it’s been worth waiting for.
Reefing (again!)
I’ve made some very simple modifications to the reefing system on SYLVESTER that make reefing under-way a much more managable process. In essence, all I did was to move the horn cleats for the pendants to a point about mid-way along the boom; making them easier to reach without leaving the cockpit. The pendants at tack and clew are left in place at all times, and just hauled in (tack first) as the occasion demands, just as Brad Story described a few issues ago.
I had a chance to try it out in anger last weekend; I took in a reef when things got blustery, and shook it out again when things quietened down a little. It worked very nicely.
Building the Coach-roof
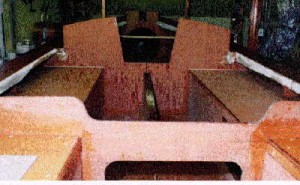
Builders tell me that one part of the plan that takes a lot of thought is the construction of the coach roof. Here’s how I did it.
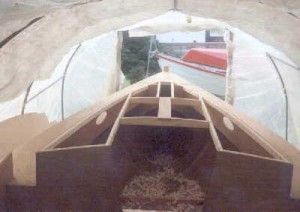
First of all I put on the cabin sides – just cutting and trying until they fit, not forgetting to cut the elliptical holes for the windows before finally gluing them in.
Next job is the framing for the roof – not too difficult joinerywise, but it takes a bit of study of the drawings to figure out what’s needed, allowing for the right clearances for the mast slot and hatch hole.
This is all faired up in preparation for the top going on.
I made the top from 1/2″ ply – it takes a LOT of bending – Two layers of 1/4″ might be easier. The top is made in two halves – port and starboard. I glued and screwed it to the centeline first – LOTS of screws to make sure it stays down.
I found, when bending the curve into the top the framing started to sag, so I placed some temporary props between the framing and the bottom of the hull to try to minimise this sagging.
I then applied glue to the rest of the framing and applied my full 180+ pounds around the edge as I put in the screws. This is the hardest bit, because if you stop half way through, with not enough screws in, it’ll just pull out and spring up. I’d recommend a screw every 4 inches or so.
Finally I removed the props and there was a little sag in the roof. No big problem, but it does mean the hatch sides need to be convex along the bottom and require a bit of fitting. Once the hatch sides are on, and the framing of the mast slot, the whole thing is as stiff as you could wish for.
I hope this is helpful.
Cabin sides in place and framing for the coach-roof completed
Jamie Orr Pours Lead in his Centreboard
Jamie writes:
Here are the lead pouring pictures.
First, some reminders:
- Pick a dry day or work under cover. Molten lead will splatter if it contacts moisture.
- Clean up your work area. It’s obvious from the photos I could have done a lot more in this regard. (Also, I think we could have had the stove in a less vulnerable position, so it couldn’t be easily knocked over. On the other hand, it didn’t get knocked over, and was at a convenient height. Take your pick.)
- Lead stays hot for a long time, watch your fingers.
- Wear protective clothing, and don’t breath the fumes.
Now, what we did.
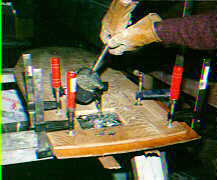
We drove four big nails into the edges of the hole in the centreboard to anchor the lead. This was only just barely enough, and the lead was a bit loose after it cooled and shrank. Some epoxy around the edges fixed that.
A piece of steel plate was clamped to the underside of the board. I wire brushed the plate as it was a bit rusty, but didn’t do anything else. The books favour some blacking or soot, as well as preheating the steel, to prevent the lead from sticking, but we had no trouble with it. The board was carefully levelled on sawhorses.
The lead had been previously used to seal the removable top on a 45 gallon drum, so it came as a thick strip about an inch thick. Dad bandsawed it into chunks while I set up the board. We fired up the backpacking stove, put the pot and lead on, and put a 3 lb coffee can over the whole thing (both ends cut out of the can!) with an air space at the bottom. The can acted as a heat reflector, wind shield, and chimney for the stove, greatly increasing the heat to the lead.
It took about six minutes to melt 2/3 of a pot of lead, or about 6 lbs. Beeswax is supposed to help impurities float to the top of the lead, but they seemed to float up quite well without help, so I didn’t bother with the wax after the first lot. A tongue depressor removed the dross nicely. I found the easiest way to hold the pot was with vise grips, ignoring the bail, at least for this pot. (The pot was bought originally for bullet making, from a sporting goods store.)
I didn’t pour the lead all at once because I only had a small stove and pot. Because the first (learning) pour was on the small side, we had to do a very small fourth pour. Also, this last pour was delayed, so the lead already poured may have cooled a bit. In any case, this last, fairly thin pour didn’t bond as well to the already poured lead. When I started to level the excess, the edges tried to come up like the edges of a pancake whose middle is stuck to the pan. After I had the excess levelled, I drilled two corners and put one inch wood screws in them. Along with the epoxy already mentioned, this fixed the problem.
As an aside, I found the best tool for levelling the lead was the electric plane. I did a final finish later with the belt sander when I was fairing the edges of the board. The lead didn’t seem to hurt the plane – if in doubt, rent. Note that lead shrinks as it cools, so it should finish about 1/8 inch above the surface when poured.
Altogether, this made a nice change from epoxy, and was a whole lot easier than I thought it would be.
Melting, and pouring the lead.
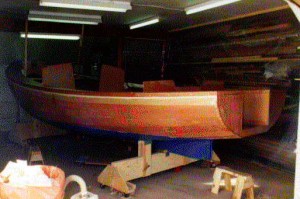
George Cobb’s hull nears completion
George Cobb, of New Brunswick, Canada, sent me a bunch of photos of his beautifully crafted lapstrake Chebacco-20 hull. George writes:
I enclose photos going back to March ’97. I started Aug ’96 but spent most of that winter on spars, CB & trunk, rudder etc. working in the basement. As you can see from the photos, my shed doesn’t have enough room to build a boat of this size. Most of the construction went smoothly. Some trouble lining off the lap lines becuase I didn’t have room enough to stand back and look at them.
In the latest photos I am in the process of applying epoxy & the fiberglass to the deck. I have just started on the cabin. I laminated a rounded front as I did not care for the pointed look in the plans. I made very few other changes to the plans. Still have cockpit coaming, cockpit sole, toerails and rubrails and various trim pieces. All hatch covers are made except for the one for the companionway. When finishing and trailer are included I doubt if I will be launching this year.
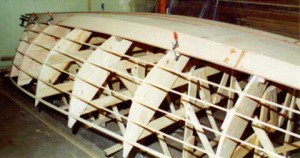
Starting planking – note the ‘lining off’ battens.
The turnover ceremony.
Starting to fit out the hull
The cockpit nears completion
Ed Heins buys Burton Blaise’s hull
So I was pondering the next project, either a Light Scooner, a Chebacco, or one of the sets of Jim Michalak’s plans that are residing in my “projects pending” file, when lo and behold, Burton Blais posted an unbelievable deal for his Chebacco hull which made up my mind all at once and made me the newest builder on the Chebacco news list. The deal was even more attractive, as Burton, up in Ontario, is only a few hours northwest of us here in Frostbite Vermont. Burton, by the way has done a magnificent job thus far. That about covers the upside of the situation.
The downside? Well, convincing my wife Deb, was the next step. Of course it seems Deb, beautiful flower of English womanhood that she is, was somewhat less than overwhelmed at the marvelous opportunity of having yet another “bloody ship” in her back garden. Fortunately, the age old solution of providing a “quid pro quo” of greater value than the object in question, (this time in the form of a tennis bracelet) worked to perfection and the necessary political groundwork had been laid. Which then left only the logistic issues to be solved.
Downside #2, we had no trailer to transport this beast. After a caucus with Bill Samson about trailer requirements, however, I petitioned a friend to loan me the trailer from his 15′ plastic puffin which theoretically just got me enough snubber to axle length to balance the Chebacco. One small problem it seemed however was that like most Vermonters, maintenance on said trailer had been sadly neglected, so before embarking I had already rewired the lights, changed out one wheel bearing and being a Vermonter myself felt that I could get by with just repacking the other 3. Mind you I had never seen a Chebacco up close and personal, so I’m envisioning at this stage, how this is going to fit.
The morning of May 16 broke sunny and warm, a lovely day for the drive. We headed west across Vermont, caught the lake Champlain ferry just north of Burlington VT and landed safely in Plattsburg, New York. From there we headed northwest up route 190 and transitioned to US 11 at Ellenburg Depot. We left US 11 at Malone NY ( a rather niceish town with a hellatiously big Kmart, best described as a Tescoish thing for our British readers). Anyway the significance of the Kmart is that there are none in our small locale so it was planned to stop on the way back
to satisfy her majesty’s shopping fix. US 37 leaves Malone and runs west along the Canadian border to where we planned to make the border crossing. All was well here until we discovered 25 miles of roadworks with no feasible means of avoidance. Hence, 25 miles of dust and gravel later we were back on rt 37 heading towards Massena New York.
Now, Cornwall Ontario is a small city. At least on the map it looks substantial enough to warrant a signpost on the freeway. However… as with our US mapmakers who show Canada as a big beige empty block above the US border, I suppose the powers-that-be assume that just a reference to “Canada” should be sufficient for the average ignorant yank motorist. Therefore, the only signpost along the road reads “Industrial Plants Bridge to Canada”. Now it seemed absolutely logical to me to think this meant “THE Industrial Plant’s bridge to Canada”. There was an enormous factory there, and it’s not unheard of to have a factory in these parts span the border. (That’s my story and I’m sticking to it) Anyway, needless to say, 6 miles farther down the road we came to the realization that in fact this was the ONLY bridge to Canada. A clandestine U turn with a trailer across one of those “Emergency Vehicles Only”
median crossings and we were headed to Ontario.
Border crossing south to north was no big deal. The Canadian folks were friendly courteous and checked Molly the Bassett Hound’s rabies papers, and passed us right through. Burton God bless him had given excellent directions so the remaining miles were insignificant.
Until we arrived at the Blais’ estate and I got a look at the Chebacco, upside down on it’s building frame, and was appraised of the size of a completed Chebacco Hull. I would have sworn that it would never fit on the dinky trailer hitched to my minivan. Not wanting to admit defeat however, we pressed on and horsed the hull out of the temporary shed. With the help of a willing neighbor turned it was over for the first time. I have the feeling that if Burton had turned this over prior to my arrival, I probably wouldn’t have gotten a chance at the boat.
This was one pretty hull all trued up with the bulkheads and temp frames still inside. But onward….
Downside #3, Back to the Vermonters lack of trailer maintenance. It seems the trip had broken loose a couple of ancient weld patches and there was no way the trailer would have survived an overload condition in that condition. Thankfully another of Burton’s neighbors came to the rescue with a grinder and welding rig, and an hour later we were back in business.
Back to Burton’s, to load up the hull. Cripes it overhangs. Well at least the bunks fit more or less on the flat bottom although they’re somewhat short for the job. A bit of gerryrigging got her sorted and tied down & we were off back south.
Actually it trailed not too bad. There was a minor skirmish with the US customs who first after inquiring about my 2 children in back, (one boy, one dog, OK that put me off) then their obvious struggle with how they were going to get a Coast Guard safety registration certificate on an unfinished hull. (I’d love to see the exam for customs agent) Finally they acquiesced to the fact that this was really lumber at this stage so there wouldn’t be duty.
We made the obligatory stop at Kmart as promised, spent the night in Ellenburg Depot and returned uneventfully with only a few scratches in the paint to show for the ordeal.
This weekend, marks the building of a proper cradle and 8 strongbacks to horse the hull off the trailer and hopefully embarcation of further boat building exploits. Stay tuned. I’m a little overwhelmed at where to begin.
Cheers
Ed Heins
For Sale
I want you fellow Bolgerphiles to be the first to know that Catfish Lounge [a Catfish Beachcruiser] is going to be offered for sail, er, sale, to make way for a Martha Jane. Price of the Lounge is $4,500, and includes an excellent Pacific galvanized trailer and a year-old Honda 2HP motor. If you have an interest, or are interested in learning more about the boat, send me e-mail. (Both the boat and I are in the San Francisco Bay area.)
John Tuma <jtuma@sjm.infi.net>
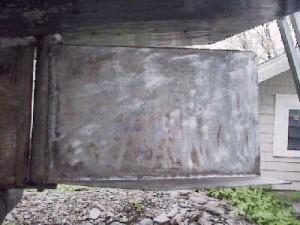
What about an aluminium rudder?
Fraser Howell sent me this photo of his aluminium rudder. He is very pleased with the way it works. It’s very strong, too. It’s worth noticing that the rudder is in a particularly vulnerable position when a Chebacco is being launched from a trailer. Careless launching can mean the rudder hits the slip when the boat slides off the trailer. It is comforting to have a really strong rudder!
Fraser Howell’s aluminium rudder
And finally:
That just about wraps it up for this time. Please, please, please keep your news and photos coming. They are the stuff that Chebacco News is made of!
Bill Samson,
88 Grove Road,
West Ferry,
Dundee, DD5 1LB,
Scotland.
<wbs@sol.co.uk>

