Building the Sheet-Ply Chebacco-20
By Bill Samson
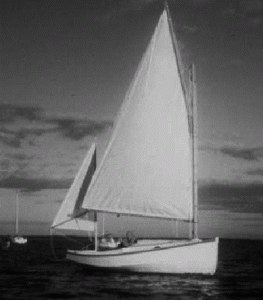
The Chebacco-20 is a trailerable dayboat designed by Phil Bolger, the prolific American naval architect who is perhaps best known for his ‘Instant Boat’ designs for amateur boatbuilders. The design was commissioned by Brad Story, the boatbuilder of Essex, Massachusetts – a few miles along the coast from Phil’s base in Gloucester. The resulting boat is unballasted, with a shallow keel and centreboard, displacing about 1200 pounds (550 kg). She relies on her form, rather than ballast, for stability although some owners have seen fit to put in two or three hundred pounds of ballast. She is rigged as a cat-yawl, with a high peaked gaff main and small sprit-boomed mizzen. The cockpit is huge, for a 20-foot boat, and the cabin minimal – with room for a couple of sleeping bags on the floor. With a simple boom-tent, there’s room for two more to sleep in the cockpit.
Construction is ‘tack and tape’; rather like ‘stitch and glue’ but without the stitches. The plans give accurate dimensions for the bulkheads and panels (- no lofting needed -) and the bulkheads are set up and panels tacked to them.
The joints between the panels are left slightly open and are filled with thickened epoxy. Glass tape is epoxied inside and outside the hull at each joint and the entire hull is sheathed in glass cloth and epoxy. This gives an extremely strong hull, which is as nearly maintenance-free as any form of construction.
Plans for the sheet ply Chebacco-20 are available from Phil Bolger & Friends. You should also get hold of Dynamite Payson’s book “Build the New Instant Boats” which describes lots of useful techniques which are applicable to the sheet-ply Chebacco.
Before starting work on any full size boat, I’d strongly recommend building an eighth scale model, using 1/16 inch ply. This will help to sort out any uncertainties you may have when reading the plans, without costing an arm and a leg if you make a mistake.
People often ask how long it will take to build a Chebacco-20. The answer is ‘It depends . . .’. I bought my plans at the end of 1992 and launched in the spring of 1996. In Scotland there are only 5 or 6 months of the year when epoxy will set successfuly out of doors, where I built my boat. Altogether, I believe I spent about 500 hours on the project, give or take. I used hand tools for just about every operation, apart from sanding. I went for a pretty good finish and probably spent as much as 40% of the construction time sanding and filling. If you’re content with a less fussy finish, you’ll be able to save a considerable number of hours.
Another question that comes up a lot is the cost of materials. I spent about £1200 (about $2000) on materials, but going with the best quality possible you could easily double or even triple that amount. You have a lot of leeway in your choices.
Construction of the Chebacco-20, as designed, takes 22 sheets of half inch ply. The for’ard end of the bilge panels has considerable twist and some builders prefer to laminate this section from two layers of 1/4 inch ply. Builders planning to take this route should buy 20 sheets of half inch and four of quarter inch. There’s something to be said, too, for laminating the cabin roof. If you do that you’ll need 18 sheets of half inch and 8 of quarter inch. This amount of ply assumes that you are building the keel sections as plywood boxes, as shown on the plan, and that the floorboards in cockpit and cabin are made of ply. If you have access to a good bandsaw it is possible to cut the keel from solid timber and save a sheet or so of ply. Similarly if you make the floorboards from timber slats, you’ll save another 3 sheets.
In addition to the ply, you’ll need about 10 gallons of epoxy resin. You can buy this a gallon at a time, as you go. In fact it’s probably best to do this because unless you’re a very quick worker, the construction will probably take over a year – three or four years of spare-time work is typical. About 100 yards of 4-inch wide glass tape is needed, and about 30 yards of 6 ounce glass cloth for sheathing the outside of the hull.
Wood is also needed for framing various parts of the boat and for the spars, but again this can be bought as you go along. Construction-grade fir is perfectly adequate for this job, as it will all be sealed in epoxy. You might even consider finding a yard that re-cycles old timber and save yourself a bit of money – especially for the mast.
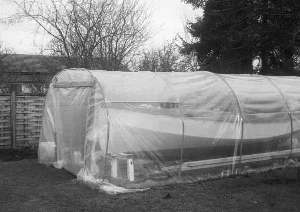
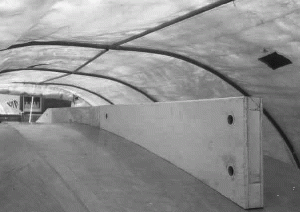
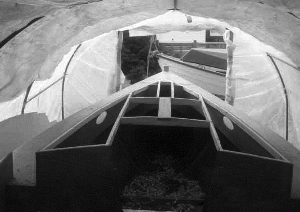
A problem for many home boatbuilders is the choice of building site. It is undoubtedly best to build in a shed if one is available. I, and a couple of other Chebacco builders have used a temporary polythene tunnel – although it might get a bit hot in warm climates. If the climate is warm, then you can build out of doors and throw a tarp over the boat when you aren’t working on it. You’ll need at least 3 or 4 feet to move all around the hull for comfort when you are working on it.
A polyethylene boat ‘shed’.
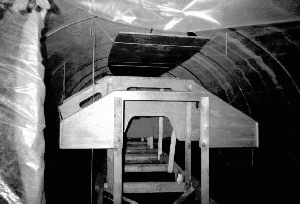
Like most ‘instant’ boats, the Chebacco hull is built upside down. Despite the fact that smaller ‘instant’ boats can be built on a couple of trestles, some kind of backbone is necessary for the constructions of the Chebacco. The style of backbone is up to you. I used a “ladder” made of reclaimed two by sixes, with the “rungs” spaced to match the bulkheads/moulds. I set this up on legs about a foot off the ground with packing under the feet to keep everything level – this is crucially important if you want to avoid building a twisted hull.
The frames and moulds have been set up on a ladder-style backbone. The topsides have been fitted and the bottom is ready to be lowered into place.
Full size lofting of the parts of the sheet ply Chebacco isn’t necessary. The shapes of the bulkheads and transom are marked out on the sheets of ply, following the dimensions given in the plans. Marking out actually takes longer than cutting them out! I found that this was very hard on the knees and would recommend getting knee pads before you start. Incidentally, it’s a good idea to plan the layout of components on the ply sheets before you start, in order to minimise wastage.
The bulkheads and transom are cut out. The temporary moulds can be made from chipboard (particleboard). Most of the cutting out can be done with a hand held circular saw – the curves are pretty gentle. A sabre saw or jigsaw can also be used but gives wobbly edges that need planing up. A hand saw is also perfectly OK a crosscut saw with hardened teeth gets through the wood surprisingly quickly and without the nervous tension that always seems to go with handling power tools. Try it!
It’s not a bad idea, at this stage, to pre-coat all your plywood components with epoxy after cutting them out. It’s much easier to get a drip-free coat on a horizontal surface than a vertical one. The downside is that all the gluing surfaces need to be roughened up and you’ll need to protect the epoxy from UV degradation until you paint it.
There are various ways in which the stem can be made. It can be laminated from fir or mahogany. I’d recommend laminating it from offcuts of half-inch ply (seven layers) glued side by side and liberally coated with epoxy. To save work later, you can cut the bevels roughly on a bandsaw, making sure not to cut too deep. The final bevels will be determined once the stem is set up with the bulkheads and moulds.
Before setting up the bulkheads it’s a good idea to glue on the one and a half by four inch “floors” on bulkheads 4 and 5 and the framing around the transom. Fir is fine for these. The plans give accurate instructions for bevelling the transom and its framing – do this now.
Following the measurements given in the lines plan, the bulkheads, moulds , transom and stem are fixed to the backbone using simple battens and nails which will be removed later. Be very careful to line everything up accurately using a spirit level and double check the heights of the gluing surfaces for the bottom. I found a lot of fiddling was necessary at this stage. Once you’ve fixed on the topsides you are committed and there’s no going back!
The shapes of the topsides and bottom are set out on the ply, using a bendy batten to mark fair curves for their edges. This is vitally important for the finished look of the craft. They are cut out and the parts joined with butt straps as shown in the plans. Again, precoating with epoxy is desirable at this stage.
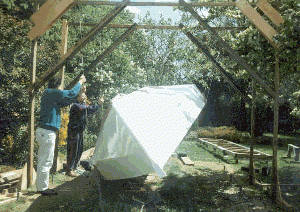
The positions of stem, moulds, bulkheads and transom are marked out on the topsides and bottom. The topsides can be temporarily fitted to the bulkheads using screws and cleats as necessary. An extra pair of hands helps here though it can be done single-handed by suspending the topsides with string from the shed roof, as shown in the photo above. Some fine adjustments to the heights of the bulkheads will probably be needed at this stage.
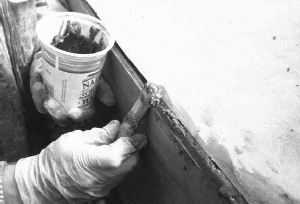
Once you are satisfied with the positioning of the topsides, They are glued on and epoxy fillets are applied to strengthen the topsides/bulkhead joints. Notice that there is no need to bevel the bulkhead edges. The epoxy fills the gaps and, indeed, a stronger joint results. The bottom is then fitted in much the same way as the topsides.
Detail of topside/frame joint – epoxy filleted and later taped with glass.
The next thing to do is make the bilge panels. No dimensions are given for these on the plans because the fine adjustments of the previous stages could result in significant variation in the bilge panel shapes. The panels are made a section at a time and then fitted, with butt straps being applied on the boat.
The shape of the bilge panel can be determined by laying a long sheet of wrapping paper (as stiff as possible) along the gap between topsides and bottom that the bilge panel will fill. The shape of this gap is transferred to the paper by rubbing coloured chalk along the edges. It is best to do this on each side of the boat separately, as there are likely to be small differences. Notice that because the bottom and topsides are not bevelled, the shape traced will be too large by about a half inch. This can be trimmed away later as fitting of each panel progresses.
The shape of the for’ard section of the bilge panel is marked out on a sheet of ply and cut out. This section is best fitted starting at the stem and screwing on cleats inside to make it lie against the topsides and bottom, working aft, trimming it to size as you go. There is tremendous twist in this panel and I used a Spanish windlass (twisted rope) attached to a clamp at the aft end of the panel to pull it into position. There is a colossal amount of potential energy in this twisted panel so take care that it doesn’t accidentally come loose and decapitate you! I found that, with the plywood I was using, if I left it clamped in position for a day or so, the plywood took up its shape and had less tendency to spring back when further work was done. Alternatively, this section can be laminated in situ using two layers of quarter inch ply.
These sections of the bilge panels are glued into position, both sides, and epoxy fillets applied as necessary.
The open chine joint is filled with thickened epoxy. This will later be taped, inside and out.
Butt straps are screwed and glued to the for’ard sections of the bilge panels. The other two sections of the bilge panels can then be fitted and glued. This job is easy peasy compared to fitting the for’ard section.
All the joints, inside and out, are taped with 4 inch glass tape and epoxy. (I won’t go into details here – Dynamite Payson explains the process beautifully in “Build the New Instant Boats”.) Two layers of tape inside, and one outside will be more than adequate – stronger than the plywood itself.
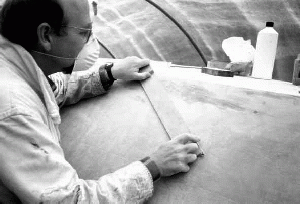
The outside of the hull needs to be faired using a power sander ( – I like the dual action type – ) and a long sanding board with 60-grade paper on it. All hollows should be filled and all humps sanded down at this stage. It sounds straightforward but takes ages to do right. Any unfairness at this stage will stick out like a sore thumb on a glossy hull. BE SURE TO USE A BREATHING MASK AND GOGGLES WHEN YOU DO THIS – EPOXY DUST CAN BE VERY BAD FOR YOU!
Fairing the hull with a sanding board
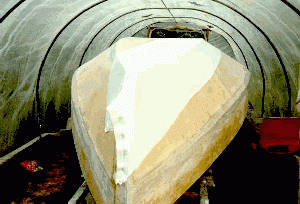
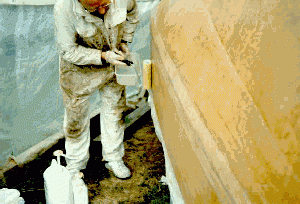
The outside of the hull is now sheathed in glass cloth and epoxy. A layer of six ounce glass cloth ( plain weave or biaxial ) to the outside of the hull, using about three coats of epoxy to fill the weave. Beware of drips, sags and runs! Dynamite’s book again explains the process very well.
Glass cloth draped on the hull, ready to be wet out with epoxy.
Applying epoxy to the glass cloth sheathing with a foam roller.
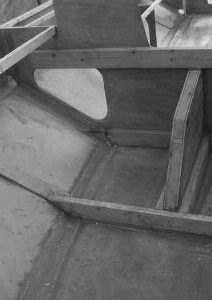
This is a good time to make the centerboard case (and the centerboard). This is a straightforward bit of joinery and needs no special explanation. NOTE, however, that the case protrudes through the bottom of the boat to the level of the outside of the keel.
The centerboard case is fitted into the hull. This is an awful job as it involves cutting the slot in the bottom and making sure it lines up accurately with the slot in bulkhead 4 and its associated floor. You’ll probably need to use a combination of sabre saw, handsaw, abrasive disk and files along with a liberal sprinkling of four letter words, working inside the hull and sawdust, epoxy dust and glass dust raining down. Goggles are a good idea – I didn’t wear any and had to go to hospital to get a sliver of glass/epoxy removed from my cornea at this stage!
The centreboard case in position ( as seen from inside the cabin).
The keel pieces, cheeks and outer stem can now be made and fitted. Unless you have large-scale woodworking machinery, the built-up ply version shown on the plan will be easiest. As a matter of interest I have once or twice run my Chebacco aground pretty violently and the box section keel survived unscathed.
The box-section keel in place. Note the holes which allow water to drain from the keel.
Some builders have gone for solid wooden keel pieces – fir or oak. The outer stem from two thicknesses of one and a quarter inch thick fir – again easier than working with a single thick piece of timber. The stem and keel can now be sheathed in glass and epoxy.
Fitting the outer stem-piece.
More sanding and fairing is needed at this stage. This shouldn’t be too bad if the last lot was done well. Again take precautions against inhaling the dust.
Once the hull has been sanded and faired it is a good idea to paint it so that there will be no worries about UV degradation of the epoxy. You could use a white epoxy paint undercoat which will show up various irregularities which have been hiding until now (I guarantee it!). You can then use a filler (polyester is fine, and easier to sand than epoxy). This is then topped with marine enamel – I’d recommend a two-part linear polyurethane paint. It’s twice the price of ordinary enamel, but lasts more than twice as long. The finish is unbelievably hard. I used the same stuff on a skiff five years ago and it hasn’t needed repainting, so I claim the extra expense and trouble of these fancy paints is worthwhile. Having said that, most builders use conventional marine enamel on top of the epoxy. So it’s up to you. The waterline needs to be struck at this stage. (You figure out a good way; I can’t.) The area under the waterline (and 2 or three inches above it) should be painted with antifouling if you are to keep the boat in the water for any length of time. If you put this straight on the epoxy and it should adhere well. Use a long handled roller to apply the paint to the inside of the centreboard case.
The outside of the hull is now finished, so it needs to be turned over. This is most easily done by six or more willing helpers. I rigged up a frame around the hull with ropes and pulleys and managed it single handed (- well, one of the neighbours did help a bit).
Flipping the completed hull using pulleys and ropes.
With the hull right-way-up, the inside joints can be taped, and the remaining floors fitted and glued in.
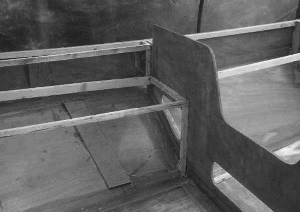
The next phase of construction is straightforward joinery. The inwales, seat frames, and carlines for decks are fitted.
Framing for side-benches and decks.
The inside of the hull is finished with 3 coats of epoxy before the decks and seats are added. Foam roller application is easiest. Watch out for runs!
The decks, seats, outboard well panels etc. are fitted to the framing. These should be precoated with epoxy and then glued/nailed in place.
The cabin sides are made and glued into position. This is pretty much a cut-and-try operation, since no shapes are given for the expanded panels on the drawings. It’s best to cut the holes for the port lights before fixing them in place.
Framing for the cabin roof is fitted to the cabin sides and faired. The cabin roof is made in two halves and glued/screwed in position. Here’s where two layers of quarter inch plywood would be an easier option, as the transverse curvature of the roof is pretty extreme for half inch ply.
Framing for the coach roof.
The hatch slides can be made (fir or mahogany is fine) and glued/screwed in place. It is vital to make sure that they are parallel, otherwise the hatch will stick and/or rattle!
Finishing touches are now done – hatch, washboards, mast slot cover and so on. This is also a good time to cut ventilator holes in the rear compartments and fix on clamshell covers. Cleats to support the floorboards can be fitted now, too. The mast step is made and fixed securely in place. Heavy galvanised woodscrews are probably the strongest option for fixing the step. The floorboards are made to fit loosely in place – cockpit and cabin.
The decks and cabin roof are now glassed and epoxied in the same way as the hull, and then faired and painted. With painting complete the final parts can be made and added – the rubbing strakes, the stemhead cleat, the rudder.
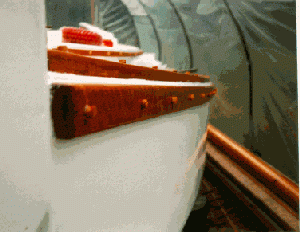
Rubbing strakes. Note the wooden plugs which hide the screw-heads. These are neatly trimmed later.
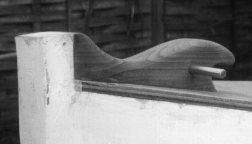
The Jonesport cleat at the stemhead – This should be through-bolted to the breasthook.
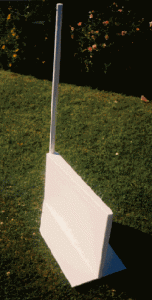
The rudder and its stock. Note the end-plate which increases the effectiveness of a relatively small rudder. The stock here is only 1″ diameter. The plans specify 2″. 2″ is better if you can find suitable material.
The spars must now be made. Clear spruce or fir is very expensive. Bolger is a conservative designer, however, and less-than-perfect wood such as may be found in any timber yard will be fine. I made mine from reclaimed timber from a demolition yard; £20 the lot!
Sails can be purchased, or made. I made my own and they work very well. There are a number of good books on the market and there’s no reason why anyone with a needle and palm shouldn’t make a perfectly satisfactory set of sails. OK, professional sailmakers make a better job, but then professional boatbuilders make better hulls in most cases, but that doesn’t stop us wanting to build our own.
After fitting cleats, you are ready to go sailing.
Launch day!
The Chebacco handles like a big dinghy. I have sailed in company with Wayfarers and she has similar performance, with more comfort for the crew! She tacks through 90 degrees and goes well on all points of sail. Being slack-bilged, she heels readily in a gust, but stiffens remarkably once the chine goes under. The slack bilges mean that the wetted area is small, so she really flies in a breeze. A reef is needed above force 4, or so, depending on how many crew you have for ballast, and another reef at force 5. Above force 6 I’d be inclined to drop the sails and use the outboard for the homeward trip.
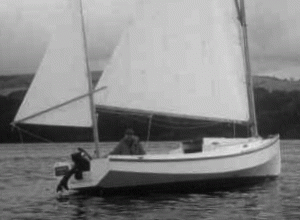
Sailing the Chebacco – It’s all been worth it!
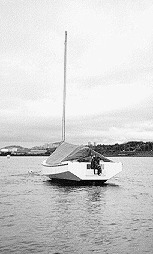
Although she is designed for easy trailering, I keep my Chebacco on a mooring in the Tay estuary from Easter until October. I row out to her in a light dinghy (Bolger’s ‘June Bug’) and can be underway within 15 minutes of going aboard. Tidying up after sailing can be done in similar short order. The mast slot allows the mainmast to be raised single-handed; a great advantage for lone sailors. She has no vices that I’ve found.
Snugged down at her mooring with a tarp over the boom to keep the rain out
Other Chebaccos
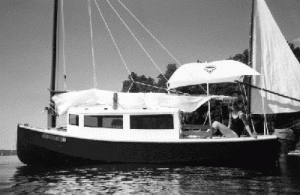
This Motorsailer version of the Chebacco was built by Bob Cushing
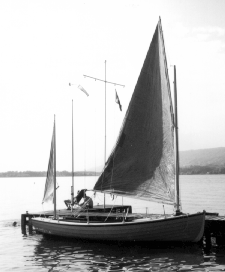
An open version of the Chebacco-20 with lapstrake hull, belonging to Alessandro Barozzi of Italy.
A lapstrake Chebacco-20 by Marc Lindgren sails into the sunset.
Bibliography
Further information about all the Chebacco boats is to be found in Phil Bolger’s book:
“Boats with an Open Mind”, published by International Marine, Camden, Maine, 1994
The following books describe building techniques that are appropriate for the Chebacco:
Harold “Dynamite” Payson, “Build the New Instant Boats”, International Marine, Camden, Maine, 1985 (Published in the UK by Stanford Maritime)
Samual Devlin, “Devlin’s Boat Building – How to build any boat the Stitch and Glue way”, International Marine, Camden, Maine, 1995
Bill Samson keeps a mailing list for Chebacco owners and builders, and publishes a newsletter 6 times a year. He can be contacted at:
Bill Samson,
88 Grove Road,
West Ferry,
Dundee,
DD5 1LB,
Scotland
Email:- bill.samson@tesco.net

