Chebacco News 78 – Richard’s interesting project

Richard Cockburn wrote to me in November 2022. He had purchased a partly completed hull from Duck Flat wooden boats in Adelaide, Australia. The advertisement is still up on their website https://duckflatwoodenboats.com/boats_for_sale/chebacco-21ft-glass-house-design/ but I guess they will take it down soon – it sold over a year ago!

Richard agreed a good price and brought it home.

It turns out that it was no ordinary hull. A glasshouse cabin but an off centre centreboard. He asked me for details of the numerous variants of Chebaccos and he also corresponded with Suzanne. (I was obviously helpful because Richard made a useful donation to the website – Thanks Richard)

Richard continues:

Dear Andrew,

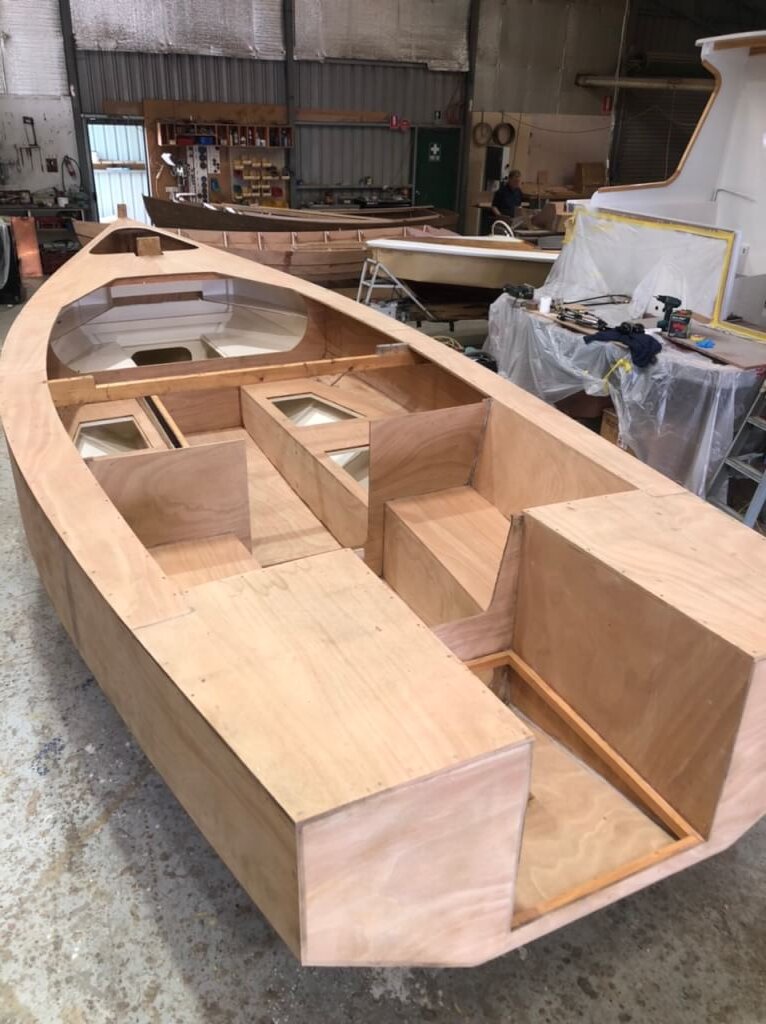
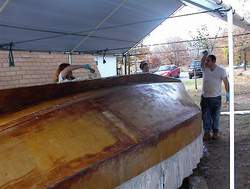
This is the history of my progress finishing the bare  hull of “Glasshouse version” I purchased the end of November 22.

The first steps were to establish what I had bought because after examination it is a combination of the standard version, Glasshouse, with an offset larger centre plate with pivot some 600mm further forward than standard.

In detail the versions divide at the waterline.

Below the water line it is the standard Chebacco with the rudder ending at the stern and no ballast.

Above the waterline the hull has the 150mm deeper sides of the glass house version.

Internally the cabin is as per glasshouse version.

After reading the information you provided I also at the same time contacted Susanne Altenburger through Bolgerboats.

Armed now with copies of MAIB of all the versions published

As I want to sail in the gulfs Spencer and  St Vincent – semi Off shore – the design is now as follows.

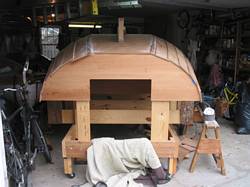
  • Cabin extended out to almost to the gunnels, for extra stability in case of knockdown.
  • forward hatch to make reefing and anchoring easier and safer.
  • Cockpit kept the 1100mm rather than sitting with feet at the top of the keel making the cockpit self draining.
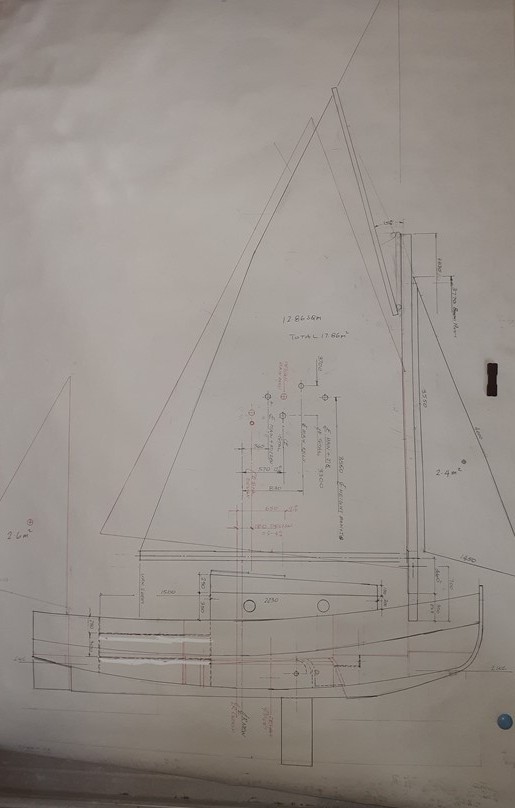
  • Sails I have existing sails and mast  from the Piver Tri I used to own, so will modify the main and make a mizzen from them. At this stage the main looks like it will be square headed but the same area as design. This moves the C of E approx 200mm further forward than standard. Equivalent to the change suggested for the cruising version .

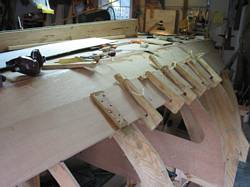
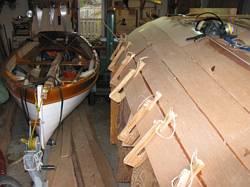
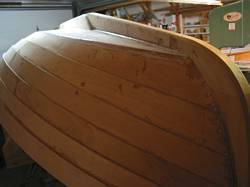
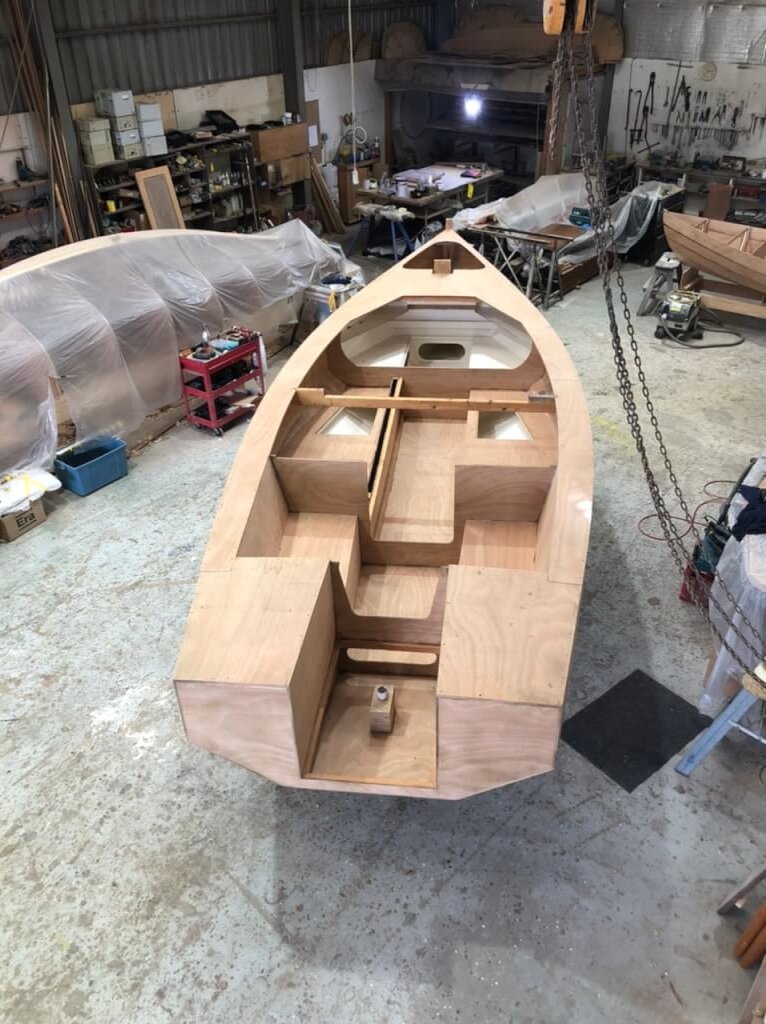
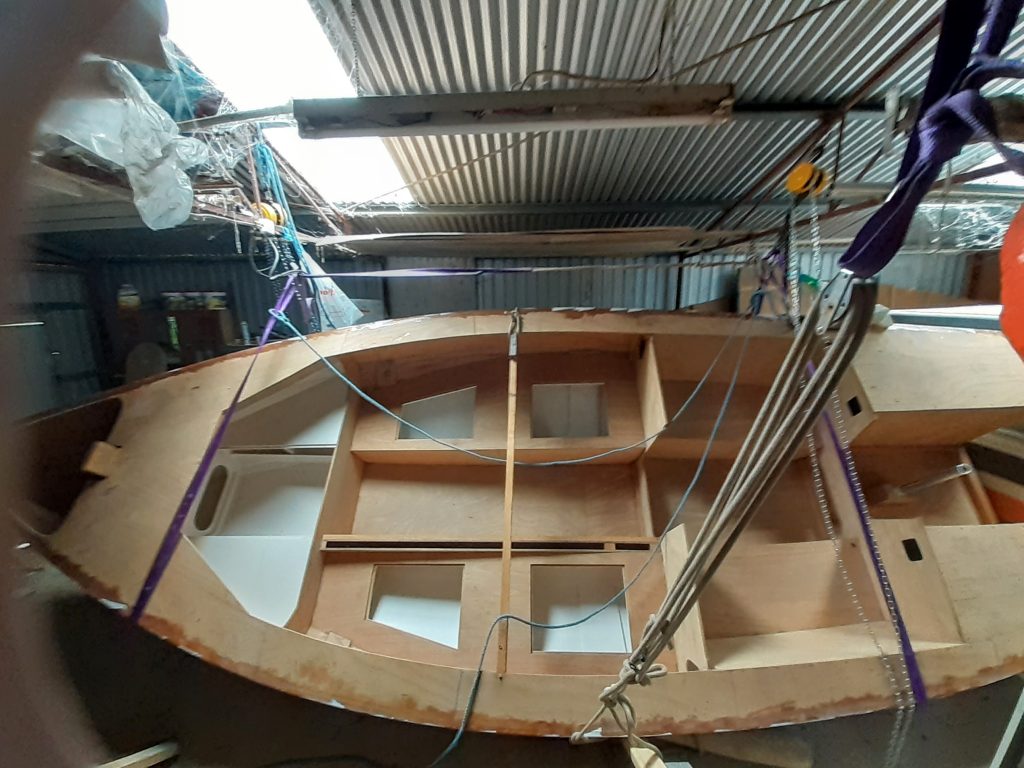
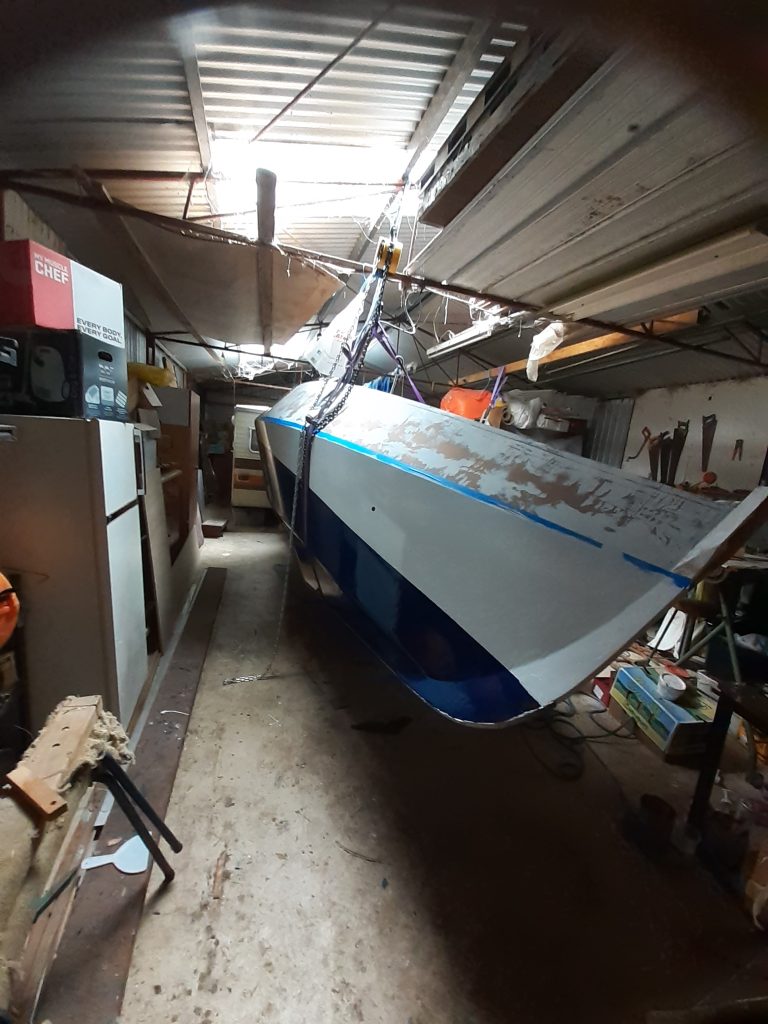
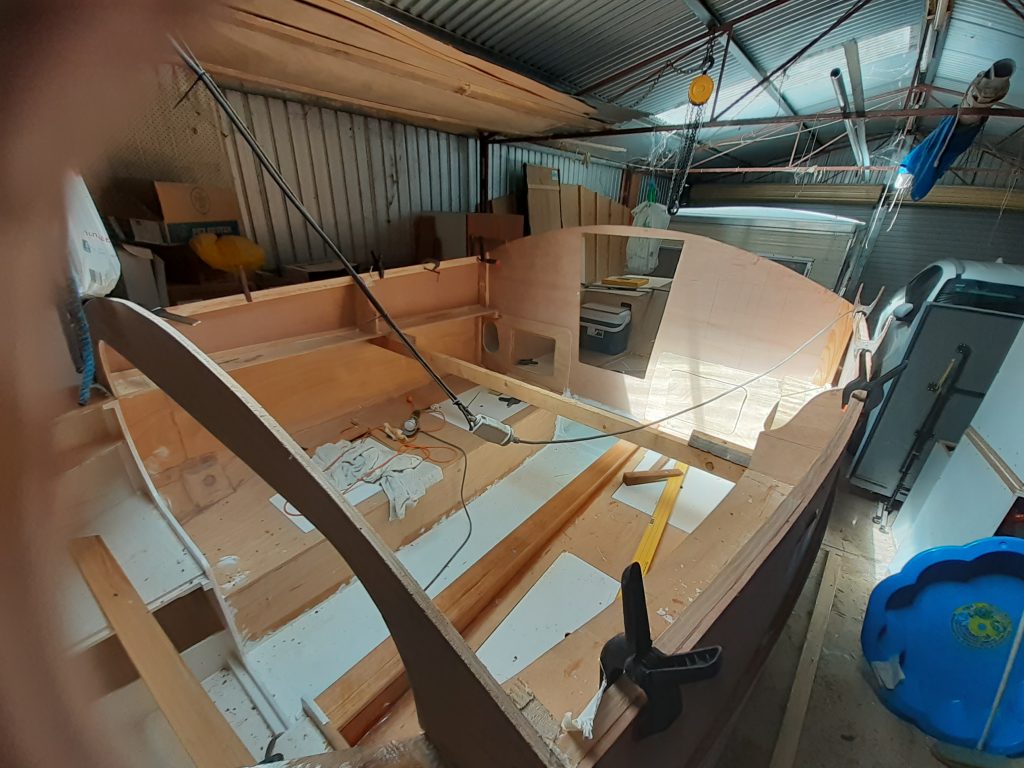
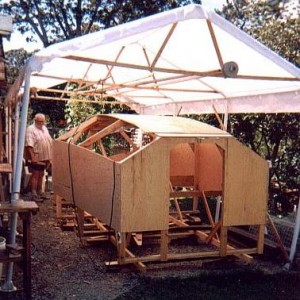
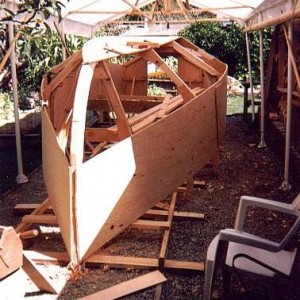
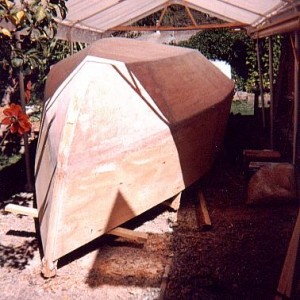
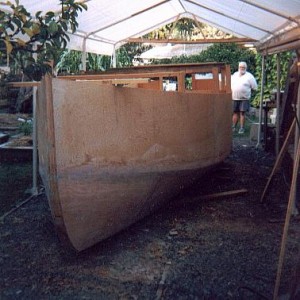
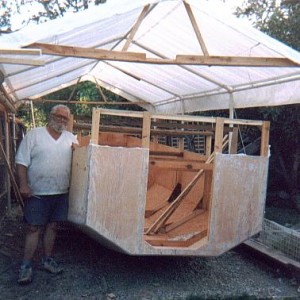
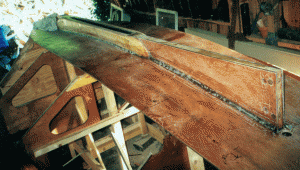
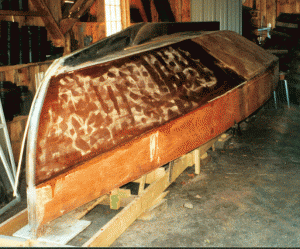
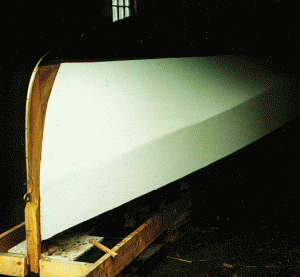
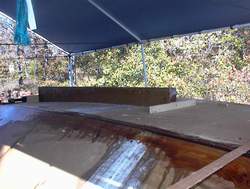
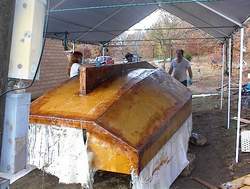
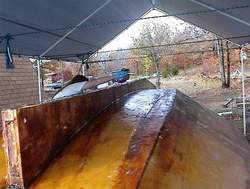
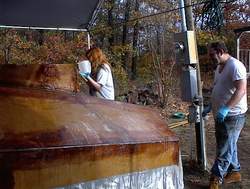
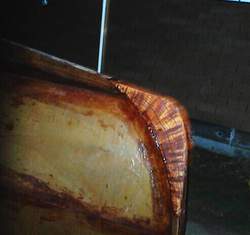
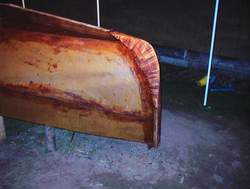
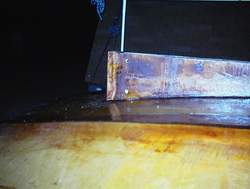
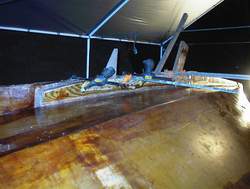
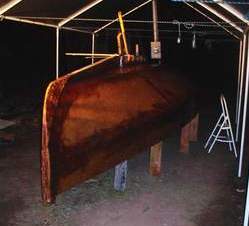
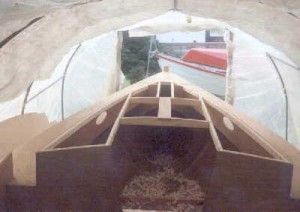
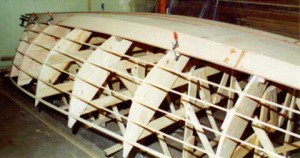
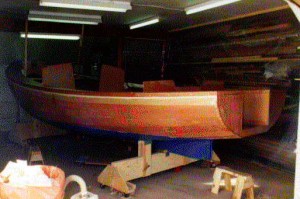
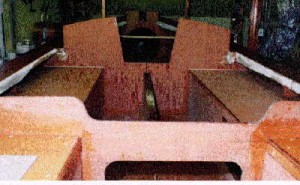
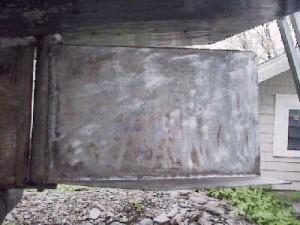
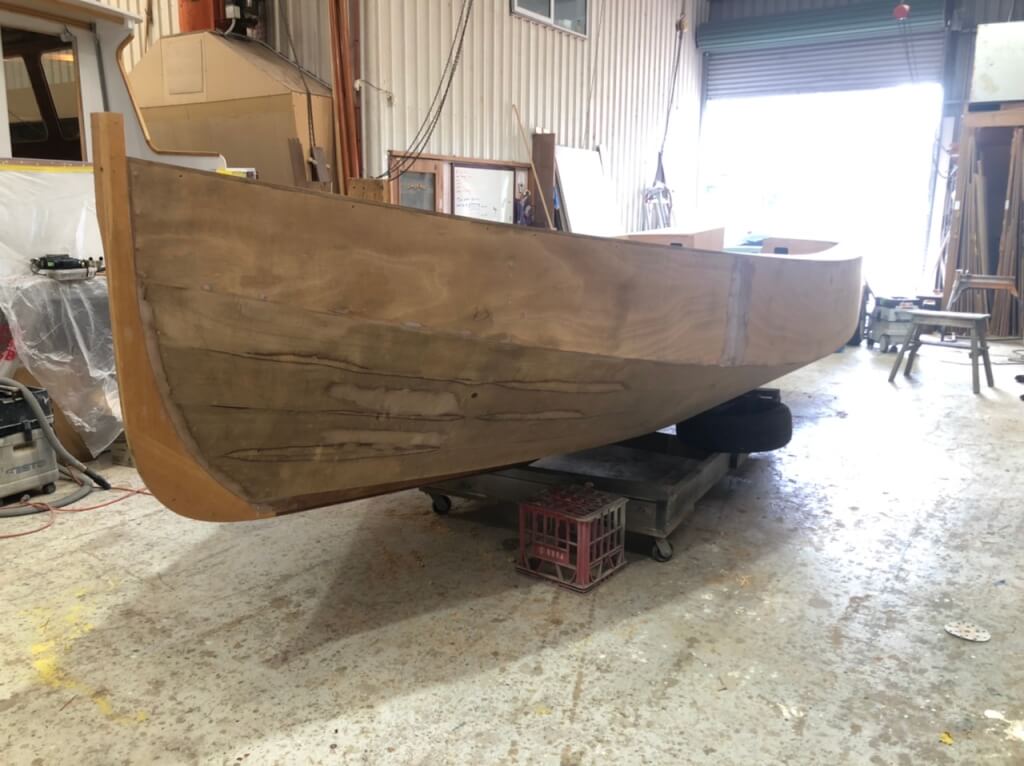
I have glassed and painted the  bottom fitted the Bulk head and framed the cabin. Cockpit and aft  deck have the floors fitted awaiting glassing along with finishing the  centre plate coating .

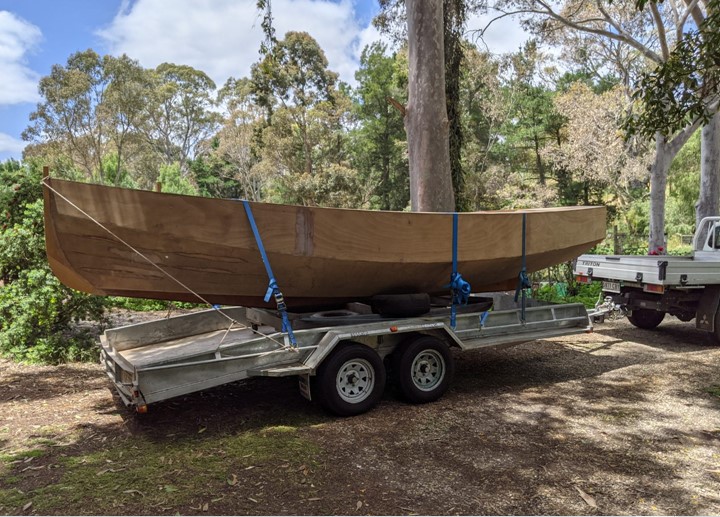
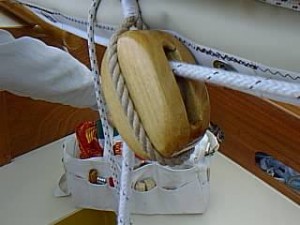
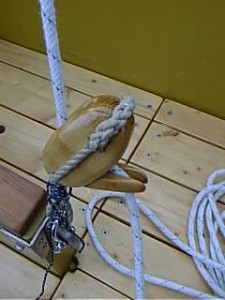
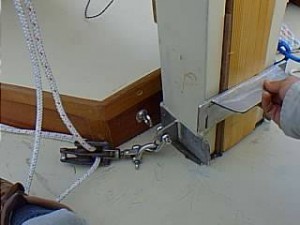
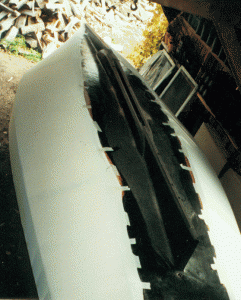
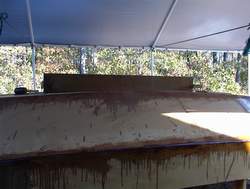
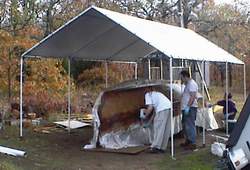
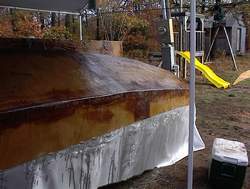
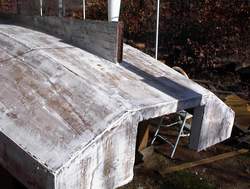
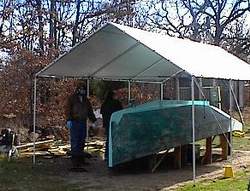
I turned the hull back upright on my own using 2 chain blocks and a rope and tackle photos attached

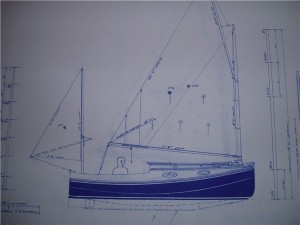
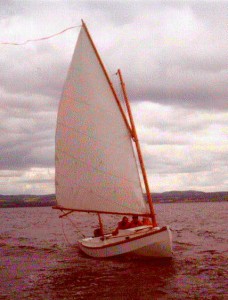
Along with photos as it is now and sketch of what it will look like completed . It is still a work in progress but planning for mid 24 completion . This is 6months later than planned

Regards

Richard

I think this is going to be a really comfortable cabin! Well done Richard.

Now a short story about a chance meeting of “The Chebacco club”: Last month I was trying to catch a tram home and I walked past a chandlery, so I dropped in to browse and chat. I was describing my rudder to the salesman when another customer called out from the other end of the isle “you are talking about a Chebacco!”. It turns out that Graeme had just bought a Chebacco that was to be delivered in the next days from interstate. He had studied the Chebacco.com site in anticipation. Fancy that, recognizing a Chebacco owner from overhearing a verbal description of a rudder end plate! Well welcome to the club Graeme! I hope you email me a story about all the fun you will be having in your Chebacco.

By the way – If you want to support the Chebacco.com website, the largest collection of Bolger boat material on the internet, there is a donate button down near the bottom of each page. A few dollars would be appreciated as it costs me a couple of hundred each year.

Chebacco News 60 – raising the centreboard

I had a question about how to raise the centreboard on a chebacco.

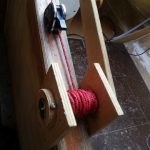
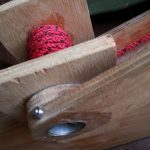
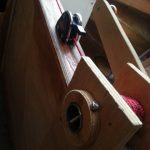
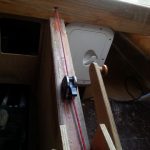
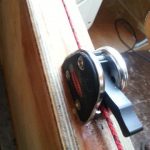
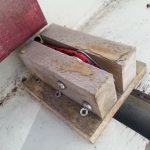
The centreboard is not very heavy and it is possible to raise the board without mechanical advantage, but I wanted it to be easy for anyone to operate the board.  I looked everywhere for a simple cheap winch but in the end it was easier to make one.


The winch is mounted to the top of the case inside the cabin. The spindle is a stainless steel tube and you can see I made plywood washers held on with a through bolt.  The 4mm spectra line is clamped in an off the shelf cam cleat and the line passes through the cabin bulkhead and round a sheave down to the plate.

It was a relatively simple job – more time was spent/wasted looking for an off the shelf solution than actually making the winch.  I do not see why a Chebacco 19 centreboard couldn’t be raised the same way, but just plain muscles work too.


Andrew

Chebacco News 49

News, questions, and boats for sale.

News:

Well, the long anticipated calendar is a bust. My preferred publisher was having health and technology issues. I may still do one using cafe press, but since I only received one order for the one that didn’t work, a calendar really isn’t hight on the priority list of things to do. Been kind of quite, only took the boat out once since the last issue. You would think that being unemployed would give me plenty of time to do that, but for some reason it didn’t work out that way. I plan on going to a couple of messabouts this summer, I’ll take pictures and write something up about them.

Let’s see, we had vandals posting all kinds of php based scripts in the registry, taking advantage of the facility that was there to allow you to post pictures. I’ve locked down the registry, so if you want to edit your entries, or add a new one, just send me an email with the relevant details. You can also send a picture, if you want, and I’ll include it.

Speaking of email, I was getting 300+ spams, and at least 20 trojans, a day, do I’m bouncing all email sent to my old email address. I posted the new email address on this site, but it wasn’t a couple of days before I started getting spam and worms again. I believe they scan the web and dig email addresses out of webpages. Working on that theory, I have implemented a script based form to send me email. Sorry for the inconvenience. If you are wanting to send in an article for publication, just send me an email with the form and I’ll tell you my direct email address.

We have ten articles this issue, if you include this news sheet. One if even a contribution about writing contribution, (a meta article, an article about articles! hehe), by Chuck Leinweber of Duckworks fame.

Thanks for all the contributions for this issue, and I hope you enjoy it.

Chebacco Richard

Questions:

Noted a mizzen comment by Donna D’Agostino and Vincenzo Ciminale in Italy.  Pass on to them the notation a windsurfing boom for their mizzen ashes snap on in a minute, can be extended to multiple lengths and can be hyper lengthened with 1″ thin wall aluminum tubing.  It would get them out of the business of “walking the boom” as they tack.
Dave Godsey

Chebacco’s for sale:

***

Free time and boat cruising – Richard Spelling

Well, my 9-month sojourn into the ranks of the unemployed is finally over.

I’m working night shift, on an Air Force base, 100 miles from the house, but it beats the alternative.

You know, I always thought that if I ever became unemployed, I’d just fall back on my non-IS skills, or take some low paying IS job. I found out the hard way that the companies with the lower paying IT jobs are all bargain shopping, and think you are over qualified if you have more than one certification. If the first thing they ask you when you send them your resume is “what are your salary requirements?”, this is a bad sign. Or they want you to have a BS in computer science, 10 years of experience, and then want to pay you $10 an hour…

As for working non-is type stuff, I tried that. Still have a going concern manufacturing variable output forge blowers and DC motor kits. Of all the things I tried in an attempt to rustle up money during my “vacation”, building those was the most enjoyable, and made a decent profit. And I tried a bunch of things, from mowing lawns, to doing handyman work, to doing computer consulting, to putting in concrete slabs. All doable, but not enjoyable, partly do to the physical labor involved, but also do to the fact that they involved starting over, and wasting all the time and money I’d spent getting my degree and certifications.

The kicker was calling the “work force investment” people for retraining, and being told I couldn’t go to any CDL or welding classes because I had a BS degree. (!)

Let’s see. Still don’t have a car/boat port to put the chebacco under,   I’m currently using a “super tarp” I picked up on ebay. Basically a gray tarp, but not the cheap crap you get at Wal-Mart. Speaking of Wal-Mart, anybody remember when shoes lasted more than a month before the sides came apart? Sandals lasted almost as long? Remember back in the day, before Sam died, when you could return stuff to Wal-Mart if it broke? Ah, those were the days.

Anyway. Invitation to my wedding: “Oh, by the way, I’m getting married. Jan 1st, 2005, First Christian Church, Pryor, Ok. I’m marrying the preacher. Elvis will be there. You are invited.”

Yes. I got married. Again. To my ex-wife. Hey, there are no rules; I can do what I want. Besides, you really don’t know how important things are to you till you almost loose them… which is another story. And yes, Elvis was there.

So, I’m living in OKC, and in Mannford, and in Pryor. I stay in my apartment in the city during the week (horror of horrors, I hate it), go to the cabin in the woods on the weekends to work on blowers and controllers, and go visit the wife and kids in Pryor once a week. Well, shit, life sure was less complicated when I was unemployed and single. As my wife/ex-wife/wife used to say: “This damned job sure interferes with my free time!”

Incidentally, one of the options I was considering, if I didn’t find a job, and the money ran completely out, etc, was to go sailing and just not come back. Extended cruise. Got bored at work last night and got to wondering how far I could have gotten in my 20ft semi-open boat. Some reading on ocean cruises leads me to think I need to stay away from open water… <nervous laugh>

Then I got to trying to figure out how big a boat I would need… I think I like the idea of sailing into the sunset much more then I like the reality of it. I’m definitely a fair weather sailor, any waves over a foot or two just slow the boat down and annoy me. And big movements of the boat are only fun on occasion.

Maybe I do have the perfect boat. Keep this job long enough to pay everything off, then maybe instead of sailing into the sunset, I should hook the Chebacco up to the back of a nice tow vehicle, and head off to non-open water! hehe Wonder how big the waves get on Baja?

Anyway. I’ll write a more boat-oriented article for the next issue. If you don’t think I should be writing non-chebacco related articles for this webzine, feel free to write the editor… 🙂

Or, even better, send in your own boat/chebacco related stories, and I’ll publish them instead of boring you with the editor’s life!

Laters, fair weather, and stay employed.

***

Bluster, San Juan Islands – Randy Wheating


Hi Richard

Thanks for all the work on the Chebacco News.

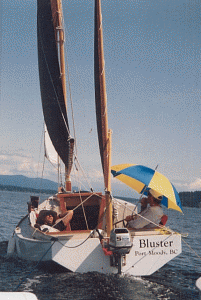
I have attached a photo of Bluster motor sailing into Hale Passage, San Juan Islands.

This was taken by Gary Powell while under tow.  Gary and his daughter Kate were sailing his engineless dory as we were all returning to launch ramp from our very enjoyable Small Boat Rendezvous on Sucia Island this past July.  The wind had died off so we just tossed them a line for the final leg.

Fair winds,

Randy Wheating

Port Moody, BC
Bluster_Hale_Passage

***

Chebacco Progress – Howard Sharp

Dear Richard,

Daytime temperatures of 10ºF, not friendly to epoxy work, have brought my building progress to a halt.  I’ve tried electric blankets, a small
electric heater under the boat running 24 hours a day, but it’s still below freezing in my uninsulated garage.

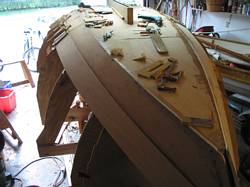
I started in April of 1993, as I see from the letter Phil Bolger sent with the plans. I decided on lapstrake construction, which I was already used to.   Building has been slow, as work and family obligations take precedent, but I am close to flipping the hull at last.

I lofted the boat full size, simultaneously working out the planking layout, using the method Iain Oughtred describes in his lapstrake building manual.  I was able to loft the permanent bulkheads with the plank lands, so I could build them into the boat.   I’m using meranti ply from Noah for all the lower strakes and the bulkheads – anything which may end up being submerged in water.  The rest will be occuome. The meranti is a little splintery, but I believe it has more natural rot resistance than occuome, and I’ve actually found fewer voids in the meranti than the occuome.

The stem and the transom are locust.  I happened to have some lying around, otherwise I wouldn’t recommend it – it’s very hard to work with, and of course very heavy.  However I’m  confident that the stem on this Chebacco will never rot and will demolish just about everything that it meets.    The transom runs straight across to include the motor mount, like Brad Storey’s boat.  I didn’t understand the implications of this until I found out that the 10º angle on the original design accommodates the default mount on most outboards!    For me that’s still not a dealbreaker, as it’ll be stronger, and I think it looks better.  The boat will have an 18″ bridge deck.    I’m toying with idea
of an electric propulsion system, and I’m still wondering whether or not to build a small bowsprit, partly for use with a jib, but mainly as
a cathead for carrying an anchor.

As soon as the weather warms up I’ll be putting dynel on the bottom and garboard, and I’ll paint the whole using Kirby’s enamel.

The name I’m not sure of yet.  Loosey Goosey springs to mind (along the lines of Itchy Scratchy).

Love the website.

All the best,

Howard Sharp.
tn_IMG_0457 tn_IMG_0460 tn_IMG_0514 tn_IMG_0536 tn_IMG_0541


The last boat I built – 10 years ago!  It’s an Iain Oughtred design, Ptarmigan, 11′ OAL.  The Chebacco fits into the garage with 2″ to spare,  My dream has always been to build something bigger – say about 4 tons.  The sheer size of the Chebacco has been a lesson in what I can expect if I go ahead with something bigger.

***

A Blustery Weekend on the Sunshine Coast – Randy Wheating

Lisa, Jacob, Sam and I spent a windy and wet at times extended weekend, August 20-22, with our Chebacco Bluster on the Sunshine Coast of British Columbia, Canada. This well known boating area is northwest of Vancouver and for us involves a one hour drive on either side of the Howe sound ferry crossing.

A heavily loaded Bluster was launched at the Halfmoon Bay public ramp and we were under way by 12:30 Friday. We motored a northwest along the coast via Welcome Passage to Smuggler’s Cove Marine Park. With its narrow entrance and various rocky arms this park is described in our guide as resembling an alpine lake. The boys went for a swim while we anchored for lunch. The new rope style boarding ladder was tested and works fine.

Next we motored a short distance to Secret Cove, a large three arm cove containing an assortment of marinas, private homes, and such. Tempting to stop at the ‘boat-in’ pub for a quick pint…

A quick trip across Welcome Passage lead to Buccaneer Bay Marine Park, situated on a narrow strip of land connecting North and South Thormanby Island. We landed at low tide and portaged our gear and provisions across the beach to a sandy and but fairly exposed campsite. Bluster was anchored just off the beach where she swung merrily at anchor in the 15 to 20 knot winds. The kids explored the beaches while Lisa and I set up camp before kicking back.
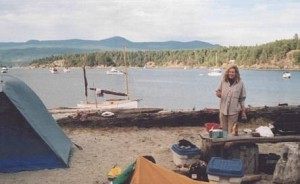
image002

Lisa in the galley, Buccaneer Bay Marine Park

Saturday dawned gusty and wet – not great family sailing weather. Fortunately for us my friend Ryan with his kids aboard their 37 foot steel ketch ‘Makoolis’ joined us and we were able to seek comfortable shelter with them. Unfortunately for Ryan, he anchored a little close in and became good and grounded on a sand bar with the falling tide. We tried all the exciting stuff like rowing his 65 lb CQR anchor to deeper waters and winching away but alas, lost race with the tides. The remainder of the day was spent drinking wine, playing cards and preparing dinner (those gimbaled stoves really work) up to a 30 degrees angle until the tides released us. No damage done. Of course if we were in a Chebacco we would have just jumped in the water and pushed her off, but I didn’t rub it in.

For the second night at anchor I set the mizzen and this did wonders at calming Bluster’s swinging in the winds. Having no experience in exposed anchoring I was very pleased with holding and reset abilities of my 5 kg Claw (Bruce copy) anchor when the wind shifted through 180 degrees overnight.

With a stiff onshore breeze we executed a near perfect (if I do say so) team beach extraction on Sunday morning:

  1. Broke camp and assembled the gear just above tide line.
  2. Rowed Fib (dingy) to Bluster, furled mizzen and warmed up engine.
  3. Raised anchor and motored to position where winds would blow Bluster onto beach near gear pile.
  4. At the point where there was still sufficient motoring depth dropped anchor then moved to windward stern cleat.
  5. Paid out anchor line until bow hits sandy beach then made her fast from the stern cleat which would held Bluster’s bow onto the beach and prevented a wind from turning her beam on.
  6. Lisa and the boys smartly relayed the gear to boat where I stowed it below.
  7. Team scrambled aboard and I hauled us off the beach with the anchor and spun the bow to the wind.
  8. Hauled Bluster to deeper waters where Lisa fired up the engine and powered us away.

Moderate westerly winds and swells from the Straight of Georgia met us as we exited Buccaneer Bay. Bluster had a great run down Welcome Passage under mizzen and jib after which we finished off the day exploring Halfmoon Bay and checking out the Merry Island lighthouse.

I was very pleased with the performance and balance of the jib/mizzen sail combination. Considering the gusty conditions and the fact that we had the kids aboard this reduced sail area gave us a comfort level that allowed us to just enjoy the ride. Our close reach speed (GPS) averaged three knots. The addition of the reefed main would have likely improved the performance but we were in no great hurry. Jacob and Sam split their time between snacking in the cockpit and below where they played cards, read and wrestled. Lisa manned (womanned?) the helm the entire homeward leg while I fiddled with the lines, charts, cameras and such.
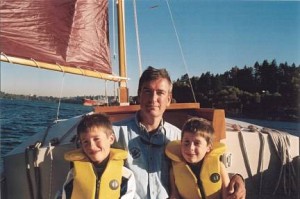
image004

Jacob, Randy, Sam

Hauled the boat out at the public ramp, prepared and ate a late lunch, kids went for a final swim and we were able to catch the 4:00 pm ferry and be home for the evening news.

A terrific family weekend adventure.

Randy Wheating

Port Moody, BC, Canada

***

MASCF St. Michaels MD – Ed Heins

This was my first trip to the Mid Atlantic Small Craft Festival In St. Michaels.  In fact it was my first small boat gathering (messabout, gawkabout, BSabout) of any kind, and I was planning to present my long suffering project Chebacco  “Boudicea”, to the boatbuilding world.   I’m sure this was painfully obvious to many of my on line contacts, who diligently waded through ubiquitous questions and pre launch drivel.  I, by the way, suffer from all the common boatbuilder maladies; procrastination disorder (PD), designer second guessing syndrome (DSGS), complete confusion complex (CCC), and ham fisted knuckle busting wood butcher disease (HFKBWBD) sometimes known as ($%$&#@!!).   In addition to those common ailments however, this past September I was also suffering from a significant case of butterflies about dragging this project four plus hours around the infamous DC beltway, and an irrational fear that assuming we negotiated the trip without problem, that surely the Chebacco would reward my seven years of labor by, if not sinking outright, at least exhibiting some indication of my complete lack of skills, acumen and abilities.   Thankfully, none of that happened.


Departing New Market Virginia at about 3PM Friday Oct1, we cruised sedately along I-81 and I-66,  spent two hours creeping the 30 odd miles around DC on the 495, sat in the predictable Friday evening bay bridge traffic and arrived St. Michaels at about 9:30 PM.  We had reservations at the Best Western in town, and that seemed like a great place to park.  I’d made contact with Dick Burnham previously to give me a hand with the launching, and the next morning as we drove through the Maritime Museum parking lot, his red pickup fell in behind.  We launched at the town ramp next to the St. Michaels inn & marina, just around the point from the museum.  Seeing the festival for the first time and approaching from the liquid side is pretty spectacular.  The Museum has about three piers and they’d added a floating extension at the end of the tee on the largest to accept more boats.   We found a space to squeeze in at the very end of the tee and rigged a couple fenders to try to keep from sharing paint with the museum.


We were in good company.  A Bolger Lilli, a folding schooner,  a Jesse Cooper, and some of Jim Michalak’s designs.  (Maybe next year I’ll cartop my “Tween”, one of Jim’s sailing dink designs, which was my first project).  Chesapeake Light Craft were there in force.  I was surprised that my wife, Debs, having existed with her things being squeezed into half our garage for so many years, seemed to think we should take on a CLC sweetwater 16 canoe. Like I need encouragement…..


Saturday afternoon we had the opportunity to take Dick & Ula Burnham out for a spin. .   I’m very interested in seeing how Dick attacks some of the Chebacco’s rather quirky bits as he finishes “Stealing Horses”.  It would be great to see a couple of these cat yawls sailing together someday.  Although we didn’t have much air to play with, I was completely satisfied with the way the Chebacco handled.   We were able to tack, jibe, I guess we found virtually every point of sail and I’m pleased at how close winded she is.   Later that afternoon, Richard Elkan of London & “Sylvester” dropped by the end of the pier and we again made a cruise around the area, this time with the rest of the Heins family aboard..  Whereas Dick and I have no idea what a Chebacco should perform like, I was pleased that Richard didn’t seem surprised as we sailed sedately through the moored boats.  Then again, I managed not to get him wet, or hit him with the boom, so his expectations may have been low.   At the end of the day though, it’s great to talk face to face with the  owners and builders we’ve exchanged emails with.


So many other things at the show; John Welsford was great as expected,  the Redwing that’s in the current WoodenBoat magazine was there, my son enjoyed the kids activities.  I’ve got nothing but Kudos to the folks that organized and made the show happen.   Only thing that could have been better, maybe a couple more Chebaccos?  Maybe next year.
 

tn_Dick_Ula tn_MASCF_Chebacco tn_MASCF_Chebaccoside tn_MASCF_Richard tn_MASCF1 tn_Pier_1

***

Chebacco Update – Ben Ho

Hello Richard,

I am making slow but steady progress with my Chebacco, mainly building the major components first before I start on the hull which will take up most of the available work space. The following are a few photos on items that I’ve done differently.

Center Board: Instead of using lead, I’ve sandwiched the CB with 4 long pieces of ¼” mild steel. It should make the CB much stronger and hopefully will better withstand a lateral grounding. The total weight is about 60 lbs, a bit heavier than the standard construction.

The glued up and shaped plywood CB:
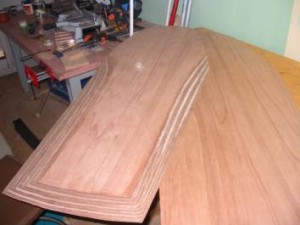
image002

Center channels routed in for the two steel bars to lay flush. One side of the bars is threaded to accept the through-bolts. Sitting at the corner is the hinge assemly that will go on the CB trunk.
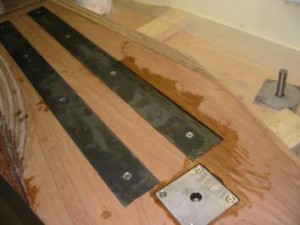
image004

The CB sheet will go through this U-bracket. Since the bracket is gripping the thin edge of the CB, I made it 6” long with 4 through-bolts in order to spread out the load. I specified a small eyelet to tie the line, but the welding shop decided that it should be a larger hand-hold instead. Oh well.
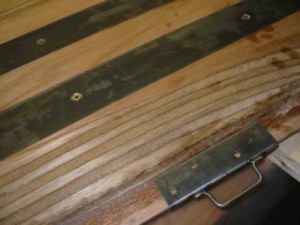
image006

The CB glassed, dry fitting in the CB trunk.
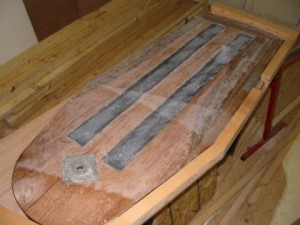
image008

These S.S. T-nuts are ideal for holding the mounting plate on the trunk:
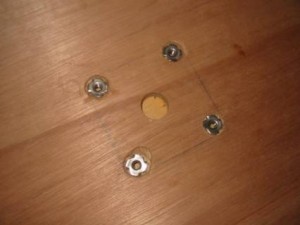
image010

Gluing up the CB trunk; the white piece lining the inside surface is counter-top laminate. This stuff is incredibly resistant to abrasion – I run my sander with 60 grit paper on it for 2 minutes, with no visible wear at all!
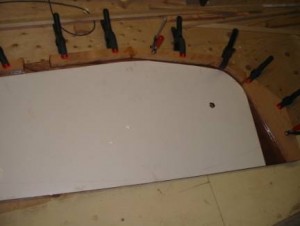
image012

The completed CB with a couple of coats of Interlux paint. To protect againt wear & tear, I build up a ¼” finger of epoxy along the bottom edge. A half-oval bronze strip will be further added on, once I figure out where to get them.
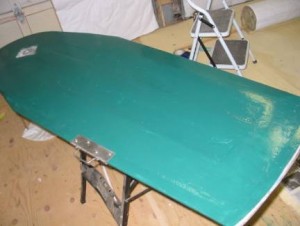
image014

Chebacco Raised Deck

OLYMPUS DIGITAL CAMERA

Sometime ago I commissioned PB&F to modify the Chebacco, mainly to enlarge the cabin by lengthening and raising it, and to move the after-deck back by the same amount in order to keep the cockpit length. The Chebacco Raised Deck is the resulting design. I subsequently decided to stay with the existing plan, because I’ve already started on it and also I prefer the old look. However some design changes are excellent ideas which I’ve gone ahead and implemented on mine. I will cover some of them here.

One of the biggest changes is the whole area near the transom. The rudder is now a balanced rudder with a tab forward of the rudder shaft, increasing the overall rudder area by about 25%. Due to the larger rudder and also the last bulkhead having moved aft, the keel skeg is no longer directly supporting the last bulkhead as in the original design. Hence there’s a fairly complex ‘backbone’ added to strengthen up the whole section:
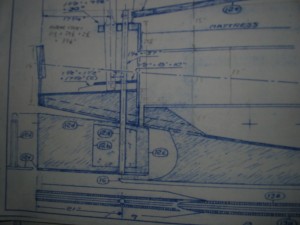
image017

The transom backbone is a solid piece 2.5” thick, supporting the mizzen mast, rudder stock, and the slop well. The design calls for this to be one continuous piece as part of the keel. The rudder runs through the center of this piece. The small hole to the right of the ‘backbone’ is the drain. The cockpit is now a raised, self-draining cockpit.

I find it too cumbersome to have such a huge, complex keel, so I broke it down and built the transom backbone as a separate component, with a large part that goes below the bottom panel and will be solidly glued to the keel later:
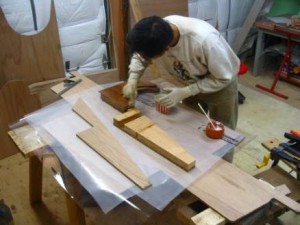
image020

Bushings for the rudder, made from high density polyurothene (i.e. kitchen cutting board), and a stopper ring cut from 1/16” SS tube that fits the outer diameter of the rudder stock.
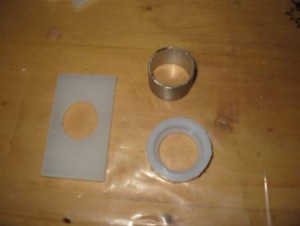
image022

Another deviation from the original design: I am concerned about mounting the rudder on a plate that protrudes a fairly long distance from the keel. What if some 300 lb gorilla sits onto the rudder while the boat is on a trailer? Instead of mounting the rudder off the keel, the transom backbone is a much better alternative. It provides a strong, balanced position to hold the stock with simply a stopper ring. The ring is glued to a PVC cap to provide a larger surface area, which rides on a nylon bushing. The bottom bushing shown in the picture is to be half-recessed and screwed onto the bottom panel, to protect the rudder from going up and grinding onto that area.
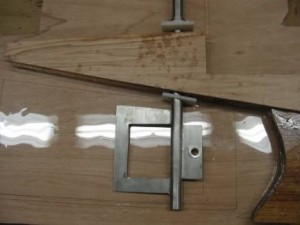
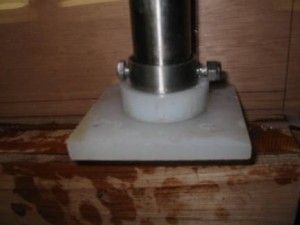
image024 image026

That’s it for now. Time to get back to work!

Cheers.

Ben

***

Chebaccos Three! – Jamie Orr
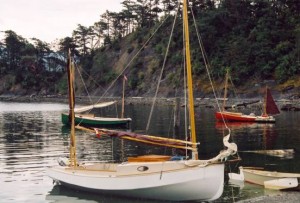
image002

That’s Bluster in front, Wayward Lass on the left and Full Gallop on the right.

(Randy Wheating photo)

Last July, a fleet of small boats rendezvoused at Sucia State Park in the San Juan Islands. It was a great weekend, and you’ll find various accounts of it on the web, my own was posted on Duckworks in September. But what is of immediate interest is that there three Chebaccos in the fleet. These were Bluster, built by Randy Wheating of Port Moody, BC,Full Gallop, built by Chuck Gottfried of Springfield, Oregon and Wayward Lass, built by me Jamie Orr, (that’s me) of Victoria, BC.

Wayward Lass and Bluster have both been seen in these pages before. Chuck’s Full Gallop, however, is brand spanking new, being completed and launched only one week before landing on Sucia! How well she looked and sailed shows the massive effort made by Chuck to finish in time for the gathering.

All three boats are the sheet plywood version, but they aren’t identical. Wayward Lass is built as designed, but both Chuck and Randy made changes here and there. The most noticeable being that both made the cabin bigger and added a bowsprit. Randy also built a tabernacle/step for the mast, with standing rigging, while Chuck made his cockpit self-draining by raising the cockpit sole (floor). A benefit of the self-draining cockpit, besides the obvious one, is a lot of storage space. When cruising in Wayward Lass I’ve found storage is tight – we have to move all our stores to the cockpit when we want to sleep in the cabin.
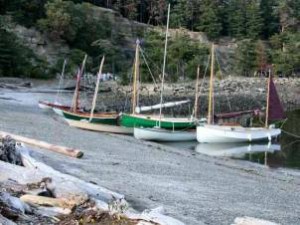
Here’s Wayward Lass (green) and Bluster (white) on the beach at Sucia, among some of the other boats. Chebaccos are a little heavy to pull up and down the beach, but they have no problem nosing in to load and unload. A stern anchor can be helpful getting off again. (John Kohnen photo)

Here’s Wayward Lass (green) and Bluster (white) on the beach at Sucia, among some of the other boats. Chebaccos are a little heavy to pull up and down the beach, but they have no problem nosing in to load and unload. A stern anchor can be helpful getting off again.
(John Kohnen photo)

But Chuck and Randy can speak for themselves and describe the changes they made.

Here’s Chuck, about Full Gallop

Full Gallop incorporated several modifications, including a raised cockpit sole, raised and widened cabin, a bridge deck, curved seats and footwell sides, and a bowsprit. The raised sole was inspired by the need to keep the boat at a dock, and so be self-bailing thru Oregon’s rain. The added plus was a huge storage space under the floor, accessed by a watertight plastic hatch.
image006

Full Gallop’s cockpit,…

…her sloping cockpit sides and her stern.
…her sloping cockpit sides and her stern.

Here’s the bowsprit rigging.
Here’s the bowsprit rigging.

This shows the height of the cockpit sole.

This shows the height of the cockpit sole. (John Kohnen photos)


The cockpit floor is an extension of the rear ‘slosh pit’ floor at the stern. I didn’t want thru-hulls, so extended the floor such that it would drain thru large limber holes and out the stern. The floor extends forward to a bridge deck that’s set even with the centerboard trunk, with the bridge deck ending about 4” above the cockpit floor level. The floor is pitched about 1” overall, to drain to the rear.

The bridge deck extends 2’ back from the rear cabin bulkhead, and is designed with access on one side of the C/B trunk from outside thru a weatherstripped lid, and the other side accessed from inside the cabin. Part of the cabin bulkhead was removed to provide the inside access, and the area reinforced.

The result is vastly increased storage under the cockpit sole accessed thru the watertight hatch, and additional storage inside the bridge deck, accessed on one side from the cockpit, and the other from inside the cabin. The storage areas are quite deep, averaging over 14” deep in most places, and low in the hull. The shallower footwell doesn’t seem to be a problem, as the coamings are generous and the seats relatively wide.

I set a full-length carlin to support the deck, cabin sides, and seat backs and coamings, with decks approximately 9” wide at the cabin. This let me slope the seat backs outward and cabin sides inward, primarily for aesthetics. A mahogany block is set at the transition between seat backs and cabin sides, which align only at the deck level. The cabin is 2 ½” higher in the back and 2” higher forward, and probably 6” wider throughout. I installed heavy breasthooks to support oak mooring bitts and a bowsprit that butts to the front of the cabin, with that area and the area of the mast slot heavily reinforced with ply and oak gusseting. No gorgeous Jonesport cleat, like on Wayward Lass!

I flew a jib from the bowsprit until I pulled the luff wire out of it. I’ll experiment with setting the jib flying, tho I use a rope stay to steady the free-standing mast. In all, the modifications are not readily apparent unless you’re familiar with the design, but all made good sense for my needs and work passably well. I value the storage, and yes, Jamie, you can sleep below without moving everything!

Now, from Randy, about Bluster

Starting from the bow and working aft are some of the personal modifications I have worked into the construction of Bluster

Cabin

Bluster’s cabin roof has been raised two inches from the drawings and the sides extended out flush with the coamings. These changes add to the interior space at the expense of side deck width, reduced to about eight inches, which with the toe rail has not been a problem move forward.

A small bridge deck straddles the centerboard trunk with cut away in the bulkhead to allow access to this storage area from the cabin.

Bowsprit

This is a plank style bowsprit (overall 1.25”x9”x26”) that is contoured on the inboard end to match the curve of the forward cabin top face. A galvanized steel, two part bracket is bolted to the forward end as an attachment point for the forestay. The 5 kg Claw anchor resides on a roller in the center of the plank, aft of which is the main mooring cleat. The 15 ft chain and 150’ x 3/8” anchor rode pass through the side deck via a deck pipe and are stored in a bucket within the forepeak.
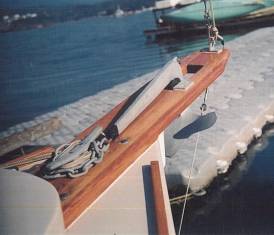
Here’s the bowsprit…

Here’s the bowsprit…

... and here it is again.

… and here it is again.

(Randy Wheating photos)


Tabernacle and Rigging

The tabernacle was welded up from ½” aluminum that is through bolted astride a double thick (one inch) bulkhead. The mast pivots on the upper bolt and the lower bolt is inserted and fastened once the mast is standing. The 1/8” ss shrouds are attached to galvanized chain plates with turnbuckles and are left in place when the mast is lowered. The forestay attached easily to the bowsprit bracket via a pelican hook. The gaff bridle is also made of 1/8” ss wire rope. Setting up is fairly simple – the mast is manually hinged into place, the lower tabernacle bolt inserted (temporary hold). The forestay in fastened via the pelican hook. Boom and gaff jaws and two sail luff ties fastened to mast and hoist away. In the lowered position the mast, boom and gaff with sail attached, and mizzen rest in holding fixture on the cabin top and a crutch in the cockpit.

The tabernacle was welded up from ½” aluminum that is through bolted astride a double thick (one inch) bulkhead. The mast pivots on the upper bolt and the lower bolt is inserted and fastened once the mast is standing. The 1/8” ss shrouds are attached to galvanized chain plates with turnbuckles and are left in place when the mast is lowered. The forestay attached easily to the bowsprit bracket via a pelican hook. The gaff bridle is also made of 1/8” ss wire rope. Setting up is fairly simple – the mast is manually hinged into place, the lower tabernacle bolt inserted (temporary hold). The forestay in fastened via the pelican hook. Boom and gaff jaws and two sail luff ties fastened to mast and hoist away. In the lowered position the mast, boom and gaff with sail attached, and mizzen rest in holding fixture on the cabin top and a crutch in the cockpit.

(Randy Wheating photo)

Transom and Motor Well

The motor well is slightly smaller than show in the drawings to just fit two Honda gas tanks, one forward and one aft of the mizzen/rudder post. The transom is constructed from one piece with a simple cut out for the 5 hp Honda. Holes in the transom facilitate motor well drainage. The stern deck is also a single piece with cutouts for the mizzen and rudderpost. There is no cut away between the cockpit and the motor well as shown in the drawings.
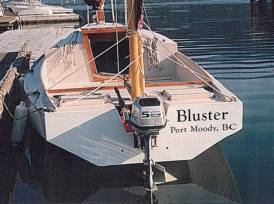
 (Randy Wheating photo)

(Randy Wheating photo)


Other Modifications
  • Blocks on gaff halyard and centerboard pendant to ease lifting.
  • Wooden strips on seat fronts to fit cross boards that can then hold floorboards flush with seat tops creating a huge cockpit sleeping platform. Boom tent to follow.
  • Watertight inspection hatches on cockpit bulkheads (accessible from cabin and lazarets) to create a usable yet watertight compartment.
  • Tiller extension for comfy steering.

Now it’s me again – Jamie speaking, I mean.

I haven’t given a lot of details about Wayward Lass, since there are several articles about building and sailing her already. But if you want to compare Randy and Chuck’s modified boats to what you’ll get by following the plans, look back through some previous newsletters. There’s a good picture in the last issue.

I like the bridge deck idea, I considered this myself, but decided against it. Don’t remember why, now. The wide cabin is a popular idea – other builders I’ve corresponded with or met have spoken of making the cabin as wide as the cockpit. The raised cabin would be welcome when you’re inside it, but I think it would have to be very carefully done or it would spoil the beauty of the design. That said, however, I have to admit that both Full Gallop and Bluster look pretty good!

The hulls on all three boats here are built as designed, at least below the waterline. Apart from weight and how it’s distributed, the only things left to make a difference in performance are the sails.

Bluster and Full Gallop have jibs set on bowsprits – I think jibs on Chebaccos need the bowsprit to work properly. I also have a jib, built according to the sail plan and set with the tack at the bow, (no bowsprit) but I rarely use it as it doesn’t work very well. Going to windward, it luffs when it is not sheeted in and upsets the flow of air to the main when it is. It does work when boomed out for running, but it’s too small to be very effective. It showed some potential when used in stronger winds with the mizzen, and no mainsail, but I haven’t explored that fully. I think it might be useful if you’re caught out in bad weather and have room to run. I think you could reach all right too, but would make a lot of leeway.

I don’t plan to add a bowsprit, but I am considering a reaching (asymmetrical) spinnaker for light winds, as shown on page 131 of Bolger’s 100 Small Boat Rigs. This would be set on a spinnaker pole that would serve as a very long bowsprit. I’m still working out the details, but stay tuned.

Wayward Lass’ main sail is different from the others, having eight inches of roach – all other things being equal, the roach adds a little speed. The downside is that battens are necessary to support the roach, and the batten pockets chafe. I’ve replaced these once already because I made them too light and two of the three battens wore right through the forward ends.

Both Chuck and Randy built their sails from Sailrite kits, and are very pleased with them. I can confirm that they look great, and seem to set well. Quiet a few builders have used Sailrite kits for main and mizzen now, and all the comments I’ve heard have been positive. So if you can’t borrow the school gym to lay out your sail, or don’t want the design headaches, Sailrite looks like the way to go.

At Sucia we didn’t do any controlled tests or scientific comparisons (also called races), but one day everyone sailed over to neighboring Patos Island. Wayward Lass was almost the last to get away from the anchorage, so I was out of the action and didn’t even see Full Gallop and Bluster sail together. However, I heard they performed about level with each other, and both skippers came away pleased with their boats.

The next day we were a little more organized, getting all three Chebaccos out together so John Kohnen could take some pictures for us. Outside of the WoodenBoat article comparing cold-moulded, plywood and lapstrake versions, this is the only time I know of that three Chebaccos have sailed in company.
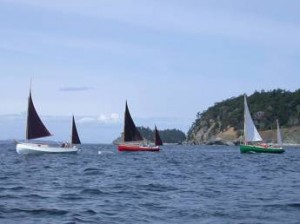
Three Chebaccos, with Sucia Island in the background. Bluster is in the lead, Full Gallop is in the middle and Wayward Lass is coming up behind. (John Kohnen photo)

Three Chebaccos, with Sucia Island in the background. Bluster is in the lead, Full Gallop is in the middle and Wayward Lass is coming up behind.
(John Kohnen photo)

We can’t say yet which boat will be faster. On this occasion, Wayward Lass had an edge, since Chuck was still getting to know Full Gallop, and Bluster was towing a dinghy – very small, but still a handicap. However, the rendezvous was enjoyed by everyone who attended and we plan to hold another in 2005. We’ll be sure to organize some real match (grudge) racing then, so stay tuned!

***

Racing Micros and Floating Sheep Bridges – David Lewis

Never have editors for friends.  “Write an article for me,” they whine.
“Where’s my article I bullied you into agreeing to?”  I swear, it never ends.

As if I didn’t have enough to do, what with keeping my sheep wormed and happy, getting my steers to the butcher, finding customers, building the  infrastructure for a farm while working full-time planning new telecom and  network systems for an entire company move.

Here comes Richard, “You live five minutes from a lake, and you have a  Bolger Micro that you haven’t sailed in two years.  Surely there’s a  sailing story in there somewhere.”

Uh huh.

Ok, let’s see.  Well, something rather amazing did happen the other day.
Not so much sailing as “rafting” but…

My farm is split down the middle by a creek which, with all the rain we’ve  been having, is not a small one these days.  There’s only one spot that is  passable by man or truck and you don’t do it without getting wet.

Now that’s just fine for my cattle, they’ll plod through anywhere that’s  below their chests.  But my sheep are a bit more finicky.  And shorter.

So I decided it was time to build a bridge.  Now shoestring budget that I  have, I wanted to do this for next to nothing.  In fact, free was a good  target.  I could have gone and bought a culvert, buried it to 40%, put  fill and cement around it, and had a decent bridge for, oh, I don’t know,  $2000, $5000, something like that.  Or I could use my muscles, my  ingenuity, and materials I already had and keep the cost below a hundred.

I have about two hundred railroad ties sitting around collecting sheep  poop.  Some of them are light (well, relatively light) and some of them  are so heavy I can barely get them into the truck.  Heavier than water in  other words.  Being a bit lazy, I used whatever weights happened to be on  the top of the pile.  Some were heavy, some were light.

I hauled fourteen of them out to the crossing and laid two parallel to the  flow and ten across those two.  I tied them together with three poly-ropes  and laid the remaining two ties crosswise on the lower and the upper end –  to make a two-sided “bowl” that I could then fill in with a layer of rocks  and dirt on top of that.  Then I began filling in either side with rocks,  the plan being to build up ramps that would be level with the top of the
bridge.

I went and bought some threaded rod and some of those aluminum tent  stakes.  I would put two rows of threaded rod through the top two ties,  parallel to the creek flow.  I would drive four stakes down through the  top of the two ties.  This would help prevent those ties from pushing out  as weight was added between them.

Then there was about a week where I didn’t get a chance to work on my  bridge.  Then it rained.  Not heavy but it kept up for most of the day.

Then yesterday I went to put in my threaded rod.

I’m sure you’ve all figured out what happened.  Bridge gone.  Just not  there.

I started tramping down creek to find it.  I passed numerous spots where I  was sure it could NOT have passed, it being so shallow there.  I finally  found it about a mile downstream, hung up on a fence across the creek and  still tied together with the poly rope.

Knowing how heavy those dang things are, it still amazes me that it made  it that far.  Now I get to figure out how to pull the timbers out of  there.  Could a culvert and cement be in my future?

***

On Contributing – Chuck Leinweber
dscf0046

If you are reading this article, you probably had a few minutes to kill and happened here by accident.  Perhaps you have this site bookmarked and check it regularly for new material.   Maybe you’re sitting at your desk taking a coffee break, or using your laptop at the beach in front of a five star hotel with WIFI.  If you are here, you probably like reading about boats and boatbuilding.  Where do these articles come from?


There are literally thousands of people writing blogs.  Who needs more blather on some website?  How much is there that can possible be of interest to some boatbuilder? Admittedly, Duckworks does post something new each day, and the Chebacco News posts great articles, but we’d be willing to bet you would like to see more about the subject you are particularly interested in.


Which begs the question.  Do you have an obligation or better yet a desire to add your opinion or experience? As an editor, I can categorically tell you that if you take the time to put your thoughts down, they will be appreciated.  Not just by frustrated editors like Richard and me, but also by all the other folks out there who are waiting to read what you have to say.


Whether you want to write about a Chebacco or some other boat design, you may be unsure how to proceed.  Rule one.  Just get the words down.  Type one word and then the next, and keep right on going. What are some guidelines?  I thought you’d never ask.


Your readers want to know how you did everything, especially if you came up with a novel way of accomplishing some of the more tedious parts of boat building.  The process is always of interest.  Just this afternoon, I puzzled over the assembly sequence of the boat I am building.  The instructions given in the plans are not always minute, and can sometimes be called obscure, so the voice of experience (yours) is always appreciated.  And if you’d like to wax poetic, rant and rave, or better yet, insert some humor, please feel free.  Your voice is what makes what you write special.


If possible, include photos.  This implies that you thought you might want to write something before you started building or before you took that cruise.  We always carry a camera, except the one time we didn’t even know it was still in the truck until we were ten miles from out launch point.  A digital camera is especially nice for web articles, and also nice because you can take about a million photos and never need to load new film.  Let the editor know where you would like each photo to be placed in the article by numbering them and indicating where each should be.  Digital photos are easy to enhance, easy to crop, easy to save in a compressed format that web editors like.   Most of us have scanners and can also use regular photos as well.


When you are done, ask a friend, your significant other, or the guy sitting next to you to read it through.  It is always hard to critique your own work.  Have them check for clarity first.  Does it make sense; does it read smoothly.  If they have grammar skills, take advantage of them.  If you intended to be humorous, it is good sign if they laugh out loud.  If they ask you where they can go to start boat building, you know you are on the right track.  If no friendly readers are available, at the very least, RUN YOUR SPELLCHECK and read the piece out loud to yourself.


I will throw in a bit of grammar advice.  Don’t use the word ‘then’.  (And then we did this, and then we did that, and then she…..)  Don’t start a sentence with the word ‘and’ or ‘so’.  Get rid of words that don’t need to be there, especially if they repeat what you just said.  The words ‘very’ and ‘really’ can almost always be omitted.  .


Last but not least, a little abstract speculation about what makes one article stand out from all the rest.  The very best are like the ones you hear when sitting around a fire at a messabout.  The fish tales, the shark tales, the alligator tales.  The time you fell in and the boat sailed off without you.  Tell what really happened—don’t pretty it up.  We want to hear about the good, the bad, and the ugly.  Let your personality, your opinions, your unique point of view loose in what you write.  Your public is out there waiting.

This website lives by submissions.  Richard depends almost totally on readers for content.  I happen to think that this makes for honest and real reading – the experiences of amateurs who get no pay for their writing and no commissions for any products that they promote.

Editors are pretty flexible, but we do have some druthers. We like to have articles in some form of text format. You can copy and paste the article into the body of an e-mail, or you can attach just about any kind of word processor file to an e-mail instead. A file on a floppy disk or CD mailed by regular snail mail will work. I have even typed up hand written material, though that is a bit of trouble. Pictures can be sent for scanning, and will be returned promptly. If you have digital versions of the photos, they can be e-mailed or sent on a disk. The best format is .jpg without too much compression. Send as many as you need to illustrate the article. We may cull a few.

If you have certain places you want pictures to go, simply make an insertion note at the appropriate place in the text <**insert boat01.jpg**> or let us do the picture placement. We’re pretty careful.

Thanks for taking the time to write up the details of your project. I assure you it will be of great interest to boat builders and wannabees.

Chuck Leinweber
Duckworks
608 Gammenthaler
Harper, TX  78631
www.duckworksmagazine.com
Chebacco News 38

Hello Richard:


I want first to thank you for continuing Bill Samson’s work in editing the Chebacco News. I have learned a great deal from this newsletter and appreciate very much Bill’s work on behalf of Chebacco builders.


In his very helpful description of the building sequence for the sheet-ply Chebacco 20, Bill describes how he installed the two hull side panels by suspending them from the ceiling while he fitted them. Since I am building outdoors and do not have a ceiling, I had to find another solution.


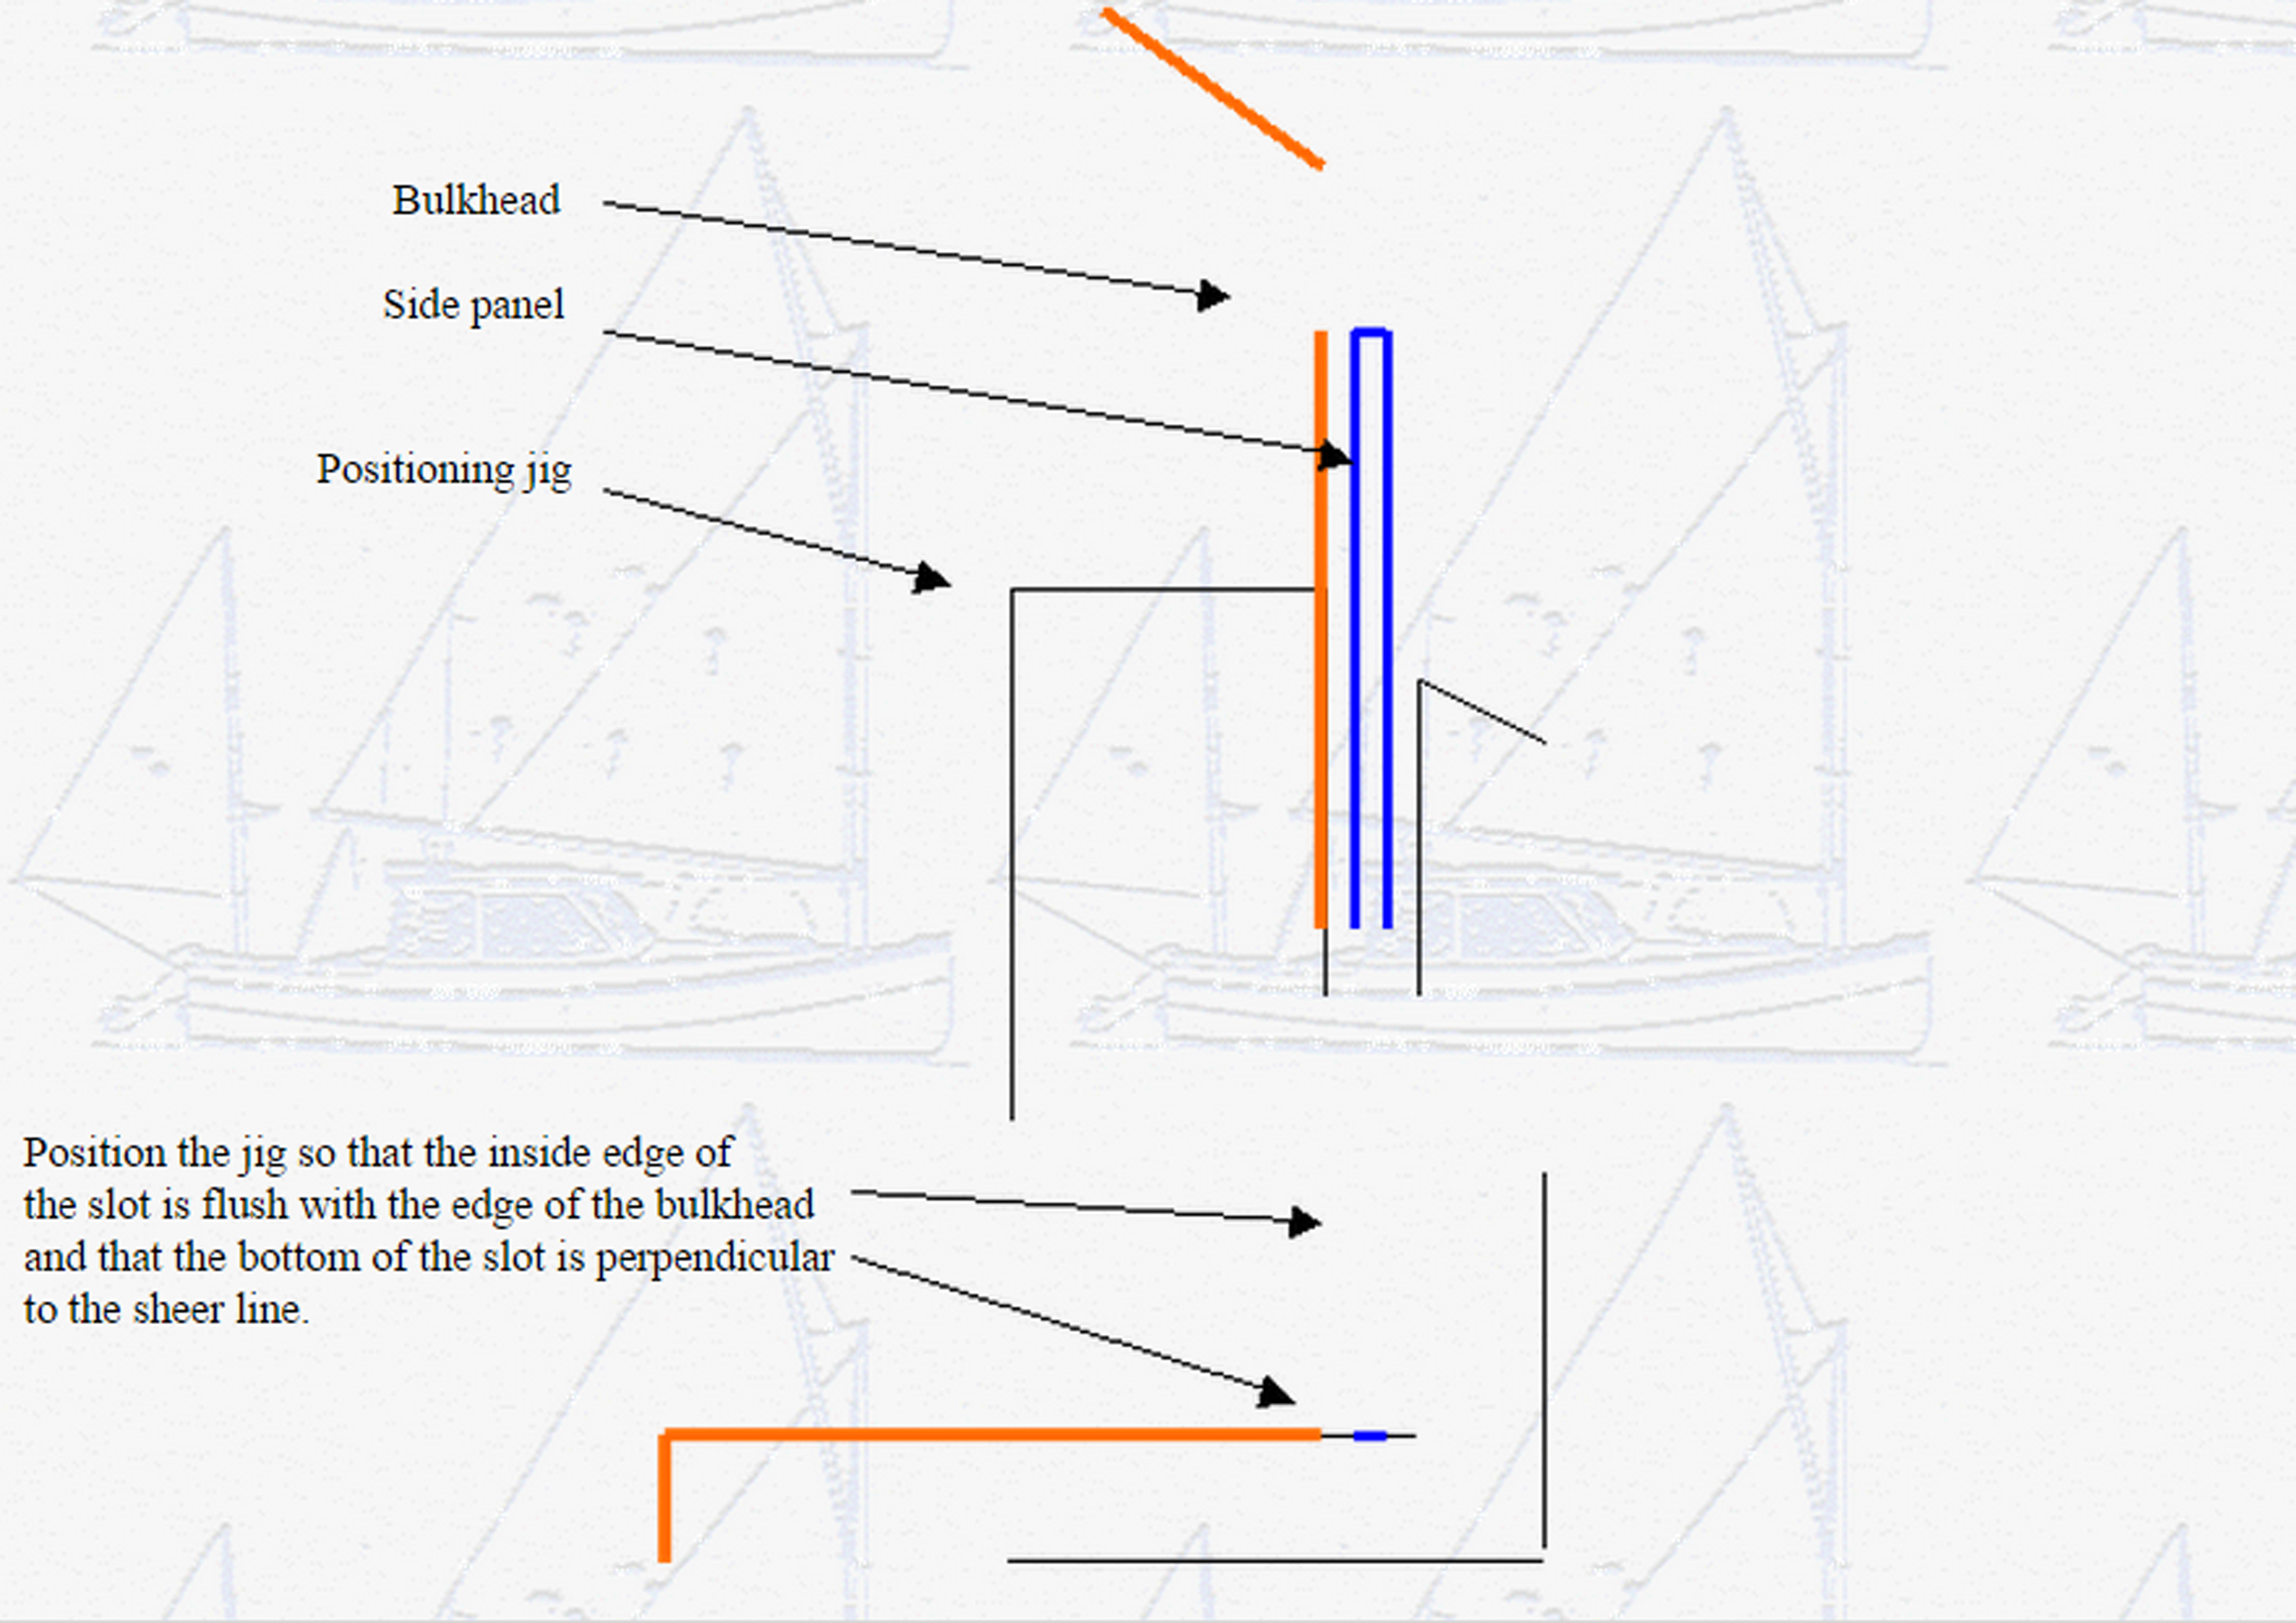
My approach, therefore, was to cut out six small jigs out of scrap plywood (I actually used the cutouts from the bulkheads.). These were screwed temporarily to bulkheads # 1, # 4, and # 6 as shown in the diagram below. The side panels were then dropped into the slots, three on each side, and I was able to take my time in positioning the panels. When the epoxy fillets were complete on one side of the bulkhead and the panels were permanently fastened at bow and stern ends, I removed the jigs and made the fillets on the other side of each bulkhead.


Side Jig 2

I found this to have been very easy and I hope that it might be of use to others as well.


Regards, Tom McIllwraith

Halifax, Nova Scotia

***

Hi Richard,

Thanks for the nice job on the last issue of chebacco.
Here are the pictures of blocks and tabernacle fitting
that you requested.

block1.jpg 1 block2.jpg 1
Blocks are made out of locust with a brass sheave spinning
on a 5 mm brass pin (Fig. Block1.jpg).  They run nice and smooth
as long as the hole in the sheave is a bit larger (e.g. 5.25 mm)
than the pin. As I mentioned before, I made patterns
by magnifying the drawings in the “Riggers apprentice”
by Brion Toss. I also fitted the block on the centerboard
case with some kind of slotted tongue (Fig. Block2.jpg)
to jam the sheet, a home-made simple substitute for a camcleat.
taber1.jpg 1 taber2.jpg 1 taber3.jpg 1

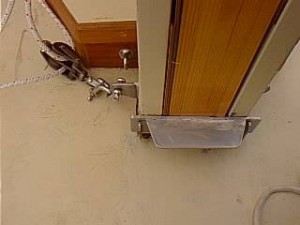
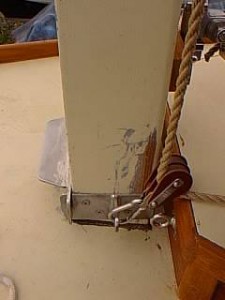
The stainless steel fitting for the tabernacle was “invented” and made by
my friend Roberto Ginetto. There is a U-shaped part that goes around
the back and sides of the tabernacle. This part is screwed onto the tabernacle.
The front part is removable (Fig. taber1.jpg) and goes on the u-shaped part
like a “fence”. The U-shaped part also has “ears” (Fig. taber2.jpg) to attach
the double turning blocks for the throat and peak haliards (starboard side,
Fig. taber1.jpg) and topping lift + jib haliard (port side, Fig. taber3.jpg).
As you can see, things are still a bit scratched and unfinished around there
but the whole thing works well and is very easy get on and off single-handed.

Let me know if you need more explanation or other info.

Cheers,
Vincenzo

Do you have any close up pictures of the hinge on your tabernacle?

Also, I notice you have the forward section closed off. What is the distance from the hing to you locking mechanism?

How do you raise the mast? You use the jib line as a forstay, do you use it to hoist the mast?

It appears your mast is rounded up top, but square on the bottom. It is square up to the double reef position of the gaff?

Have any closeups of your gaff saddle?

Hi Richard,

It is very easy to raise the mast, I just stand on the cabin roof and walk it up, it takes only a second then to block it with the metal fence. I do not use the jib haliard as a forestay or to raise the mast, although I guess that could be done.

The mast must be rounded all the way above the hinge point, otherwise the gaff jaws will not be free to swing around when hoisting or lowering sail (acting as a wrench around a bolt) and might bust at the first gust of wind! So, the mast is left square only in the part that goes into the tabernacle.

I will take close-ups and measures over the weekend.

Buon vento,
Vincenzo.

Richard,

the distance from the pin of the hinge to the bottom of the locking mechanism is 67 cm.
The width of the steel plate of the locking mechanism is 6 cm.

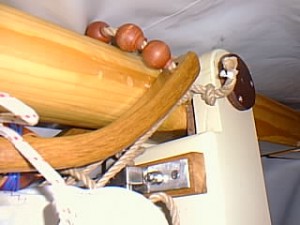
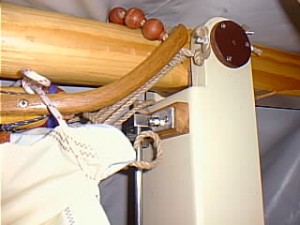
I made the curved gaff jaws epoxying 2mm oak lamination to a final thickness of 24 mm
(see attached pictures)

gaff1 gaff2 gaff3

Cheers,
Vincenzo

Did you use the 1 inch stainless steel rod described in Chebacco News 18 for the pivot pin?
I’m thinking of going a little thinner, to have less of a hole in the mast.
Did you do any kind of reinforcement for the hole in the mast?

The round plate with the three screws, this is the bearing plate for the pivot pin? Are all the mast forces taken by this plate, or is it a loose enough fit that the mast forces are taken by the box section of the tabernacle?

PCB&F says: “Since we know of no widely available source for them any more, we are proposing a ‘home-made’ gooseneck. It uses two stock ‘heavy duty’ SS gudgeons to accept a 1/2″ SS eyebolt which then connects via another ‘undersized’ bolt loosely to two SS tangs that are screwed to the forward sides of the boom; there should be enough freedom for the boom to move any which way, including twist from the sheet-pull. ”

I was never sure what exactly they were saying. It looks like you have a 10 inch or so long, 1/2″ thick  rod between the upper and lower brackets (gudgeons?) on the tabernacle face. I can’t see, but I’m assuming you then have an oversized eyebolt that slides up and down over this rod, is attached to the front of the boom, and acts as your gooseneck?

I used 1 inch bronze rod for the pivot pin.

To avoid having the pin bearing directly on wood, I screwed steel plates
(with a 1 inch hole for the pin), one screwed to the side of the mast, the
other to the side of the tabernacle, so the forces on the pin should mostly bear on the steel plates. The plates you see in the pics are just plywood plates that prevent the bronze pin from working its way out of the hole.

You are exactly right about my gooseneck. The pin is 12 X 30 mm stainless steel. I made it so long with the idea of rigging a downhaul to tension the luff. However the throat halyard is enough to give plenty of tension, and the sliding up and down of the boom is just a useless complication when hoisting or lowering the sail. I am going to cut that rod!
Pics of gooseneck details next weekend.

Vincenzo.

***

From: “Bill Samson” <bill.samson@tesco.net>
To: <richard@spellingbusiness.com>
Subject: New Chebacco growing on Vancouver Island . . .
Date: Sunday, November 11, 2001 2:41 AM

Hi Richard,

Just had these pics from Bill McKibben via Chuck Merrell of his ‘glasshouse’
Chebacco Motorsailer that’s coming along well.

Bill has raised the topsides a little more than is shown on the plans, but
(I think) kept the overall height the same.  You remember the pic of his
model on one of my last Chebacco Newses?

Anyway, Bill would be delighted if you included one or two of his pics in
your next issue.

Cheers,

Bill Samson

>Speaking of pix, the attached just came in from B&B for the NW Chebacco.
>Will put them on his web page.  They were taken in Aug and September.  I
>have a hunch he’ll have it complete by sometime next summer.  BTW, that
>green foliage, higher than the cover in Picture #1 is Beth’s corn crop from
>last summer.  I had some they brought down.  Delicious!
>Chuck
>NWCheb01 NWCheb02 NWCheb03 NWCheb04 NWCheb05

***

Hello Richard!  A short note with 3 photos for your next Chebacco e-zine, the main purpose being to show how I’ve tried to build a Chebacco over the summer.  As cold weather now comes over the Massachusetts hills here, I’ll soon be forced to close down boatbuilding work although I’m hopeful that an Indian Summer will come about to allow the finishing of the hull and flipping.  Even in snow I’d flip her!

Stealing Horses Keel
Photo 1 shows the keel on top of the bottom panel.  It was my assumption that it would be much easier for me to work at placing the keel without the bilge panels in place.  A step ladder under the bilge panel space allowed closeup work, to see into the centerboard slot, to work on finishes such as they are.

 Stealing Horses Bilge Panel

Photo 2 shows Stealing Horses with her bilge panels in place.  The front 8 feet is composed of 2 layers of 1/4″ plywood with the first brought into shape with Spanish windlass action, and the second secured with a buttering of thickened epoxy and many sheetrock screws forcing the outer to the inner panel per Jamie Orr’s earlier description of how to do this.  The aft sections of the bilgepanel are 1/2″.  A brass half-oval strip extends over the inner stem, awaiting the outer stem for attachment.  The strip along the forward keel, along both centerboard cheeks, down the aft keel but shy of where the rudder post attachment will be placed.

Stealing Horses Xynole

Photo 3 shows the bilge and topside panels covered with xynole cloth prior to wetting out.  The keel and most of the bottom has, as the photo shows, been cloth-clad and coated with epoxy laden with graphite.

At this time — late October — the large xynole sheets have been wetted out and received 3 coats of fairing compound which cured just before the cool weather.  Now the job of sanding the hull is sporadically underway.  The outer stem–composed of built up planks of rosewood–has been lag-screwed and epoxied to the inner stem.  The lagscrews are recessed into the inner stem and set in bedding compound.  By the way, Jim Slakov (who built an exquisite lapstrake Chebacco) suggested to me one of his embellishments: that a small wood wedge be eventually epoxied to the inner stem to hold the mast at an intermediate stage when raised.  The idea is to stand in the cockpit and raise the mast to this point (contingent on one’s height and muscle power), and then to leave it semi-raised and secured by the rachet effect of the wedge while climbing to the cuddy roof to complete the job.

I’d like in what remains of this building season to get the hull sanded and the waterline scribed to the hull–I’d like of course to do more like paint and flip–but I’d settle for this.  Soon I’ll be forced to unscrew the ladder strongback of the boat forms from the ground stakes that level it.  The coming frost will of course heave these stakes and I’m concerned that the hull not be stressed so I’ll let it float atop frozen ground.  Then an accurate waterline will be impossible.

Semi-gloss marine enamel was bought for a 2-coat job above the waterline (to be placed about 2″ higher than the design waterline) with the graphite-laden epoxy coming up from the bottom.  Kirby Paints was kind to test their various paints and primer on a sample of my plywood/my epoxy to see how to proceed (no primer was deemed necessary).

For those considering a sheet plywood version of the Chebacco the following is a list of major materials and their sources that I’ve used:
1.  Meranti marine plywood (LS 6566 grade) from Noahsmarine.
2.  Locally grown spruce, encapsulated in epoxy.  Some island-grade rosewood brought back from the South Pacific some time ago.
3.  Xynole cloth from Defender instead of fiberglass cloth because of a concern for puncture and abrasion resistance.  Xynole, however, absorbs epoxy like a blotter.
4.  Epoxy, fillers, and fiberglass tape from Raka Epoxy.
5.  Fasteners from Jamestown Distributors and Hamilton Marine.  Hamilton sells a nice through-bow silicon bronze eye bolt for pulling the boat to the trailer. I went to Jamestown for silicon bronze ring nails and screws, bedding compound.
6.  Sails, sewn over last winter, from Sailrite kits.
7.  Kirby traditional marine paint for the topsides / bilgepanels that are above the waterline.

Cheers, keep warm,

Dick Burnham

Stealing Horses stem paint

Here is our Chebacco with 2 coats of oil-based Kirby semi-gloss white on her.  The outer stem is as yet unfinished but we plan to sand it down and to varnish it.


Dick Burnham

***

Hi Richard

New email address  – ‘rwheating@telus.net’

Apologies for not thanking you sooner for your work on the Chebacco News.

I live in the same corner of the world as Jamie Orr.  He lives on Vancouver Island and me on the main land.  My Chebacco has been in the works since 1995 (!)  I was searching for just the right boat project (my first) when I read the Chebacco article in the Wooden Boat magazine.  However this would be a test of my dedication as my wife and I were just starting our family which I was to discover dramatically cuts into ones free time…
My boys are now seven and five and I am able to pick up the pace so to speak.  Just tonight I have done the final tidying up and dusting in preparation for spray painting my boat.  Mine is the standard sheet ply variety Chebacco with some modifications such as raising the cabin two inches and widening it out to the coamings.  I have also gone with a one piece ( a la Brad Story) transom with drain holes.  The forward bulkhead I doubled in thickness (to one inch) to allow me to mount the mast, using a tabernacle, directly onto the cabin roof.   I have some ideas for the tabernacle but would be very interested in other CB readers experiences with this.
Hope to launch this before January and then spend the spring on the trim  and spars.  Thanks for the sail info.  I will likely go with the Sailright kit.
I will send along some photos in the near future.
Thanks again,

Randy Wheating
Port Moody, BC
Canada

***

Sanding the CLC

Everyone has been saying that this will be a cold winter. To which I have invariably replied “NO, it will be a mild winter, so I can finish the boat!”. And you know what? With the exception of a couple of days of snow, it has hardly gotten below 50 degrees yet… spooky.

DSC00029 DSC00032 DSC00033

These are pictures my homemade power long board. To the left, I have just disassembled the inline air sander I bought from Harbor Freight. Center is where I have made up some small mounting blocks, and countersunk some 1/4″ flat head screws in it. To the right, I am gluing the blocks to the sanding board with some 5 minute epoxy. Note that the blocks are attached to the sander during this operation, this is the only way to make sure they are glued exactly the right distance apart, so they fit on the slide of the air sander perfectly.

DSC00034 DSC00035

After testing my setup on the boat, I realized the slide on the sander was some kind of plastic, and bent all out of shape when the board was forced to follow the curve of the hull. What you see in this picture is a 1/4″ x 1″ length of cold rolled steel, used to keep the slide stiff and reduce the wear. Still got some wear using the sander, and had to return it to the store. I’m not sure it was all related to my setup though, as I’ve had this exact type of sander before, and had the same problems with it. I’ve since ordered a Campbell Hausfeld air sander from HF. They had it in the catalog for $16.99, about $40 less than I could find it anywhere else. The card in the mail said it was back ordered, and I can’t find it online any more… Not sure if it was a typo or what, but it appears they are going to send it to me.

To the right, you see where I have taken the sanding pad and used glass tape to strengthen the attachment of the spacer blocks to the board. The sandpaper was attached to this board with contact cement, 3M Super 77 spay adhesive. Application of the heat gun on high while pulling the paper off made changing to a new sheet a breeze. I used 36 grit paper, the kind that worked with the inline sander. At about $7 for a box of 25 at the local HF. Went through two boxes.

DSC00030

On the left here I am squaring up the rudder assembly, and on the right it is set aside for the epoxy to set up. I used three layers of the 2″ tape I got frommarsales1@aol.com I bought five 50 yard rolls of 2″, 6oz tape from him for $35, you might email him and see if he has any more. The tape is a satin weave and doesn’t wet out as easily as some of the more open weaves. You have to pre-wet your surface, then apply your tape, then wet the outside. Give capillary action a few minutes to work the epoxy in, then work any remaining bubbles out with your thumb. This tape is a bit more work than a more open weave would be, but well worth the saved money.

I make the rudder a bit thick for the post, so I trimmed it down some with a flap wheel on the angle grinder. Also, I flared the aft end on both the blade and the wing down to a finer point than on the plans, in an attempt to save a bit on drag.

DSC00001 DSC00003 DSC00004

Here you see the centerboard case going in. In the picture on the left I have just dropped it in, I had to cut a notch out of the board you see to get it to drop all the way down. Center is a side view, and right is a view of one of the cleats used to hold it. If you look in the picture, you will see that the cleat only has one screw. This is to allow the case to be levelled from underneath, before tape and epoxy is added.
On the right you can see a one of the bilge panel spices, still covered with the remnants of the wax paper used to keep the clamp board from sticking. I later went back with a wire brush on a drill and got this off.
DSC00003_2 DSC00005 DSC00006

On the left you see the crew applying glass and epoxy to the hull. This was a major operation, glassing the entire hull with 6oz cloth. Made more interesting by it being in the 60s, and by my being out of slow set epoxy. We only had one pot start to cook off on us, and I was able to dump and spread it before it had smoked too much.

Center you see a good shot of the cloth hanging off. In the future I may try to trim closer to the hull before applying the epoxy. I wasted quite a bit of glass here, as after it gets a few runs of epoxy on it, about the only thing you can do with this stuff is throw it away.

On the right, you will see where it looks like I spiced onto the back of the keel. This is caused by me splicing onto the back of the keel. Measure twice, cut once. Then cut again. Also note the brown under the glass. I used the last of my slow cure hardener to spread wood flour and epoxy over any sections that weren’t exactly smooth, so the glass would lay even. I learned on a previous boat not to use phenolic micro balloons under the glass. They aren’t very strong in tension, and I had a section de-laminate on me during sanding. This boat is being made as strong as I know how to make it, so the only putty under the glass is wood flour based.

DSC00007 DSC00008 DSC00009

The left two shots show a good view of the cutout for the motor well. Also, note that the glass is folded over twice on the transom, and right under where the rudder will be. This required a bit more work faring the hull, but the added strength may come in handy some day.

DSC00010 DSC00011 DSC00012

More shots of us desperately spreading epoxy and chasing bubbles, before the epoxy set up.

DSC00024 DSC00025 DSC00026

The two pictures on the left are of the stem after it is attached. I agonized for days over whether to finish it “bright” or not. finally, looking at the pictures I have in the Chebacco News issues showed that most people were painting over it. In addition, I REALLY wanted to cover it with a layer of glass. So, it is made up of cutouts of plywood, laminated together. Notice the radial lines on the stem? This is where I broke the belt on the hand power planer, and had to use the chain saw to finish the carving… <grin>. The stem had a liberal coat of putty applied to the bottom and then was attached top and bottom with a couple of temporary screws. After the putty set, a little sanding was done, then more putty, and a couple of layers of glass cloth went over the whole assembly. This coming Saturday a friend is coming over to help me forge a piece of 1/8″ stainless steel to the shape of the cutwater, so the keel armor will extend from the bottom up and around the cutwater! Should be very cool.

DSC00027 DSC00028 DSC00031

On the right we have applied a coat of glass bubbles and wheat flour as a faring compound. Notice the line starting halfway up the bilge panel next to the transom? This is where the bottom and the bilge layers of cloth overlap. I have two layers of glass over the bottom chine to add to the strength.On the left, I’m attaching the cheek plates over the centerboard case. I broke with tradition, and foil shaped them in the best bolger tradition, with the flare on the sides and bottom matching. Hopefully this will reduce some of the turbulence caused by this protrusion of the keel.

This notched trowel process took a LOT of epoxy. More than glassing the hull! Oh, well, it allows me to fill in the low spot, and will give a smoother hull. Helping to decrease resistance and turbulence.

DSC00001_2 DSC00003_3 DSC00004_8

This is the boat after MUCH sanding. The girls decided they would volunteer to sand the boat instead of buying me a birthday present. Their mistake! <evil grin>. I only had them sanding for a couple of weeks… They did a wonderful job, though. The odd color scheme is my attempt to vary the color of each successive layer of filler. No reason, I had the pigment and though I’d experiment.

On the left we are just starting to apply the leftover Interlux barrier coat primer from another project. I put a little of the green pigment I had left into the white primer, and it turned the yucky blue you see. We turned the boat into a swimming pool! I didn’t have quite enough for the entire hull, but that’s ok. I experimented with the paint, and it stuck to unwashed, unsanded, smooth epoxy with no qualms. Even stayed on after a couple of days in the dishwasher, and hardened up nicely after a couple of weeks.

On the right, you see the hull with paint on it. We are putting it on in many thin layers, to avoid runs. In this picture we still need a couple of layers of paint. The green is a color I got from mixing three gallons of various shades of green deck paint purchased at the local close out store. At $2.88 a gallon, I bought 12 gallons, even before testing on the epoxy!

Anyway, that’s all for now, next issue I’ll have pictures of the forged armor for the keel, and pictures of the boat turning, currently planned for some time in January. Also, I’ll show how I figured out the welding of stainless steel on a cheap wire feed welder.

Richard Spelling

From the muddy waters of Oklahoma.

Chebacco News 21

Chebacco News

Number 21, June 1998

syl1

SYLVESTER scoots along in a sea breeze

Why so late?

You’ve probably noticed that this issue is about a month later than usual. The explanation is that there wasn’t enough material from our readers to fill an issue until now. Anyway, there’s some good stuff now, so I hope you’ll find it’s been worth waiting for.

Reefing (again!)

I’ve made some very simple modifications to the reefing system on SYLVESTER that make reefing under-way a much more managable process. In essence, all I did was to move the horn cleats for the pendants to a point about mid-way along the boom; making them easier to reach without leaving the cockpit. The pendants at tack and clew are left in place at all times, and just hauled in (tack first) as the occasion demands, just as Brad Story described a few issues ago.

I had a chance to try it out in anger last weekend; I took in a reef when things got blustery, and shook it out again when things quietened down a little. It worked very nicely.

Building the Coach-roof

Builders tell me that one part of the plan that takes a lot of thought is the construction of the coach roof. Here’s how I did it.

First of all I put on the cabin sides – just cutting and trying until they fit, not forgetting to cut the elliptical holes for the windows before finally gluing them in.

Next job is the framing for the roof – not too difficult joinerywise, but it takes a bit of study of the drawings to figure out what’s needed, allowing for the right clearances for the mast slot and hatch hole.

This is all faired up in preparation for the top going on.

I made the top from 1/2″ ply – it takes a LOT of bending – Two layers of 1/4″ might be easier. The top is made in two halves – port and starboard. I glued and screwed it to the centeline first – LOTS of screws to make sure it stays down.

I found, when bending the curve into the top the framing started to sag, so I placed some temporary props between the framing and the bottom of the hull to try to minimise this sagging.

I then applied glue to the rest of the framing and applied my full 180+ pounds around the edge as I put in the screws. This is the hardest bit, because if you stop half way through, with not enough screws in, it’ll just pull out and spring up. I’d recommend a screw every 4 inches or so.

Finally I removed the props and there was a little sag in the roof. No big problem, but it does mean the hatch sides need to be convex along the bottom and require a bit of fitting. Once the hatch sides are on, and the framing of the mast slot, the whole thing is as stiff as you could wish for.

I hope this is helpful.

framing

Cabin sides in place and framing for the coach-roof completed

Jamie Orr Pours Lead in his Centreboard

Jamie writes:

Here are the lead pouring pictures.

First, some reminders:

  • Pick a dry day or work under cover. Molten lead will splatter if it contacts moisture.
  • Clean up your work area. It’s obvious from the photos I could have done a lot more in this regard. (Also, I think we could have had the stove in a less vulnerable position, so it couldn’t be easily knocked over. On the other hand, it didn’t get knocked over, and was at a convenient height. Take your pick.)
  • Lead stays hot for a long time, watch your fingers.
  • Wear protective clothing, and don’t breath the fumes.

Now, what we did.

We drove four big nails into the edges of the hole in the centreboard to anchor the lead. This was only just barely enough, and the lead was a bit loose after it cooled and shrank. Some epoxy around the edges fixed that.

A piece of steel plate was clamped to the underside of the board. I wire brushed the plate as it was a bit rusty, but didn’t do anything else. The books favour some blacking or soot, as well as preheating the steel, to prevent the lead from sticking, but we had no trouble with it. The board was carefully levelled on sawhorses.

The lead had been previously used to seal the removable top on a 45 gallon drum, so it came as a thick strip about an inch thick. Dad bandsawed it into chunks while I set up the board. We fired up the backpacking stove, put the pot and lead on, and put a 3 lb coffee can over the whole thing (both ends cut out of the can!) with an air space at the bottom. The can acted as a heat reflector, wind shield, and chimney for the stove, greatly increasing the heat to the lead.

It took about six minutes to melt 2/3 of a pot of lead, or about 6 lbs. Beeswax is supposed to help impurities float to the top of the lead, but they seemed to float up quite well without help, so I didn’t bother with the wax after the first lot. A tongue depressor removed the dross nicely. I found the easiest way to hold the pot was with vise grips, ignoring the bail, at least for this pot. (The pot was bought originally for bullet making, from a sporting goods store.)

I didn’t pour the lead all at once because I only had a small stove and pot. Because the first (learning) pour was on the small side, we had to do a very small fourth pour. Also, this last pour was delayed, so the lead already poured may have cooled a bit. In any case, this last, fairly thin pour didn’t bond as well to the already poured lead. When I started to level the excess, the edges tried to come up like the edges of a pancake whose middle is stuck to the pan. After I had the excess levelled, I drilled two corners and put one inch wood screws in them. Along with the epoxy already mentioned, this fixed the problem.

As an aside, I found the best tool for levelling the lead was the electric plane. I did a final finish later with the belt sander when I was fairing the edges of the board. The lead didn’t seem to hurt the plane – if in doubt, rent. Note that lead shrinks as it cools, so it should finish about 1/8 inch above the surface when poured.

Altogether, this made a nice change from epoxy, and was a whole lot easier than I thought it would be.

leadmeltleadpour

Melting, and pouring the lead.

George Cobb’s hull nears completion

George Cobb, of New Brunswick, Canada, sent me a bunch of photos of his beautifully crafted lapstrake Chebacco-20 hull. George writes:

I enclose photos going back to March ’97. I started Aug ’96 but spent most of that winter on spars, CB & trunk, rudder etc. working in the basement. As you can see from the photos, my shed doesn’t have enough room to build a boat of this size. Most of the construction went smoothly. Some trouble lining off the lap lines becuase I didn’t have room enough to stand back and look at them.

In the latest photos I am in the process of applying epoxy & the fiberglass to the deck. I have just started on the cabin. I laminated a rounded front as I did not care for the pointed look in the plans. I made very few other changes to the plans. Still have cockpit coaming, cockpit sole, toerails and rubrails and various trim pieces. All hatch covers are made except for the one for the companionway. When finishing and trailer are included I doubt if I will be launching this year.

cobb1

Starting planking – note the ‘lining off’ battens.

cobb2

The turnover ceremony.

cobb3

Starting to fit out the hull

cobb4

The cockpit nears completion

Ed Heins buys Burton Blaise’s hull

So I was pondering the next project, either a Light Scooner, a Chebacco, or one of the sets of Jim Michalak’s plans that are residing in my “projects pending” file, when lo and behold, Burton Blais posted an unbelievable deal for his Chebacco hull which made up my mind all at once and made me the newest builder on the Chebacco news list. The deal was even more attractive, as Burton, up in Ontario, is only a few hours northwest of us here in Frostbite Vermont. Burton, by the way has done a magnificent job thus far. That about covers the upside of the situation.

The downside? Well, convincing my wife Deb, was the next step. Of course it seems Deb, beautiful flower of English womanhood that she is, was somewhat less than overwhelmed at the marvelous opportunity of having yet another “bloody ship” in her back garden. Fortunately, the age old solution of providing a “quid pro quo” of greater value than the object in question, (this time in the form of a tennis bracelet) worked to perfection and the necessary political groundwork had been laid. Which then left only the logistic issues to be solved.

Downside #2, we had no trailer to transport this beast. After a caucus with Bill Samson about trailer requirements, however, I petitioned a friend to loan me the trailer from his 15′ plastic puffin which theoretically just got me enough snubber to axle length to balance the Chebacco. One small problem it seemed however was that like most Vermonters, maintenance on said trailer had been sadly neglected, so before embarking I had already rewired the lights, changed out one wheel bearing and being a Vermonter myself felt that I could get by with just repacking the other 3. Mind you I had never seen a Chebacco up close and personal, so I’m envisioning at this stage, how this is going to fit.

The morning of May 16 broke sunny and warm, a lovely day for the drive. We headed west across Vermont, caught the lake Champlain ferry just north of Burlington VT and landed safely in Plattsburg, New York. From there we headed northwest up route 190 and transitioned to US 11 at Ellenburg Depot. We left US 11 at Malone NY ( a rather niceish town with a hellatiously big Kmart, best described as a Tescoish thing for our British readers). Anyway the significance of the Kmart is that there are none in our small locale so it was planned to stop on the way back

to satisfy her majesty’s shopping fix. US 37 leaves Malone and runs west along the Canadian border to where we planned to make the border crossing. All was well here until we discovered 25 miles of roadworks with no feasible means of avoidance. Hence, 25 miles of dust and gravel later we were back on rt 37 heading towards Massena New York.

Now, Cornwall Ontario is a small city. At least on the map it looks substantial enough to warrant a signpost on the freeway. However… as with our US mapmakers who show Canada as a big beige empty block above the US border, I suppose the powers-that-be assume that just a reference to “Canada” should be sufficient for the average ignorant yank motorist. Therefore, the only signpost along the road reads “Industrial Plants Bridge to Canada”. Now it seemed absolutely logical to me to think this meant “THE Industrial Plant’s bridge to Canada”. There was an enormous factory there, and it’s not unheard of to have a factory in these parts span the border. (That’s my story and I’m sticking to it) Anyway, needless to say, 6 miles farther down the road we came to the realization that in fact this was the ONLY bridge to Canada. A clandestine U turn with a trailer across one of those “Emergency Vehicles Only”

median crossings and we were headed to Ontario.

Border crossing south to north was no big deal. The Canadian folks were friendly courteous and checked Molly the Bassett Hound’s rabies papers, and passed us right through. Burton God bless him had given excellent directions so the remaining miles were insignificant.

Until we arrived at the Blais’ estate and I got a look at the Chebacco, upside down on it’s building frame, and was appraised of the size of a completed Chebacco Hull. I would have sworn that it would never fit on the dinky trailer hitched to my minivan. Not wanting to admit defeat however, we pressed on and horsed the hull out of the temporary shed. With the help of a willing neighbor turned it was over for the first time. I have the feeling that if Burton had turned this over prior to my arrival, I probably wouldn’t have gotten a chance at the boat.

This was one pretty hull all trued up with the bulkheads and temp frames still inside. But onward….

Downside #3, Back to the Vermonters lack of trailer maintenance. It seems the trip had broken loose a couple of ancient weld patches and there was no way the trailer would have survived an overload condition in that condition. Thankfully another of Burton’s neighbors came to the rescue with a grinder and welding rig, and an hour later we were back in business.

Back to Burton’s, to load up the hull. Cripes it overhangs. Well at least the bunks fit more or less on the flat bottom although they’re somewhat short for the job. A bit of gerryrigging got her sorted and tied down & we were off back south.

Actually it trailed not too bad. There was a minor skirmish with the US customs who first after inquiring about my 2 children in back, (one boy, one dog, OK that put me off) then their obvious struggle with how they were going to get a Coast Guard safety registration certificate on an unfinished hull. (I’d love to see the exam for customs agent) Finally they acquiesced to the fact that this was really lumber at this stage so there wouldn’t be duty.

We made the obligatory stop at Kmart as promised, spent the night in Ellenburg Depot and returned uneventfully with only a few scratches in the paint to show for the ordeal.

This weekend, marks the building of a proper cradle and 8 strongbacks to horse the hull off the trailer and hopefully embarcation of further boat building exploits. Stay tuned. I’m a little overwhelmed at where to begin.

Cheers

Ed Heins

For Sale

I want you fellow Bolgerphiles to be the first to know that Catfish Lounge [a Catfish Beachcruiser] is going to be offered for sail, er, sale, to make way for a Martha Jane. Price of the Lounge is $4,500, and includes an excellent Pacific galvanized trailer and a year-old Honda 2HP motor. If you have an interest, or are interested in learning more about the boat, send me e-mail. (Both the boat and I are in the San Francisco Bay area.)

John Tuma <jtuma@sjm.infi.net>

What about an aluminium rudder?

Fraser Howell sent me this photo of his aluminium rudder. He is very pleased with the way it works. It’s very strong, too. It’s worth noticing that the rudder is in a particularly vulnerable position when a Chebacco is being launched from a trailer. Careless launching can mean the rudder hits the slip when the boat slides off the trailer. It is comforting to have a really strong rudder!

frudder

Fraser Howell’s aluminium rudder

And finally:

That just about wraps it up for this time. Please, please, please keep your news and photos coming. They are the stuff that Chebacco News is made of!

Bill Samson,

88 Grove Road,

West Ferry,

Dundee, DD5 1LB,

Scotland.

<wbs@sol.co.uk>