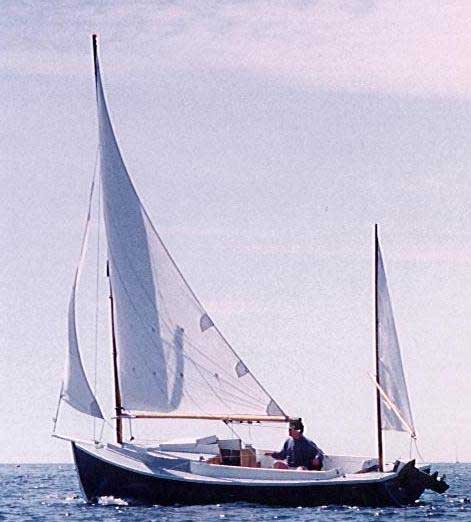
Chebacco News 32

Chebacco News 32 – November 2000


Roll Call!

I don’t know about you guys, but while I know there are a fair few Chebaccos out there I have only the vaguest idea where most of them are.

If you own a Chebacco – whether on the water or at any stage of construction, why not drop me an email or a line telling me what type you’ve got (sheet-ply, lapstrake, long, ‘glasshouse’, cruising . . .), when it was launched (or is due to be launched), its name (if any), name of builder, and location. I’ll publish the list once you’ve been in touch, and it can be updated as and when new Chebaccos are launched. Of course, I’ll respect anyone’s privacy if they’d rather not be included.

Completed Chebaccos I know about are:

LARK

WAYWARD LASS

KELANI ROSE

GRAY FEATHER

SYLVESTER

KATTEPUS

Apologies to folks I’ve forgotten. Anyway, complete details on all (including the above) will be most welcome!

Hollow Masts

John O’Neill writes:

Dear Bill,

Regarding ‘bird’s mouth’ masts. First, my understanding is that hollow spars should be about 10% fatter than the same spar that’s solid. Second, as I discovered, you can use more than 8 staves. If you do, you get a more even cross sectional thickness. That is, if you look at it on end, the hollow space won’t have the outline of a stop sign, but more of a true circle. I used 12 staves on the 16′ masts of my two Bolger Cartoppers, mostly as a way to more efficiently use the nearly pristine 3/4″ Dour Fir stock I had on hand, and that I didn’t want to search out and buy any more of. (Despite the added kirf waste, i.e. sawdust, I got better use of the wood). But I think the more even cross section using 12 staves provides a real strength/weight advantage, and might be worth it regardless. The width of the staves (given a perfect ‘bird’s mouth’ cut) solely determines the maximum thickness of the finished spar. To determine the width figure the circumference of the mast, and divide that by the number of staves you want. My 2 1/2″ mast worked out to 0.65″. Then divide 360 by the number of staves to get the angle for the bird’s mouth cut. For 12 staves it works out to 30 degrees. I’d recommend making a short section of test mast just to be sure of your numbers. I had my first crude one rubber-banded together in about an hour (altogether I made three!). Plus they’re fun to show off to friends of an engineering bent.I used a carbide wobble blade on a table saw for the bird’s mouth cut. It worked perfectly (with a lot of featherboards and support for the work piece, and a lot of test cuts. Make extra staves!). I used epoxy for glue-up, but instead of hose clamps I used waxed twine (epoxy won’t stick to wax) in a hand-tight spiral wrap down the length of the spar. It kept good, even pressure on the joints, with no risk of squeezing any joints dry, and as an added benefit it was easier to sight down to see if the spar was straight, without hose clamps in the way.
After a host of frustrating attempts at dry fitting my even dozen of staves (fitting the last one was always the kicker!) I finally hit on rolling them up around a core. It works like this. Arrange the staves in the order you want them, with the outside face down. Place a thick dowel a foot or more long, or a stiff cardboard roll, almost anything with the approximate diameter of the hollow interior, on top, and roll the staves up around it. It’s a ridiculously easy, one-person operation, even with a dozen slippery, slithery, epoxy coated staves. I felt like an idiot when I figured it out, that I hadn’t figured it out sooner! Just rubber band it up and pull out the roll (make sure you leave some of it protruding, I learned that too) and the base is assembled. The rest of the assembly almost falls into place. I used a plug from the base, up past the partner to where the fittings where screwed in. I drilled a fat hole clear through to avoid turning the mast’s interior into a moisture trap. Then I coated the hole walls with epoxy to minimize moisture induced dimensional changes, which I figured might sooner or later cause splits in the mast. To deal with the ‘hard spot’ at the top of the plug, I drilled down into it using two big Forstner bits. The first bit was barely smaller than the plug, and was drilled about 2 inches into the top. The second was a bit smaller than the first and drilled in as far as it would go. Not the best but I think it will do. It does add weight but it’s low where it doesn’t count.

Another plug option I’ve seen, much better for interior halyards, is to make what is essentially a tiny, hollow, second mast, to fit inside the first as a plug. The staves of this ‘second mast’–towards the top–are tapered, but not glued together, such that the plug is of constant thickness top to bottom, but ends at the top in stiff, individual, tapered fingers, almost like one side of a tall finger joint. I don’t know that I’d run interior halyards on a mast where any thickened epoxy was used during glue-up. There might be some protruding dried bits that could cause chafe.
Great newsletter by the way! You and your contributors almost have me talked into a Chebacco as my next project. Probably hard chine. But Bolger has so many great boats! I’m really torn . . .

John O’Neill, Fairfield,
CA


Meanwhile, Gil Fitzhugh has completed his hollow spars:


I’ve built the masts, boom and gaff using the birdsmouth method, with the mast modified in way of the partners as described in Chebacco News #31. I wrapped the whole mast with a layer of 6oz glass, with the weave running straight up the mast. Then I spiral wrapped the lower 4.5 feet (enough to get above the boom jaws) with another layer, with diagonal weave. The overlaps, loose strands and whatnot were as ugly as sin. I sanded everything smooth with 40 grit and then progressively sanded it down to 22o grit. And it looks damn good! It’s roundish, straightish and strongish. I’m now epoxy coating and sanding off the mizzen, boom and gaff, which won’t be glassed. Then I’ll add the fittings. Next spring I’ll varnish them.


I’ve built almost everything on this boat myself, but Joan was invaluable putting the masts together. I’d mix up about 3 squirts of epoxy at a time, stir, put in Cab-o-Sil, stir some more and then give the can to Joan. She’d paint the birdsmouths while I mixed the next batch. It must have taken half an hour, working fast, using WEST with slow hardener. Then we rolled up the spar and got about 25 automotive hose clamps around it and tightened them up. Being careful, of course, to keep shoving everything back toward straightish as it tried to sag, until we had it really tight. The guy at the auto parts store looked at me pop-eyed when I bought 20 5-inch and 20 4-inch hose clamps. I cleaned out his whole supply.


Drawing a Waterline? Try Pete’s “Poor Man’s Laser Level”

Image321

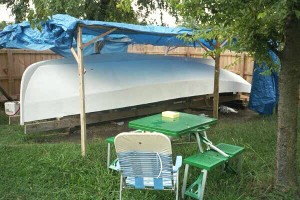
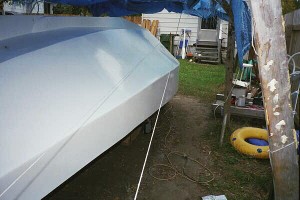
Pete Respess’s beautiful Chebacco hull

Pete Respess writes:

Dear Bill,

I have been reading your newsletter for about a year now (have been building 11 months) and finally have something that may be of use to your readers. It has to do with striking the waterline – a nebulous, scary task which all boat building books seem to brush casually by. In one place in the newsletter I read that I was “on my own” when it came to doing this. That made me ask a friend who proposed, “Hey just launch it and get down there with a magic marker and draw it in”. My pride did not let me opt for that idea though. Instead I decided upon the “poor man’s laser level”. What I did was run two parallel strings (about ten inches apart) along the boat’s length close to whre the water line should be. The strings and the boat should both be level before beginning. Then at night fall, use a flashlight to cast the “two” string’s shadows against the hull, making sure they hit the correct place on the stem and near the stern according to the plans. When the shadows of the two strings coincide, there’s your line to be drawn.
Actually, you just mark tick marks every few inches at this point and wait for daylight to fill in the actual tape line with a batten. That’s it. Of course I have not launched the boat yet to prove this theory. You will have to judge whether or not to wait for that test before you decide to include this technique. I just liked how marvelously simple and “cheap” this
method was. No laser to buy or other complicated stuff. I got the idea from building my privacy fence around the back yard. When three sticks line up “by eye” along your property, then that is your “true”fence line.

I am including the most recent picture of my boat in it’s primer coat (Epoxy Barrier-Kote). It now has a coat of Interthane Plus on it which I have just finished wet sanding with 220 and 400 grit paper (second coat this weekend). I was fortunate to have met a guy a couple of miles from me who retores wooden runabouts professionally. The things he told me about his painting and finishing techniques are priceless. I coupled his ideas with a few things from your newsletter – the results are beautiful. I am told a slight orange peel is acceptable, at least it is with me. You only see that when you get real close anyway.

Pete Respess
Hopewell, VA

For the technical thinkers out there, I have thought of the following geometric stuff. The two lines act as a horizontal plane which slices the boat in the same way the water does. When that plane lines up with the two points, fore and aft on the hull according to the plans, you have a water line. And “figures don’t lie”. Plus it kind has the ring of common sense too.

Image322

The Poor Man’s Laser Level in action


“Wayward Lass” continues her adventures . . .

Jamie Orr writes:

I had a great sail on the weekend, drove to Nanaimo and went over to Sechelt to see Jim Slakov. This was the only weekend I could do it, but we’ve had a lot of gales and stormy winds over the last week or two, and prospects didn’t look good. The forecast said things would improve, but on Saturday it still predicting up to 40 knots of wind. I was getting antsy sitting around home, so I drove up in the afternoon to have a look — yup, lots of
wind. Spent a couple of hours rigging up and fiddling with the new reefing stuff I’ve added, then launched late in the day. The Nanaimo launch site is very well sheltered, behind Newcastle Island, so I thought I’d stick my nose out and see what it was like on the open water. Even with 2 reefs it was more than I liked, so I tacked and let the sail out to reach back. I was immediately startled by a loud Whoossh! and water frothing by at high speed — we were surfing — with 2 reefs! That’s the quickest acceleration I’ve ever had sailing — really got the heart started!

Spent a not very restful night at anchor at Newcastle Island marine park, lots of slapping and noise, but at least no sailing around the anchor with the mizzen up. After breakfast on Sunday I thought I’d go for a bit of a sail around Snake Island before I packed up and went home. However, once I got out there it wasn’t bad, things were much quieter — then the radio weather report predicted good conditions (only up to 15 knots) for the nest 48 hours, so I just kept on going. Sailed for 2 hours, then the wind backed until it was right in my face (sound familiar?) so down came the sail and Honda came to the rescue. Took another 3 hours to finish the 16 or 17 odd miles across Georgia Strait (Sechelt is on the mainland).

Spent the night at Jim Slakov’s. Unfortunately, when I didn’t arrive on Saturday, they ate the dinner I would have had (Greek, one of my favourites!) but I was very well looked after anyway by Jim and his wife, Rose. Had a good look at Jim’s boat — beautiful. He put up the mast to show me the system he has worked out for raising and stowing everything, very smooth and well thought out. I stole a few ideas for later
consideration, but I’ll never touch the quality of Jim’s work.

We called at Gary Foxall’s but missed him. Had a look at his boat though, looking good and could be ready for next September, with luck — maybe a fleet of Chebacco’s in Port Townsend yet!

Got a good start Monday morning, left the dock about 3 minutes before 8:00, with the sails already hoisted. Caught the wind as I passed between the breakwaters, killed the engine right then and didn’t use it again for the whole trip home! Felt like I’d found the grail! Had a fairly steady wind 3/4 of the way, before it started to fade. After 4 hours I was within maybe 2 miles of the dock, but it took another hour to cover those 2 miles. Got a bit of breeze that took me nicely through the ferry channel, then it went back to a whisper that let me sail right up to the dock and just step off with the mooring line.

So I had a good time. My dad couldn’t make this trip, as he had an old friend visiting, and the pair of them are gallivanting off in Prince Rupert. I had a few difficulties single handing, but have some better ideas now on how to manage. Upside was that I had his Cruiser suit, and stayed warm and comfortable.

Jamie

P.S. Jim and Rose are great hosts, but take care when he offers you a hot
toddy — a generous man….

That’s all for this issue

. . . but if you have any news, questions or stories, please drop me a line:

Bill Samson,

88 Grove Road,

Broughty Ferry,

Dundee DD5 1LB,

Scotland

bill.samson@tesco.net

Chebacco News 31

Chebacco News 31 – October 2000


The Big Trip!

Image38

Bill Samson, Jamie Orr and Les Orr

Jamie Orr writes:

Hello Bill

The big adventure is over now, we’re all back home, and life is settling back into the normal routines. I thought I’d try and record our (Wayward Lass and crew’s) trip for Chebacco News, with my impressions of how the boatperformed.

This was a watershed event, the first trip in Wayward Lass. This was her fourth time in the water, and the second time the sails were up. It’s about 35 miles from the most Southeastern point of Victoria to Point Wilson, near Port Townsend. Adding another 3 miles to the Boat Haven in Port Townsend, and a bit more to Fleming Beach where we launched, and we probably covered some 85 miles in total, crossing and recrossing the Strait of Juan de Fuca between Vancouver Island and Washington State.

We got away from the launching ramp at 9 am on the 7th. When we left, the weather was overcast, with light to moderate westerly winds. There was a small craft warning at the (western) entrance to the Strait, but conditionswere okay at the eastern end. The forecast was for stronger wind from the south by late afternoon. I hoped we could sail southeast at first, then east along the Washington coast when the wind shifted. We started out on a direct course for Point Wilson, along the Victoria shore until we felt confident that everything was working properly, then changed to a more southerly course to cross the strait, and be able to take advantage of the expected wind change. However, the wind dropped fairly soon, and when it came back it was right on our nose. The sails came down and we got down to some serious motoring.

Visibility wasn’t too great, maybe 3 or 4 miles at this time, but we felt we could find our way with chart and compass – we also had a Garmin II GPS that a friend insisted on lending us, although neither Dad nor I felt comfortable relying completely on that as we hadn’t done much with it. We had 1 to 2 foot waves most of the time. With the fog and overcast sky, it felt chilly until we opened the thermos and had something to eat. (I’m a believer in keeping the furnace fuelled.)

After an hour or two we could see the land well enough to identify Dungeness Spit, which sticks out into the strait from the US side, and turned onto an easterly course for Point Wilson, or at least where the chart and compass said it ought to be. After a while more we identified Protection Island at the mouths of Sequim and Discovery Bays. It took a long time to bring it nearer, but eventually we were level with it, and had definitely identified Point Wilson ahead. About here we tried sailing again, but the wind was just too much from the east to make our course. Since the forecast was for strong southerly winds, and we wanted to get in early enough to find a berth and have a quiet night, we went back to motoring again.

At Point Wilson the wind and tide were both against us, and the GPS, which had reported some 4.5 knots most of the way, dropped until it was only 1 knot right opposite the point. The wind by this time was getting close to the predicted 20 knots, I think. Once around the corner, we hugged the shore to Point Hudson, 2 miles on. Port Townsend is built on Point Hudson, so once there, we had more or less arrived. Around that corner and another mile and we were at the Port Townsend Boat Haven, a big marina well sheltered by a long breakwater. We called US Customs, who were extremely helpful and patient with the rookie skipper, and were assigned permanent vessel identification and PIN numbers, along with a clearance number for this visit. The trip over took 8 hours from dock to dock.

We got the tarp over the boom, and mopped up the cockpit – between the spray and the rain, things were pretty wet. With the tarp up we were quite comfortable, but I was glad we had the cuddy to keep our gear dry. It also provided some shelter under weigh, keeping spray in the cockpit to a minimum.

Image39

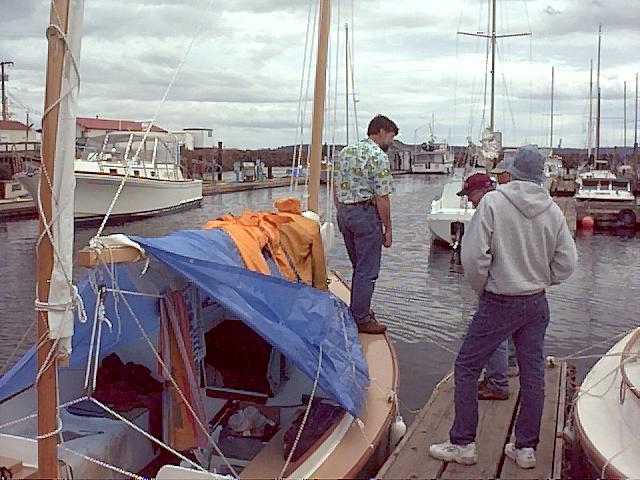
Wayward Lass at the dock in Port Townsend


I’ve included the pictures that Chuck Merrell took in Port Townsend and e-mailed to me. I haven’t got any others at this time. The blue tarp shows up nicely, and that’s me on the boat. There are a lot of strings hanging everywhere because I haven’t entirely worked out the best way to attach all the sails and blocks. I’m trying to keep it all low-tech, but things will be evolving as we learn. I’m pleased to say the sails, also made by yours truly, seem to have the right shape.

I’d asked previously around the web about VHF radios and navigation lights. Before we went off, I bought a handheld VHF that will accept either rechargeable nicad or throwaway alkaline batteries, and a set of lights that operate off a single D cell each. I’m not sure how far the lights can be seen, but the choice in battery powered lights is limited. The VHF was almost entirely used for weather reports. So far I’m happy with my choices.
Alan Woodbury met us at the marina and gave us some local knowledge about restaurants and Port Townsend in general. After some fish and chips, Dad and I crawled into the cuddy for the night. We are both 6 feet and close to 200 lbs each, but found we could both sleep comfortably in the cuddy, using air mattresses. At the bow end, the mattresses turn up at one corner, but we put our feet at that end so it didn’t matter.
We spent the 8th walking the floats at the Festival, saw dozens of beautiful boats from big schooners to tiny canoes. We said Hi to Craig O’Donnell, on hand with the CLC folks, and took in talks by Brion Toss, rigger, and Carol Hasse, sailmaker. Both excellent. Craig dropped by for a quick chat just before we turned in. Unfortunately Jim Slakov didn’t make it down as planned with Kelani Rose – I understand he injured his back. Hope you’re better now, Jim – looking forward to seeing you another time.
On the 9th, Dad thought he’d stay at the Boat Haven while I went back to the show to meet all the Bolgerphiles at 10 am. We had a good turnout, and after talking for a while we all went to the coffee shop and talked some more. Thanks to Alan for the cinnamon buns! After that the group split up to see the exhibits. Alan and I tried to hear Carol Hasse on sailmaking, but were at the back of a large crowd, so crept out after a short time. Alan wanted to see some more boats, but I’d seen them all the day before, so I thought I’d go back to the Boat Haven for a while. I mentioned this to James McMullen, who’d said he wanted a look at Wayward Lass, and he wangled a ride down there in Ginger, a beautiful electric cruiser created by her owner, whose name I can’t quite remember – I think it was Dan, but the last name is gone.
When we arrived, we stepped into a regular Bolger seminar. Between Ginger and Wayward Lass we had our own mini boat show. More talk, then things thinned out a bit and that was the end of the Festival for us. Dinner that night was Dad and I, with Bill Samson and Alan Woodbury – more fish and chips. Bill went off with Alan to sleep at his place, and Dad and I hit the cuddy again.
Next morning we were up before dawn to get an early start. Alan brought Bill down at 5:30 (did I mention Bill was to sail back to Victoria with us?) in a fairly heavy rain. Luckily it stopped again, and we got away at 6:15, motoring between all the boats anchored off the shore. The early start was partly to take advantage of lighter winds in the morning (expected to be on our nose again) and partly to let me try out my tiny navigation lights (they worked just fine.)
We got a considerable boost from the ebb flowing past Point Wilson, the GPS reported 7 knots over the ground, or about 2 ½ knots of tide. This stayed with us for quite a distance into the strait.
After an hour or so, we put up the sails. We couldn’t hold our course to Victoria, but the wind was great and we had a good sail, enough for everyone to take the tiller for a spell. But the wind strengthened to the point where I thought we’d try a reef, and there I had a problem. The sails are only lashed on, without proper provision for tying in reefs. My lashing didn’t give the foot enough tension, and I haven’t got reef points in the sail, only the cringles at luff and leech. I was told by a professional sailmaker that points were not necessary in a sail this size, but he must have been thinking of a sail with a really efficient outhaul for the leech cringle. The sail was like a big bag with the reef – no way would it sail properly close hauled, so it came down and we went back to motoring.
We could see the southern San Juan Islands, and had a lively discussion about what was where. We also saw a buoy in mid-strait, which triggered more discussion. (It was fairly poor visibility again) Based on the buoy, we felt we were just a bit north of our course, probably due to having to point north of it to use the sails. The GPS batteries had died on us, and I couldn’t find the spares (they weren’t on board) but it revived enough to confirm our position, which was nice. Just as well we weren’t relying on it, though.
Shortly after, visibility improved and Victoria appeared. Since it had been foggy going as well, we had no idea just when to expect to see it, and couldn’t believe at first that it was there already. However, when it took another 3 hours to actually reach it, we believed. We went into Victoria Harbour to clear Customs (by phone) and announce Bill’s arrival in Canada. Canada Customs were just as easy to deal with as their US counterparts, although they only gave us one number. A last short trip back to our launch ramp, and that was that. The return took only 6 ½ hours.
Wayward Lass behaved excellently. I am pleased as anything with her performance over the Strait. She handled the wind and waves with complete aplomb – the motion was smoother under sail, but even motoring I thought she did very well. Being as light as it is, the hull leaps around a bit, but always felt stable and safe, and wasn’t stopped by the 3 foot waves on the way home. Performance at the dock was equally good, although without a tarp it might be another story with more than one aboard. The motor is a 5 horse Honda short shaft with a 3 gallon remote tank – this combination is heavy, and I thought the stern was down a bit when the engine was running. When sailing, though, it wasn’t as low, so maybe I can adjust the motor angle and improve things. We didn’t know how much fuel we’d burn, so carried an extra 6 gallons. We found that we used under 2 gallons each way (imperial gallons – it was just about 2 US gallons.) The sail set quite well, as mentioned, but I’ve got to fiddle with the attachment to the spars. I’ve also got to put in those reef points.
We carried all the prescribed equipment, plus the GPS and VHF. I think I’ll buy my own Garmin GPS next year, for the extra security it gives. Even not knowing how to use all its features, we found it helpful – the most important information, your position, comes up on its own – all you do is turn it on.
The Bolgerphiles that I met in Port Townsend were Chuck Merrell, Bill Samson, Alan Woodbury, John Kohnen, Larry Barker, Jim Chamberlain, Gary Foxall, Craig O’ Donnell, Randy Wheating, Jerome MacIlvanie and James McMullen. Apologies to any missed or misspelled. I had a great weekend and plan to do it all again next year. (If I can swing it, I may go back in November for a sailmaking/repair seminar at Carol Hasse’s loft.)
Jamie

I’d like to add my own thanks to Jamie for his kind invitation to accompany him and Les back to Victoria, and also to Alan Woodbury for his hospitality.

Image40

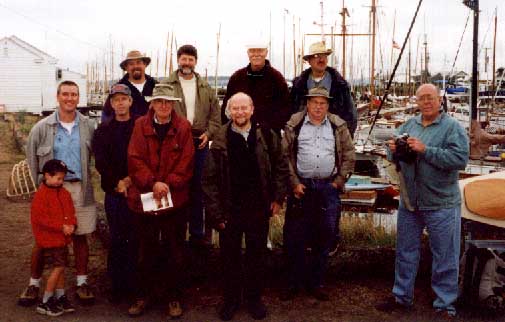
Some of the Bolgerphiles at Port Townsend – It was great to meet you all!

Hollow spars

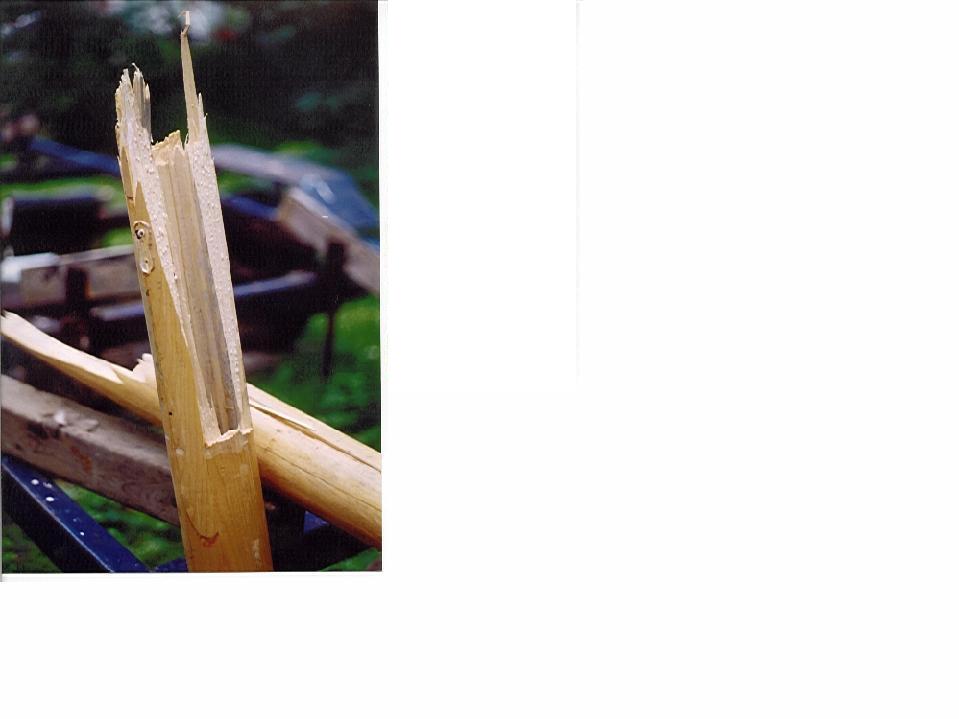
Fraser Howell recently built a hollow (birds mouth) mast for his Chebacco “Itchy and Scratchy”. One day while he was out sailing, the mast failed just above the partners! He sent me this pic of the mast:

Image41

He reports that it seemed to flatten slightly, just before it broke. He says there were no solid parts inside the mast – so that the halyards could run inside. Maybe they might have prevented it? Anybody else out there using a hollow mast of this type? We’d love to hear from you. On the subject of masts, Gil Fitzhugh is building a birds-mouth-type hollow mast for his Chebacco. When I mentioned to him that Fraser had met with this trouble, he suggests:

The objectives are 1. Strengthen the mast in way of the pressure point generated by the mast partners; 2. don’t create a hard spot somewhere else that will break; 3. salvage the birdsmouth strips I made at vast cost in time and money; 4. don’t add more weight than necessary; 5. given that building this boat has pushed me to the brink of certifiable insanity, don’t come up with a solution so complex that it pushes me over the edge. Here’s what I’ve done.


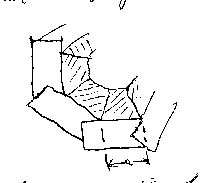
Image42If I could add a strip of shaded cross-section to each birds mouth strip before I roll the whole shebang up into an octagon, I’d have a much thicker cross section. There’d still be a hole in the middle for halyards, wires for a masthead light or whatever.

So I made 8 strips that look like this:

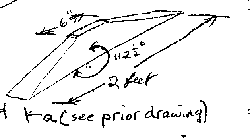
Image43I basically made them on the bandsaw . A table saw would have worked, but not as easily I think. Hand tools would have worked, but would have violated Objective 5 above. The width of the strip at the top isn’t critical, but depends on the thickness of the stock from which you cut the strips. If the stock is so thick that the top becomes a razor edge, you no longer have a hollow mast at that point.

Cutting order: 1. Make strips 2 feet long by a wide by however thick the wood is.

2. Make the diagonal cuts, but don’t go all the way through. The still-attached tails are good guides, clamping surfaces etc.

  1. Bevel both sides.

Glue the strips in place. Then cut away the shaded areas in the above drawing and clean up the Image44

surface with a few swipes of a hand plane. When gluing, clean up as much squeezeout as possible. these are mating surfaces, and what you neglect to clean up sooner will be a bitch to clean up later.

All this assumes that you cut your birdsmouths with rocket-science precision. I didn’t. Some of mine are a tad thicker on one side than the other. If you use this idea to create eight auxiliary thickening strips all exactly the same, your mast won’t work. (Guess how I learned this fundamental truth?) Not to worry. Label (number) your birdsmouth strips, so you predetermine which one is going to mate with which. Then determine the width of each auxiliary strip so it will fit properly. Sounds hairy. Isn’t. I did the whole thing in a couple of hours and made my auxiliary strips in a couple more. After everything’s glued up and the excess epoxy cut away, you test fit each pair of strips before the final glue-up. If it’s tight, whack it with a chisel or rabbet plane a couple of times. It really will work.

When the mast is done and rounded I’ll do two special wraps with glass cloth, in opposite directions, in way of the partners. My son, the engineer, tells me this will add strength.

We won’t know whether this works until we’re out in a howling gale and the mast doesn’t break. I prefer to avoid the howling gale.

Speaking of howling gales . . .

Phil Bolger was interested in my report in Chebacco News #30 about being caught out in a blow. He suggests:

Next time you’re caught out in a breeze (not necessarily that strong!) it’d be interesting to see what she will do under mizzen alone. I haven’t tried this in a Chebacco, but I wouldn’t be surprised if she could make good at least a beam reach, under good control.

I haven’t had a chance to try this out, yet, and Sylvester is now tucked up in my drive for the winter. Nevertheless, I’ll try it out next season, and would be interested to hear how any of the rest of you fare under similar circumstances.

And finally

Many thanks to those of you who wrote to me and sent photos. No more room this time. Maybe next . . .?

Bill Samson can be contacted on : bill.samson@tesco.net
Chebacco News is at http://members.xoom.com/billsamson

Snail mail to Bill Samson, 88 Grove Road, Broughty Ferry, Dundee DD5 1LB, Scotland.

Chebacco News 28

cropped-image1.gifChebacco News 28 – October 1999

Kelani Rose is Launched!

ch283

Jim Slakov’s KELANI ROSE struts her stuff.

Jim Slakov, of Sechelt BC reports:

Well we launched the Kelani Rose (daughters Kelly and Annie and wife Rose) near the end of May, and have sailed about a dozen times since then. The weather in June was abysmal and not what we call summery at all, but July and August so far have been great! As I’m just learning to sail, we pick our days, and miss the windiest ones, perhaps saving them for later. One day the wind blew about 15 knots and that was very exiting, the boat took it well and didn’t show any signs of stress. I didn’t know about lifting the centre board when running with the wind…of course we’re commiting some of the classic errors for beginners . .. like getting into irons after a failed coming about, and ending up sailing backwards for a spell ( I know now to sheet the mizzen to correct that)… the transom does drag a bit sometimes, there is a 6 horse, 60 lb. outboard on the bracket, I think I’ l l throw a little more weight up front and see what happens, it’s not serious in any case and doesn’t seem to affect the performance… the Kelani Rose will self steer when the conditions are right, and some very experienced sailors have been aboard and complimented her on her handling ability. All in all I can’t think of anything I would change were I to build another, except to put a better quality line on the centre board ( I used a cheap 2nd hand prawn line and saved maybe 50 cents), so that will have to be removed in the fall.

There is a wooden boat show in Vancouver at the end of August, in which Kelani Rose will strut her stuff and hopefully do the name Chebacco proud! Am going to get some pictures taken under sail , soon I hope, and send them off to you… signing off for now, Jim Slakov… my email address is woodventures@uniserve.com

As it happens, Jim did do us proud and won first prize in the ‘Best New Construction’ category! Kelani Rose also got an excellent writeup in the ‘Coast Independent’ newspaper. Readers of Chebacco News will be interested to know that Jim made extensive use of cherry wood in her construction, and very beautiful it looks, too. The masts are of yellow cedar and the other spars of Douglas fir. He reports that the mast is up and the boat ready to go within 15 minutes of arriving at the slip.


Itchy and Scratchy goes from strength to strength:

ch286

Itchy and Scratchy . . .

Fraser Howell continues to experiment with the sails on his strip-built Chebacco Itchy and Scratchy:

Hi Bill

It is too windy to go out today. I’ll catch up on correspondence. Last time I wrote about the set of my mainsail, leech possibly too tight, too much depth for anything but light breezes. I tried a couple of things. I replaced the mast hoops with lashings that hold the luff closer to the mast, except at the tack. This pulled material out of the “pocket” and reduced the depth of the sail quite effectively. I also restrained the boom as if with a down haul to put more tension than the weight of the boom into the luff. That tension is set by the main hoist which has a 2:1 purchase.

These measures have flattened the sail, and reduced weather helm. I think it is faster, but I haven’t sailed in company, so cannot confirm it. I increasingly enjoy experimenting with the sail shape in different wind strengths and tacks. Varying tension on the foot, luff, the angle of the gaff, size and sheeting of the headsail. By the numbers Chebaccos should be fast, but I have not found that is always easy to achieve. Some days it is no fun at all, and my boat seems reluctant to do anything easily. Other times it is a joy to sail, balanced and fast.

Cheers;

Fraser


Jerome McIlvanie makes progress:

ch287

Jerome’s Chebacco . . .

Jerome McIlvanie of Yakima WA reports:

. . .I put an extra 1/4″ ply on the bottom, glassed, sanded and painted for six months. Turned it over, fitted out the inside, moved the cabin aft six inches, put an extra bulkhead clear across between aft cockpit and seat bulkhead. I enclosed it and built in an insulated ice box as shown in WoodenBoat magazine. It doubles as a seat also. I raised the sides of the cabin 2″ and put on 1″ or so more crown in the top. I used 2 layers of 1/4″ ply glued and screwed to 4 laminated bows out of long, thin 1 3/4″ square. I cut eh hole out for the hatch and used it for the sliding hatch. I glassed the top. For the centreboard and used 1 1/4″ thick black polyethylene. It’s tough but machines nicely and is a little heavier than the leaded ply CB.

Hopefully next year it will be in the water.


Another Epic Cruise in Lark

ch284

LARK heads north to Cape Cod . . .

Tim Smith of New York City reports:

I suppose a literal-minded person would say that our Chebacco cruising season stopped for the winter, in the sense that the boat was hauled and wrapped, and the children had a school year, and there was Christmas, and snow. But all that was really an interlude between voyages, one that gave us barely enough time to work on our wish list. Item one on the list was good bedding, so we bought two Coleman air mattresses and a battery-operated pump. Next we located a pre-fab galley box, with compartments to hold pots and pans and drawers for cutlery. I had thought for a while that a rudimentary electrical system would be nice, and lo and behold, there in the West Marine catalog was a 12-volt battery, sealed in a plastic case, with two ports for cigarette-lighter-style connectors. Turns out that it fits in the well beside the mizzen step; with an extension cord run into the cockpit, it can power the GPS, lights, VHF, what have you.

Next we ordered a new mizzen. The old one had tried to commit suicide at the mooring in a gale, when the clew, which had a bronze fitment on it, came loose and beat itself to pieces.

Then we decided we needed a tender, and so built an Auray Punt during the cold months. I picked the design because it looked good for t owing and could carry four, and promised to be easy to build. It went together with no surprises, though I made the botttom out of 3/8 inch ply instead of the 1/4-inch specified. Of course the punt wasn’ t quite finished by the time the provisioning season was over.

Our Chebacco, called Lark,went back in the water toward the end of June. It’ s an easy job for one person, now that the mast-stepping slot is installed and the trailer has extra bunks. I rigged a brailing line through the beehole in the mizzen mast to help keep the new sail secure: furled it by grabbing the clew and rolling it up into a sausage against the mast, then belayed it, and lashed the brailing line in a descending spiral around the whole works. It seemed tight, though the very top of the sail was too stiff to lie down properly. Left Lark on the mooring feeling pleased.

That night a storm blew in, and it stayed for the morning. I drove down to the dyke with my son just to have a look. The mizzen had stayed furled all right, but Mother of God – the wind had lifted the whole works, mast and sail, up out of the step and halfway out of the partner, and the rig was swinging around drunkenly, wedges scattered like broken teeth. We got the mess under control, my boy learning some brand new words along the way. Evidently the small stiff spot at the head of the sail had caught enough of the gale to pull everything loose. There is one other yawl in our local waters that has a sprit-rigged mizzen, and more than once I’ ve seen the sail flapping forlornly at the mooring after a big blow. Does this mean simply that there is room in one small town for two morons? Or is there a lost art of spritsail furling that other readers may know about? We addressed the problem by winding the mizzen around an d around the mast and cleating a line to the clew, which seemed to do the trick. I’ d love to hear what others have done.

Howling wind was a theme of the early part of the summer, and we had lots of practice sailing the boat single and double-reefed – a boon , actually, because we learned a lot about her limits. One fine blustery afternoon I had three experienced dinghy racers aboard and one very game novice, and we decided to leave one reef in when we should have had two. We sailed out into Nantucket Soun d into the teeth of a 20-knot southwest wind kicking up 4-to-6 foot waves. The boat was stable and fast; the sail was exhilarating, wet, and not too alarming. Crawling forward to secure the anchor on its sprit, I got a good look upward along the mast, and couldn’ t quite believe the bend it was taking. Under those conditions the rudder seemed small, but we were pushing it. One nice thing about this kind of sailing in the Chebacco, as opposed to a conventional cat: I find this boat much easier to jibe in a big wind. We used to dread the maneuver in a Marshall 22, but now don’ t give it a second thought, and that ‘ s a handy thing in a crowded harbor.

The strong southwest wind prevailed, but we were bent on cruising and constrained by a schedule, so one Frid ay morning in July we loaded our new gear aboard and took off, intending to head for Nantucket Island, about 25 miles to the south. We decided to tow a dinghy. Big mistake. The Auray Punt wasn’ t yet launched, so the dinghy we took along was an old family warhorse, a relatively heavy design by F. Spaulding Dunbar with little rocker and a lot of wetted surface. It towed nicely as we left the harbor, then slowed our progress perceptibly as we nosed out into the sound. Then we stopped thinking about it for a while because a quite amazing wind blew up and stayed up, making a wicked short chop against the falling tide. We weren’ t traveling anywhere far in those conditions, so we turned tail and ducked into the lee of some local barrier islands for a daysail.

Near sunset we anchored by the beach, spotted couple of guys digging clams, bought some, cooked them up with garlic and white wine, and ate them as the sun went down. The new air mattresses were a great success. With the cooler on one side of the centerboard trunk and the galley box on the other they were amply supported, and we slept snugly under the boom tent, kids in the cuddy. The next morning it was still blowing like hell. With a double reef in, we headed back out into the sound to see what progress we could make.

Towing the dinghy it was tough going to windward, wet and slow. I don’t recall what the currrent was doing, but the GPS said we were making little more than 2 or 3 m.p.h., and that was up hill and down dale. When we gave up at last and reached back for the harbor, our speed didn’ t improve much: I’ d guess that the tow cut our speed in half on all points of sail. “Maybe next time we should leave the dinghy behind and take advantage of the boat’ s sailing ability,” my wife suggested. I thought of some suggestions in return, but stifled them.

Three weeks later we had another stretch of vacation and another shot at a Nantucket trip. We got provisions together and waited for fair weather, which wasn’ t long coming. On a Friday morning with a 10-15 knot breeze we tucked in a reef and headed south – a glorious sail with the wind on the port quarter, the boat happy as a mallard. With the dinghy left at home on the beach, we made the trip in about five hours. The children played blackjack in the cuddy, declining to tell us how they had learned the game.

Nantucket is an island choking on its own wealth, a Yankee playland for the gilded age. Which means, among other things, that its harbor is jammed full of fabulous boats. As we were going into the harbormouth, Endeavor, the J-boat, was coming out. And once we were well inside it was like a crowded parking lot. We picked our way easily through the fleet, sailed up to a beach at the foot of Main Street, found room enough to swing among the Boston Whalers in a couple feet of water, and waded ashore. We spent the night with friends who have a house there.

Morning came, and the weather report was discouraging. The day itself promised fair weather with a Northeast breeze, but the next couple of days were to be gray and wet. Rather than turn the children off to cruising, we decided to head for home. We wandered down to the beach – steps ahead of Bill and Hillary Clinton, in town for a fund-raiser – and found Lark aground. She wasn’ t hard aground, just stuck in the sand, bow afloat, a couple of extra inches of waterline showing at the stern. But the tide was falling, and would be for another four hours. My wife, my son and I stood backwards against the transom and heaved. Nothing. We got our hands under her, lifted, and heaved some more. She moved. Four more good grunts and she was afloat.

It was a long close reach home, a sail of about six hours in a 10-12 knot breeze and bright sunshine. The kids tried their hands at sailing. The boat hummed along; the trip was sublime. For the record, we did, finally, get the Auray Punt painted and launched. She’ s the fourth Bolger in our fleet: besides Lark there’ s a long Diablo and an Elegant Punt. The Auray Punt is a really nice rowboat, swift and steady. I’ d say she’ s a little bit less stylish in three dimensions than in two, although when she’ s coming at you head-on, showing her flare, she’ s got real panache. Towed behind the Diablo, she tracked nicely. She’ s light, so maybe next year we’ ll try towing her somewhere with the Chebacco. Or maybe not. Lark has a big heart, but she’ s no tugboat. Which means, I suppose, that my wife was right. Happily, she doesn’ t know how to find this URL, so she’ ll never know.

ch285

Tim Smith’s stretched Diablo and Auray Punt . . .


Jamie Orr and Bill Samson talk boats

Jamie Orr of Victoria BC was visiting Scotland in August and dropped by to see Bill Samson and to go for a sail in Sylvester. The ‘sail’ was more of a ‘motor’ due to lack of wind, but we O.D.’ed on boat talk and had a great time. Jamie’s sheet ply Chebacco is nearing completion and should be in the water next year. Jamie left these photos of his mast slot, which has a neat sliding cover:

ch281

Cover closed . . .

ch282

and open.


New email address and URL for Chebacco News:

Bill Samson can now be contacted on : bill.samson@tesco.net
Chebacco News is at http://members.xoom.com/billsamson

Snail mail to Bill Samson, 88 Grove Road, Broughty Ferry, Dundee DD5 1LB, Scotland.

Chebacco News 24

Chebacco News

Number 24, December 1998

ch245

Tim Smith’s Chebacco LARK – with nine(!) people aboard.

LARK (and Tim Smith) show us how it’s done –

Tim Smith writes:

Dear Bill,

Sitting down to write you an account of our first family cruise in our Chebacco, my ears are ringing with cognitive dissonance. I’ve just returned from a trip to the Royal Huisman Shipyard in the Netherlands, where the zillionaire founder of Netscape is having a boat built: a 155-foot cutter with three staterooms, crew quarters for eight, a mast that will clear the Golden Gate Bridge by 30 feet, and 40 miles of copper wire to link the 24 on-board computers. I’m thinking, if I had all the money in the world, would I want a boat like that? Sure. But I’d never let go of the Chebacco.

Our boat was bought second-hand: it was built by Brad Story for Sister Krista Mote and featured in Chebacco News No. 7. I had been planning to build one, and had ordered plans and measured the garage door, when I saw a classified ad for Sister Krista’s boat (she was moving up to a bigger cruiser to accommodate nieces and nephews, and was quite sad about the sale.) I thought, why not cut out the middleman, go sailing right away, and get a boat built by Brad himself?

We took possession of the boat in the winter of ’97, and spent much of the next summer learning to sail her out of Chatham, Mass., on the elbow of Cape Cod.

One clear lesson: she had been built without the mast-stepping slot-she wasn’t configured for trailering-but after the drama of stepping the mast on the beach with three strong friends, I knew I wanted the slot. Another lesson: She’s so beautiful that things became practically embarrassing. People followed us around. The week we launched her the local paper splashed a big photo of her on the front page, just for the sake of atmospherics. One guy ogled us from the beach with his binoculars while his girlfriend lay by his side, topless and ignored.

Chatham is catboat country, with a big population of fiberglass models, mostly Marshalls and Herreshoffs. The Chebacco outsails just about all of them. She points higher, she’s generally faster, and she takes off across the flats to windward in a foot of water, which the others just can’t do. We had a lot to learn about sailing a divided rig, but by summer’s end we were pretty confident. Except for one thing: we never did get out into a big blow, to test her limits.

Last winter I had the mast slot installed by the estimable Pease Boat Works, a local yard. They also installed a bow-eye for trailering, and removed, planed and re-glassed the centerboard, which had swollen stuck.

Summer vacation arrived, and we were ready to go cruising: me, my wife, and the two kids, ages eight and four. We gave ourselves three days, figuring we wouldn’t push it. Loaded a cooler, a propane stove, sleeping bags, a cell phone and a GPS, and took off in a light rain, telling ourselves we’d just head west along the lower Cape and see how far we got in an afternoon, maybe just to the next harbor.

The tide was with us, and the wind picked up, and we flew along the coast on a broad reach-past Harwichport, past Hyannis, and all the way down to Osterville well before nightfall, a distance of twenty miles or so. We were averaging seven or eight m.p.h. as measured by the GPS. Tucked into Osterville harbor, anchored in a shallow spot away from the clustered moorings, and settled down for the night.

That’s when we realized we’d made two mistakes. One, we forgot the garlic. Two, I’d bought sleeping pads that were too thin. The kids slept fine in the cuddy, which has thick cushions covering the whole cabin sole, but my wife and I tossed and turned on the cockpit benches under the boom tent.

Morning dawned sunny, warm, and absolutely still. Where to go? Someplace with beds. We realized that we were just a few miles across Nantucket Sound from Martha’s Vineyard, a big island where old friends have a house. My wife, Priscilla, got on the phone. Sure, they could give us a shower and a bed, and we could even tie up at their dock. So we cranked up the 4-horsepower Yamaha and motored away from land. The Chebacco (which is rechristened Lark) handled big powerboat wakes with aplomb. She generates enough apparent wind under power to make the sails draw, so there is a pleasant steadying effect. We motorsailed along, shutting the engine down when breezes came up, starting it up again when the wind died.

We reached the Vineyard by midafternoon, called again for directions, and sailed around a sandy point to our friends’ house. Henry, our host, is a person of some ceremony (he was once the U.S. ambassador to Austria), and clearly had been waiting for years for the chance to greet a vessel at his dock. There he stood, waving. When we got within a hundred yards, my heart sank: This dock had been built for swimming, not for boats, and the sharp hood ends of four-by-fours poked out wickedly every few feet. But we couldn’t bear to disappoint Henry, so we put a lot of fenders and cushions over the side and tied up gingerly for a decent interval. I put the wife and kids ashore and skedaddled, anchoring off the stony beach within easy wading distance of shore. That night we had grilled tuna, good company and soft beds.

Day three dawned with a nice breeze, and we headed back for Chatham. We had two choices: head due north to the mainland and sail east along the shore, the way we had come, or angle straight across the sound–a much shorter trip of some 30 miles, but in open water. The sky was clear, the tide was with us, the forecast was fair, and what the hell, Bolger has written that you could sail one of these things safely across the North Sea if you handled it (ahem) competently, so we made sail and headed straight across.

Before long the Vineyard was out of sight behind us and the mainland a thin line on the horizon. The wind picked up, gusting to perhaps 20 knots, and the seas began running at 4 to 5 feet. Not dramatic, but the boat signalled firmly and politely that it wanted a reef. We hove to and reefed with ease, thanks to the wooden blocks my brother had carved and screwed to the boom, not unlike the ones in a previous issue of Chebacco News.

And then we flew home. At one point, as we surfed on a broad reach in the steep following sea, the GPS registered 9.9 m.p.h. The boat’s manners were fine; our four-year-old slept most of the way in the cuddy, and our eight-year-old danced around in the cockpit, thrilled. We took a little spray aboard, and briefly considered a second reef, but she is so stiff on that second chine that it wasn’t necessary. At this speed there seemed to be some weird harmonic effect at the stern, a groaning sort of noise that came from the rudder when I hauled on the tiller. (I looked, afterwards, and nothing was amiss). We learned two things about the tiller, actually: one, when spending the night aboard, you can get it out of the way by raising it vertical and lashing it loosely to the mizzen. And two, you need every inch of it to control the little rudder in a big wind and quartering sea. My brother had been after me to cut eight inches off the tiller for the sake of cockpit space, but now I won’t do it.

By the time we reached Chatham it was really blowing, and there were very few other boats around. My left arm got a little tired working the tiller, but I suspect that I’ve got a lot to learn about trimming the sails for balance. We scudded into Stage Harbor, our home port, sailed right up to the beach, dropped the mainsail, and unloaded in ankle-deep water.

That homecoming crystallized for me one of the many things that make this boat so loveable. Sometimes it behaves like a big boat, and sometimes like a small boat. Its great virtue is that it knows when to do which. It can blast across thirty miles of open water without making you fear for your children’s safety, and then nose up to the shore and be manhandled like a daysailer. Hats off, Phil Bolger.

ch247

LARK at anchor, off an unmistakable Cape Cod coastline.

Fraser Howell has an adventure, too –

Hi Bill;

Had a blistering sail yesterday. The wind was a steady 20 Kt, gusting to 25 or 30. Started out with main only, one reef. With the wind slightly aft we averaged 6.5 kt. We had a hand-held GPS and it showed up to 8.5 mph during the gusts!! We were not as fast on the return trip. For the first time I had to put in a second reef. A wet trip with spray accumulating to about 3 inches in the cockpit over a 3 hour sail. At one time the lee rail was well under. I’ve never even come close to burying a gunwhale on Itchy and Scratchybefore. With the second reef, the sail area is only about 75 sf, and it is

difficult to tack with such a small sail area, and no mizzen.

This was the windyest weather I’ve had her out in. I was glad to have a crew, because it was hard work. The boat and rig held up well.

Cheers; Fraser

A cautionary word from Bob Branch

Hey Bill, I was just rereading the Oct issue (looking to see if the next was posted yet…) and noticed that in some owners desire to experiment with jibs they are using mainsails from other boats (eg lasers). The shape of a main is all wrong for use as a jib. The draft is in the wrong spot (too far aft) and will thus create alot of heel (not conducive to good Chebaccoing upwind) and if you increase the halyard tension on the jib (also I believe not conducive to good Chebbacoing) the leading edge of the sail will become real round… not conducive to pointing. Just tell folks to go to a local sailmaker and hit on finding a used dinghy jib. Even when old it will give a better shape than using a main off something else. But don’t say it in a non political way. (Ahhh, the joys of being a newsletter editor… how well I remember…. hmm. Hey! I now forget! Wow, is that a load off my mind!)

Bob

Bob Cushing’s Chebacco Motorsailer –

Bob Cushing sent me some great photos of his motorsailer version of Chebacco:

ch241

Chebacco Motorsailer under sail

ch242

The Chebacco Motorsailer’s roomy cabin.

Bob Cushing writes:

The pictures are of the Chebacco Motorsailer on Cayuga Lake, one of the central NY Finger Lakes – about 35 miles long – one to two miles wide – in the rolling hills, wine-making area of NY state; also the home of Cornell University and a little remaining ’60s culture, i.e. organic farming, VW vans, Vegetarian restaurants etc. Quite a nice area. There was very little wind that day, so the Chebacco was just ghosting along with Mary taking pics from shore.

When there is a good wind it handles it great – rarely needs reefing and will see up to 7.4 mph on the GPS.

Plenty of room for two in the cockpit area – could actually seat four but would be quite tail-heavy then. As you can see from the pics I’ve added a steering wheel and remote motor-control assembly on the starboard sude of the entryway to the cabin. It looks kinda odd but works great. You just pin the tiller in center position with a U-bolt when you want to use the steering wheel under power. Docking – especially backing up, is much better this way – just like a very nimble powerboat. Of course you can also use the tiller/rudder under power if desired. Wheel and throttle-shift are quick-release. Unscrew a coupla knobs and both have a second mounting position inside for power operation in really inclement weather. There’s a vent cover/gas fill/pump out fitting in the cockpit. It’s hinged and swings up to reveal a 25 gal fuel tank. Also under here is a pump-out fitting for a Porta John which meets Canadian regs.

Halyards are pulled through a rope-clutch setup with cleat behind for backup – much easier than before when I had to alternately pull and cleat off each halyard as I worked the gaff up into position. I now have two blocks on each halyard instead of one and can actually pull both through the rope clutch with one or two hands without them backing down unless I release the clutch lever (cost $75.00) – not cheap but so much easier and safer to my mind.

The interior shot shows the dinette table, access to loads of storage under the cockpit, under all bunks, john and toolbox are under the step, stove, sink, watertank and cooler all go up front ahead of the bunks.

The main hatch was enlarged to twice normal size so you can open over half of the interior for full standing room. There’s also a small lift-out hatch over the galley area and the front window swings open. All windows are tinted lexan and curved as are the sides of the house – very strong – with 1″ perimeter with many screws. There’s lots of foam floatation in front, under the outer bunks and in back under th rearmost storage areas. A large hole in the bottom would probably result in only about one foot of water in the hull.

The mainsheet swivel assembly is mounted on 1″ thick plywood which is bolted to the mizzen tabernacle. The rope traveller is slightly behind this. I’m thinking about making a solid traveller and mounting it about 3″ farther back.

The mizzen sheet pulls through a curved pipe (Brad Story copy) and then to a cam cleat – works fine and one less line.

This boat might beFOR SALE if someone really wanted it as I have the building disease and would kinda like to build an AS-29 (AS-35?), but I also really like this boat so it wouldn’t be cheap – extremely nice finish with teak floors etc

rcushing@cvsi.com

Bob has also recently prototyped Phil Bolger’s sleek Cruising Kayak design – featured in the October 3rd 1997 issue of ‘Messing About in Boats’. It has a ‘trunk’ for storing a substantial amount of camping gear.

ch244

Bob Cushing paddles the prototype of Phil Bolger’s Cruising Kayak

Light Dory for sale –

dory

Bill Parkes writes:

Gloucester Light Dory, 15 1/2 feet long, Douglas Fir Marine Ply on oak

frames, silicon bronze fastened, white oak seats, rubbing strake and

rail cap, spruce oars, all bronze fittings. $750. Trailer extra $300

Call Bill Parkes 731-1039 evenings or 787-7342 daytime; or

wparkes@budget.state.pa.us

Painting tips from Jamie Orr

I’ve been continuing with the two part paint, and thought I’d send this follow up to my last experience, in case you can use it for the News.

A few months ago I used two part polyurethane paint on the outside of the hull, now I’ve been painting the inside and found it harder because of the corners, butt blocks, bulkheads and so on that break up the surface into small sections. Because of the smaller sections, I put on the primer and first coat using a brush only. However, I wasn’t happy with the job, as the brush marks were very visible. The paint tacks up very quickly and by the time a section was covered, the paint was starting to get sticky, and hard to brush smooth. The corners and other obstacles made this worse.

For the second coat, I went back to a 9″ foam roller (WEST brand), tipping it out with a synthetic bristle brush, and ignored the corners until I had done all the area accessible by roller. (I was surprised just how much I could reach with it.) After this was done, I went back to do the corners and tight spots with the brush and a small (3″) roller with about a 1 ¼” diameter (nameless cheapo brand). By this time, the previously rolled on paint had had time to set up and so I didn’t mark it up when I brushed over the edges. I’ve switched to bristle brushes because the foam brushes were getting too flabby too fast and had to be changed frequently. The bristle brushes will last a whole session, and I like them better for poking into the corners.

I also took extra care on the second coat to have the paint at the recommended temperature so the viscosity was right (i.e. smooth and not so sticky). With the lower daytime temperatures now, it helped to store the paint indoors the night before, and I watched the thermometer for the right time to start painting.

I’m pleased with the results. After the first (all brushed) coat I was pretty fed up, but the second coat has cheered me right up. Using a roller gets a much more even coat, and does it faster and more easily to boot. Even the little 3″ roller made the tight spots easier.

I didn’t have enough paint on hand to do both coats the same day, so I had to sand to take the shine off the first coat. If I were doing it over, I would arrange to do the second coat right after the first – this would save the sanding and (possibly) give a better bond between coats.

To keep the toxic paint off me, I used the same disposable overalls and organic filter mask, sleeve protectors and gloves as before. I’ve had trouble with safety glasses fogging up, so often don’t use them with resin or paint. However, this time I got a scare with the primer – as the brush came off the edge of a bulkhead, some paint splattered, and at least two tiny drops hit my face, one at the corner of my eye. Luckily, it didn’t do more than sting for a second, so I guess the tears washed it out almost before I realized what had happened. I’ve since found that with new and stronger elastic on the face mask, and with it tightened right up, I can wear the safety glasses longer – even got through the whole session last time without having to take them off.

Merry Xmas!

That’s all we’ve got space for this time, so some material will need to wait for the February issue. Nevertheless, keep your photos and stories coming in. Have a good festive season.

Bill Samson, 88 Grove Road, Broughty Ferry, Dundee DD5 1LB, Scotland

wbs@sol.co.uk

Chebacco News 20

Chebacco News

Number 20, March 1998


SYLVESTER makes an overnight trip

We don’t get much news about trips in Chebaccos, so here’s an account of one I did on 5th August 1997. It’s based on notes from SYLVESTER’s log (Yes! I keep a log of all my trips – Is that sad or what?). Low water was due at 11 am, so I got down to the shore at 10, rowed TWEETIE-PIE (my June Bug) out to SYLVESTER and got her ready.

lei0016

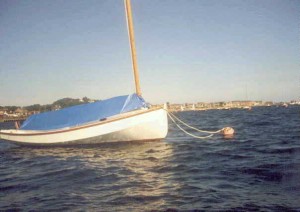
SYLVESTER at her (his?) mooring

I was underway, single-handed, in a force 3 Easterly, at slack water at 10-30 am.

The Tay is a rather shallow estuary, with loads of sandbanks and very few buoys to show you where they are, upriver of Dundee.

lei0013

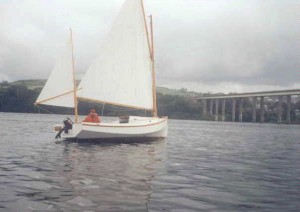
Heading upriver, towards the Tay Road Bridge.

It was my intention to get upriver to the Earn – which enters the Tay from the South, just West of Newburgh – and to motor up there to Bridge-of Earn. But . . .

estuary

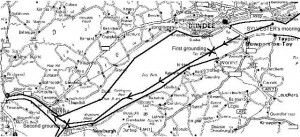
The route taken by SYLVESTER (The total extent of this map is about 25 miles E-W)

You’ll just be able to see, on the map above, that there are two bridges across the Tay. The Easternmost is a road bridge, and the other is a rail bridge. I had a pleasant run upriver until I passed under the rail bridge. Just beyond the bridge I ran aground on a sandbank, but the flooding tide soon lifted me off again.

taybridg

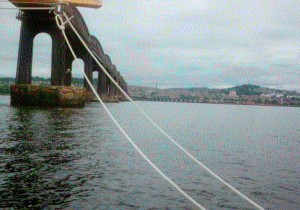
Just about to pass under the Tay Rail Bridge

From then on, I paid close attention to my charts, and avoided the sandbanks, most of which are on the North side of the river. The banks are complicated around Newburgh, but there are some pint-sized buoys to allow boats to thread their way among them. The locals amuse themselves on a nice afternoon by watching yachtsmen come to grief – often having to spend the night on a bank!

towing

TWEETY-PIE (a June Bug) towing astern – Tay Rail Bridge in the background.

The mouth of the Earn is not far beyond Newburgh, and I headed for it. Unfortuately, no-one had warned me that you need to keep well out in mid-stream before turning up the Earn, so, once again, I ran aground. By this time, the wind was gusting force 4 or 5 and things got a bit fraught. Even though the tide was flooding, I kept getting blown higher up the bank. I dropped the sails and started the outboard, hoping to motor off the bank. Unfortunately, the propellor had an argument with some rocks and the shear-pin broke.

My only option, now, was to continue sailing – The Earn is too twisty and narrow to sail up, so I decided to continue up the Tay. I eventually managed to pole myself off the bank and made my way under main alone up to Inchyra, where there are some moorings on the North side of the river, belonging to the Civil Service Sailing Club.

inchyra1

At anchor – Inchyra.

I dropped my hook (a 15 pound Danforth), replaced the broken shear-pin and rowed ashore. I had brought the June Bug with me, under tow. Two of the Civil Service guys were there and made me very welcome with a mug of coffee. They also pointed out a spare, permanent mooring that I could tie up to for the night, and save me the trouble of anchor-watching when the tide turned.

Having moved to the mooring, I rowed ashore again, tied TWEETY-PIE to the jetty and walked the mile and a half to the nearest pub, the Glencarse Hotel, for a pint and a sandwich. I got back to the jetty a couple of hours later, about 9pm, and found TWEETY-PIE dangling by her painter down the side of the jetty – It was approaching low water again! A hot drink, contemplate the sunset, then off to bed.

inchyra2

Sunset at Inchyra

Next morning, I got up at 5am, had breakfast, and set out at high water – 6am. There was no wind, so I motored back all the way, dodging the sandbanks, and got home at 9.30.

Verdict? I don’t think I could have been happier with any boat, than I was with SYLVESTER (and, of course, TWEETY-PIE).

More about Reefing systems – a two-way conversation

Following Brad Story’s account of the reefing system he uses on his Chebacco, Bob Branch got back to me with some suggestions of his own. This led to a two-way discussion of possibilities that may be of interest to Chebacco-riggers.

Bob wrote:

Thanks for issue #19. Another good job as always.

That was a nice pic of the “c” under construction under the lean too. [Jamie Orr’s hull]

A suggestion on the reefing system Brad demonstrated. Works nice but those

cleats on the boom can be a problem when reefing… trying to find them on a

flailing boom, stuck under the sail cloth, and you head having to be in such

close proximity to the boom (a bad idea in heavy weather in any boat from my

experience.) The reefing system I have used on a number of offshore boats is

just a mod of the one Brad sent. It brings the topping lift and the clew reef

lines to the mast and then turns them to the cabin top to cleats on the aft

end of the cabin. I know it adds the cost of a few blocks and sounds like a

bit of spigetti. But I have routinely used 3 reefs, topping lift, boom vang,

and in sloops all the jib and spinnaker halyards (though I reversed my

thoughts on those if much single handing is done without roller furling {never

roller reefing} on the headsail. It gets the crew out of the cockpit (where

its weight ought not to be) and puts the jib halyard at a more convenient

location for a controled sail takedown for the solo sailor). Anyway, it can

all be done very neatly. When you are reefing with this arrangement you are

not AT ALL dependent on control of the boom. In fact I get it the heck out of

the boat completely. I take up tension on the topping lift first so the boom

will not drop AT ALL during the reef. I ease the main sheet way off till the

boom is out of the cockpit completely (and away from my precious skull). Then

I lower the halyard and secure the tack (take in the tack reef line) tightly.

The main halyard is tensioned… very tight so the draft in the sail winds up

in the forward part of the sail when the sail is set. This is critical for

pointing upwind in a cat rig. The clew reef is then taken in and tensioned to

the max. You need this tight to really get a flat sail which is what you are

looking for just as much as sail area reduction. Now I haul the mainsheet and

away we go. Note, I didn’t do anything about the excess sail cloth. Right. If

the outhaul was tight to start with (which it should have been because you

were already at upper wind range prior to the reef) and the reef outhaul is

tight (which it should be) The excess cloth will be in a fold or two very

tightly against the boom. Even with a second deep reef in a high aspect main I

have NEVER found it necisary to tie the excess cloth. If the boom doesn’t have

adequate cockpit clearance or cabin top clearance to keep the sail cloth clear

you might have to but now the boat is back under control, the boom is under

control and not swinging around, and it is a simple matter of two ties at most

for the entire sail. The boat isn’t pitching anymore either! And ya never left

the cockpit. One little detail. When you make your sail or order it from the

sailmaker, be sure the reef clews are a little higer than just a perpendicular

from the mast. You want more angle upwards for the boom when you reef… so

the cloth has the room it needs, and so your precious skull is further from it

too.

I now it won’t happen in a Chebacco, but true luxury in sailing is NOT to be

found below decks. It is a boat whose boom is always above your head, during

normal sailing, tacking, jibing, and when reefed. Ahhhhhh. Peace of mind.

Keep the scratched side down, (your shallow draft Chebacco does have a scratch

I hope… otherwise you aren’t in the water it was designed for.),

BOB BRANCH

I replied:

Dear Bob,

Many thanks for your sensible suggestions re: reefing. It wouldn’t be practical in my Chebacco as it stands, because there is no gooseneck to hold the inboard end of the boom at a fixed height – something that I think’d be essential when a line comes off the inboard end of the boom to a block at the mast-foot. Otherwise the halyard tension would be working against the reefing line tension with potential mixups if one or other is slackened off. My Chebacco boom has jaws at the mast end and no tack downhaul – the weight of the boom is enough to flatten the sail. The trick is to balance the tensions in the throat and peak halyards.

Having this setup, I can raise or lower the entire sail/spars. I normally keep the boom above head-height. The only discomfort that can befall the crew is being throttled by the mainsheet in a gybe!

Yes, I do have a few honourable scratches on the bottom of SYLVESTER. Fewer than I’d expected given the horrible grinding noises when I ran aground last season. I have a galvanised steel strip around the keel which bears the brunt of such navigational misjudgements!

I’ll put your thoughts into CN#20 – some of the guys do use goosenecks and could benefit directly by adopting the system you suggest.

Bill

Rudder Issues

Burton Blaise emailed me regarding some concerns he has about the Chebacco’s rudder. My reply is printed below. His words are in italics –

Hi Bill:

Hope things are well with you. I am back at my workbench trying to do whatever I can on my Chebacco project in my small heated workshop. I am contemplating building the rudder so that it is ready to be attached to the hull in Spring. Looking at the plans, it strikes me how small the rudder appears – not much more than 1.5 square ft total area – and I wonder how such a small rudder can effectively steer such a (relatively) large boat. After all, the rudder blade for my Gypsy (which is a much smaller & lighter boat than Chebacco) is significantly larger. In your experience, how well does Chebacco respond to her helm? I worry that the rudder as shown might make for poor steering ability!! I realize that this design does have a bottom plate for extra “bite” when heeled, but I still worry that the rudder surface is much too small for a boat of this size.

I worried about the same thing when I was building, but Brad Story reassured me that it wasn’t a problem. He was right. The only anxious moments I’ve had were immediately after letting go of my mooring, before SYLVESTER had gathered much way, trying to steer the boat before being swept against the other moored boats by the tide. Mind you, the sail and CB have as much to do with steering as the rudder, and I haven’t had any problems since I got used to that aspect. I suppose that if the boat heeled a great deal, the rudder might come clear of the water – again something I’ve never experienced. I understand that some boats with much larger rudders are tricky to steer – Peter Bevan tells me that the Light Schooner won’t respond to the rudder unless the sails and CB are set just right.

You need to pay close attention to the steering when surfing downwind, but that’s the case with any boat. I’ve never felt in danger of losing control.

I also have a question concerning the pintle and support structure for the entire rudder and its post. From what I gather from the plans, the entire weight of the rudder assembly is borne on the pintle, with main support for the rudder post where it comes through the mizzen mast partner (which is strengthened with a small steel plate where the post comes through) – is this correct? If so, what stops the rudder from riding up and down, and possibly scraping against the bottom of the hull (especially in wave action?)? Should there be some kind of stop on the rudder post to prevent this action, or does this simply not happen at all?

Yes, it does ride up and down. Mine has about 1/2″ of vertical play. There’s no sign of significant wear, though it is a little looser now where it passes through the mizzen partner. I’m sure that this is as much to do with side-to-side movement as up and down, when sitting on her mooring. As a matter of interest, I’ve put a thick nylon washer around the pintle to take the wear and reduce friction.

Also, the plans appear to show a free flooding rudder, but I really wonder if this is necessary. Surely weight cannot be an issue here, since the space between the two plywood rudder cheeks has such a small volume as to be almost negligible.

Sure. But the main idea is to let water out. There’s always a danger of water getting trapped in any hollow structure, no matter how well sealed it is. I regard these as drain holes.

Also, if I use steel for the rudder post assembly, what is the best way to keep the lot from rusting? I had considered aluminum or stainless steel for the job, but I simply do not have access to the proper welding equipment, etc.. How did you handle this?

I got mine welded up from mild steel, then sent it off for hot dip galvanizing. I got a blacksmith to do the fabrication of the rudder stock and pintle and it cost me 25 pounds. The galvanising was another ten. So far, it’s held up well. When it rusts significantly I’ll take it all apart and send it off for re-galvanizing.

Bill

More on Rudders

Jamie Orr writes:

I’ve found a “retired” machinist to make up the rudder fittings in stainless steel. I wanted to use bronze where I could, but was told by at least two outfits that bronze was best cast, not welded/brazed. Also the flat stock is hard to obtain. So, since casting a single set of fittings is a bit expensive, I’ve yielded to the experts and plumped for the stainless. The lower rudder fitting is made out of 1/8th stock,

bent up around the skeg, with lower sides at the back part as well to add strength, making a 3/4 “cup” around the bearing. This fitting is already bent and welded to shape, but hasn’t got its pin or any holes drilled yet. The rudder post will be 1+ 5/16 stailess tubing, a bit thinner than called for, so I’ll have to fair in the rudder to the post. I’m having the straps welded on as if the rudder is only 1+ 5/16 as well, to get a longer weld — that is, a full 180 degrees on the post. I’ll cut down the rudder to fit in way of the straps — should be strong enough with the framing backing it up.

My machinist is also making nylon bearing/bushings for the bottom and at the tiller. The lower one will be wider at the bottom for the post to sit on, with the upper part fitting inside the rudder stock, and the pin hole drilled up through the nylon. The top one will be a bearing as well as pad out the width of the rudder stock to match the tiller width – stainless again for the rudder straps.

I’m trying to decide how high tech to go in paint, and whether to bother with bottom paint on a mostly trailered boat (probably not). I don’t want to go the length of a two part polyurethane, despite the finish, but I am considering the one part “Brightsides” mentioned in the Bolgerlist from time to time. I’m also very tempted just to go with a

good quality enamel, on the grounds that I won’t have to learn any new painting techniques or take up chemistry.

Jamie

And finally . . .

That’s all we’ve space for this time. I hope you enjoyed it. Keep your letters and emails coming!

Bill Samson,

88 Grove Road,

West Ferry,

Dundee, DD5 1LB,

Scotland.

Chebacco News 07

Chebacco News

Number 7, January 1996

We have something of a breakthrough in this newsletter, in that it is mostly concerned with sailing a Chebacco. Sister Krista Mote has been sailing her Chebacco in company with her friend Sister Donna Marie in the coastal waters of New Jersey, for the past four years. Here is her story . . .

‘TOULOUMA TOO’ (1)

I recently had the pleasure of meeting Bill Samson while he was staying with Gil and Joan Fitzhugh. The following notes are an attempt to comply with his request to write about TOULOUMA TOO.
Before I set forth the joys of sailing a Chebacco, I’d like to briefly explain how we became acquainted. My brother’s children learned to sail on a beautiful Beetle Cat – TOULOUMA. Aunt Mary (that’s me) was their frequent companion, but they were eventually lured away by more exciting companions. Just around that time, Sister Donna Marie from California, came to live at our convent. After taking her sailing once, T knew I had found a kindred spirit. We had many joyful experiences camping in the Beetle Cat. I eventually complained that we needed more space and comforts to accommodate our increasing age and desire to cruise longer distances. Harry, my brother, said, “Look around.” What a great idea.
Growing up looking at wooden boats and later, camping in the Beetle Cat, develops an acquired preference for the way boats look; an attitude which may be considered snobbish by some. Needless to say looking for a boat to replace the Beetle Cat was a frustrating experience until Harry showed me a picture and article about the Chebacco. It was love at first sight, and the rest is history.
Now I’ll tell you about my Chebacco and what you might expect with yours. I guarantee you that you and your boat will develop a lasting friendship. The personification established by referring to boats as “she” will become more real as you discover and appreciate this boat’s unique personality. You may even find yourself “talking” to her. Example: I occasionally entertain a fanciful thought (only when a weeks cruise is inconveniently interrupted by an all-day rain or two) of a bigger boat with a cabin, standing room and accompanying amenities. The dream is quickly dismissed when morning dawns buoyantly sunny again, the huge white sail is raised and we’re off on another glorious adventure. I apologize to my dear boat and assure her that she is too beautiful, too agreeable, and too much fun to ever part with’.
“How do I love thee? Let me count the ways”-

SHE’S BEAUTIFUL: The fun of sailing a Chebacco is enhanced by echoes of ooh’s and aah’s as she catches the eyes and interest of on-lookers. We’ve been docked in line with a variety of impressive yachts. Boaters will pass by these lavish modern vessels and stop in their tracks to admire and ponder our Chebacco. We often remain in the background and enjoy watching people walking around her, examining every inch. Now and then other sailors will actually pursue us to offer their praises and inquire about her origin. She’s a conversation piece, and it adds to the camaraderie on the water.
SHE’S FAST: I do not consider myself a competitive sailor. My sailing skill does not measure up to the standards required for racing. However, I will confess that I frequently find myself secretly competing with other boats of the same size or slightly larger. I can usually catch up with, stealthily overtake or keep ahead… at which times TOULOUMA TOO is the “Cat that swallowed the canary,” and I, the proverbial grinning Cheshire. Going to windward this is not always so. Then I think about adding a jib. She’ll get you to your destination (when you have one) sooner than you may wish. After all, the fun of sailing is getting there.
SHE’S EASY TO SAIL: The joy of sailing a Chebacco is found in her easy handling. A child could sail this boat. She’s so easy, she’ll make a beginner look like an “old salt” in other words, a professional. She’s responsive even in a light wind and can be sailed efficiently with a double reef in winds ranging from 20-25 knots. If the center board gets jammed “up” you can use the mizzen to assist in coming about if need to. In Dan Segal’s article, “Chebacco 20: Evolution of a Civilized Daysailer” (see Wooden Boat: July 1991) – claimed – “With some tweaking, she will steer herself.” It is true. I have had fun experimenting with this and have perched myself upon the fore deck and watched her sail. Suspecting this could be dangerous, I’m intensely alert and only practice this manoeuvre far away from other boats.
SHE’ S COMFORTABLE: Even though the cuddy is small, it’s very accommodating for a couple of sleeping bags. You’ll be as content as two peas in a pod. We previously used air mattresses and are now replacing them with custom fitted 4″ foam sleeping cushions. The latter will take less space in the cuddy and eliminate our exertion in blowing up each night as air is-lost. Some time after the sun sets, we rig our cockpit tent and presto, instant additional shelter
seven1
Toulouma Too – showing boom-tent.
We sit on the floor, allowing plenty of head room as we rest our backs against a cushion .
seven2

seven3
We play cards, listen to a book tape, have a snack, and eventually say our prayers of gratitude. Sometimes we just talk as we’re rather silent during the day, not wanting to disturb the serenity of each tranquil moment. When we awake in the morning, everything that is stowed in the cockpit from the cuddy is nice and dry being protected from the cool night’s dew by our tent. When you have discovered that perfect anchorage” for the night, you’ll bless the mizzen for keeping you up into the wind, especially while rendezvousing with friends while moving in a curving motion is undesirable.
SHE HAS A SHALLOW DRAFT: Due to the shallow draft, we have the advantage of being able to explore alluring shorelines, shoal creeks, and coves. We can even beach her for a picnic if we choose. This wonderful feature provides us with the opportunity to witness nature “up close and personal.” For instance, one night during our last cruise, we chose an anchorage in two feet of water, about ten feet from the lovely picturesque shoreline of Island Beach State Park. As we lazily watched the sun set, we were suddenly joined by a beautiful red fox. He boldly trotted along the water’s edge pausing intermittently and indifferently looked us over. I guess we were more impressed with him than he was with us. This is the sort of delightful experience sailors with deep keels are denied. The next morning, we stepped off our boat and ventured along the same charming shore, observing nature’s opulence. Stepping off in four or five feet of water would not be nearly as convenient. In addition to the convenience of a shallow draft, is the fact of a relatively short mast. Due to the gaff rig, the mast is short compared to other boats of similar length (about 20′ minus the gaff spar). You will be very happy to discover that you can motor or sail under many bridges that others cannot.
SHE HAS STORAGE: There’s sufficient storage to certainly satisfy most sailors needs. On the other hand, storage may become just adequate depending on individual needs and the duration of the cruise. You may be forced to set priorities. Sister Donna Marie and I are gradually improving. However, we find that when we sacrifice one object, it quickly gets replaced with something else. For instance, we eliminated one or our two ice coolers and replaced it by an Origo alcohol stove which proved to be a great decision! We have learned to simplify our menu and get along with less clothing. Fortunately for we who sail in the back bays of New Jersey, there are many marinas equipped with showers. Yacht clubs are especially hospitable in sharing facilities.

Here’s where we stow it:
1. 1 can’t imagine stowing an anchor anywhere on this boat except on a bow sprit. I am forever grateful to Harry for identifying the need to do so, before she was built.
2. What do you do with wet wash cloths? Harry made me a beautiful little wood towel rack, fastened forward in the cuddy.
3. Wet bathing suits are stowed in the motorwell, so are gas and water.
4. PFD’s fowl weather gear, plus a variety of nautical non-necessities are readily available from the spacious lazerettes. [- there are hatches opening onto the chambers either side of the motor well (Ed.)]
5. Toiletries in an adapted spice shelf
seven4
6. Sleeping bags are stowed in the bow.
7. Pillows and sleeping gear in the hammocks. [- slung under the side decks in the cuddy. These are little hammocks – not for sleeping in! – BS]
8. Food and drink under the bridge, inside cuddy. [Toulouma Too has a bridge deck, providing storage at the aft end of the cuddy. Builders who have not included a bridge deck but have followed Phil’s plans to the letter will find adequate storage under the side benches, accessible from the cuddy – BS]
9. Docking lines, plus all kinds of little gadgets, weather radio, sun tan lotion, bug spray etc. are tucked away under the motor well in the cockpit. Oh yes, the first aid kit is under there too.
In conclusion, as a credit to the above praise, I need to point out the following: As a result of our (Harry and I) trial sail with Mickey (owner of a Chebacco in Massachusetts – 1990), Harry identified several alterations to be made before Brad Story built my particular boat. Brad was sent a list of requests pertaining to planking, framing, aft end of cockpit, centerboard, mast partner, stem, anchor sprit, rig, mainsail and mizzen. These mutations have made this “Cat” exceptional. All this added to the fact that it was built to purrfection by Brad Story. I might boast of having the most desirable “Cat” of the litter.
Observation: The “yachty” Chebacco pictured in news letter *3 April 1995 is TOULOUMA TOO. Actually, I think she is referred to as The Story 20.
For anyone who is curious about the origin of the name, TOULOUMA. My dear Uncle Gus suggested the name for the Beetle Cat after reading Alone in the Caribbean, by Frederick Fenger. The word TOULOUMA is from the Carib Indian language which means “pretty girl”. The Carib Indians are the people who live on the windward side of the Leeward Islands. Harry thought it was very appropriate for such a pretty boat.
PS Harry has a great respect for Phil Bolger’s work and owns a Shearwater. We had the pleasure of talking with Phil over tea after our sail in 1990. It was a charming and memorable experience.
seven5
Phil Bolger with Sister Krista on board ‘Resolution’.

‘TOULOUMA TOO’ (2)

Joan and Gil Fitzhugh went sailing with Sister Krista and Sister Donna Marie in mid-October. Here’s what they have to say:
Joan and I had a delightful sail with Sister Krista and Sister Donna Marie last Sunday. I’ll pass on my impressions, but remember that they’re from the standpoint of a very inexperienced sailor. . .
Sunday was overcast, cold and blustery. Wind was 10-12 kts near shore, 15-20 out in the bay, with higher gusts. Waves weren’t very high, maybe a foot, but the water was heavily wind-streaked and about a third of the waves had small whitecaps. As you know, Sister Krista’s boat was modified by adding 300+ lbs of inside ballast, and by raising the mast a few inches. As you probably didn’t know, her centerboard was jammed in the up position. She doesn’t know the source of the problem, but expects to have it corrected at the end of the month when the boat is hauled out of the water.
We motored out into the bay and raised the mizzen. The boat pointed itself into the wind and behaved docilely, while Sister Krista raised the mainsail, into which she had already tied a single reef. We whizzed off on a beam reach, with Sister Krista concerned that a second reef might be in order. After a while I took the tiller. The boat held course fine in a steady wind, with just a bit of weather helm, but I found the gusts a bit off-putting. (I hadn’t sailed anything in a year and a half, and had never sailed a yawl, so recognise that all my comments are filtered through my inexperience.) A puff would make her round up sharply into the wind. Considerable pull on the tiller would point her back on course, but with a lot more heel. Sister Krista decided a second reef was a wonderful idea! She sheeted in the mizzen and Sister Donna dropped the anchor (Barnegat Bay is shallow enough to anchor in most places). Tying in the reef was a non-event, since the boat is a pretty steady platform. With the anchor raised the boat was transformed. Very pleasant and non-scary, even in gusts.
I wanted to see how it would behave close-hauled. Answer: fine, though with the board stuck up we seemed from the angle of the wake to be making about 15 degrees of leeway. Even so, true upwind progress was possible, though slow. With the board unjammed I’m sure it would have been great. Coming about was easy if the mizzen was used for some steering help.
An easy intentional gybe soon had us surfing downwind at a rollicking clip. Then Joan sailed it and she, too, enjoyed it.
Since home was directly upwind, and since Sister Krista had plans for the afternoon, it was time to head back. After three or four long beats, it was apparent that a) home was getting noticeably larger, and b) it was nonetheless not doing so fast enough. Sister Krista got the sails down , again with no apparent heroics, and we motored in. The 4-horse was more than adequate to punch through the wind. The access to the dock was directly crosswind, and the drift was considerable, but the engine and Sister K’s tillerwork were able to get us in. By the way, Phil Bolger says that you can steer with the tiller and the motor will pivot appropriately, but I noticed that Sister K climbed to the stern and steered directly with the motor whenever we were under power.
All in all, Joan and I came away from this sail much relieved – a lot of our money and my time has been going into this boat with nothing but a belief that everything would be copacetic [I like that word; ‘US colloq.’ it says in my dictionary – BS]. Until recently we’d never even seen a Chebacco, let alone had a sail in one. We’re now persuaded that we’ve chosen a suitable design. We’ll gain experience slowly – I doubt our first few sails will be in as much wind as we had with Sister K – and, since our boat will live on a trailer, we don’t have to wait ’til end-of-season haulout to unjam the centerboard.
‘NENCIA’ News, too from Alessandro Barozzi, of Italy. In Chebacco News #6 there was a photo of NENCIA, his Chebacco without a cabin and with self-draining cockpit. I asked Alessandro how this worked and he wrote to me. [Inaccuracies are my responsibility, due to the shakiness of my Italian.]
Casavecchia has incorporated a self draining cockpit simply by leaving out the footwell and making a single bridge from the third station to the stern, resulting in what he calls ‘a party boat’; in fact I believe that half a dozen Japanese Sumo wrestlers could dance a minuet on it!
He also comments on the relative merits of lapstrake vs sheet ply he says –
I agree with you about the elegance of her lines, but I am convinced, having spent a summer with NENCIA, that in all probability the more practical version is the one you have made [sheet ply]. The clinker hull is too inclined to splinter at the least bump and I suspect that it is also considerably heavier.
I’m not sure I agree about the heaviness, since the sheet ply version is sheathed in glass and epoxy. He goes on to say that he is tempted to raise the freeboard of NENCIA and improve the accommodations and is thinking of how this might be achieved without sacrificing the aesthetic properties of his boat.

News from builders

Fraser Howell of Nova Scotia has e-mailed me to say that his hull is now painted with dark blue two-part gloss paint.
Bill Meier of Connecticut has started building his lapstrake Chebacco-20, upright. It will be interesting to hear how well this works out when compared with Gil Fitzhugh’s inverted technique. Bill writes –
As the leaves begin to fall I’m finally beginning to see some progress on the boat. I spent the better part of the summer on assorted parts but didn’t start putting anything together until September. As things stand now, the backbone and bottom assembly are set up, the molds are positioned and I have the plank lands marked. Since I’m building upright, marking off and fitting the first plank forced me to spend the last two weekends lying in sawdust and shavings on the concrete garage floor. This coming weekend I’ll do a final dry fitting and then permanently fasten down my first plank.
When I joined the bottom pieces I tried the technique of scarphing plywood by hollowing out a six inch groove along the joint and filling it with fiberglass matting and epoxy. My poor disk sander complained, the dust was everywhere and it took me three batches of thickened epoxy before I got a fair surface. I decided that it was more pleasant (as well as cheaper and faster) to cut the scarphs with a sharp hand plane so that’s my current strategy. Four down and twenty to go!
The only significant change to the construction drawings I’ve mad to this point is to build a solid keel. I was concerned about the durability and longevity of a hollow keel, so I agonized more than a few nights about alternative constructions. I wasn’t thrilled about working (or paying for) large pieces of white oak so I finally settled on the technique of building the keel from lifts sawn from construction grade 2×6 Douglas fir, which also eliminated the need for separate cheek pieces. The lifts were cut with a skil saw, fastened with 3M 5200 adhesive and 20d bronze ring nails, planed to final shape and soaked in Cuprinol wood preservative. I nailed from the bottom up so that I could plane the curved top surface. A hickory shoe was added to the bottom of the keel for those unexpected rocks lurking just under the surface. Three-eighths inch bronze rod will be used to fasten the keel to the hull at strategic points. I’m not completely happy with my choice of Douglas fir, but the boat will be kept on a trailer most of the time and I’m hoping the Cuprinol will keep it healthy for more than a few years.
Keep up the good work. I’ve been thoroughly enjoying the newsletter.
Regards,
Bill Meier

Gill Fitzhugh tells me that since he flipped his hull he is battling against rainwater getting under the tarp. He also writes –
I’ve been cleaning up the inside, especially forward of station 5 where the inside is visible. There’s a fairly simple way to clean up the joints between strakes, although old spilled epoxy is hard on cutting tools. It involves a rabbet plane . . .
He goes on to explain how the plane can clean up the epoxy runs at the plank lands. Gil also commends the plank bevelling technique shown in the November/December issue of WoodenBoat: –
Gee, I wish I’d known about that, or thought of it myself! Instead of temporary molds, I could have built in the permanent ones. With molds in place the rollover could have been done with three or four people. The result would have been more accurate and cheaper. And round battens with no twist? Brilliant! I’m impressed all over again by the potential for the human race when someone can create a quantum leap in simplicity and accuracy for what’s essentially a backyard process that’s been going on for centuries.

Gil also pointed out a transcription error (mea culpa) in his table of offsets –
The height of plank line EF at station 8 is 2.1.3, not 3.1.3. The other numbers are the ones I sent you.
I’ve now corrected my master copy, so if you’d like a fresh copy with the correction, please get in touch.

Roots . . .

Lofting takes Gil back to his days as an actuary –
I kind of enjoy lofting. It’s a bit like graduating a mortality table from raw data, but the result is so much prettier.
Hmmm . . . This takes me back to the origins of my own interest in woodworking; my father was an undertaker. . .

Keep in touch

I’ve had particular fun putting together this issue of Chebacco News and would like to express my thanks to all our contributors. Please send me your stories, views, opinions, challenges, insults, . . .

Bill Samson,
88 Grove Road,
West Ferry,
Dundee DD1 1HG,
Scotland.

e-mail – mctwbs@river.tay.ac.uk