Chebacco News 62 – 11 years and counting, a cedar strip build

Received from Dennis Gamble recently:

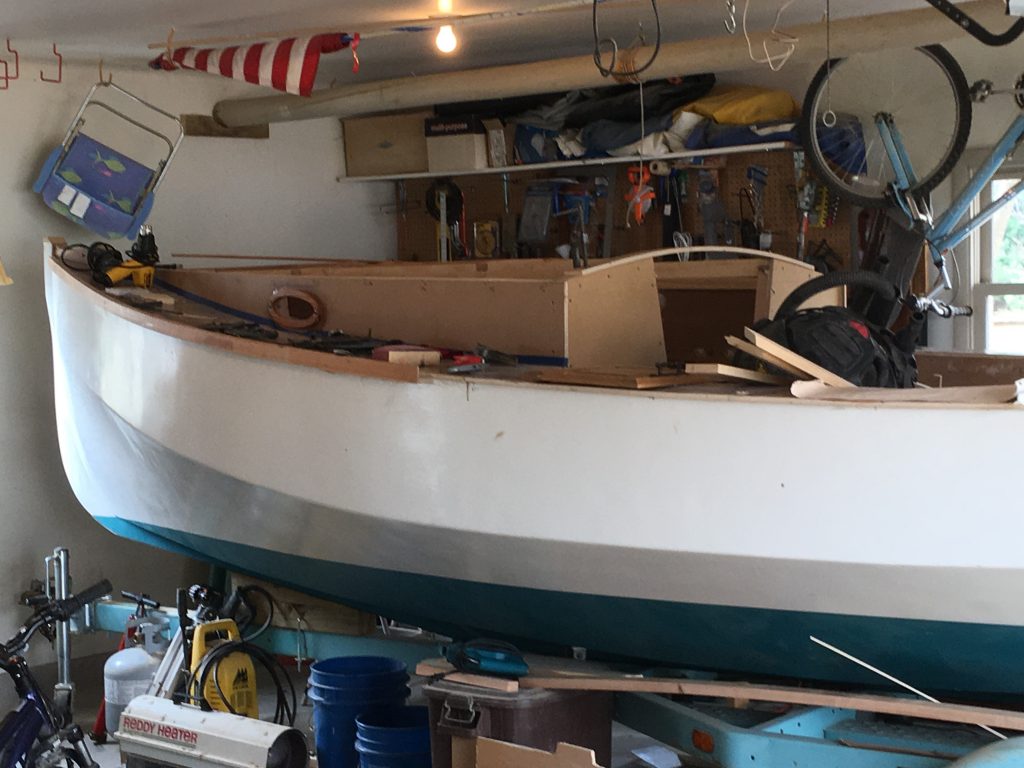
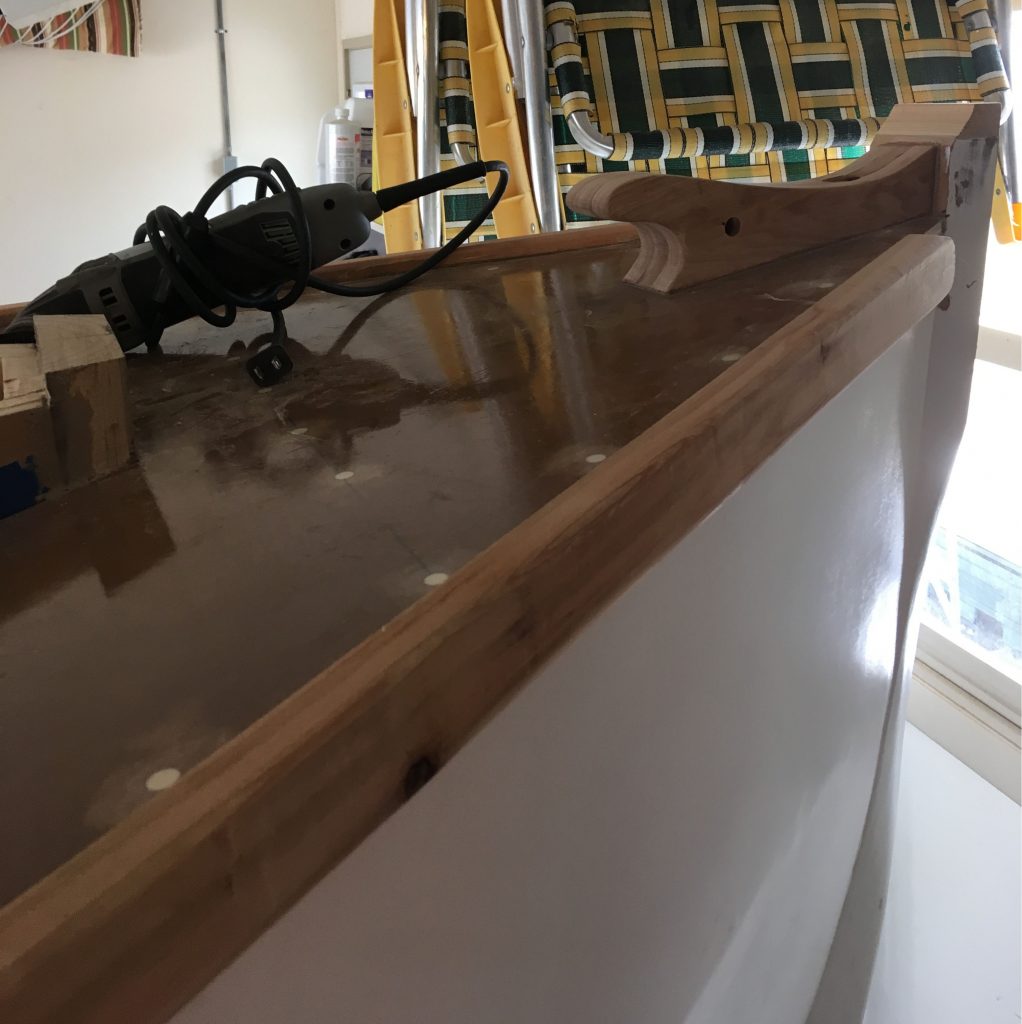
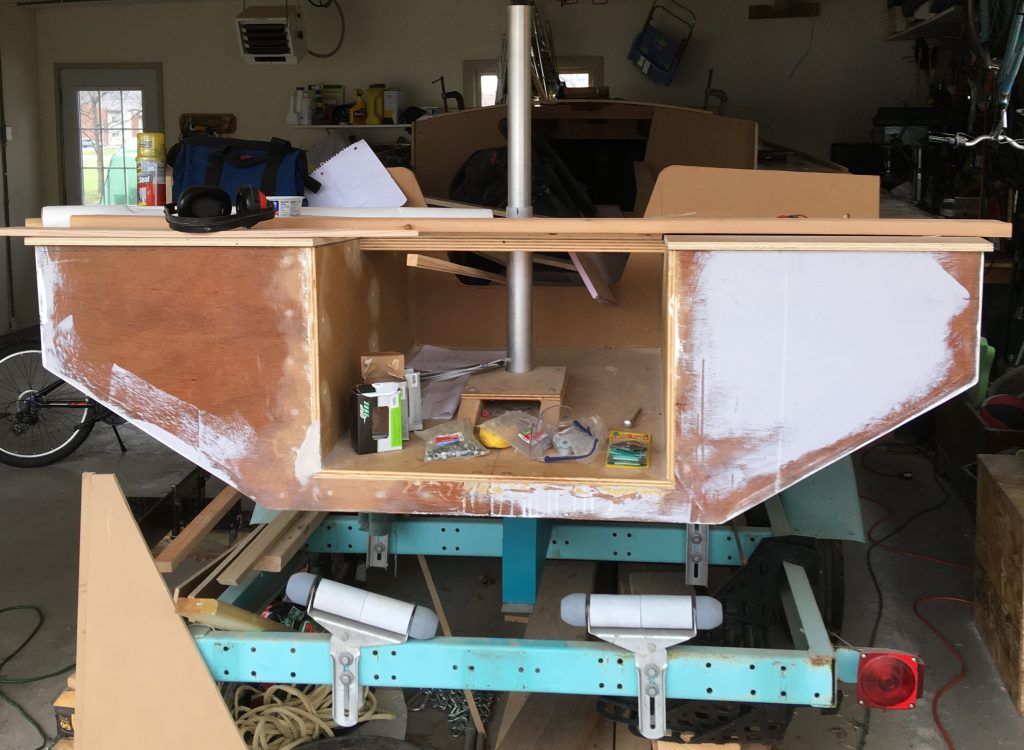
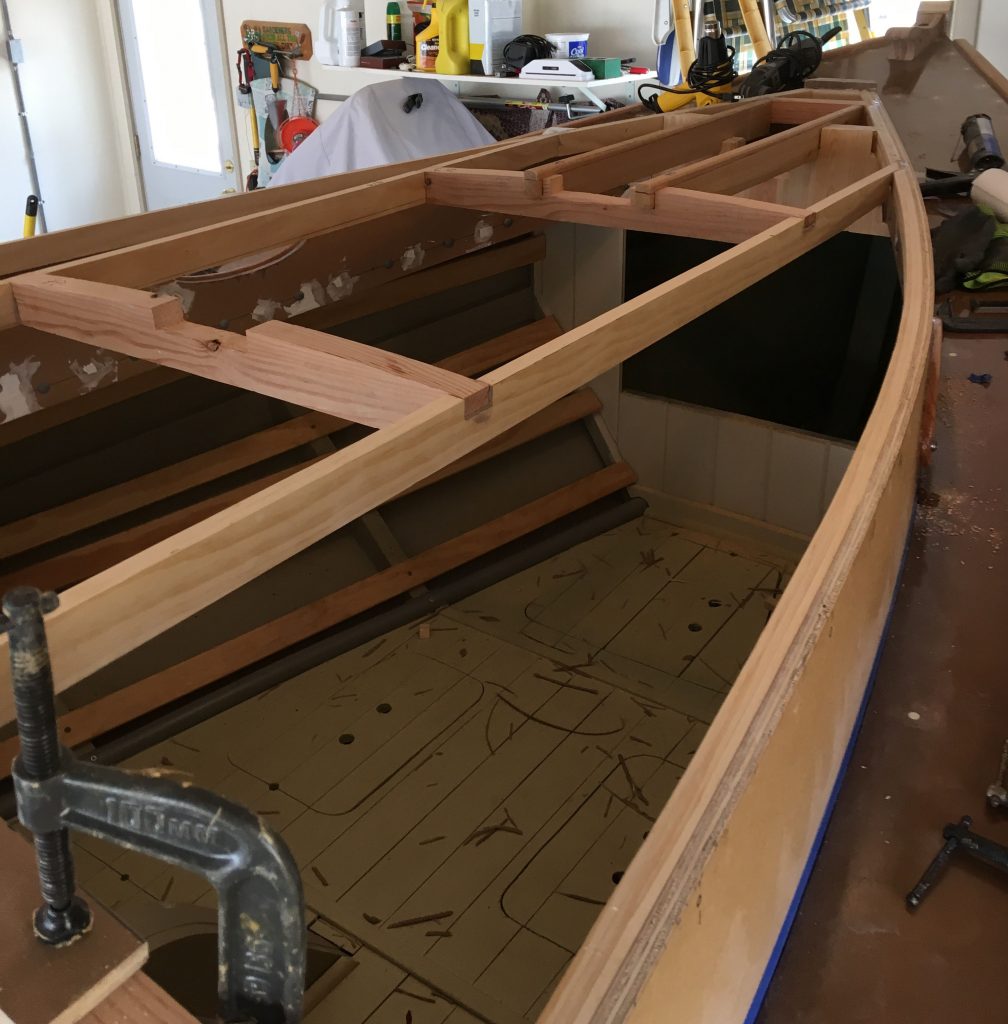
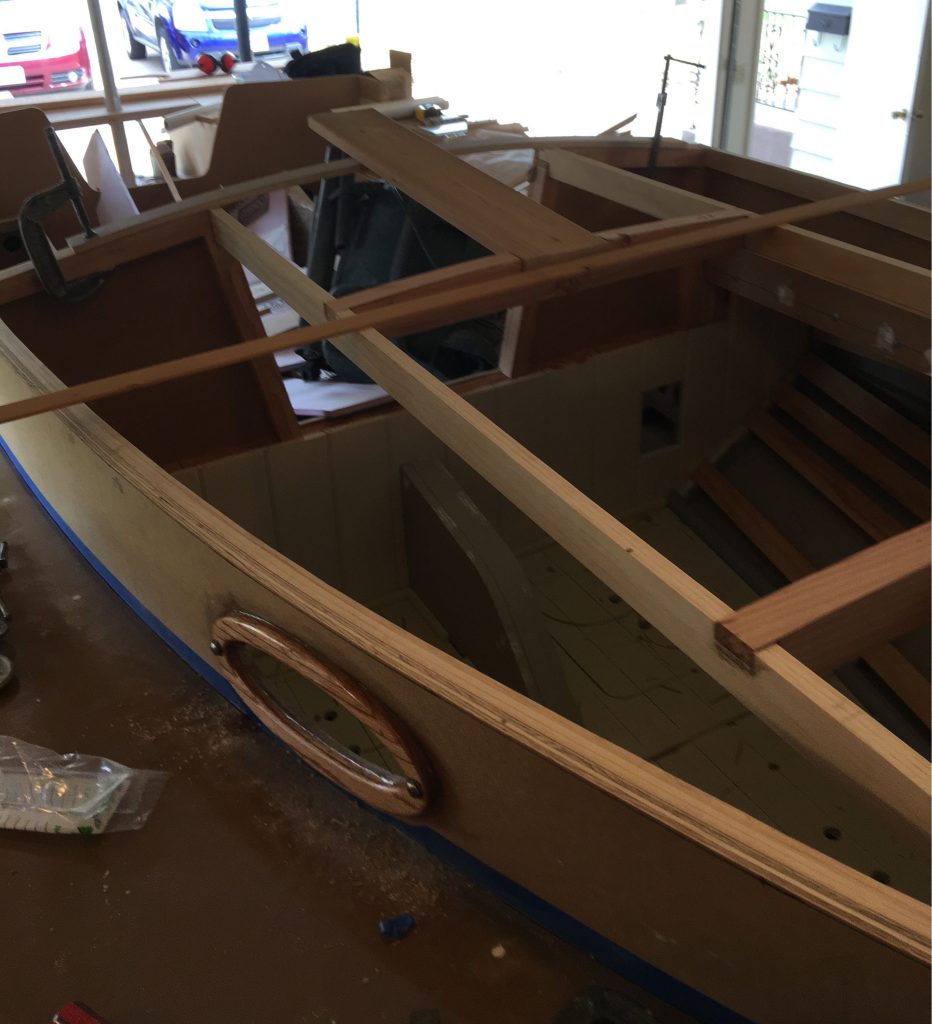
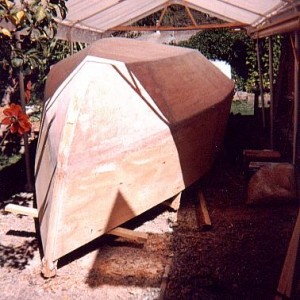
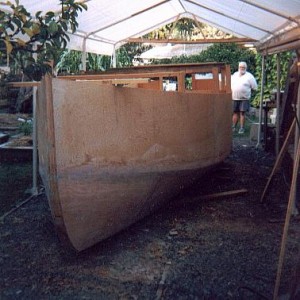
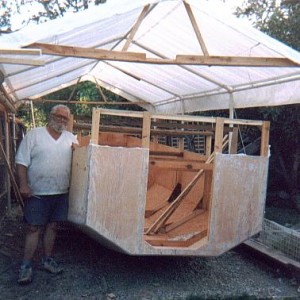
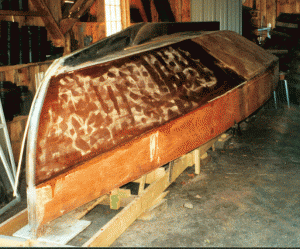
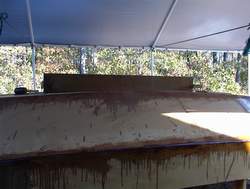
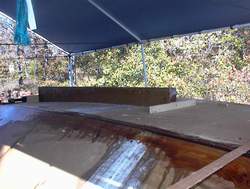
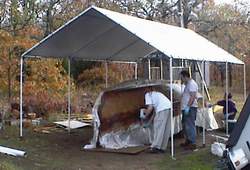
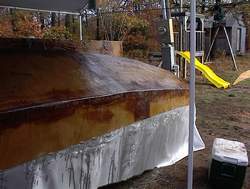
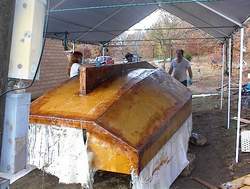
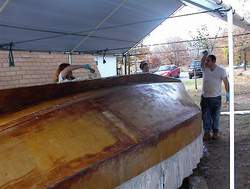
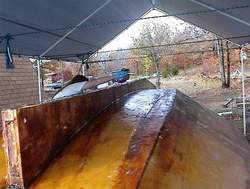
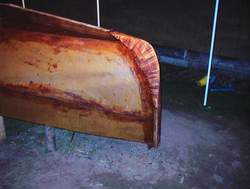
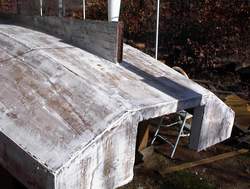
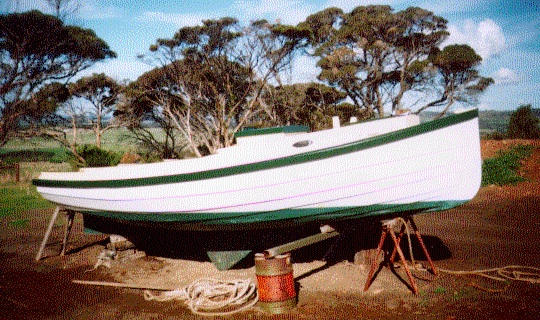
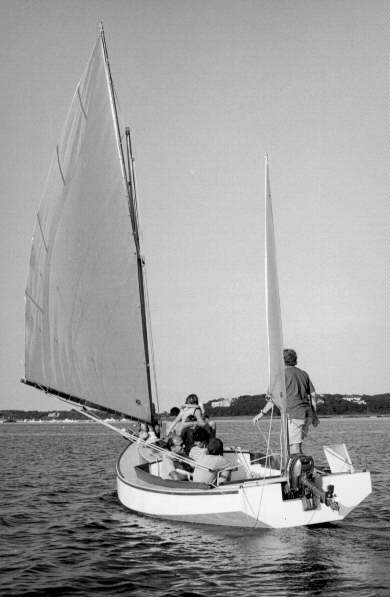
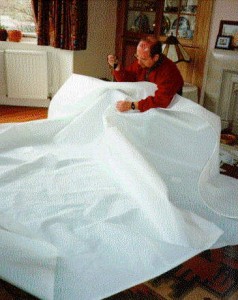
I live in Marshfield, Wisconsin, and have been building my Chebacco for about 11 years now.  After completing a Bolger Gypsy back in 2004, I decided I needed something a bit larger.  I did not enjoy the sanding of epoxy required for the tack and tape method, so I decided to build my boat using sawn frames and chine logs instead. 

I first lofted the boat full size in my basement on ¼ inch gypsum board.  I then built the frames, inner stem, centerboard and case.   The frames and stem are of douglas fir. The next step would have been the strong back, but I didn’t have a large enough space to set the boat up at my previous residence.  So the frames and centerboard went up into the garage rafters for a couple of years until I moved into my current home. 

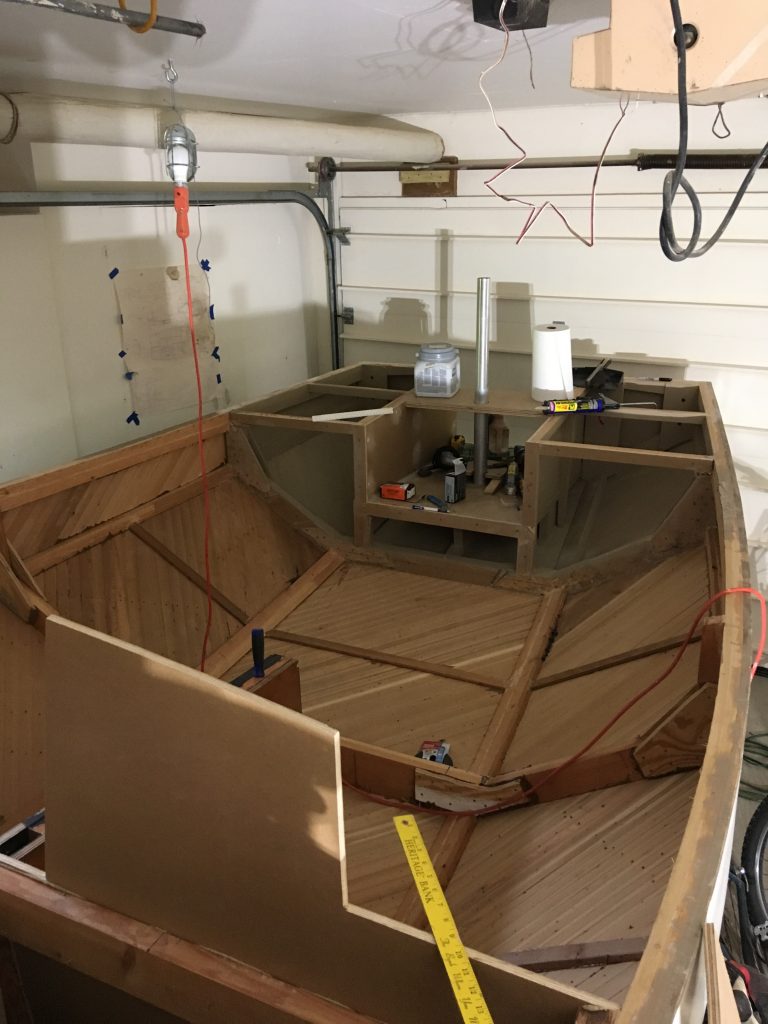
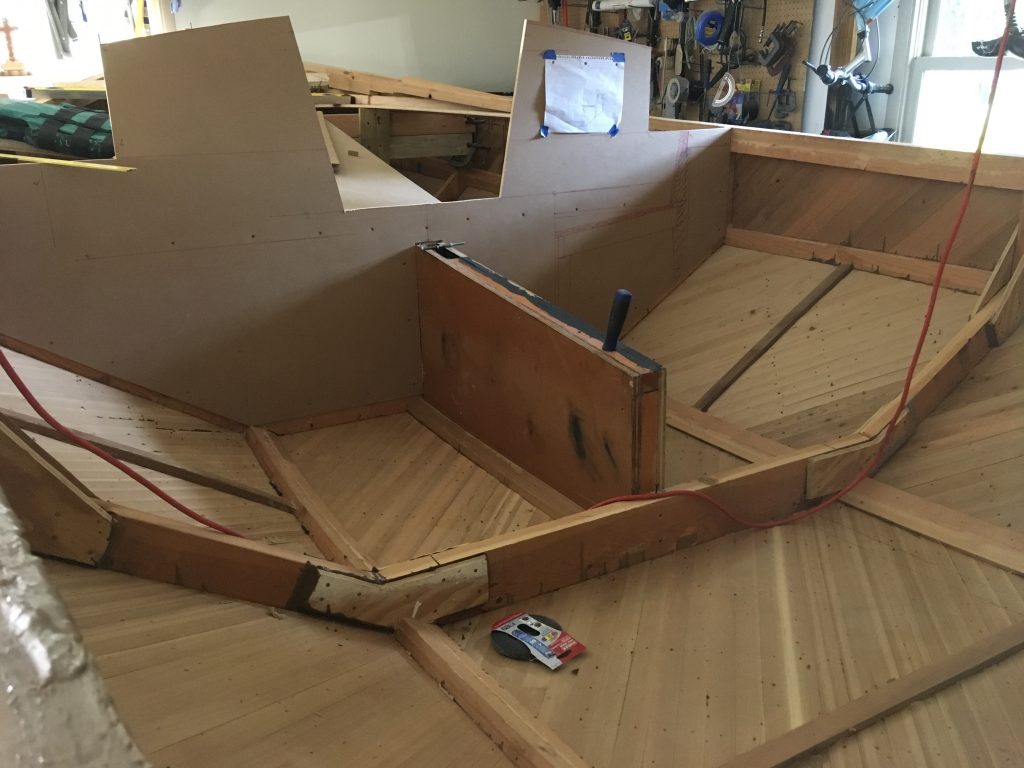
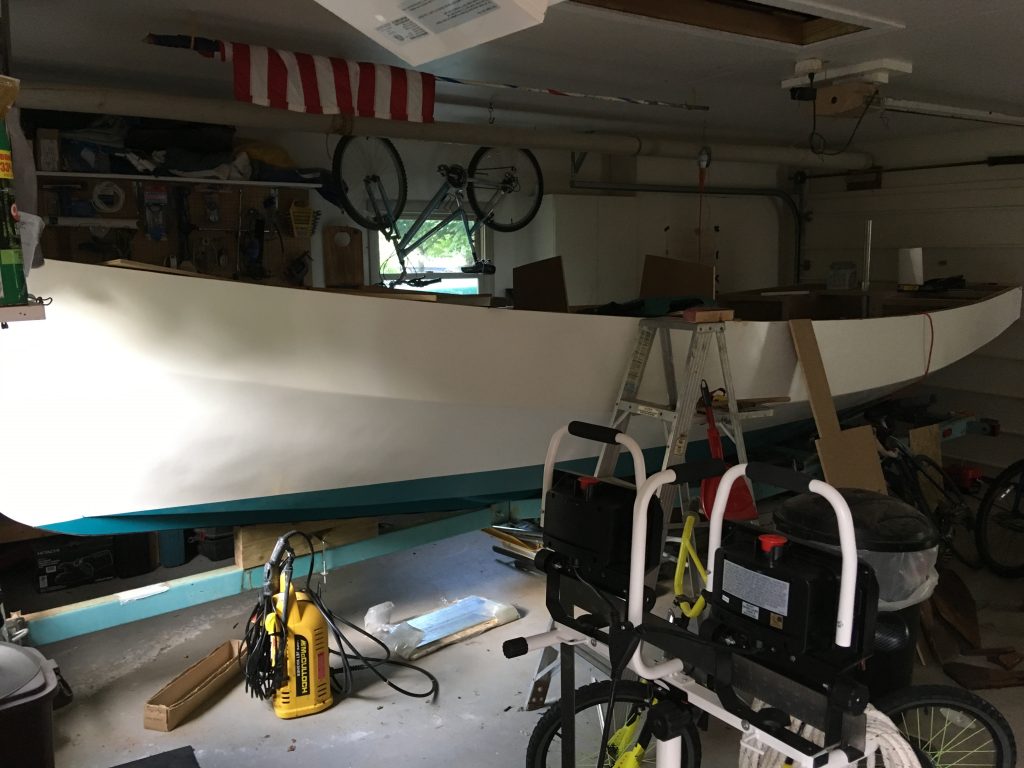
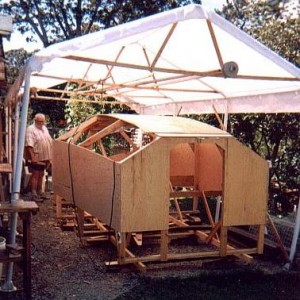
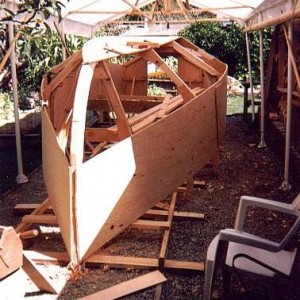
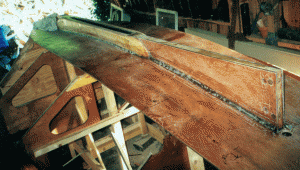
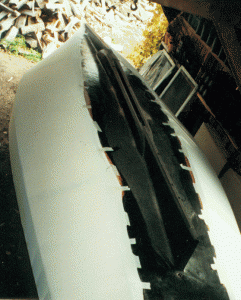
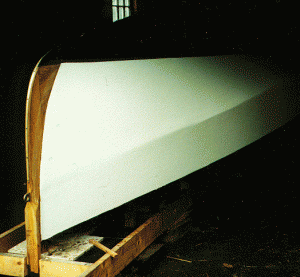
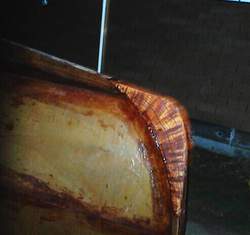
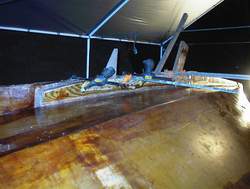
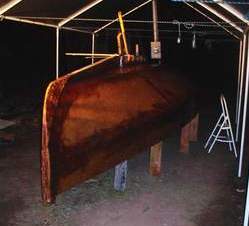
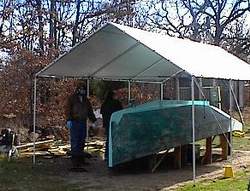
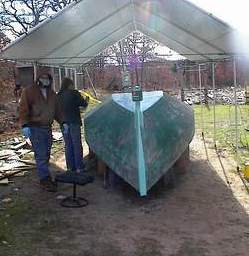
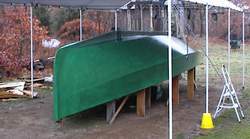
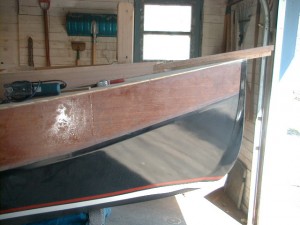
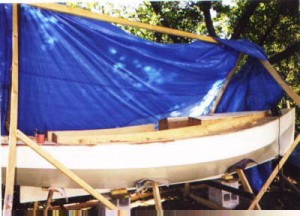
I have a double garage now, about 22 feet deep.  The strongback went up in the right side stall, and the boat has lived there ever since.  My hull is constructed of 3 layers.  The first 2 layers are ¼ inch by 1.5 inch cedar strips laid on a diagonal at 90 degrees.  The outer layer is 1/8 inch meranti plywood.  The hull is covered on the outside with 4 oz fiberglass cloth set in epoxy.  I will not be fiberglassing the inside. In retrospect I would probably have used plywood for the hull, as this is a fairly labor intensive method of construction.  Also, my hull is not as fair as it could be.  This did not become apparent until after I had glassed, painted and flipped it onto it’s trailer.  I will repaint with a flat finish rather than re-glass.  I have been using ½ inch MDO for the cockpit, deck and cabin construction.  All exterior horizontal surfaces will have a layer of 4 ounce fiberglass cloth set in epoxy.  I am using thickened epoxy for exterior glue joints.  I have been using PL Premium construction adhesive for most interior joinery. 

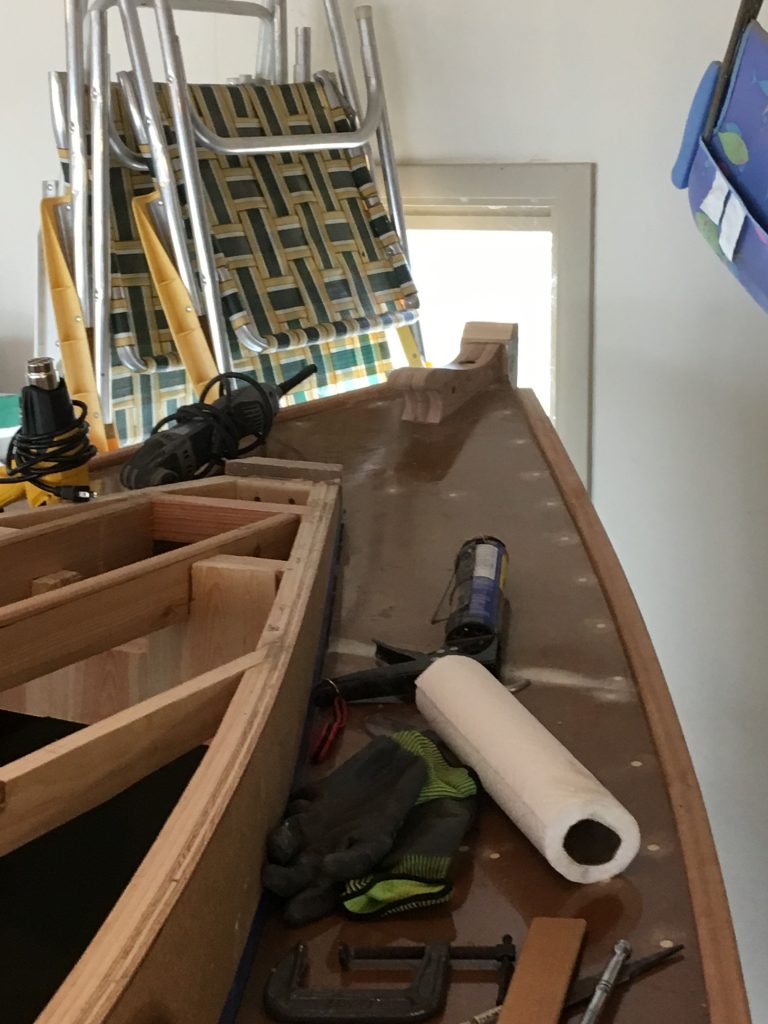
Progress has been slow but steady.  I added a heater to my garage a few years ago, which has allowed me to work through the Winter.  I try to work on the boat a little every day, but probably average only 5 hours a week.  At my current pace, I’m probably 3 to 4 years away from launching.  I haven’t taken many construction pictures, and have lost track of some of the earlier shots, but here are some newer shots.  More shots at https://saildubay.club/boat-building-project/

Chebacco News 38

Hello Richard:


I want first to thank you for continuing Bill Samson’s work in editing the Chebacco News. I have learned a great deal from this newsletter and appreciate very much Bill’s work on behalf of Chebacco builders.


In his very helpful description of the building sequence for the sheet-ply Chebacco 20, Bill describes how he installed the two hull side panels by suspending them from the ceiling while he fitted them. Since I am building outdoors and do not have a ceiling, I had to find another solution.


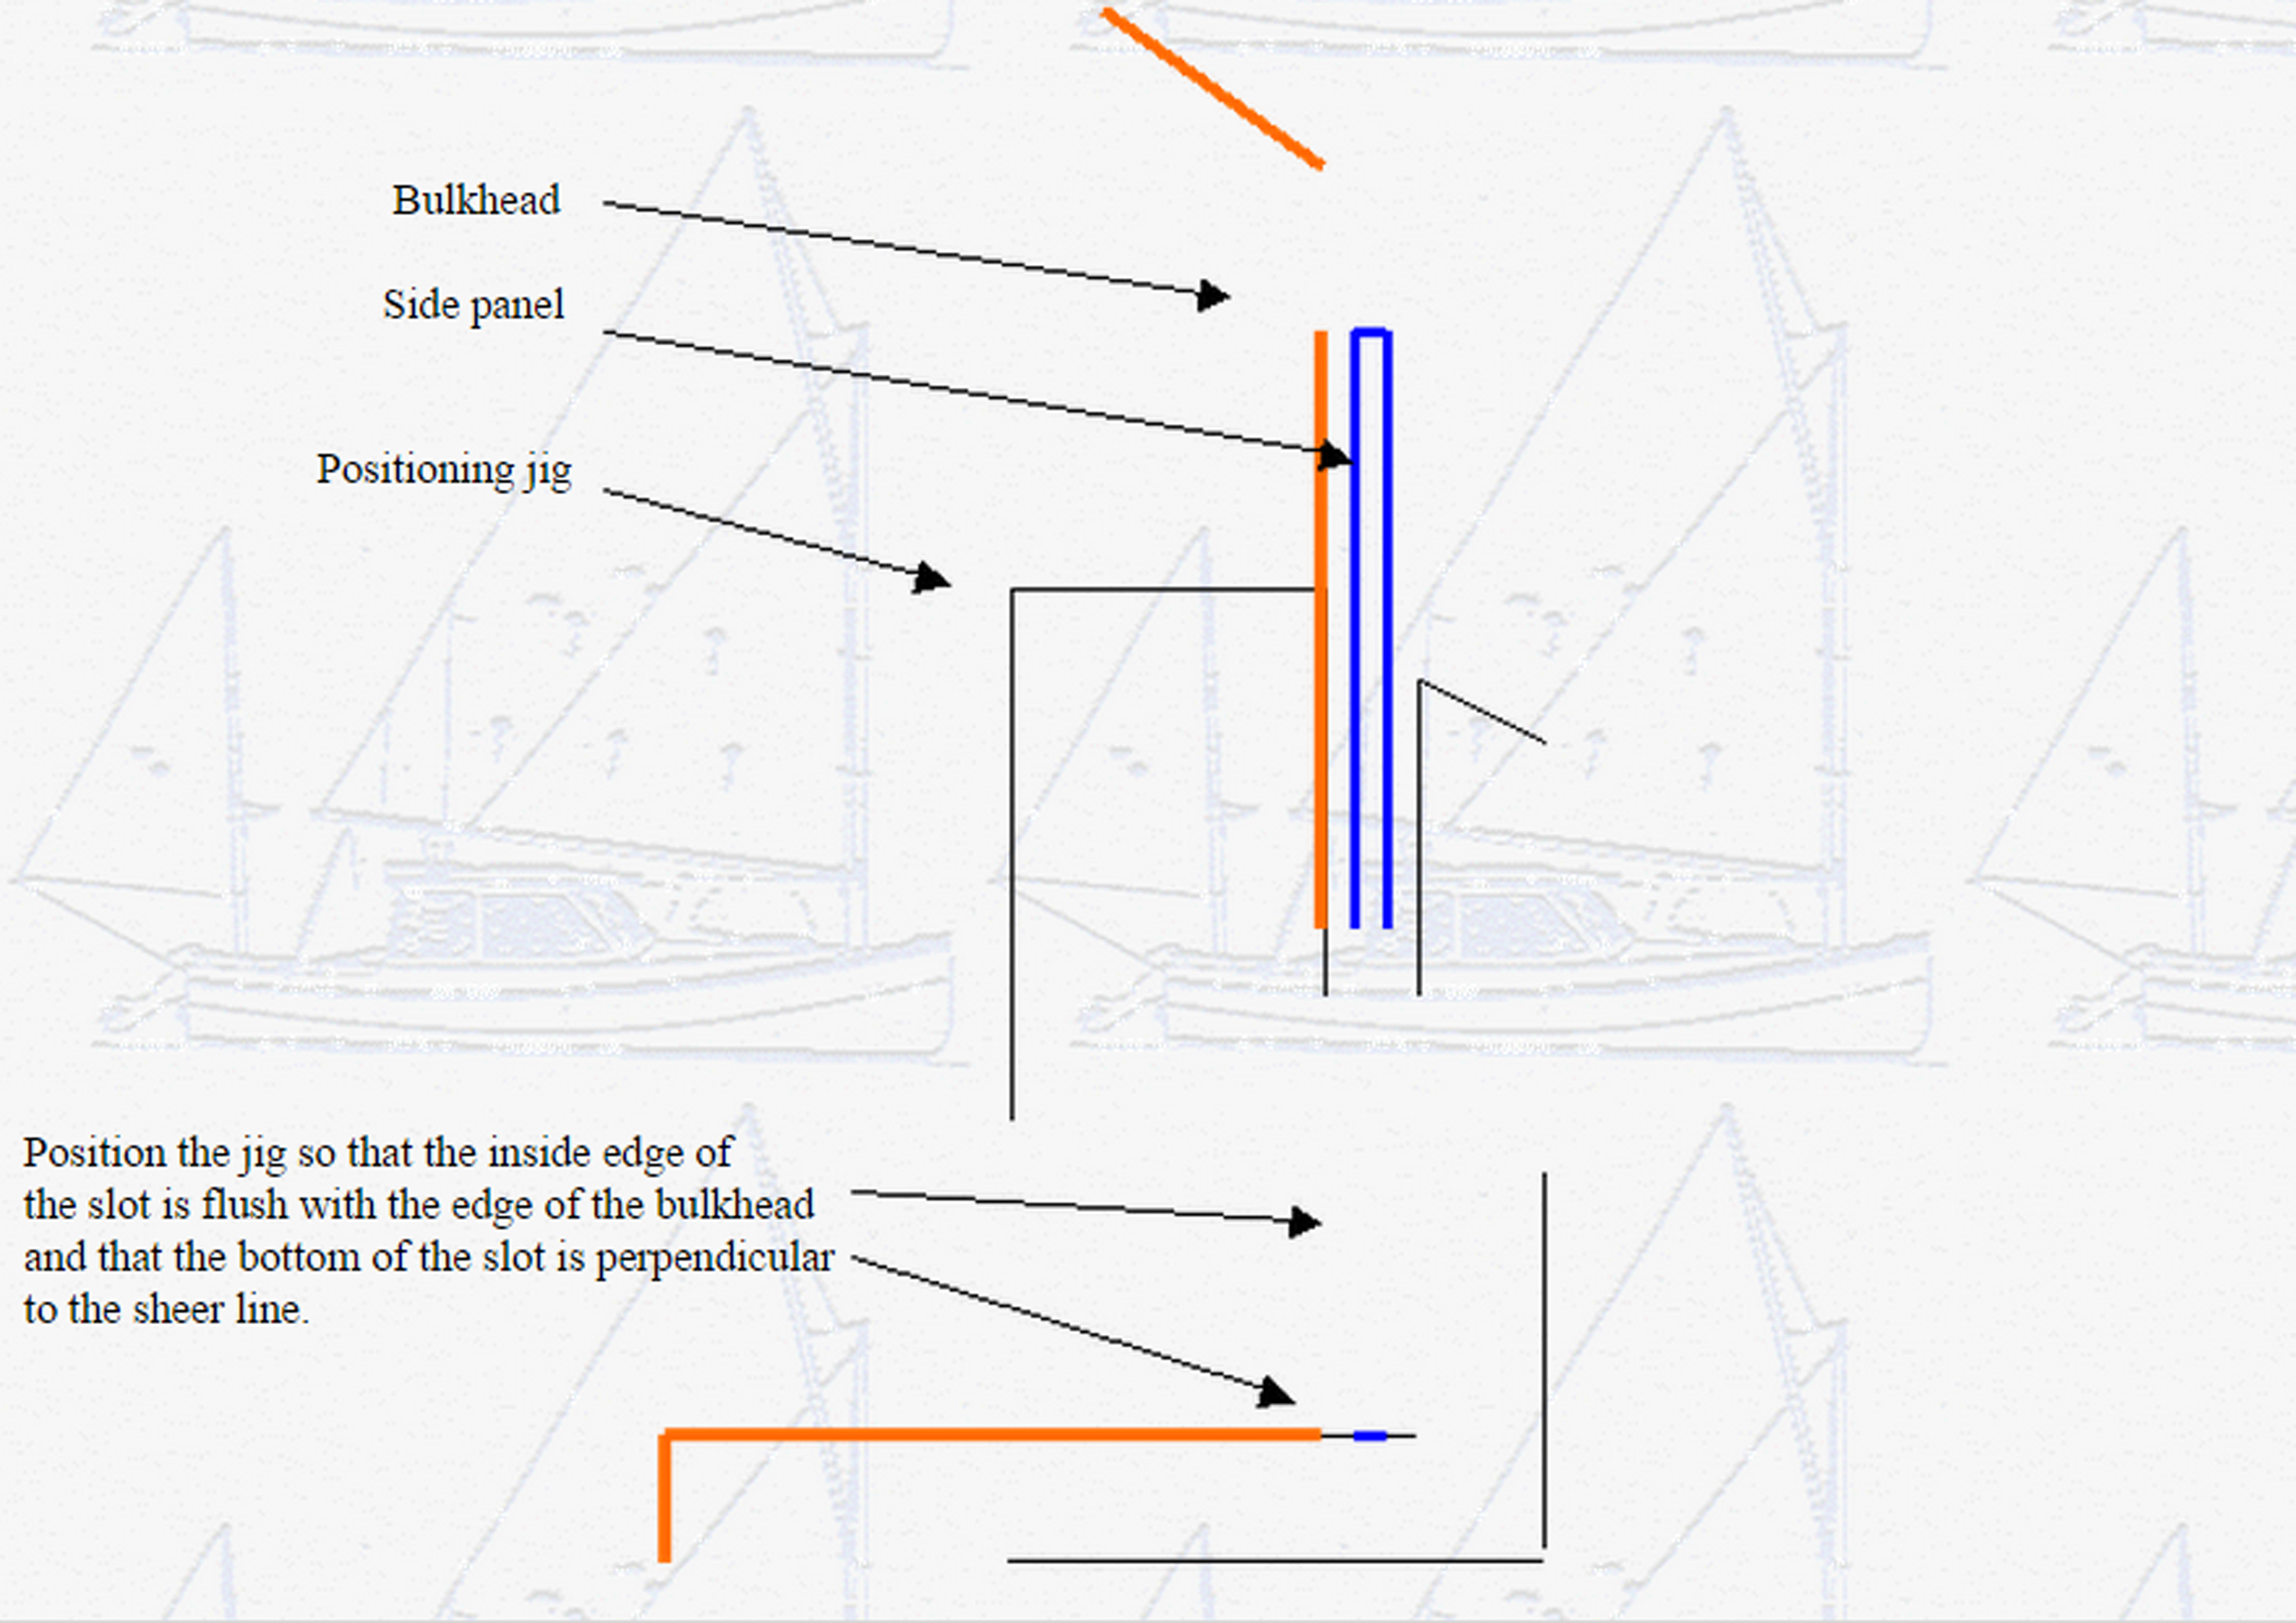
My approach, therefore, was to cut out six small jigs out of scrap plywood (I actually used the cutouts from the bulkheads.). These were screwed temporarily to bulkheads # 1, # 4, and # 6 as shown in the diagram below. The side panels were then dropped into the slots, three on each side, and I was able to take my time in positioning the panels. When the epoxy fillets were complete on one side of the bulkhead and the panels were permanently fastened at bow and stern ends, I removed the jigs and made the fillets on the other side of each bulkhead.


Side Jig 2

I found this to have been very easy and I hope that it might be of use to others as well.


Regards, Tom McIllwraith

Halifax, Nova Scotia

***

Hi Richard,

Thanks for the nice job on the last issue of chebacco.
Here are the pictures of blocks and tabernacle fitting
that you requested.

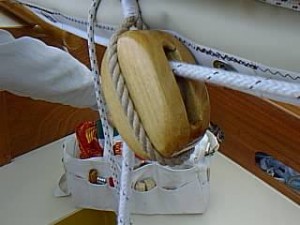
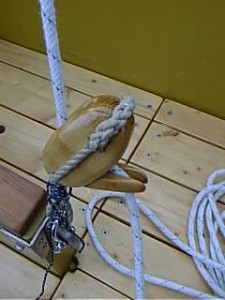
block1.jpg 1 block2.jpg 1
Blocks are made out of locust with a brass sheave spinning
on a 5 mm brass pin (Fig. Block1.jpg).  They run nice and smooth
as long as the hole in the sheave is a bit larger (e.g. 5.25 mm)
than the pin. As I mentioned before, I made patterns
by magnifying the drawings in the “Riggers apprentice”
by Brion Toss. I also fitted the block on the centerboard
case with some kind of slotted tongue (Fig. Block2.jpg)
to jam the sheet, a home-made simple substitute for a camcleat.
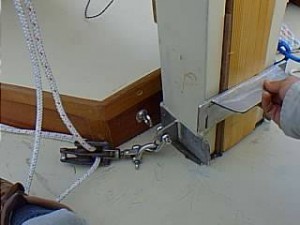
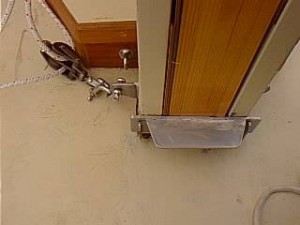
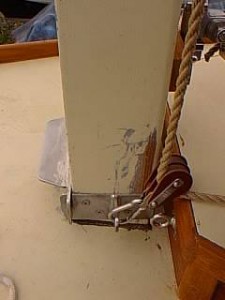
taber1.jpg 1 taber2.jpg 1 taber3.jpg 1

The stainless steel fitting for the tabernacle was “invented” and made by
my friend Roberto Ginetto. There is a U-shaped part that goes around
the back and sides of the tabernacle. This part is screwed onto the tabernacle.
The front part is removable (Fig. taber1.jpg) and goes on the u-shaped part
like a “fence”. The U-shaped part also has “ears” (Fig. taber2.jpg) to attach
the double turning blocks for the throat and peak haliards (starboard side,
Fig. taber1.jpg) and topping lift + jib haliard (port side, Fig. taber3.jpg).
As you can see, things are still a bit scratched and unfinished around there
but the whole thing works well and is very easy get on and off single-handed.

Let me know if you need more explanation or other info.

Cheers,
Vincenzo

Do you have any close up pictures of the hinge on your tabernacle?

Also, I notice you have the forward section closed off. What is the distance from the hing to you locking mechanism?

How do you raise the mast? You use the jib line as a forstay, do you use it to hoist the mast?

It appears your mast is rounded up top, but square on the bottom. It is square up to the double reef position of the gaff?

Have any closeups of your gaff saddle?

Hi Richard,

It is very easy to raise the mast, I just stand on the cabin roof and walk it up, it takes only a second then to block it with the metal fence. I do not use the jib haliard as a forestay or to raise the mast, although I guess that could be done.

The mast must be rounded all the way above the hinge point, otherwise the gaff jaws will not be free to swing around when hoisting or lowering sail (acting as a wrench around a bolt) and might bust at the first gust of wind! So, the mast is left square only in the part that goes into the tabernacle.

I will take close-ups and measures over the weekend.

Buon vento,
Vincenzo.

Richard,

the distance from the pin of the hinge to the bottom of the locking mechanism is 67 cm.
The width of the steel plate of the locking mechanism is 6 cm.

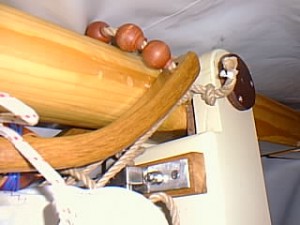
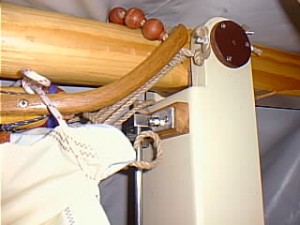
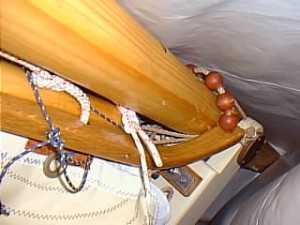
I made the curved gaff jaws epoxying 2mm oak lamination to a final thickness of 24 mm
(see attached pictures)

gaff1 gaff2 gaff3

Cheers,
Vincenzo

Did you use the 1 inch stainless steel rod described in Chebacco News 18 for the pivot pin?
I’m thinking of going a little thinner, to have less of a hole in the mast.
Did you do any kind of reinforcement for the hole in the mast?

The round plate with the three screws, this is the bearing plate for the pivot pin? Are all the mast forces taken by this plate, or is it a loose enough fit that the mast forces are taken by the box section of the tabernacle?

PCB&F says: “Since we know of no widely available source for them any more, we are proposing a ‘home-made’ gooseneck. It uses two stock ‘heavy duty’ SS gudgeons to accept a 1/2″ SS eyebolt which then connects via another ‘undersized’ bolt loosely to two SS tangs that are screwed to the forward sides of the boom; there should be enough freedom for the boom to move any which way, including twist from the sheet-pull. ”

I was never sure what exactly they were saying. It looks like you have a 10 inch or so long, 1/2″ thick  rod between the upper and lower brackets (gudgeons?) on the tabernacle face. I can’t see, but I’m assuming you then have an oversized eyebolt that slides up and down over this rod, is attached to the front of the boom, and acts as your gooseneck?

I used 1 inch bronze rod for the pivot pin.

To avoid having the pin bearing directly on wood, I screwed steel plates
(with a 1 inch hole for the pin), one screwed to the side of the mast, the
other to the side of the tabernacle, so the forces on the pin should mostly bear on the steel plates. The plates you see in the pics are just plywood plates that prevent the bronze pin from working its way out of the hole.

You are exactly right about my gooseneck. The pin is 12 X 30 mm stainless steel. I made it so long with the idea of rigging a downhaul to tension the luff. However the throat halyard is enough to give plenty of tension, and the sliding up and down of the boom is just a useless complication when hoisting or lowering the sail. I am going to cut that rod!
Pics of gooseneck details next weekend.

Vincenzo.

***

From: “Bill Samson” <bill.samson@tesco.net>
To: <richard@spellingbusiness.com>
Subject: New Chebacco growing on Vancouver Island . . .
Date: Sunday, November 11, 2001 2:41 AM

Hi Richard,

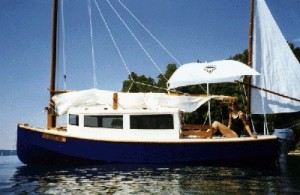
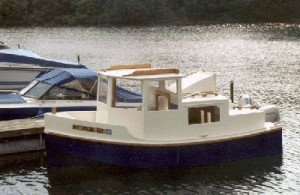
Just had these pics from Bill McKibben via Chuck Merrell of his ‘glasshouse’
Chebacco Motorsailer that’s coming along well.

Bill has raised the topsides a little more than is shown on the plans, but
(I think) kept the overall height the same.  You remember the pic of his
model on one of my last Chebacco Newses?

Anyway, Bill would be delighted if you included one or two of his pics in
your next issue.

Cheers,

Bill Samson

>Speaking of pix, the attached just came in from B&B for the NW Chebacco.
>Will put them on his web page.  They were taken in Aug and September.  I
>have a hunch he’ll have it complete by sometime next summer.  BTW, that
>green foliage, higher than the cover in Picture #1 is Beth’s corn crop from
>last summer.  I had some they brought down.  Delicious!
>Chuck
>NWCheb01 NWCheb02 NWCheb03 NWCheb04 NWCheb05

***

Hello Richard!  A short note with 3 photos for your next Chebacco e-zine, the main purpose being to show how I’ve tried to build a Chebacco over the summer.  As cold weather now comes over the Massachusetts hills here, I’ll soon be forced to close down boatbuilding work although I’m hopeful that an Indian Summer will come about to allow the finishing of the hull and flipping.  Even in snow I’d flip her!

Stealing Horses Keel
Photo 1 shows the keel on top of the bottom panel.  It was my assumption that it would be much easier for me to work at placing the keel without the bilge panels in place.  A step ladder under the bilge panel space allowed closeup work, to see into the centerboard slot, to work on finishes such as they are.

 Stealing Horses Bilge Panel

Photo 2 shows Stealing Horses with her bilge panels in place.  The front 8 feet is composed of 2 layers of 1/4″ plywood with the first brought into shape with Spanish windlass action, and the second secured with a buttering of thickened epoxy and many sheetrock screws forcing the outer to the inner panel per Jamie Orr’s earlier description of how to do this.  The aft sections of the bilgepanel are 1/2″.  A brass half-oval strip extends over the inner stem, awaiting the outer stem for attachment.  The strip along the forward keel, along both centerboard cheeks, down the aft keel but shy of where the rudder post attachment will be placed.

Stealing Horses Xynole

Photo 3 shows the bilge and topside panels covered with xynole cloth prior to wetting out.  The keel and most of the bottom has, as the photo shows, been cloth-clad and coated with epoxy laden with graphite.

At this time — late October — the large xynole sheets have been wetted out and received 3 coats of fairing compound which cured just before the cool weather.  Now the job of sanding the hull is sporadically underway.  The outer stem–composed of built up planks of rosewood–has been lag-screwed and epoxied to the inner stem.  The lagscrews are recessed into the inner stem and set in bedding compound.  By the way, Jim Slakov (who built an exquisite lapstrake Chebacco) suggested to me one of his embellishments: that a small wood wedge be eventually epoxied to the inner stem to hold the mast at an intermediate stage when raised.  The idea is to stand in the cockpit and raise the mast to this point (contingent on one’s height and muscle power), and then to leave it semi-raised and secured by the rachet effect of the wedge while climbing to the cuddy roof to complete the job.

I’d like in what remains of this building season to get the hull sanded and the waterline scribed to the hull–I’d like of course to do more like paint and flip–but I’d settle for this.  Soon I’ll be forced to unscrew the ladder strongback of the boat forms from the ground stakes that level it.  The coming frost will of course heave these stakes and I’m concerned that the hull not be stressed so I’ll let it float atop frozen ground.  Then an accurate waterline will be impossible.

Semi-gloss marine enamel was bought for a 2-coat job above the waterline (to be placed about 2″ higher than the design waterline) with the graphite-laden epoxy coming up from the bottom.  Kirby Paints was kind to test their various paints and primer on a sample of my plywood/my epoxy to see how to proceed (no primer was deemed necessary).

For those considering a sheet plywood version of the Chebacco the following is a list of major materials and their sources that I’ve used:
1.  Meranti marine plywood (LS 6566 grade) from Noahsmarine.
2.  Locally grown spruce, encapsulated in epoxy.  Some island-grade rosewood brought back from the South Pacific some time ago.
3.  Xynole cloth from Defender instead of fiberglass cloth because of a concern for puncture and abrasion resistance.  Xynole, however, absorbs epoxy like a blotter.
4.  Epoxy, fillers, and fiberglass tape from Raka Epoxy.
5.  Fasteners from Jamestown Distributors and Hamilton Marine.  Hamilton sells a nice through-bow silicon bronze eye bolt for pulling the boat to the trailer. I went to Jamestown for silicon bronze ring nails and screws, bedding compound.
6.  Sails, sewn over last winter, from Sailrite kits.
7.  Kirby traditional marine paint for the topsides / bilgepanels that are above the waterline.

Cheers, keep warm,

Dick Burnham

Stealing Horses stem paint

Here is our Chebacco with 2 coats of oil-based Kirby semi-gloss white on her.  The outer stem is as yet unfinished but we plan to sand it down and to varnish it.


Dick Burnham

***

Hi Richard

New email address  – ‘rwheating@telus.net’

Apologies for not thanking you sooner for your work on the Chebacco News.

I live in the same corner of the world as Jamie Orr.  He lives on Vancouver Island and me on the main land.  My Chebacco has been in the works since 1995 (!)  I was searching for just the right boat project (my first) when I read the Chebacco article in the Wooden Boat magazine.  However this would be a test of my dedication as my wife and I were just starting our family which I was to discover dramatically cuts into ones free time…
My boys are now seven and five and I am able to pick up the pace so to speak.  Just tonight I have done the final tidying up and dusting in preparation for spray painting my boat.  Mine is the standard sheet ply variety Chebacco with some modifications such as raising the cabin two inches and widening it out to the coamings.  I have also gone with a one piece ( a la Brad Story) transom with drain holes.  The forward bulkhead I doubled in thickness (to one inch) to allow me to mount the mast, using a tabernacle, directly onto the cabin roof.   I have some ideas for the tabernacle but would be very interested in other CB readers experiences with this.
Hope to launch this before January and then spend the spring on the trim  and spars.  Thanks for the sail info.  I will likely go with the Sailright kit.
I will send along some photos in the near future.
Thanks again,

Randy Wheating
Port Moody, BC
Canada

***

Sanding the CLC

Everyone has been saying that this will be a cold winter. To which I have invariably replied “NO, it will be a mild winter, so I can finish the boat!”. And you know what? With the exception of a couple of days of snow, it has hardly gotten below 50 degrees yet… spooky.

DSC00029 DSC00032 DSC00033

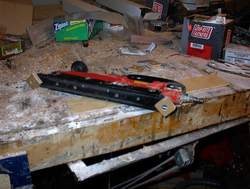
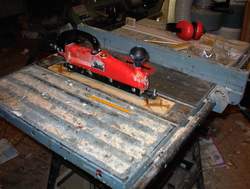
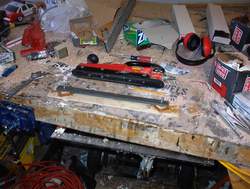
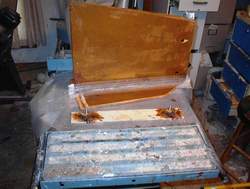
These are pictures my homemade power long board. To the left, I have just disassembled the inline air sander I bought from Harbor Freight. Center is where I have made up some small mounting blocks, and countersunk some 1/4″ flat head screws in it. To the right, I am gluing the blocks to the sanding board with some 5 minute epoxy. Note that the blocks are attached to the sander during this operation, this is the only way to make sure they are glued exactly the right distance apart, so they fit on the slide of the air sander perfectly.

DSC00034 DSC00035

After testing my setup on the boat, I realized the slide on the sander was some kind of plastic, and bent all out of shape when the board was forced to follow the curve of the hull. What you see in this picture is a 1/4″ x 1″ length of cold rolled steel, used to keep the slide stiff and reduce the wear. Still got some wear using the sander, and had to return it to the store. I’m not sure it was all related to my setup though, as I’ve had this exact type of sander before, and had the same problems with it. I’ve since ordered a Campbell Hausfeld air sander from HF. They had it in the catalog for $16.99, about $40 less than I could find it anywhere else. The card in the mail said it was back ordered, and I can’t find it online any more… Not sure if it was a typo or what, but it appears they are going to send it to me.

To the right, you see where I have taken the sanding pad and used glass tape to strengthen the attachment of the spacer blocks to the board. The sandpaper was attached to this board with contact cement, 3M Super 77 spay adhesive. Application of the heat gun on high while pulling the paper off made changing to a new sheet a breeze. I used 36 grit paper, the kind that worked with the inline sander. At about $7 for a box of 25 at the local HF. Went through two boxes.

DSC00030

On the left here I am squaring up the rudder assembly, and on the right it is set aside for the epoxy to set up. I used three layers of the 2″ tape I got frommarsales1@aol.com I bought five 50 yard rolls of 2″, 6oz tape from him for $35, you might email him and see if he has any more. The tape is a satin weave and doesn’t wet out as easily as some of the more open weaves. You have to pre-wet your surface, then apply your tape, then wet the outside. Give capillary action a few minutes to work the epoxy in, then work any remaining bubbles out with your thumb. This tape is a bit more work than a more open weave would be, but well worth the saved money.

I make the rudder a bit thick for the post, so I trimmed it down some with a flap wheel on the angle grinder. Also, I flared the aft end on both the blade and the wing down to a finer point than on the plans, in an attempt to save a bit on drag.

DSC00001 DSC00003 DSC00004

Here you see the centerboard case going in. In the picture on the left I have just dropped it in, I had to cut a notch out of the board you see to get it to drop all the way down. Center is a side view, and right is a view of one of the cleats used to hold it. If you look in the picture, you will see that the cleat only has one screw. This is to allow the case to be levelled from underneath, before tape and epoxy is added.

On the right you can see a one of the bilge panel spices, still covered with the remnants of the wax paper used to keep the clamp board from sticking. I later went back with a wire brush on a drill and got this off.

DSC00003_2 DSC00005 DSC00006

On the left you see the crew applying glass and epoxy to the hull. This was a major operation, glassing the entire hull with 6oz cloth. Made more interesting by it being in the 60s, and by my being out of slow set epoxy. We only had one pot start to cook off on us, and I was able to dump and spread it before it had smoked too much.

Center you see a good shot of the cloth hanging off. In the future I may try to trim closer to the hull before applying the epoxy. I wasted quite a bit of glass here, as after it gets a few runs of epoxy on it, about the only thing you can do with this stuff is throw it away.

On the right, you will see where it looks like I spiced onto the back of the keel. This is caused by me splicing onto the back of the keel. Measure twice, cut once. Then cut again. Also note the brown under the glass. I used the last of my slow cure hardener to spread wood flour and epoxy over any sections that weren’t exactly smooth, so the glass would lay even. I learned on a previous boat not to use phenolic micro balloons under the glass. They aren’t very strong in tension, and I had a section de-laminate on me during sanding. This boat is being made as strong as I know how to make it, so the only putty under the glass is wood flour based.

DSC00007 DSC00008 DSC00009

The left two shots show a good view of the cutout for the motor well. Also, note that the glass is folded over twice on the transom, and right under where the rudder will be. This required a bit more work faring the hull, but the added strength may come in handy some day.

DSC00010 DSC00011 DSC00012

More shots of us desperately spreading epoxy and chasing bubbles, before the epoxy set up.

DSC00024 DSC00025 DSC00026

The two pictures on the left are of the stem after it is attached. I agonized for days over whether to finish it “bright” or not. finally, looking at the pictures I have in the Chebacco News issues showed that most people were painting over it. In addition, I REALLY wanted to cover it with a layer of glass. So, it is made up of cutouts of plywood, laminated together. Notice the radial lines on the stem? This is where I broke the belt on the hand power planer, and had to use the chain saw to finish the carving… <grin>. The stem had a liberal coat of putty applied to the bottom and then was attached top and bottom with a couple of temporary screws. After the putty set, a little sanding was done, then more putty, and a couple of layers of glass cloth went over the whole assembly. This coming Saturday a friend is coming over to help me forge a piece of 1/8″ stainless steel to the shape of the cutwater, so the keel armor will extend from the bottom up and around the cutwater! Should be very cool.

DSC00027 DSC00028 DSC00031

On the right we have applied a coat of glass bubbles and wheat flour as a faring compound. Notice the line starting halfway up the bilge panel next to the transom? This is where the bottom and the bilge layers of cloth overlap. I have two layers of glass over the bottom chine to add to the strength.On the left, I’m attaching the cheek plates over the centerboard case. I broke with tradition, and foil shaped them in the best bolger tradition, with the flare on the sides and bottom matching. Hopefully this will reduce some of the turbulence caused by this protrusion of the keel.

This notched trowel process took a LOT of epoxy. More than glassing the hull! Oh, well, it allows me to fill in the low spot, and will give a smoother hull. Helping to decrease resistance and turbulence.

DSC00001_2 DSC00003_3 DSC00004_8

This is the boat after MUCH sanding. The girls decided they would volunteer to sand the boat instead of buying me a birthday present. Their mistake! <evil grin>. I only had them sanding for a couple of weeks… They did a wonderful job, though. The odd color scheme is my attempt to vary the color of each successive layer of filler. No reason, I had the pigment and though I’d experiment.

On the left we are just starting to apply the leftover Interlux barrier coat primer from another project. I put a little of the green pigment I had left into the white primer, and it turned the yucky blue you see. We turned the boat into a swimming pool! I didn’t have quite enough for the entire hull, but that’s ok. I experimented with the paint, and it stuck to unwashed, unsanded, smooth epoxy with no qualms. Even stayed on after a couple of days in the dishwasher, and hardened up nicely after a couple of weeks.

On the right, you see the hull with paint on it. We are putting it on in many thin layers, to avoid runs. In this picture we still need a couple of layers of paint. The green is a color I got from mixing three gallons of various shades of green deck paint purchased at the local close out store. At $2.88 a gallon, I bought 12 gallons, even before testing on the epoxy!

Anyway, that’s all for now, next issue I’ll have pictures of the forged armor for the keel, and pictures of the boat turning, currently planned for some time in January. Also, I’ll show how I figured out the welding of stainless steel on a cheap wire feed welder.

Richard Spelling

From the muddy waters of Oklahoma.

Chebacco News 26

Chebacco News

Number 26, May 1999

kangaroo

GINA – on Kangaroo Island, Australia

GINA

Colin Hunt, of Victoria, Australia, sent me this picture of GINA – Clive Colenso’s lapstrake Chebacco. He reports a good, dry boat which has been surveyed for charter hire. The waters around Kangaroo Island can get pretty rough. GINA has the cockpit modified to be self-draining with approximately ½ cubic meter of underfloor stowage for outboard, anchor etc.

Colin asks if anyone has the offsets for any version of Chebacco on a computer file in .DXF format? This might lend itself to CNC routing, to allow mass production of Chebaccos!

Chebacco –25 . . .

Simon Jones (also in Australia) reports:

I’m building directly onto the bulkheads which I have moved to new stations , I am intending to rig her with a jib and a small bowsprit to accommodate anchors and larger foresails ( reachers etc, ) the interior has been enlarged to give full sitting headroom and quarter berths as well as a big double forard , taking out the centreboard has allowed me to cut the keel down to a flat keelson reducing draft and giving me a nice companionway to stand in with the hatch open , ( I’m just running thru all the alterations I can think of here ). I have closed in the cockpit at the stern to give me a large lazarette for storage, the cockpit is still 7′ long so plenty of day room … I have jumped up the deck height 6″ all round and instead of a flushdeck style cabin I have changed to the standard box cabin as in the 20 with a 5″ side deck (just enough for one foot, the other using the cabintop) while this is pretty thin its enough to go forard if necessary, however I hope to use

my forard hatch for most foredeck work . I’m keeping the mizzen as I have always found them to be worth every penny.

I’m currently epoxying everything as its obviously easier than doing it after construction, and I hope to have her in the water before the end of the year as I have the luxury of being able to work on her pretty much full time.

Your idea of having a Chebacco meet sound great! … I’d love to fly over to Canada and be in it…. That’s one fantastic cruising ground they have there and a chance to sail there should never be missed (falling in the water however is a one off!…. your firth would be warm by comparison) ok …I wont bash your ear about it all any more … I’ll be sure to get piccies to you when I have them.

Cheers Simon.

Well! This’ll be one interesting boat. As far as I know, it’ll be the very first Chebacco-25 to be launched. Watch this space!

Plywood – your views –

Tim Fatchen – yet another Australian, writes:

[WBS in Chebacco News #25
“So – Write to me about your ideas on plywood. I’ll fess up first – I
used pretty cheap Far-Eastern ply labeled BS1088, though it was
clearly nothing of the kind. It has frog-hair thin outer veneers, and
thickish inner ones. On the other hand the glue is certainly
waterproof and there are few if any voids in the inner veneers. My
theory is that glass/epoxy sheathing would make it acceptable, and
so far I’ve had no problems (3 years after launching). Let’s hear your
stories!”]

Bill, you clearly took the road favoured by the elite. From your
description of the plies, we fairly clearly used the same source for
Flying Tadpole in 1991, except ours was a grade down and didn’t try to
pretend to BS1088 (unless the BS stamp was added later to boost sales).

Nevertheless, still good waterproof glue and very few voids despite the
froghairthin outer plies. After seven years of abuse in Flying Tadpole,
the only problems which have arisen are two or three spots where
checking of the top ply has occurred (a series of slits about 1/2 inch
long, look like razor nicks) and we haven’t bothered doing more than
give them a lick of paint. Longevity was helped by through epoxy
encapsulation.

Our Nymph, even older (1989), was made from the same ply. Even more
abuse, sits for months at a time under the oak tree, gets roughly hurled
onto decks of houseboats occasionally, always makes landfall on sharp
stones lurking in the mud…Various nicks, dings and scratches in the
bottom, brutally neglected, but still absolutely sound (and originally 3
coats of epoxy inside and out, but no fibreglass).

In both cases, the ply was very heavy, though – I suspect mangrove wood
as the inner plies. Only real objection to it is that it’s a dog to work
compared with gaboon – splinters. I’m reminded of this as we’re still
using odd leftovers of 1/2 inch (not as good as the 1/4 inch was for
voids) as backing plates for deck hardware, battery boxes etc.

So that’s seven and ten years respectively of both use and neglect, the
latter being harder on boats…

Tim & Flying Tadpole

A few notes on the Chebacco’s properties

By Giuseppe ‘Pippo’ Bianco

Like most of the CN readers, I’m particularly intrigued by Phil Bolger’s designs and I have purchased plans for the Micro, Long Micro and Chebacco. The latter is very close to what I need: the most boat which conjugates sheet plywood construction, easy transportation, launching and hauling with a trailer, comfort and safety. I’ve not been able to find any data like righting moments and seaworthiness index for the Chebacco, so I decided to try to compute them by myself. After all, I’m a scientist by profession, so, I said to myself, this shouldn’t be too difficult… Well, that is true only in part. A complete analytical description of the interaction between a sailboat, the wind and the sea waves is almost impossible, and probably the only way to get comprehensive and reliable results would be building the boat, stuff her with instrument (like inclinometers, accelerometers, strain meters), sail it in a variety of conditions while recording the data, analyze them and draw the proper conclusions. I’m pretty sure that nobody carries out such measurements except maybe large, well funded designing companies working on super racers involved in world class competitions. So, in the amateur’s world, one is forced to use a mixture of common sense and a few empirical formulas.

A few basic numbers are needed to make a first assessment. Carl Adler (early readers of the Common Sense Design’s Newsletter will recall him as the Micro prototype builder) runs a great interactive sail calculator on the WWW which allows direct comparisons between any pair of sailboats listed in his database, recently integrated by myself with the relevant data for the Micro, the Long Micro and the Chebacco. The URL of his page is http://www.image-ination.com/sailcalc.html.

The parameters one needs to know for each boat are the length at water level (LWL), length out all (LOA), the beam, the displacement and the sail area. For the Chebacco those numbers read as follows (in metrics, yeah):

LOA=5.99 m; LWL=5.04 m; Beam=2.26 m; Displacement=789 kg; Sail area = 16.35m2.

The sail calculator crunches those numbers and rapidly comes out with the following sentences for our boat (compared hereafter with the corresponding data for the Micro and Long Micro):

Category: racer. Carl classifies the boats into four categories: racer, racer/cruiser, cruiser/racer and cruiser, in descending order of performance. Micro classifies as racer/cruiser, while Long Micro gets a cruiser score.

Capsize Ratio: 2.5. This number is an indicator of a boat’s ability to resist to the capsize: a value lesser than 2 is considered good; the higher the number, the more vulnerable is the boat. Micro gets 2.0, Long Micro 1.8, so both are stiffer than the Chebacco.

Hull speed: 5.5 knots . This figure depends only on the LWL. Micro 4.7, Long Micro 5.3.

Sail area displacement ratio: 19.5 . This is an indication of how powerful a sail plan is with respect to the vessel’s displacement. Values around 18 and higher indicate high performance boats. Micro gets 17.5, Long Micro 23.5.

Displacement length ratio: 170 (light). Micro sports a huge 411 (heavy), Long Micro an average 274 (moderate).

Length to beam ratio: 2.24. Micro gets 2.21, Long Micro 2.63. A value of 2.7 is considered average; 2.2 is low.

Motion comfort: 10.6. This numbers depends on a complex way from displacement, length and beam: the higher the number, the more comfortable is the boat. Micro gets 17.8, Long Micro boosts a 20.1.

Be warned that sometimes the ratios above are not plain ratios, but rather complex expressions involving odd powers of the parameters. A good description of the formulas used to compute the above parameters is given in  http://home.att.net/~hcyoung/formulas.htm

Well, the empirical formulas above confirm what the Chebacco sailors know already about her being spirited. Her capsize ratio is apparently not so good, such as the motion comfort index which is worse than the Micros’.

Not content yet with these numbers, my next step involved some more in-depth analysis. There are two ways to do that. The first is the old-fashioned one: grab a (modern) scientific calculator and a ruler, make measurements on the plans and compute the sought-for parameters, following algorithms commonly found in books on boat design. The second consists in modeling the boat in a dedicated computer program, which in turn will do all the number crunching. Commercial hull design programs are very expensive and barely worth the expense by an amateur: the free demo versions are, in my opinion, almost useless. Luckily enough, however, there are a few nice complete programs around, available free of charge on the WWW. The ones that I know better are Carene40 and Carene50 by Robert Lainé, Hulls by Gregg Carlson and Hullform 6S by Blue Peter Marine Systems. The Carene family is nice and robust, but it’s a bit lacking when one needs to compute the static properties of a boat. Hulls is great, with the only possible exception being the limited number of sections allowed to model a hull. Hullform 6S is probably the best and most complex, yet relatively easy to use, but unfortunately it doesn’t perform the plate development as the first two. On the other end, it’s not limited to hard chine hulls, and comes with a nice user’s manual.

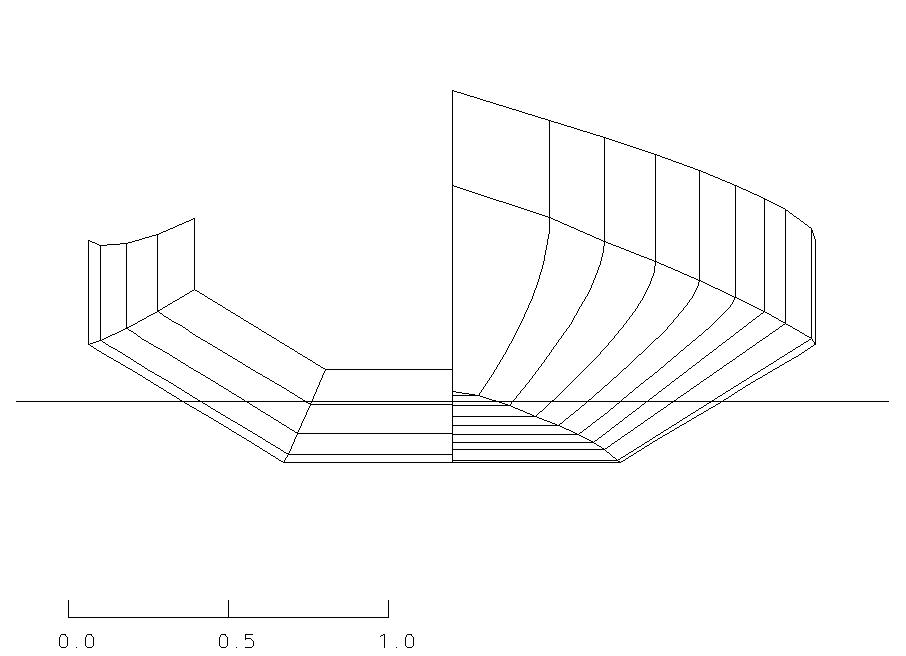
I decided to use Hullform 6S to do my analyses. The first step has been to input all the sections as described in the table of offsets of the Chebacco’s plans. This is quite straightforward. I did that using the 42″ water level as baseline: the end elevation view of the resulting hull is shown in the figure below, where on the right half is the forward view and the left half is the aft view. The scale is in meters. This is very close to the drawings on the original plans, even if admittedly not perfectly fair. I didn’t consider the keel to keep things simple.

chebend (2)

Now, in order to perform the static analysis, one has first to balance the hull. I found that my synthetic hull balances very well (i.e. the pitch angle is very small) using the center of buoyancy positions given in the plans, with a few cm tolerance. Using a nominal displacement of 789 kg (1740 lbs.), the plans indicate a bottom draft of 0.193 m, while I find a bottom draft of 0.205 m. This is a difference of 12 mm. Alternatively, to sink the boat at the nominal draft, the displacement would have to be 710 kg (1565 lbs.). I don’t know which one is the correct number. Please note that this is the bottom draft (canoe body draft), not the keel draft.

The nice thing with Hullform is than one can compute the righting moment as well as other parameters for any heel angle. Let me warn you however that my analysis is oversimplified. It doesn’t take into account the combined effect of masts, sails, crew position, wave effects, and so on.

Another warning here: the righting moment computation requires knowledge of the position of the center of mass of a boat, around which the boat rotates when heeling. Longitudinally it has to be in the same position of the center of buoyancy, but the unknown here is its vertical position. This is tough to compute and actually, in the real world, it moves together with the crew and all the stuff on the boat. I first set the center of mass of the Chebacco on the waterline plane, but I’m not sure whether this is true or not. According to Bill Samson, this is a bit too optimistic, so, following his suggestions, I’ve performed the same calculations two more times, respectively lifting the center of mass by 0.1 and 0.2 meters.

Last warning: apparently Hullform treats any hull as if it was completely decked at the sheer level, even if there is no mention of this in the user’s manual. The Chebacco is not decked for a good part, so my results are optimistic.

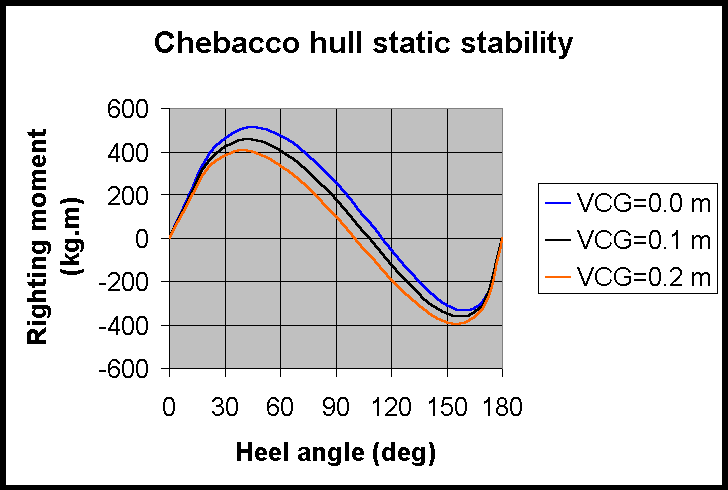
Nevertheless, after 111 runs of the program, here are the plots of the computed righting moments with respect to the heel angle for three different vertical positions of the center of mass, referred to as VCG (vertical center of gravity).

Image6 (3)

My first (VCG=0.0 m) synthetic hull gets the sheer into the water at about 35 degrees of heel. It is apparently self righting up to about 115 degrees, but over that angle it goes all the way down to settle upside down. Looking at the numbers, there is no chance to right it back by pulling on the centerboard… Note also how the curves move downwards when VCG increases, indicating the well known effect of worsening stability. For VCG=0.1 m, the sheer at midships gets submerged at an heel angle of about 40 degrees, and the righting moment vanishes at about  degrees. Finally, for VCG=0.2 m, the sheer gets under water about 45 degrees and the boat is self righting up to about 95 degrees of heel.

An important number used to assess the stability of an hull is the ratio between the area under the curve with positive righting moments to the area over the curve where the moments are negative. In our first case (VCG=0.0 m), this ratio is about 2.7, reasonably good, but it goes down to 1.9 for VCG=0.1 m and to 1.3 for VCG = 0.2 m. After having computed these and several more parameters (actually Hullform does everything), one opens “Principles of yacht design” by L. Larsson and R. E. Eliasson at page 54, enters those numbers in the equations therein and computes a magic number, called the Dynamic Stability Factor (DSF). The Chebacco’s parameters for VCG=0.0 yield DSF=11, placing our beloved boat among the “inshore” vessels. This classification, endorsed by the International Standard Organization, classifies vessels into 4 categories following the water conditions they’re qualified for: sheltered (DSF<10), inshore (10<DSF<25), offshore (25<DSF<40) and ocean (DSF>40). The most penalizing for the Chebacco is the so-called Beam Displacement Factor, which apparently indicates that the beam of the Chebacco is too wide with respect to her typical displacement. However, increasing the displacement is not that effective in getting better figures for the DSF, and this apparently confirms that Phil Bolger and Brad Story are right (surprised?) when they say that additional ballast would be useless in the Chebacco. On the other hand, a slightly narrower beam (e.g. 2.0 m instead of 2.2 m) would have boosted the DSF to much more seaworthy values. The situation obviously worsens for VCG=0.1 (DSF=9), and for VCG=0.2 m (DSF=7). Hence, based on the above criteria, the 20′ sheet ply Chebacco is marginally qualified for inshore waters.

It needs to be said however that this flaming of the wide beamed boats came after the infamous Fastnet disaster in 1979, in particular because those boats are more easily capsized due to the action of big (b-i-g) and breaking waves and, when capsized, are more stable upside down. I don’t think that any Chebacco sailor would ever try to test his boat in really bad seas, so watch the weather forecasts… In any case, like Bill Samson said elsewhere in the CN, this reasoning is academic because there’s no notice yet of a Chebacco having been capsized.

Given the flared sections of the Chebacco’s hull, I tend to think that the computed DSF values are a bit underestimated, and I would conclude by saying that those boats “…are very good in rough water and forgiving in squalls and with prudent and skilled handling and not exceptionally bad luck would get over the North Sea, or the ocean for that matter; but by present day standards they are inshore and fair-weather boats”.

P.S.: for those who didn’t catch it yet, the last sentence is Phil Bolger’s opinion on his Chebaccos. I’m by no means an expert in boat design, and my speculation should only be considered as the result of a few pleasant hours of work of an amateur boat builder during a rainy week-end. Nevertheless, I would love to hear PCB’s opinion on this “paper”…

Bibliography

Lars Larsson and Rolf E. Eliasson 1994. Principles of Yacht Design. Camden, Maine: International Marine

Howard I. Chapelle 1936, 1994. Yacht Designing and Planning. 2nd Edition. New York, London: Norton

Philip C. Bolger 1994. Boats with an Open Mind. Camden, Maine: International Marine

Tabernacle and Bowsprit

David Neder writes

I am located in the city of Waukesha, Wisconsin. About 90 miles NNW of Chicago
or twenty miles due west of Milwaukee/Lake Michigan.
I am attaching photos of the “Anna C”.

Agf00001
Bow with tabernacle and short sprit.

Since the boat will be trailered and I am too long in the tooth to wrestle with a mast, I added the tabernacle. Its section modulus in both the x and y axis is twice that of the mast at the pivot
point.


Materials: 1/2 Fir Marine Plywood, Ribbon strip mahogany plywood, mahogany, red oak, West Epoxy, Fiberglass. Two part poly-urethane paint on the exterior. Interior is paint with Acrylic paint with a fungicide. Construction is taped seam.

David J. Neder

And finally

David sent some other images, too, but there’s no more room in this issue. Neither is there room here for all the plywood-related comments, so they’ll have to be held over as well.

Please send your contributions to me, Bill Samson, 88 Grove Road, Broughty Ferry, Dundee, DD5 1LB, Scotland. wbs@sol.co.uk

Chebacco News 25

Chebacco News

Number 25, March 1999

ch246

Another glorious shot of Tim Smith’s LARK strutting her stuff off the New England coast. [Incidentally, these stunning monochrome shots of LARK have been just the lever needed by some of our readers to persude their better halves that the Chebacco is the perfect boat from them!]

Change to Web address:

Note that the World Wide Web address (URL) for Chebacco News is now

http://www.sol.co.uk/w/wbs/chebacco.htm

A Get-together for Chebacchisti?

I have been discussiong the possibility of a get-together for Chebacco-type people with various members of our elite [ahem!] circle, and it looks like the greatest concentration of Chebaccos is in the British Columbia area. I therefore asked one of the local guys, Jamie Orr, what he thought of the idea. This was his response:

Subject: Chebacco Gathering

Date: Fri, 11 Dec 1998 16:15:22 -0800

From: “Orr, Jamie” <JORR@oag.bc.ca>

To: “‘Samson, Bill'” <wbs@sol.co.uk>

Hi

I spoke to Jim Slakov and Randy Wheating last night. Both thought the

idea of a gathering was a great one. I expect something will happen

here anyway, and if we can bring in some other Chebacco and Bolger fans

from other areas, that would be perfect.

I didn’t take notes, but here’s what I think I heard. Jim’s boat is

finished and ready to launch come Spring. Gary Foxall, according to

Jim, has his boat turned and is working on the seams, the centreboard

case and so on. Randy’s boat is still upside down, but he’s moving

ahead too. Randy also corresponded a while back with someone in the

interior who was thinking of building — so there may be another boat

somewhere in the hinterland. He (Randy) thought that he could probably

be done by September of 2000 (see below), said it would certainly give

him a goal.

So it looks like there will be at least 3, probably 4 Chebaccos in the

water by then. Do you think its worth putting out feelers in Chebacco

News this early? As I said, there’s a strong chance a gathering of some

sort will happen anyway, and it would be good to meet some of people

from the Bolgerlist and the News.

Port Townsend’s Wooden Boat Festival is the first weekend after Labour

Day (the first Monday in September — does that hold true in Scotland?)

I don’t know if that would be a problem for potential attendees with

children, as school goes in the day after Labour Day.

Of course, having the Festival as a venue means that if only a few

people turn out, there’s still lots to do and see.

Jamie

PS Jim and Gary made their own sails. (All three of us bought the

materials at UK Sails in Sidney — 20 miles from Victoria on the way to

the mainland ferry — helpful folks.) Guess I’d better get a hustle on.

So there you are. If you’re interested, why not contact me or Jamie with your views?

Plywood?

I received the following email from Dr Dick Burnham, currently in Papua New Guinea:

Date: Sat, 13 Feb 1999 16:26:11 -0500

From: “Burnham” <burnham@datec.com.pg>

To: “Bill Samson” <wbs@sol.co.uk>

.My son is sending here xeroxes of the Payson-purchased sheet-Chebacco plans. I’ll study them and build a model. 1/16th inch ply–per your suggestions–if there is any here, otherwise I’ll just have to have some 1/16th rosewood or something equally exotic bandsawed for me to splinter and shove and glue up.

I was surprised by your suggestion to epoxy the interior side of the ply with 3 coats. The plywood is truly weather proofed; it is the baloney in a sandwich. No wonder some consider using non-marine grade ply. BTW, would you consider asking your newsletter folk to respond on what kind(s) of ply (and approx. cost/sheet) they used for the sheet-Chebacco? [OK guys – Fess up!] And how they arrived at their choice? It would be curious to see if you could construct a little chart on what, why, how much…even post-building analysis (such as: are they happy with it, does it have problems).

Now I see that the ply is so protected: glass cloth+3(?)coats epoxy outside, 3 coats inside. It still does more than merely make a form for glass, though. Or so it seems to me. It is structural and of course is in charge of resisting the log jammed into it on the water. Still wondering here about Parker’s use of “form-ply” which has US southern yellow pine exterior plys and has “waterproof” glues — after all it is a ply that must resist the sludge-like characteristics of wet concrete and must have sufficient

rigidity (better inner cores?) than other plys….

Regarding fiberglass. Has anyone tried Dynel, Xynole (I think?)? It is a highly abrasive resistant cloth that is knows to take kindly to curving forms…. Good for bottoms….

In your #23 you speak of Gray Feather as “having a bone in her mouth.” Just found in the delapidated library on this so tropical campus a copy of Slocum’s writings. Indeed he uses the very same phrase to characterize Spray as she turns from S. America and scoots westward with tradewinds to hold her leash onward toward Polynesia.

From deep in Melanesia,

Yours truly,

Dick Burnham

So – Write to me about your ideas on plywood. I’ll fess up first – I used pretty cheap Far-Eastern ply labelled BS1088, though it was clearly nothing of the kind. It has frog-hair thin outer veneers, and thickish inner ones. On the other hand the glue is certainly waterproof and there are few if any voids in the inner veneers. My theory is that glass/epoxy sheathing would make it acceptable, and so far I’ve had no problems (3 years after luanching). Let’s hear your stories!

Sails

The following email came from Jamie Orr:

Date: Wed, 14 Jan 1998 16:05:00 -0800

From: “Orr, Jamie” <JORR@oag.bc.ca>

To: “Samson, Bill” <wbs@sol.co.uk>

Lovely work, Bill

I was amazed at the quality of the print I sent in — are you sure you aren’t enhancing these things? My first thought was that we really have to get the cedar siding on the house refinished this year!

I hope to be able to send in some news on sailmaking soon. I’ve started with the mizzen, that being the simplest. I cut it out with straight lines all round and seamed it absolutely flat — as flat as my basement floor, anyway.

I’m using the two-sided tape to hold the cloths for sewing — I can’t imagine doing without it at this stage in my relationship with my sewing machine. It’s an old Pfaff 138 with a motor that never stops (or even slows!) and a hair trigger clutch. Even after using up two bobbins in practice, my first seams were still “interesting”. However, it’s gradually getting tamer, and the power is wonderful — the toughest

thing I’ve done so far is five layers of 4 ounce dacron in the clew patch, but the machine never noticed.

For holding the corner patches in place, I used a few strokes of one of the kids’ gluesticks. These are like lipstick tubes with soft quickdrying glue. It seems to stay flexible and doesn’t print through the cloth. To be on the safe side, I stuck each patch in the stack to the next, stuck the whole stack to the sail, then left some heavy books

on top for half an hour before running it through the machine. Of course, the books had to be the right sort — I found Chappelle’s “Boatbuilding”, Howard-Williams “Sails” and PCB’s “Different Boats” did a fine job. The last isn’t very heavy, but is definitely the right sort.

Again, great work on the News. Are you going to “bind” the last six as you did the first two lots? If so, put me down again for a copy.

Jamie

I replied:

Subject: Sails

Date: Thu, 15 Jan 1998 12:01:15 +0000 (GMT Standard Time)

From: Bill Samson <wbs@sol.co.uk>

To: “Orr, Jamie” <JORR@oag.bc.ca>

CC: wbs@sol.co.uk

Dear Jamie,

Some great ideas there! I used the double sided tape, too, on the main seams, and did all the edges, patching etc by hand.

I don’t know if you’ve tried some of the long seams in the mainsail yet, but here’s how I tamed the vast amounts of cloth –

1. Tape the next cloth on with double sided tape.

2. Roll up that cloth widthways, and the rest of the sail in the other direction, so you’ve got two long rolls (use tape to stop them unrolling) with a narrow strip of cloth

between where the seam is to be sewn.

3 Feed this long object through the sewing machine. The trick here is to get your sewing machine into the middle of the room with space fore and aft for the double roll as it passes through.

I hope that makes sense – anyway you’ve probably figured it out for yourself. I saw it happening in a photo I saw of a sail loft, where the machinist was working in a hole in the centre of a huge table which supported the double roll as it was fed through.

I like the idea of using the glue stick for patches. I used short lengths of double sided tape.

I haven’t done anything yet about a bound version of numbers 13 to 18. I only shifted about 3 copies of the first two, and it’s horrendous getting Word for Windows to

deal with documents that size, without falling over.

I’ve been working on an essay on how to build a Chebacco, for PCB&F. Phil’s planning to get essays from builders of various of his designs, and hopefully put them together into a book. I hope it works out.

Keep in touch!

Bill

sails

Me (Bill Samson) working on my Chebacco Mainsail – Very therapeutic!

For anyone planning to make their own sails, I’d like to recommend a couple of publications that I’ve found very useful:

“Sail Making for the Home Boatbuilder (Including: altering second hand sails)” by Paul Fisher – cost £12 +£1 p&p (UK) from Selway Fisher Design, 15 King Street, Melksham, Wiltshire, SN12 6HB, UK, www.selway-fisher.com, email: selwayuk@aol.com

“The Sailmaker’s Apprentice” by Emilano Marino, International Marine (McGraw Hill). $39.95

Ed Heins makes progress:

Had a photo and email from Ed Heins, who is completing a Chebacco starting with a part-built hull from Burton Blaise:

ch248

Ed Heins’ Chebacco hull nears completion

Subject: Winter’s waning

Date: Sat, 20 Feb 1999 22:16:50 -0500

From: “Ed Heins” <edheins@hcr.net>

To: <wbs@sol.co.uk>

Bill,

Haven’t messaged you for a while and thought I’d give you an update on the project. The boat still resides beneath 2 tarps and lowered A frame in the back garden, but I do have posession of spar lumber as of today. The local sawmill was cutting some spruce, so I commissioned a half dozen 2 x 6 ” 20 footers and another dozen 14 ft 1 x 4’s. He wanted to cut me a 4 x 4 blank, but I think laminating will help stop warp. Corkscrew masts being just so unprofessional looking.

Lamination starts on Monday, and then will be working on turning the square blanks into round masts. Oh well a first time for everything.

. . .

Cheers,

Ed

And finally:

A slightly thinner Chebacco News than usual, and later than usual, too! Don’t complain – It’s up to you guys to keep me informed of developments. No news = no Chebacco news!

Bill Samson, 88 Grove Road, Broughty Ferry, Dundee DD5 1LB, Scotland.

wbs@sol.co.uk

Chebacco News 19

Chebacco News

Number 19, January 1998

Is Electric Outboard Power feasible for a Chebacco?

Gil Fitzhugh wrote to Phil Bolger and Friends –

Dear PCB&F,

. . .

I’ve been intrigued by ‘Lily’ [the electric launch] and saw her or a sister ship at St Michael’s last month. I’m not looking to build or own a power boat, but I’d welcome your views about whether the newest electric outboards with a modest number of batteries would provide reasonable auxiliary power for a Chebacco. I shouldn’t think I’d need to motor more than 3 hours between charges – usually less, since I wouldn’t go anywhere far in a Chebacco if I couldn’t anticipate reasonable sailing – and maybe a couple of solar panels on the cabin roof (or deck house) would replace, during a day’s sail, what I’d used up motoring out of harbor in the morning. Otherwise, I figure a 5-horse Honda 4-stroke would be the next-most environmentally friendly source of adequate power. Thoughts?

Best regards,

Gil Fitzhugh

PCB&F replied –

Dear Gil,

. . .

On your E-power idea, the matter is straightforward and viable for the milder duty cycle you propose if you take it seriously. Before LILY, we hung two smaller 42lbs thrust MINNKOTAs on Ted Ratcliff’s 20′ ply Chebacco ‘KATTEPUS’ and she went quite well, only hampered by the limited pitch (one size only available) on the props.

The following hardware should be good for up to 5 hours of continuously powering your boat:

  • 65/70lbs thrust 24 volt MINNKOTA (saltwater series optional for coastal use) [$430],
  • 4x6V TROJAN T-105 for 217Ah (or T-145 for added range and cost!) [4x$49 or $129] connected in series to get 24V, but interruptable by
  • single battery switch into two banks of 12V [$20], which in turn can then be charged readily in less than overnight by a
  • 40Amp STATPOWER 4-stage ‘smart’ charger with two-bank output to feed each 6V T-105 pair with 20Amps as de facto one battery [$350]
  • You could add an E-meter [$160] to gauge consumption and get instant reading on voltage and actual amp and amp/hr numbers – useful and instructive.

This will cost more than any combustion engine. But after initial installation, and very minor battery maintenance you’ll be running her for years without additional worry, never mind noise, vibration or oil-plumes – decent return for the money. E-cost will be on the order of perhaps 80c-$1 per total charging cycle . . . But always recharge immediately after you bring her back within reach of the nearest 110V outlet.

Put two batteries in about the location in each cockpit bench where [the Cruising Chebacco] plans show a single one. And locate the expensive charger inside the cuddy/house to keep it out of the rain. LILY’s rain-proof units would take twice as long to recharge these 6V pairs, and seem thus way too wimpy for the occasion. Your E-CHEBACCO would have about 2/3 the capacity of LILY. You probably won’t see more than 4Kt due to the limited pitch on that 11″x4″ prop.

. . .

Susanne Altenburger

Phil Bolger

Hanging the bilge planks on a Sheet Ply Chebacco:

Skip Pahl has been comparing notes with Jamie Orr regarding the hanging of bilge planks. He kindly copied this email to me:

Dear Jamie,

Thanks for all the good information in CN about your building methods and

experiences. Your advice is really timely for after several years of

deliberations, courage and model building, I began cutting wood this summer.

Progress is slow. My building speed is limited by the ability to buy only

three sheets of plywood (or its $ equivalent) every two weeks! Add to this

the fact that I’m very slow when it comes to new types of construction and

you’ll understand why I am straining for new wisecracks to answer the

inevitable question, “So, when’s the big launch date?”

I am writing to you because it is approaching the time to hang the bilge

planks and I am struggling to visualize the process. I too wish to avoid

building all that stress into the hull that 1/2″ ply creates when making that

“Gawdawful” twist and have decided to go with the 1/4″ ply laminations.

I made 7:1 scarf joints when I layed-up the 1/2″ sheer strakes and bottom.

They worked out really well. The curves are fair and the joints appear to be

very strong. However, with laminated bilge strakes it looks as though the

butt block is the way to go. Would you review my thinking here and see if

I’ve got the process right?

PART 1 ( (No volunteers required)

1) Trace mylar or craft paper templates on bilge openings on each side.

2) Transfer template shapes onto for bottom layer plywood. Cut out and

coat outboard surfaces with rolled layer of unthickened epoxy. Allow to cure

and sand.

3) Make 4″(?) wide butt blocks out of 1/4″ plywood and attach to aft end

of each of the forward sections of the bilge strakes. Use thickened epoxy and

bronze screws to clamp.

4) Attach forward section of each strake to the stem using bronze screws

only and begin working aft making temporary clamp blocks that are attached to

the shear strake and bottom. Use wire stitches as needed to fair.

5) Attach aft end blocks to middle sections of bilge strakes.

6) Hang middle sections of bilge strakes by beginning at the forward end

butts and working aft. Use bronze screws and epoxy at the joints with wire

stitches at the top and bottom to keep joints fair. Work aft using wire

stitches and clamp blocks (no glue).

7) Hang aft sections of bilge strakes using bronze screws on transom.

8) Go back and unscrew planks at stem and transom and reattach with

epoxy and epoxy/cabosil putty.

PART 2 (Volunteer required)

1) Transfer template shapes onto top layer of unjoined plywood and cut

out.

2) Pre-drill an 8″ grid of holes in exterior panels to allow for escape

of air pockets in laminating.

3) Masking tape interior seams closed so epoxy will not run into

interior of hull.

4) Dry fit exterior lamination panels and mark for future positioning.

5) Beginning with the center panel, roll thickened epoxy onto outboard

surface of inside lamination and unthickened expoy onto inboard surface of

exterior lamination.

6) Join the two panels with pan headed screws beginning at the center

and working forward and aft.

7) Apply forward and aft sections of exterior lamination in similar way

using bronze screws along the butted seams. No butt blocks are used on these

seams inside the hull.

8) Before epoxy has cured, apply unthickened epoxy to seams and follow

with epoxy/cabosil putty mixture to fair.

Sorry this took so long. Please let me know if I’ve got it screwed up. I

have nightmares of things getting stuck together crooked.

Thanks for your help.

Skip Pahl

These sound like sensible procedures. My only comment is that I’d probably thicken the epoxy, a little, between the laminations – but that’s just personal prejudice.

Skip also sent this photo of a gorgeous model he’s built of a sheet ply Chebacco:

transom

Skip Pahl’s model of a Chebacco-20

Uncured epoxy

Just about every boatbuilder will at some time in their career experience the horrors of uncured epoxy. This happened to Burton Blaise, who sent this nessage out to a few of us. In short, getting it off is not a lot of fun:

In case anybody is interested in my continuing epoxy saga, I am

pleased to report that, after a gruelling week-end of scraping, grinding

and sanding, I finally got all of the gummy epoxy off my Chebacco hull

and am back at where I was a couple of weeks ago (that is, ready to

complete glassing the hull – weather permitting!). As mentioned in an

earlier message, I found that the straight edge of a piece of broken glass

really works best to scrape the majority of the goo off. Any remaining

residue was removed using a belt sander fitted with a very coarse

sanding paper (30 or 40 grit). Anyone attempting the broken glass trick

should bear in mind the need to be EXTREMELY careful during the

scraping operation – I got carried away and careless, with the result that

my glass scraper broke in mid-stride, causing my hand to slip past the

glass edge and slicing a good way into my right index finger (after

bandaging my finger – which probably really should have gotten stitches

– I wisely resorted to completing the operation wearing thick canvas

gloves). This hull hasn’t even been launched yet, and already its been

baptized with my sweat, my tears (of frustration) and now my blood!

However, the way things are shaping up, I know that she’ll be worth it all

in the end. Yep, she sure is a shapely hull.

Burton

I’m certainly glad to hear it worked out OK eventually!

Chebacco too big for you? – Try a ‘Bobcat’!

Colin Hunt of Australia sent me this photo of a pair of Bolger ‘Bobcats’ (a.k.a. ‘The Instant Catboat’, ‘Tiny Cat’, ‘Little Gaffer’ . . .). Colin points out that the construction of the 12 foot hull is very like that of a sheet-ply Chebacco hull. They are excellent daysailers and family dinghies, too. So – if you’ve not quite decided that you’re ready to take on the construction of a Chebacco-20, why not hone your skills by building a ‘Bobcat’? Plans are available through PCB&F, as well as Dynamite Payson, who has also published the excellent ‘Build the Instant Catboat’, which is an almost indispensible aid to construction.

ch171

A pair of ‘Bobcats’ by Colin Hunt.

Reefing systems for a Chebacco

I was recently caught out in a force 5, under way, single handed, and had the uncomfortable job of trying to put a couple of reefs in while slithering around on the cabin top, avoiding being swept overboard by the flailing boom. It’s no secret that the Chebacco is fairly tippy, initially, (though with superb secondary stability) and so whatever side you approach from, the boat heels in that direction and the swinging boom heads your way! I eventually backed the mizzen a little so that she hove-to on port tack and thus was able to approach the boom from the starboard side, where the cleats for the reefing pendants are attached.

Although I got her well enough reefed to sail the 7 miles back to my mooring, the sail was a tad baggier than I thought ideal, and I felt there must be an easier way to do things. So I phoned Brad Story, who has built and sailed more Chebaccos than anyone else. He suggested that I would have been better to lower the boom into the cockpit, or into a boom crutch to hold it steady while I was working on the reefing. Seems obvious now; I wish I’d thought of it! Secondly, the cleats for the reefing pendants should be positioned so that they can be reached from the cockpit. Good thinking!

Brad writes:

Dear Bill,

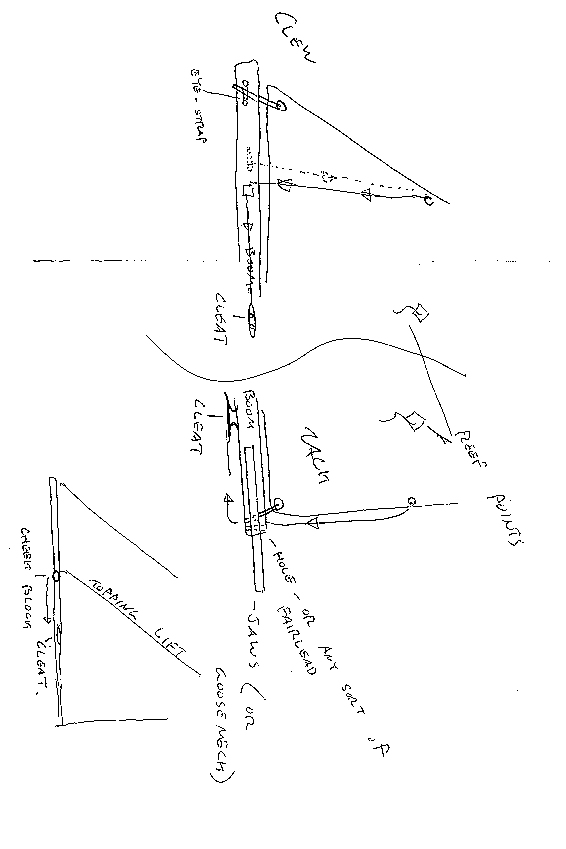
I’ve tried to sketch some details of my own rig. The topping lift is on one side only (keeps it simple!). At the mast head is a loop spliced into the topping lift. It’s held up there with an eye-strap or two. From there it just runs to a cheek block on the boom, and then forward to s small cleat. It’s very handy – it’s right in the cockpit. It can never fall down and it’s one less line to deal with when setting up or striking the rig.

The jiffy reefing lines I’ve sketched, also. At the tack, a single line is made fast at the upper grommet. It runs down the luff, through a fairlead (hole, whatever) and aft to a cleat on the bottom of the boom, far enough aft to be reached conveniently. At the clew, a line is made fast to an eye-strap on one side of the boom (below the appropriate grommet and alittle bit aft). This line runs up to the grommet , through it and back down to a fairlead (or small cheekblock) and forward to a cleat. When it’s time to reef, just lower the sail a bit, haul both of these lines until the grommets are where they should be, and cleat them off.Now all you need to do is bundle up the foot of the sail. Again, it’s fast and convenient.

Brad Story

brad

Brad Story’s sketches of reefing arrangements

Jamie Orr’s hull nears completion:

Jamie Orr of Victoria BC, Canada, sent me this picture of his hull. He reports that he’ll be making the sails over the winter, when it’s too cold for epoxy work. He’s using 5.4 ounce cloth and plans to make a jib, as well as main and mizzen.

SORRY – THIS PHOTO HAS BEEN LOST

Jamie Orr’s sheet-ply hull

And finally . . .

That’s all for this issue. Here are some addresses that may be of interest to readers:

Phil Bolger & Friends, PO Box 1209, 29 Ferry Street, Gloucester, MA01930, USA (- Designers of the Chebacco boats and source of plans for all versions)

Harold H Payson, Pleasant Beach Road, South Thomaston, ME 04858, USA ( – Author of ‘Build the Instant Catboat’ and alternative source of some Bolger designs)

Brad Story, Boatbuilder, Box 231, Essex, MA 01929, USA (- Originally commissioned Phil Bolger to design the Chebacco boats, and has built many superb examples of them)

Bill Samson, 88 Grove Road, West Ferry, Dundee, DD5 1LB, Scotland ( – Editor of Chebacco News)

Chebacco News 17

Chebacco News

Number 17, September 1997

Bob Cushing launches the first Chebacco Motorsailer

chglhs1c

Bob Cushing’s Chebacco Motorsailer Congratulations to Bob Cushing for building and launching the first example of the Chebacco Motorsailer – the ‘Glasshouse’ version referred to in Phil Bolger’s book ‘Boats with an Open Mind’. This version has a fixed ballast keel and no centreboard. The tiller is positioned to allow the boat to be helmed from within the spacious cabin. Bob writes:

We have sailed the Chebacco Motorsailer 3 times now and finally had some good wind on our last sail. With winds of about 20-25 kts and 2-4 ft waves on Seneca Lake in upstate New York we sailed downwind for about 15 miles. We had both reefs in as we were not sure of how wild it would get but as it turned out it was quite docile running downwind in these conditions – one reef would probably have been adequate. Speeds were in the 5-6 kt range as measured by the GPS. Speed under power with the 9.9 Honda have been measured by the GPS to be 7.0-7.5 kts max and 5.5 kts a more reasonable (i.e. quiet and comfortable) speed under power.

The boat is very comfortable with 7 foot berths, a dinette table to port, which can pivot to center, a kitchen area up front with sink, stove, cooler, food storage and 6 gallon water tank. There is a lot of storage space under the bunks and throughout the rear of the boat under the decks. A porta-john with pump-out capability is kept under the step, along with the toolbox. A small built-in fuel tank is behind this. Tinted Lexan windows were used throughout. The front-center opens and four Beckson round ventilation ports w/screens elsewhere. Trailing and launching is quite easy from a standard bunk-type boat trailer. Setup time is about 20 minutes – Take down and pack up about 30. This will be shortened by some 5 – 10 minutes with some simplification of procedures and fasteners. The mast is laminated from fir and weighs 60 pounds – not too hard to step – walk it up on the roof as one end rests in the tabernacle. The actual lifting/pivoting weight once it is in the tabernacle is probably only 30 – 40 pounds. The sails were made from a Sailrite kit. They are made from 5 ounce dacron and went together pretty easily using a home sewing machine and two people working together on large sections.

All in all a really nice little trailerable motorsailer.

Bob Cushing

b.cushing@csss-a.cvsi.com

chglhs2c

Another view of Bob’s Chebacco Motorsailer

Phil Bolger writes:

Bob Cushing lights up our lives. Amazing, and wonderful, how fast he does good work. The boat looks nice and I am inclined to think it’s a better bet than the more-or-less conventional ‘cruising Chebacco’ we’ve been discussing. . . . the idea of sitting in shelter, right on the pitch axis and center of buoyancy, has a lot to be said for it.

Phil

Bob Cushing has built a number of Bolger boats, including the Fast Motorsailer and the Microtrawler. I understand that Bob’s Microtrawler is currently up for sale –

microtrc

Bob Cushing’s Microtrawler – FOR SALE!

If you are interested in buying it, Bob can be contacted at 5998 E. Lake Road, Cazenovia, NY 13035-9323, USA, or at the email address above.

A Tool for fairing Epoxy Fillets:

Burton Blaise writes:

One of the great advantages of building hard chined hulls by the “tack and tape” method is that even amateurs such as myself can put a hull together with minimal time and effort. However, working on my Chebacco 20 hull, I found it difficult to cut the bilge panels with sufficient accuracy to give me beautiful, fair outer seams at the chines (where the bilge panel meets the topside and bottom panels). In fact, this type of building technique cannot do otherwise than produce ugly seams where

hull panels meet since the plywood edges are not bevelled to ensure perfect mating of the pieces. Therefore, such seams (especially outer seams) must generally be made fair before applying glass tape by globbing on putty (thickened epoxy) and then smoothing on with a putty knife or other straight edge to produce a nice, fair and eye-pleasing chine. (This also adds to the strength of the joint).

Working on my Chebacco 20, I was finding this to be a pretty demanding task, with a great deal of fussing and several successive coats of thickened epoxy necessary to produce a half-way decent looking outer corner. Thinking that there had to be an easier way, I eventully came up with an idea for a simple tool which enables me to create perfectly fair outer corners in just one pass. Perhaps such a

gizzmo is already known to the more initiated boatbuilders, but for the rest, here is my idea:

Take two tongue depressors or other flat, straight edged pieces of wood (e.g., paint mixing sticks), place (stack) one on top of the other, and drill a small hole through the two stacked pieces at one end. Then pass a short screw through the hole and tighten with a wing nut to create a pivoting point. You now hold a very simple device which greatly facilitates the task of fairing an outer corner or chine along a

compound curve on a hull. To use, simply glob thickened epoxy on the seam to be faired, then open the fairing gizzmo (spread the sticks apart) and rest the straight edge of one blade (or stick) on one of the hull panels and the other blade on the adjoining panel, and slowly, steadily draw along the seam making sure that both straight edges rest firmly on the panels at all times. The gizzmo automatically and smoothly adjusts to the changing curves and angles between adjoining panels as you go along the hull. The result is a perfectly smooth and fair outer corner or

chine in a single pass, with only minor touch ups to be done later. I’ve used this on the Chebacco hull and have found it to work like a charm! Once the resin sets, I then apply the glass tape and fill the weave with unthickened epoxy, according to standard practice. Hope this is helpful to someone out there!

Burton

Rigging a Chebacco:

Burton wrote to me again:

While I am nowhere near the stage of having to rig a Chebacco yet (as is quite obvious from my recent correspondence with the Bolgerphiles group!), I am starting to think about the details of the rigging. Now, I really have very little experience with sailboat rigs in general (my Gypsy’s rig is so simple that it does not prepare me for the more complicated cat-yawl rig of the Chebacco), and the details shown

on the Chebacco building plans leave me with more questions than answers. For instance, I’m not relly clear on what exactly lazyjacks are, or how to set up the toppinglift, nor do I know much about reefing and pendants & such. I wonder if, for the benefit of the uninitiated, you might consider devoting part of an upcoming “Chebacco News” issue to the art of rigging a Chebacco, perhaps even including some detailed drawings of how to set up her rig and some explanations of the different elements (sheets, halyards, cleats, pulleys – er, blocks, that is, etc.). I

suspect that we novices could stand to learn a lot from your own and other builders’ experiences – some food for thought at any rate.

Chat with you soon!

V. best,

Burton

My reply was:

Briefly, the halyards and the topping lift (which I have on the port side of the sail) go through blocks at the top of the mast, down to blocks at the mast foot, then back to cleats on the cabin roof at the front end of the cockpit.

The topping lift, if it was paired with another on the starboard side, would constitute a pair of Lazyjacks, which simply guide the gaff and sail down onto the boom when they are lowered, rather than falling off to one side. Lazyjacks often fork into 3 parts on the boom, to help gather the sail better. I’m not comfortable with lazyjacks because they need more line and complicate things. I like to get everything out of the way when I snug the boat away under its cover. The more lines, the more

complicated this would be.

A reefing pendant is a line which is attached to one side of the boom, just aft of the corresponding leech cringle which becomes the clew when the sail is reefed, is led through the cringle, then down to a block or fairlead on the other side of the boom, then led forward to a cleat where it can be cleated off when the sail is reefed. A similar pendant can be installed at the luff. When both of these are hauled tight, the sail is reefed all but the tying of the reefing points – which isn’t that important. With two lines of reefing points (as in the Chebacco’s sail) two pendants are needed at the leech, and two at the luff, with cleats for each.

That’s all I’ve got on my sail, apart from the mainsheet, which is straightforward.

Cheers,

Bill

Inexpensive epoxy

Dick Burnham writes:

After reading Reuel Parker’s “The Sharpie Book” I was newly informed that

only about 4 or 5 firms manufacture epoxy. Parker buys direct, it seems,

from Shell Oil. A place in West Palm Beach, Florida (admittedly distant

from Scotland) sells an epoxy (RICO?) in a 15 gallon kit that includes

hardener and resin for about $377? I called them on their 800 number and

seem to recall that it was about $30 – / gal. Which, if its the same, is

soooo very different from West epoxy at $80/. The name of the WPB place is

in the appendix of Parker’s book.

Epoxy Woes!

Burton Blaise has been having problems with epoxy. He sent an email to the Internet Bolgerlist – read on:

I desperately need help from all ye bolgercolleagues experienced with epoxy . All summer long I’ve been using epoxy (a 4:1 mix from Gelcote International) quite successefully in assembling my Chebacco 20 hull. In typical warm summer weather, the epoxy would cure within about 24 h, to the point where it could be sanded. Occasionally, the epoxy would remain sticky even after curing for 2 days, but this sticky stuff (which I assume is amine blush) would come off readily by wiping with a wet cloth, and the epoxy could then be sanded.

Recently, however, I’ve been experiencing some difficulties with the same epoxy, and frankly, I’m at wits end to know what to do. About a week ago I did a few last touch ups (fairing and filling) with the epoxy and taped the last few seams around the keel. After 3-4 days of curing, I washed the sticky surface thoroughly with water as usual. I should point out that, other than being sticky on the surface, the epoxy seems to have hardened. When I started to sand, I noticed that the sand paper was clogging very quickly, and that the epoxy was not sanding into a fine dust (as it has been during all previous sanding sessions), but rather was either not sanding at all or just coming off in little waxy bits. In fact, in many spots the recently epoxied surfaces remain hard but tacky. I’ve tried washing several times with water, and even with acetone , but the surface remains tacky (even at the present time, fully one week since

the epoxy was applied, it remains tacky and cannot be sanded). When I tried scraping the epoxied surface using a cabinet scraper, I get a very thin gummy film coming off but nothing else. Washing with acetone followed by scraping does not improve things. Now, I’m pretty certain that I’ve measured the resin and hardener correctly, and in fact am using the same approach (and materials) that have worked well all summer.

The only thing different is that we have been getting some cooler, damp weather lately (particularly at nights, when its been going down to about 10 C), with a few rainy days. However, we’ve also had some warm days where the temperature in my tarp boatbuilding shed should have been more than sufficient for curing epoxy.

Well, now that you’ve read my sad story, could some kind soul please offer me some suggestions on how I can deal with this problem? Right now I’m stuck at this stage, since I need to be able to do some sanding before I can apply the final glassing over the entire hull. I’m especially anxious to complete glassing and painting of my hull by the end of September, so that I can turn her over and make some progress on the deck structure before having to call it quits for the winter. Is there anything that can be done, or has something gone horribly wrong with my epoxy, or my technique, or whatever?

Sure looking forward to some suggestions from y’all. Many thanks in

advance.

Burton

The Internet Bolgerphiles duly replied and the conclusion was that the problem was probably caused by a slight excess of hardener in the epoxy mix (a lesson for us all!). The solution that was adopted by Burton was to scrape off the bad epoxy. He tried a cabinet scraper, but the best solution was to use fragments of broken glass as scrapers.

Meanwhile, if anyone has any other theories/solutions, please send them to me and I’ll include them in a future issue.

Butt Block Woes:

You’ll recall that in the last issue, problems were reported with butt-strap joints giving out when the panels were bent into position. Jamie Orr comments:

I used the same plywood butts on my Chebacco that Burton did, but reinforced them with 1″ #10 bronze screws. This also solved the clamping issue. The soft bronze is nice because the screw can be countersunk without worrying about breaking through the other side, the point is easily ground off when it does break through. Although Burton has fixed his problem, adding screws might provide more peace of mind.

After looking at the sailing pictures, I feel inspired all over again. I’m having problems staying on my time line, but still plan to flip this Summer.

Jamie Orr

A later email said:

I thought I’d add another comment.

When I joined the pieces of bilge panel (first layer of 1/4 inch), I did the first joint on the boat. This was OK, but for reasons since forgotten, I took the panel off (only tacked on) and did the second one on the flat. I think that if I build another boat in this style, I will do all the butt joins flat, as it’s easier to clamp. Also, the edges beyond the buttstrap can be easily edge glued and will then stay in line rather than twisting apart and having to be held in place when fastening to the hull.

Of course, if you are fastening to the hull at the same time, the last point doesn’t apply, but I try to tackle only one thing at a time.

Jamie

Progress report

Jamie Orr also reports progress:

Hi, Bill

I’m at the stage of “designing” my sails, and thought I’d touch base with you. So far you’re the only builder I’ve heard of who also made the sails as well.

I think you said somewhere that you cut the mizzen very flat. Was that dead flat or only relatively flat? Can some shape be induced by slacking off the snotter?

On the main, I started out thinking that I would use a vertical cut, very plain. However, now I’m thinking that it might be more useful as a learning exercise to go the whole nine yards, with horizontal cut, roach, battens and all. I’ll probably change my mind a time or two yet, as I’ll be doing the mizzen first. This is all winter work — I’ll start as soon as the weather becomes a problem for boatbuilding.

On the boat, I now have the hull glassed (six ounce), except for some work on the keel. One of the high points of the hull was carving the stem — it always feels so good to work with real wood after a long spell of plywood and fibreglass. I used the band saw to cut the profile and rough out the taper, then block plane, spokeshave and chisel to finish it off.

I laminated the bilge panels out of 1/4 inch plywood. I glued and fastened the first layer on, and let the epoxy set up before I started the second layer. To guard against voids between the layers I pre-drilled holes on eight inch squares, in the outer layer only, after the pieces were cut to shape. I rolled some unthickened epoxy on to both layers, then spread a generous amount, slightly thickened, on the outer piece (outer, because it was lying flat and so the epoxy couldn’t drip or drool). I started with the

middle piece, and started fastening from the centre of that, using self tapping, pan head screws to draw the layers together. Working outward both ways from centre helped make sure that air and excess epoxy got pushed out.

When I put the end pieces on, I started fastening from the butt joints and worked to the ends of the hull.

The screws were number 8’s, and almost none of them stripped the threads in the hole. Where this did happen, I just rammed another one through both layers, right beside it. At the butt joints, I put them in four inches apart and got a nice tight joint each time. Butts were about a foot away from those in the first layer. I used a cordless drill to drive the screws. Power is almost a necessity here due to the working time of the epoxy, especially in mid-summer. I used 287 screws altogether, and it took a solid four hours, with no breaks, to do both sides, from the time the first batch

of epoxy was mixed. My dad helped position the panels, but we only had one drill for fastening — I had a back-up drill on hand, but it was too new to use near epoxy unless the first one failed!

I filled the joints at the edges right away, so that if any blush formed, it wouldn’t be deep down in the joints where my sandpaper couldn’t reach. The joints were already sealed with masking tape on the inside.

I have a big clean up planned, so I’ll try to remember to take some pictures when I’ve done that — the site is not suited to well laid-out photos, but we’ll see what happens.

Jamie

On the subject of sailmaking, I replied:

Yes the mizzen is cut DEAD flat. It assumes some shape anyway, especially if the snotter isn’t twanging tight, and more if the snotter is slackened.

I cut my main with horizontal cloths, broadseaming the seam that goes through the tack and one either side, down to no broadseaming at the peak. You need the double-reefed main to set as flat as possible, therefore broadseaming at the peak is a bad idea. I carried the broadseaming back about 30% of the way from the luff, to keep the maximum draft well forward, to avoid weather helm. It worked! Likewise, the

curves on luff and foot should have maximum depth about 30% up/back from the tack. These curves were about 6″ deep, but that was just guesswork on my part. I’m not sure whether more, or less would be better.

Bolger Plans

Plans for all versions of the Chebacco and all other Bolger designs are available from Phil Bolger and Friends Inc., Boat Designers, P.O.Box 1209, 29 Ferry Street, Gloucester, MA 01930, USA. Phil enthusiastically recommends Dynamite Payson’s books. They are ‘almost a necessity’ for building many of his designs.

And Finally

That’s all we have room for this time. Please send me your news:

Bill Samson, 88 Grove Road, West Ferry, Dundee DD5 1LB, Scotland

Chebacco News 16

Chebacco News

Number 16, July 1997

The BIG one!

I had this email from Simon Jones (sjones@hal9000.net.au):

G’day Bill!

With some trepidation and not a little awe, l write to say that l have

committed myself to building a Chebacco 25 (the big chewie!), presently

looking at any possible modifications to improve the original, have really

enjoyed reading the newsletters, and hope to be able to put some of the

ideas into practice (forewarning of any real stupid mistakes accepted in

confidence, sure I’ll need it!). Many years a sailor and this is my first

building project, I’m hoping to start towards the end of the year and take

about a year, and l would greatly appreciate you putting me in touch

(especially by email) with any of the other builders.

yours….Simon Jones.

WOW! So, at last, one of us has taken the plunge. I’ve put Simon in touch with some Lapstrake Chebacco builders, but of course this (as far as I know) will be the first `25 to start building. We look forward with interest and bated breath to hearing more about this ground-breaking task!

Memories of July ’96

billp

Bill Parkes takes the helm of ‘Sylvester’

I (at last) got a film developed that has been in my camera since last summer, when Bill and Mary Parkes of Mechanicsburg, PA, visited. Bill, Donald McWhannell and I went for a cruise up the Tay estuary. It was a beautiful day, with light winds, and we went with the tide upriver to Balmerino (about 8 miles) and back again to West Ferry, using the outboard when the wind dropped completely . . .

‘Itchy and Scratchy’ . . .

Fraser Howell of Nova Scotia has sent me some photos of his strip-planked Chebacco ‘Itchy and Scratchy’ –

Hi Bill,

Finally, some pictures, as you recently referred in the Newsletter . . . This is Chris Bennet and I (in the hat).

fras3

This picture of us leaning on Itchy and Scratchy was our first ever night out.
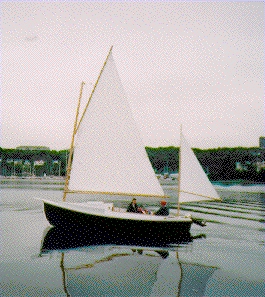
fras1

You may notice how the heavy motor, 10hp, trims her down by the stern. A smaller motor would be more appropriate (unless I can get it to plane!). I’m going to try a prop with less pitch.
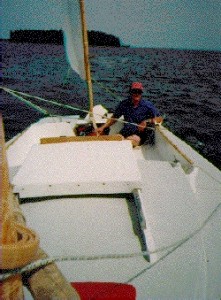
fras2

You can see in this shot looking aft how little weather helm she carries. I’m going to rig a self-tending jib and a tiller comb before I launch in May.

Self-bailing cockpit?

Fraser also sent me an email –

Bill; have you considered a self-bailing cockpit ? What would you think of

another cockpit floor, just above the wl, draining into holes cut into the

cb case ? The thing would be 3/4 in plywood, made rigid with supports. Air

circulation from additional cut-outs into the cabin. I’m thinking more of

rain drain than increased seaworthiness or storage. I got the pictures back

safe and sound. I am going to launch on the weekend of June 13. It is still

too cool in Halifax on the water for comfort on a small boat. In getting

ready, I noticed some unevenness in the veneers. I had to re-glue the edges

of some, so I resealed the hull and painted her white. I hope this will not

become an annual event. I think that I might have been better off sheathing

her in heavy cloth and epoxy rather than the hardwood veneers. Other options

to bailing rain are a boom tarp or a bilge pump with battery and solar panel.

Fraser

Here’s how I replied –

Hi Fraser,

As you may know, I use a boom tarp. The only self-draining Chebacco I

know of is Alessandro Barozzi’s – this is an open version (no cuddy) and

the cockpit has no footwell! I.e. the seats go all the way across and

water drains over the inner transom into the outboard area. I don’t know

how he deals with raising and lowering the centreboard, but no doubt it

would be pretty straightforward to design some feasible system. This

style of cockpit could be combined with a smallish footwell which is

covered by a lid when not in use – like the one in Micro. On the other

hand, one of the attractions of Chebacco, for me, is the armchair-like

comfort of the cockpit!

I’m contemplating an article in CN on how to make a boom tarp – giving

dimensions. I made one from blue polytarp in an afternoon – It’s lasted

over a year.

Cheers,

Bill

It also occurred to me that the Chebacco’s cockpit can be swamped and the water could only get as high as the seats before draining out over the inner transom. I’m pretty confident the Chebacco would sail reasonably well in this state (- I tried it with my model Chebacco -) so a self draining cockpit isn’t really needed for safety – it would simply avoid the need for covering the cockpit at a mooring, or pumping out.

Fraser also reports that he’s going to try a self-tending jib with a boomed foot. I look forward to hearing how it worked out.

Getting rid of Epoxy Drips

Dick Burnham emailed me with the following query-

On another note, how do you guys clean up WEST epoxy? On my little canoe

it is one mess on the inside since I built in upside down and couldn’t see

inside until it came off the jig. I’m fearful of putting the belt sander

to it because the plywood is a mere 4mm thick, and the outer veneer is as

thin as frog hair…. Currently, when roused to solve the problem, I’m at

it with — alternatively, a block plane and a Stanley preformed metal job

which is something of a cross between a plane and the coarsest rasp afloat.

The site of the issue, as I didn’t make clear, is on the inside of the

lapstrakes. The problem should be identical on the Chebaccos.

I referred him to Gil Fitzhugh, who replied in his inimitable style! –

I know of no fun way to take hardened lumps of epoxy off the insides of

plywood strakes, but there are some effective if tedious ways. For truly

egregious runs, slicing down the right-way-up hull (from the blobby end of

the run to the plank from which it cometh) with a narrow chisel gets you

started. You don’t want to shave the run so flat that the corners of your

chisel dig into your precious veneer. When you’ve chiseled enough that your

runs have fairly flat tops, but are still proud of the plank, switch to a

flexible cabinet scraper, again scraping parallel to (not across) the run.

In this step I generally scrape from the plank lap up to the blob. You can

take off a truly microscopic shaving, and blend the run totally into the base

coat of epoxy. (You did coat the inside of the plank before you permanently

installed it, didn’t you? And let it dry? And sand it smooth while it was

still lying flat and unobstructed in your shop, and not all squoonched around

a narrow hull? You didn’t? Aww-w-w-w!)

If the run has set up rock-hard, a few passes with a hair-dryer will soften

it for cutting with a chisel. The scraper seems to work fine on hard epoxy,

but you’ll have to sharpen it fairly often.

I don’t think 4mm ply is a good match for a belt sander once the planks are

bent around the boat. When the planks are flat, well, maybe. But be bloody

careful. I like your analogy to frog hair.

If you ever build another boat, you may prefer to avoid this problem in the

first place. When you offer up your plank to the hull for its very last

trial fit, mark it with a pencil line on the inside where the prior plank

overlaps it. This doesn’t take a lot of acrobatics – just hold a pencil

against the edge of the previously installed plank, and slide it along. When

you take the plank off the hull for the very last time, you’ll see exactly

where the overlap will occur. Mask it off with tape. Paint thickened epoxy

only on the unmasked edge. Leave the tape on while you clamp the plank in

place. Thickened epoxy will dribble out on the masking tape. Reach

underneath and peel off the tape. It doesn’t have to come off in a single

strip; in fact, you’ll probably have to tear it around bulkheads, molds,

etc. This tape will be a yucky, slithery, slimy, god-awful mess, which you

will allow to infiltrate and harden upon your shop floor, your wastebasket,

your hands, your glasses, your clothing and your hair – everywhere, in fact,

except the inside of your hull. You won’t have eliminated the excess epoxy,

but you’ll have been selective about where you let it do its thing.

Butt straps – epoxy etc. –

Burton Blaise emailed me about butt straps in the sheet ply Chebacco-20 he’s building:

Just thought I’d get in touch to keep you apprised of my progress on

the Chebacco-building front. At this time, I have just completed fastening

the topsides and bottom panels onto the frames and bulkheads using

bronze screws to hold the panels in place and epoxy fillets/glass taping

for ultimate strength and permanence. I found that, while this operation

is fairly straightforward, the topsides experienced considerable strain,

especially at the bows, which resulted in my butt joints cracking at the

seam between the two butted sections (the butt joints were made with

epoxy and 1/2″ plywood butt straps, as explained in the plans and

according to previous Bolger designs). I’m not really sure what went

wrong here – maybe too much twist and an improperly made butt joint

(though I’ve made similar joints before with good old fashioned

polyester resin and never had a problem). This is the first time that I’ve

ever used epoxy, and I must say that I find the stuff to be a pain in the

butt (pardon the pun) to work with – this stuff takes much longer to set

than polyester and it seems somewhat brittle once it has cured – I

noticed that unless the epoxied/taped joints have fully cured (i.e., >2

days at 20C during the daytime), any stress in the joint can cause the

tape to delaminate or the fillet to “crack”. Once fully cured, however, the

joints seem to be all right and can take stress (though I haven’t really

forced them too much for fear of causing real damage). I sure hope

that the finished product turns out OK in terms of strength, durability,

etc.. In your judgement, are these experiences with epoxy fairly normal?

Also, I noticed that the epoxied surfaces remain “sticky”, even though

the epoxy has hardened to a full cure (i.e., after several days). When I

wash with water, the stickiness is removed. Is this stickiness caused

by the famous “amine blush” which I’ve read occurs with epoxy?

Anyway, to get back to the cracked butt joints, this unfortunate

occurrence affected the fairness of the panel’s curve at the joint, and I

have remedied the situation by using a combination of “Spanish

windlasses” and clamps to draw the edges of the butted sections back

into alignment as best as I could. Then I strengthened the joint by

applying gobs of thickened epoxy to the other side of the butt joint (on

the outside face of the hull), trying to work the stuff into the thin fissure,

and then applying a strip of fibreglass tape to cover this seam, and

filling with epoxy. This has now cured, and seems to be fairly strong (I

hope that it will be even stronger in the end, once the whole hull has

received its fibreglass sheathing). I will of course now have to do quite

a bit of sanding and fairing of the outside face of the hull to

restore the fairness in the panel’s curve at this point. BTW, what should I

use for fairing – can I use Bondo, or thickened epoxy? If I use Bondo, will

the final fibreglass/epoxy sheathing stick well to it?

My next step is to proceed with tracing the shape of the bilge panels,

and then comes the keel and centerboard case (the latter has already

been built, and is waiting to be slid into place through the slots already

cut into the bottom panel and no. 4 bulkhead – BTW, I used Brad Story’s

technique of lining the inside surfaces of the CB case with Formica using

epoxy as the adhesive: seems to work fine). At this point, I can’t wait to

have the basic hull completed, sheathed, and turned over (since my

building shed is rather cramped, and I don’t feel like taking it apart yet, I

intend to use the “gorilla” technique to turn over the hull – that is,

convince a gang of friends and neighbors to carry the hull out, flip it

over, and carry her back in to rest on the building cradle – I’ll have to

stock up on some beer for this operation..).

That’s about all for now. As usual, I shall await your advice and

suggestions in great anticipation.

Hope you’re enjoying some fine sailing weather. I haven’t been out in my

Gypsy yet, as I’ve been too busy building a boat and mowing the lawn

these days, but I do hope to get out on the St. Lawrence river soon.

Cheers,

Burton
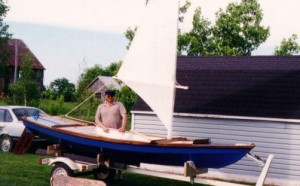
ch141

Burton Blaise with his Bolger ‘Gypsy’

Wow! Plenty to discuss here.

Butt-joints – They’re certainly not the strongest way of joining two sheets of ply, especially if the butt block is on the inside of a bend (as it invariably is in boatbuilding). My daughter, Amy, did a school project a couple of years ago on the comparative strengths of scarf joints, butt-block joints, taped butt joints (i.e. glass tape either side) and ‘glass welds’ – where the two pieces are planed away to give a shallow ‘V’ which is subsequently filled with layers of glass and epoxy (a poor man’s scarf). Of these, the strongest (with 1/4″ ply) was the taped butt, which was stronger than plywood with no joint at all. The scarf (properly done) was as strong as unjoined wood, the ‘glass weld’ was very variable and the butt strap the weakest of all. The only merit of butt-block joints is their simplicity. Nevertheless, with a layer of glass on the outside of the joint, it is at least as strong as the taped butt, so I reckon the strip of glass tape you’ve applied will achieve this. The problem will be to get a fair surface without sanding away all the good glass.

Another point is that butt straps should always be nailed, as well as glued – this takes the strain off the outer veneers of the ply, which are the first thing to go when a butt strap joint fails. I put clenched copper nails in the butt straps I used in Sylvester – about 8 per joint.

Amine Blush – Most makes of epoxy suffer to a greater or lesser degree from amine blush – a sticky residue on the surface of the cured epoxy – especially if the epoxy has cured at a lowish temperature in humid conditions. It’s harmless and washes off with water without affecting the strength of the joint.

Using Bondo – Officially, Bondo (‘Plastic Padding’ in the UK) being based on polyester resin, is not recommended as a filler for an epoxy coated surface. I think it’s true that the bond would be mechanical, rather than chemical and so not as reliable as using thickened epoxy. I certainly wouldn’t use it before sheathing with glass. On the other hand I used it myself (or a similar product) for fairing during painting. It’s only when you start painting that the final unfairnesses come to light and Bondo-type products are so convenient to use – quick setting, easy sanding. So far it hasn’t let me down.

And finally . . .

Well, that’s all this month’s news. I got some photos from Australia today, but they’ll have to wait for the next issue. Remember – I depend on you all for news, pics, ideas, suggestions, dreams, . . . So don’t hesitate to put pen to paper, finger to keyboard, or whatever and (e)mail it to me:

Bill Samson,

88 Grove Road,

West Ferry,

Dundee,

DD5 1LB,

Scotland

email – wbs@sol.co.uk

Phone +44 1382 776744