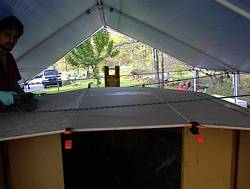
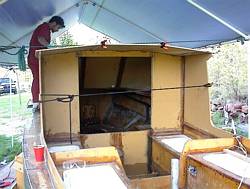
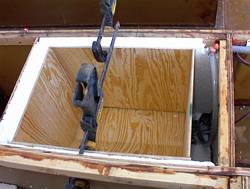
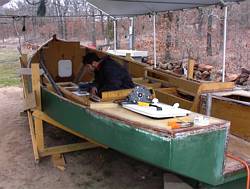
Chebacco News 43

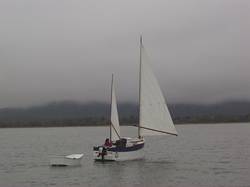
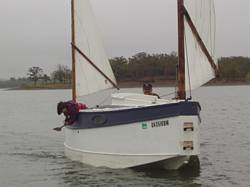
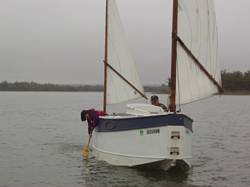
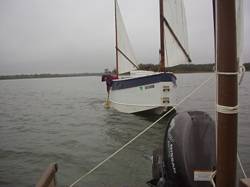
A very wet cruise in the CLC – Richard Spelling.

Weather forecast for my four day Eufaula cruise: Chance of rain: Thursday 100%, Friday 100%, Saturday 100%, Sunday 40%

Started the day Thursday morning with a three hour dash down the Muskogee Turnpike to Lake Eufaula, OK. The various websites make the claim “over 600 miles of shoreline and 102,000 surface acres”. Don’t know about that, but it’s so blasted big you have to buy two maps. The maps show distance from the dam (where we were planing on launching), with the largest numbers being in the 30’s. Looked like a good chance to try some GPS navigation and, if we got any wind, to determine the rough water ability of Schroedinger’s Cat. Maybe prep for a Gulf tour…?

Arrived a little after 11 am and there is no sign of any homemade boats or builders! I check my watch to make sure I have the date right. You wouldn’t think someone could make that mistake but I’ve been known, on rare occasions, to show up for work and wonder where everyone was at around 10 am on Saturday morning. Or, once, to show up for work at 8pm instead of 8am and wonder why it was getting dark…

Drive around the park for a bit. Site recon. There are two ramps, one secluded with what looks like waters that are protected from the wind, the other exposed on a lee shore. The exposed ramp was next to a camping area with a half dozen people there and was visible from the rest of the lake so I got the boat ready to launch there. Had my truck broken into on a secluded launch ramp once and I’m in no hurry to repeat the experience.

After an hour of poking around, setting the boat up, and launching it (usually takes only 15 minutes but I’m waiting on Tom & George) I decided they weren’t going to make it and set off motoring toward what looked like an interesting island north of the launch site.

Of course when I get halfway across the lake I see a big white Micro pull up at the launch ramp. Had to use the binoculars to confirm. Don’t know why they call them bi-noculars – never could look through them but one eye at a time.

Headed back and tied up at the dock. Itself an interesting experience as I had never tied up at a dock before.

Cell phone to the rescue: George was coming, but the exchange student they had with them was sick and George, Mary, and Olaf would be late. Was decided we would motor to the island north of the launch point and George would meet us there.

We were setting up Tom’s Micro at the turn-around on the ramp and were promptly bitched at by a park ranger for “parking” after we had been there for 15 minutes.

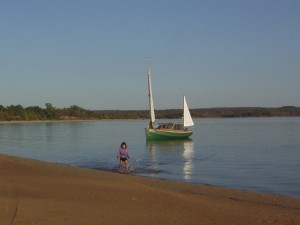
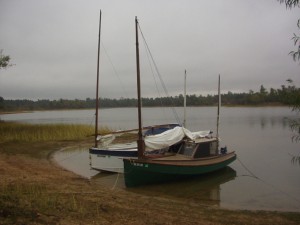
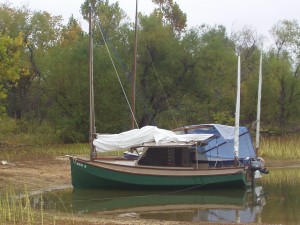
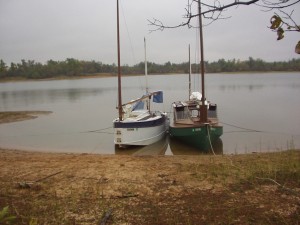
OLYMPUS DIGITAL CAMERA

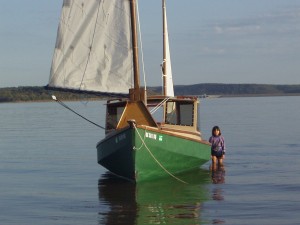
OLYMPUS DIGITAL CAMERA

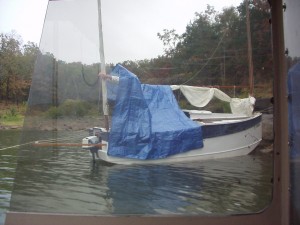
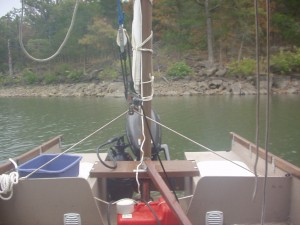
OLYMPUS DIGITAL CAMERA

We motor up and around Mud Creek, using the map and the GPS to confirm my initial guess of where the inlet to the river was. Couldn’t see it till we’re within a quarter mile, so this was a good test of my navigation skills.

Visibility was fine, it just looked the same as the rest of the lake! Was thinking we would motor around the island and scope out a nice protected bay to anchor for the night while we waited on George to show up.

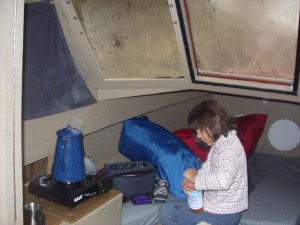
Stopped for lunch before we got to the channel that makes the island an island and not a peninsula. Lunch was MREs – what I keep calling my “boat meals”.  MREs, the military edition ones, with the chemical heaters and the whole nine yards. Heated mine up on the stove and gave Tom the MRE heater to play with.

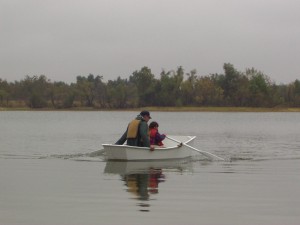
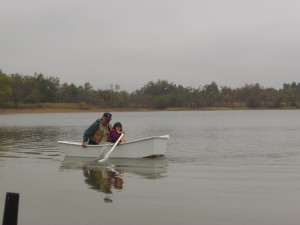
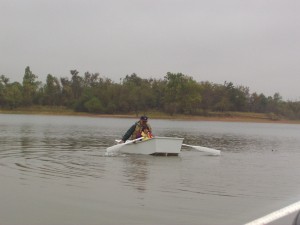
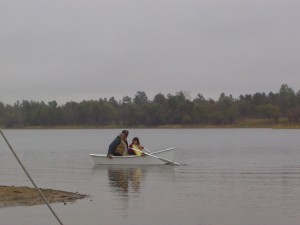
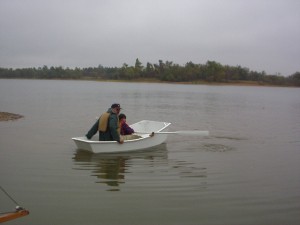
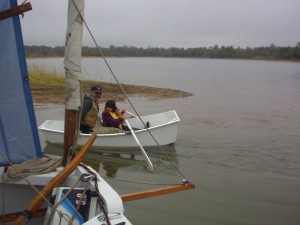
Alana wanted to play with Tom’s dingy, and I broke out the emergency paddle from S’ Cat. It’s about 2 1/2 feet long, not really much of a paddle for a 20 ft boat, but perfect for a 7 year old to play with. I call it my emergency paddle tounge-in-cheek because if my motor quits and I can’t sail my emergency propulsion system is really carried around in my pocket and is made by Nokia.

It developed that Alana can’t paddle a dingy. We didn’t find this out till she was about 15 ft from shore, and too scared to follow instructions. The funny thing being that there was a north wind that would have blown her back to the shore if she had just stopped trying to paddle! All her attempts so get back were keeping her away. She threw Tom the rope before I got the Chebacco started up and away from the shore on shallow water drive.

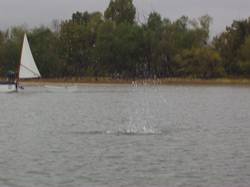
Shallow water drive is a setting on the Nissan 6 hp where the motor is kicked up about halfway.  Worked so-so in reverse but threw water in the air for 20 ft in forward! Cool!

Didn’t really need the shallow water drive at this point but the predicament gave me an excuse to play with it.

We find the channel back to the lake. Or it would have been a channel if the water was up about 10 feet more… <sigh> I ask Tom if he has a shovel so we can dig a canal 100 ft from the river to the lake… He doesn’t think it’s that funny. We decide to spend the night there.

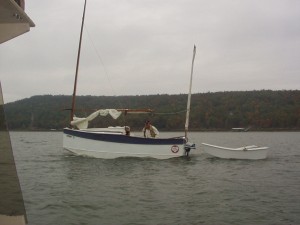
It’s getting on time for George to show up so I head out at 1/2 throttle and 6 knots back the way we came to go find George. Start heading back towards the launch point and see what looks like a green and red Micro with the bi-(mono)noculars.  Decided there is no reason for me to go all the way over there, hoist the main so he can be sure to see me, and motor over to the lake side of the “channel”.

OLYMPUS DIGITAL CAMERA OLYMPUS DIGITAL CAMERA OLYMPUS DIGITAL CAMERA OLYMPUS DIGITAL CAMERA OLYMPUS DIGITAL CAMERA

Tom’s boat on one side of the cut, mine on the other.

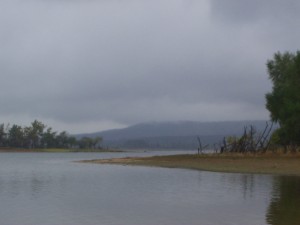
Run aground 50 ft from shore in knee deep water. If the water was at the normal level (4 ft higher) this would be a really cool beach to swim and sail on.

Suggested if we want to get anywhere in the morning we should camp somewhere on the south side of the island so we don’t have the trip down Mud Creek from the “channel” to do first thing in the morning. Tom suggests we camp on the east side of the island so we both motor east and pick a nice spot sheltered from the wind.

First thing I do when we get there is go pee on “No Camping” sign…

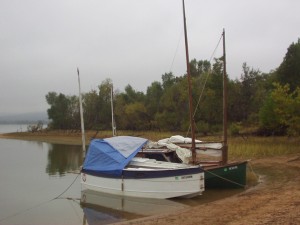
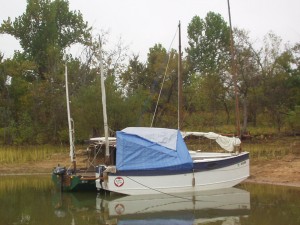
I snuggle S’ Cat up into a narrow and deep part of the bay, and tie off with a couple of limb lines. Perfect – I can step from the cockpit to the land!

George shows up in a bit, and we talk and visit for awhile. George, Mary, and Olaf go back to the rec. area to spend the night in the camper. Mary doesn’t want to spend the night in the rain on the boat.

Water is calm all night; we are sheltered from the south wind that blows up in the morning and I sleep amazingly well.

In the morning I burn eggs for breakfast. Apparently the butane stove I have puts out too much heat even on the lowest setting for the thin backpack camping mess kit from Walmart.

In our little protected cove there is no wind at all but the tops of the trees are moving something fierce and the waves in Mud Creek are moving quite quickly.  Looks like lots of wind today. Good – will get a chance to check the sea keeping of CLC in bigger waves.

George arrives and we set off for the island by “Snug Harbor” that we picked out the night before as a destination for the day.

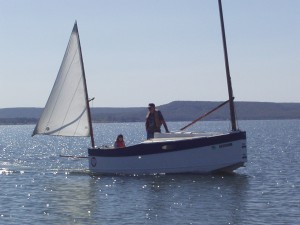
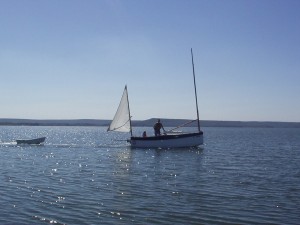
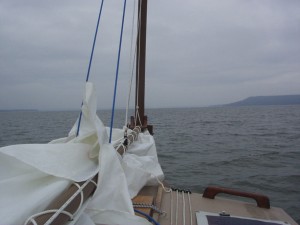
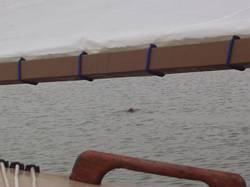
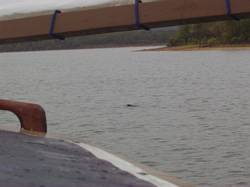
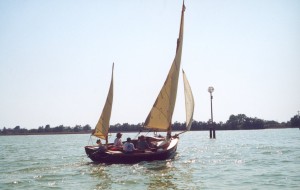
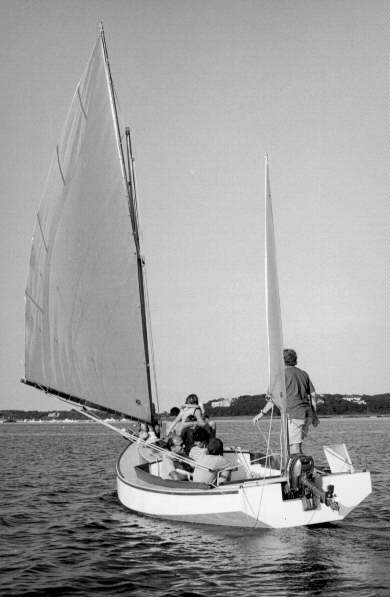
I’m towing Tom’s dingy. As you can see in the picture we are getting some pretty big waves now. I tend to overestimate the size of the waves so I kind of kept an eye on the dingy.  It never disappeared behind waves but got close a couple of times.

Some pounding as the front of CLC drops off of some of the waves and I’m throwing spray 20 ft to the sides occasionally.  Some water coming over the top but not too much. Occasionally water will wash up the back of the motor well but it doesn’t get into the cockpit.

Do not like towing a dingy.  I was making very little progress in these waves, plenty of wind, by only doing about 2.5 knots. I should be doing at least a knot or two more, me thinks, judging from my sailing in similar (if less intense) conditions. Wind kicks up even more, maybe force 4, and I pull a reef in.

Quite a lot of action but I’m dry under the dodger and do not at any time feel concerned about the boat, just annoyed the dingy is slowing me down when I could be making bigger splashes!
George heading back to the launch ramp after taking on water. Only picture of the big waves, I was a little busy...

George heading back to the launch ramp after taking on water. Only picture of the big waves, I was a little busy…

George has a regular 16 ft Micro.  He is plowing into the waves so much that the step holes in the front are flooding the bow well enough for water to start coming into the cockpit through the forward cabin vent!  He drops sail and motors back to the launch point.

I decide I want to beat upwind to get out of big waves and pick up some speed.  Good thing I do as Tom stays pretty much on the north side of the lake and rams four stumps on the trip to the island. He radios when he hits the first one and I swear up and down the map shows him in 45 ft of water.

Hmm… Big stump fields everywhere. Maybe that is what all these little red “>” signs mean?  Not on the legend though.

I leave the reef in even after the wind calms down and let the boat self steer as we continue to beat pretty much into the wind towards the island we picked out.

Island a bust. First off, it’s not an island and has no protected bays. We land on one small projection to keep the boats out of the waves and walk all the way around the “island”. The mud is sticky and gets over everything. There is trash, shotgun shells, ATV tracks, etc. all around and we decide this isn’t the place to spend the night.

Tom is taking on water from his stump ramming sessions so we head back toward dam.

I spend a frustrating five minutes trying to leave!  I can’t get off the blasted shore!  I pull in the dingy painter so it won’t foul the prop and back off the sticky mud with the motor in reverse.  Cut the engine and the wind blows me back to the mud! And I’m on the downwind side of the peninsula! The boat is  sailing UPWIND into the mud! I do this three times before I decide to back out 100 ft to open water under power.  Frustrating.

OLYMPUS DIGITAL CAMERA OLYMPUS DIGITAL CAMERA

Tom’s leak appears to have slowed down so we anchor in a rocky cove sheltered from the south wind. I’m scared of the rocks so I put out two anchors and two limb lines and we take down mizzens for a possible thunderstorm the NOAA man (machine?) was talking about on VHF.

A dingy is useful for something! (other than something for Alana to play with.  And slowing the boat down)  We use it to set anchor lines.

Tom cooks up a couple of pounds of shrimp for dinner and we eat it in the Micro in one of the brief periods of no rain.

Quiet night – slept like a log till the wind shifts to the north and we start getting some small wavelet action to wake me up.  NOAA radio says thunderstorms on a line from Macalester to Muskogee.  South of us and a north wind.  Maybe we’ll be lucky.  I go back to sleep.

OLYMPUS DIGITAL CAMERA

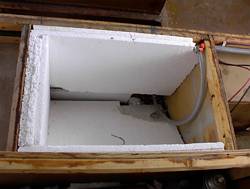
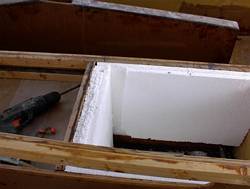
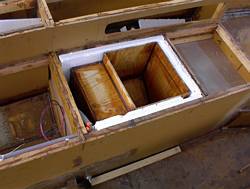
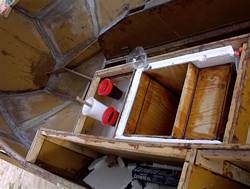
In the morning we have turkey ham for breakfast. Yum. Incidentally, my built-in icebox kept ice in the water bottles for almost a week.  Sweet.

OLYMPUS DIGITAL CAMERA OLYMPUS DIGITAL CAMERA

No wind so we motor back to dam site to see if George hung around or took off.  He’s not there and the showers are locked. Guess I’ll just have to keep making do with my “Leinweber” shower…

We look at the map and decide to spend the night a couple of miles from the dam in a place called Broken Cove.  We start off motoring but the wind soon picks up and we hoist the dacron.  I reject my first pick, the small island, as there is no shelter and it’s in plain view of a bunch of houses.  All the second choices on the west side of Broken Cove are rejected because I can see trees sticking out from half a mile away. We head for the east side and find a nice cove with water deep enough to get the boat noses onto the beach and raft up for dinner.

OLYMPUS DIGITAL CAMERA

Bazillian birds in the area but they get annoyed with the sailboats and leave.

Lunch is Raman with dehydrated chicken.  I boil the chicken and let it soak for 30 minutes but it’s still too hard to eat.  Guess if it takes 18 hours to dehydrate it will take more than 30 minutes to rehydrate.  Will try putting it in a bag with water in the icebox the night before next time.

OLYMPUS DIGITAL CAMERA OLYMPUS DIGITAL CAMERA OLYMPUS DIGITAL CAMERA OLYMPUS DIGITAL CAMERA OLYMPUS DIGITAL CAMERA OLYMPUS DIGITAL CAMERA OLYMPUS DIGITAL CAMERA OLYMPUS DIGITAL CAMERA OLYMPUS DIGITAL CAMERA OLYMPUS DIGITAL CAMERA OLYMPUS DIGITAL CAMERA OLYMPUS DIGITAL CAMERA

I lay down to read for a bit and Tom and Alana take the dingy out for a row. I decide to get up and take some pictures and what do I see but Alana ROWING the dingy back! This is the girl who couldn’t paddle two days before!

For dinner we have pasta and burritos thanks to the miracle of MREs.

After dinner we go out so Tom can sail a Chebacco.  He is very impressed.

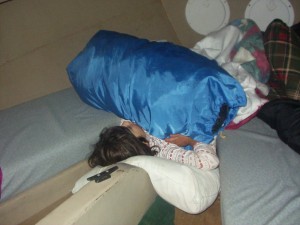
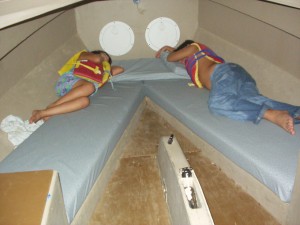
You go to the trouble of making beds, and where do the kids sleep?

You go to the trouble of making beds, and where do the kids sleep?

Rains all night.  Humidity is horrible inside the boat.  Condensation on everything; especially the lexan windows. So much so that I don’t even need the curtains for privacy!  Sure clears your lungs out but would get pretty old after a week or so.

Breakfast of eggs.  Not burned this time – borrowed Tom’s iron skillet.

Sail away without using the motor in the morning on light winds, just for giggles. I poke around the bay, heeling the boat on one tack then the other so the bilge pumps can clean out under the floorboards.

tn_PA200058 tn_PA200060 tn_PA200061

Because we weren’t using the motors, got these pictures! (la la la…, what is that behind me? DIVE! DIVE!)

tn_PA200065 tn_PA200068 tn_PA200070 tn_PA200072

Shot of the fall colors in the hills.

Shot of the fall colors in the hills.

I beat upwind for about an hour on a starboard tack, boat tuned, mizzen steering the boat, sitting backwards in the cockpit enjoying the scenery. Sail to the dock in light air, running the last 100 ft under mizzen alone. Tom has motored in already and he grabs the boat.

Put up and do the turnpike dash home.

A very wet and enjoyable weekend.  Learned a whole lot about camping in the boat.

Chebacco Richard – https://www.chebacco.com http://www.richardspelling

***

Jamie goes to Port Townsend – Jamie Orr

In September, the nights are cool, the kids? go back to school, and thousands of wooden boat nuts converge on Port Townsend for the Wooden Boat Festival.

The Festival runs for three days, Friday to Sunday, but I have to earn a living, so it was already Friday morning when Wayward Lass left Victoria, carrying her own complement of boat nuts to the show. These being the usual, my dad and myself. The current tables indicated that a 10:00 am start would make best use of the tide, so we didn?t have to rush. I?d launched the night before to avoid any low tide problems at the ramp, leaving the boat overnight at the Oak Bay Marina. The shortest route from Victoria to Port Townsend is a straight line from Gonzales Point in Victoria to Point Wilson, two miles north of Port Townsend, and the marina is less than a mile from Gonzales. From point to point the distance is 26.7 (nautical) miles, from dock to dock we covered a bit over 30 miles.

We pushed off at five past ten, and motored out to Gonzales, where we put up the sails. There wasn?t much wind, but enough to keep the sails filled with the motor still running. As we got out into the strait proper, the wind improved, but still wasn?t enough to get us to Port Townsend by 6:00 pm, so we motor-sailed for the whole crossing. At 1:05, after three hours, we were some two miles past the mid-point, enjoying a warm sunny day. The wind, although it went up and down, stayed in the west so we had it on our starboard quarter the whole time.

At intervals we would sail through very definite ?eddy-lines? between different tidal currents. Often these brought different water conditions, and we?d move from whitecaps to no whitecaps or vice versa as we crossed the lines. The boost we were getting from the tide also varied, and our speed, measured by GPS, could rise or drop by over a knot at these lines.

The current was fastest near Vancouver Island, where it runs strongly around the corner into Georgia Strait, and again near Point Wilson, where it funnels into Puget Sound. As we approached Point Wilson, we were travelling at 11 knots over the ground, about twice what we would expect without the current. At Point Wilson we also had the best wind of the day, so we shut off the motor for the remainder of the trip. We sailed down to and around Point Hudson, where the boat show is held, and through a forest of boats anchored off the town. We were approaching the ferry dock, wondering when the ferry was going to leave, when it let loose a long blast on the horn. We made a fast gybe to get out of its way, and turned in a large circle that let us pass well behind the departing ferry.

Soon after, we stopped to take down the sails, then discovered that Honda didn?t want to start. This was a shock, as he?s generally totally reliable. However, after some drifting around, and some pointless fiddling around, Honda woke up again, and we docked at the Boat Haven at 3:50 for a total time of 5 hours and 45 minutes, a new record for Wayward Lass. (The motor problem did not happen again ? I don?t know what it was, although Alan Woodbury suggests we attribute it to a vapour lock caused by pumping cold gas into a still-warm motor. Sounds good to me!)

We had help at the dock, Jerome MacIlvanie was there to take our lines. Jerome had his lapstrake Chebacco at the show again, and happened to be at the Haven as we came in.

Here?s Jerome in his immaculate lapstrake Chebacco. This was, of course, taken at the show, not at the Boat Haven.

Here’s Jerome in his immaculate lapstrake Chebacco.
This was, of course, taken at the show, not at the Boat Haven.


And another shot showing some of the finishing detail. You can get as close as you like and It?s still immaculate.

And another shot showing some of the finishing detail. You can get as close as you like and It?s still immaculate.


Chuck Leinweber of Duckworksmagazine  was also there on the dock, and we all introduced ourselves to each other. Then I trotted off to call Customs and check into the country, and then I checked us into the Haven. We were assigned a mooring on the “linear dock”, a long (very long) dock that snakes out from the far end of the Boat Haven and back along just inside the breakwater. Chuck motored over there with us and helped us carry our gear back to the Harborside Inn, right beside the Haven. After we got settled in, Dad and I went across the road to Sea J?s Café for dinner, then back to the hotel for the rest of the evening.

Saturday morning, we were up and caught the first shuttle bus to the boat show, arriving just before nine. Once in, we lost ourselves in looking at the boats on display, in the water and out. I?m amazed at the time and effort people must put in to bring their boat to such a peak, and to keep it there. I try to look after Wayward Lass, but even so, the lines are getting more grey than white, the floorboard finish is wearing, and tiny scratches are appearing in the cockpit paint (that?s what landing on sandy beaches does!). Never mind the more obvious dings, from ramming docks or other boats! Anyway, I saw a lot of great boats on show, all of which I want to build right away. Right.

I want to say thanks to John Harris and his CLC crew for their unfailing courtesy and interest. We not only used their site as a meeting place again, but John relayed messages back and forth, helping everyone find everyone else! Thanks again, John. (And I really like your new Skerry design.)

Other web and/or Chebacco correspondents we saw this year, besides Jerome and Chuck, were Alan Woodbury, and his father-in-law Roger, James McMullen, John Welsford of New Zealand and Dave Lacombe. John is a designer with a wide portfolio for amateur builders. He is better known in New Zealand and Australia, but that is changing ? you can see (and buy) some of his work at Chuck?s website. As in past years, meeting and talking to other builders and sailors was the best part of the weekend.

Alan, Roger and James came out for a sail on Wayward Lass. Once again I was able to sit back and enjoy the sail, while others did all the work. (Something happened when I scanned this picture ? this is a mirror image, the boom should be on the other side!)

Alan, Roger and James came out for a sail on Wayward Lass. Once again I was able to sit back and enjoy the sail, while others did all the work.
(Something happened when I scanned this picture ? this is a mirror image, the boom should be on the other side!)

James is planning his own Chebacco, a lapstrake one with a whole slew of custom touches ? I?m looking forward to seeing it finished.

Some of us got out for a sail, hoping to see the schooner race from close-up again. We didn?t get a lot of wind, but enjoyed ourselves anyway. Jerome was also out, with Archie Conn, who visited Vancouver Island last spring for a sail in Wayward Lass ? he was thinking for a while about building his own Chebacco, (but he?s still searching for the perfect design), and we motored/drifted in company for a while. After it was obvious that the schooner race was a non-starter, we fired up the motor and idled around, looking at boats that caught our eye. Between Alan and James, we could identify most boats in sight, and an astonishing number of the people sailing them!

Alan sent me a copy of the Port Townsend & Jefferson County Leader ? that?s us there on the back page! James is sitting on the cabin, and Alan is waving to the rowing boat.

image008

Alan and Roger had a family gathering happening, and James had a ferry to catch, so we said goodbye after our sail. Dad and I went back to the boat show to see what else we could see. We eventually joined John Welsford and Dave Leblanc for a Mexican dinner ? Dave and the waiter helped the rest of us order. To round off the evening, we had a preview of one of John?s new designs, the new Pathfinder plans that will soon be available on the Duckworks site. As I mentioned above, you can buy a number of Welsford designs at Duckworks ? take a look sometime. (This is not a commercial, take it as a public service announcement!)

Dad and I weren?t sure, when we came over, whether we would leave on Sunday or Monday. The tide indicated an early start would be best on either day, leaving no time on the chosen day for boat show or other activity. While we would have liked to stay another day, the wind was very much in our favour on Sunday, and it seemed a shame to waste it. We also thought there was a chance that things would deteriorate on Monday ? we were wrong, but didn?t know that. In any event, at 6:55 am on Sunday we cast off from the Boat Haven dock, and motored out through all the anchored boats. It was overcast but not raining, with a light breeze from the south. Stopping the engine off Point Hudson, we put on the cruiser suits for warmth, which was just as well, because it was chilly out in the strait later, and we had some showers too.

Sailing from Point Hudson, we rounded Point Wilson at 7:30, and with wind and tide, measured speeds up to 9.7 knots. The wind held steady just over our left shoulders, and gradually increased over the next three hours. We had two other sailboats ahead of us, on similar courses, both of them sloops of 30 feet or more. We couldn?t keep up to them, but we came close for quite a while, especially with the nearer.

By 10:30, the wind was over 15 knots, judging by the whitecaps, and Wayward Lass was getting harder to steer. We hove to and took in one reef, which solved the steering problem. By then the effect of the tide was much less, and speeds were around 5 knots, except when we caught a wave and surfed it ? then we would hit the 7 knot range.

I mentioned bands of current earlier, separated by eddylines. We experienced these again, only with the stronger winds, the difference between bands was most obvious by wave size. On several occasions we were overtaken by a series of sizeable waves ? one of these felt as if it had just picked us up and thrown us forward. The GPS jumped from its reading of 4-point-something to 8.5 knots for just a second, then dropped back to where it started ? quite a feeling, that was!

We neared Victoria, on the southeast corner of Vancouver Island, when it was almost time for the tide to change. Around the time of the change, the current atlas shows a lot of smaller, circular eddies, and I think we were caught in one of these for a short time, as our speed over the ground dropped to 1.7 knots, despite the fact that we were still moving well through the water. Luckily we sailed out of this fairly soon, since the wind was dropping, and we were able to pass south of Discovery Island before the now-flooding tide could push us up the eastern side. Once past Discovery, we were almost home and needed to go north for the last mile anyway, so the north-flooding tide wasn?t a problem. With only a breath of wind, we sailed slowly between the breakwaters at Oak Bay, around all the docks and in towards the gas dock, then lost the wind completely as we turned for our final approach. This meant that I didn?t make the tidy landing I wanted, but we did manage to drift in without calling on Honda for a push. Canada Customs take calls from the phone at that dock, so we were able to officially re-enter Canada there.

Our time for the entire trip home was 6 hours and 5 minutes, just twenty minutes more than the trip over took, but this time we did it under sail. This was a first, since we?ve always used the motor on the crossing before, even if we were sailing at the same time. As I?ve said, we could have stayed over another day without weather problems, but we don?t feel badly after that great sail home. Although, come to think of it, Dad had a great sail home, not me ? he had the helm the whole way, I only got to hold it while he put on his boots, poured his coffee, and stuff like that! Still, I had a great passage, so I won?t complain.

See you there again next year!

***

Miscellaneous boat pictures – Richard Spelling

OLYMPUS DIGITAL CAMERA OLYMPUS DIGITAL CAMERA OLYMPUS DIGITAL CAMERA OLYMPUS DIGITAL CAMERA P9030001

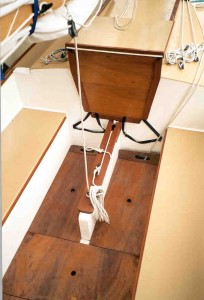
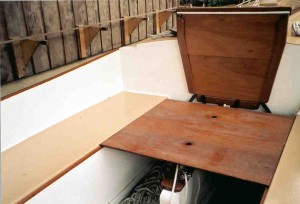
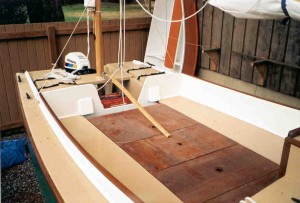
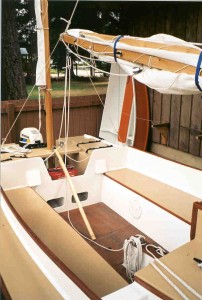
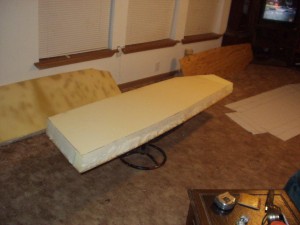
Decided to try my hand at upholstery, and I’m to cheap to pay someone else. Recycled some 4″ foam I already had, bought some 2″ foam and vinyl online, and broke out the sewing machine I got in the divorce. Laying out the lines was a simple exercise in 3d thinking, and I simplified it and made the outboard sides of the bunks vertical instead trying to match the rotating angle of the bilge panels. As is, the 2 inch seat cushions fit perfectly in the gap beside the bunks to keep you off the plywood.
OLYMPUS DIGITAL CAMERA

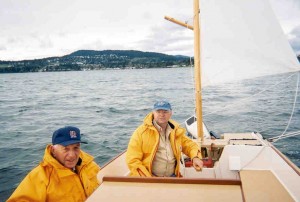
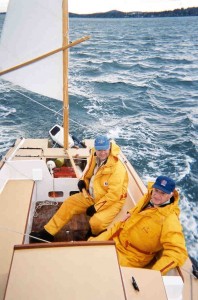
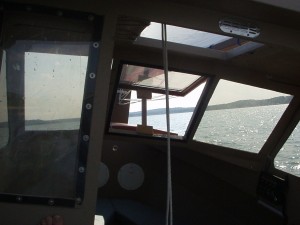
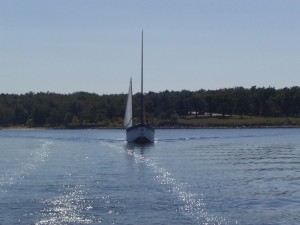
Here are a couple of shots of the boat underway. These give you a good idea of the view forward, and a good idea of how much the boat heels under normal conditions. Doesn't normally go over much more, even with lots of wind.

Here are a couple of shots of the boat underway. These give you a good idea of the view forward, and a good idea of how much the boat heels under normal conditions. Doesn’t normally go over much more, even with lots of wind.


OLYMPUS DIGITAL CAMERA

Here I have the boat up on car ramps so I can take off the rudder to fix the leak around the rudder post.


OLYMPUS DIGITAL CAMERA

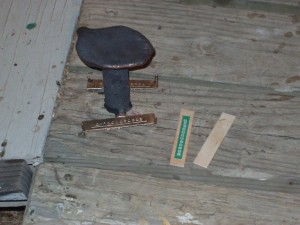
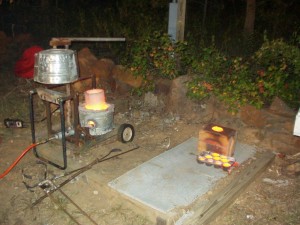
Three shots of me casting the silicon bronze hull number plates for the boat. HOT!

OLYMPUS DIGITAL CAMERA OLYMPUS DIGITAL CAMERA

Interior shot of the bunks in place.

OLYMPUS DIGITAL CAMERA

Couple of shots from the Conroe fall messabout. (before the camera died of dead batteries and stupidity)

OLYMPUS DIGITAL CAMERA OLYMPUS DIGITAL CAMERA

Chebacco News 40

Intro and more building the CLC

aDSC00008_2Well, I’ve sold my AF2. Entropy retired to a happy home in sunny Arizona. Pays for the outboard on the CLC. Interestingly enough the buyer, according to his friend (who we delivered the boat too), has an occupation of “rich kid”. I think it’s neat that he could afford any boat in the world, and wanted my homemade one!

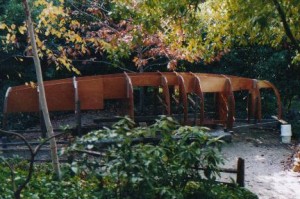
Looking very much like a boat.

The standard thing that people said when I was building the AF2 was “how are you going to get it out the door?” The standard thing people say about the CLC is “It looks like a boat”. As you can see from the pictures below, it does look like a boat. Just not a sailboat!

Windows, what to do.

I finally decided to go with Plexiglas/acrylic instead of Lexan/polycarbonate. Decided to do my own tinting instead of paying the extra for the tinted acrylic, not sure I saved any money, and in the long run may need to redo all the windows. However, they would be easy to switch out, in that event.

Battery adventures

Well, the money I saved by going with the Sam’s Club golf cart batteries turned out to be not any money at all. I have this bad habit of doing that, I’ll do something to save money, and wind up spending more then if I had just gritted my teeth and did it right to start with. Have to work on that.

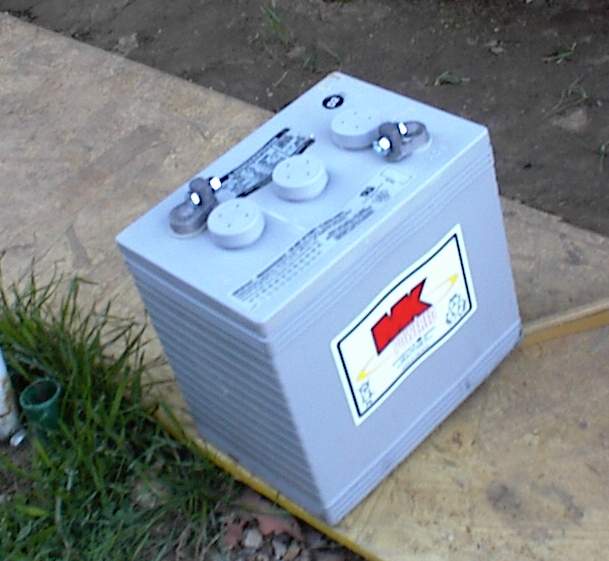
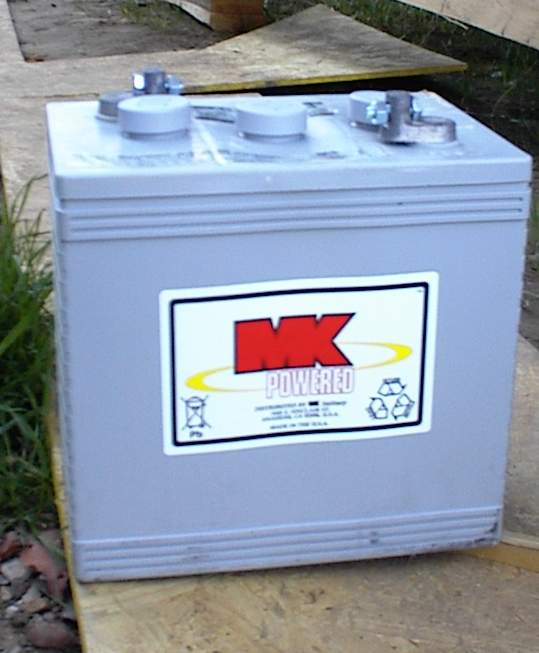
When I was installing the batteries I noticed acid leaking from on of them when I moved it to the boat on the hand truck. Not good for a sailboat (even one that looks like a power boat) that the batteries would leaks when tilted. Decided to get the West Marine version of the golf cart batteries, even though they cost twice as much as the Sam’s batteries, on the theory they wouldn’t leak. Two weeks after I placed the order, West Marine still didn’t have them. Canceled, and paid twice as much again, for MK gel sell batteries with the golf card form factor.

bDSC00004_9 bDSC00005_6The Westco Battery guy said “they probably double stacked them”. Right on the side of the box it said DO NOT DOUBLE STACK. (not really a box, more a cardboard half cover for the batteries)Then, when they came, one of them had a smashed in center cell. With some encouragement http://www.westcobattery.com/ sent a replacement. When it arrived, it was three! I originally had complained because a couple of the bolts were missing. Apparently they sent two new batteries then. Then when I convinced them the cell was smashed too much, they sent a replacement for that. Swapped out the bad one and sent the three back. (on their dime)

Interestingly, the shipping guy was having a cow that I would claim the batteries were damaged. I told him it was between him and WestCo. He put the three batteries on the hand truck to haul them up the driveway, and guess what, only two would fit.  So, he stacks the third one on top. Is that “double stacking?”

bDSC00004_4 bDSC00018
I remember a conversation with a guy who had built a very pretty wood and epoxy boat about the size of the Chebacco. He said he had used 10 gallons of epoxy and I remember asking “why so much?” I hope Larry at Raka likes me; I stopped counting at 30 gallons…boat epoxy, and more epoxy

mast, titebond

tn_mDSC00003_4 tn_mDSC00001_7 tn_mDSC00001_6
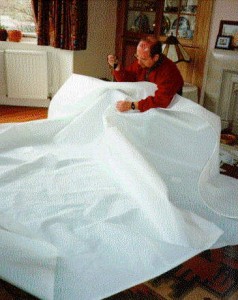
Left hand picture here we are clamping the spacer boards on the mast, Made the mast hollow so the wires for the anchor light would have a place to run. Right show the sanding crew hard at work.Here are some pictures of the mast. On the left I’m using pallet wrap to pull some of the wrinkles out around the transition from square to round. Primitive vacuum bagging, without the vacuum or the bag.

tn_mDSC00001_4 tn_mDSC00003_7 tn_mDSC00001_5

Decided I would laminate the other spars with TiteBond II instead of epoxy, save money, and it’s still stronger than the wood. Need lots of clamping pressure with TiteBond, every “C” clamp I have is in this picture. Someone on Yahoo suggested there might be “creep” problems using TiteBond. Don’t know about that, they aren’t under constant load. Just have to wait and see what happens.tn_mDSC00001_13 tn_mDSC00012_3

Nice picture of the scarphs for the mast. Bottom of the mast is doug fir, top is red cedar.

Going to redo the gaff hollow ala birds mouth, gaff to plan is a bit heavier than I like. Also, decided the other night to scarph up plywood scraps, so this should be an interesting stick. Then again, I may save that for a latter project, and just use the stick as is for now.
motor, mounting board

Motor is in, rather heavier than I thought it would be, though it’s probably right to spec. Will worry about installing the alternator kit later. Actually, could have waited to buy the motor, can’t put the motor mounting board on yet ‘cuz it would block easy access for getting into the boat. Made the mounting board out of sheathed plywood instead of oak, will put a 1/4″ aluminum plate for wear resistance. Also, I’m putting wedges under the mounting board on the back of the boat, instead of making mounting brackets ala plans inside the motor well.

Camper Works

Sad to say I had (and am still having) a bad experience buying something online. I bought a porta potti from a place called “Camper Works”. After 4 weeks it still hadn’t showed up. I started sending them emails, which were ignored. I started calling them, and they kept giving excuses. I finally got disgusted and canceled the order, and ordered from a place called “Camper World”. The Thetford 135 from Camper World showed up in a couple of days. Then, a couple of days later, the one from Camper Works showed up! It had been shipped THREE DAYS after I called and canceled the order. I shipped it back, and the guy said he would send a check….

Well, I haven’t gotten a check back. I guess I’m going to have to call Discover Card and do a charge back.
thriftymarine

Had a similar experience with Thrifty Marine. They have such good prices on their Bomar hatches that I ordered some more deck plates from them. A trivial order, $18, but I paid promptly and expected the hatches to be shipped. 6 weeks later they hadn’t been, and emails were not being responded to. Had to call, and kept getting excuses. “I’ll ship them first thing in the morning”.

Finally had to send an email threatening to report them to Paypal for fraud. This got my hatches sent, for some reason. Owner said he would “make it up to me” on my next order. Needed another 10” round hatch for the front, asked how much. He said he would ship it gratis on Wednesday (neat, that would make up for the hassle!), but it’s been three weeks…

I’ve added a warning on the “resources” page, buy from them at your own risk.

Trim

tn_trDSC00003tn_trDSC00004tn_hDSC00003_12
Splurged on the trim for boat, figured if I spent this much time and money on the boat, I would like some trim that looked good. Bought about 12 board feet of Honduras mahogany. Expensive wood, almost as much as teak, could probably have got lots more red oak for the same price. As it is, I’m going to get some mahogany stain and put it on, make it look even redder.

tn_sDSC00009_2 tn_sDSC00008 tn_sDSC00001
Here are some pictures of the berths. I made access holes in the berth tops instead of having the whole top pull out ala plans. Stronger structurally, and looks better I think.


tn_dDSC00013tn_dDSC00015tn_tDSC00014

Here are some picture of the seats going together. Note alcove and ventilation hole.

tn_tDSC00003_14tn_tDSC00004_11tn_tDSC00005_8tn_tDSC00007_6

Some pictures of the tabernacle.

tn_cDSC00001_15 tn_cDSC00004_10 tn_cDSC00009_4

Scraping paint runs, faster than sanding. Laying out cockpit coaming. Note that the only joints on the boat that are not stitch and glue are where I fastened something to a closed compartment and couldn’t access the bottom. This requires a LOT of tape, but I have NO end grain or plywood edges exposed for water to get in.

tn_cDSC00001_12 tn_dDSC00004_3 tn_dDSC00004_13
The forward hatch will be sliding; the rest of the hatches will be hinged. Bought hatch hinges but they don’t work like I expected, and I think I’m going to sell them on Ebay and use treadmill belt and bungee cords for the hatch hinges.More pictures of the coaming going together, some pictures of the deck. To the right, picture of the sliding hatch on the forward deck. Also not to plans, plans showed a narrow hinging hatch.

tn_dDSC00005_2 tn_dDSC00005_3 tn_dDSC00006_2More sanding, and another picture of the forward hatch.

tn_dDSC00006_3 tn_dDSC00007 tn_dDSC00007_7Top hatch being “stich and glued” in with cleats and clamps. Note the profile of the deck on the right. Plans show a rounded curved deck. Decided that a stitch and glue hard chine deck would look better and go with the rest of the boat.

tn_dDSC00009_5 tn_hDSC00001_2 tn_hDSC00003_13Some pictures of the pilot house. Kind of looks like a tank or something, eh?

tn_hDSC00001_14 tn_hDSC00003_11 tn_hDSC00003_12More pictures of the pilot house.

tn_hDSC00004_12 tn_hDSC00005tn_hDSC00004_2

tn_hDSC00005_7 tn_hDSC00005_9 tn_hDSC00006

tn_hDSC00006_6 tn_hDSC00008_5 tn_hDSC00008_6

Note the rag tied to the rope. Only took me about half a dozen times running into the rope to put the rag there. I guess I’m a slow learner.

tn_hDSC00009_6 tn_hDSC00010_6 tn_hDSC00010_7

tn_hDSC00010_8 tn_hDSC00011_3tn_hDSC00012_4

Redhead says it feels “creepy” inside the pilothouse. No windows yet.

tn_hDSC00013_3 tn_iDSC00001_3 tn_iDSC00003_2Side decks give plenty of room for walking. Starting to work on the icebox. Laying out the panels for marking.

tn_iDSC00003_3 tn_iDSC00005_4 tn_iDSC00006_4 tn_iDSC00007_3 tn_iDSC00008_3 tn_iDSC00010_2
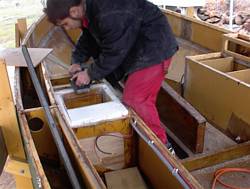
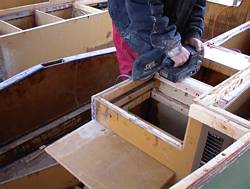
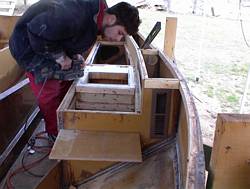
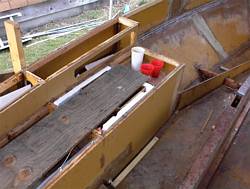
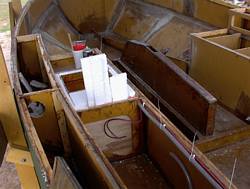
Icebox going in. Offset top so cabin/cockpit bulkhead won’t span the lid. Right I’m foaming the extra spaces out.

tn_iDSC00011tn_iDSC00012_2tn_iDSC00014_2

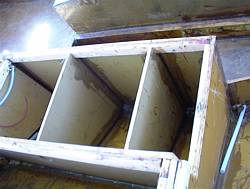
More icebox work, center picture is the compartment for the potti.

tn_iDSC00015_2tn_iDSC00016tn_iDSC00017

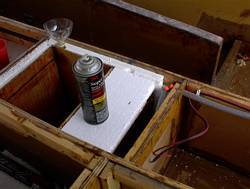
Board holding down the styrofoam, expanding foam, well, expands, so it was trying push the rest of the styrofoam up. Stuck the pieces together with 3M spray adhesive.

tn_vDSC00001_8 tn_vDSC00003_8 tn_vDSC00004_5

My experiments into vacuum bagging. Bagging the aft mast step to make sure the glass sticks down to the wood on all the odd corners. Without bagging I would have hat to do it in several stages, and do a lot of sanding. With bagging I can do it all at once, and only need to scrap off the creases left from the bag.

-Chebacco Richard

***

LED lights, take two:

The other day I received an email from Ken James about LED lights and regulators.

This is nothing strange, every time I write an article on how to do something, someone will pipe up, “you know, there is a better way”.

Which is as it is should to be, I suppose. Peer review and all, certainly makes for a better end product. For instance, talking to various people has convinced me that the best way to power LED’s is though current limiting, and not a fixed voltage regulator. Not to say that the fixed regulator won’t work, but there is an easier way. Or, maybe it isn’t even an easier way, in some circumstances, but it removes the complicated and expensive voltage regulator and replaces it with a cheap IC at the light locations.

Anyway, I had built the prototype (mark 3) LED anchor light the other day using current regulator IC’s from National Semiconductor, some resistors to set the current limit, and some bright white 5.6 candela LED’s from BG Micro.

Then I get this letter from Ken James. “Several years ago, over ten now, I had the idea of using leds for nav lights. Retired from the USN, went sailing a bit, then started building led lights. Been at it ever since. Solved all the problems you have encountered, including many you haven’t discovered yet, from what I read on your web site 😉 . So now I sell the lights, atwww.deepcreekdesign.com.”

Funny the people you meet online.

It was actually the high price of the LED lights at Deep Creek that decided me to make my own!

And you know what, after exchanging 16 or so emails with Ken there, I’ve come to the conclusion I probably didn’t save a whole lot of money making my own lights. But, like homemade boat building, that is not really the point.

For instance, Ken pointed out that with the 20 degree spread of my BG Micro LED’s a boat would have to be hundreds of feet away to see the anchor light. Seems you need a 60 degree vertical spread to be “legal”. Not that I was too concerned with being legal, but I was kind of concerned with getting run into…

So, to make an anchor light with 20 degree 5.6 candela LED’s I would need:

360/20= 18 LED’s to make a circle of light. But, since they need 60 degrees of vertical spread TOO, I would need three rows of the 20 degree LED’s, so I would need 18*3 or FIFTY FOUR of those LED’s (which are showing up everywhere and Ebay for about $2.50 each for some reason). Since I really only need 4.2 candela for 2 mile visibility (Ken’s numbers) I would need (4.2/5.6)*54= 40 of the expensive little buggers. There is $100 in LED’s right there. Plus circuit boards, regulators, etc, I’m just about at what Ken charges for his light!

<sigh>, story of my life.

But wait, he doesn’t use 40 LED’s on his lights, now what is going on here?

Well, firstly Ken uses a “pulse regulated driver”. This means he uses a high efficiency switching regulator, and drives the LED’s with pulses of electricity. This gets more “visibility” with the same power output.

Also, Ken uses surface mount LED’s with an output of .66 candela. You are thinking that this is quite a bit smaller than the 5.6 candelas of the LED’s I was playing with. Well, you must understand that candelas is a measure of brightness, and not total light OUTPUT. His small surface mount LED’s only put out .66 candelas, but they put them out in a fan of light 140×60 degrees.

Let’s see, that is .66 candelas at 140×60, or 5544 candela degrees (is that even a measurement?)

And, 5.6 candelas at 20×20 is 2240 candela degrees.

So, he is using LED’s that are about 2.5 times as efficient as well.

Could I make one using his LED’s? Yes. Nichia sells to the public, but not cheaply. Bought a couple of dozen NSSW440 surface mount white 60×140 LED’s, and used 18 of them for my anchor light. Here is a picture.

Incidentally, if you want to use the surface mount LED’s, you will need a board. I’m considering selling a kit for these lights. If you are interested, email me.

Well, if I can’t save money making my own anchor light, at least I can save money by making my own LED bicolor light then!

Maybe, maybe not. Ken pointed out that if I’m not careful I would have “zone overlap”. That is where the beam from the colored LED’s overlap and from directly in front of the boat people would see a white light… not good. He was even kind enough to mention ways to get around this problem.

I could certainly build a cheap bicolor light. Would it be as good as the professionally hand made ones at Deep Creek? Probably not. Would it be safe to go sailing with? Probably.

Am I going to build my own lights? You are damn straight. Life, like sailing, is not about the destination, but is about the trip. Making my own LED anchor lights has turned out to be very good learning experience. In the process I have made new friends, learned quite a bit about electronics, and added the skill of etching circuit boards to my boat building skills.

If all you are wanting is efficient lights for your boat, you should buy them from Ken. His are well engineered and come with a warranty.

If you want the learning experience of making your own lights, or just want to tinker, you should make your own. Ask me questions, I’ll be happy to help you out.

-Chebacco Richard

***

Hi Richard

No earth shaking events to tell you about, but we had a visit from Bruce Hector on Saturday, and got out for a nice little sail with him.  We managed
some good speeds for a designed waterline of around 18 feet, which other builders might find encouraging — we exceeded the theoretical hull speed
for that waterline by about half a knot, by GPS.  We did that with and against any tide there was, so they were honest numbers.

We also tried out the optional jib, at least to windward, which folks might find of interest.  All the votes aren’t in yet, but it looks like anyone
thinking of sewing up a jib might also think of adding a bowsprit.  I like my Jonesport cleat too much to take it off just yet so I’m going to keep
playing with the jib on other points of sail.

I have a couple of pictures of Bruce on board — there are still a few shots on the roll to use up, but will do that and get them developed by the start
of next week.  No idea how they will turn out — I forgot the camera, so I bought a one-use Kodak.

Cheers,

Jamie

Hi Richard

Finally got these developed.  Only snapshots, but much better than I hoped for with a disposable camera.  Pity the photographer isn’t more skilled.
I’m sending all I have of Bruce, you choose which you want to use.  None of them look too wild, or show any spray flying, because I waited until we were
on a nice stable reach before to using the camera.

So how’s S’s Cat coming along?  I’ve been cleaning up some old epoxy snots inside W.L.’s cabin — they’ve only been there for two and a half years!  I
didn’t attend to them at the time because I wanted to get launched, then there was always some other reason not to fix them.

Been giving some thought to storage for cruising gear, too.  Last year we mostly used the cabin for storage, not sleeping, but I’m trying to keep a
lot of stuff out of the living area by using the space under the seats and up by the mast.  I might add more storage type hammocks under the side decks
too — we have one each side right now, and they’re great for small stuff. I went to great lengths thinking up the perfect galley box for all the
kitchen stuff, but when I made a mock-up of corrugated cardboard, I decided that I preferred the current Rubbermaid bins.  I may still make up a
mini-version to keep thermos flasks and cups to hand but not underfoot.  I guess this (storage) may be one reason why two-footitis is such a common
boater’s disease?

Gotta run,

Jamie

BruceHector1 BruceHector2 LesOrrandBruceHector1 LesOrrandBruceHector2

***

Around James Island

As Randy Wheating noted in the last “Chebacco”, it’s good to see visiting boatbuilders and/or boatnuts from other parts of the world.  This weekend I had a visit from another builder – not a Chebacco builder (yet) but a Micro fan.  I thought it was my duty to point out how he had strayed from the path of righteousness, and how better than to take him out in the One True Boat, a Chebacco?

Bruce Hector, of Kingston Ontario, was visiting family in Vancouver, and caught the early ferry over to Vancouver Island on Saturday, April 6, to say hello and see Wayward Lass.  This ferry lands at Schwartz Bay at the north end of the Saanich Peninsula, only 2 or 3 miles from Sidney, where we often launch.  I drove out with the boat and met him at the Safeway parking lot there, then we picked up my dad, Les, and headed over to the boat launch at Tulista Park.  We rigged up in about half an hour, and left the dock about 9:30 am  with a good south wind, something between 10 and 15 knots, I think.  A small craft warning was posted, but the highest winds forecast were 20 knots, sometime towards evening, so they just barely qualified for the warning.  Once clear of the dock, breakwater and other obstacles to navigation, we put up the sails and let out the sheets to reach eastwards towards Sidney Island at well over 5 knots (motoring, we top out about 5.5 knots).  Once near the island, we decided to turn upwind to make it easier to return, so we tacked and headed back over Sidney Channel.  However, between reaching earlier, and the wind veering round a bit to the west, we couldn’t do much better than go back the way we’d come, even when close-hauled.

Also, the wind had picked up a bit, maybe a steady 15 knots and a bit more in the gusts, so we stopped to put in a reef once we got a bit away from Sidney Island.  The mizzen did its usual job of keeping her head to wind while we tied in a single reef.  Bruce pointed out that the shore was getting pretty close by the time the sail was peaked up again, so we got under way before finishing the reef points – these are mostly to keep things tidy anyway, the tack and clew rings take the strain.

After getting well back to the west, nearly in line with the westward side of James Island, we tacked again and were able to free the sheets slightly as we went into the channel between Sidney and James Islands, on James Island’s eastern side.  Once well into the channel, James Island cut off some of the wind, but we kept moving, if a little slower.  As we approached the south end of James, the wind was maybe 15 knots again.  When we thought we could weather the south end of the island we tacked, but found the wind had gone even farther round to the west, and we couldn’t sail the course we wanted.  While we were discovering this, the wind blew us back onto the starboard tack, so we continued on with that, close-hauled this time.

In what seemed almost no time at all, we were far enough over to turn north again, this time easily aiming for the channel between James Island and the Saanich Peninsula (Vancouver Island).  As we sailed up the channel, the wind became freer, so our beat turned into a reach again, this time on the port tack.  The wind was lighter again, so we took out the reef in the main, and tried putting up the jib.

This is a new sail for Wayward Lass, it’s shown as an option on the sailplan, and this only was its second time out.  I can’t say it’s a great success – in fact, I would say it’s a waste of time trying to sail to windward with it.  Without a headstay, it’s hard to get the leech tight – but even when it’s reasonably tight, the sail is too close to the main.  If the sheet is pulled in enough to stop the sail flapping, the jib backwinds the main.  If the sheet is loosened to where the jib doesn’t spoil the wind for the main, then the jib flaps. Maybe there is a theoretical point where everything works, but we couldn’t find it.  Experiments will continue.

Once we stopped fooling with the jib, and had the full mainsail drawing properly, the GPS hit 6 knots several times, even though what little tide there was, was against us (it had shown just over 6 knots on the southern leg.)  The wind would not have been more than 15 knots (estimated.)

Sidney was coming up fast by now.  It was only around 1:00 pm, but we were all getting a bit cold, so decided to quit while we were still having fun.  The mizzen came into play again, keeping us head to wind while we furled the main – the GPS reported 1.8 knots in reverse at this time!  From the time we stepped off the boat until we were in the van, ready to go, only about 20 or 25 minutes passed.  We drove up to Robin’s Donuts, but couldn’t find parking for the van and trailer close by, so carried on to Dad’s place.

We finished off the last thermos of tea, along with some of Dad’s home-made oatcakes and jam while we talked and looked at Bruce’s boat photos – he owns a houseboat, has built a Nymph, Diablo, Pirogue and most of a Micro so far, not a bad variety at all!  He someday hopes to build a plywood aircraft carrier to accommodate an ultra-light STOL plane — that’ll be one for the album, not to mention the TV news and a few headlines!

What with the early start and very cooperative wind, Bruce was able to get away in time for the 3 o’clock ferry back to the mainland.  I hope he enjoyed his trip to Vancouver Island and around James Island.  That was probably the best sail we’ve had ourselves out of Sidney.  Good wind, (but not too much,) we all had good protection from the spray, lot’s of good food and drink (thanks for the beer and sausage, Bruce!) and the reef lines didn’t get tangled.  What more is there?

Chebacco News 39

Intro and flipping the CLC

A lot has happened since the last issue of Chebacco. I’ve finished the armor for the keel, flipped the boat, and am now working on the inside. Pictures and annotations below.

I had the bright idea (I thought) of offering Chebacco plans for sale on this website. I’ve had a couple of “where can I get these from” requests. I know that PCB&F have been burned by this in the past, so I was going to take my lead from Chuck Lienweber and Jim Michalak, and offer only the convenience of purchasing online, for a small fee and the credit card costs. I would take an order with Paypal, and fax something to PCB&F saying “send plans to so-and-so, check is in the mail). I faxed PCB&F with the idea.

Susanne called me and discussed, at length, this subject. “Why can’t they just send us a check?” seemed to be the gist of it. I did mention that JM’s plans sales have DOUBLED since Chuck started offering them online, but she didn’t seem interested.

Anyway.

There are now 20 boats in the registry. Wonder what the percentage is that aren’t registered? I think it’s traditional in statistics to use the SWAG method and just make up a number. Therefor, I degree that for every 1 boat registered we have 9 boats not registered, making the total number of Chebaccos something like 200…!

I’m hosting a messabout at the local lake here in the muddy waters of Oklahoma. Link to the left.

Jamie has two article in this issue, and I have two as well. Come on guys (and gals?), send in those articles. And pictures, lots of pictures! I understand that not every boat builder is a writer, but a few words and some pictures would be appreciated by all the readers. (Plus, pretty soon you will get tired of the pictures of me building the CLC!)

In this issue, I also have an article on the electronics for the CLC. I’m selling the LED regulator I made for the LED’s on my boat as a kit, so if you are wanting to play around with these super efficient and almost indestructible lights for you boat, you should buy one!

Also in this issue, I’m putting online an Adobe PDF file compiled by Mike Haskell. This is basically the entire Chebacco website, compiled and searchable! It is a 21mb download, so if you have a slow connection you might consider letting Google do your work for you and doing “site:chebacco.com something to search for” at their website. Or, buying the CD from Chuck . No longer available for download from the Chebacco.com site

Anyway, (again)

Here are the boat pictures

1DSC00001_3 1DSC00003_3 1DSC00005_2

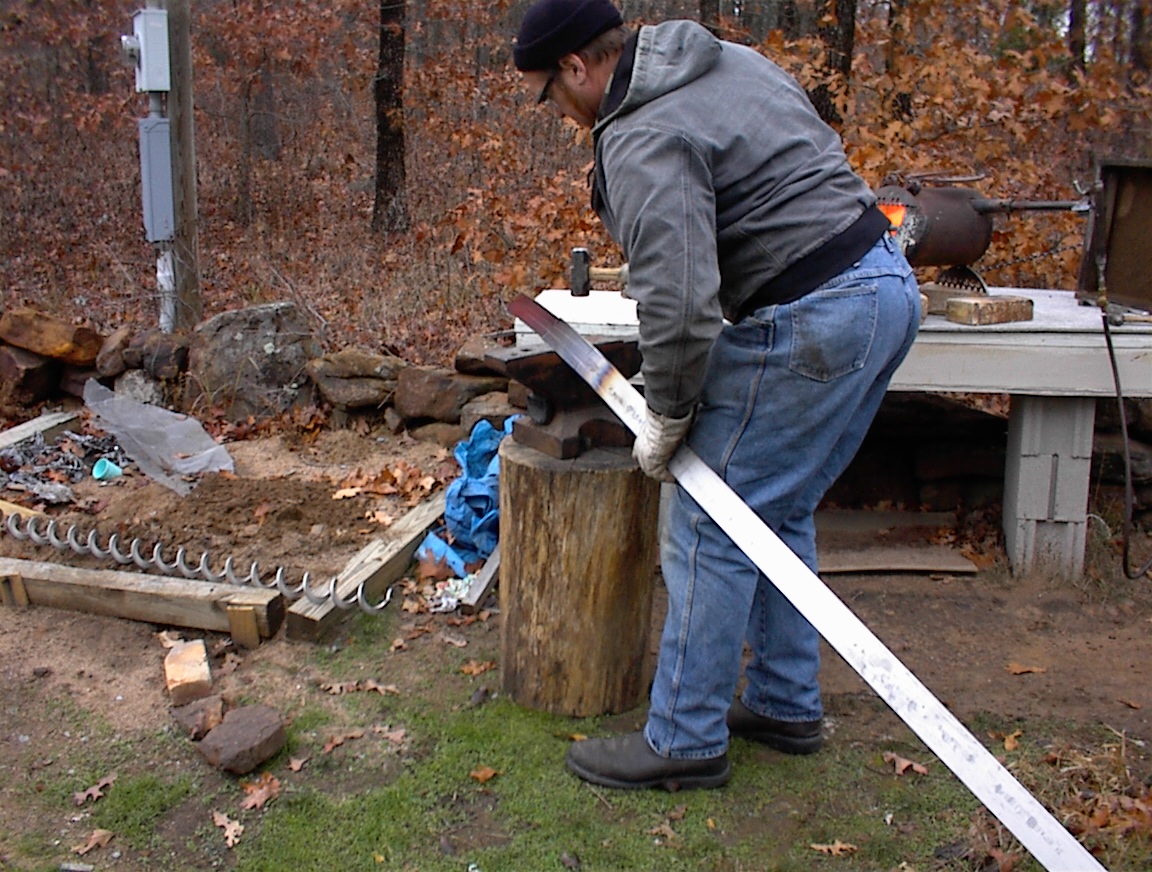
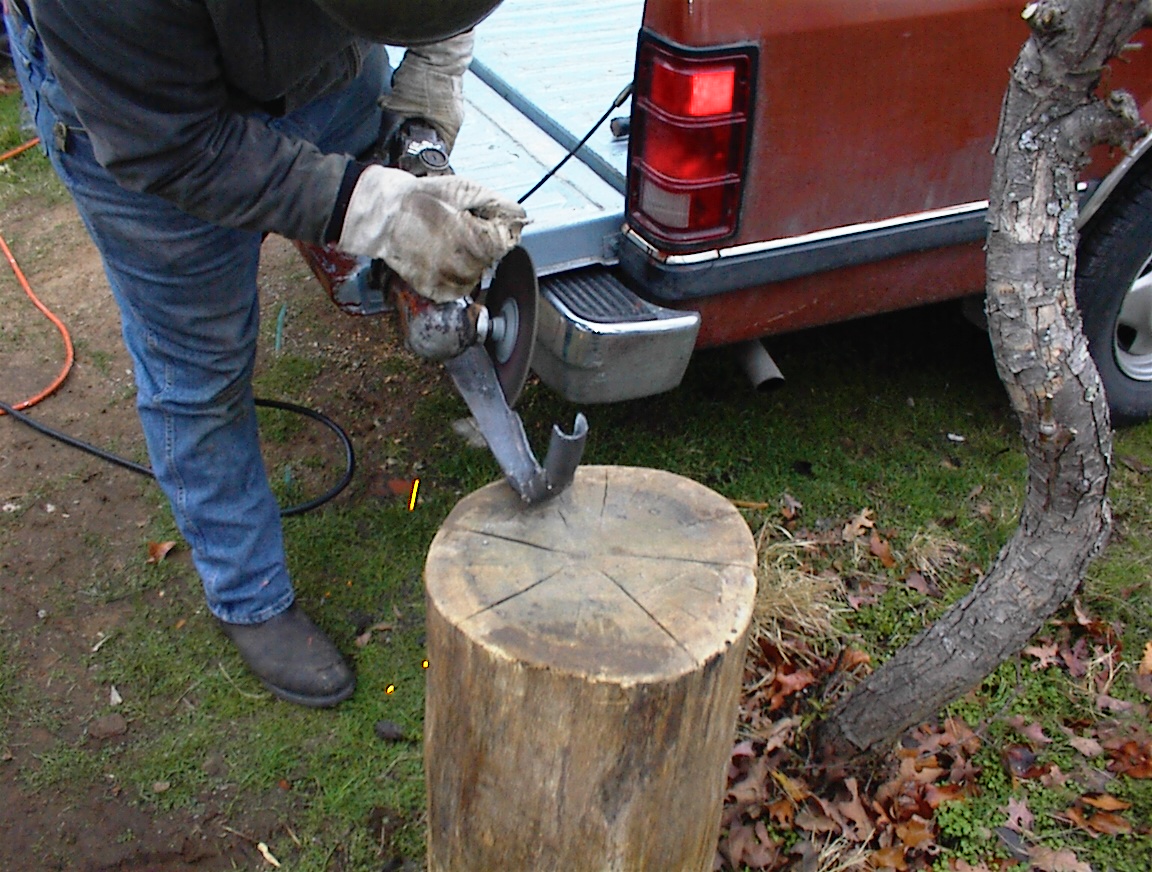
Here is a friend of mine I enlisted to help with the metal work. I wanted the front half of the keel to be armored to take groundings. Mike here has a home forging setup, while I have a home casting setup. Here you see him prepping the 1/8″ stainless steel keel armor for forging.

1DSC00006_2 1DSC00007 1DSC00008_2

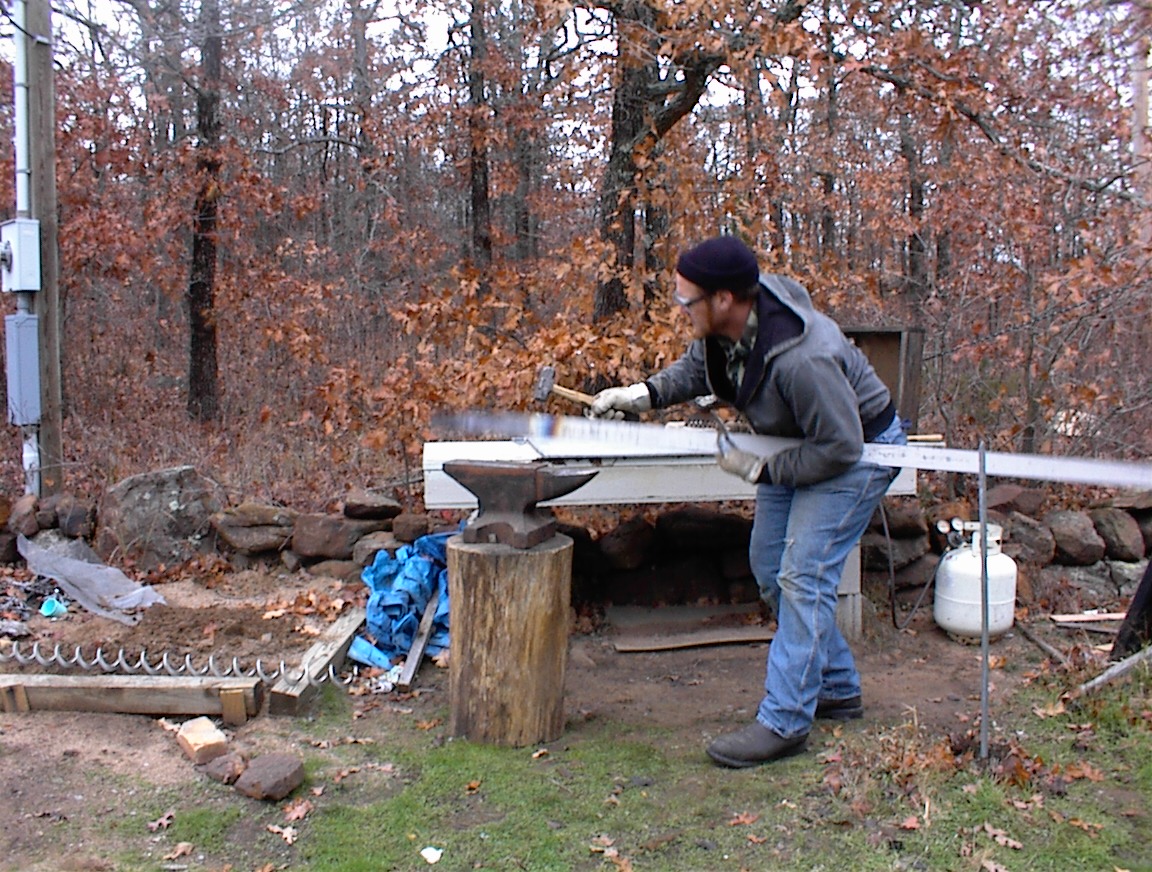
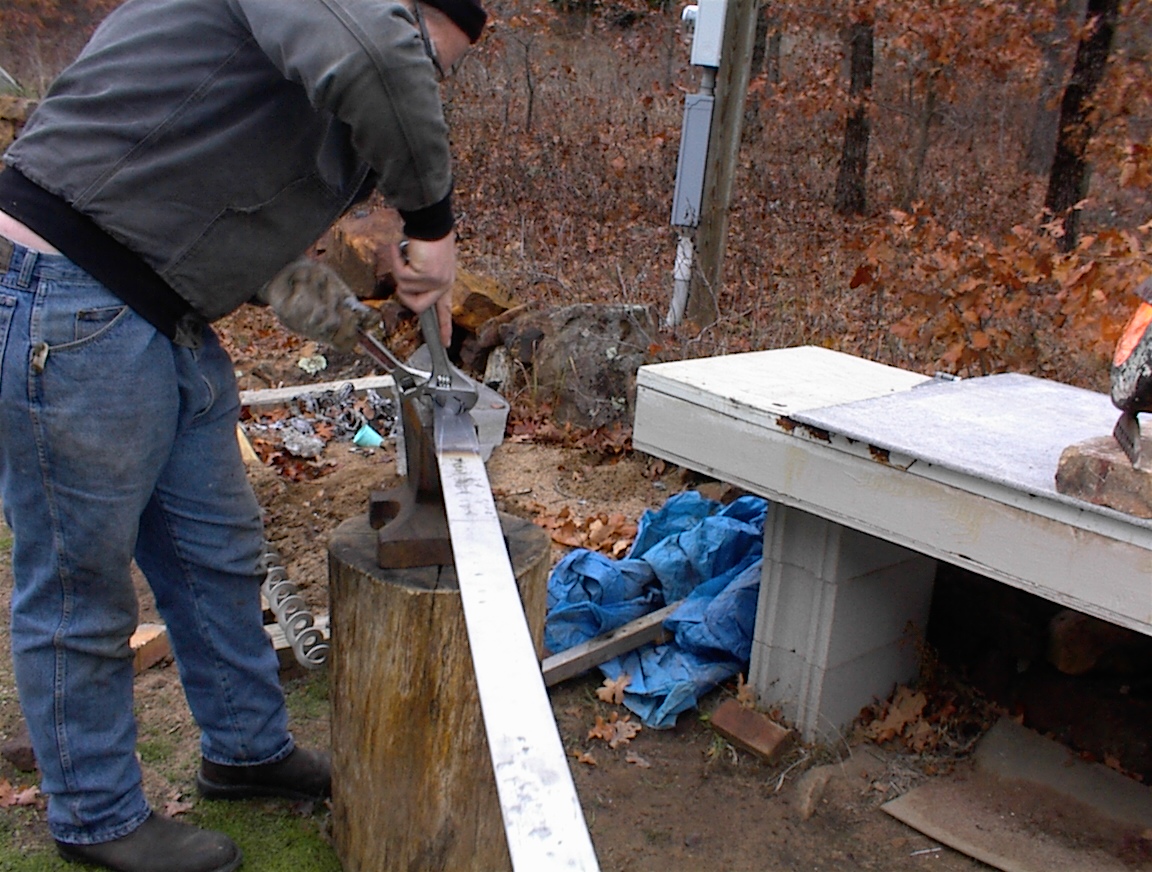
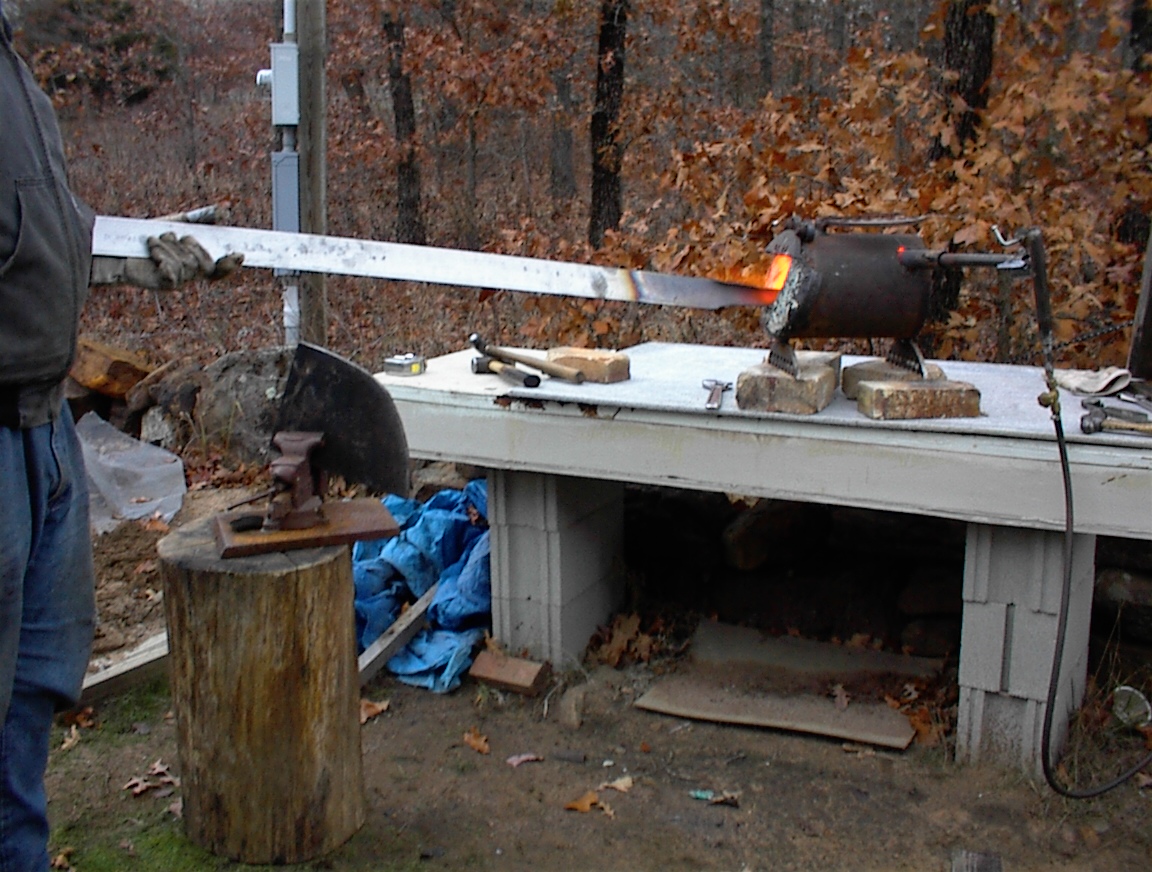
I could have just cut it off, but I wanted it to wrap up and around the cutwater, sort of like an icebreaker keel. Here Mike is forming the part that wraps around the cutwater. Note the forge made from a freon can, sitting on my sandbox.

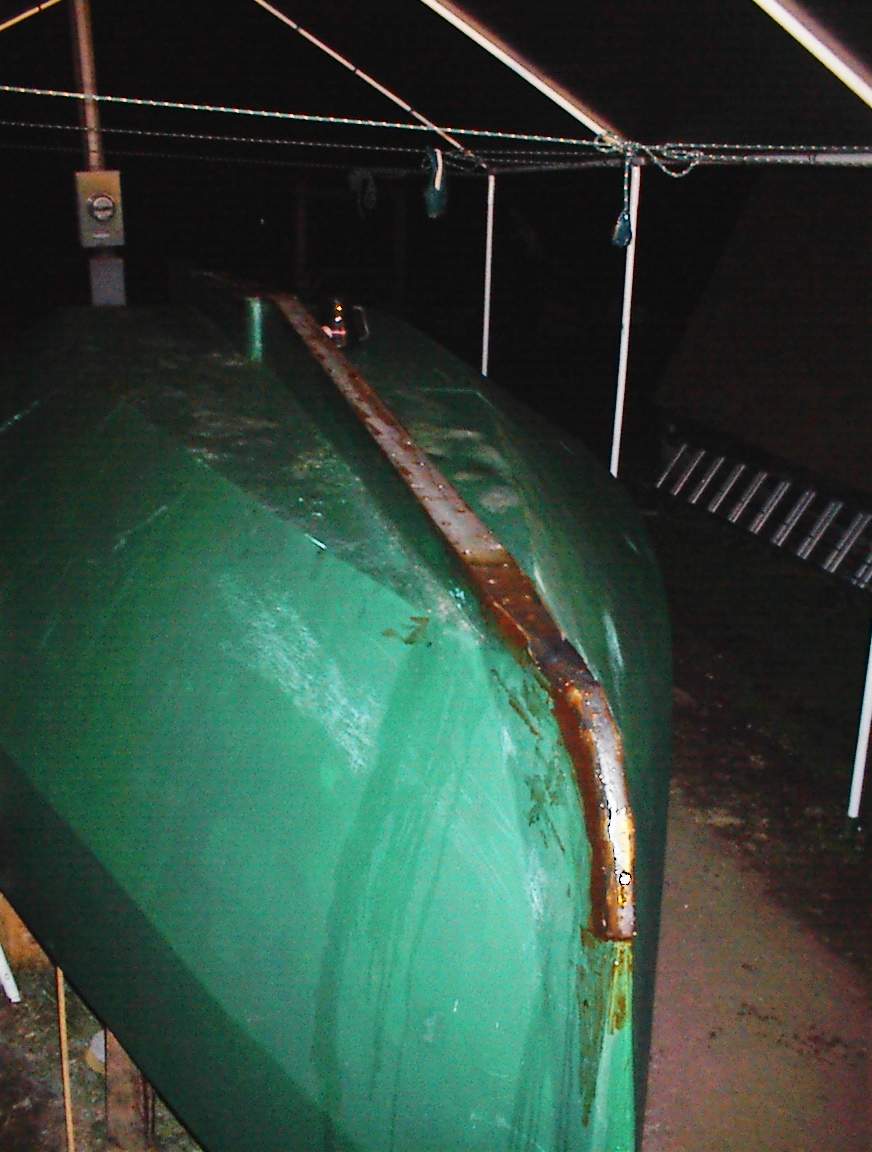
1DSC00009 1DSC00010 1DSC00011Almost done, doing some trimming with Mikes heavy duty grinder, and doing the final fitting to the boat. On the right you see where I have attached the keel strip with a bunch of countersunk stainless screws and lots of epoxy.

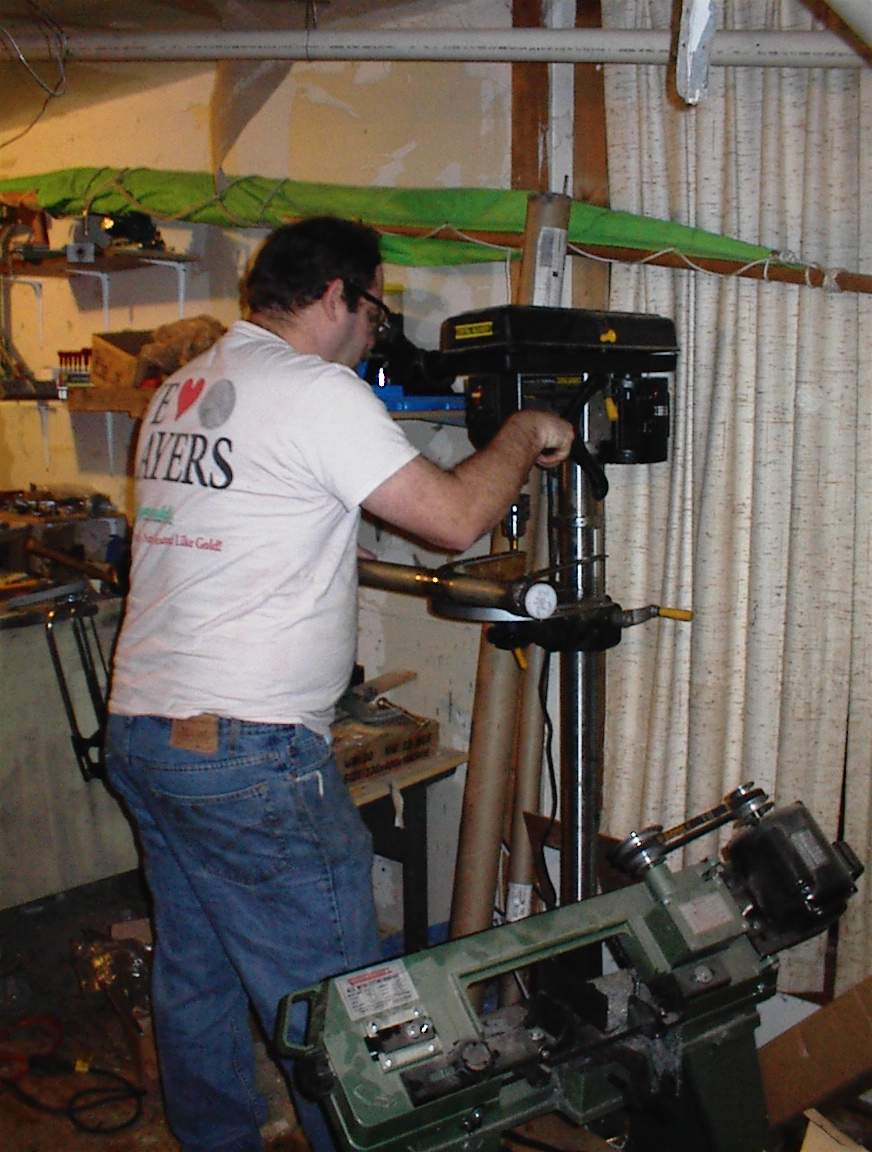
2DSC00001_6 2DSC00003_5 2DSC00004_4Here is me working on the rudder, drilling the holes to attach the stainless to the rudder itself. I made the front of the rudder a bit wide, but some trimming with the flap wheel on the grinder and you can barley notice.

2DSC00005_3 2DSC00007_3 2DSC00009_3Here the rudder is in the middle of the sanding operations, and to the right it is attached to the boat. On the top of the right photo you can see the UHMW bushing that the rudder turns on. Under the top rudder support I’m going to put another bushing, with a flange fitting on the rudder post. I’m hoping the rudder will bear only on the UHMW poly and no on the wood and glass of the hull.

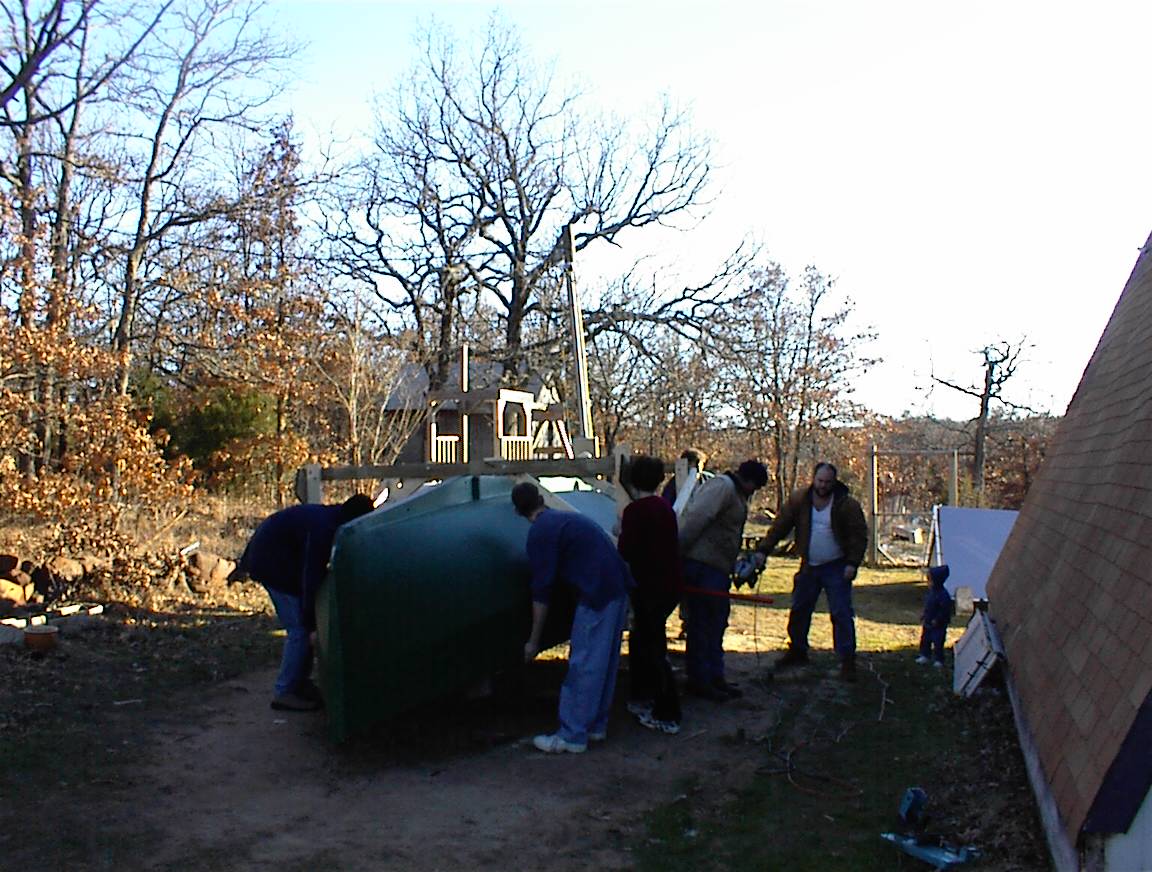
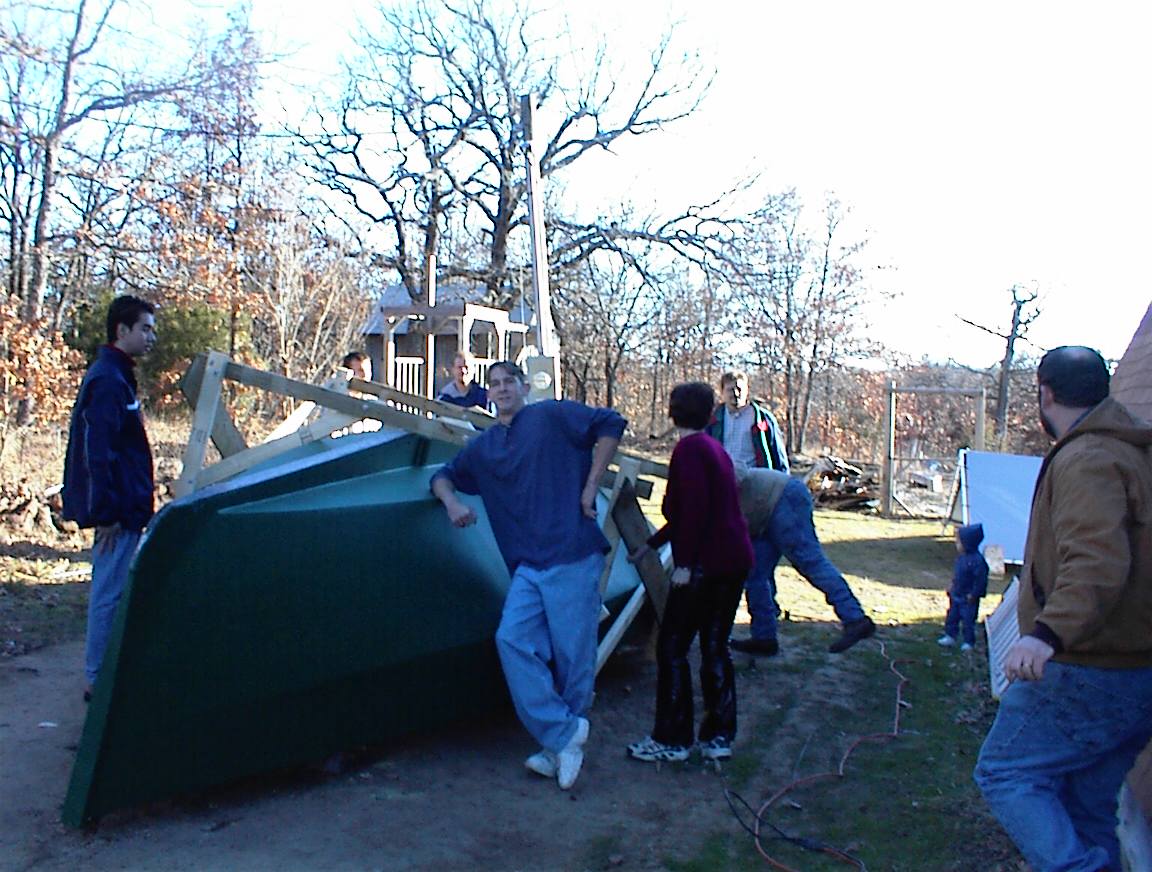
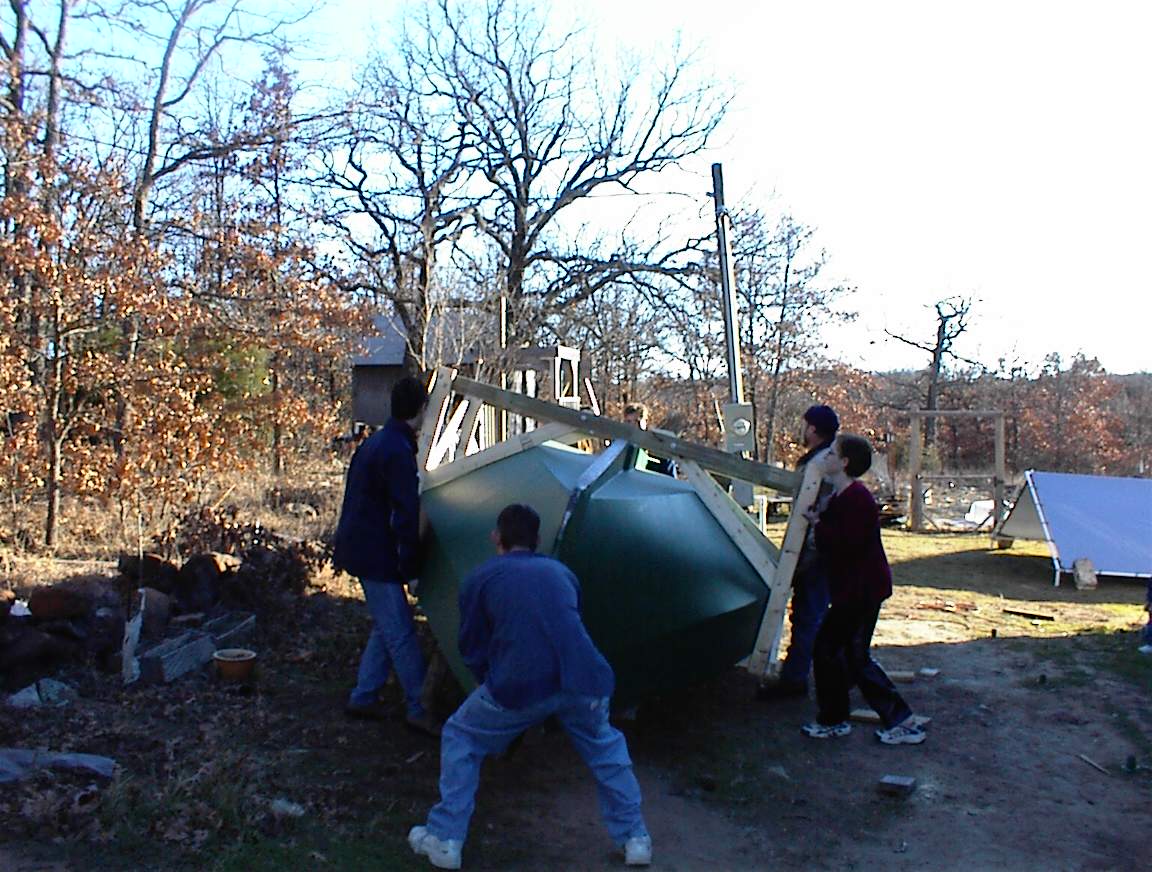
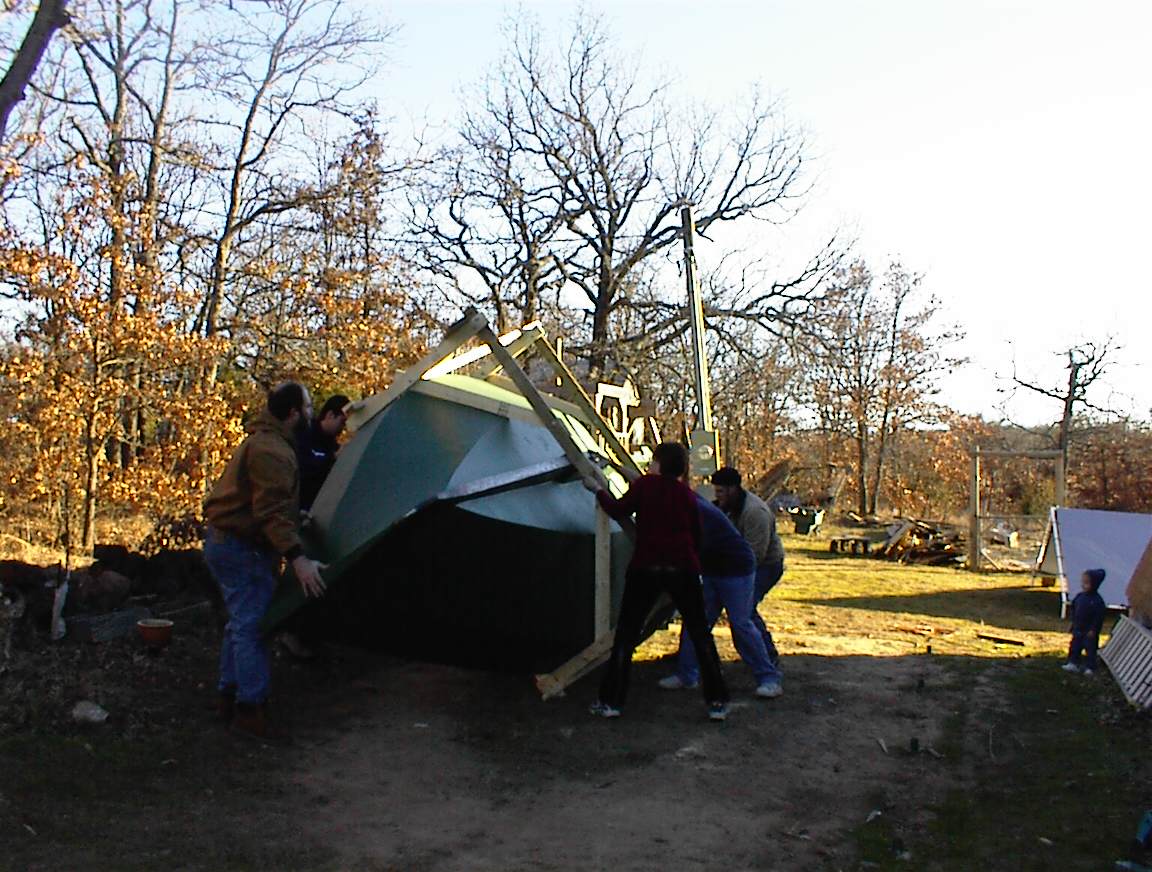
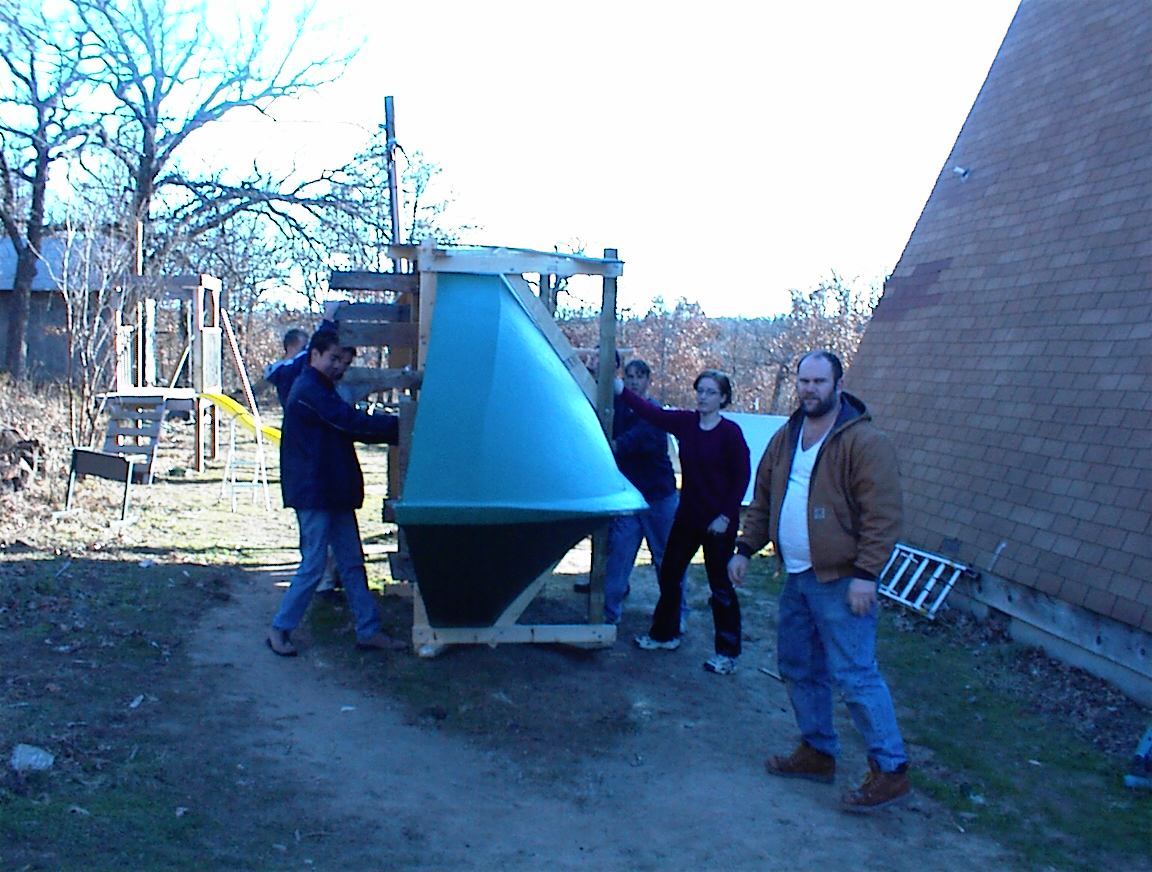
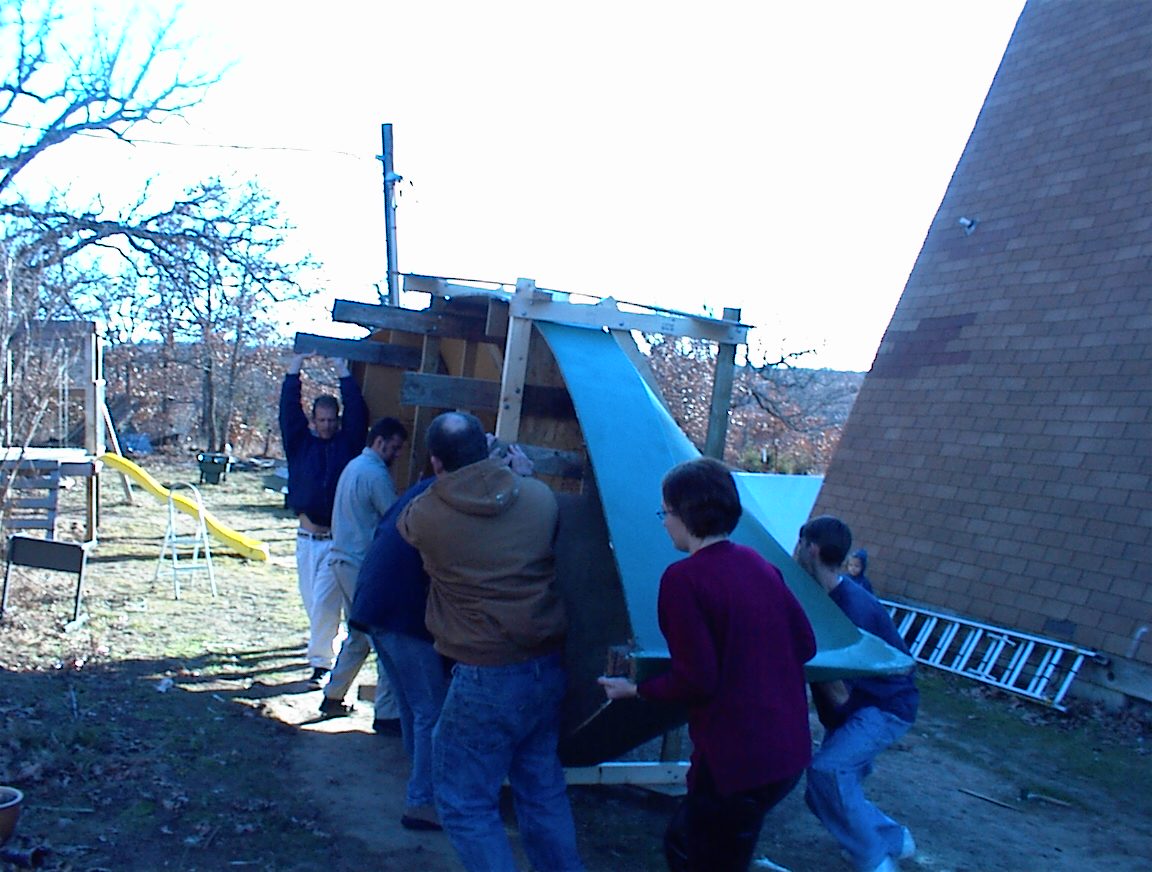
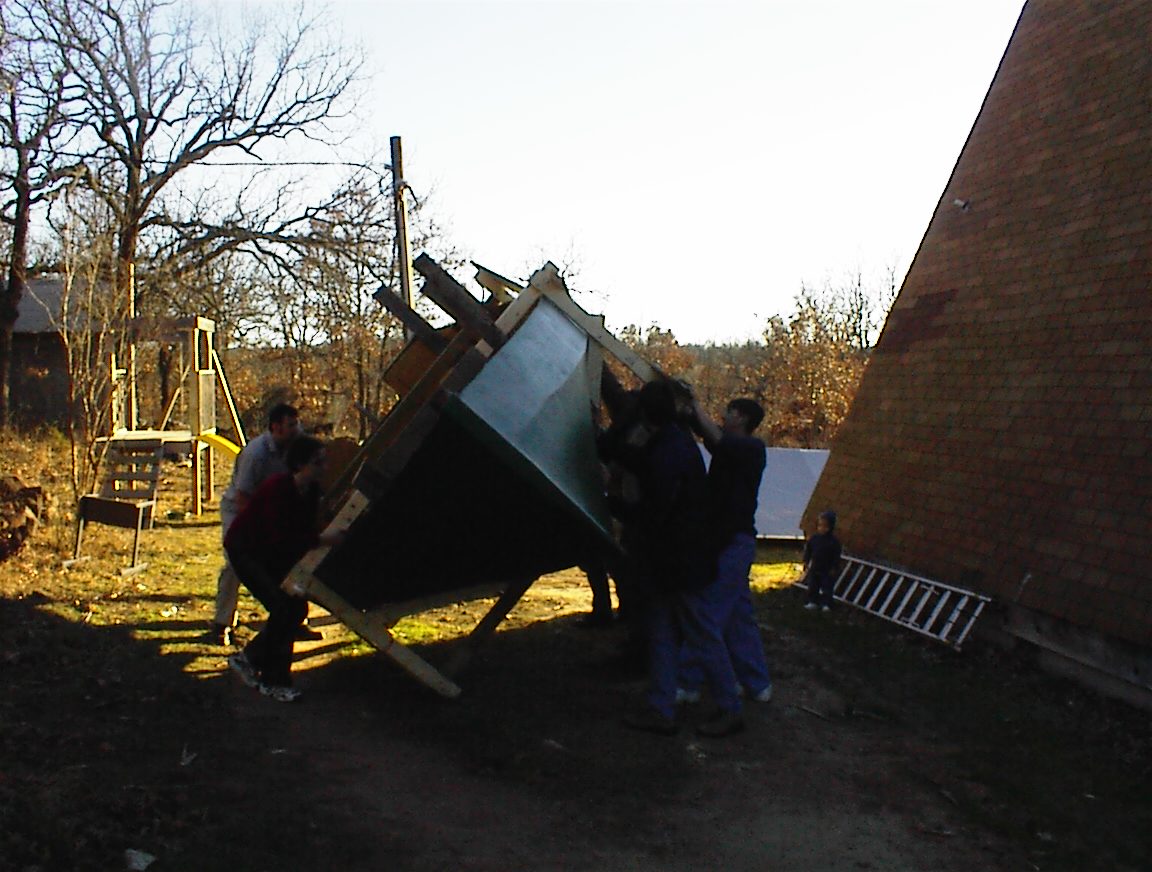
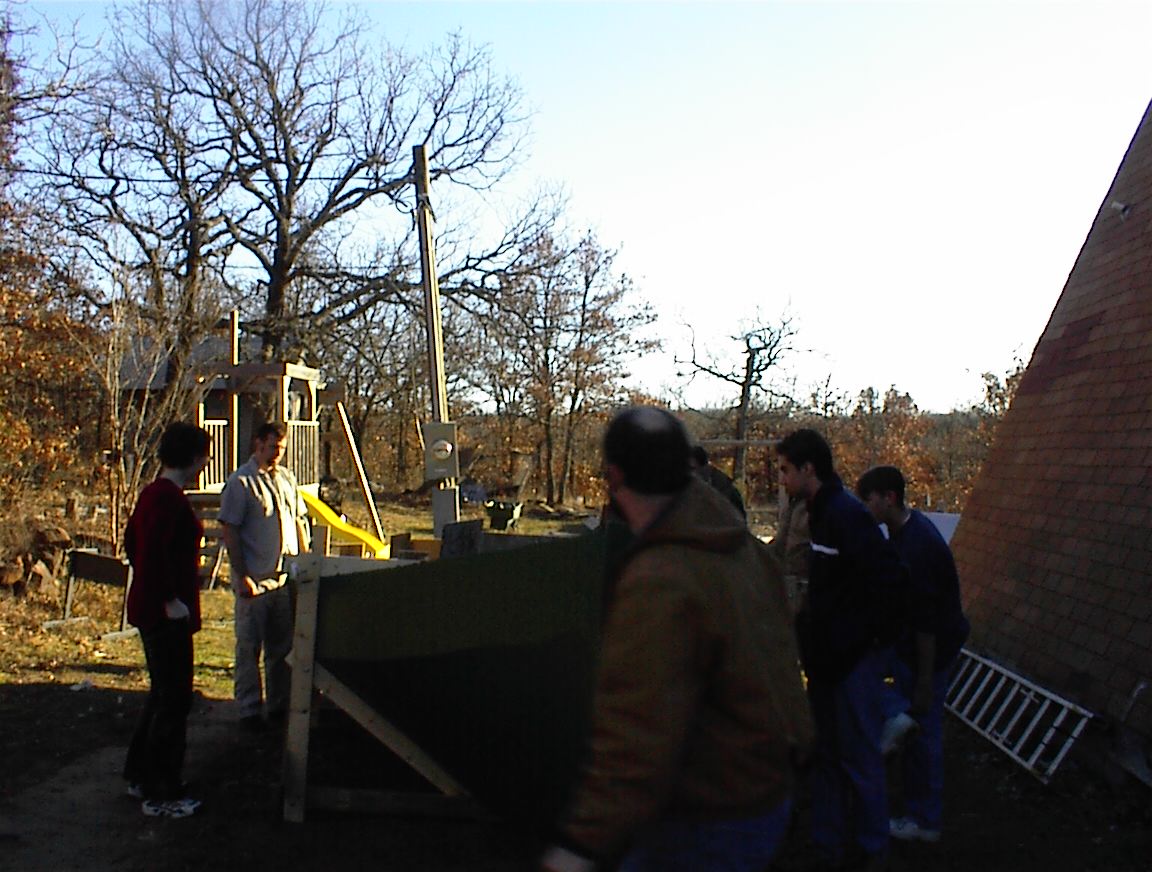
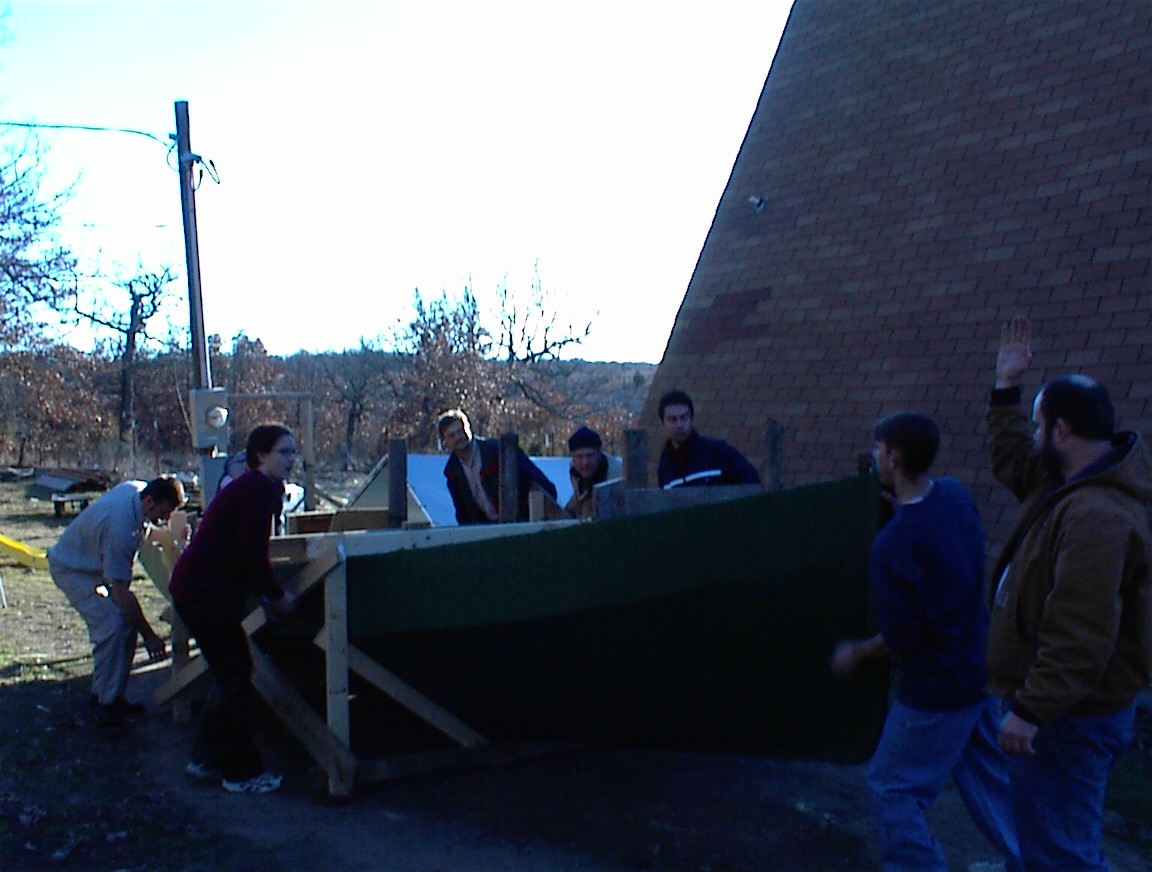
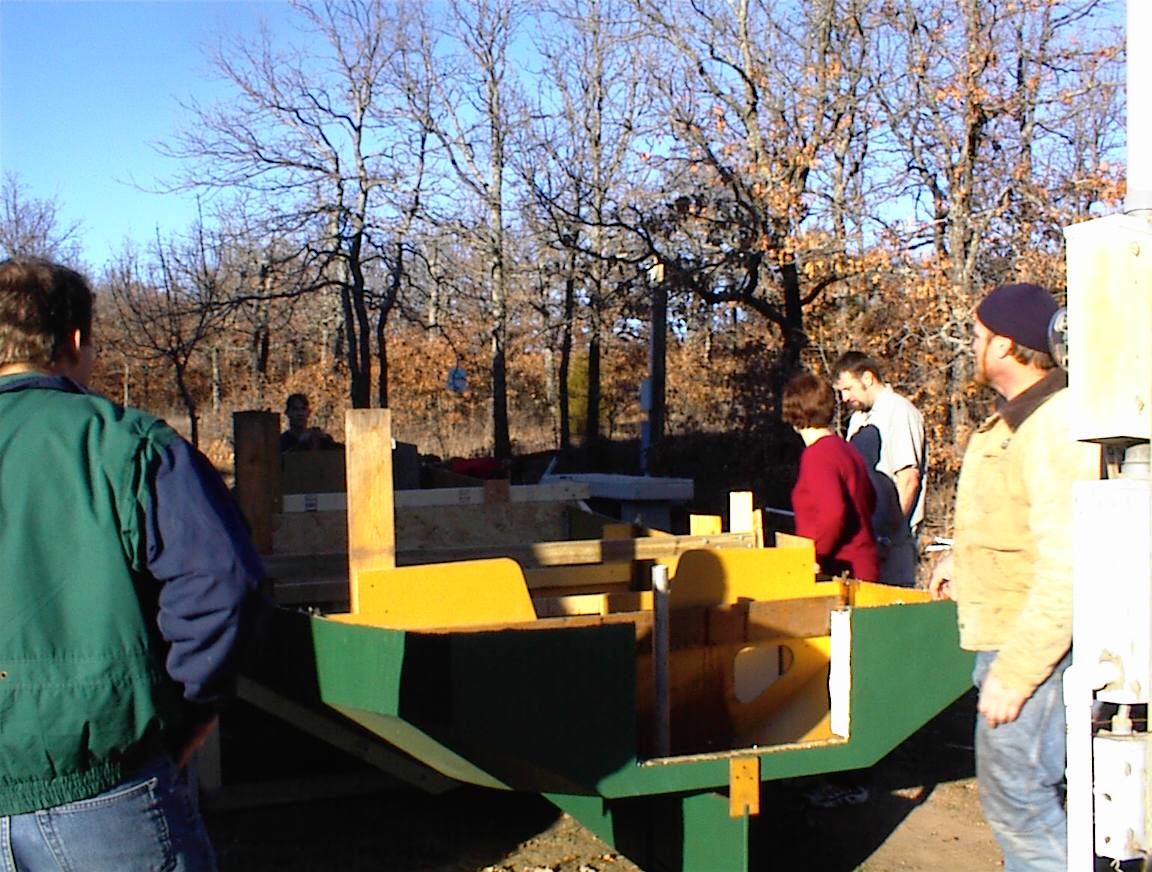
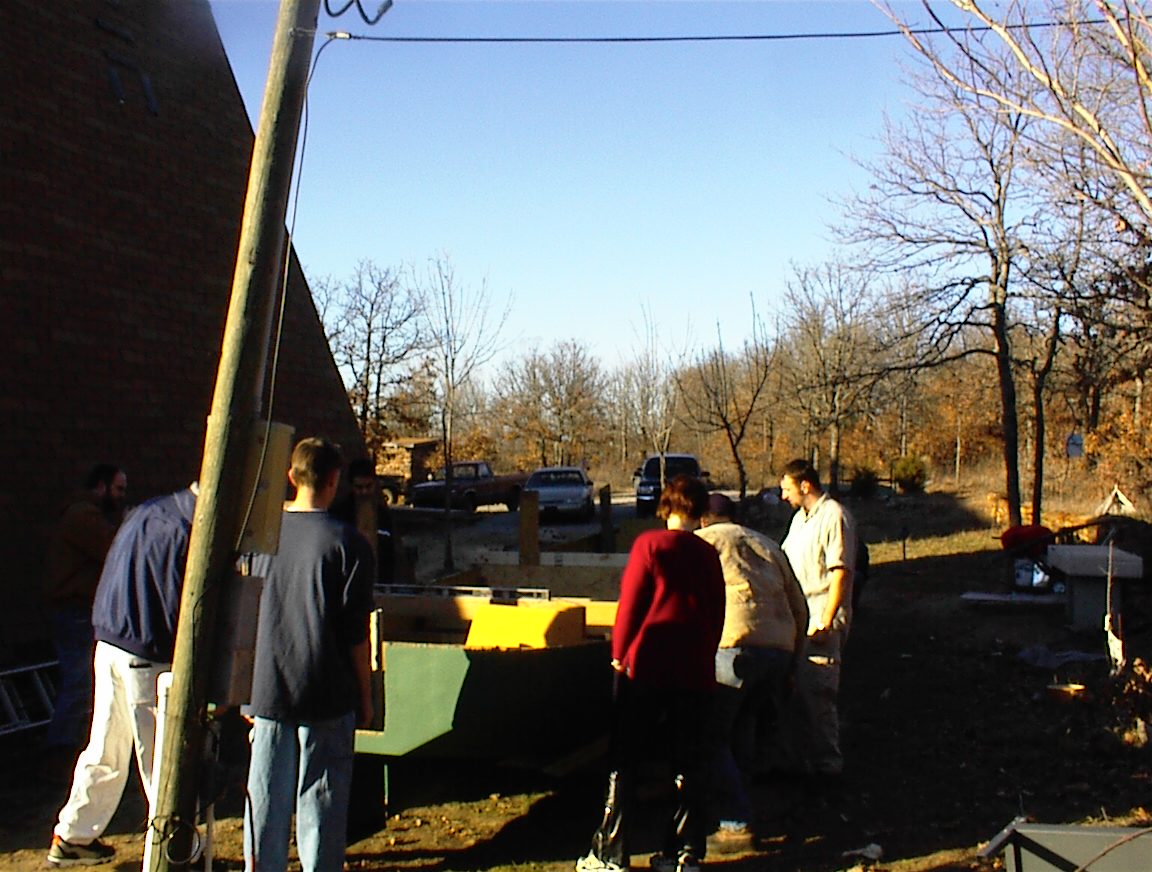
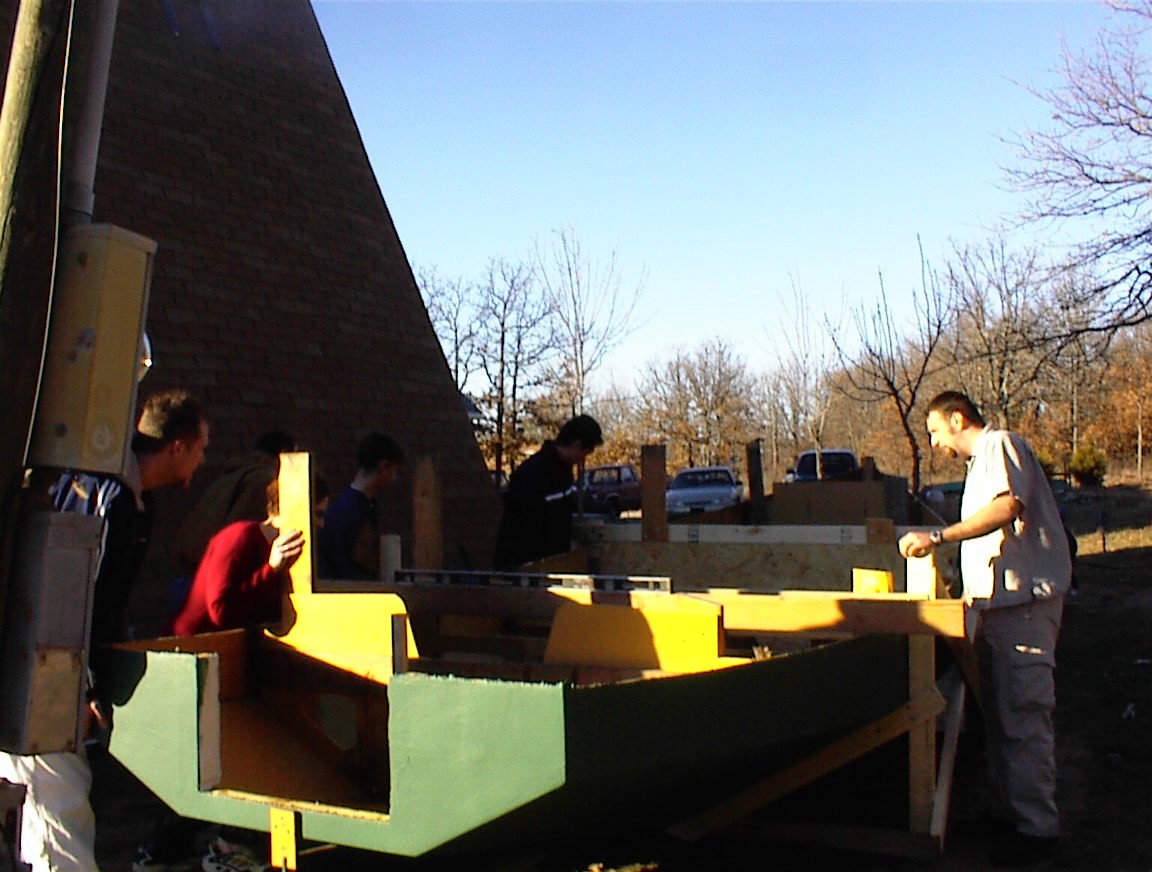
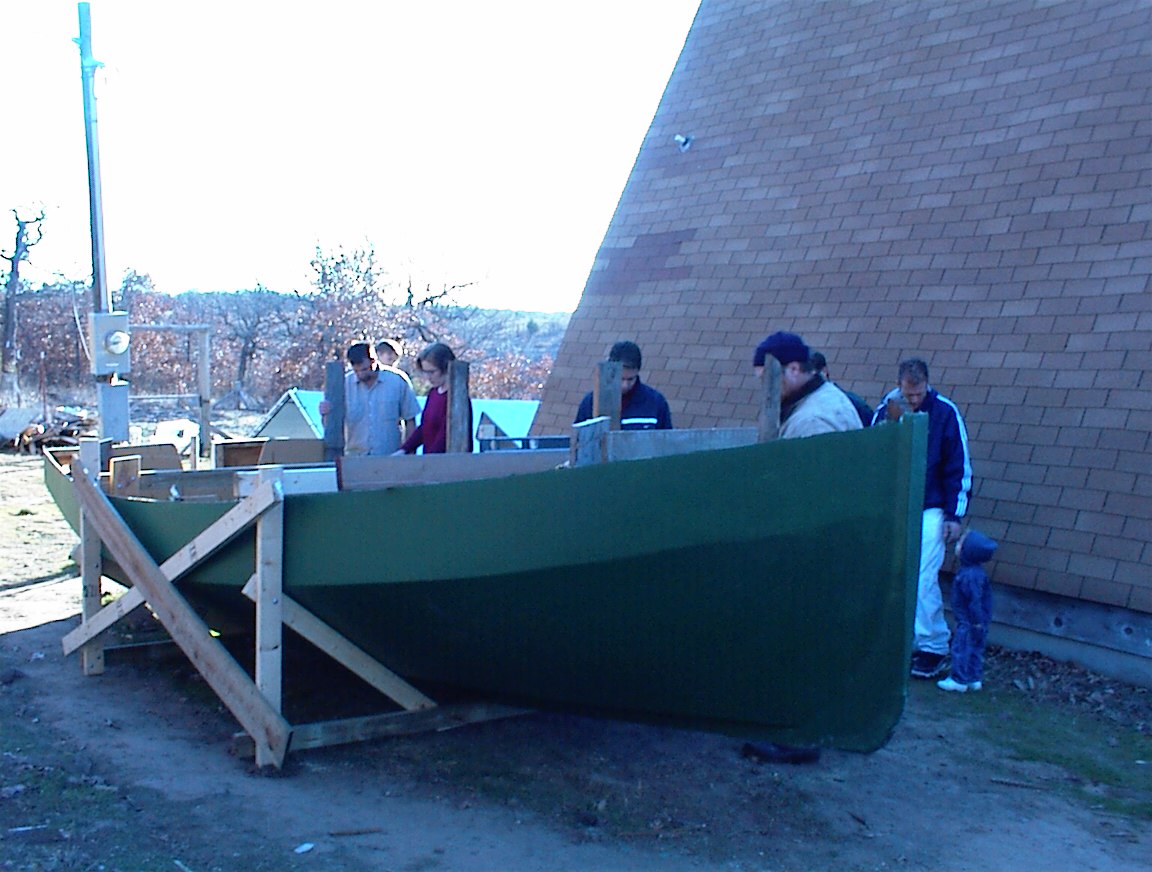
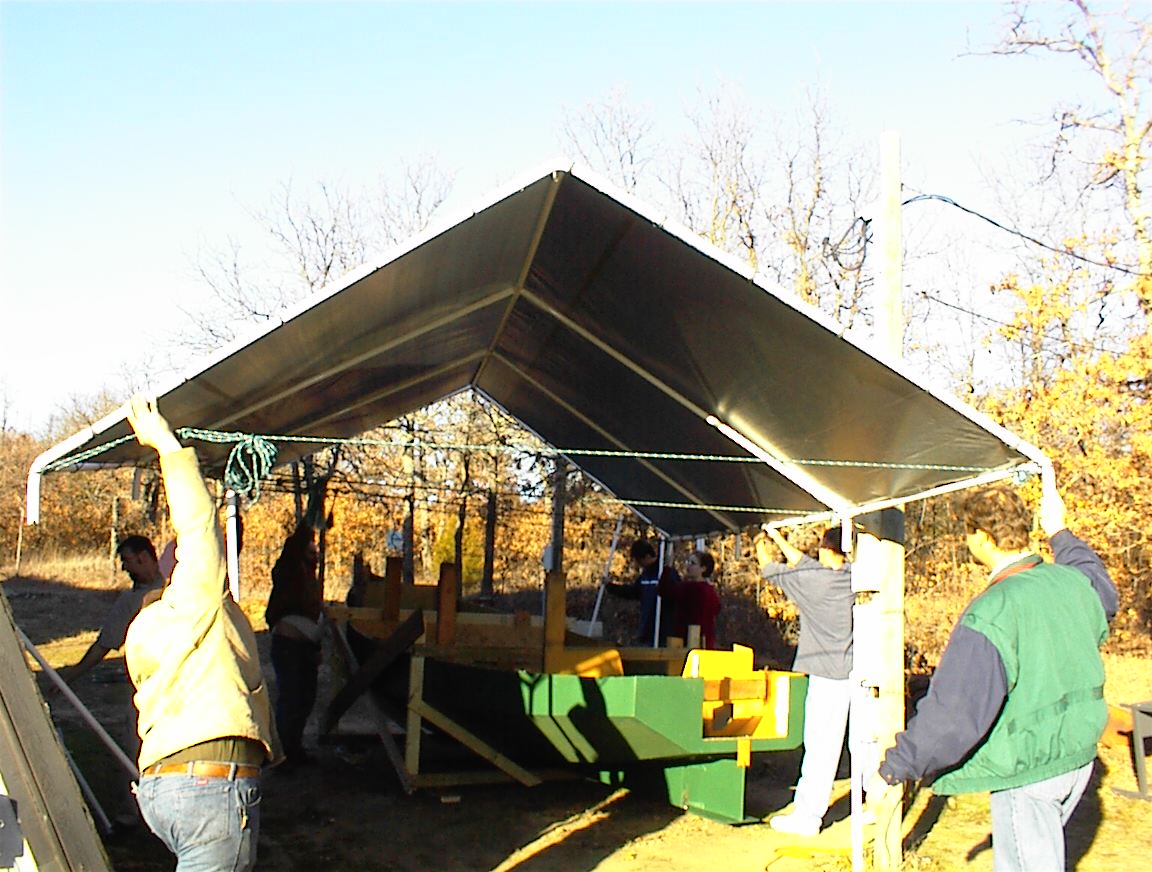
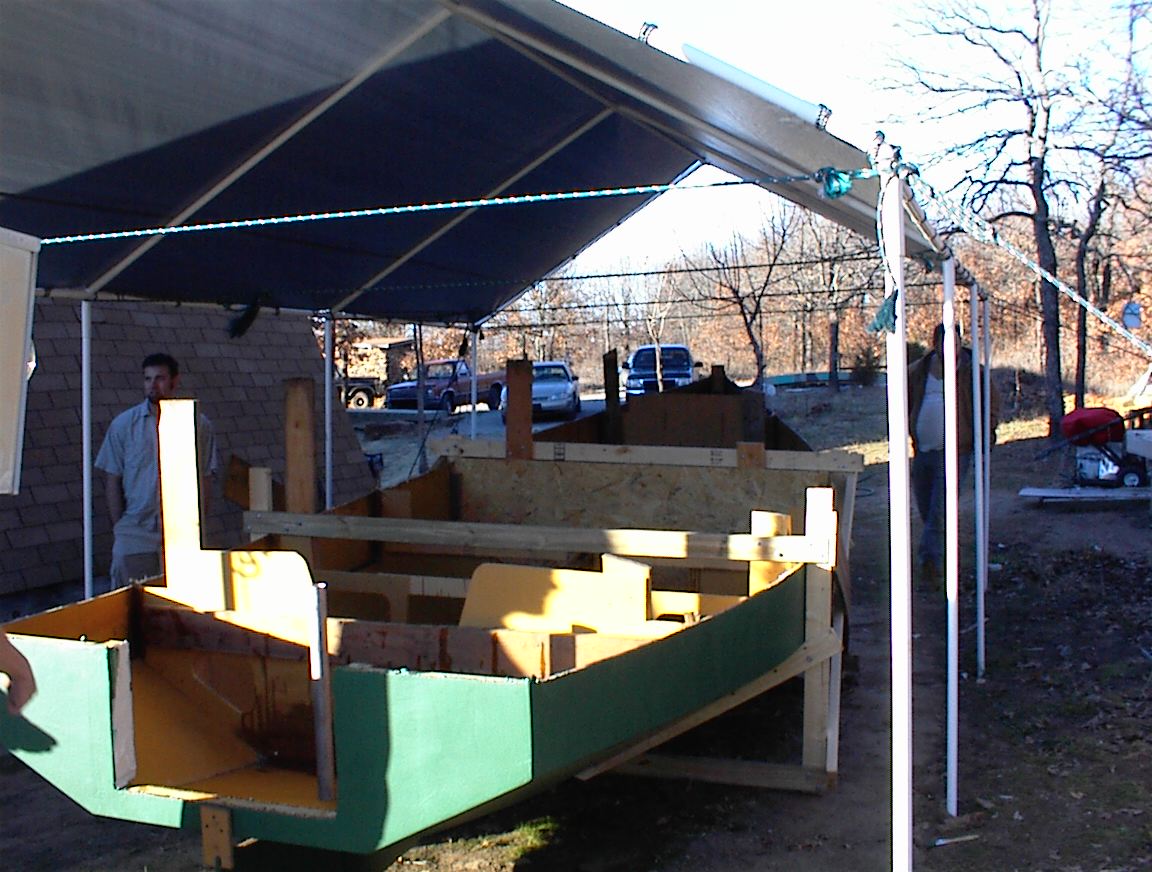
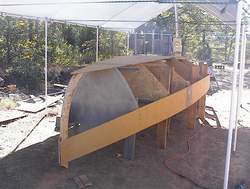
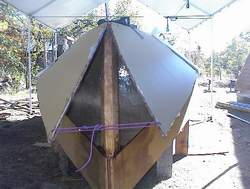
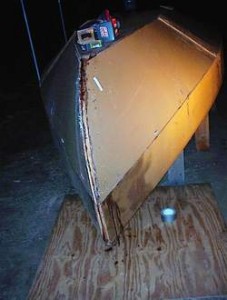
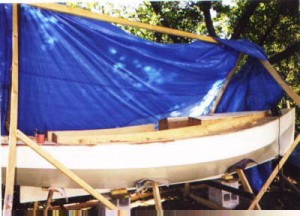
3DSC00004_6 3DSC00005_5 3DSC00006_5Lift, scoot, tip, lift, scoot, tip, etc. I learned from my mistake with turning (and dropping) the last boat. I built a frame around this one, lots of handholds, and with the frame it would sit on the side without being held. Made it into a two part operation.Here we are commencing the turning operation. We jacked up one side, and cut the “building legs” off, then let it down. One of the girls wanted to invite a bunch of friends over for barbecue, and I said it would be ok as long as they helped flip the boat. (We didn’t tell them till they got here. hehehehe) The designated camera person was late comming out with the rest of us, so I didn’t get any pictures of the canopy coming down.

3DSC00007_5 3DSC00008_5 3DSC00009_53DSC00010_33DSC00011_33DSC00012_2Over she goes! Didn’t drop this one. We are adjusting it to be centered on the canopy, and level (at least side to side, I made all the panels square with bulkheads, which are canted a bit. It’s not level front to rear, but that doesn’t affect anything) “NO! Don’t put a block under the rudder!”

Final tuning and adjusting.3DSC00013_2 3DSC00015_2 3DSC00016_2

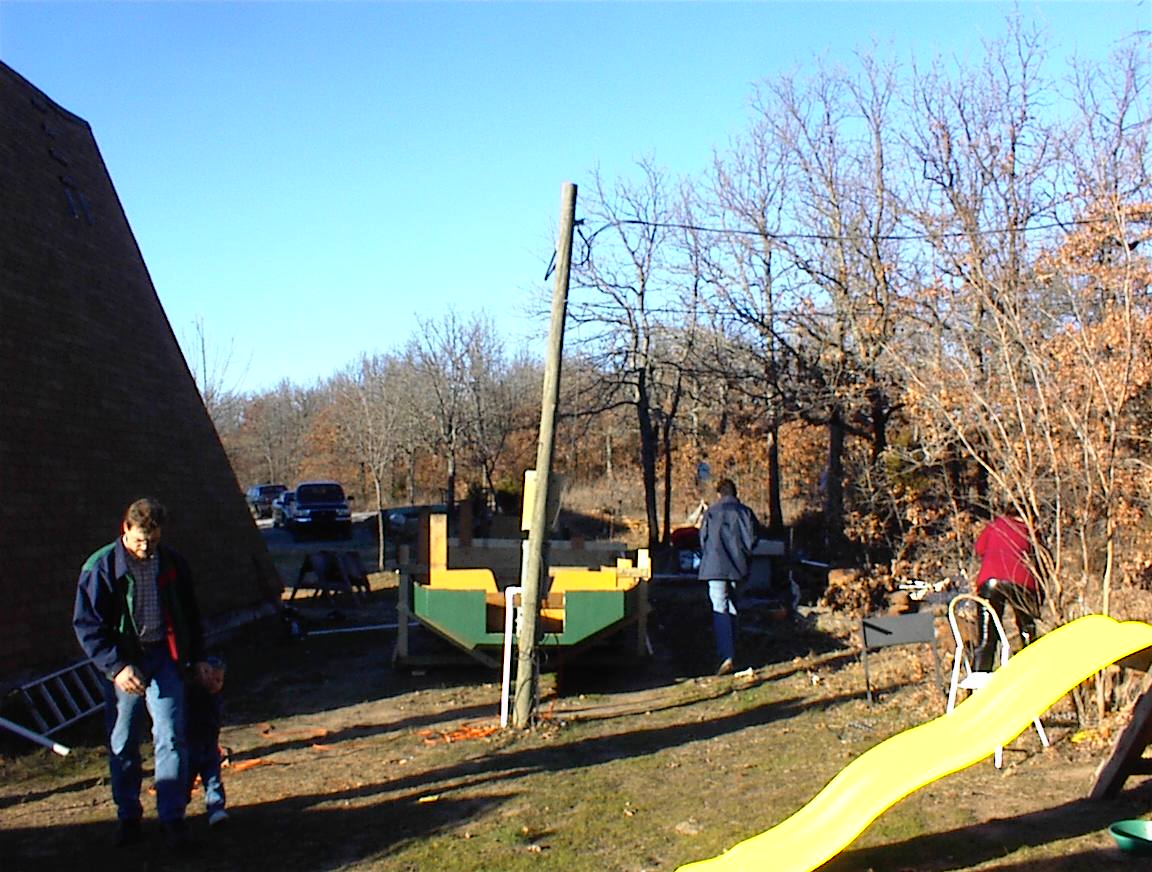
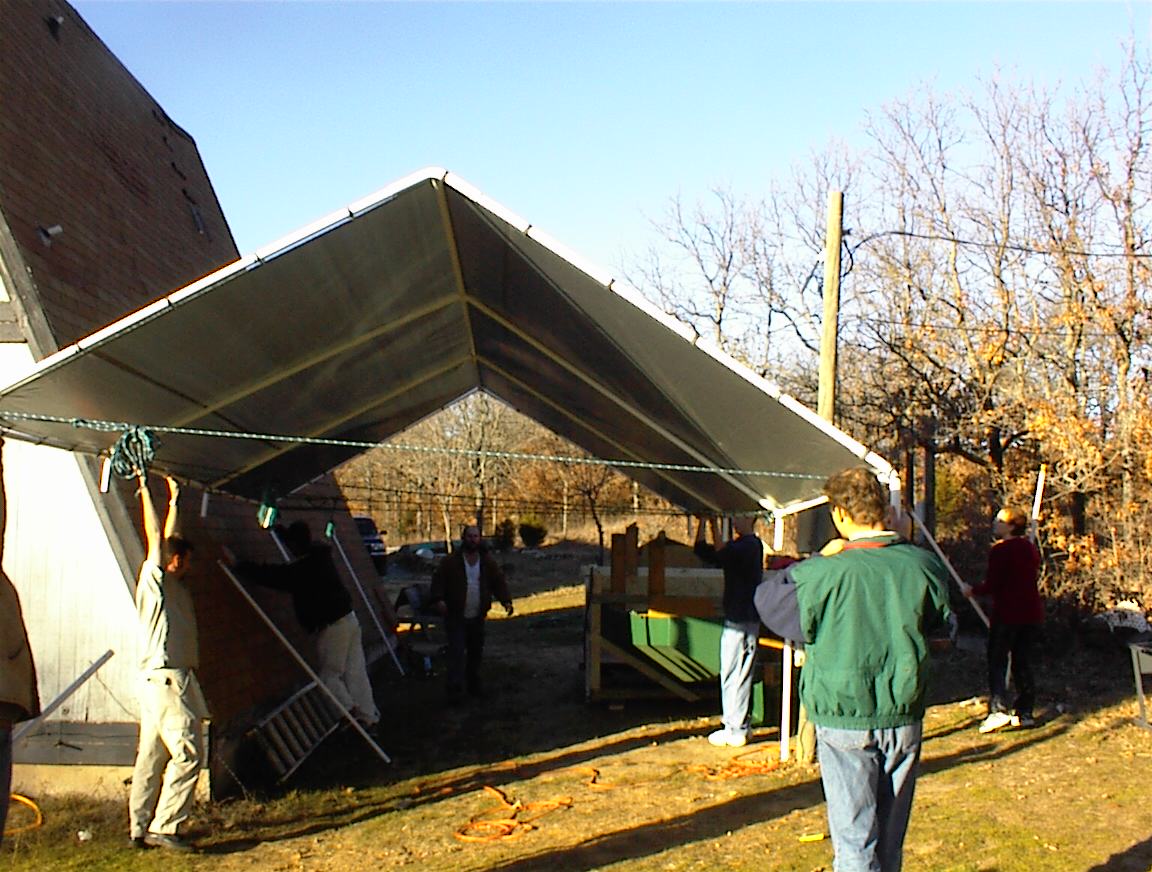
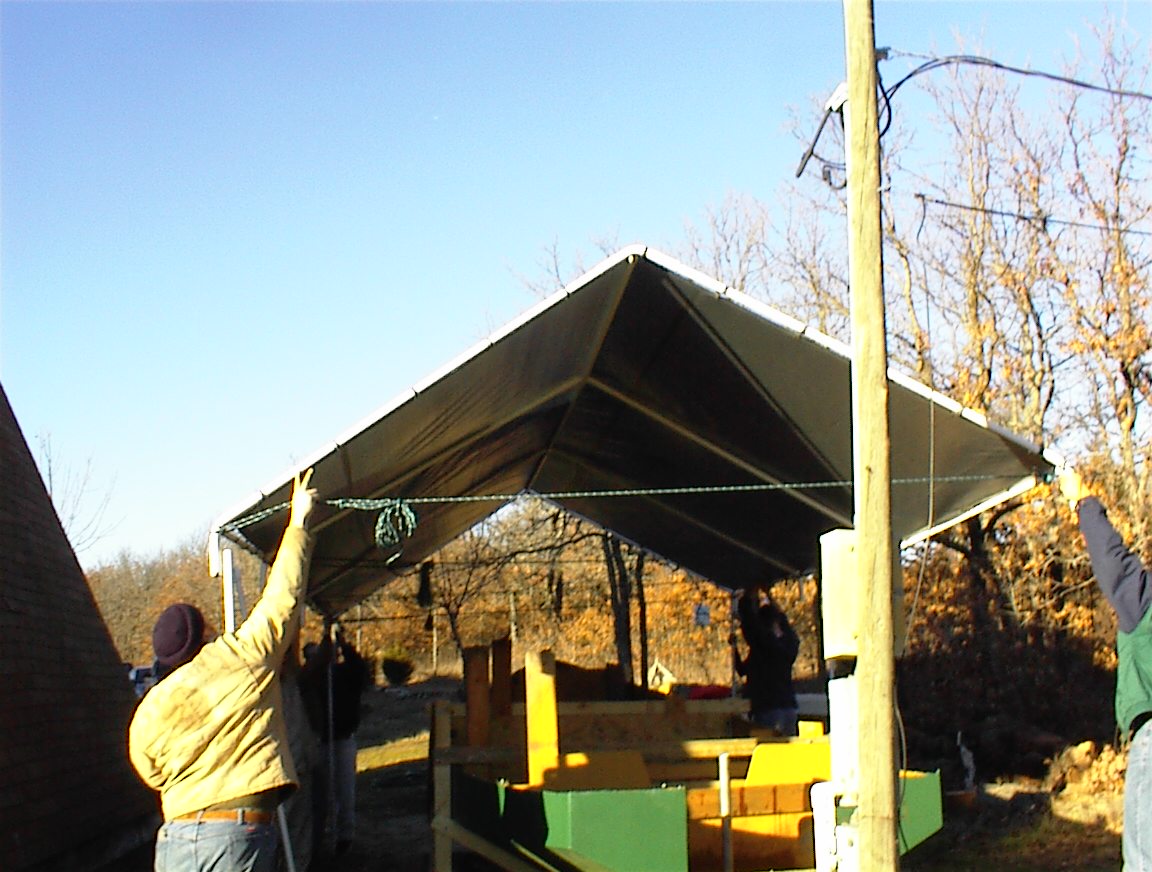
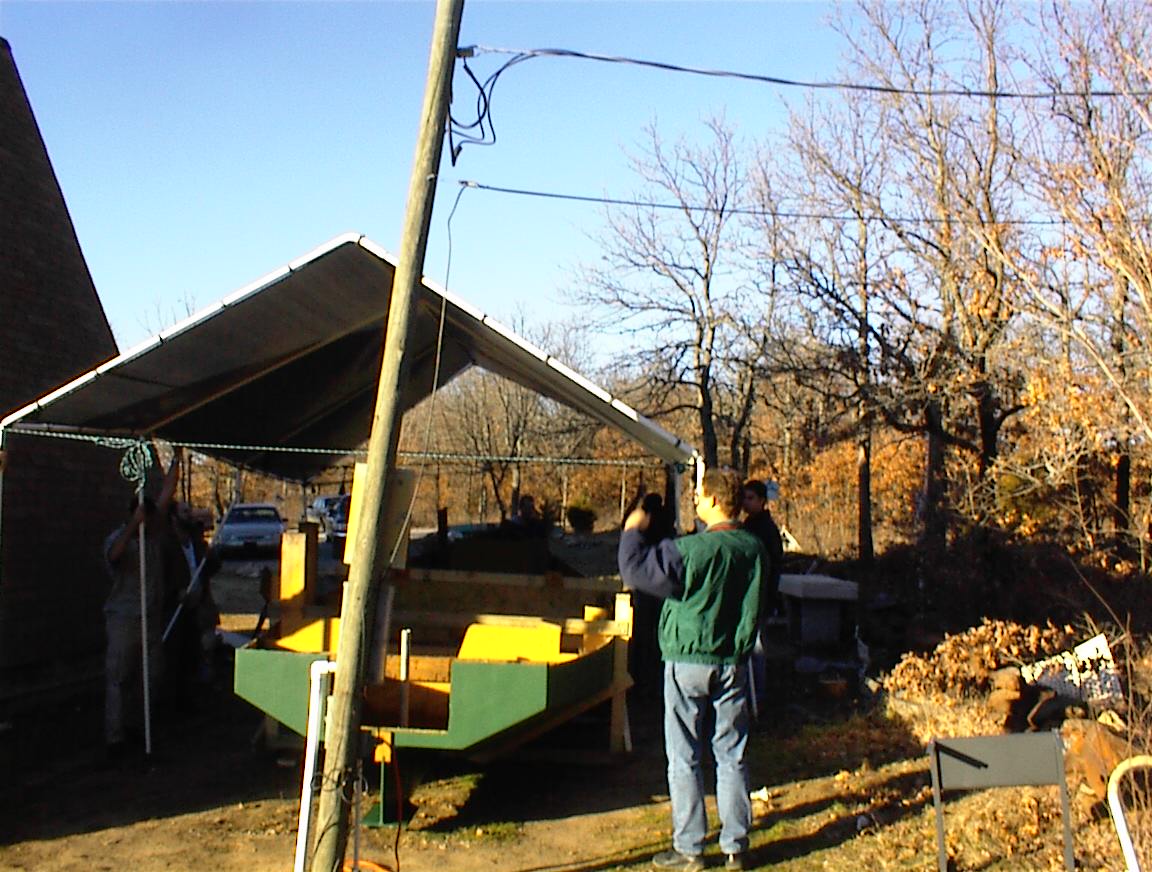
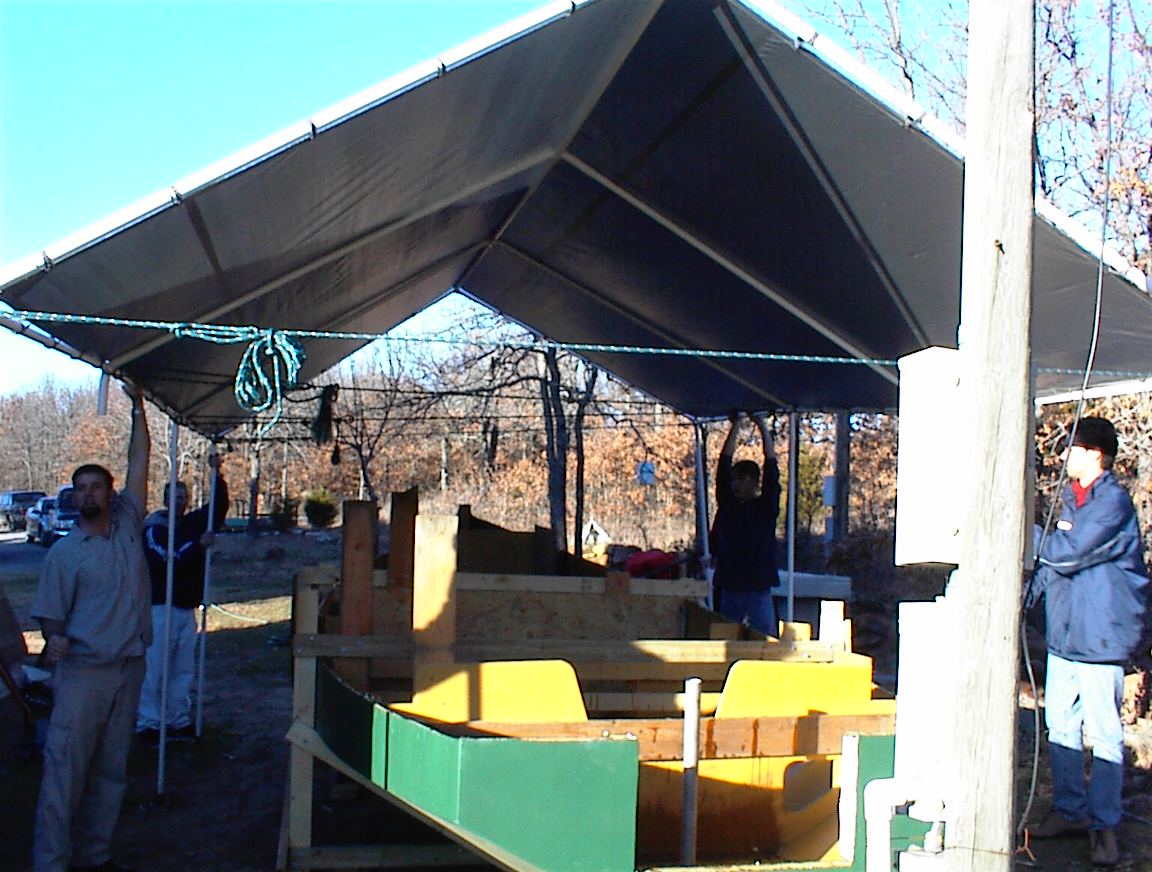
Starting to move the canopy back in. Much to big for one person to carry, but doesn’t weigh much.Turning crew inspecting the boat. Yes, I know the power pole is slanted. It’s been that way as long as I’ve owned the property. Doesn’t seem to cause any problems.

3DSC00021_2 3DSC00023_2 3DSC00024_23DSC00025_23DSC00026_23DSC00027_2Six people hold the canopy, six more insert poles. Makes me glad the girls have so many friends!

3DSC00028_2 3DSC00030_2 3DSC00039Final tweaking, and tie the canopy back down.

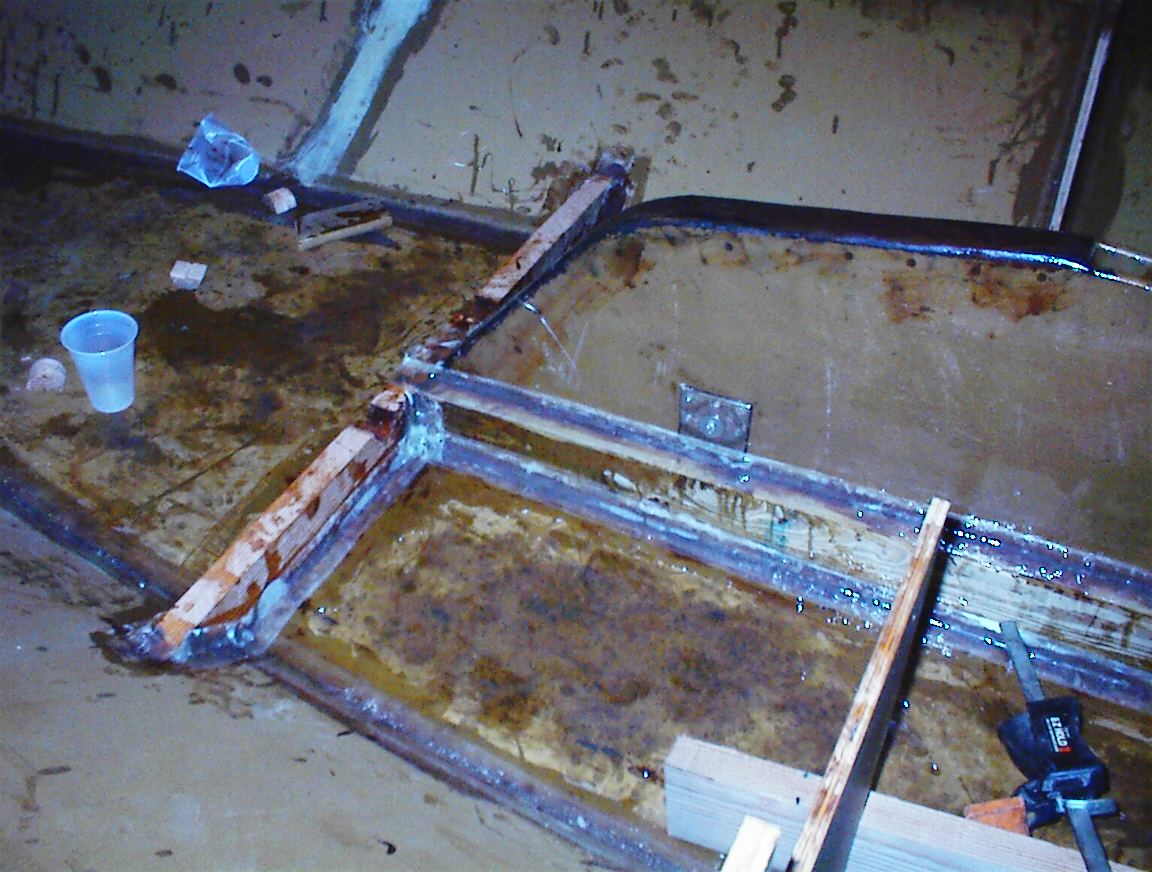
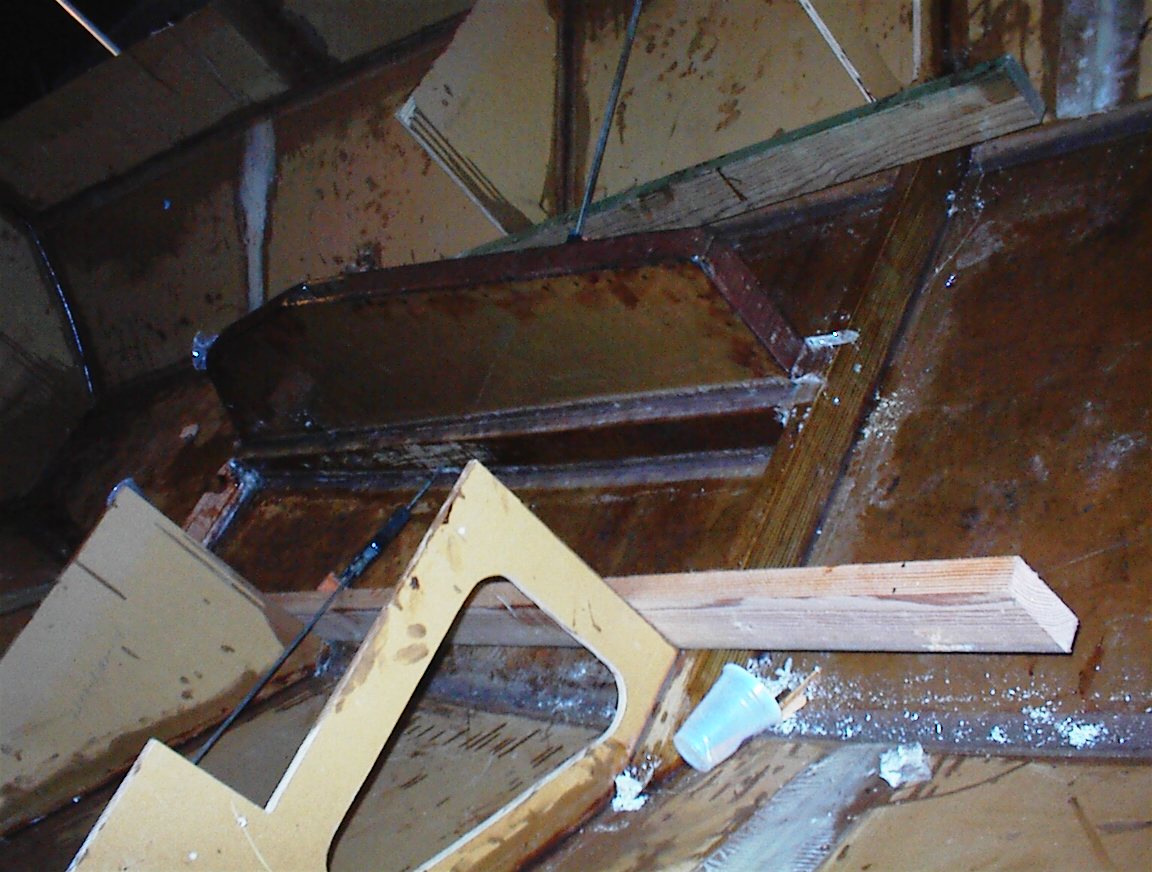
4DSC00001 4DSC00003 4DSC00004The left two are pictures of the centerboard interior bracing. The CLC doesn’t have the bracing on the top of the centerboard case that the regular Chebaccos do. Notice the several layers of tape and generous use of epoxy putty. And, yes, I did cut the drain holes on the wrong side of the board. It will be under the floorboards, and the only issue will be small triangular area between the berths that won’t drain back. But, since the cabin is closed, doesn’t have a bilge pump anyway, and this will be covered by the floor boards, I’m just not worrying about it.

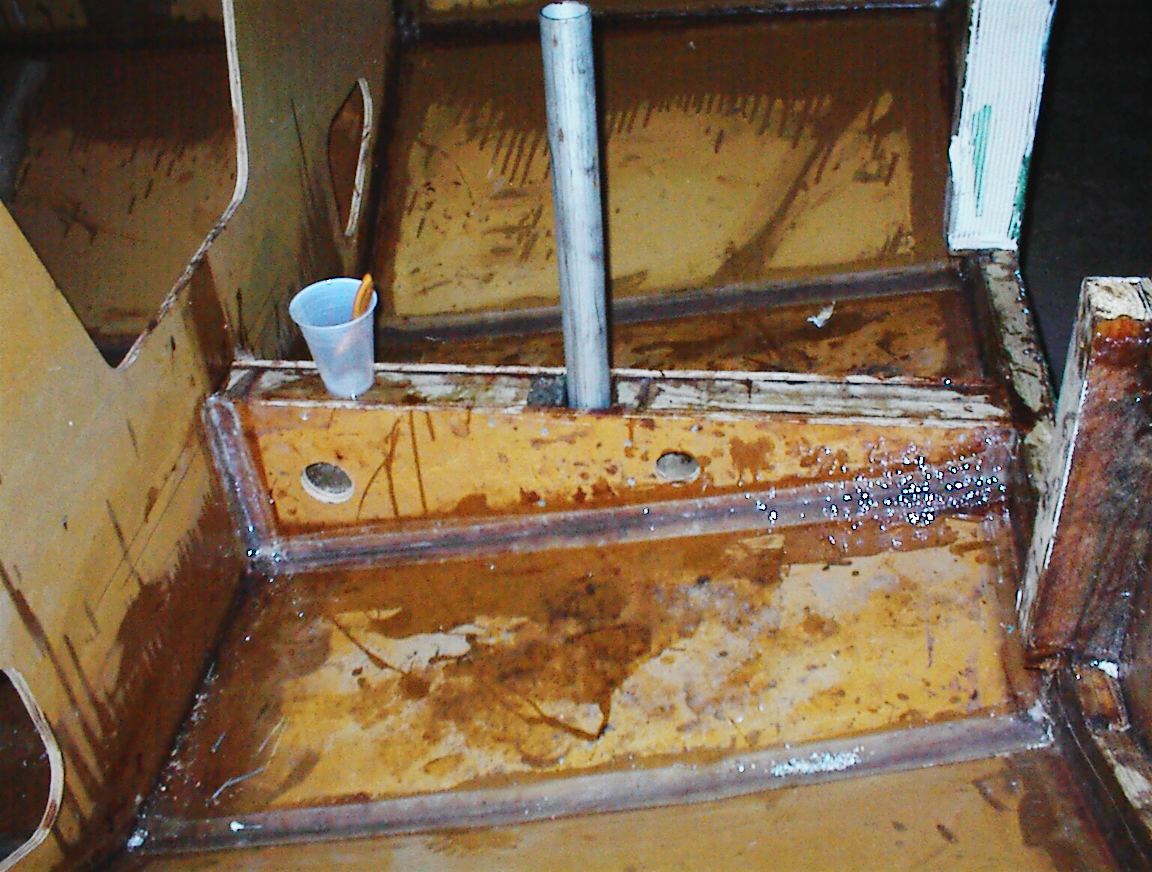
To the right you see the through hole for the rudder, and the aft well substructure. There would have been closed off spaces inside this structure for moisture to gather. The MDO and pressure treated is pretty good stuff, but I cut ventilation holes anyway. I’m putting two small deckplates on the bulkhead in the left of the picture. I know the plans call for this to be open, but I want the added floatation if the cockpit is ever flooded.

4DSC00005 4DSC00008 4DSC00001_2When I was building this section, I really noticed the lack of pictures of this particular construction detail on the web. Hence, you see lots of these pictures here! In the right two photos I have installed the walls to the aft floatation/storage boxes, and the framing for the motor well floor.

4DSC00003_2 4DSC00003_4 5DSC00006In the left photo I’m attaching the sides of the “seats” (which will also be the head ad galley). Attached them to cleats on one side, taped the other, pulled the cleats, and taped the remaining joint.s Center photo is my new power tool. He does a pretty good job, I can turn him loose on something and do something else myself. Very handy to have around, I would suggest you buy one. On the right you can see the framing for the top on the ground tackle compartment. I’m going to cover this over and put a Bomar hatch from Thrifty Marine (see resources) in. Rain and spray proof.

DSC00004 DSC00003 DSC00001Here you see pictures of the storage compartments I’m building. Not on the plans, but in a 20ft boat you can’t have to much storage. The compartment behind the seat will be accessed by opening the seat hatch, opening the deck plate covering the round hole, and reaching through the hole. Not the easiest access, but I’m thinking of storing light dried goods in there, maybe bread, that kind of thing.

The other storage area will be accessed through a hinged door over the galley and behind the head. For light dishes and toiletries, respectively.


You can see the layer of light glass on the bottom of the side of the seat, to protect against standing water in the cockpit.

5DSC00001_4
***HEY, how did that picture get in here? This is the new bed I made the wife for the anniversary. It does show how boat work spills over into regular life. This was built in two halves, out of some of the spare 1/2″ MDO from the boat. Two halves so it would be easy to take into the bedroom. The lip around the top was filleted and glassed, so it would take the strain big people and little cats getting into bed.

Hi again, Richard

The weekend before last, Dad and I took a drive over to Bill McKibben’s place to say hello and see his modified glass-house Chebacco.  It’s going to
be BIG!  He’s going for comfort in the interior, raising the sides a foot over the already higher (I think) designed sides.  When the cabin goes on,
it’ll be big enough for full standing headroom!  There’s a vee berth going into the bows, with a galley along the port side, and a head compartment, I
think.  Also there will be quarter berths under the (shortened) cockpit seats.  Bill thinks more ballast will be needed to offset the added weight
up high, and is considering modifying the keel, and/or carrying inside ballast, maybe extra drinking water in portable containers.  There’s
certainly lots of room.

Picture_No_1

Bill’s braver than most.  The hull is from the Chebacco offsets, so the underwater shape is as designed, but for the topsides he’s working from the
model he made (Chebacco News #33, Feb 01), and the interior is in his head.  He says its all an experiment, but I think he’s pretty well
thought it out.  The model looks good and extra ballast should make it stable.  Beth said she prefers the fast motorsailor, since it will take them
home in a hurry if the weather turns sour, but Bill is quite keen on the new, slower boat.  It’s modelled after something he saw in Desolation Sound,
a power boat hull and cabin converted into a motor-sailor, with davits added for a substantial dinghy as well.  Bill says it combines everything he wants
into a tidy package.  The boat that inspired him was about 25 feet, and Chebacco is only 20, but I don’t think that’s going to stop him.  Including
davits.

Picture_No_2

Bill’s model looks good, so once the ballasting is worked out, the full size motor sailor should turn out well.  I’ve attached some pictures of the
progress to date — unfortunately I couldn’t get far enough away to show the whole boat at once, as it’s under shelter.  The frame at the stern may be
converted into support for the davits, or could be removed, Bill is still pondering that one.

Picture_No_3

Bill’s plans for moving the hull out of the shop may be helpful to someone  else — he is leaving the keel off, so he can put rollers under the hull and
just push it where he wants it.  Then he’ll add the keel once he’s got the boat clear of shop, yard, flowerbeds, and so on.

I hope I haven’t misrepresented anything here — if I’ve got it wrong, Bill, my apologies.

***

Tom_and_Jamie

Hi Richard

I had a visit from fellow Chebacco builder Tom McIllwraith (from Halifax) on January 12.  He had occasion to visit Vancouver, and dropped in on a couple
of wet coast Chebacconists while he was in the area.  On the weekend before, he called on Randy Wheating to check on progress of Randy’s (as yet
un-named) sheet ply Chebacco, then last Saturday he caught the ferry over to see Wayward Lass.  Tom’s not a stranger to Chebacco sailing, having been out a few times with Fraser Howell in his strip built Itchy and Scratchy.

Tom’s done a lot of thinking about modifying his boat to make it slightly less Spartan in accommodation.  As well as angling the coamings for lounging
in the cockpit, he’s thinking about making the cabin wider – in line with the cockpit sides, I think, — and just a bit higher.  He and Randy had a
good discussion – here’s what Randy had to say:

“I spent a couple of pleasant hours on a rainy Sunday afternoon with Tom in the boat “shop”.

It never fails to give me a neat feeling to meet a kindred spirit, from across the Straight, country or world that has laid awake at night or
pretended to be attentive at a meeting while puzzling over some obscure Chebacco detail in his mind.  It is really a pretty small club when you
think of it.

Tom and I swapped many ideas and modifications until the moment of truth when we each confessed to our biggest “oops”.  That is, a mistake that
has passed the point of correction.”

(I’m not including any “oopses” here – I’m sure every boat’s got one or two, but when 99.9% of people look at a boat, they see only the big picture, not
the details.  Good thing, too. — Jamie)

I have to agree with Randy about the kindred spirit part.  Since I got involved in building and sailing Wayward Lass I’ve met a whole raft of
interesting people, and have learned a lot from them as well as enjoying the chat.  The internet and this newsletter are great tools for this, of course,
but the personal visit is still king.

Tom and I hoped to go for a sail, but when we took a look at the Strait of Juan de Fuca, just after he arrived at the bus depot, it was a mass of big
whitecaps – no way!  The marine forecast was still showing gale warnings, although things were supposed to ease later.

We headed to my place, and had a solid session of boat talk, climbing around Wayward Lass.  After that, and a bite of lunch, I phoned my dad up in
Sidney, about 15 miles north and around the corner from the Strait.  He obligingly went for a short walk, and phoned back saying that it didn’t look
too bad, the racers were out and he hadn’t seen any reefs in their sails. So we hooked on the trailer and drove to Tulista Park in Sidney, my
favourite launch ramp.  Dad came out to see us off, and for Tom’s benefit, I timed the rigging-up, from stepping out of the van to getting back in for
the launch.

Rigging up took 28 minutes on this occasion, a bit over the average, but not a whole lot.  I’ve only once come close to 15 minutes, when I’d put
everything away properly the time before.  This time, we started with a disorganized collection of ropes and sticks.  I’d only laced on the mizzen a
couple of nights before, not very well as we found, and all the ropes were just dropped in the after lockers.

Honda started on the second pull, and after an interesting 180 between the pilings, thanks to the wind, we headed out.  The wind was pretty well from
the west, straight off the shore, so we put up the sails right away and shut down the motor.  I’d put them away with a reef still tied in on Boxing Day,
and we left that in.  Because we would have to beat back to the ramp, we took a quick turn to windward, just to see how strong the wind really was –
no problem, the single reef was enough, maybe 20 knots of wind, but not much wave action because of the wind blowing away from the land.

We headed easterly, towards Sidney Island, with its mile long spit and friendly lagoon, on the other side of Sidney Channel.  The mizzen wasn’t
very helpful while running – with a strong wind it tends to push the stern around.  However, I kept it up because it helps us heave-to so nicely.

After a while, we became aware that the wind was picking up.  The way home was now patterned with white, and looked quite different.  We turned to
windward again — and gave up any thought of going all the way to the spit. We’d have had a very long beat home if we’d gone on.  Wayward Lass was
sailing well, but going against the waves threw up some heavy spray.  Tom got into the Cruiser suit, but not before he soaked up some of that spray.
Going to windward in these conditions, I was glad to have a second body for ballast – he kept the worst of the spray off me, too!

It was wet, but we made good progress.  However, after a long tack to that brought us near the shore, but still quite a ways north of the ramp, there
were a couple of very strong gusts.  These challenged our favourite designer’s assertion that nothing short of “hurricane force winds or heavily
breaking seas” will tip a Chebacco.  Rather than chance becoming the first Chebacco ever to capsize, I let the mainsheet run free, and we hove to for
the second reef.  The only other sailboat in sight at the time was a biggish one (40 feet?), and it was reefed down too.

Tom must have wondered if I really knew what I was doing.  The reef lines (pendants?) for the second reef were still in the cabin.  I got them out,
and tied the tack down quickly enough.  However, to get the foot tight enough it was necessary to rig the clew reef line properly, from boom to
reef ring back to boom then pull it tight to the cleat.  Meanwhile we were sailing merrily backwards at about 3 knots, away from our destination.  I’m
not entirely sure why, but every time I was about to tie off the end of the clew reef line, after all that leading here and there, the bows would swing
off the wind and the boom would fly out to the side.  I eventually got the reef tied, but it was a real circus there for a few minutes.  I think the
mizzen luff and snotter weren’t tight enough, as the wind was making bags in the sail – also I had to pull the boom inboard to run the clew line through
the ring, rather than letting the boom fly loose.  Bottom line is have your reefing lines rigged before you need them!

Wayward Lass was fine again with the two reefs in.  I estimated the wind at 25 to 30 knots at this point, no idea what the gusts reached.  Take this all
with a grain of salt if you want, it’s only a guess.  The waves were much less than they would have been if the wind hadn’t been off the land, since
they couldn’t build up on such a short fetch.  I poured Tom a cup of tea and put it down beside him (he was steering now) but it promptly went into the
bilge.  Tom very nicely said he was too occupied to drink it anyway.  I poured a cup for myself, but it was full of salt spray almost immediately,
so I gave it up too.  Not too long after, I suggested that we’d had all the fun we could take for the day, and since it would take quite a while to work
our way up to the ramp, we might start motoring.  Good old Honda started again without complaint, and it was down sails and home.

Tom assured me he’d enjoyed the afternoon (I hope you weren’t just being polite, Tom.)  I enjoyed it myself, despite feeling like an idiot at times –
out of practice and very disorganized.  Another time we’ll suit up completely at the start, and rig all the reefing lines too.  Oh, yes, and I
won’t leave cups of tea unattended!  Still, it’s got me all fired up again, and I’m planning some more sailing as soon as we stabilize a couple of new
projects at work.

I see I’ve got a bit carried away talking about the sailing (again! – call it a character flaw.)  I really meant to concentrate on Tom’s visit,
because, as Randy pointed out, it’s great to see Chebacconists from other parts of the country (world?).  It was fine meeting you, Tom, and I hope
anyone else coming out this way will call, and maybe we’ll get them out for a quick one too.

Tom, I also hope you’ll will write up your building experiences and tell us about what modifications you decide on, and let us see some pictures.  The
world can’t have too many Chebaccos!

Jamie Orr

***

There once was a man, who spent much more money than he should have, to have LED lights on his boat. This is the same man who decided he HAD TO HAVE a CNC router, built one from scratch, then used it twice.
Anyway, for no particular reasons, other than I thought it would be cool, and I wouldn’t have to worry about leaving the anchor light on all night, I decided I MUST HAVE lights on my boat that were based the new, ultra efficient, bright white LED’s.
I bought my LED’s mainly from http://www.bgmicro.com/, They run, according to the spec sheet from Nichia, at 3.6-4v and output 5600 mcd (mili candela, whatever that is) in a 20 degree fan.
I had originally planned to have eight of the lights, masthead, forward red, forward green, aft, two cabin lights, and two reading lights. Also, I had planed to run 12v to the lights, and do the voltage conversion there. Red and Green lights would be using red and green LED’s.
I read everything I could find on LED flashlights, and LED lights. There is a lot of information on the ‘Net on the subject. A lot of it worthless. One site recommends using a 7812 voltage regulator and three of the LED’s in series (so each gets 4v). Bought eight of these, the next day someone pointed out that the specs for this regulator require the input be about 3v over the output voltage. I.E., I couldn’t run it off a 12v batt and get a consistent 12v out of the regulator.
So, I had the bright idea of using the 7808, which puts out 8v, and having TWO of the LED’s in series. When the eight of these arrived I wired one up on the breadboard and presto, I had light! Wired eight of the LED’s up, and left them on. When they say “bright white” they mean it, had eight spots behind my eyes for hours before I decided I needed to wear shades to play with these things.
I left the 8 LED’s running and had supper. Afterwards, I discovered that THREE of the things had burned out!. What the BLEEP!?!
Some carefull checking determined that with the two in series, the voltage drop over one would be, say 3.9v, and the drop over the other would be, say, 4.1 v.
So, I figured I needed to drive the blasted things with EXACTLY 3.6v. There is a problem with this, this is apparently an odd voltage, there is no “78036” or whatever. So, I decided to make my own variable voltage supply, one for each light, and go to town. Bought, again, eight, LM317’s, and associated resistors and whatnot. Wrote a spreadsheet to calculate the values for the resistors so I could have the thing put out 3.6v. Wired it up. Plugged LED’s in and they were DIM! A little checking and it turned out that any kind of load on the thing and the voltage would drop…. Net research showed other people having the same issue, but couldn’t find a solution. Still a mystery there.
Time to step back and think about this. Maybe I should just have one voltage regulator, and wire 3.6 v to the switches, and out to the lights. I could do some kind of current regulator, but I wanted the simplicity of running the same voltage out to whatever light I wanted, and just hooking up as many LED there as I needed. Dug and dug and dug. Found a national semiconductor manufacturer who has a wonderful website with all kinds of information on it. They sell an IC that looked like, with a little work, it would make a wonderful regulator for the boat! (about this time I’m thanking someone for the VoTech electronics I took as a kid, back in the day)
A little soldering, a magnifying headset, some tweezers. Presto, one central, efficient, source of 3.6 volts for the LED’s lights on my boat!
BTW, I’m selling a kit to put these together. Kit price is $75, follow instructions at the “store” link to the left.
The kit uses a surface mount board the manufacture sells, with all the regulator components on it. The board comes from them fixed at 12v, and I use a magnifying headset, tweezers, and a pointy soldering iron to change it to work as a variable voltage source, to get 3.6v for the LED’s. The kit includes an etched board to mount the manufactures board on (as a daughter board) and all the hardware needed. I’ve removed the 2.7k itty bitty surface mount resistor and connected a wire to go to the variable resistor on the “mother” board.
DSC00005 DSC00006 DSC00007
As you can see in the pictures, I’m using a nice fancy, bulkhead mount enclosure. Got this, and lots of other neat stuff fromhttp://www.allelectronics.com. Give them a look see, they have neat stuff!
After all this, I discovered that the bright red LED’s I was going to use for the red bow light wouldn’t work at 3.6v. They go dim and get hot.<sigh> I guess I’m putting white LED’s in the colored fixture.
tn_1DSC00006_2 tn_1DSC00007_2 tn_1DSC00008_2
Here are some pictures of the masthead light with and without the cover. I bought the Series 25 fixtures from Boaters World, the price was reasonable, and I wouldn’t have to make them.
PCB&F writes (what does it say when you start referring to people by their initials?). The designer of the Chebacco light cruiser, Susanne Altenburger’s (who just denied that the Chebacco was “her” boat, in a rather LONG phone call), writes that you should use “two 6V deep-cycle batteries capable of around 215 Ah at 12V”. Now, were am I going to find those things? Nothing in the marine stores, nor in the auto shops. Can’t buy them online, the shipping would kill me. Walking through Sam’s club one day, but what do I see on the way out but a 6V, deep-cycle, 215 Ah, GOLF CART battery! Yippee! And, the things only cost $45 each. Nonstandard size, though. Will have to make my own box for them.
 3DSC00009
A 32watt, flexible, solar panel will top off the batts, and keep them topped off when the boat is in storage mode. I could have saved quite a bit and went with a hard panel, especially as it is going to be mounted on to of the cabin and there is no danger of it being walked on. However, the hard panel were looking awful heavy. 33lbs for some of them! So, I decided I needed the flexible, light weight ones.
There is a story here, these things were going for around $300 on ebay, and everywhere I saw them. Caught one on ebay with a buy-it-now for $240. GOT IT. Hurrah! Saved money!
Then, I was discussing solar panels with my friend Chuck, and he said he got his from here: http://www.solar-electric.com/.
Guess what, they had my panel too. FOR $187!!! AHHHG!
Then, when writing this article, I looked again and found the flexible panels at the above URL for $296. Huh? Read the description for the $187 panels. It appears that these are basically the flexible ones, in a frame. Same technology, but added weight of an aluminum frame and a galvanized steel backing! They weigh 10.6 lb, where the flexible one weights 4.7 lb. So, for an extra $53 I purchased a reduction of 5.9lb in the weight of the panel. Will it make a difference? Maybe, maybe not. But, any weight I can save above the CG counts!
Will put a clear window in the tarp that goes over the boat so the batts charge in when the boat is in storage, as soon as I figure out a cheap way to do this. May use the storm window sealing kits from the Home Despot or something.
Anyway, a 6.5 amp SunSaver charge controller will make sure I don’t overcharge the batteries, and I’ll get the 5amp alternator option when I get the motor.
2DSC00001 2DSC00003 2DSC00005_2
I had originally planned to run conduit for the electrics, but as you can see in the picture, I didn’t. I decided they would take up two much space, and instead ran the wires as shown. I was carefull to pre-run any wires that would be in closed compartments.
Here you can also see the plumbing for the bilge pumps and the drain for the built in icebox. I went from the pumps directly to 1/2 flexible tubing, to try to minimize the drain back when the pump is off. The bulkhead and there’ll fittings I made myself, from scratch!
Nice to have your own homemade foundry and machine shop!
***

(So, I guess only people in Australia can build 25ft Chebaccos… Looking good Simon! -Ed)

G’day Richard , a couple of pics of the boat .

Cheers Simon.

MuddyMay01 MuddyProfileMay01

Chebacco News 37

Building the CLC.

I’m building the Bolger Chebacco, Light Cruiser edition. Or, CLC. I have a Michalak designed AF2, but the wife doesn’t like going sailing in it. She has specific complaints; she doesn’t like changing sides during tacking, it’s too hot when I like to take it sailing, when the wind is calm and the water is smooth. She may have a point here, and the electric motor on Entropy, while it moves the boat around, is pretty slow. She likes to go sailing when the wind and waves are kicking up, but this is when I get anxious about the AF2 being capsized, and when we are pounding annoyingly into the waves.
So, AF2 “Entropy” is for sale and CLC “Schrödinger’s Cat” is born.
The CLC has a pilot house for shelter in the rain, permanent hard dodger for shelter from wind and sun. The boat is 7.5ft wide, and according to the designer it would take “hurricane force” winds to knock it over. The basic boat is self righting up to 90 degrees, and should be even better with the pilot house. The hull is well proven, and handles sweetly in rough water. Even the roughest lakes in OK should present no challenge. The CLC has two bunks, a head, and a small camping style galley, so we should be able to go camping in the boat for a weekend, assuming we can stand each other for that long.
She has a folding mast to make trailering simple and quick. I can setup Entropy in 15 minute, and take her down in 20. This includes tying the sail onto the mast. The folding mast on the CLC should knock at least 5 minute off both ends of that. Also, the CLC has a dedicated slop well on the centerline aft for a motor. Lots of money is designated to buying a NEW outboard, that will start on the first pull, and will push the boat at hull speed. So, even if there is no wind, I can leave the mast folded and we can go motoring!
I’ve decided to take my time on this one, though the wife swears I’ll be done by Thanksgiving, the the response from my sailing buddy when I told him I was taking my time was “ya, right”. Do I have a reputation or something?
I’m using 1/2″ MDO for the boat. It’s about as good as you can get without spending three times as much and getting marine plywood. It is even argueable that it is better than some marine plywood, as the paper face will prevent checking in the plys that would let water in. Here is a picture of a piece that spent three months in my dishwasher. It’s in absolutely perfect condition, and you can’t even tell it’s been soaked with hot water a couple of times a day for months. Quite amazing, actually.

DSC00008_3

Everyone asks, “do you need to take the paper off?”. No. The paper is stronger than the wood. Test joints made by myself and others, using the Payson/Carnell fiberglass butt joint technique, always break in the wood layer, by ripping the wood fibers apart. Never in the paper, in the epoxy, or in the glass. Here is a picture of a test joint tested destructively.

DSC00009_3

Here are a couple of pictures of the making of the 24X8 panels for cutting the topside out. There is a backing block of 1/2″ ply behind the joint, which the clamping block you see screws into. I’m using wax paper to keep the epoxy from sticking to the boards. This is problematic, it sometimes gets glued very good to the epoxy, and takes a wire brush on a drill to separate! Sometimes, though, it pulls right off. Go figure. Will be using polyethylene from now on, it doesn’t stick at all. My garden is in the background, where I grow cardboard boxes.

DSC00012 DSC00013

I put a layer of light glass cloth, 1.34oz, on the parts of the boat where rainwater might collect, before the boat was assembled. This is to seal the wood in that area and prevent rot. I also glassed the centerboard case inside and out, and coated the centerboard with graphite loaded epoxy for reduced friction and abrasion protection.  I’ll be glassing the insides of the stub keel, and the insides of the rudder post housing, as well as the slop well. The ground tackle compartment got a coating of limestone loaded epoxy as well as the light glass, but I may go over this will graphite loaded epoxy as well.
Here is a picture of the bushing I made out of UHMW poly for the centerboard to pivot on.This is 10 thou bigger than the pin, so there is a loose enough fit that the centerboard will bear on the case and not the pin when under side loads. It was turned on the lathe to be a press fit into the centerboard, and notches were cut out of the flat sides of the bushing with a hacksaw. It was hammered into the hole cut in the board, then the notches were filled epoxy and wood flour, and the whole assembly glassed over. The holes for the pin were cut later.

DSC00009_2

Here is a picture of the bearing plate for the centerboard pin. This is designed to take the load from the pin and distribute it to the wood in the centerboard case. There are extra layers of glass reinforcing the wood under this plate.

DSC00006_3

Also, the design modifications for the CLC remove the bracing from the top of the case provided by bulkhead 4. So, I will make sure that the 2x boards surrounding the case both outside on the keel and inside under the floorboards are securely fastened to the centerboard case, to transfer side loads to the hull.
Here are the watertight hatches for the boat. These are Bomar hatches, which I got for a WONDERFUL price from http://www.thriftymariner.com . From West Marine they would have cost $450. I got this whole box of hatches for $134. You should all buy something from this guy to help keep him in business! The hatches on centerline will be of the sliding type built by myself. They will be rain and spray tight, but would leak if immersed. But, they are on the centerline, so I can get away with them not being airtight.

DSC00010_3

Here I am adding reinforcement and biaxial cloth to the transom. I’m making this boat as strong as I know how. This reinforcement is in case I ever want to test with a 15 hp motor, and to be able to not worry about the motor bouncing off on the wonderful roads here in OK.

DSC00003_4

Here are the bulkheads, centerboard, and centerboard case, cut out and waiting to be assembled outside.
DSC00004_4 DSC00005_4 DSC00007_3
Here I’m laminating up the stem out of 1/4″ plywood. Bill Samson recommended laminating out of scraps of 1/2″ ply. I tried that, but couldn’t get them to take the bend without cracking. As it was, I had to get the 1/4″ wet for it not to crack. Realized a couple of weeks later he meant to laminated it SIDEWAYS, with piece already cut to the shape, and not to bend the pieces. Duh.

DSC00001_3

I ‘m using a cheap shelter from Harbor Freight to keep the sun and rain off the boat. I’m hoping for a mild winter. I added rope bracing and tied the corners down. It seem to stand up the wind pretty good so far, we’ve had gust to 40mph, and it barely moves. I also drilled and pinned the assembly together, so there is more than just the tarp holding it together!
DSC00010_2 DSC00011_2
Here are the bulkheads and forms setup outside under the shelter. I didn’t build a strongback for the boat, though I toyed with the idea. The topsides have alignment lines on them, and putting legs on one of the forms and one of the bulkheads allowed me to screw the topsides on and have a self supporting structure. The rest of the bulkheads were installed, then legs added to carry the load, and everything carefully leveled. The bottom was installed, next, and the stem trimmed to size.
DSC00001_6 DSC00003_7 DSC00004_7 DSC00005_6
The bilge panels were laminated in place, using thick paper to take the shape off the assembly. There are a few gaps, and it needed a little trimming, but epoxy covers most screw ups, and makes craftsmen of us all. The forward fg butt joint clamping blocks were left in place while the bilge panels were twisted into shape, to prevent any possibility of the joint coming apart under the extreme stress of the twisting..
DSC00001_4 DSC00001_5 DSC00004_6
This took a LOT of force, I wound up having to use three high tech ropes in the spanish windlass mode to get the thing bent. I was seriously supprised the ply didn’t snap!
DSC00003_5 DSC00004_5 DSC00005_5
I plan on leaving the ropes in place till I have the chine jointed filleted and taped on the outside, and filleted and taped on the inside forward of bulkhead one. Also, I will fillet and tape the forward sections of bulkhead one that intersect with the bilge panels. Hopefully, then, when I pull the ropes, the panels won’t move much!
I could have done it the recommended way and laminated up two layers of 1/4″ ply, but I’m not sure it would have been any easier. I would have had to drill a couple to four hundred holes to clamp the boards together properly for lamination, and would have had to make a 1/2″ – 1/4″ fg butt joint. Plus, I wanted to see if the ply would break when I bent it!
Today I sanded off the excess epoxy putty form the “spot epoxy” phase, and glassed the chines, as well as the front of the bulkhead one/bilge panel joint.
I realized a couple of days ago that my back always complains when I do a lot of hand sanding. Harbor Freight had an inline air sander one sale for $29, and it is wonderful! I did have to make a couple of field modifications, the exhaust is wet (even though I have a dryer on the air line), and it was spraying water on the place where the paper clamps to the sander. This was causing the paper to get wet and tear off way before it was used up. A couple of deflectors solved that problem. I’ve even come up with a way to convert the thing into a power long board, for faring the hull! I’ll post pictures in the next issue of Chebacco.

DSC00001

***

Hi Richard

Just got back from the Port Townsend Wooden Boat Festival in Port Townsend,
(where else?) Washington.  This year, for the first time, a Chebacco was in
the show.

Jerome McIlvanie has done an absolutely beautiful job on his lapstrake
version (see Chebacco News 28, October 1999.)  Both the boat and finish are
immaculate, and the varnished hatch and cabin doors (doors, not drop
boards!) are the icing on the cake.  I wish I could send you a picture, but
I didn’t think to take one – too dazzled, I guess!  John Kohnen was there,
though, with camera in hand, so maybe he would forward one for the Chebacco
page, if asked.  Maybe Jerome will send in a write-up on his building
experiences as well, it would be very worth-while.

Wayward Lass was in Port Townsend again, but she was down in the “other”
marina.  We’ve had a lot of small craft warnings, and Friday was no
exception, but the strong winds (up to 25 knots) weren’t expected until the
afternoon. When I left the dock at 6:05 am, there was no wind at all, and
there wasn’t enough to make sailing worthwhile until 7:30.  Once the sails
were up, I left the motor going in order to cross before the small craft
warning came to pass.  I’ve never motorsailed before, it’s always been one
or the other – but it worked well, with the speed over 6 knots most of the
time.

My new Garmin 12 GPS keeps me on track as well as giving me the exact speed
over the bottom.  It told me the tide sweeping down between the San Juan and
Canadian Gulf Islands was pushing me over 20 degrees off course, and made
adjusting for this a breeze.  It also provided added peace of mind when the
early morning fog advanced to meet me in the middle of the Strait, dropping
visibility to a couple of hundred yards.  These handheld GPS units are great
little helpers — I had my compass course, and expected the fog to lift
shortly anyway (it did), but still….

I rounded Point Wilson, 2 miles north of Port Townsend, at 11:40, and shut
down the motor.  I had a great sail down to Point Hudson, where the town is,
pulling ahead of a bigger boat, who was still motoring (their main was up,
but sheeted right in, while the wind was behind us.)  Once around Point
Hudson, I sailed close past the entrance to the Festival at the Point Hudson
Marina, and on down the shore between all kinds of boats, both anchored and
sailing around.  Decided it was too good to stop, so I gybed and went back
to Point Hudson for another go round.

Saturday was the day the BolgerList guys were to meet.  We mostly got
together at the CLC booth (met John Harris of CLC there), then moved over to
the café for cinnamon buns – but they didn’t have any this year!  Tragedy!
Still, we managed.  Those present were John Kohnen, Derek Waters, John
Ewing, myself, and Miles, whose last name I didn’t get – sorry, Miles.
Afterwards, we went down to see Jerome’s boat, and found Alan Woodbury
there, with his father in law, Roger.

Did the docks then – my favourites were Jerome’s Chebacco (we need a name
there, Jerome) and a Lyle Hess Renegade, the design that Serrafyn was built
to, I believe.

We met up again at Wayward Lass about 1:30, and went for a sail – John,
John, Alan, Roger and myself.  (Derek had his family, and Miles was off to
hike the Olympic Mountains with his wife.)  Alan took the helm and we headed
out past Point Hudson, then over to watch the schooner race.  We had a good
view of the start, then followed the race down to the first buoy.  On the
return leg, we saw Jerome on the water and sailed over to say “Hi”.  The
wind had about dropped by then, and he was just taking down his sail as we
approached.  Still looked great, though.

We also saw a Martha Jane, owned by Bennett from California – the boat’s
name was Steadfast.  She looked good, and Bennett told us he’s sailed her
all over, including Florida and the East Coast.  Although we were going in
similar directions from time to time, we didn’t get into a head to head
race, so we can still both hold to our conviction that our boat is superior!
I will say, though, that the lug sail looked very impressive.

That was about it for boat showing.  Jerome, Alan, John Kohnen and myself
had dinner together at the little café by the Boat Haven – good fish and
chips and great milkshakes!  After that we went our separate ways.  I was
worrying about the weather for the next day, so I tuned in to the weather
channel on VHF.  It sounded like the forecast was improving, but it was
still expected to blow hard again in the afternoon – and in the morning I
could expect to lose 2 knots to the tide.  Gradually the conviction grew
that the best time to head home was right then, even though it would take
most of the night, and I still had some stuff I wanted to do first.

Anyway, I left the dock at 10:30, with my battery operated nav. lights
duct-taped to the masts.  Even before I reached Point Hudson I was getting a
lift from the tide – 6 knots at half throttle.  I rounded Point Wilson at
10:55, and 20 minutes later I was making 8.7 knots over the bottom!  (Normal
motoring speed is about 5.5 knots.)  It was almost a windless trip, except
for a bit of breeze in the Point Wilson area, so I didn’t have the sails up
at all.  It was chilly, I was glad of the Mustang Cruiser suit, with hat and
gloves on as well.  After the fog on the way over, I had bought a radar
reflector in Port Townsend, and I was glad of it as I passed three big
freighters in the dark. I saw the lights of each in the distance, but
couldn’t tell what they were until they were about a quarter of a mile away,
when they suddenly materialized out of the gloom and became these huge
ships.

I reached the Customs dock in Victoria’s Inner Harbour at 4:18 in the
morning, called in, then got my head down for a couple of hours before
making breakfast and heading to Fleming Beach and the launch ramp.  A great
night’s trip to end a great weekend.  If I’ve missed anyone or mispelled
their name, I apologize.  See you all again next year.

Jamie

***

Hi Richard,

here are some pictures of our newborn
chebacco “Kitty Hawk”.

Cheers,
Vincenzo

kittyhawk1 kittyhawk2 kittyhawk3

Hi Richard,

thanks for you nice message. I made the wooden blocks out of black locust
using drawings on “the rigger apprentice” by B. Toss as templates.

The tabernacle has worked well, so far. As I had mentioned, I did not like
the original turnbuckle system to hold the mast, and replaced it with a
steel fence-like piece (I will try to take a picture of it).

Yes I did leave room for the gaff between boom and the folded mast and, just
like you plan to do, I keep the boat under a tarp with the sail and rigging
attached with the mast folded down.

The sails were made by a professional sailmaker (veleria Zadro in Trieste)
that is one of the few in this country to know how to cut a gaff sail. Thanx
for your suggestions about the sails. I will try to increase the draft on
the main by playing with the halliards and the boom out haul, and see if that
improves things. Zadro refused to cut the mizzen dead flat! Any way I am now
trimming it flatter than it looked in those early pictures. I am also
experimenting the mizzen with a conventional boom instead of the sprit.

The aft hatches are made as in the plans and they seem to be good enough to
keep rain and spray out; of course some water would get in case of capsize
or if swamped by a big wave.

I will try to send you details of the blocks and tabernacle.

Yes, things around the back of the cockpit and the motor/slop well are
indeed a bit different than in the plans. I will send you pictures of the
details. Anyway, the idea was to make the cockpit self-baling when the water
reaches the level of the seats; So there is an oval cut at that level in the
back of the cockpit that drains in the slop well that has the round drainage
holes that you noticed. These holes serve the double purpose of keeping
things in the slop well and of accepting some rubber flaps (not yet on in
the picture!) mounted on the stern that would act as valves. The flaps are
needed only to prevent BIG waves coming from astern from spilling water in
the well (and in the cockpit!) while letting water go in the opposite
direction. At some point I will have to do some sort of swamp test to verify
all this!

Ciao,
Vincenzo.

***

When I came to Tulsa for flight school I owned a 14′ O’day Javelin sailboat. I
brought it along. On October 31st, 1987 my roommate and I decided to go
sailing. It was in the 80’s, which was un seasonal for that time of year. The
water, however was pretty cold. He had never been sailing. I had sailed a
little, but no formal lessons.

Background: The last time I sailed in Ohio before coming to OK it was a wild
time. A highschool buddy and I took the boat up to the lake. When we got there
a big thunderstorm was approaching the lake, and all other boats were leaving.
We looked at each other and said “What the F***”. We put the boat in the water
and rigged it. By the time we had the sail up it was raining cats & dogs. We
started out of the boat launch and the gale force winds hit. Man did we have
the time of our lives! The bow was cutting through the waves like we were at
sea! She was hiked over and water was running into the cockpit area from the
low side. Water was POURING from the mainsail onto us. It was an awesome time!
(I/we didn’t realize how STUPID that was!)

Back to OK… My roommate and I got the boat out onto Keystone with no
problems. We had sailed around for about an hour. Then we noticed a storm
developing to the south. (Little side note here… an Ohio storm does not
equal an Oklahoma storm .. unknown to us..) I announce “Hey, no it’s gonna get
fun!” LOL!!! Boy was THAT an understatement!!! The winds were so strong out of
the south that I reefed the mainsail quite a bit, and dropped the jib
altogether. I was getting frightened. (Did I mention that I swim like a
ROCK!?) I started back towards the boat launch, but of course it was to the
south. Directly into the wind. My buddy (who had never sailed before) kept
telling me to put the sails all back up and lets have fun. I finally listened
to him. We started tacking back and forth to get to the boat launch.

It was on the third or fourth tack when the wind shifted drastically and with
great force. It grabbed the mainsail and “jibbed” it. (It took it from one
extreme to the opposite side all at once — and fast!) The momentum took the
boat right over. We capsized in a heartbeat.

Both of us clammered up on the bottom of the boat. At first it was funny. We
were laughing. Then I heard her taking on water. The lifejackets were neatly
stowed in the cuddy cabin. Nice, eh? I tried swimming under and getting them,
but my feet keep getting tangled in the rigging. (Did I mention that I swim
like a ROCK!? LOL!!) It had “full floatation”, but it had taken on so much
water that we were unable to keep it “righted” each time we tried.

At the time of capsizing we were only a couple hundred feet from the launch.
By this time the wind and current had blown us out into the middle of the
lake! (Did I mention that I swim.. Oh yeah..never mind) All day long we had
not seen ONE person on the lake. My buddy made a very brave move, which I
still appreciate to this day. He decided to swim for shore from the middle of
the lake! It was horrible to watch. Each time his head would go below a swell
in the water, I thought he had drown! I was standing on the bottom of my boat
yelling for him all the way! I know he couldn’t hear me with the wind, but I
had to do something. It seemed like he swam forever. When he finally made it
ashore, he was dead tired. He waved to me. Then he limped up the hill and out
of site looking for help.

Ok.. now it gets funny. After my friend’s ordeal.. this Bayliner with 4 dudes
partying goes by! I scream.. they come over and I get on their boat. I tell
them to let my sailboat sink because I don’t care anymore! They were great
about it and lashed it, still capsized, to their Bayliner. When we got to the
launch I notice that it had banged the side of their boat up pretty bad. I
don’t think they noticed since they were so stoned. LOL! My buddy finally
comes back over the hill and I am standing by my car! LOL!! Poor guy!

Final side note. After getting it onto the trailer I could not pull it until
enough water drained out to get the trailer fenders up off the tires. It took
2+ hours to drain! LOL!!

That night we treated ourselves to a steak dinner. We had our picture taken
with our waitress. I still have that photo, and the memories. What a great
friend!

Ok.. I’m all mushy now. 🙂

That’s my Keystone story.
Keith

Chebacco News 35

Jib

Main

Mizzen

(computer drawings of Chebacco sails courtesy Sailrite)
Been doing some research on sails for the Chebacco I’ll be building.
(wife says “I would have started it different…” So, Hi, I’m your editor. My name is Richard Spelling, I make boats. Among other things. I’m making a machine shop from scratch right now. I’ll post an article about me later. I have the plans for the Chebacco light cruiser (the one with the pilot house that kind of makes it look like a car) and will be building it. I’ve been doing some research on Chebacco sails…)
As I understand it, there are basically two options if you want good dacron sails for your Chebacco. Well, there are actual three options, but I did say “good sails”.
The first option, the one I have concerns with, it to have your local sail maker make you some sails for your new Chebacco.
I have two minor issues with going this route for my boat. The first is price, which from what I’ve heard, would put this option on the high side. Never actually asked for a quote from one, though. I’m a guessing it would be high. This would be a custom, one of a kind, never made this type of sail before job for your local sail maker. 99.9%ish of the sails made around here are the familiar triangle, high aspect, sloop rig sails. Which brings me to the second issue I have with going this route. It appears that cutting gaff sails, and mizzen sails as well, is something of a lost art. The cut of the sails is nothing like the cut of the main or the jib on a sloop. I find it unlikely the sail makers here in Tulsa, Oklahoma know the proper way to cut a gaff and a mizzen sail. Actually, at the local lake, I had one person comment that my AF2 Entropy was the only boat on the lake with a gaff rig.
Also, I’ve seen Micros, the venerable Bolger cat-yawl, with to much draft in the mizzen. The higher entry angel on the mizzen causing the boat to self-steer about 15 degrees lower than the Micro can go.
So, if the local sail makers are out, where does that leave one? There is one firm I’m aware of (there may be others) that make a lot of the sails for Bolger boats. Bohndell.
To see if they were up to speed, I sent them an email asking for the specs on their Chebacco sails. Here is what they wrote back:
The Chebacco is not a stock sail. Price for the gaff sail plan is $978 and $850 for the sprit plan. Please allow four to six weeks for delivery. Please call or write if you have any questions. Sue Chace
Can you send me the specs on the Chebacco sails, the gaff version?
What weight sailcloth?
How much hollow in the leach?
How much round in the foot, luff, and head?
Where is maximum draft located?
Same for the mizzen.
What kind of provisions are on the sail for connections to the mast hoops?
What kind of grommets?
Available in any colors other than white? If so, what price?
What kind of warranty comes with them?
Dear Mr. Spelling, Here are the specs you requested. Please understand that gaff sails cannot be designed on a computer, they must be done by floor layout, so these figures are approximate. Main: 3/4″ head round, 3″ foot round, and 2″ on the luff. Leech hollow about 4″. Maximum draft will be about 40% aft of the luff. Mizzen: 2″ leech hollow, 1″ luff round and 2.5″ on the foot. That sail will be fairly flat. We would be installing #l brass spur grommets on the luff for lashing on the hoops. We do not provide hoops. We would not recommend colored Dacron for these sails. The gaff main will be leech planked, the best fabric for this purpose is warp oriented, and is not available in colors. Furthermore, it would be difficult to match colors in two different weights, the main is quoted in 5.1 oz. and the mizzen in 3.9 oz. As for the warranty: We guarantee that if you have built the spars to plan, the sails will fit. After that, owner use and abuse will have the most effect on the longevity of the sails. Sail covers, or removing the sails will greatly increase the life of any sail. At this point, our earliest delivery date is August 15th. Thank you for your inquiry, Sue Chace
So, it appears, to my admittedly limited experience, that Bohndell knows what they are doing. Ignoring the part about “gaff sails cannot be designed on a computer”. I assume that means “gaff sails cannot be designed on a computer on the software we have”.
The next option I’m thinking of is a Sailrite kit. I went that route for the main on my AF2 Although, next time I won’t do it on the floor. OUCH!. I bothered Jeff at Sailrite for a couple of months with emails, finding out EXACTLY how he would design the sail for Entropy. Actually, I got enough information out of him to cut the sail myself if I had wanted to. The kit price was reasonable, not a whole lot more than the price of the raw dacron.
So I bought the kit, for about twice the amount I had already thrown away on poly tarp sails. It went together easily with the seam stick tape, and I sewed it on my cheap Wal-Mart sewing machine. At one point I was punching through 11 layers of dacron, with no problem.
I have to say that I am happy with it, and with the experience of making it., so, a Sailrite kit for the new boat was definitely a consideration. I wrote Sailrite, and asked them basically the same questions I asked Bohndell. Here is their reply:
Thanks for your questions, Richard. If you have not found our web pages on the Chebacco, check out the following:

<divclass=section1>
The fabric is 4 oz Dacron from Challenge. The shape of the sail can be anything you desire, i.e., leech hollow, edge round, draft location. But these are not matters that can be easily described without the 15 or so pages that the computer prints out on each sail we do (output that you receive when you order a kit). I hope you will just tell us for this first sail that you want the sail a bit fuller or flatter than normal or the draft a bit further forward or aft of normal or the leech hollow a little more or less than normal.

We provide #2 spur grommets in the kit for use in securing the sail to its spars. These sails are normally laced in place but you can use hoops if you desire.
Dr. Richard Burnham of Cummington, MA, just finished a set of Chebacco kits. You can reach him at dick@talkingcrow.net.
Jim Grant at Sailrite

So, basically he says “we can make it any way you want, buy it and we will tell you how it’s made, see our web page”. Kind of a disappointment, especially as how their web page says “Gaff mainsail made from 5 oz. white Dacron© using the designer’s plans”, and I was wanting to get info on the “designer’s plans” for these sails.
Also, Sailrite has the sail kits available in various colors. Perhaps they aren’t aware of “We would not recommend colored Dacron for these sails. The gaff main will be leech planked, the best fabric for this purpose is warp oriented, and is not available in colors” Actually, I think the leech on the Sailrite kit either uses tape, or is folded down a bunch of times like on the sail for my AF2. Maybe that is what ”leech planked” means? Have to ask.
Leech planked: The panels are parallel to the leech of the sail rather than the foot (cross cut), eliminating the need for battens. Let us know if you have any other questions. Sue Chace
So, it appears the Sailrite kit is “cross cut”. Wouldn’t’t “Leech hollow about 4″ eliminate the need for battens?…
Still, I had such a good experience with them doing the sail for my AF2, I decided to give them the benefit of the doubt. I contacted Dr. Burnham and picked his brain.
He even volunteered to write a couple of paragraphs for the new Chebacco!
Here goes on putting the sails together:
Sailrite kits were suggested to us by Phil Bolger who said that the Chebacco needed a full main and that he had information that Sailrite did it right. My wife, Ulla, and I got the three sail kits in the dead of winter and were looking things over when we called Jeff at Sailrite who suggested an order of making: mizzen, jib, main. The mizzen is flat and easy to make, the jib has a steel cable and some draft, and the main is the most challenging.
I must mention the “why” of the jib. My wife and I like to sail together but she is not about to be a knitter at sea — she too wants to be part of the sailing. In years past tending the jib on a racing sailboat was her part as I handled the main and the tiller. We hope to carry on this good working relationship aboard our Chebacco-to-be.
We used our venerable home sewing machine which handled every single job that Sailrite suggested for it — patches, edging, seaming, hemming of boltrope and cable, reef points. The machine is a Husqvarna some 23 years old and when we had it serviced as we started the sewing adventure there were some broken gears but the machine had a 25 year warranty! The after-sail servicing showed that the machine did the job without stress. The material for main and mizzen was 4.9 oz. dacron and the jib was 4.0 oz. Sometimes we sewed through 7 or more layers of cloth — clunk-clunk-clunk went the Husqy.
The way we built the sails was this: I used the sticky-tape to stick the seams together. Patches were given to Ulla who ran them through the machine. The sail panels were sewn using a Sailrite genius-stroke: we got a 10′ long 4″ diameter cardboard tube from a local carpet supplier (free), cut it longitudinally so we could slip a rolled up sail inside it. I would hold the tube on the port side of the machine while Ulla guided the taped seam through the machine (she rolled up a small amount of sail by hand and ran it under the machine’s arm. She didn’t care for sewing on the floor so mostly she stood up at the table feeding the sail through while I slow-walked the tube along.
Whenever we had questions, Jeff at Sailrite’s 800-number was there with more than enough information to keep us on the right path. All ingredients were supplied for the sails although we bought a small die set and rented the large #6 set for a week. Now the sails are in the loft, Ulla is looking after her weaving and sheep, and I’m building the boat.
Cheers,
Dick

Well, that’s about it. I think both Bohndell and Sailrite will give you a good set of sails. If you have more money than time/skill, the Bohndell sails are a good deal. For me, though, I’m thinking the Sailrite kit for the new boat. The deciding factors over going the Bohndell route being the much lower price, and the availability of the colored versions, and the fact I think they do the best design work on gaff sails.
***

A letter from Gil:

Joan and I spent June 25-29 at the New England Brass and Gas Meet, a biennial gathering of pre-1916 cars. Our 1912 Buick was one of 120 brass-bound beauties, and we drove it about 350 miles with a lot of shaking and rattling but no major convulsions.

The first day’s tour was to the Massachusetts coast, specifically to Gloucester with an ongoing spur to Rockport and back. Rather than go to Rockport through heavy shore traffic with our two-wheel brakes, leather cone clutch, square-cut gears and no stop lights or turn signals, we decided to try to find Philip C. Bolger and Friends. This is easier than it used to be. Most people in Gloucester, even in boat-related places, had never heard of Phil. But his concession to modernity, to the extent of getting a telephone (hooked only to a FAX line, and not used for speech), resulted in PCB&F being listed, complete with street address, in the directory. After we had chugged a few miles down a side road, we came to Resolution, Phil’s old liveaboard boat, moored in the front yard of a house. We parked in the street, went to the house, and walked all around it looking for the most likely door to knock on. Eventually, Suzanne appeared on an upstairs deck. After I told her we were the Fitzhughs who were building a Chebacco, that we were in town and wanted to meet her and Phil (who by then had also appeared), we were very cordially welcomed and invited in for tea and conversation.

And what wide-ranging conversation! The car, of course, was an ice-breaker. Suzanne is very knowledgeable about cars, having rebuilt a favorite station wagon and having worked extensively in auto mechanics in her native Germany (I hadn’t realized she was born abroad). She said there just weren’t many really old cars in Germany, since they didn’t survive the war; I said many of ours had been melted down in scrap drives during the war and used to make the bomb casings that helped ruin the ones in Germany. Phil had fond memories of growing up with Model Ts, but had owned two Crosleys in his youth. The Crosley was an American car almost as big as an English Morris Minor, and not at all related to the British Crossley (two esses) that was older and much more substantial. What mostly impressed Phil about the Crosley was how roomy it was; was this the beginning of his nonconformity?

Maybe the origin of the name Philip C. Bolger and Friends (plural, when most of the world knows the company as only Phil and Suzanne) is his comment: “I married six cats.” Indeed, there was always something furry in view, and one of Phil’s ongoing concerns is keeping the inside cats inside and the outside ones outside.

The current flap about licensing naval architects, recently discussed with various degrees of vituperation in both WoodenBoat and Messing About In Boats, has Phil and Suzanne well and truly exercised, and for good reason. A lot of well-known and highly regarded boat designers don’t have the technical academic background to design big ships, and so couldn’t pass the proposed licensing tests. If I want a custom-made aircraft carrier, I’ll go to a naval architect. If I want a sailboat, or something to catch fish from, I’ll go to PCB&F and damn the licenses.

In politics, Phil votes Libertarian. (Why am I not surprised?) We agreed he was the Libertarian equivalent of a Yellow Dog Democrat (for those overseas, that’s someone who’ll even vote for a yellow dog as long as it runs as a Democrat). Phil has no particular regard for Ralph Nader and “that guy with the ears” (Ross Perot); he thinks they just wanted an ego trip. The Libertarians are trying to build a party that believes in smaller and less intrusive government, oxymoronic as that may sound.

Phil said he owed Bill Samson a letter. He was very complimentary about Bill’s efforts with CN and hoped someone would be found to take it over. This was before either of us knew of Richard’s succession.

We ended the visit by taking P&S for a ride in the Buick. It was altogether a delightful interlude, and no doubt much more pleasant than the drive to Rockport and back would have been.

Our tour on the last day took us to Newburyport, where I visited a small maritime museum. The price of my ticket entitled me also to visit Lowell’s Boat Shop, the oldest in the country, founded in 1793. We had a good tour, and I said I was building a Chebacco. One of the boatbuilders said a friend of his, Brad Story, had built several. But, he said, Brad has gone back to his roots – being an artist, which he was before he got into boats – because of health problems. He has serious back trouble and has also had both ankles fused. This, folks, is a real shame. Remember, Brad commissioned the design in the first place, so he’s the cause of what many of us are building as well as the builder of what not a few of us are sailing.

Best regards to both. Richard, welcome aboard.

***

A letter from Jamie:

Hi Richard

I’ve fixed up my cockpit so I can raise the floorboards to seat level, for sleeping.  I sent a note to Bill Samson about a recent cruise, and he thought this idea might be of use to other Chebacconists, so I’m sending it to you for the new Chebacco page, if you want it.  I’ve attached pictures of Wayward Lass showing these, and a couple of other additions.  Feel free to edit as needed.  These modifications have all been tested in use and worked just fine.

Floorboards

My floorboards are 1/2 inch plywood, all cut to the same length, including
the two that run up along the centerboard case.  (The small gaps this leaves
at the end of these two are filled with spacers of the same material).

floorboards

I used a jig made of the floorboard material to mark where the upper edge of
the supporting cleat, or rail, should come to.  The rails themselves are
made of leftover trim, an African mahogany of some description, finishing
about 5/8 square.  I screwed these to the seat fronts, bedding them in
polysulphide so they can be removed if need be.

floorboards-halfway

To span the cockpit safely, the 1/2 inch ply has to be reinforced underneath
— I used fir, 3/4 x 1 1/2 inch, on edge.  This can cause complications, as
the reinforcing pieces have to be positioned to clear the centerboard case
and mainsheet block while the floorboards are raised, as well as the bottom
of the boat and anything stored in it while the floorboards are in their
usual position.  A 3/4 inch ply might work without reinforcement, but better
test it first.

floorboards-sleeping1

Note that the mainsheet has to be out of the way for sleeping.  I loop it
over the end of the boom and let it run from there under the platform.  The
boom is held steady by the two short lines to the quarters.  (I also use
these when anchored or motoring as the mainsheet alone lets the boom wag
back and forth a bit.)

mainsheet

I’m thinking of adding extra boards for use as seats at either end of the
cockpit, or as a table.  These would be narrower, and could be stored under
the seats (reached through the cabin) when not in use.

While I had the boards out, I thought I might as well take a picture showing
how I use the space below for storing my anchors (8# danforth and 25#
fisherman).  With the rope flaked (piled) as shown, it pays out without
kinking.  Beer is stored under the next board aft where it will stay cool
(but not icy) – a very useful space all round!
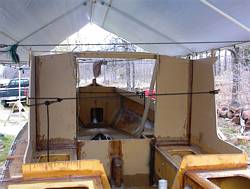
anchor locker

Mast collar

Since my mast is square at the bottom, when the halyards were slacked off
the jaws used to jam and the boom couldn’t swing.  To make it easier reefing
and furling, I added the collar shown on the mast.  The collar lets the boom
roam around without damaging the jaws.  It also keeps the boom up when
anchored with the tarp set up for a tent.  The vertical strips above the
collar are for the chafing when sailing — my mast was starting to get a bit
chewed up by the jaws — I also leathered the jaws.  The rope at the bow is
for the danforth, it’s left like this so that the anchor can be dropped
quickly from the cockpit.  (The Jonesport cleat on the bow is made as drawn
on the plans, works very well too, holds the anchor rope right on the
centerline, is worth the time and effort.)
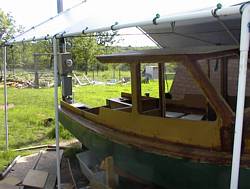
mast collar

Finally, I’ve shown the slots in the gunwales, designed to hold 1″ webbing
for tying down a boom tent.  I’ve got a slot every 2 feet or so, from just
behind the cockpit to just ahead of it — these need to be cut before the
rubbing strip is fastened on.  I haven’t made a real tent yet, but the slots
work fine with the polytarp tent!

tie down straps

That’s the lot.  Good luck with the newsletter, looking forward to your
first issue.

Cheers,

Jamie

Chebacco News 34

Chebacco News 34-June 2001

So long – and thanks for all the news!

Well folks, this is to be the last issue of Chebacco News under my editorship. It started in September 1994, printed on a dot-matrix printer with my old Atari ST computer, and has evolved into the current Webzine.

My heartfelt thanks are due to all of you who, over the years, have shared your Chebacco experiences via Chebacco News – but most especially to Gil and Joan Fitzhugh, not only for their insightful articles, but as the North American distributors of the printed version of this newsletter.

There are two reasons for me giving up the editorship. The first is that my interests have moved on, primarily to kayaking, and I’m not using Sylvester as she should be used. The second is that NBCI is going to start charging for the use of its webspace and I’m, frankly, not prepared to pay for a service that brings me no income.

SO – IF YOU WANT TO HAVE COPIES OF CHEBACCO NEWS TO REFER BACK TO, YOU’D BETTER START DOWNLOADING THEM BEFORE THEY DISAPPEAR ON JULY 15 2001.

If anyone is keen to take over the editorship and set up Chebacco News with their own ISP, please contact me and I’ll be pleased to help them get going.

Sylvester is for sale:

I’m offering Sylvester for sale at £4500 to include a galvanised, braked Snipe road trailer and Mariner 4hp outboard. Please contact me if you are interested, atbill.samson@tesco.net


Cabin Windows – Jamie shows us how it’s done!

cabin windows

Brass-bound cabin window on Wayward Lass

Jamie Orr writes:

I just borrowed a digital camera, took some quick shots of the new windows.
They’ve turned out fairly nicely, I think, all things considered. I used
1/8 flat brass stock. The inside was the most trouble, I drilled a hole
then used a sabresaw (jigsaw) to cut to the line. The outside I cut with a
bandsaw — wonderful tool, just used the regular blade and some eye
protection for the flying filings (brassdust?). I didn’t cut as close to
the line as I should have because I was afraid to, so I had a lot of filing
to do afterward, but it was pretty straighforward stuff. They’re held in
place with one brass roundhead bolt at either end, the curve of the cabin
sides put enough pressure on the middle. Seated the whole works in Boatlife
sealer. The cabin side is routed for the lexan panes — that was done way
back before the sides went on. (That was the biggest problem — predicting
the placement and cutting the holes before anything was actually there.)

Jamie

Wayward Lass struts her stuff at Depoe Bay

Jamie Orr trailered Wayward Lass to the boat show at Depoe Bay, Oregon. Here’s what he had to say about it:

Hi

Yup, we’re back, had a great time. Went over to Port Angeles, 45 miles west of Port Townsend on Thursday afternoon, and drove to Alan’s place [ Alan Woodward, that is]. Got a little lost, but were saved by a Chebacco silhouette stuck on a pole at his driveway. Left about 9:00 next morning after breakfast (eggs from Alan’s chickens, very fresh!) and drove and drove and drove.

We followed the Hood Canal, the big fjord that almost gets back to the sound at the other end, then turned west somewhere short of Olympia. Reached the coast at Longbeach (I think) and stopped for lunch shortly after. Then we crossed the Columbia river mouth on a very long bridge and entered Oregon at Astoria. From Astoria to Pacific City the road wound around a bit, going inland a lot. This was the hardest part of the trailering, as the trailer and boat go back 25 feet from my rear bumper, and the boat’s just under 8 feet wide, as you know. I did a lot of concentrating, caught only glimpses of scenery for about two hours. The last stretch was more relaxing again, and we got in around 6:30.

Launched Wayward Lass and tucked her in, then went for dinner at the Spouting Horn with Larry Barker and John Kohnen. (Our party was myself, Dad, Alan and John Ewing). Then back to the motel, where Alan and John cunningly managed to get the suite (the motel had overbooked the cheap rooms so upgraded one of ours) that Dad and I had had our eye on, and so to bed.

Spent all Saturday, which was good weather after the first couple of hours, looking at and talking about boats. Depoe Bay is a small boat show, mostly on dry land. The harbour entrance and the bar outside make going out difficult except under good conditions. I talked to the guys at the Coast Guard station, and learned that on that day there was a “26 foot limit” which left us out. And I’m sure that they meant 26 footers with big dependable diesels! We did put up the sails and go out for a sail up and down the harbour — about 150 feet each way, with light to non-existent wind, coming from almost any direction due to the eddies. That was just to satisfy some kids that begged a ride.

Lot of interesting small boats — a Chamberlain dory skiff, same as I have the frames sawn out for, a Joel White faering, a whitehall, an immaculate Wayfarer, lots of river dories, several nice skiffs, including John Kohnen’s Pickle, and a bunch more. Also saw Dan Pence’s electric powered Ginger again, plus a Microtrawler with a big tugboat superstructure on it — looked just like a small working tug, right down to the dogs on the stem (sawtooth edge to give a grip on logs so you can push them around). I spoke to one of the owners, who said that unfortunately they couldn’t get up on plane with all that weight, even with their 50 horse Honda! They’re going to try some trim tabs at the back, I think.

Of the Port Townsend Bolgerites, we saw John and Larry, plus Jim Chamberlin. I wanted to say hello to Pat Pateson from the current list, but didn’t meet him. I see from his Friday note that I did see him, or at least a guy with a neck brace beside the red elegant punt, but never spoke to him.

Sunday we woke to sheets of fine rain blowing by. The ocean and surf looked even more exciting than on Saturday. Went down to the show after a good breakfast, and saw that a lot of folks were packing up and leaving. So after a look around and quick chat with the organizer, we hauled Wayward Lass and did the same. The micro tug was already out, and I saw Dan headed towards the ramp too, so I think Ginger was right behind us, although I could be wrong. The lousy weather on Sunday was really a blessing for us. We’d done it all the day before, and had a long drive ahead. We took the freeway route to Olympia this time, and cut an hour off our time — got in to Port Townsend about 8:00. Back in the tent about 10:30. Up on Monday, breakfast again courtesy of Alan’s “girls”, then we followed him into town while he dropped off his wife’s car, whose starter didn’t. Had a quick look in at the wooden boat school, dropped Alan at home and headed for Port Angeles again. Got back to my own house about 5:00, just in time for dinner.

I don’t know what it cost, and I’m not going to work it out. Had a good time and that’s enough. Not sure we’ll ever do it again, but I’m glad we did it this time.

I didn’t take a lot of pictures — I guess I’m a dead loss that way, but Larry, and of course John, were both snapping away, and I expect we’ll see theirs on the web pretty quickly.

Very pleased with the trailering. We covered 1,356 kilometres from start to finish, of which 1,318 were on US soil. I didn’t track the gas mileage (kilometerage?) either, but we filled up 4 times, the last time in Port Townsend coming home.

Chuck [Merrell], sorry we couldn’t fit in a visit. Didn’t realize just how big a distance we had to cover and how long it would take. See you another time!

Cheers,

Jamie

Jamie gives himself a fright!

Jamie (again – What’s happened to everybody else?) writes:

Hi Bill,

I went for a little trip on Friday night, which turned into a “learning
experience”. If I wrote it as a story, I could call it “Heavy Weather
Sailing and Stupidity, or Why You Should Listen to the Weatherman!”

I wanted to go over to the US side to drop in on a Traditional Small Craft
Association messabout at Bowman Bay, about 30 miles due east of Victoria.
To get there for Saturday, and catch the tide, I planned to leave right
after work on Friday, hopefully arriving about midnight. I figured that
with all the lights on the south side of the San Juan Islands, I should have
no trouble finding my way (true). I launched on Friday morning, and parked
Wayward Lass in Victoria’s Inner Harbour for the day, just a minute away
from my office. At lunch time I went down and did the smartest thing of the
whole trip, I tied in two reefs in preparation, then furled the sail away
again. The forecast was for winds of 15 to 25 knots from the southeast, so
I was thinking that I would probably cancel the trip.

I got away from the dock at 5 p.m. By then the weatherman said there should
have been winds of 5 to 15 knots, but it was dead calm, with no waves
outside the harbour. So I thought I would go east for a while and see how
it went, before I quit and went home. I fiddled around putting up my
battery operated nav lights, getting the anchor line ready and generally
straightening things up, then motored off, pulling Alan’s elegant punt,
Creamsicle. For a couple of hours it continued calm, with only scattered
cloud. As the light went, some waves appeared from the east, with a light
wind. Even once it was dark, there was still a lot of light from various
towns on the San Juans, and Whidbey Island, plus isolated house lights, in
addition to the lights shown on the chart.

Things started to get more lively. The waves built up very quickly, and I
had to throttle back so we wouldn’t pound. (I was still motoring because
the wind was right in my face.) Then the wind picked up quite a lot, so
that I was getting a lot of spray blowing back even when we weren’t
pounding, which we were starting to do every third wave, or so. I estimated
that I was about 1/2 way there or a little less, and since guesstimated
headway was almost nothing, I decided to turn for home — about 9 p.m. now.
I would say that was the second smartest thing I did, except there wasn’t
really any choice by now. I considered sheltering behind Lopez Island, but
I wasn’t sure I could even get that far, and I didn’t have a large scale
chart of the area if I did.

So, I put the motor out of gear, and let the mizzen hold us head to wind
while I raised the double reefed main. The dinghy nuzzled us while I did
this, to the detriment of my paint. Then I shut down the motor, and turned
downwind. The boat took a while to turn, it seemed quite happy to point
just a little upwind of broadside on, but once I got her moving, she turned
okay. Then talk about having a tiger by the tail! I had my hands full just
steering downwind. Every wave tried to push the stern around. Wind and
waves were mostly from astern, but just a little bit on the port quarter. I
let the mizzen weathercock so it wouldn’t help push us around so much. It
felt horribly out of control, but gradually I realized the boat was handling
it, at least.

I don’t know if a larger rudder would have helped, as it was mostly the
waves pushing the stern around, not the wind — although the wind was doing
its bit as well. Once or twice we broached completely, swinging 90 degrees
to our course, and taking the next wave broadside. I thought about raising
the centreboard to see if that helped, but the lanyard hadn’t been fastened,
and it had gone down the hole, so I don’t know yet if that would have made a
difference. Then I thought I’d try motoring, and see if I had more control,
so again the mizzen held us into the wind, more or less, while I furled the
main and the dinghy nuzzled us some more. The I undid the dinghy painter
and pulled it out of the motor’s bottom half. But when I went to start the
motor, the motor that never takes more than 2 pulls, it wouldn’t go! And
after half a dozen pulls, the recoil mechanism wouldn’t either. (It just
came out of the shop after having that fixed, too!) So now I was firmly in
the 19th century for my technology, whether I liked it or not. I got the
main up again, and got back to sailing. About the same time (I stopped
keeping notes some time before) I took down the mizzen, mast and all,
pushing it as far as it would go into the cabin. I also moved the dinghy
painter to the midships cleat on the lee side, as it had drifted downwind,
and I thought it as hindering me when I tried to turn downwind again. I
noticed there was some water in the dinghy, but it didn’t seem enough to
worry about, compared to the general state of the world. By this time the
wind was probably 20 knots anyway. The waves were huge, to me, and short
enough that they were very steep. Some of them were breaking at the tops.
I could hear them hissing and rushing up behind me, and was happier not
looking at them. Later, I estimated that they were probably no more than 5
feet from trough to crest, but from crest to crest was probably only 40 feet
or less — the wind was against the tide, which I should have considered.
At least it wasn’t raining.

I was able to control Wayward Lass a little better now. I was hoping my
troubles were over, but about then the dinghy painter snapped. I heard it
and felt it go, but by the time I’d picked up the spotlight and turned into
the wind, I couldn’t see it anywhere. I guess it picked up so much water
that it became too heavy for the rope. The painter broke right in the
middle, maybe it had a kink or knot from when I had to undo it to clear it.
Anyway, that simplified things even more, and the rest of the trip was
relatively uneventful, except that I succumbed thoroughly and completely to
the sea sickness that had been hovering at the edge of my consciousness —
try dealing with that at the same time as not broaching! Sometime after
midnight the wind dropped rapidly and the waves downsized to a well behaved
swell. I took both reefs out, but even then it was suddenly very slow
going. I let the sheet go and drifted around while I took off the engine
cover and wound on the “emergency” starter cord. I pumped the gas up
carefully, choked the engine, and it started first pull! So it was down
sails for the last time, and motored in — had to dodge a lot of wood in the
water, including one large log dead in my path. The storm probably washed
them off the beaches, they only seemed to be a problem near shore. I had to
motor about 5 miles along Victoria south shore, but there was enough light
reflecting off the water that the logs showed up well.

I got into Fleming Beach just after two a.m., never so glad to get ashore as
I was then. Took a while to pack up and recover the boat, I was literally
staggering with tiredness and feeling lousy. Stopped at a doughnut shop for
a snack, there were several police there on their break, and I wondered if
they would think I was drunk! (They didn’t, or at least left me alone.)

So I’m a little bit smarter now, I hope. I’ll pay attention to the weather
forecast, even if there’s nothing in sight to bear it out. I never, ever,
want another night like that one. On the plus side, I now have tremendous
confidence in the Chebacco. Even when we broached, she never threatened to
go over. When I was taking down the mizzen, we were “lying ahull” I guess,
and she moved about pretty briskly, but again she felt “safe”. Mind you,
after a while you get used to being terrified! We never took any green
water aboard, from any direction. I think that flared bilge panel deflects
most of a sideways wave under the hull, like a big wedge. And both ends
seemed to ride up and over anything. I got a fair amount of spray over the
bow when I was motoring into the wind, and a few good shots sideways, but
none to speak of when running or hove to. (I feel like a real sailor when I
use that!) The mizzen held us well up to the wind despite (or because of?)
it being quite strong.

And that was it for the night. There is a happy postscript to it all,
though. After I broke it to Alan that I’d lost his punt, I called the Coast
Guard to report it in case it should show up. After several transfers, I
spoke to a very helpful fellow in Rescue Coordination, who took all the
details. And then this morning (Sunday), in the middle of typing up a
“lost” notices to put up at marinas and boat launches, I got a call from the
same people to say that a dinghy of that description was being picked up by
the Victoria Clipper, the catamaran passenger ferry from Seattle. Ten
minutes later someone on the ferry called to say they had it, and I could
pick it up at their dock when they arrived, in about 4 more minutes! So I
went right down, and there she was, the paint a little dinged up on one
gunwale, but otherwise none the worse for it all.

So that’s my news today, guys. I feel moderately dumb for virtually
ignoring the forecast, and I’ll probably regret telling anyone about this,
but I probably learned more in the three hours between 9 and midnight than
in 10 years of normal sailing, so it wasn’t all for nothing!

Cheers,

Jamie


A purpose-designed tender for a Chebacco:

Chuck Merrell has designed a tender for Chebacco, to Jamie Orr’s specifications. Jamie will be building the prototype of Apple Tart.

Apple Tart is designed to fit inside the cockpit of a Chebacco, for trailering, and can then be towed behind the boat when sailing, allowing the sailors to get ashore when the shoreline is unsuitable for running the Chebacco up onto the beach.


Apple Tart is the smallest of a series of three prams that Chuck has designed, the others being Apple Pie (7’6″) and Peach Pie (10’). Bill McKibben has prototyped Apple Pie and Bill Samson is building the prototype of Peach Pie, which will have a spritsail rig.

Contact Chuck at chuck@boatdesign.com for further details of these pretty little boats.


atbom


Jim Slakov’s rigging sketches:

Dick Burnham was kind enough to pass on Jim Slakov’s sketches and specifications of the rigging he uses on his immaculate lapstrake Chebacco, Kelani Rose.

sldrwg1


sldrwg2

So there you have it!

Of course I hope you’ll all keep in touch and let me know how you are getting along with your projects.

I also want to thank you all for helping to keep Chebacco News going for 7 years.

Bill Samson, 88 Grove Road, Broughty Ferry, Dundee DD5 1LB, Scotland

bill.samson@tesco.net

Chebacco News 31

Chebacco News 31 – October 2000


The Big Trip!

Image38

Bill Samson, Jamie Orr and Les Orr

Jamie Orr writes:

Hello Bill

The big adventure is over now, we’re all back home, and life is settling back into the normal routines. I thought I’d try and record our (Wayward Lass and crew’s) trip for Chebacco News, with my impressions of how the boatperformed.

This was a watershed event, the first trip in Wayward Lass. This was her fourth time in the water, and the second time the sails were up. It’s about 35 miles from the most Southeastern point of Victoria to Point Wilson, near Port Townsend. Adding another 3 miles to the Boat Haven in Port Townsend, and a bit more to Fleming Beach where we launched, and we probably covered some 85 miles in total, crossing and recrossing the Strait of Juan de Fuca between Vancouver Island and Washington State.

We got away from the launching ramp at 9 am on the 7th. When we left, the weather was overcast, with light to moderate westerly winds. There was a small craft warning at the (western) entrance to the Strait, but conditionswere okay at the eastern end. The forecast was for stronger wind from the south by late afternoon. I hoped we could sail southeast at first, then east along the Washington coast when the wind shifted. We started out on a direct course for Point Wilson, along the Victoria shore until we felt confident that everything was working properly, then changed to a more southerly course to cross the strait, and be able to take advantage of the expected wind change. However, the wind dropped fairly soon, and when it came back it was right on our nose. The sails came down and we got down to some serious motoring.

Visibility wasn’t too great, maybe 3 or 4 miles at this time, but we felt we could find our way with chart and compass – we also had a Garmin II GPS that a friend insisted on lending us, although neither Dad nor I felt comfortable relying completely on that as we hadn’t done much with it. We had 1 to 2 foot waves most of the time. With the fog and overcast sky, it felt chilly until we opened the thermos and had something to eat. (I’m a believer in keeping the furnace fuelled.)

After an hour or two we could see the land well enough to identify Dungeness Spit, which sticks out into the strait from the US side, and turned onto an easterly course for Point Wilson, or at least where the chart and compass said it ought to be. After a while more we identified Protection Island at the mouths of Sequim and Discovery Bays. It took a long time to bring it nearer, but eventually we were level with it, and had definitely identified Point Wilson ahead. About here we tried sailing again, but the wind was just too much from the east to make our course. Since the forecast was for strong southerly winds, and we wanted to get in early enough to find a berth and have a quiet night, we went back to motoring again.

At Point Wilson the wind and tide were both against us, and the GPS, which had reported some 4.5 knots most of the way, dropped until it was only 1 knot right opposite the point. The wind by this time was getting close to the predicted 20 knots, I think. Once around the corner, we hugged the shore to Point Hudson, 2 miles on. Port Townsend is built on Point Hudson, so once there, we had more or less arrived. Around that corner and another mile and we were at the Port Townsend Boat Haven, a big marina well sheltered by a long breakwater. We called US Customs, who were extremely helpful and patient with the rookie skipper, and were assigned permanent vessel identification and PIN numbers, along with a clearance number for this visit. The trip over took 8 hours from dock to dock.

We got the tarp over the boom, and mopped up the cockpit – between the spray and the rain, things were pretty wet. With the tarp up we were quite comfortable, but I was glad we had the cuddy to keep our gear dry. It also provided some shelter under weigh, keeping spray in the cockpit to a minimum.

Image39

Wayward Lass at the dock in Port Townsend


I’ve included the pictures that Chuck Merrell took in Port Townsend and e-mailed to me. I haven’t got any others at this time. The blue tarp shows up nicely, and that’s me on the boat. There are a lot of strings hanging everywhere because I haven’t entirely worked out the best way to attach all the sails and blocks. I’m trying to keep it all low-tech, but things will be evolving as we learn. I’m pleased to say the sails, also made by yours truly, seem to have the right shape.

I’d asked previously around the web about VHF radios and navigation lights. Before we went off, I bought a handheld VHF that will accept either rechargeable nicad or throwaway alkaline batteries, and a set of lights that operate off a single D cell each. I’m not sure how far the lights can be seen, but the choice in battery powered lights is limited. The VHF was almost entirely used for weather reports. So far I’m happy with my choices.
Alan Woodbury met us at the marina and gave us some local knowledge about restaurants and Port Townsend in general. After some fish and chips, Dad and I crawled into the cuddy for the night. We are both 6 feet and close to 200 lbs each, but found we could both sleep comfortably in the cuddy, using air mattresses. At the bow end, the mattresses turn up at one corner, but we put our feet at that end so it didn’t matter.
We spent the 8th walking the floats at the Festival, saw dozens of beautiful boats from big schooners to tiny canoes. We said Hi to Craig O’Donnell, on hand with the CLC folks, and took in talks by Brion Toss, rigger, and Carol Hasse, sailmaker. Both excellent. Craig dropped by for a quick chat just before we turned in. Unfortunately Jim Slakov didn’t make it down as planned with Kelani Rose – I understand he injured his back. Hope you’re better now, Jim – looking forward to seeing you another time.
On the 9th, Dad thought he’d stay at the Boat Haven while I went back to the show to meet all the Bolgerphiles at 10 am. We had a good turnout, and after talking for a while we all went to the coffee shop and talked some more. Thanks to Alan for the cinnamon buns! After that the group split up to see the exhibits. Alan and I tried to hear Carol Hasse on sailmaking, but were at the back of a large crowd, so crept out after a short time. Alan wanted to see some more boats, but I’d seen them all the day before, so I thought I’d go back to the Boat Haven for a while. I mentioned this to James McMullen, who’d said he wanted a look at Wayward Lass, and he wangled a ride down there in Ginger, a beautiful electric cruiser created by her owner, whose name I can’t quite remember – I think it was Dan, but the last name is gone.
When we arrived, we stepped into a regular Bolger seminar. Between Ginger and Wayward Lass we had our own mini boat show. More talk, then things thinned out a bit and that was the end of the Festival for us. Dinner that night was Dad and I, with Bill Samson and Alan Woodbury – more fish and chips. Bill went off with Alan to sleep at his place, and Dad and I hit the cuddy again.
Next morning we were up before dawn to get an early start. Alan brought Bill down at 5:30 (did I mention Bill was to sail back to Victoria with us?) in a fairly heavy rain. Luckily it stopped again, and we got away at 6:15, motoring between all the boats anchored off the shore. The early start was partly to take advantage of lighter winds in the morning (expected to be on our nose again) and partly to let me try out my tiny navigation lights (they worked just fine.)
We got a considerable boost from the ebb flowing past Point Wilson, the GPS reported 7 knots over the ground, or about 2 ½ knots of tide. This stayed with us for quite a distance into the strait.
After an hour or so, we put up the sails. We couldn’t hold our course to Victoria, but the wind was great and we had a good sail, enough for everyone to take the tiller for a spell. But the wind strengthened to the point where I thought we’d try a reef, and there I had a problem. The sails are only lashed on, without proper provision for tying in reefs. My lashing didn’t give the foot enough tension, and I haven’t got reef points in the sail, only the cringles at luff and leech. I was told by a professional sailmaker that points were not necessary in a sail this size, but he must have been thinking of a sail with a really efficient outhaul for the leech cringle. The sail was like a big bag with the reef – no way would it sail properly close hauled, so it came down and we went back to motoring.
We could see the southern San Juan Islands, and had a lively discussion about what was where. We also saw a buoy in mid-strait, which triggered more discussion. (It was fairly poor visibility again) Based on the buoy, we felt we were just a bit north of our course, probably due to having to point north of it to use the sails. The GPS batteries had died on us, and I couldn’t find the spares (they weren’t on board) but it revived enough to confirm our position, which was nice. Just as well we weren’t relying on it, though.
Shortly after, visibility improved and Victoria appeared. Since it had been foggy going as well, we had no idea just when to expect to see it, and couldn’t believe at first that it was there already. However, when it took another 3 hours to actually reach it, we believed. We went into Victoria Harbour to clear Customs (by phone) and announce Bill’s arrival in Canada. Canada Customs were just as easy to deal with as their US counterparts, although they only gave us one number. A last short trip back to our launch ramp, and that was that. The return took only 6 ½ hours.
Wayward Lass behaved excellently. I am pleased as anything with her performance over the Strait. She handled the wind and waves with complete aplomb – the motion was smoother under sail, but even motoring I thought she did very well. Being as light as it is, the hull leaps around a bit, but always felt stable and safe, and wasn’t stopped by the 3 foot waves on the way home. Performance at the dock was equally good, although without a tarp it might be another story with more than one aboard. The motor is a 5 horse Honda short shaft with a 3 gallon remote tank – this combination is heavy, and I thought the stern was down a bit when the engine was running. When sailing, though, it wasn’t as low, so maybe I can adjust the motor angle and improve things. We didn’t know how much fuel we’d burn, so carried an extra 6 gallons. We found that we used under 2 gallons each way (imperial gallons – it was just about 2 US gallons.) The sail set quite well, as mentioned, but I’ve got to fiddle with the attachment to the spars. I’ve also got to put in those reef points.
We carried all the prescribed equipment, plus the GPS and VHF. I think I’ll buy my own Garmin GPS next year, for the extra security it gives. Even not knowing how to use all its features, we found it helpful – the most important information, your position, comes up on its own – all you do is turn it on.
The Bolgerphiles that I met in Port Townsend were Chuck Merrell, Bill Samson, Alan Woodbury, John Kohnen, Larry Barker, Jim Chamberlain, Gary Foxall, Craig O’ Donnell, Randy Wheating, Jerome MacIlvanie and James McMullen. Apologies to any missed or misspelled. I had a great weekend and plan to do it all again next year. (If I can swing it, I may go back in November for a sailmaking/repair seminar at Carol Hasse’s loft.)
Jamie

I’d like to add my own thanks to Jamie for his kind invitation to accompany him and Les back to Victoria, and also to Alan Woodbury for his hospitality.

Image40

Some of the Bolgerphiles at Port Townsend – It was great to meet you all!

Hollow spars

Fraser Howell recently built a hollow (birds mouth) mast for his Chebacco “Itchy and Scratchy”. One day while he was out sailing, the mast failed just above the partners! He sent me this pic of the mast:

Image41

He reports that it seemed to flatten slightly, just before it broke. He says there were no solid parts inside the mast – so that the halyards could run inside. Maybe they might have prevented it? Anybody else out there using a hollow mast of this type? We’d love to hear from you. On the subject of masts, Gil Fitzhugh is building a birds-mouth-type hollow mast for his Chebacco. When I mentioned to him that Fraser had met with this trouble, he suggests:

The objectives are 1. Strengthen the mast in way of the pressure point generated by the mast partners; 2. don’t create a hard spot somewhere else that will break; 3. salvage the birdsmouth strips I made at vast cost in time and money; 4. don’t add more weight than necessary; 5. given that building this boat has pushed me to the brink of certifiable insanity, don’t come up with a solution so complex that it pushes me over the edge. Here’s what I’ve done.


Image42If I could add a strip of shaded cross-section to each birds mouth strip before I roll the whole shebang up into an octagon, I’d have a much thicker cross section. There’d still be a hole in the middle for halyards, wires for a masthead light or whatever.

So I made 8 strips that look like this:

Image43I basically made them on the bandsaw . A table saw would have worked, but not as easily I think. Hand tools would have worked, but would have violated Objective 5 above. The width of the strip at the top isn’t critical, but depends on the thickness of the stock from which you cut the strips. If the stock is so thick that the top becomes a razor edge, you no longer have a hollow mast at that point.

Cutting order: 1. Make strips 2 feet long by a wide by however thick the wood is.

2. Make the diagonal cuts, but don’t go all the way through. The still-attached tails are good guides, clamping surfaces etc.

  1. Bevel both sides.

Glue the strips in place. Then cut away the shaded areas in the above drawing and clean up the Image44

surface with a few swipes of a hand plane. When gluing, clean up as much squeezeout as possible. these are mating surfaces, and what you neglect to clean up sooner will be a bitch to clean up later.

All this assumes that you cut your birdsmouths with rocket-science precision. I didn’t. Some of mine are a tad thicker on one side than the other. If you use this idea to create eight auxiliary thickening strips all exactly the same, your mast won’t work. (Guess how I learned this fundamental truth?) Not to worry. Label (number) your birdsmouth strips, so you predetermine which one is going to mate with which. Then determine the width of each auxiliary strip so it will fit properly. Sounds hairy. Isn’t. I did the whole thing in a couple of hours and made my auxiliary strips in a couple more. After everything’s glued up and the excess epoxy cut away, you test fit each pair of strips before the final glue-up. If it’s tight, whack it with a chisel or rabbet plane a couple of times. It really will work.

When the mast is done and rounded I’ll do two special wraps with glass cloth, in opposite directions, in way of the partners. My son, the engineer, tells me this will add strength.

We won’t know whether this works until we’re out in a howling gale and the mast doesn’t break. I prefer to avoid the howling gale.

Speaking of howling gales . . .

Phil Bolger was interested in my report in Chebacco News #30 about being caught out in a blow. He suggests:

Next time you’re caught out in a breeze (not necessarily that strong!) it’d be interesting to see what she will do under mizzen alone. I haven’t tried this in a Chebacco, but I wouldn’t be surprised if she could make good at least a beam reach, under good control.

I haven’t had a chance to try this out, yet, and Sylvester is now tucked up in my drive for the winter. Nevertheless, I’ll try it out next season, and would be interested to hear how any of the rest of you fare under similar circumstances.

And finally

Many thanks to those of you who wrote to me and sent photos. No more room this time. Maybe next . . .?

Bill Samson can be contacted on : bill.samson@tesco.net

Chebacco News is at http://members.xoom.com/billsamson

Snail mail to Bill Samson, 88 Grove Road, Broughty Ferry, Dundee DD5 1LB, Scotland.

Chebacco News 25

Chebacco News

Number 25, March 1999

ch246

Another glorious shot of Tim Smith’s LARK strutting her stuff off the New England coast. [Incidentally, these stunning monochrome shots of LARK have been just the lever needed by some of our readers to persude their better halves that the Chebacco is the perfect boat from them!]

Change to Web address:

Note that the World Wide Web address (URL) for Chebacco News is now

http://www.sol.co.uk/w/wbs/chebacco.htm

A Get-together for Chebacchisti?

I have been discussiong the possibility of a get-together for Chebacco-type people with various members of our elite [ahem!] circle, and it looks like the greatest concentration of Chebaccos is in the British Columbia area. I therefore asked one of the local guys, Jamie Orr, what he thought of the idea. This was his response:

Subject: Chebacco Gathering

Date: Fri, 11 Dec 1998 16:15:22 -0800

From: “Orr, Jamie” <JORR@oag.bc.ca>

To: “‘Samson, Bill'” <wbs@sol.co.uk>

Hi

I spoke to Jim Slakov and Randy Wheating last night. Both thought the

idea of a gathering was a great one. I expect something will happen

here anyway, and if we can bring in some other Chebacco and Bolger fans

from other areas, that would be perfect.

I didn’t take notes, but here’s what I think I heard. Jim’s boat is

finished and ready to launch come Spring. Gary Foxall, according to

Jim, has his boat turned and is working on the seams, the centreboard

case and so on. Randy’s boat is still upside down, but he’s moving

ahead too. Randy also corresponded a while back with someone in the

interior who was thinking of building — so there may be another boat

somewhere in the hinterland. He (Randy) thought that he could probably

be done by September of 2000 (see below), said it would certainly give

him a goal.

So it looks like there will be at least 3, probably 4 Chebaccos in the

water by then. Do you think its worth putting out feelers in Chebacco

News this early? As I said, there’s a strong chance a gathering of some

sort will happen anyway, and it would be good to meet some of people

from the Bolgerlist and the News.

Port Townsend’s Wooden Boat Festival is the first weekend after Labour

Day (the first Monday in September — does that hold true in Scotland?)

I don’t know if that would be a problem for potential attendees with

children, as school goes in the day after Labour Day.

Of course, having the Festival as a venue means that if only a few

people turn out, there’s still lots to do and see.

Jamie

PS Jim and Gary made their own sails. (All three of us bought the

materials at UK Sails in Sidney — 20 miles from Victoria on the way to

the mainland ferry — helpful folks.) Guess I’d better get a hustle on.

So there you are. If you’re interested, why not contact me or Jamie with your views?

Plywood?

I received the following email from Dr Dick Burnham, currently in Papua New Guinea:

Date: Sat, 13 Feb 1999 16:26:11 -0500

From: “Burnham” <burnham@datec.com.pg>

To: “Bill Samson” <wbs@sol.co.uk>

.My son is sending here xeroxes of the Payson-purchased sheet-Chebacco plans. I’ll study them and build a model. 1/16th inch ply–per your suggestions–if there is any here, otherwise I’ll just have to have some 1/16th rosewood or something equally exotic bandsawed for me to splinter and shove and glue up.

I was surprised by your suggestion to epoxy the interior side of the ply with 3 coats. The plywood is truly weather proofed; it is the baloney in a sandwich. No wonder some consider using non-marine grade ply. BTW, would you consider asking your newsletter folk to respond on what kind(s) of ply (and approx. cost/sheet) they used for the sheet-Chebacco? [OK guys – Fess up!] And how they arrived at their choice? It would be curious to see if you could construct a little chart on what, why, how much…even post-building analysis (such as: are they happy with it, does it have problems).

Now I see that the ply is so protected: glass cloth+3(?)coats epoxy outside, 3 coats inside. It still does more than merely make a form for glass, though. Or so it seems to me. It is structural and of course is in charge of resisting the log jammed into it on the water. Still wondering here about Parker’s use of “form-ply” which has US southern yellow pine exterior plys and has “waterproof” glues — after all it is a ply that must resist the sludge-like characteristics of wet concrete and must have sufficient

rigidity (better inner cores?) than other plys….

Regarding fiberglass. Has anyone tried Dynel, Xynole (I think?)? It is a highly abrasive resistant cloth that is knows to take kindly to curving forms…. Good for bottoms….

In your #23 you speak of Gray Feather as “having a bone in her mouth.” Just found in the delapidated library on this so tropical campus a copy of Slocum’s writings. Indeed he uses the very same phrase to characterize Spray as she turns from S. America and scoots westward with tradewinds to hold her leash onward toward Polynesia.

From deep in Melanesia,

Yours truly,

Dick Burnham

So – Write to me about your ideas on plywood. I’ll fess up first – I used pretty cheap Far-Eastern ply labelled BS1088, though it was clearly nothing of the kind. It has frog-hair thin outer veneers, and thickish inner ones. On the other hand the glue is certainly waterproof and there are few if any voids in the inner veneers. My theory is that glass/epoxy sheathing would make it acceptable, and so far I’ve had no problems (3 years after luanching). Let’s hear your stories!

Sails

The following email came from Jamie Orr:

Date: Wed, 14 Jan 1998 16:05:00 -0800

From: “Orr, Jamie” <JORR@oag.bc.ca>

To: “Samson, Bill” <wbs@sol.co.uk>

Lovely work, Bill

I was amazed at the quality of the print I sent in — are you sure you aren’t enhancing these things? My first thought was that we really have to get the cedar siding on the house refinished this year!

I hope to be able to send in some news on sailmaking soon. I’ve started with the mizzen, that being the simplest. I cut it out with straight lines all round and seamed it absolutely flat — as flat as my basement floor, anyway.

I’m using the two-sided tape to hold the cloths for sewing — I can’t imagine doing without it at this stage in my relationship with my sewing machine. It’s an old Pfaff 138 with a motor that never stops (or even slows!) and a hair trigger clutch. Even after using up two bobbins in practice, my first seams were still “interesting”. However, it’s gradually getting tamer, and the power is wonderful — the toughest

thing I’ve done so far is five layers of 4 ounce dacron in the clew patch, but the machine never noticed.

For holding the corner patches in place, I used a few strokes of one of the kids’ gluesticks. These are like lipstick tubes with soft quickdrying glue. It seems to stay flexible and doesn’t print through the cloth. To be on the safe side, I stuck each patch in the stack to the next, stuck the whole stack to the sail, then left some heavy books

on top for half an hour before running it through the machine. Of course, the books had to be the right sort — I found Chappelle’s “Boatbuilding”, Howard-Williams “Sails” and PCB’s “Different Boats” did a fine job. The last isn’t very heavy, but is definitely the right sort.

Again, great work on the News. Are you going to “bind” the last six as you did the first two lots? If so, put me down again for a copy.

Jamie

I replied:

Subject: Sails

Date: Thu, 15 Jan 1998 12:01:15 +0000 (GMT Standard Time)

From: Bill Samson <wbs@sol.co.uk>

To: “Orr, Jamie” <JORR@oag.bc.ca>

CC: wbs@sol.co.uk

Dear Jamie,

Some great ideas there! I used the double sided tape, too, on the main seams, and did all the edges, patching etc by hand.

I don’t know if you’ve tried some of the long seams in the mainsail yet, but here’s how I tamed the vast amounts of cloth –

1. Tape the next cloth on with double sided tape.

2. Roll up that cloth widthways, and the rest of the sail in the other direction, so you’ve got two long rolls (use tape to stop them unrolling) with a narrow strip of cloth

between where the seam is to be sewn.

3 Feed this long object through the sewing machine. The trick here is to get your sewing machine into the middle of the room with space fore and aft for the double roll as it passes through.

I hope that makes sense – anyway you’ve probably figured it out for yourself. I saw it happening in a photo I saw of a sail loft, where the machinist was working in a hole in the centre of a huge table which supported the double roll as it was fed through.

I like the idea of using the glue stick for patches. I used short lengths of double sided tape.

I haven’t done anything yet about a bound version of numbers 13 to 18. I only shifted about 3 copies of the first two, and it’s horrendous getting Word for Windows to

deal with documents that size, without falling over.

I’ve been working on an essay on how to build a Chebacco, for PCB&F. Phil’s planning to get essays from builders of various of his designs, and hopefully put them together into a book. I hope it works out.

Keep in touch!

Bill

sails

Me (Bill Samson) working on my Chebacco Mainsail – Very therapeutic!

For anyone planning to make their own sails, I’d like to recommend a couple of publications that I’ve found very useful:

“Sail Making for the Home Boatbuilder (Including: altering second hand sails)” by Paul Fisher – cost £12 +£1 p&p (UK) from Selway Fisher Design, 15 King Street, Melksham, Wiltshire, SN12 6HB, UK, www.selway-fisher.com, email: selwayuk@aol.com

“The Sailmaker’s Apprentice” by Emilano Marino, International Marine (McGraw Hill). $39.95

Ed Heins makes progress:

Had a photo and email from Ed Heins, who is completing a Chebacco starting with a part-built hull from Burton Blaise:

ch248

Ed Heins’ Chebacco hull nears completion

Subject: Winter’s waning

Date: Sat, 20 Feb 1999 22:16:50 -0500

From: “Ed Heins” <edheins@hcr.net>

To: <wbs@sol.co.uk>

Bill,

Haven’t messaged you for a while and thought I’d give you an update on the project. The boat still resides beneath 2 tarps and lowered A frame in the back garden, but I do have posession of spar lumber as of today. The local sawmill was cutting some spruce, so I commissioned a half dozen 2 x 6 ” 20 footers and another dozen 14 ft 1 x 4’s. He wanted to cut me a 4 x 4 blank, but I think laminating will help stop warp. Corkscrew masts being just so unprofessional looking.

Lamination starts on Monday, and then will be working on turning the square blanks into round masts. Oh well a first time for everything.

. . .

Cheers,

Ed

And finally:

A slightly thinner Chebacco News than usual, and later than usual, too! Don’t complain – It’s up to you guys to keep me informed of developments. No news = no Chebacco news!

Bill Samson, 88 Grove Road, Broughty Ferry, Dundee DD5 1LB, Scotland.

wbs@sol.co.uk