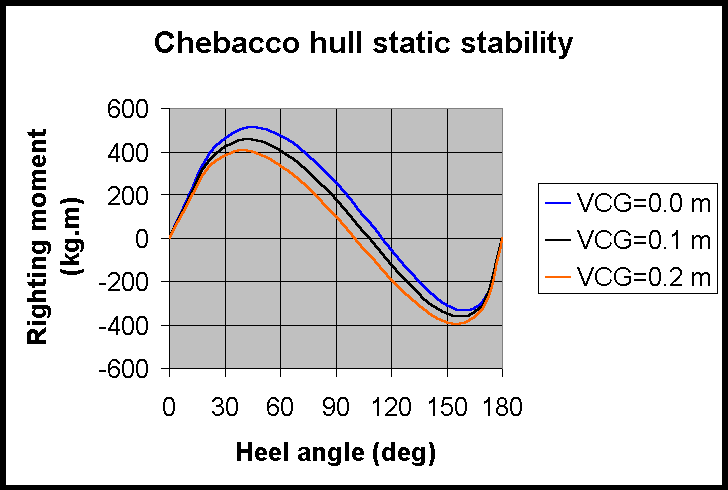
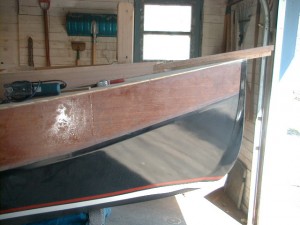
Chebacco News 79 – Lapstrake table of offsets

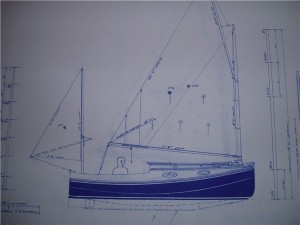
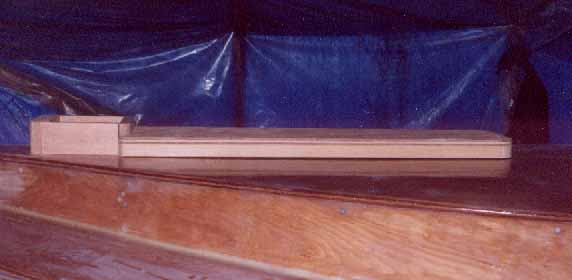
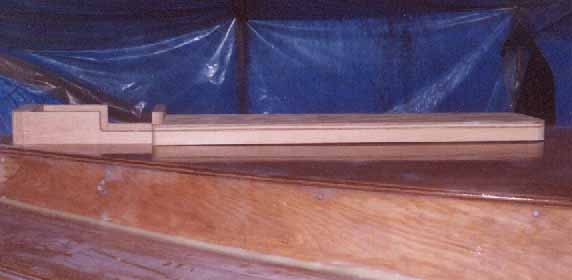
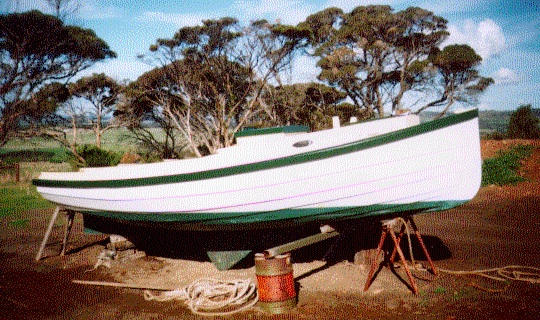
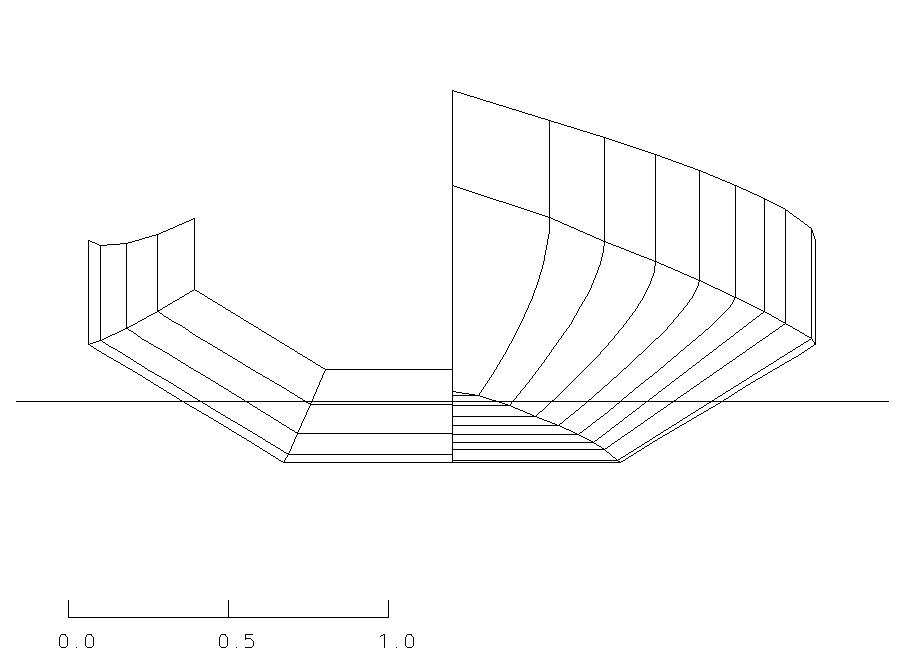
I received a request for the table of offsets for a lapstrake chebacco. Here I have posted an Excel file with all of the offsets in Feet-Inches-eighths and also mm for both the 19’6 and the 25’4 versions. I found it easier to work in mm here in Australia (Inch rulers and tape measures are available but not so common) so I created these spreadsheets to make the conversions. It will probably require a bit of studying to work out what you are looking at.

The first table for each boat shows the height above a base line of the buttockline at each station. You will need to refer to the drawing for the location of each station – you may notice that Phil numbered his stations in different directions for the 19′ and the 25′ versions. We will never know why. The base line is the bottom of the keel for the 19′ version and 2 inches below the bottom of the keel for the 25′ version (I assume Phil changed his mind somewhere in the design process about the depth of the keel – but kept the table of offsets.) The buttockline is the line where a vertical slice would go through the hull. The vertical slices are 12″, 24″, 30″ and 36″ from the centreline for the 19′ version, but only the 24″ buttock is given for the 25′ version. This table also has the height of the deck and bottom panel. It looks as if I have found a small error in Phil’s deck height at station 1 during my analysis.

The second table for each boat shows the width from the centreline (so-called “half breadth”) of the waterline at each station. The waterlines are the lines where horizontal slices meet the hull. This is just like the line where the water meets the hull when the boat is afloat.

In theory you could build a hull using only one of these tables – but in practice you need to cross reference some little details that can’t be worked out with only 1 table.

Andrew

Chebacco News 61 – Mudlark, the other Chebacco 25

I received an exciting email from Simon Jones in South Australia. If you have read all the newsletters you may remember Simon started a Chebacco 25 back in newsletter 26 (1999). The hull got built but the project got put on hold for many years. Simon tells me the covers are coming off and he hopes to have Mudlark in the water next summer (southern hemisphere).

I’ll let Simon tell the story:

“Call me dumb or stubborn, I knew I only had one big boat in me but a multitude of ideas and wishes that I had to incorporate into my build.

I loved the basic lines of the C25, I didn’t like a lot of other things, the cabin was too low, the centreboard was a huge lump in the way, the rudder was too small and not on the stern, the cat rig was too cumbersome and inflexible. 

I wrote to Bolger asking for advice and any thoughts. I received a very terse reply to the effect that any deviation was an abomination and I was on my own.

Changes.

Raised the freeboard one plank to allow for sitting headroom over water ballast tanks under quarter berths.

Moved to ketch rig with adjustable bowsprit and stern hung rudder.

Moved from centreboard to leeboards.

Extended cabin top and recambered.

Installed watertight bulkheads fore and aft.

Reduced depth of keelson to allow for more stable grounding.

Rearranged interior to sleep four with central galley.

Cheers Simon.”

I have suggested a meeting of the only two Chebacco 25’s at Goolwa wooden boat festival in two years time – are there any other Chebacco owners in Australia who might want to join us?

Chebacco News 59 – Pete Greenfield’s Outdoor Boat

Pete Greenfield is the editor of Watercraft Magazine in the UK (watercraft-magazine.com) a magazine dedicated to small home build boats.  In 2009 he recycled the moulds from a lapstrake Chebacco that Connie Mense had used to build her beautiful “Argo”.   See the resources section under websites for photos of Argo. Peter wrote about his journey to build his own Chebacco (actually he is still writing about his journey, like so many boatbuilding journeys it is a long one!) in Watercraft Magazine and he has graciously given me permission to reproduce some of his articles.

This is the first one he wrote in the November/December 2009 edition:

Building the OUTDOOR BOAT

by Pete Greenfield

Underneath the spreading chestnut tree, the editor has recycled Connie Mense’s moulds to build his own Chebacco Boat. And the green-ness of the project doesn’t stop there. With photographs by the author and the resident twitcher.

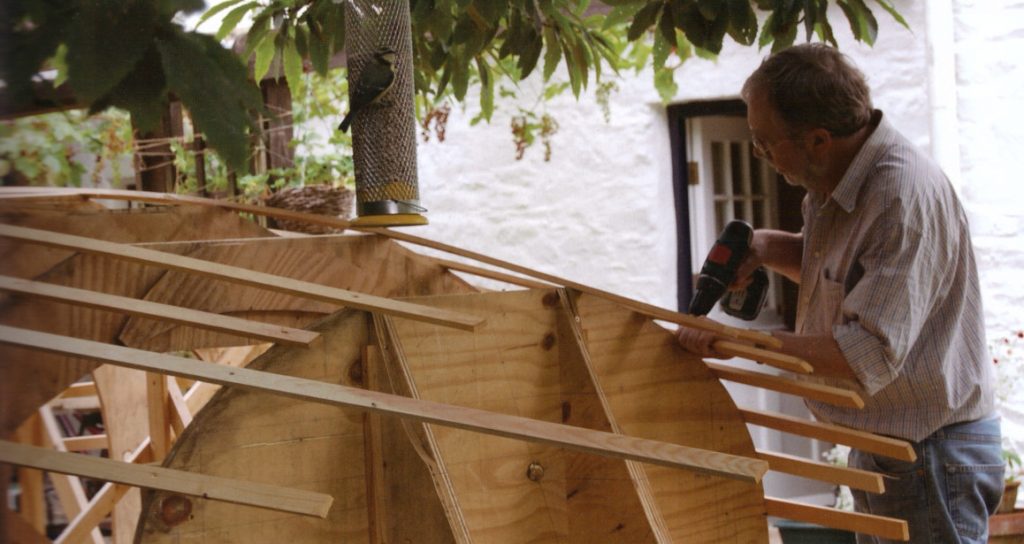
Why do birds suddenly appear every time I go near the boat frame in our garden? The cat has only to purr from the depths of a duvet in a distant bedroom and they take flight instantly. But when I peel back the polytarp from the boatbuilding frame, every tit in Cornwall turns up to perch on it.  I never liked that Hitchcock film. Worse, they’ve all been devouring the autumn’s raspberries, so my boatbuilding frame is beginning to look like a Crime Scene and – I kid you not here – a hungry-looking lesser-spotted woodpecker has also taken to visiting and I swear he has his onyx eye on my lining-off battens.

I’m quietly proud of my lining-off battens, not least because in the past, I’ve had problems with battens. Last time, they were fairing battens. A fairing batten is a length of small section timber which you lay across the erected inverted mould frames to check that they are …er… fair, meaning that you have set up the moulds so accurately that the batten takes up a suent curve, without humps or hollows, as it drapes across them. Needless to say, the fairing batten should not be so thin that it sags between moulds or so thick that it will not bend over them without resort to brute force. Equally, there should be no imperfections in the fairing batten – knots, kinks or badly made joints – which cause deflections, making it harder to check whether your moulds are really fair. Or, in the case of my previous ferro boat, really not.

You do not need lining-off battens for the monocoque hulls of ferro boats. You do need them when building a clinker planked wooden boat because they delineate the edges of the planks which are a major factor in the visual appeal of the boat. These clinker planks might look to the untutored eye as if they have straight parallel sides and are all of equal width but as Water Craft alumni will be aware, in reality such planks are frequently banana-shaped, sometimes S-shaped and the beamier the boat, the more curvaceous they need to be. Further, the illusion that the planks of the topsides are identical is created when the boatbuilder determines the shape of the garboard, the plank nearest the keel, which may well need to be a convoluted S-shaped banana with extra-wide ends…

But enough of GM crops… take it from me that when a shapely clinker hull is lined off so that the lie of every single plank from garboard to sheerstrake looks just right, it’s a work of art as much as craft and the tangible testament to the hand and eye of a real boatbuilder. Which is why, rather than mess it up myself, I decided to use the lining-off marks Connie had left on her moulds. But I still needed a full set of lining-off battens, all long enough to wrap around the hull from stem to stern, all knot- and kink-free. Fat chance of finding suitable timber in west Cornwall, I grumbled and went to the nearest builders’ merchant with little hope and less expectation.

Alas, dear reader, that I should have been so unjust! There at the Culdrose branch of the Travis Perkins chain, beyond the inevitable breeze blocks, pea gravel, drains and decking, huddled in the crepuscular cathedral of the timber shed, I found long lengths of straight grained and generally knot-free red pine in various sizes including a nominal 38 x 16mm, which they supply ‘Planed All Round’ at 34 x 11mm. Which is how, me buckos, a national disseminator of what Betjeman called ‘bungaloid growth’ came to determine that the lands – the overlaps of the clinker planking – on our Chebacco boat will be precisely 1 5/1 6″ (34mm) wide.

Unfortunately, however, the longest pieces TP could supply were around 15’6″ (4.8m) which meant proper joints would be needed; scarf joints which would not create kinks when the battens were bent to the hull curve. In the past, I’ve had problems with scarf joints.

The scarf joint, Grasshopper, is the boatbuilding joint. When one long length of timber must be made from two short ones, the shipwright cuts identical opposed tapers which mate together. Long tapers are required to get the largest possible ‘faying surfaces’ – the faces of the timber which will be glued together – which means the scarf needs to be at least eight times as long as the thickness of the timber being joined.

In the past, I would try to cut the taper with a tenon saw, the saw would invariably veer off-square and I would then need to plane vigorously to get a uniform incline, all too often creating in the process a speed-bump halfway along the taper. Planing down the speed-bump, I would start to get break-out at the feather edge. I would also start to get rather irritated.

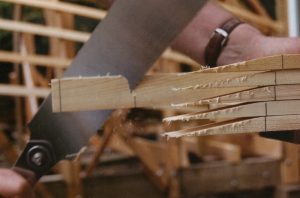
So, Grasshopper, reach not for your western saw. Take up instead your Gyokucho Ryoba Kommane – yes, I had noticed that this running metaphor is crossing cultures, thank you – which has a 12″ (0.3m) double-edged blade, with rip teeth on one edge and crosscut teeth on the other. This gives the unique combination of a saw blade short enough to be used with some precision yet with rip teeth which are much better suited to a shallow diagonal cut virtually along the grain. Do not – at first; you will later – saw to the line; cut a little shy to allow for a couple of passes of the plane.

My other problem with scarfs used to come when I glued the two halves of the scarf together: all too often, as clamping pressure was applied the tapers would slide apart and sometimes go off at a tangent in the process.

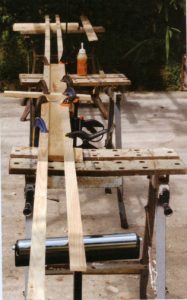
It was under the tutelage of Mr D Phillips at Falmouth Marine School that I learned to do scarfs properly. First off, you need a base to support the scarf while you glue it: a clean plank, as long as you’ve got, with a nice straight edge. About midway along the plank, square across two lines to show the extent of the scarf joint, then wrap this area in cling-film to prevent the job sticking to the base.

For quick jobs outdoors, I have found Gorilla Glue easy and forgiving to use, tolerant of low temperatures, quickly cleaned up and very strong once set. It’s a polyurethane, so no mixing is needed and it’s not only tolerant of damp timber, it likes it. So much so that you are advised to spread the Gorilla Glue on one of the faying surfaces – now you do remember what a faying surface is, don’t you children? — and paint the other one with water. The wetter you make this face the more the Gorilla Glue will foam up as it sets; the foam fills crevices but does not act as a bonding agent on sloppy joinery.

So, my method when gluing scarf joints is to first clamp the piece of timber with the lower part of the scarf to the base, aligning it with the marked lines and the edge of the base and positioning the clamp well away from the action. Apply the Gorilla Glue to the taper. Wet the matching taper on the other half of the joint and lower this second piece of timber into place, again lining it up with the joint lines and the base edge and securing it firmly in place with a clamp well away from the joint. And it’s only when I’m sure the two pieces of timber are correctly aligned and firmly held in place that I wrap the topside of the scarf joint in more cling-film, add a scrap of ply on top to spread pressure and then clamp up the joint firmly. This way, I suffer from none of those old kinks and slippage; an important consideration at my age, Grasshopper.

Chebacco News 54


Altus Trip – Richard Spelling

So I’m pulling Schroedinger to Altus; traveling on 40 west of OKC. Around mile marker 70 I start to see big huge windmills in the distance. As I get closer there are more and more, then a whole farm of them – maybe a hundred. I start thinking, “Hey, these weren’t here the last time I was through this way.” Then I get to trying to figure when the last time I actually WAS through here was – on 40 west of OKC. Seems it was while I was in the Marines going to El Toro, driving a friends Volkswagen van, with four bald tires, in the middle of a huge winter ice storm. Back in…. 1984. Time flies when you are having fun. I think I need to get out more..So I’m pulling Schroedinger to Altus; traveling on 40 west of OKC. Around mile marker 70 I start to see big huge windmills in the distance. As I get closer there are more and more, then a whole farm of them – maybe a hundred. I start thinking, “Hey, these weren’t here the last time I was through this way.” Then I get to trying to figure when the last time I actually WAS through here was – on 40 west of OKC. Seems it was while I was in the Marines going to El Toro, driving a friends Volkswagen van, with four bald tires, in the middle of a huge winter ice storm. Back in…. 1984. Time flies when you are having fun. I think I need to get out more… <grin>

OLYMPUS DIGITAL CAMERA

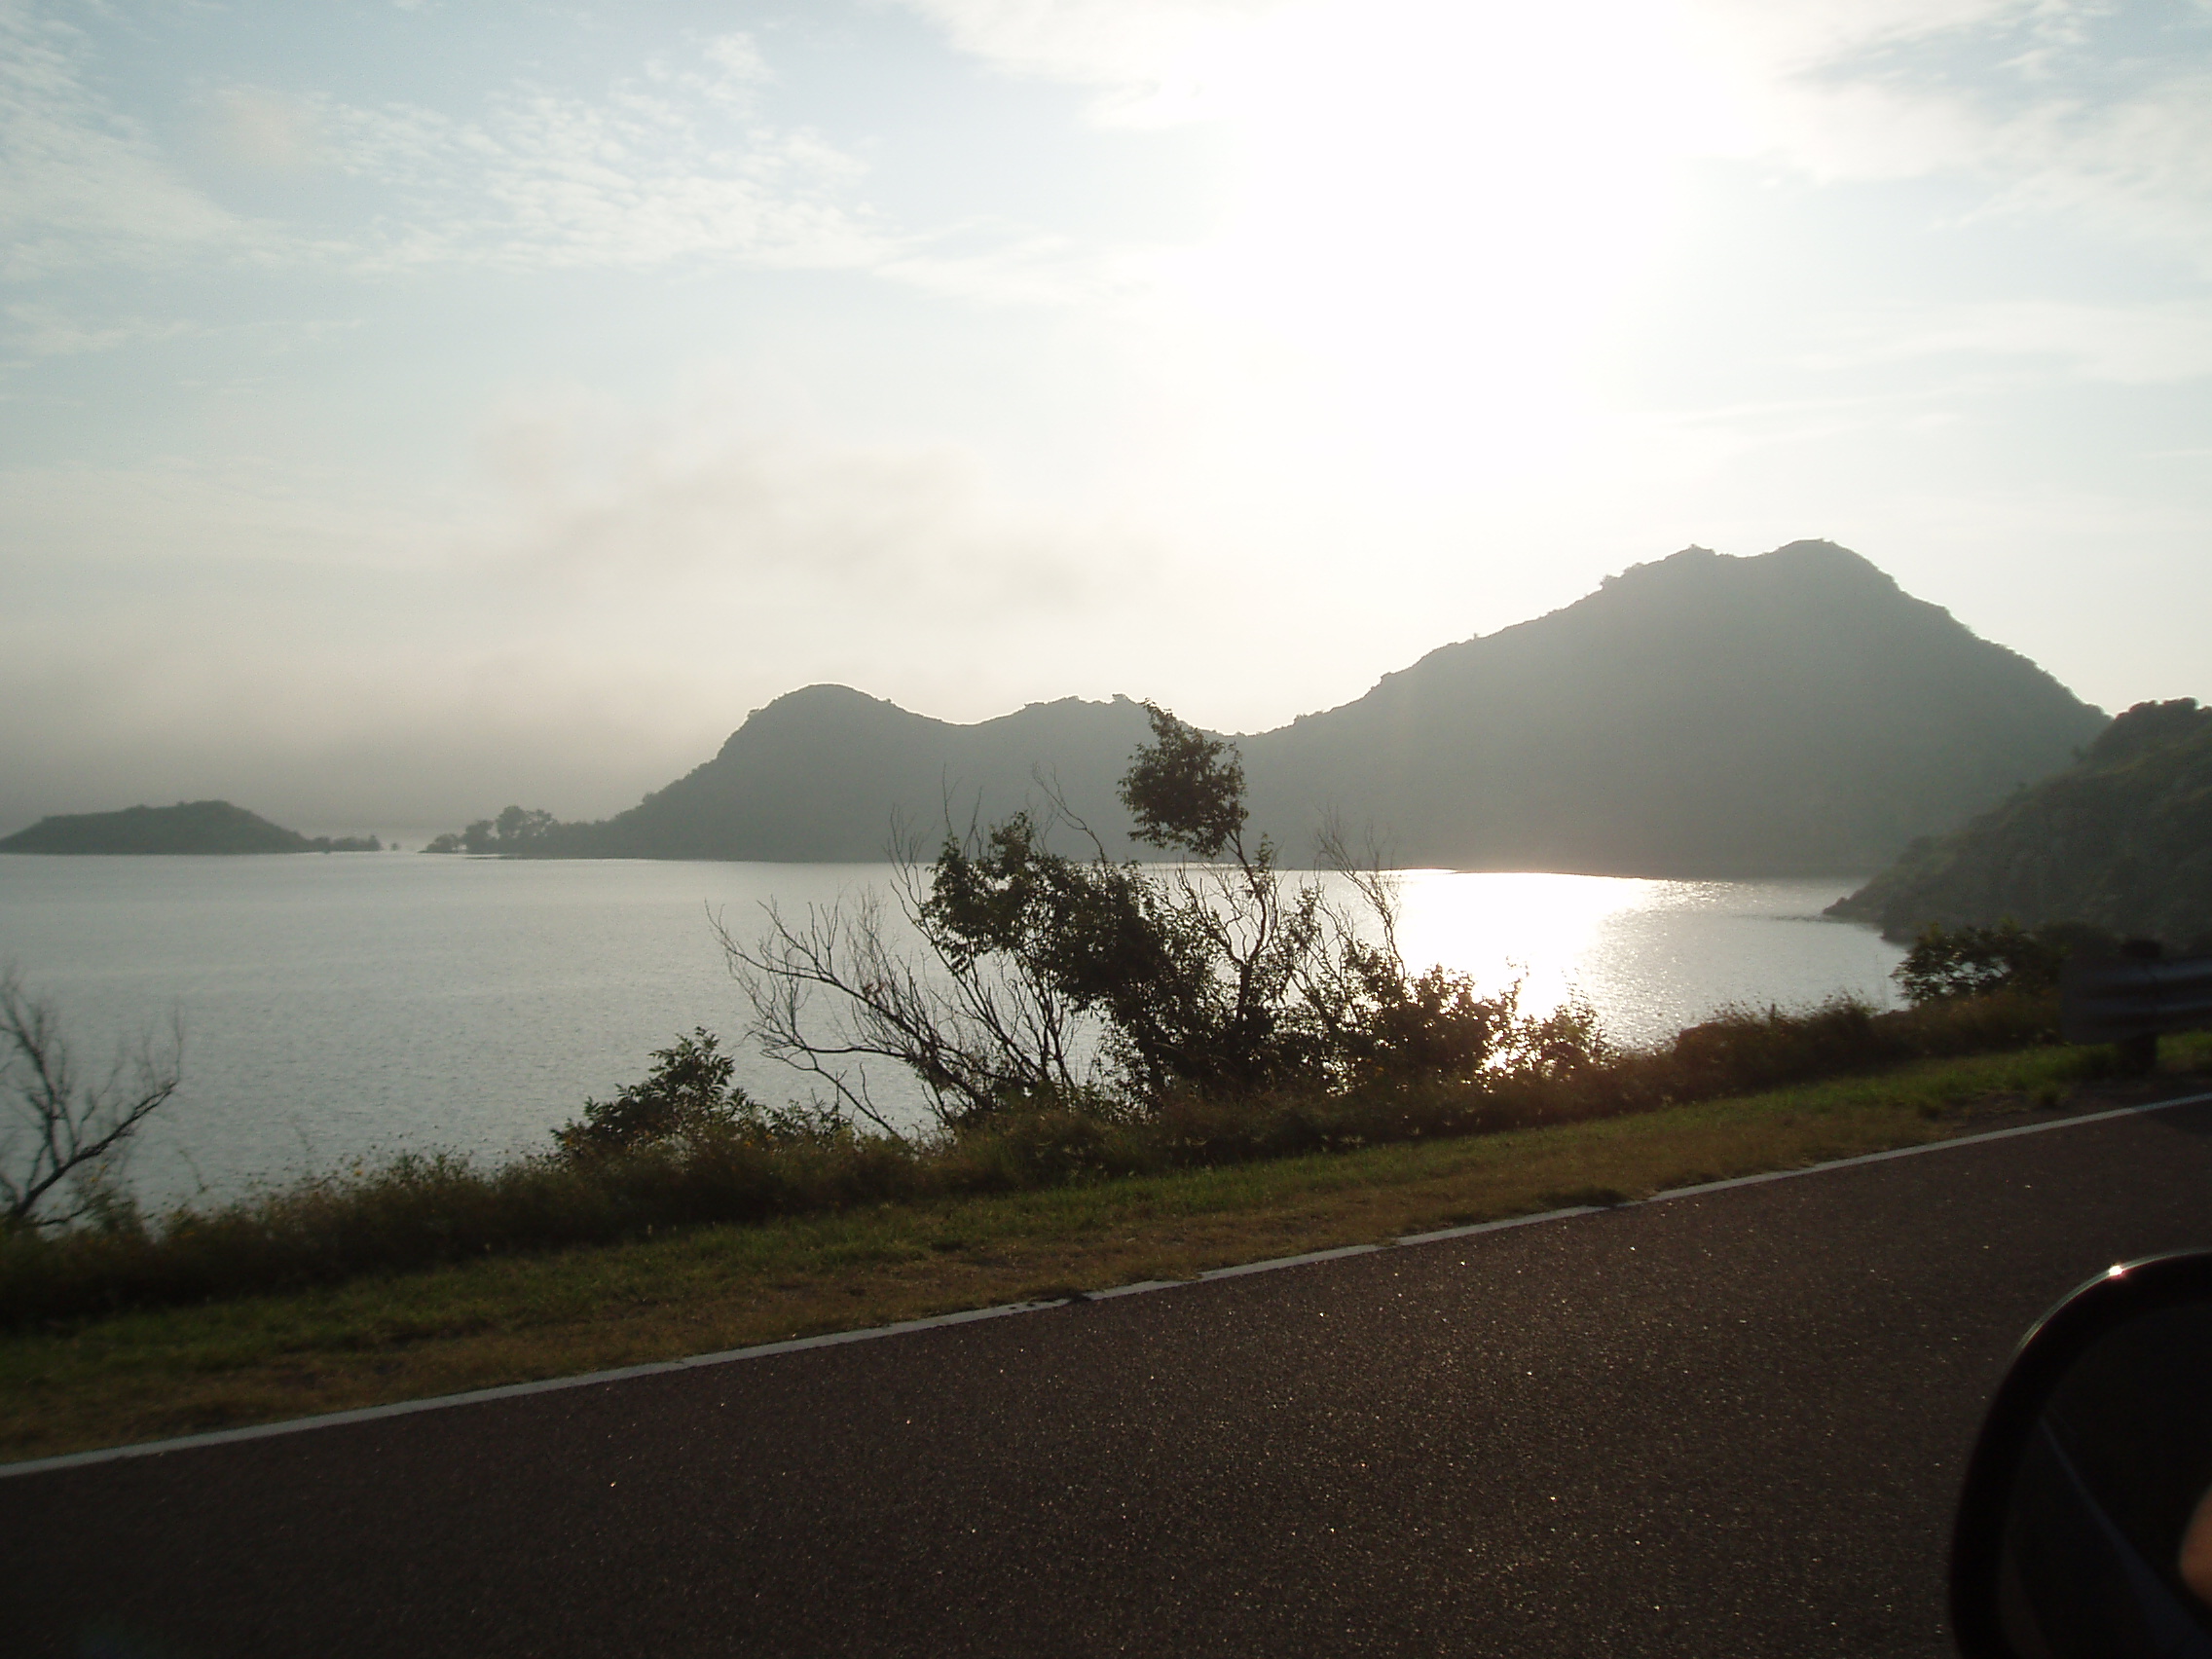
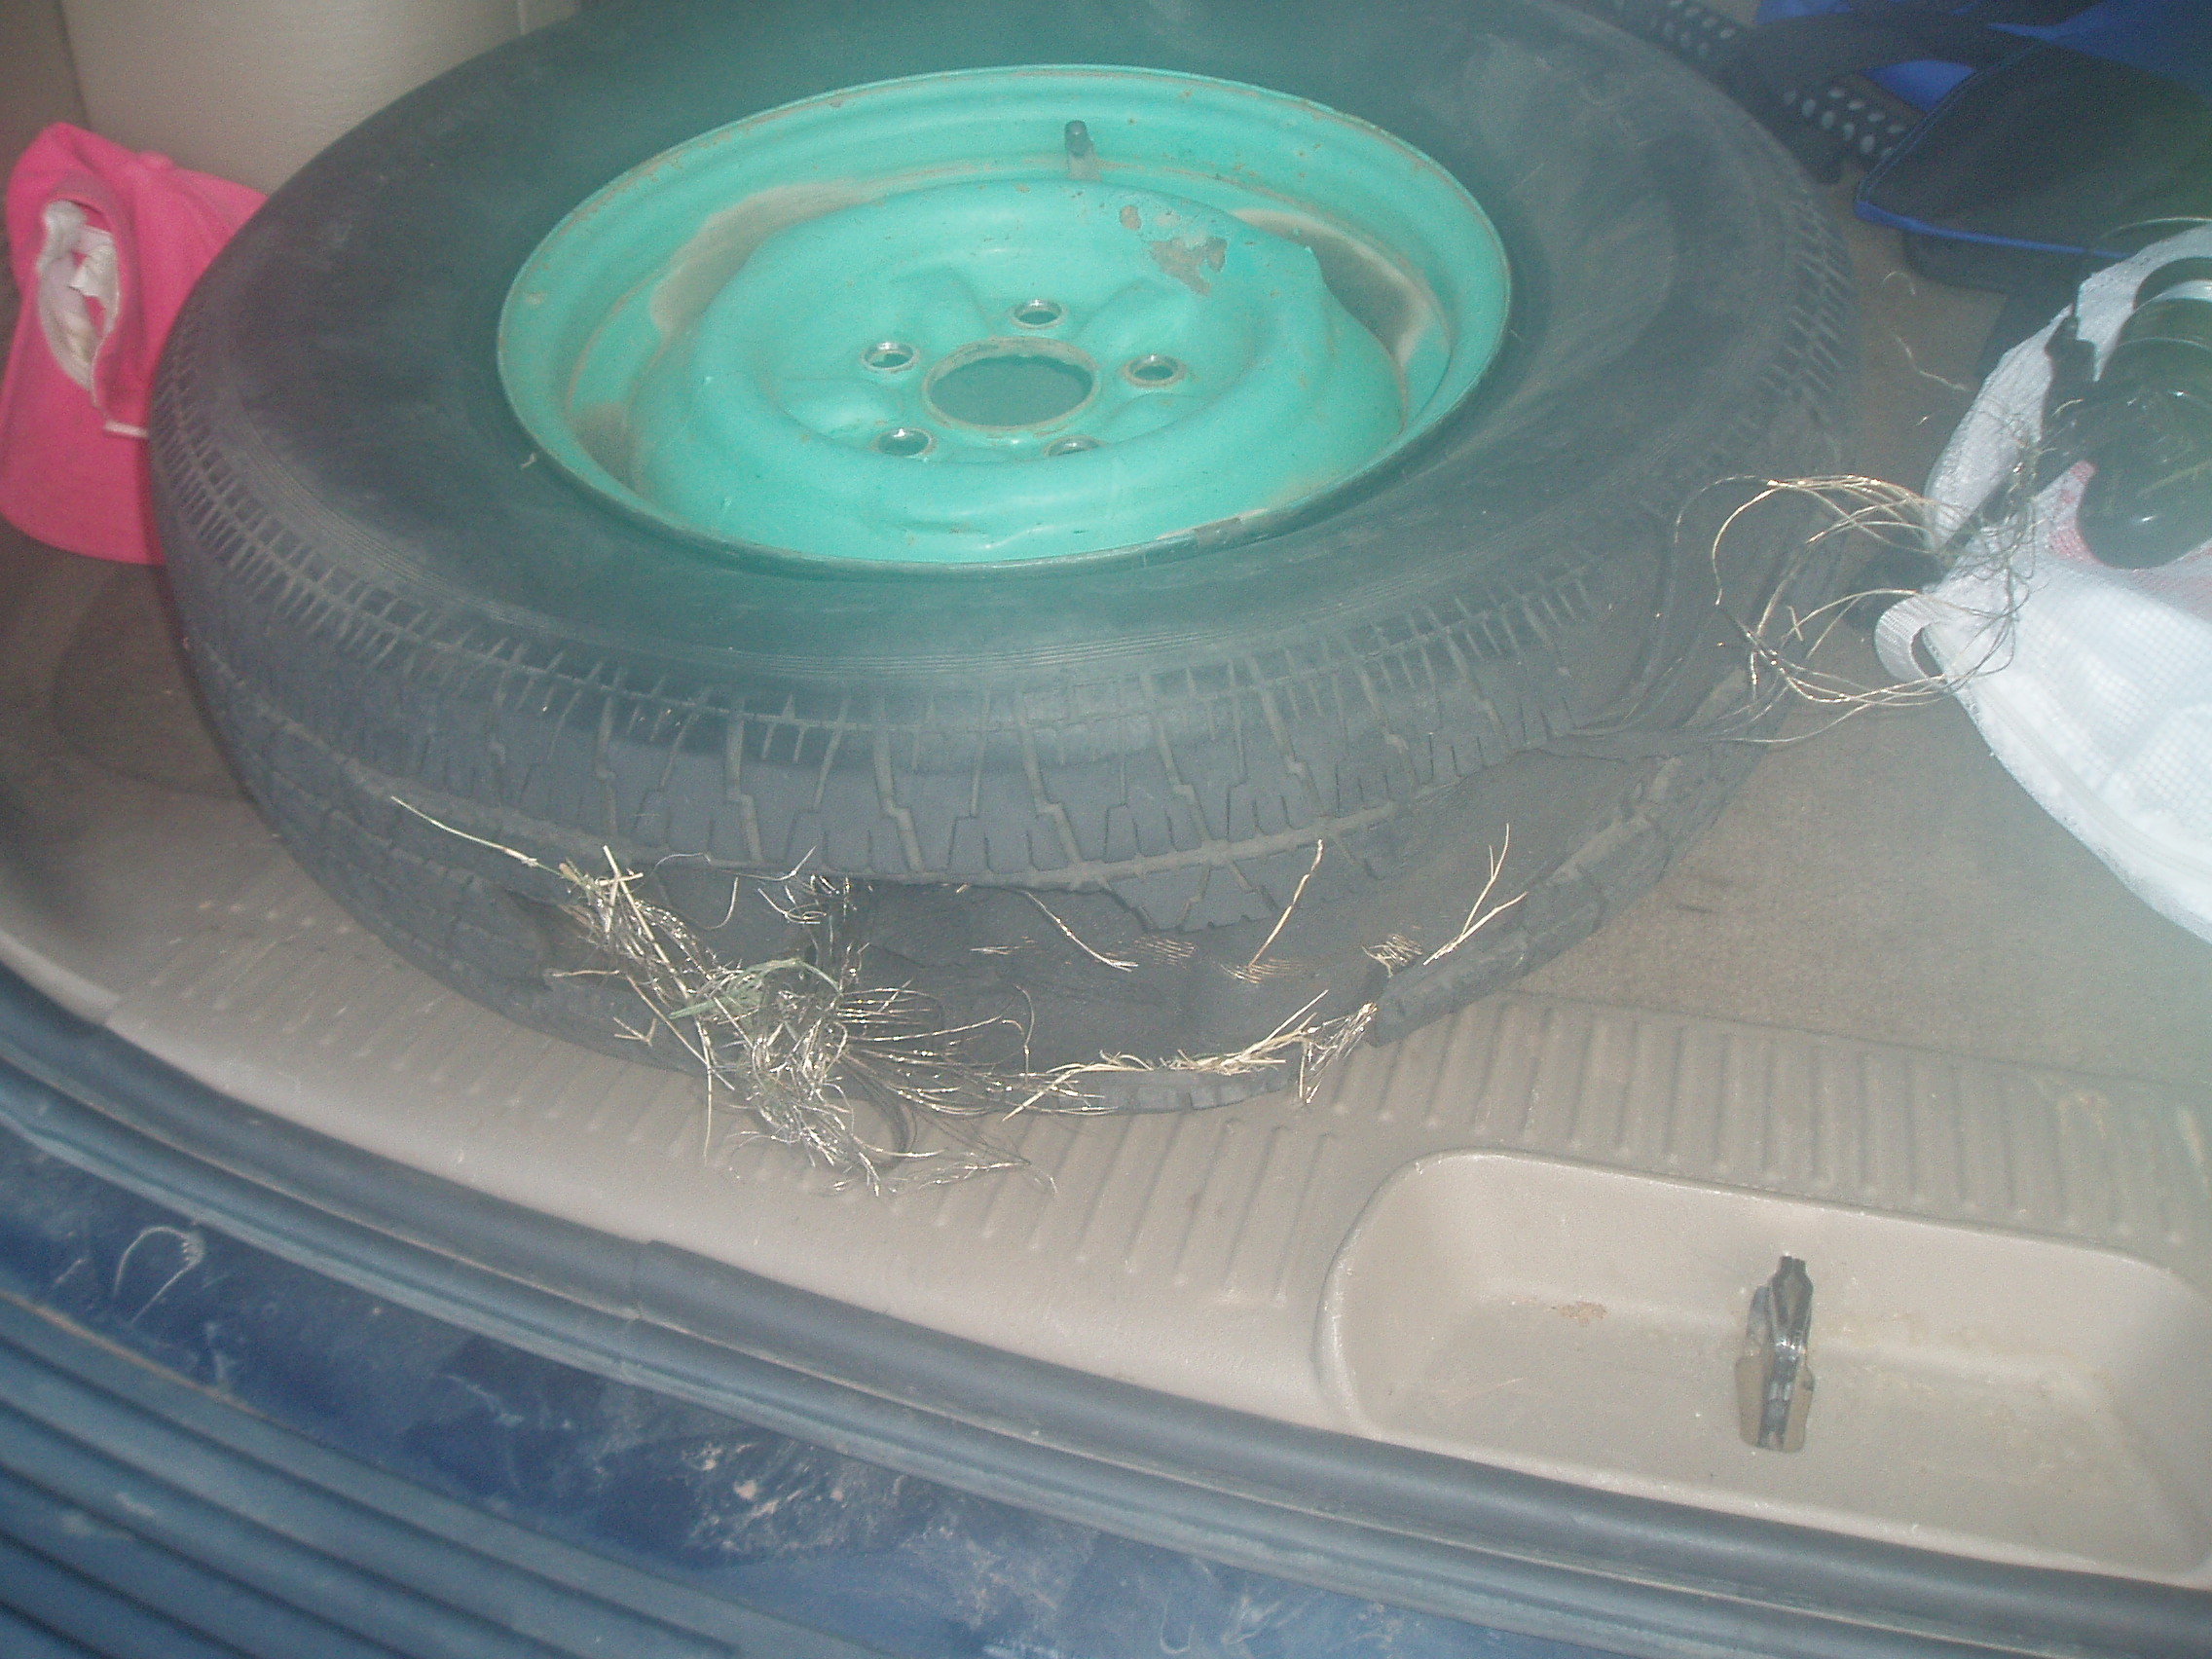
With the “mountain” in site, on a two lane road, I have a blowout. With only a couple thousand miles on these tires and with the weight of the trailer well within the weight rating. Last time I buy tires at Pep Boys. Second blowout, actually, but the first one was caused by a roto-tiller hidden in the grass, so I can’t hold that against them.

OLYMPUS DIGITAL CAMERA

Go to jack up trailer and scissors jack won’t fit under axle. Pull forward to a more level spot and it will then fit under axle but it won’t even begin to lift up the trailer. Break out truck jack and use it on frame of trailer to take some of the weight, then use scissors jack to lift axle up enough to get wheel off. Need to weld me up one of those funny looking “stick under axle and pull forward” trailer jacks.

Go to put on my spare (which is brand new, from previous blowout) and guess what. It doesn’t fit on the hub. The center of the hub (which I replaced years ago because the bearing races were loose in the hub) is just slightly too large for the rim.

And I’m in the middle of BFE so, of course, my cell phone doesn’t work. With fortuitous foresight I had tossed a 3lb hammer and 1-1/8″ thick piece of round stock in the bed of the truck instead of putting them up properly before I left. I bent over the new wheel and pounded on the hub center in a circular motion for about 10 minutes till I “persuaded” it to be a little bigger.

Nice wind for sailing when I get there but I just came off a night shift and a long drive, so I sleep

Next day the wind is real light but we go out anyway. Decent sail.

dadboatlakealtus

I pack up and head back, trip is uneventful.

***

Chebacco Lily Catchpole – Howard Sharp

DSC_0042

It was a beautiful day and we managed to navigate without damage to boat or egos.

IMG_0616
Some construction photos. Turning day; easily done by two and the slight slope outside the garage.

IMG_0658

The cockpit construction, with bridge deck. I built in two battery boxes for the not too far off day when we will all be using electric motors (at the moment she’s propelled adequately at 5kts by a 5hp Nissan). Lily has navigation lights, and one of the battery boxes is taken up by a 1/2 size 12v battery recharged by a solar panel.

I’m keeping the boat on a trailer, launching it every time I sail, and motoring away from a crowded dock. I chose to lock off the motor dead center and use a remote throttle from the cockpit rather than reach back over the motor well. Rapid last minute changes of direction are not possible, but in my view the convenience of having throttle control right under my hand (or foot) is a worthwhile trade off. I’ve also found that I need to keep the centerboard down for better directional control, especially when in reverse.

P1000386

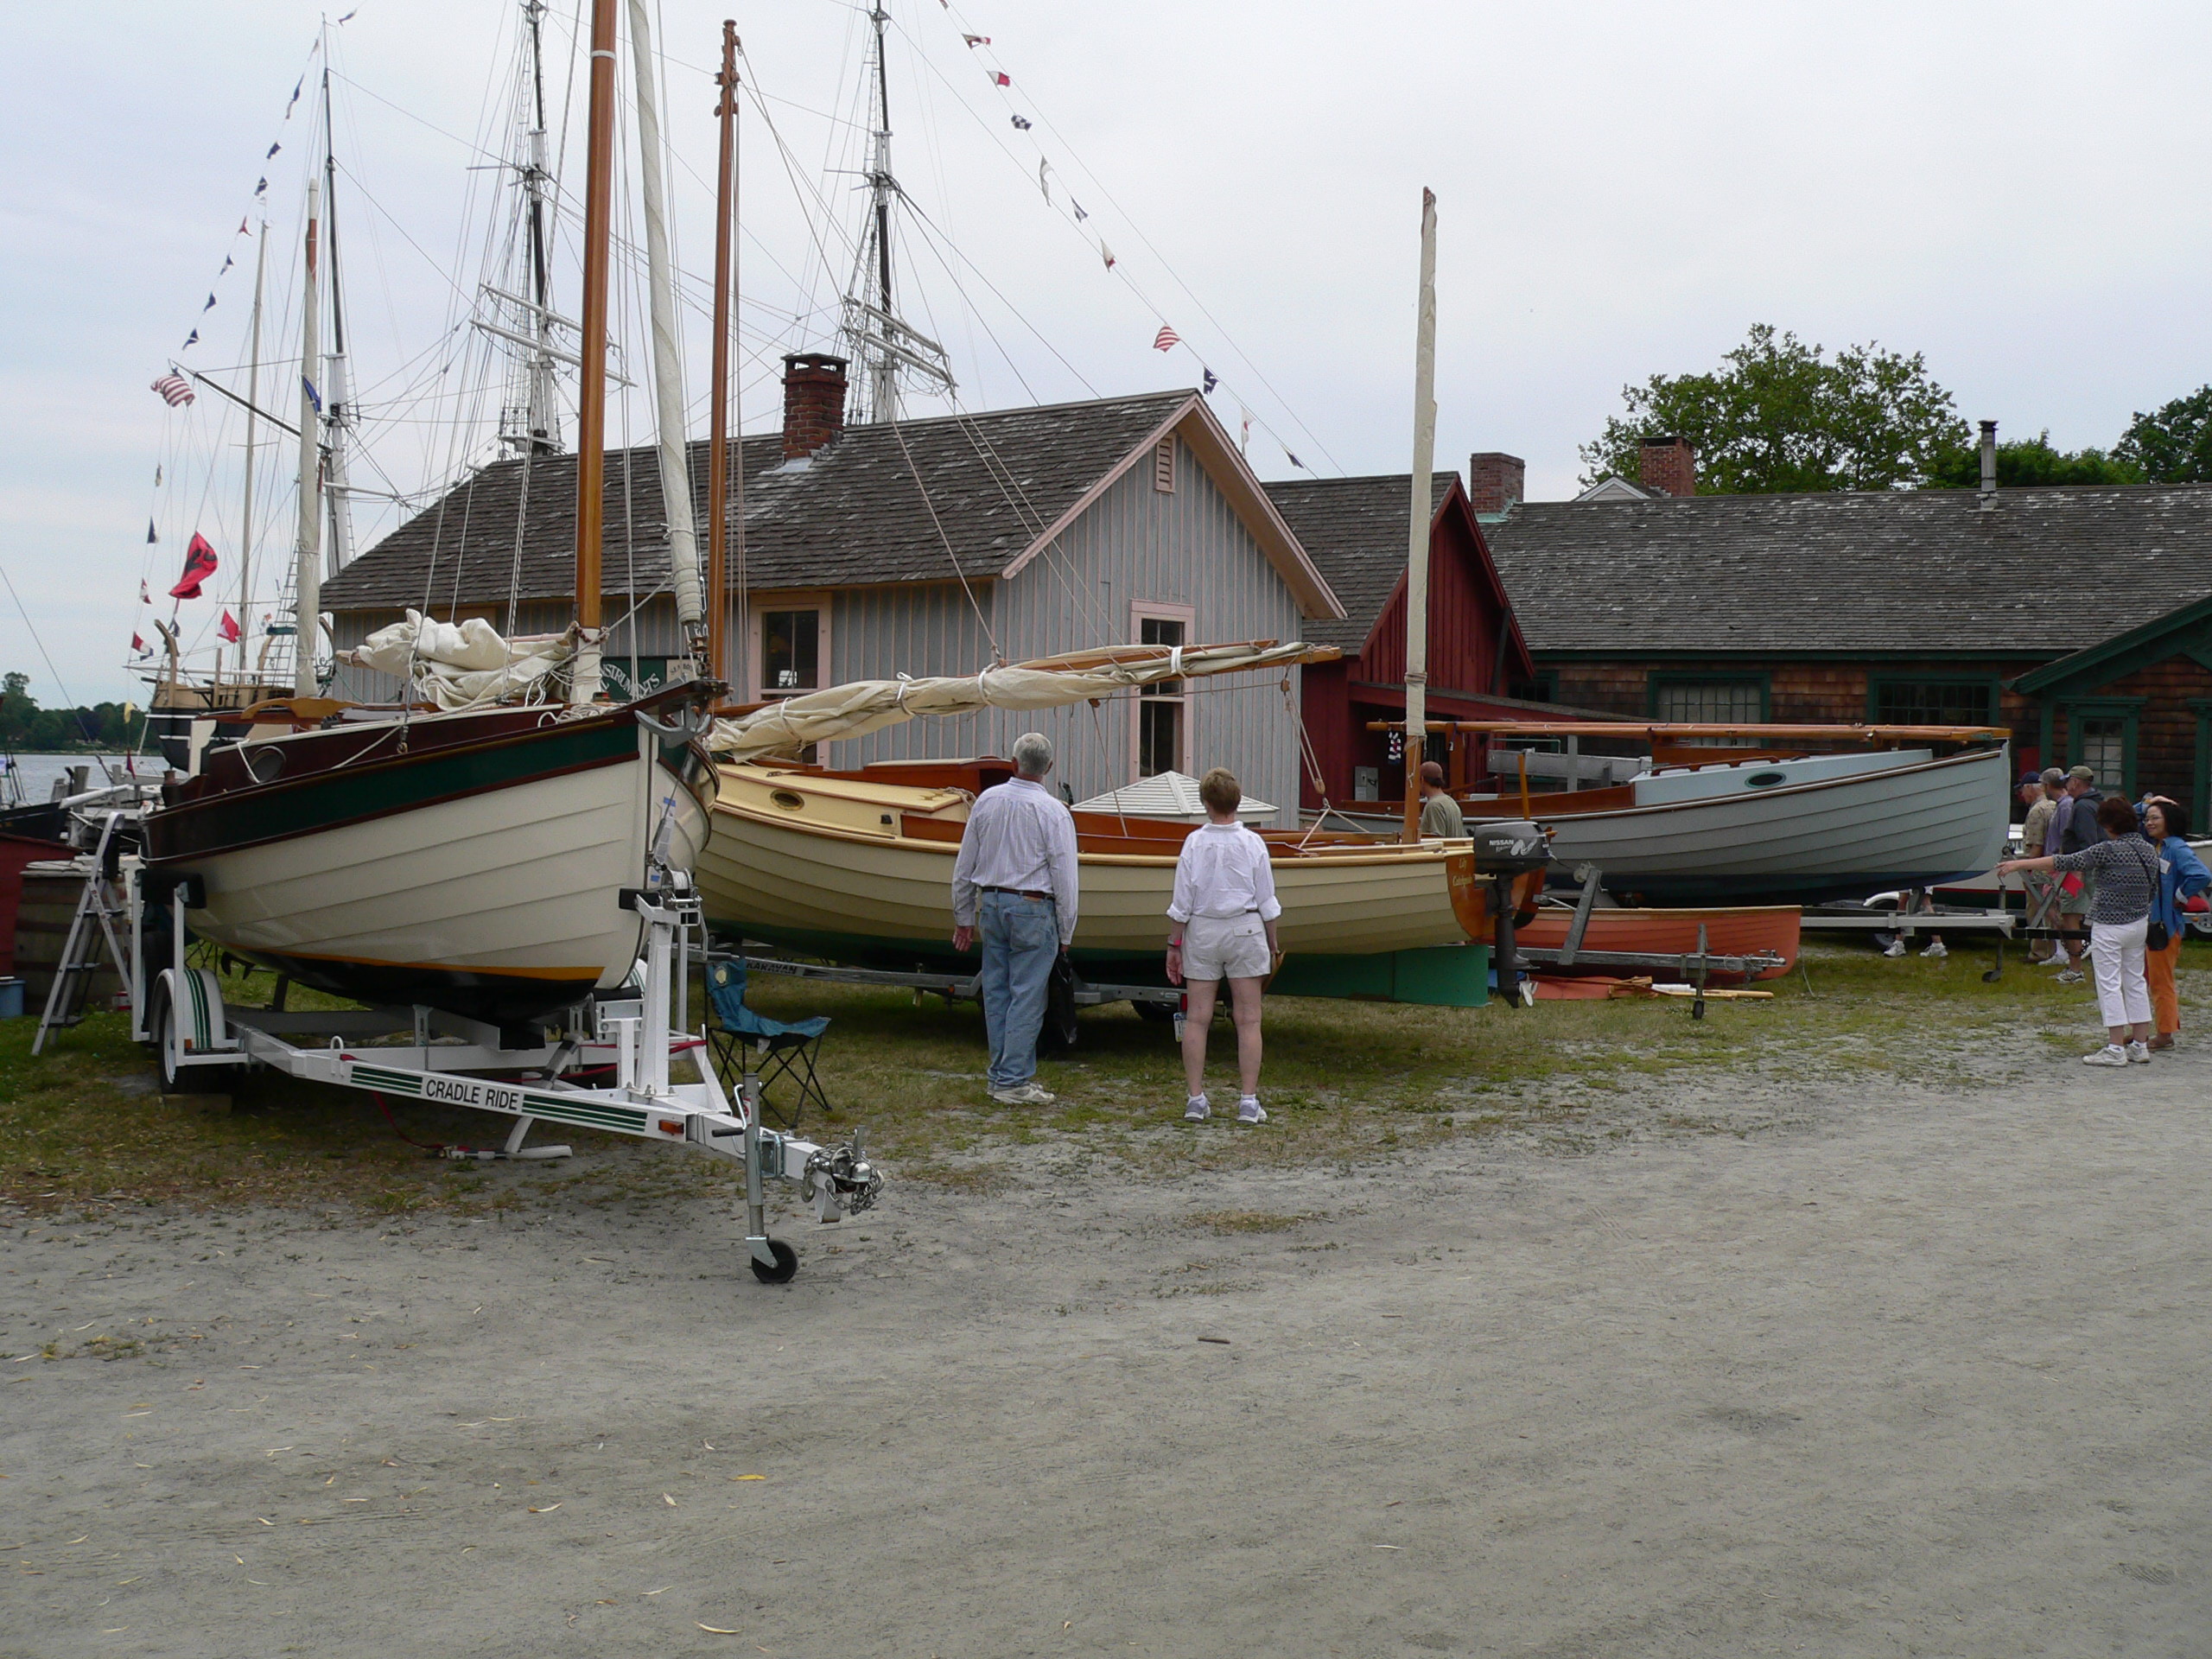
Two weeks after launch, I took the boat to the boat to the WoodenBoat show at Mystic, CT, as part of the Phil Bolger tribute. Chebaccos were well represented,as you can see. From the left, Ben Ho’s raised deck version, with a lot of useable space in an enlarged cabin, and a self-draining cockpit, “Lily Catchpole”, and David? Robichaux’s “Grey Cat”.

P1000422
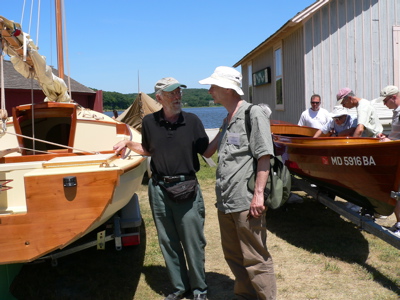
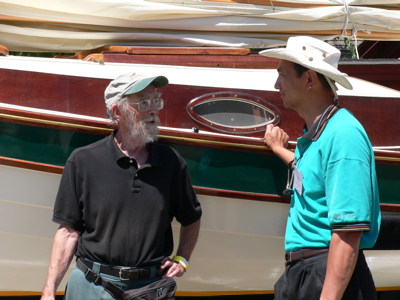
We got to meet PB himself – Ben Ho with PB:

P1000424
Here he is asking me to conduct experiments to see what effect raising the centerboard has on weather helm:

P1000778

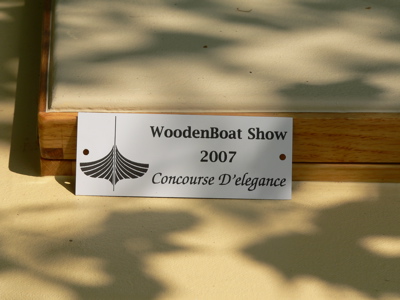
And on Saturday “Lily C.” and I were delighted with an honorable mention in the Concourse D’elegance owner-built category:

I’ve sailed bigger yawls in the past, but the Chebacco has reminded me just how useful the mizzen can be for a single-handed sailor. Even under motor, the sail can be used to reliably steer the boat for minutes on end, while I go about clearing things up for docking, navigating, or preparing for night. “Lily Catchpole” will easily sail at 5kts, and with 15kts of wind has reached 6.5kts under one reef – pretty good for a boat of this size. We’re planning a circumnavigation of Manhattan, and hope to bring you a report.

Howard.

***

That Trip – Nick Hughes

greenwichdelivery 002 greenwichdelivery 021 greenwichdelivery 028 greenwichdelivery 033

Dear Richard here is an account of our first journey in Sylvester the Chebacco we bought from Richard Elkan in London in May. My girl friend Sally and I left Greenwich , London at 5:10 a lovely calm morn with the promise of force 5/6 gusting 7 later in the day.

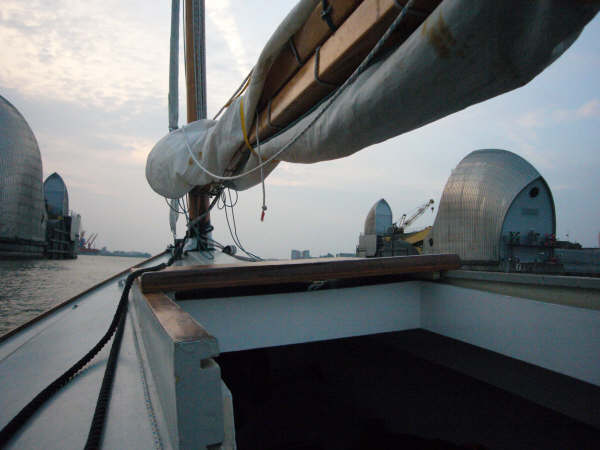
We decided to motor with our trusty lil’ Honda BF5 as we wanted to complete the trip of about 25 miles in one day as quick as possible. We passed quickly through the Thames Barrier, the old Docks , and wharfs and kept a weather eye open. We had decided that if the weather had taken a turn for the worse by the time we reached Gravesend we would overnight there but as it happened there was a N.Easterly blowing making for a nasty chop but nothing terrible, so we decided to press on.

However once we were in the mouth of the Thames Estuary the awful combination of a N.easterly now picking up in strength on an ebb tide made for a rough passage. The area is notorious for being rough in a North Easterly but we reckoned we had just enough of a window to get through. We then followed the Isle of Grain coastline at a very healthy distance as it dries out for about a mile and we watched as surf formed on the far shore. and so we headed for to the River Medway Estuary about 4 miles away.

And so it went… the wind now reaching the promised 5/6 and gusting more at times, not the most pleasant of journeys. the next two hours were bloody rough, the waves up to 7- 8 feet high. Sylvester’s bow rose up and up then we slide down or rather pounded down before the next one rose before us. After an hour we had not come to any grief and were impressed by Sylvester’s strength and ability in such a sea and motored on. We took on only little water as we were head on to the wind .. again most impressive.

Keeping well clear of the dreaded lee shore on the Grain shallows we literally ploughed on!! then as we approached the mouth of the River Medway we saw a small yacht run aground on the Grain shore, surf was breaking over her and it was frightening to watch. No one could get near because of the lack of water/ surf etc and she sent out a Mayday. Soon enough the police rib came out followed by the Sheerness lifeboat. In the meantime she had somehow found enough water to get free… a lucky man!

We then had the pleasure of entering the Medway with the N.E wind building up huge waves astern which were actually breaking .It was hard work to keep from broaching … surf down the waves …. yaw.. get ready and off we went again!! … even some big modern motor cruisers were struggling as they ran for shelter. Finally after about half an hour we were in more sheltered waters and could relax for the next two hours until we reached home.

We finally got back to our barge at 13.30, cold wet but very very confident in Sylvester’s abilities. We live on a 1926 Dutch barge and spent 26 hours bringing her back from North Holland to England but that was nothing compared to our first journey in Sylvester.. Thanks Phil Bolger to designing such a stunning little boat and credit to Bill Sampson who built her..Hopefully we shall be able to go for a sail soon.. but thats another story yet untold.
regards Nick & Sally

***

Inspector Clouseau a cold moulded Chebacco – John TumaRichard,

I am sending along some pictures of my modified Chebacco, “Inspector Clouseau.” Two weeks before the launch date, I discovered the boat was covered with pink overspray. It’s a mystery where it came from, hence the reference to the Pink Panther.

My boat is a combination of cedar strip and cold molded construction to the lines of the lap-plank Chebacco 20. However, I adapted the full keel from the glass house Chebacco for this boat. By eliminating the centerboard trunk, I was able to open up both the cockpit and the cabin. The boat carries 200 pounds of scrap steel and concrete ballast.

Inspector Clouseau sails to weather remarkably well, though how is a bit of a mystery, but off the wind this boat really shines.

The pictures show me out sailing in the Oakland-Alameda Estuary, and also out on San Francisco Bay.

If anyone is interested in knowing more, they can reach me at j_tuma (at sign) comcast (period) net.

John Tuma


PS: Thanks for putting the Chebacco News together. I really enjoy

seeing what other Chebacco enthusiasts are up to.


DSCF5631 100_0772s 100_0773s

Chebacco News 51

News, questions, and boats for sale.

News:

Lots of good contributions this issue. Been awhile since the last one, been busy, very busy. Franticaly putting in a shop and making room in house for what a friend of mine calls my re-wife.

No burning questions pending, and no boats for sale that I know of.

Enjoy the issue, and happy holidays

Chebacco Richard

Questions:

Chebacco’s for sale:

***

Some Pictures – David Nedder

image002 image004

I have plenty of coaches.

image006

Due to our drought conditions, the lake level is about 12″ below normal. The anchor holder looks a bit off, but when I let go of the anchor rode,down it goes down immediately. The anchor can remain installed while trailering.

image008

Normally the boat floats off of the trailer at this launch site.

image010

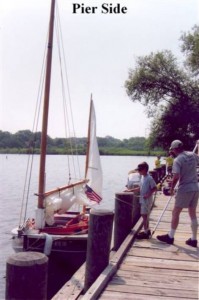
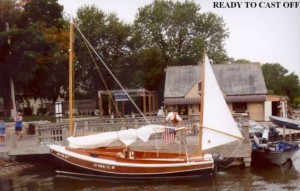
Now ready to swing around to the pier.

image012

Pier Side.jpg

image014

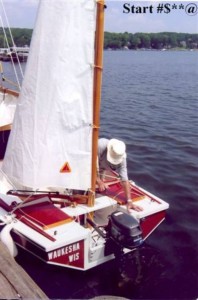
My iron wind is somewhat recalcitrant.

image016

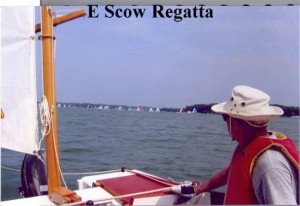
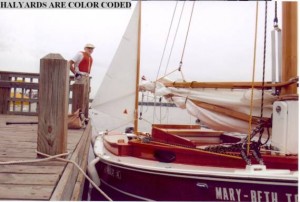
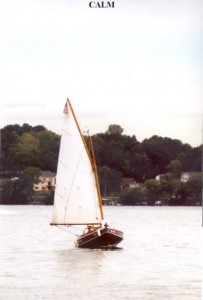
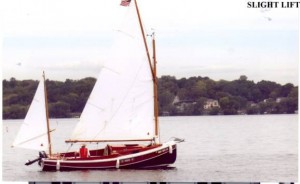
The Pewaukee Lack Yacht was holding a regatta that day. Mid August my brother and I took our families out to Pewaukee Lake for a cruise. The winds were moderate 5-10 MPH with an occasional gust to 12. Since my wife is not an enthusiastic sailor, I keep the pucker factor as low as possible. In moderate wind I can seat my guests so that the only ballast I shift is myself. This makes for an enjoyable cruise.

Pewaukee lake is about 5-6 miles long and about 1.5 miles at its widest. It has small islands and the winds tend to swirl and take a somewhat circular path. I can set the main and mizzen for neutral helm and “Mary-Beth, too” will sail in a large arc for about 30-40 minutes before changing tack.

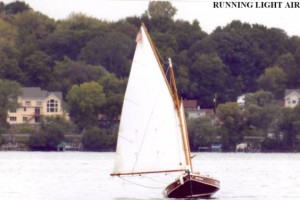
Attached are some pictures taken of the “Mary Beth too” sailing.

<palign=”left”>It was light air on Pewaukee Lake at the end of August. The photographer is Lloyd Schultz of Madison, WI. He can take beautiful pictures on an overcast day.

Happy New Year.

Regards

D.J.Neder.

image018 image020 image026 image024 image028 image022

***

Photos – Bill Jones

Hello Richard,

Here are a few photos for the next edition of the Chebacco News. The Carol Leigh was started in September 2003 and launched June 2005. I have not had her out much due to weather and schedule conflicts, but the little time on the water we have had has been quite enjoyable. Some quick GPS readings indicated a maximum speed of 7 knots once the wind kicked up a little.

There are lots of construction photos and notes at www.people.vcu.edu/~wmjones

image002

Construction is of ½ inch marine fir ply and mainly douglas fir dimensional lumber. The hatch covers and CB trunk brightwork is white oak.

image004

Preparing to pull out of the fine facilities at the Grey’s Point Campground in Topping, Va.

image006

Here we are approaching the mouth of the Rappahannock River as it enters the Chesapeake Bay. We chose this point for the naming ceremony as it was too busy at the dock. Visible in the foreground is one of the wooden blocks I made for the Carol Leigh.

image008

A nice shot of the fleet admiral relaxing on her namesake flagship.

***

Lapstrake Raised Deck Build update – Ben Ho

Hello Richard,

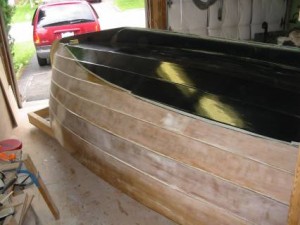
Almost 18 months after I ordered the Chebacco plan from PCB, and one year after I cut the first piece of marine plywood, my lapstrake hull is finally finished and turned over. The hull was completed in June, and then sanding, fairing, epoxying, painting…took the whole summer. The unusual tropical heat we had this summer in Ontario didn’t help. Here are some pictures.

image002

Hull is done, waterline struck with a laser pointer, working on the bottom finish with epoxy mixed with graphite and green pigment. As it turned out, the black from the graphite pretty well overrides the green, so the resulting color is very-dark green. It took a few tries before I got the hang of rolling on epoxy with a smooth finish.

image004

Here’s what the hull looks like after 5 coats of epoxy, 2 coats of primer, and 2 coats of Interlux paint. I use System Three for epoxy and primer. The primer is wonderful stuff – it hides small imperfection well and sands easily. The sheer strake is left unpainted.

image006

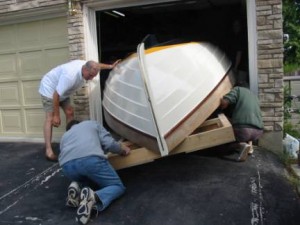
The big moment! The turn-over crew is preparing to get the hull out from the garage. The widest part is about 1” wider than the garage, so the whole setup needs to be tilted first.

image008

The hull is built on a strong-back with casters, so it rolls around easily.

image010

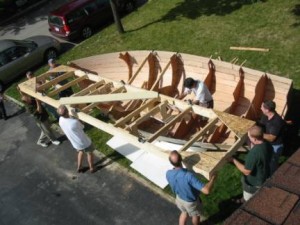
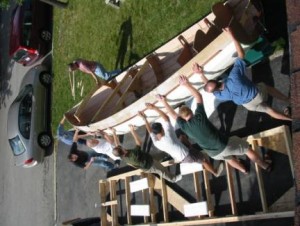
With six guys it was surprisingly easy to lift it up by 90 degrees. The safety rope prevents it from accidentally rolled all the way. The frame and temporary molds are still solidly attached to the hull to provide rigidity.

image012

Roll-over complete, the hull is sitting on nice soft grass. Now the frame is taken off….

image014

And the hull lifted up and put back on the frame, right side up!

image016

And pushed back into the garage.

image018

And ready for the interior work. Now the fun begins!!

***

Super Sail – Charles Gottfried

While there is no question that Bolger’s Chebaccos are among the finest sailing, most beautiful and most versatile boats in the (known) world, that’s not to say improvements can’t be made. I was recently persuaded to enter my boat in the Shipyard Raid, a staged race from Gabriola Island, BC, to Pt. Townsend, WA., and decided that I’d attempt to optimize a few things to squeeze that last bit of speed out of Full Gallop, my sheet ply chebacco. The first thing that came to mind was: More Sail!

image001

Figure 1 – Full Gallop at Sucia Island

An optional jib is shown on the plans, approximately 25 square feet in area, and recommended to be set flying from the stemhead. Since I had a perfectly lovely 2’ bowsprit fitted, primarily to carry an anchor, I decided that the standard jib would probably not set right, being carried too far forward. Additionally, others have reported that their jibs didn’t seem to enhance performance very much, if at all, and were a pain to set up. Some head scratching followed…

I didn’t have precise angles or sizes figured, but I did have the dimensions of the standard jib. Through calculations of center of resistance, center of effort, prismatic coefficient, and righting moment, along with making magic signs and uttering the sacred incantations, I expertly re-sized the stock jib sailplan.

Actually, I guessed.

I kept the leech and luff the same length, and increased the foot dimension, from 4’ to 8’. This increased the size of the sail to about 50 square feet, and helped move the center of effort (CE) for the sail back, to counter the effect of the bowsprit moving it forward. My intent was to keep the CE about the same, and since the sprit moved the CE forward 2’, the increase in the foot, to 8’ should move it back to about the same place, more or less. I hoped.

I spoke with the good folks at Sailrite, the sail kit manufacturers, with whom I have done business before. They’re experts on sails, kits, materials, and making things work well. Jeff Grant advised me that the standard jib arrangement on the standard boat probably didn’t work well because the ‘slot’ between the sail luff and the mast was so small that it probably channeled little wind to the mainsail, and may have even hindered the effectiveness. He further pointed out that, flown from the bowsprit, that problem would lessen, at least somewhat. The further forward from the mast the jib would set, the better for efficiency. It made sense.

Chebaccos’ front deck is tiny, especially if its pitching and rolling in a seaway. Since I didn’t want to have to try to stretch out to the end of the bowsprit to attach the sail to a forestay, I decided to set the sail ‘flying’. This involves incorporating the wire stay into the sail luff, instead of fastening it between the masthead and bowsprit. This wire-reinforced sail is then attached to halyards that hoist not only the top of the sail, but can pull in the tack as well, from a block on the end of the bowsprit. This let me lead halyards back to the cockpit, attach the sail tack and head, and haul it out to set on the sprit. Both top and bottom halyards can be tightened, and the sail is drawn as tight as possible. The sheets are rigged in the conventional manner, thru blocks lashed to eyes on the coachroof, and then to cleats. Now, with a little practice, I can set and strike the sail while standing in the opened hatchway, safe from spray and a potential swim from the foredeck.

Performance

I initially set the sail on a June afternoon with 8 mph sustained winds, with some gusts. It set perfectly the first time, and after messing about with temporary blocks to carry the sheets, I headed across the lake. It had been a while since my last sail, but I immediately felt the improvement in speed. Shortly, I was joined by a lazer sailor, who admired the boat, and, sailing next to me, coached me in fine-tuning the sail. The tweaks made some improvements, and were easily accommodated with the moveable blocks I’d put together (they were on loops of line that could be attached to coachroof or beam-mounted cleats). Eventually, I found that I could outsail the lazer on some points of sail, which surprised both of us “Hey, I’ve raced at the Lazer Nationals, and this is a fast boat. And you’re pulling away!”.

In hindsight, the sail could be made even larger, by as much as an additional 12”-16” on both the leech and luff. The 8’ foot seems about right, tho. I’m not certain how wise that much additional sail would be, except in very light winds. In the end, I’m pleased with the sail as it is, and even without the extra area, the improvements are noticeable. I can’t speak highly enough about the Sailrite folks – the kit was great, done quickly, and at just over $200, the price was right. Now, I’m just waiting to hear how good it looks from behind, as told to me by the other Shipyard raiders.

***

Sucia 2005, and a cruise through the San Juan Islands – Jamie Orr

It was a dark and stormy night….

And noon the day after wasn’t looking too hot either, as Dad and I stowed our gear in Wayward Lass, our faithful Chebacco, and backed her down into the waters of Sidney Channel. It was Friday, July 8th, and we were off to the 2005 Small Boat Rendezvous in the San Juan Islands. The weather forecast said we might get winds up to 25 knots, so we put in one reef just for luck.

But when we left the wind was still about 15 knots and was perfect for a beam reach to the northern tip of Sidney Spit, three miles away. We used this relatively sheltered stretch to get organized, and get into our foul weather suits as we expected some spray while crossing Haro Strait, between Sidney Island and the San Juans.

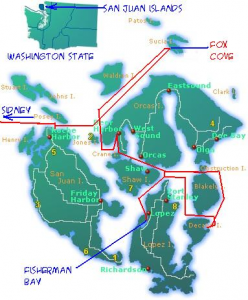
Sure enough, once we rounded the end of the spit, we started to feel the effect of the wind blowing unchecked up the Strait, and before long we had the second reef tied in. It was slow going for a while, sailing to windward over a bumpy sea. However, it didn’t last and by 1:45 we shook out both reefs and started to make better time. The log shows that our top speed was over 6 knots, but by the time we reached the entrance to Roche Harbor the wind was gone and we had to motor in to the customs dock, then out again for the second leg of our trip. (It’s about 10 miles from Sidney to Roche, and another 15 to Sucia. There is a rough map of the islands at the very end of this tale.)

The wind came back then, although not as strongly, and the tide was under us, so it didn’t take long to sail down Spieden Channel to President Channel, running northeast between Waldron and Orcas islands with Sucia visible right ahead. We still had the tide, as well as a southerly wind that was just right for the whole (unreefed) sail. The clouds rolled away and I crawled out of my damp foulies, but I had jumped the gun, and was putting them back on half an hour later. Still, it was nice to have a chance to air out, even briefly.

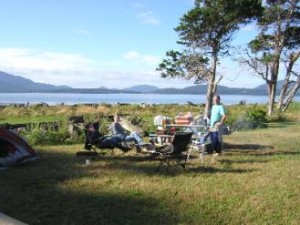
The rain came and went, but the wind stayed fairly steady, and we arrived at Sucia in the early evening. This year we were rendezvous-ing (is that a word?) in Fox Cove, but as we came through the entrance we saw only one boat on the beach, Jim Ballou’s Mill Creek kayak, with Jim standing on the grass above it, waving vigorously. He’d crossed from Orcas the morning before, and it had been so rough since then that he was wondering if anyone else was going to show up!

image002

Jim Ballou’s Mill Creek kayak

We didn’t realize it then, but others had already shown up. There were two or three keelboats moored in the bay that were part of our group, but as I recall, we didn’t meet their crews until the following day. These were, I think: Doug and Will from Olympia in their Ranger 23; Thea and Mike Schifsky in their “overgrown H-28”, Raven. And I believe Ryan Shellborn, with his children Thompson and Emily, was already there too, in his 37 foot steel ketch Makoolis.

And there were more coming – before nightfall, Greg and Shelley Stoll arrived in their MacGregor 21, Windisfree, accompanied by Andrew Linn in his Newport 16, Aurors. The final arrivals for the day were Jay Kammerzell and his son in their homebuilt Bolger Micro.

image004

A view to the west, showing Greg and Shelley relaxing in their campsite, with Andrew Linn standing.

My memory is hazy about who arrived when, but I think everyone else arrived on Saturday afternoon. In no particular order, they were:

Chuck Gottfried and Dean Bishop in Chuck’s Chebacco Full Gallop;

John Kohnen in his Footloose skiff, Pickle;

Frank Mabrey in his MFG runabout;

Randy Wheating in his Chebacco Bluster, with his wife Lisa and sons Jacob and Samuel;

Peter Binley and family in their newly-acquired San Juan 23, Java;

Ron Mueller in his 20 foot Jarcat; and

Bill and Sandy Childs in their 19 foot Bartender.

(I wasn’t thinking ahead, so I don’t have pictures of all of the15 boats in attendance. I’ve posted some at the end, just before the map – my thanks to John Kohnen for letting me use so many of his photos.)

image006

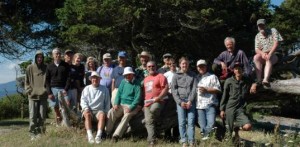
And here we all are – isn’t that a happy looking bunch? (John Kohnen photo)

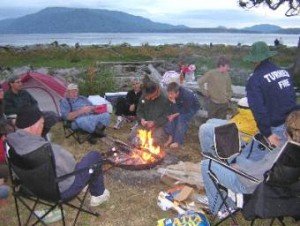
Before everyone else arrived, some of us went out for a sail. Jim came along with Dad and I on Wayward Lass, and Windisfree and Aurors were also out. We patrolled between Sucia and Orcas, hoping to meet some of the Saturday arrivals, but were too early and were back in the cove for lunch before they came. The trip over was enough time on the water for most folks, and the rest of the afternoon and evening were spent socializing and admiring each others’ boats. The weather co-operated and we all had a fine time. Greg and Shelley Stoll’s campfire was a gathering point in the evening – I think about half the crews were camped ashore.

Here’s some of the crowd sitting around the campfire as the day ends.

image008

Sunday dawned clear, with nearly everyone looking forward to a lazy day. However, Andrew had to leave that morning, to be back at work on Monday. Things were looking good as he left but a powerful headwind came up shortly after, causing him to have a very long day. His description of it is posted on the Western Oregon Messabout list, the URL appears at the end of this account. Meanwhile, the three Chebaccos, Bluster, Wayward Lass and Full Gallop, plus Jay in his Micro were out sailing together, a real Bolger crowd. We didn’t do any racing, though, we settled for just messing about.

image010

image012

Here’s Randy and family in Bluster, and Jay and his son in their Micro.

The wind, while we were outside the cove, was from the north. This, combined with a strong current running southeast kept us from sailing north around the island. It also discouraged us from going very far to the south as we would have had a tough time getting back the cove again, so there was no expedition to another island this year. No one seemed to miss it, though, perhaps because the trip over had been more demanding.

Monday morning, it was time for everyone to leave. One by one they said their goodbyes, pulled up their anchors or pushed off the beach and headed out of the cove. Jim Ballou was the first, we watched him as he paddled the two and a half miles to Orcas Island. Conditions were good for the crossing, but that Mill Creek looked awfully small out there! Most boats were headed southeast to the Lummi ramp or Bellingham, but Wayward Lass, Full Gallop and Makoolis were bound the other way, southwest down President Channel to start a few days cruise in the San Juans.

Pulling up our own anchor, we sailed out of the cove, then paused to watch the remainder of the group leaving. John Kohnen in Pickle, and Frank Mabrey in his MFG runabout, were the very last to go. They didn’t know it yet, but the same wind that made Andrew’s trip a tough slog was going to do the same for Monday’s sailors. See more URLs at the end for details.

With a final wave to John and Frank, our mini-fleet turned southwest and spread its wings. We had a moderate breeze from the south, but sailing close-hauled we were soon separated as each boat and helmsman followed their own path. Wayward Lass was to windward, while Full Gallop was slightly off the wind, presumably to keep her big jib drawing. Makoolis was in the rear – can’t remember why, but Ryan was more or less sailing single handed as his kids aren’t very big, and he had some big sails to handle.

I don’t know if you could call it a race between Wayward Lass and Full Gallop, but we were two similar boats going the same direction, so draw your own conclusions. I know that we in Wayward Lass were keeping a sharp eye on Full Gallop. Both Chebaccos were sailing well and as the wind strengthened, we started to wonder if we could take the time for a reef, or if it would put us irretrievably behind. Wayward Lass had a slight lead but as we drew closer to Waldron Island, it became apparent that the time for reefing was now, not later, so we pointed Wayward Lass into the wind to heave to and we reefed as quickly as we could.

With its cat-yawl rig, a Chebacco doesn’t heave to in the normal way. What I do, and I think most Chebacco sailors do, is point straight into the wind, and sheet the mizzen on the centreline, while letting the mainsheet run loose – it also helps to have the centreboard down. This will keep usually keep her pointing upwind, but allows her to sail backwards. I’ve clocked Wayward Lass at 3 knots, going dead astern, so it’s not a method you should use for riding out a storm. However, it’s more than adequate for reefing or for finding that hidden thermos for a hot drink. One other thing, the rudder should be centred as well, or the boat will veer off to one side or the other. I do this in Wayward Lass by dropping the tiller into a slot cut in the floor boards for the purpose.

Back to President Channel — Full Gallop had stopped to take in a reef too, so our relative positions were unchanged. Wayward Lass was now sailing more easily although there was still some spray flying at times. Looking back at Makoolis, we could see she had heaved to as well, presumably also to reef. Ryan confirmed this later, saying his crew preferred not to sail at too great an angle. Working on his own in that big ketch made reefing a longer job, so Makoolis fell behind before she started sailing again.

Meanwhile, we were now well into the channel between Waldron and Orcas, with Waldron Island to leeward. We could soon see that Wayward Lass was going to get through without tacking, but Full Gallop, being to leeward, had to tack out towards the centre of the channel, putting her well behind. (However, Full Gallop exacted a terrible revenge later in the summer, during the Shipyard Raid….)

From the eastern end of Waldron, we could see the passage between Jones and Orcas Islands directly south of us. We continued on to the southwest a little longer, until we thought we could point at the passage, then tacked. We found we hadn’t gone quite far enough, but the ebbing tide was pushing us still further southwest, so we hoped that would compensate for our early turn.

Makoolis had finished reefing some time before, and was now sailing down the channel towards us. I was amazed at how close to the wind she was sailing – I’d always understood that ketches were not close-winded at all. She was also making excellent speed through the water.

image014

Here’s Makoolis storming along, with Full Gallop hot on her tail.

As we approached the passage between Jones and Orcas (and yes, the tide had given us a nice boost to windward) and started tacking through it, Makoolis continued to gain at a great rate, tacking through unbelievably small angles. And I shouldn’t have believed it – Ryan had had the engine going ever since he stopped to reef. Just idling along, but it had let him sail much closer to the wind than he could have without it, and it boosted his speed as well. A great demonstration of effective motor-sailing, and he certainly had me fooled.

Passing Steep Point on Orcas, we came into sight of Deer Harbor and into more sheltered water. The wind dropped to about five knots, bringing an end to one of the truly great sails, one of the best we’ve had in Wayward Lass.

I wanted to go right into the dock to refill the gas and water tanks. We hadn’t used the engine much, but I had given away a gallon of gas at Sucia, and had spilled almost as much in the transfer (a siphon hose would be a useful (and green) thing to carry in future). The landward side of the fuel dock looked empty, so we slipped past another wharf sticking out from the shore and prepared to make a wide turn and come alongside.

As we turned, though, we saw the reason for all the space — a line of “wet paint” signs stood along the dock, so we aborted and headed back outside.

However, all was not lost. I’d seen a Chebacco-sized space at the very far end of the dock, the windward end. This would be a little harder to get into since the land not only turned the wind, but blocked most of it, leaving us only a light air from the north, dead on Wayward Lass’ nose as she edged in again. This meant we had to tack several times in the narrow space between the dock and the shore. As we got nearer our goal, we gained less and less on each tack, until we didn’t seem to make any progress. I think there must also have been a very slight current coming from further up the harbour that confounded our efforts.

In frustration, on the next tack towards the dock I let out several feet of mainsheet. Perhaps we had a gust of wind at the same time, I don’t know, but Wayward Lass surged forward towards the line of parked boats. I could feel weather helm and didn’t think we could turn downwind in time to clear the boats, so I went with the flow and put the helm down. Wayward Lass turned neatly into the wind and although the sails lost their drive, the speed we’d picked up carried us nicely up towards our berth. The burst of speed had also caught the eye of one of the dock attendants, who came a-running to stop us T-boning someone’s runabout, but no fending off was necessary and he only took our line as we squeezed past the last boat and up to the dock.

It’s all in the attitude – I just behaved as if I’d meant to do that. We even got a couple of compliments on our boat-handling. (Har!)

Once we were fueled and watered, we cast off again, still under sail (well, we had to keep up appearances, didn’t we?). Makoolis had anchored by then, just south of the marina, and Full Gallop was rafted alongside. We did the same on the other side.

Like a Mama Duck and a pair of fat ducklings.

On the green Chebacco, Jamie Orr standing, Les Orr sitting; in the middle, Thompson, Emily and Ryan Shellborn; and Chuck Gottfried on the right. Dean Bishop is behind the camera.

Fine job there, Dean!

image016

The next day was calm, so we motored south and east from Deer Harbour. Shortly after we passed the village of Orcas, a gentle breeze came up, lasting long enough to carry us north around Shaw Island and down between Canoe Island and Flat Point on Lopez. The wind died away then, and since the tide was turning against us, we started engines again and motored the last mile or two into Fisherman Bay

image018

Here’s a shot of Full Gallop with her new jib. It didn’t seem to make a huge difference on this trip, but was very effective later in the Shipyard Raid – I guess Chuck got her all figured out in the interim!

It’s “set flying”, instead of being hanked to a headstay, so it’s harder to get a tight luff, necessary for effective windward work.

Here I suffered a major disappointment. I’d heard great things about Holly B’s Bakery, and her cinnamon buns – imagine my shock when we learned that the bakery was closed on Tuesdays! We consoled ourselves with cinnamon treats at a restaurant instead, but it wasn’t the same. There’s definitely another trip to Fisherman Bay in my future!

On Wednesday morning, Ryan and his young crew turned Makoolis south towards Cattle Point, at the bottom of San Juan Island, to sail up the west shore looking for Orcas (the killer whales, not the village or the island.) Full Gallop and Wayward Lass went north instead, around the top of Lopez, then out into Rosario Strait to James Island. Both Chuck and I wanted to see James as it was one of the scheduled stops for the Shipyard Raid in September, and both Chebaccos were signed up. We anchored for a short time there, but it’s a poor anchorage, so we motored into the nearby sandy bay on Decatur Island. There we celebrated the sunset with margaritas and other tequila-based rituals. (The Raid didn’t use James either, in the end, but went south to Watmough Bight, a much better anchorage and a jumping off spot for the crossing to Port Townsend.)

image020

Margaritaland!! aka Full Gallop with your hosts, Chuck and Dean

We were nearing the end of our time. In the morning, we said goodbye to Full Gallop’s crew who were bound north and east to Bellingham Channel. It being calm, Wayward Lass motored north up the west side of Rosario Strait to Obstruction Pass then west through the islands again. As we neared the passage between Shaw and Orcas once more, a northerly wind came up and we finished the day with a good sail back to Deer Harbor.

The next morning, our last, was also calm and we started off under power again. We had a look in at Jones Island, another planned Raid stop and an attractive anchorage. A light wind came up from behind (the east) and we sailed slowly along the south side of Spieden Channel. Halfway through the channel, the wind grew confused, but eventually settled in the northwest and we were able to clear the channel before the tide turned. Then we had another slow sail across Haro Strait to just south of Forrest Island, near Sidney Island, where the wind finally left us and we started the motor again. A short time later we were officially back in Canada, ready to go home.

There was one small hiccup that I mention as a warning to others. I must have backed in too far when we launched the week before, and the salt water caused enough corrosion in that short time that the left rear wheel on my van wouldn’t turn.. I tried driving to force it loose, but it just scraped along so I called a tow truck to haul the van to Sidney Tire. The guys there took the wheel off, then whaled away on the brake drum (?) with a big mallet. My kind of mechanics! This freed things up in no time, and there was no damage to be found. They said it wasn’t worth charging for, so three cheers for Sidney Tire! We soon had Wayward Lass on the trailer, and that was the end of our San Juan adventure.

As it was last year, the Small Boat Rendezvous is well documented:

· Andrew Linn’s journey home is at http://groups.yahoo.com/group/MessaboutW/message/8482

· John Kohnen also described his trip http://groups.yahoo.com/group/MessaboutW/message/8475

· Randy Wheating’s account is in the July 16 Chebacco page (www.chebacco.com if you’re not reading this on the Chebacco page)

· Greg Stoll is publishing his story in Duckworks, the URL for the third part is http://www.duckworksmagazine.com/06/gatherings/sucia3/index.htm and this has links to the first two parts.

· While it’s not part of this story, I’ve mentioned the Shipyard Raid. You can read about it, and what is planned for 2006, at www.shipyardraid.ca/, which has links to published articles about it.

And here’s a few more photographs of some of the rendezvous boats:

image022 image024 image026

Bill’s Bartender (John Kohnen photo)

Bluster and Fib (John Kohnen photo)

Frank’s MGF Runabout (John Kohnen photo)

image028 image030 image032

Mike and Thea’s Raven (John Kohnen photo)

Jay’s Micro (John Kohnen photo)

Ryan’s Makoolis (John Kohnen photo)

image033

This is a map of the San Juan Islands I stole from www.gonorthwest.com, so go visit their site sometime. It shows the islands very nicely – Sidney, on Vancouver Island, is off to the west as shown. Lummi Island and Bellingham are southwest of Sucia. The red lines show Wayward Lass’ track, you’ll have to read the text to tell which way we’re going, and when, since we doubled back now and then.

***

Messabouts, Buildings, and Boat storage – Richard Spelling

Here are some pictures from the Arkansas messabout this summer, and a few others. It went over much better than my attempts to have Oklahoma Messabouts. Probably because, on the face of it, I’m not a very sociable person. I like specific people just fine, but not strangers, and certainly not crowds of them. When I go to messabouts I have to force myself to talk to other boat builders, which is the whole reason for going to messabouts! Not a great formula for an event host. Phil Lea doesn’t have this problem. He even married a politician, or a “political advisor”. But then again, I married a preacher, so that probably doesn’t say a whole lot. There were more boats here than I have pictures of, and I only remember a few names. (I am absolutely HORRIBLE with names). So I apologize if I don’t name your boat in the picture. Feel free to send me an email and I will identify you and your boat. Anyway, to pictures.

image002 image004 image006 image008 image010 image012 image014 image016 image018 image020 image022 image024

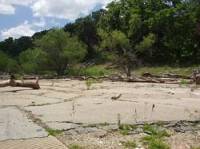
Some pictures of the local abandoned park. You can sort of get to it by road, but the road leading down to the park has been closed off, so you can only get to within a mile or so of it. The best way is to go by water. It used to be tradition in our family to take the boat here on the 4th of July and watch the fireworks on the lake.

image026 image028

Phil Lea in his Junebug, in the hot dead calm on lake Dardanelle.

image030

JM in his traditional double paddle boat pose

image032

I was convinced this was a production boat. It’s not, it’s a homebuilt, custom, fiberglass job. Neat

image034

cooling tower. LEXX in the for-ground

image036

Max’s AF4. Took it for a spin, nice boat. Totally different than a sailboat. You can actually go places.

image038 image040 image042

extreme carbon fiber double paddle canoe. Phil about to try it.

image044 image046 image048

Phil tries it.

What does it say about the modern world when the most successful advertising for something on ebay is “not the cheap stuff you get at Wal-Mart”? My gray plastic “super tarp” bought on ebay, specifically “not cheap Wal-Mart tarp”, is actually holding up nicely. Better than the expensive nylon/Cordova one, even. Should get another year or two out of it.

By then I will have the overhang on the side of the shop built for the boat. Yes. I spent the last few months in a frantic effort (needed to get the machine shop out of the spare bedroom) to build a shop, something I’ve been planning for years. Collecting parts for, drawing layouts of, etc. It’s 18ft x 35ft with 10ft tall walls. Even put in insulation (which, oddly enough, you put on BEFORE you put the sheet metal on). It could have been bigger, but it’s “cozy”, and easy to heat and cool. The upside is that I now have a 10 foot tall wall that’s 35 feet long to build a shed roof onto, and enclose a nice spot to park the boat. I even have plans for the building’s first paint job, it’s going to get a camo finish, to match the winter woods. In the summer you can’t see the building from the road because of the leaves on the trees, but in the winter you can, sort of. Hence the paint job. Even have a camo key for the building!

And I’m stretching my metal storage shed out as well.

Why the need for all the additional space? Well, the wife is taking a sabbatical from the preaching business, and moving in with me. So we will then only have two homes to maintain! Then she is going to start looking for a position elsewhere. She calls is “sending her papers worldwide”.

My job is going fine, even if it’s 100 miles from my house. (and new shop!) I sometimes get frustrated with the red tape from working for Uncle, but other than that it’s going ok. (we have a saying at work. “They give you a spoon, and tell you to build a castle. Then they hide the spoon). I’m getting pretty disgusted with the prospects for a job in Tulsa, so if the wife finds something “worldwide”, I would be open to relocating.

As I told her when I re-married her, my only requirements are a place to park the boat, and a shop. A man must have priorities, after all!

Chebacco News 49

News, questions, and boats for sale.

News:

Well, the long anticipated calendar is a bust. My preferred publisher was having health and technology issues. I may still do one using cafe press, but since I only received one order for the one that didn’t work, a calendar really isn’t hight on the priority list of things to do. Been kind of quite, only took the boat out once since the last issue. You would think that being unemployed would give me plenty of time to do that, but for some reason it didn’t work out that way. I plan on going to a couple of messabouts this summer, I’ll take pictures and write something up about them.

Let’s see, we had vandals posting all kinds of php based scripts in the registry, taking advantage of the facility that was there to allow you to post pictures. I’ve locked down the registry, so if you want to edit your entries, or add a new one, just send me an email with the relevant details. You can also send a picture, if you want, and I’ll include it.

Speaking of email, I was getting 300+ spams, and at least 20 trojans, a day, do I’m bouncing all email sent to my old email address. I posted the new email address on this site, but it wasn’t a couple of days before I started getting spam and worms again. I believe they scan the web and dig email addresses out of webpages. Working on that theory, I have implemented a script based form to send me email. Sorry for the inconvenience. If you are wanting to send in an article for publication, just send me an email with the form and I’ll tell you my direct email address.

We have ten articles this issue, if you include this news sheet. One if even a contribution about writing contribution, (a meta article, an article about articles! hehe), by Chuck Leinweber of Duckworks fame.

Thanks for all the contributions for this issue, and I hope you enjoy it.

Chebacco Richard

Questions:

Noted a mizzen comment by Donna D’Agostino and Vincenzo Ciminale in Italy.  Pass on to them the notation a windsurfing boom for their mizzen ashes snap on in a minute, can be extended to multiple lengths and can be hyper lengthened with 1″ thin wall aluminum tubing.  It would get them out of the business of “walking the boom” as they tack.
Dave Godsey

Chebacco’s for sale:

***

Free time and boat cruising – Richard Spelling

Well, my 9-month sojourn into the ranks of the unemployed is finally over.

I’m working night shift, on an Air Force base, 100 miles from the house, but it beats the alternative.

You know, I always thought that if I ever became unemployed, I’d just fall back on my non-IS skills, or take some low paying IS job. I found out the hard way that the companies with the lower paying IT jobs are all bargain shopping, and think you are over qualified if you have more than one certification. If the first thing they ask you when you send them your resume is “what are your salary requirements?”, this is a bad sign. Or they want you to have a BS in computer science, 10 years of experience, and then want to pay you $10 an hour…

As for working non-is type stuff, I tried that. Still have a going concern manufacturing variable output forge blowers and DC motor kits. Of all the things I tried in an attempt to rustle up money during my “vacation”, building those was the most enjoyable, and made a decent profit. And I tried a bunch of things, from mowing lawns, to doing handyman work, to doing computer consulting, to putting in concrete slabs. All doable, but not enjoyable, partly do to the physical labor involved, but also do to the fact that they involved starting over, and wasting all the time and money I’d spent getting my degree and certifications.

The kicker was calling the “work force investment” people for retraining, and being told I couldn’t go to any CDL or welding classes because I had a BS degree. (!)

Let’s see. Still don’t have a car/boat port to put the chebacco under,   I’m currently using a “super tarp” I picked up on ebay. Basically a gray tarp, but not the cheap crap you get at Wal-Mart. Speaking of Wal-Mart, anybody remember when shoes lasted more than a month before the sides came apart? Sandals lasted almost as long? Remember back in the day, before Sam died, when you could return stuff to Wal-Mart if it broke? Ah, those were the days.

Anyway. Invitation to my wedding: “Oh, by the way, I’m getting married. Jan 1st, 2005, First Christian Church, Pryor, Ok. I’m marrying the preacher. Elvis will be there. You are invited.”

Yes. I got married. Again. To my ex-wife. Hey, there are no rules; I can do what I want. Besides, you really don’t know how important things are to you till you almost loose them… which is another story. And yes, Elvis was there.

So, I’m living in OKC, and in Mannford, and in Pryor. I stay in my apartment in the city during the week (horror of horrors, I hate it), go to the cabin in the woods on the weekends to work on blowers and controllers, and go visit the wife and kids in Pryor once a week. Well, shit, life sure was less complicated when I was unemployed and single. As my wife/ex-wife/wife used to say: “This damned job sure interferes with my free time!”

Incidentally, one of the options I was considering, if I didn’t find a job, and the money ran completely out, etc, was to go sailing and just not come back. Extended cruise. Got bored at work last night and got to wondering how far I could have gotten in my 20ft semi-open boat. Some reading on ocean cruises leads me to think I need to stay away from open water… <nervous laugh>

Then I got to trying to figure out how big a boat I would need… I think I like the idea of sailing into the sunset much more then I like the reality of it. I’m definitely a fair weather sailor, any waves over a foot or two just slow the boat down and annoy me. And big movements of the boat are only fun on occasion.

Maybe I do have the perfect boat. Keep this job long enough to pay everything off, then maybe instead of sailing into the sunset, I should hook the Chebacco up to the back of a nice tow vehicle, and head off to non-open water! hehe Wonder how big the waves get on Baja?

Anyway. I’ll write a more boat-oriented article for the next issue. If you don’t think I should be writing non-chebacco related articles for this webzine, feel free to write the editor… 🙂

Or, even better, send in your own boat/chebacco related stories, and I’ll publish them instead of boring you with the editor’s life!

Laters, fair weather, and stay employed.

***

Bluster, San Juan Islands – Randy Wheating


Hi Richard

Thanks for all the work on the Chebacco News.

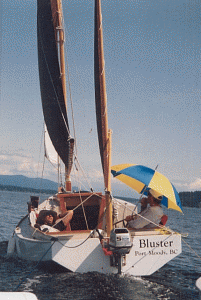
I have attached a photo of Bluster motor sailing into Hale Passage, San Juan Islands.

This was taken by Gary Powell while under tow.  Gary and his daughter Kate were sailing his engineless dory as we were all returning to launch ramp from our very enjoyable Small Boat Rendezvous on Sucia Island this past July.  The wind had died off so we just tossed them a line for the final leg.

Fair winds,

Randy Wheating

Port Moody, BC
Bluster_Hale_Passage

***

Chebacco Progress – Howard Sharp

Dear Richard,

Daytime temperatures of 10ºF, not friendly to epoxy work, have brought my building progress to a halt.  I’ve tried electric blankets, a small
electric heater under the boat running 24 hours a day, but it’s still below freezing in my uninsulated garage.

I started in April of 1993, as I see from the letter Phil Bolger sent with the plans. I decided on lapstrake construction, which I was already used to.   Building has been slow, as work and family obligations take precedent, but I am close to flipping the hull at last.

I lofted the boat full size, simultaneously working out the planking layout, using the method Iain Oughtred describes in his lapstrake building manual.  I was able to loft the permanent bulkheads with the plank lands, so I could build them into the boat.   I’m using meranti ply from Noah for all the lower strakes and the bulkheads – anything which may end up being submerged in water.  The rest will be occuome. The meranti is a little splintery, but I believe it has more natural rot resistance than occuome, and I’ve actually found fewer voids in the meranti than the occuome.

The stem and the transom are locust.  I happened to have some lying around, otherwise I wouldn’t recommend it – it’s very hard to work with, and of course very heavy.  However I’m  confident that the stem on this Chebacco will never rot and will demolish just about everything that it meets.    The transom runs straight across to include the motor mount, like Brad Storey’s boat.  I didn’t understand the implications of this until I found out that the 10º angle on the original design accommodates the default mount on most outboards!    For me that’s still not a dealbreaker, as it’ll be stronger, and I think it looks better.  The boat will have an 18″ bridge deck.    I’m toying with idea
of an electric propulsion system, and I’m still wondering whether or not to build a small bowsprit, partly for use with a jib, but mainly as
a cathead for carrying an anchor.

As soon as the weather warms up I’ll be putting dynel on the bottom and garboard, and I’ll paint the whole using Kirby’s enamel.

The name I’m not sure of yet.  Loosey Goosey springs to mind (along the lines of Itchy Scratchy).

Love the website.

All the best,

Howard Sharp.
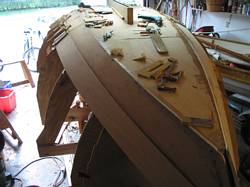
tn_IMG_0457 tn_IMG_0460 tn_IMG_0514 tn_IMG_0536 tn_IMG_0541


The last boat I built – 10 years ago!  It’s an Iain Oughtred design, Ptarmigan, 11′ OAL.  The Chebacco fits into the garage with 2″ to spare,  My dream has always been to build something bigger – say about 4 tons.  The sheer size of the Chebacco has been a lesson in what I can expect if I go ahead with something bigger.

***

A Blustery Weekend on the Sunshine Coast – Randy Wheating

Lisa, Jacob, Sam and I spent a windy and wet at times extended weekend, August 20-22, with our Chebacco Bluster on the Sunshine Coast of British Columbia, Canada. This well known boating area is northwest of Vancouver and for us involves a one hour drive on either side of the Howe sound ferry crossing.

A heavily loaded Bluster was launched at the Halfmoon Bay public ramp and we were under way by 12:30 Friday. We motored a northwest along the coast via Welcome Passage to Smuggler’s Cove Marine Park. With its narrow entrance and various rocky arms this park is described in our guide as resembling an alpine lake. The boys went for a swim while we anchored for lunch. The new rope style boarding ladder was tested and works fine.

Next we motored a short distance to Secret Cove, a large three arm cove containing an assortment of marinas, private homes, and such. Tempting to stop at the ‘boat-in’ pub for a quick pint…

A quick trip across Welcome Passage lead to Buccaneer Bay Marine Park, situated on a narrow strip of land connecting North and South Thormanby Island. We landed at low tide and portaged our gear and provisions across the beach to a sandy and but fairly exposed campsite. Bluster was anchored just off the beach where she swung merrily at anchor in the 15 to 20 knot winds. The kids explored the beaches while Lisa and I set up camp before kicking back.
image002

Lisa in the galley, Buccaneer Bay Marine Park

Saturday dawned gusty and wet – not great family sailing weather. Fortunately for us my friend Ryan with his kids aboard their 37 foot steel ketch ‘Makoolis’ joined us and we were able to seek comfortable shelter with them. Unfortunately for Ryan, he anchored a little close in and became good and grounded on a sand bar with the falling tide. We tried all the exciting stuff like rowing his 65 lb CQR anchor to deeper waters and winching away but alas, lost race with the tides. The remainder of the day was spent drinking wine, playing cards and preparing dinner (those gimbaled stoves really work) up to a 30 degrees angle until the tides released us. No damage done. Of course if we were in a Chebacco we would have just jumped in the water and pushed her off, but I didn’t rub it in.

For the second night at anchor I set the mizzen and this did wonders at calming Bluster’s swinging in the winds. Having no experience in exposed anchoring I was very pleased with holding and reset abilities of my 5 kg Claw (Bruce copy) anchor when the wind shifted through 180 degrees overnight.

With a stiff onshore breeze we executed a near perfect (if I do say so) team beach extraction on Sunday morning:

  1. Broke camp and assembled the gear just above tide line.
  2. Rowed Fib (dingy) to Bluster, furled mizzen and warmed up engine.
  3. Raised anchor and motored to position where winds would blow Bluster onto beach near gear pile.
  4. At the point where there was still sufficient motoring depth dropped anchor then moved to windward stern cleat.
  5. Paid out anchor line until bow hits sandy beach then made her fast from the stern cleat which would held Bluster’s bow onto the beach and prevented a wind from turning her beam on.
  6. Lisa and the boys smartly relayed the gear to boat where I stowed it below.
  7. Team scrambled aboard and I hauled us off the beach with the anchor and spun the bow to the wind.
  8. Hauled Bluster to deeper waters where Lisa fired up the engine and powered us away.

Moderate westerly winds and swells from the Straight of Georgia met us as we exited Buccaneer Bay. Bluster had a great run down Welcome Passage under mizzen and jib after which we finished off the day exploring Halfmoon Bay and checking out the Merry Island lighthouse.

I was very pleased with the performance and balance of the jib/mizzen sail combination. Considering the gusty conditions and the fact that we had the kids aboard this reduced sail area gave us a comfort level that allowed us to just enjoy the ride. Our close reach speed (GPS) averaged three knots. The addition of the reefed main would have likely improved the performance but we were in no great hurry. Jacob and Sam split their time between snacking in the cockpit and below where they played cards, read and wrestled. Lisa manned (womanned?) the helm the entire homeward leg while I fiddled with the lines, charts, cameras and such.
image004

Jacob, Randy, Sam

Hauled the boat out at the public ramp, prepared and ate a late lunch, kids went for a final swim and we were able to catch the 4:00 pm ferry and be home for the evening news.

A terrific family weekend adventure.

Randy Wheating

Port Moody, BC, Canada

***

MASCF St. Michaels MD – Ed Heins

This was my first trip to the Mid Atlantic Small Craft Festival In St. Michaels.  In fact it was my first small boat gathering (messabout, gawkabout, BSabout) of any kind, and I was planning to present my long suffering project Chebacco  “Boudicea”, to the boatbuilding world.   I’m sure this was painfully obvious to many of my on line contacts, who diligently waded through ubiquitous questions and pre launch drivel.  I, by the way, suffer from all the common boatbuilder maladies; procrastination disorder (PD), designer second guessing syndrome (DSGS), complete confusion complex (CCC), and ham fisted knuckle busting wood butcher disease (HFKBWBD) sometimes known as ($%$&#@!!).   In addition to those common ailments however, this past September I was also suffering from a significant case of butterflies about dragging this project four plus hours around the infamous DC beltway, and an irrational fear that assuming we negotiated the trip without problem, that surely the Chebacco would reward my seven years of labor by, if not sinking outright, at least exhibiting some indication of my complete lack of skills, acumen and abilities.   Thankfully, none of that happened.


Departing New Market Virginia at about 3PM Friday Oct1, we cruised sedately along I-81 and I-66,  spent two hours creeping the 30 odd miles around DC on the 495, sat in the predictable Friday evening bay bridge traffic and arrived St. Michaels at about 9:30 PM.  We had reservations at the Best Western in town, and that seemed like a great place to park.  I’d made contact with Dick Burnham previously to give me a hand with the launching, and the next morning as we drove through the Maritime Museum parking lot, his red pickup fell in behind.  We launched at the town ramp next to the St. Michaels inn & marina, just around the point from the museum.  Seeing the festival for the first time and approaching from the liquid side is pretty spectacular.  The Museum has about three piers and they’d added a floating extension at the end of the tee on the largest to accept more boats.   We found a space to squeeze in at the very end of the tee and rigged a couple fenders to try to keep from sharing paint with the museum.


We were in good company.  A Bolger Lilli, a folding schooner,  a Jesse Cooper, and some of Jim Michalak’s designs.  (Maybe next year I’ll cartop my “Tween”, one of Jim’s sailing dink designs, which was my first project).  Chesapeake Light Craft were there in force.  I was surprised that my wife, Debs, having existed with her things being squeezed into half our garage for so many years, seemed to think we should take on a CLC sweetwater 16 canoe. Like I need encouragement…..


Saturday afternoon we had the opportunity to take Dick & Ula Burnham out for a spin. .   I’m very interested in seeing how Dick attacks some of the Chebacco’s rather quirky bits as he finishes “Stealing Horses”.  It would be great to see a couple of these cat yawls sailing together someday.  Although we didn’t have much air to play with, I was completely satisfied with the way the Chebacco handled.   We were able to tack, jibe, I guess we found virtually every point of sail and I’m pleased at how close winded she is.   Later that afternoon, Richard Elkan of London & “Sylvester” dropped by the end of the pier and we again made a cruise around the area, this time with the rest of the Heins family aboard..  Whereas Dick and I have no idea what a Chebacco should perform like, I was pleased that Richard didn’t seem surprised as we sailed sedately through the moored boats.  Then again, I managed not to get him wet, or hit him with the boom, so his expectations may have been low.   At the end of the day though, it’s great to talk face to face with the  owners and builders we’ve exchanged emails with.


So many other things at the show; John Welsford was great as expected,  the Redwing that’s in the current WoodenBoat magazine was there, my son enjoyed the kids activities.  I’ve got nothing but Kudos to the folks that organized and made the show happen.   Only thing that could have been better, maybe a couple more Chebaccos?  Maybe next year.
 

tn_Dick_Ula tn_MASCF_Chebacco tn_MASCF_Chebaccoside tn_MASCF_Richard tn_MASCF1 tn_Pier_1

***

Chebacco Update – Ben Ho

Hello Richard,

I am making slow but steady progress with my Chebacco, mainly building the major components first before I start on the hull which will take up most of the available work space. The following are a few photos on items that I’ve done differently.

Center Board: Instead of using lead, I’ve sandwiched the CB with 4 long pieces of ¼” mild steel. It should make the CB much stronger and hopefully will better withstand a lateral grounding. The total weight is about 60 lbs, a bit heavier than the standard construction.

The glued up and shaped plywood CB:
image002

Center channels routed in for the two steel bars to lay flush. One side of the bars is threaded to accept the through-bolts. Sitting at the corner is the hinge assemly that will go on the CB trunk.
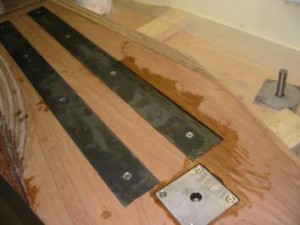
image004

The CB sheet will go through this U-bracket. Since the bracket is gripping the thin edge of the CB, I made it 6” long with 4 through-bolts in order to spread out the load. I specified a small eyelet to tie the line, but the welding shop decided that it should be a larger hand-hold instead. Oh well.
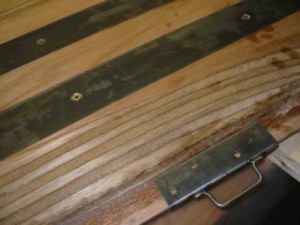
image006

The CB glassed, dry fitting in the CB trunk.
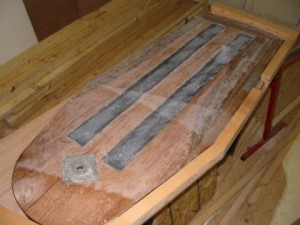
image008

These S.S. T-nuts are ideal for holding the mounting plate on the trunk:
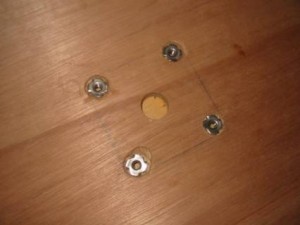
image010

Gluing up the CB trunk; the white piece lining the inside surface is counter-top laminate. This stuff is incredibly resistant to abrasion – I run my sander with 60 grit paper on it for 2 minutes, with no visible wear at all!
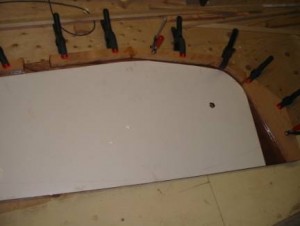
image012

The completed CB with a couple of coats of Interlux paint. To protect againt wear & tear, I build up a ¼” finger of epoxy along the bottom edge. A half-oval bronze strip will be further added on, once I figure out where to get them.
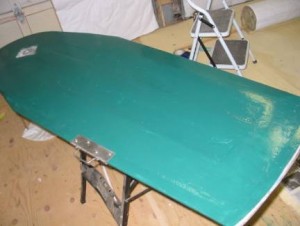
image014

Chebacco Raised Deck

OLYMPUS DIGITAL CAMERA

Sometime ago I commissioned PB&F to modify the Chebacco, mainly to enlarge the cabin by lengthening and raising it, and to move the after-deck back by the same amount in order to keep the cockpit length. The Chebacco Raised Deck is the resulting design. I subsequently decided to stay with the existing plan, because I’ve already started on it and also I prefer the old look. However some design changes are excellent ideas which I’ve gone ahead and implemented on mine. I will cover some of them here.

One of the biggest changes is the whole area near the transom. The rudder is now a balanced rudder with a tab forward of the rudder shaft, increasing the overall rudder area by about 25%. Due to the larger rudder and also the last bulkhead having moved aft, the keel skeg is no longer directly supporting the last bulkhead as in the original design. Hence there’s a fairly complex ‘backbone’ added to strengthen up the whole section:
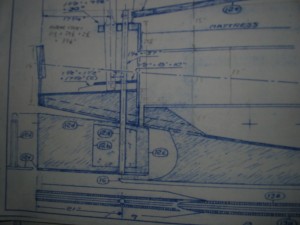
image017

The transom backbone is a solid piece 2.5” thick, supporting the mizzen mast, rudder stock, and the slop well. The design calls for this to be one continuous piece as part of the keel. The rudder runs through the center of this piece. The small hole to the right of the ‘backbone’ is the drain. The cockpit is now a raised, self-draining cockpit.

I find it too cumbersome to have such a huge, complex keel, so I broke it down and built the transom backbone as a separate component, with a large part that goes below the bottom panel and will be solidly glued to the keel later:
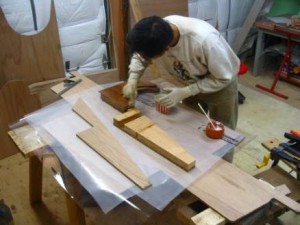
image020

Bushings for the rudder, made from high density polyurothene (i.e. kitchen cutting board), and a stopper ring cut from 1/16” SS tube that fits the outer diameter of the rudder stock.
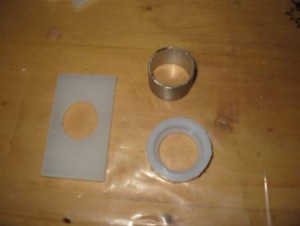
image022

Another deviation from the original design: I am concerned about mounting the rudder on a plate that protrudes a fairly long distance from the keel. What if some 300 lb gorilla sits onto the rudder while the boat is on a trailer? Instead of mounting the rudder off the keel, the transom backbone is a much better alternative. It provides a strong, balanced position to hold the stock with simply a stopper ring. The ring is glued to a PVC cap to provide a larger surface area, which rides on a nylon bushing. The bottom bushing shown in the picture is to be half-recessed and screwed onto the bottom panel, to protect the rudder from going up and grinding onto that area.
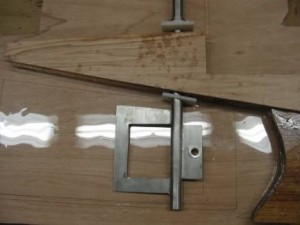
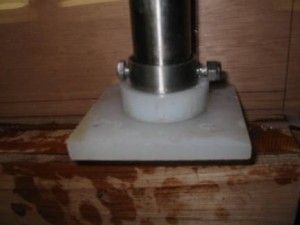
image024 image026

That’s it for now. Time to get back to work!

Cheers.

Ben

***

Chebaccos Three! – Jamie Orr
image002

That’s Bluster in front, Wayward Lass on the left and Full Gallop on the right.

(Randy Wheating photo)

Last July, a fleet of small boats rendezvoused at Sucia State Park in the San Juan Islands. It was a great weekend, and you’ll find various accounts of it on the web, my own was posted on Duckworks in September. But what is of immediate interest is that there three Chebaccos in the fleet. These were Bluster, built by Randy Wheating of Port Moody, BC,Full Gallop, built by Chuck Gottfried of Springfield, Oregon and Wayward Lass, built by me Jamie Orr, (that’s me) of Victoria, BC.

Wayward Lass and Bluster have both been seen in these pages before. Chuck’s Full Gallop, however, is brand spanking new, being completed and launched only one week before landing on Sucia! How well she looked and sailed shows the massive effort made by Chuck to finish in time for the gathering.

All three boats are the sheet plywood version, but they aren’t identical. Wayward Lass is built as designed, but both Chuck and Randy made changes here and there. The most noticeable being that both made the cabin bigger and added a bowsprit. Randy also built a tabernacle/step for the mast, with standing rigging, while Chuck made his cockpit self-draining by raising the cockpit sole (floor). A benefit of the self-draining cockpit, besides the obvious one, is a lot of storage space. When cruising in Wayward Lass I’ve found storage is tight – we have to move all our stores to the cockpit when we want to sleep in the cabin.
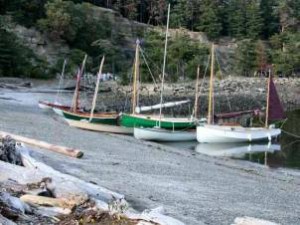
Here’s Wayward Lass (green) and Bluster (white) on the beach at Sucia, among some of the other boats. Chebaccos are a little heavy to pull up and down the beach, but they have no problem nosing in to load and unload. A stern anchor can be helpful getting off again. (John Kohnen photo)

Here’s Wayward Lass (green) and Bluster (white) on the beach at Sucia, among some of the other boats. Chebaccos are a little heavy to pull up and down the beach, but they have no problem nosing in to load and unload. A stern anchor can be helpful getting off again.
(John Kohnen photo)

But Chuck and Randy can speak for themselves and describe the changes they made.

Here’s Chuck, about Full Gallop

Full Gallop incorporated several modifications, including a raised cockpit sole, raised and widened cabin, a bridge deck, curved seats and footwell sides, and a bowsprit. The raised sole was inspired by the need to keep the boat at a dock, and so be self-bailing thru Oregon’s rain. The added plus was a huge storage space under the floor, accessed by a watertight plastic hatch.
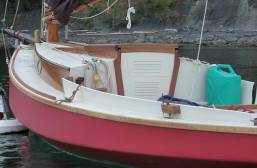
image006

Full Gallop’s cockpit,…

…her sloping cockpit sides and her stern.
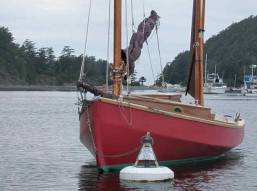
…her sloping cockpit sides and her stern.

Here’s the bowsprit rigging.
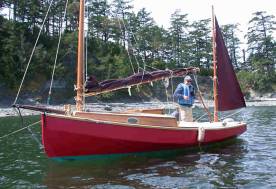
Here’s the bowsprit rigging.

This shows the height of the cockpit sole.

This shows the height of the cockpit sole. (John Kohnen photos)


The cockpit floor is an extension of the rear ‘slosh pit’ floor at the stern. I didn’t want thru-hulls, so extended the floor such that it would drain thru large limber holes and out the stern. The floor extends forward to a bridge deck that’s set even with the centerboard trunk, with the bridge deck ending about 4” above the cockpit floor level. The floor is pitched about 1” overall, to drain to the rear.

The bridge deck extends 2’ back from the rear cabin bulkhead, and is designed with access on one side of the C/B trunk from outside thru a weatherstripped lid, and the other side accessed from inside the cabin. Part of the cabin bulkhead was removed to provide the inside access, and the area reinforced.

The result is vastly increased storage under the cockpit sole accessed thru the watertight hatch, and additional storage inside the bridge deck, accessed on one side from the cockpit, and the other from inside the cabin. The storage areas are quite deep, averaging over 14” deep in most places, and low in the hull. The shallower footwell doesn’t seem to be a problem, as the coamings are generous and the seats relatively wide.

I set a full-length carlin to support the deck, cabin sides, and seat backs and coamings, with decks approximately 9” wide at the cabin. This let me slope the seat backs outward and cabin sides inward, primarily for aesthetics. A mahogany block is set at the transition between seat backs and cabin sides, which align only at the deck level. The cabin is 2 ½” higher in the back and 2” higher forward, and probably 6” wider throughout. I installed heavy breasthooks to support oak mooring bitts and a bowsprit that butts to the front of the cabin, with that area and the area of the mast slot heavily reinforced with ply and oak gusseting. No gorgeous Jonesport cleat, like on Wayward Lass!

I flew a jib from the bowsprit until I pulled the luff wire out of it. I’ll experiment with setting the jib flying, tho I use a rope stay to steady the free-standing mast. In all, the modifications are not readily apparent unless you’re familiar with the design, but all made good sense for my needs and work passably well. I value the storage, and yes, Jamie, you can sleep below without moving everything!

Now, from Randy, about Bluster

Starting from the bow and working aft are some of the personal modifications I have worked into the construction of Bluster

Cabin

Bluster’s cabin roof has been raised two inches from the drawings and the sides extended out flush with the coamings. These changes add to the interior space at the expense of side deck width, reduced to about eight inches, which with the toe rail has not been a problem move forward.

A small bridge deck straddles the centerboard trunk with cut away in the bulkhead to allow access to this storage area from the cabin.

Bowsprit

This is a plank style bowsprit (overall 1.25”x9”x26”) that is contoured on the inboard end to match the curve of the forward cabin top face. A galvanized steel, two part bracket is bolted to the forward end as an attachment point for the forestay. The 5 kg Claw anchor resides on a roller in the center of the plank, aft of which is the main mooring cleat. The 15 ft chain and 150’ x 3/8” anchor rode pass through the side deck via a deck pipe and are stored in a bucket within the forepeak.
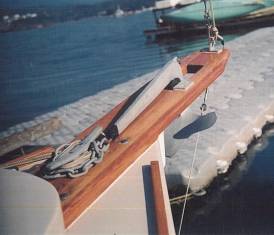
Here’s the bowsprit…

Here’s the bowsprit…

... and here it is again.

… and here it is again.

(Randy Wheating photos)


Tabernacle and Rigging

The tabernacle was welded up from ½” aluminum that is through bolted astride a double thick (one inch) bulkhead. The mast pivots on the upper bolt and the lower bolt is inserted and fastened once the mast is standing. The 1/8” ss shrouds are attached to galvanized chain plates with turnbuckles and are left in place when the mast is lowered. The forestay attached easily to the bowsprit bracket via a pelican hook. The gaff bridle is also made of 1/8” ss wire rope. Setting up is fairly simple – the mast is manually hinged into place, the lower tabernacle bolt inserted (temporary hold). The forestay in fastened via the pelican hook. Boom and gaff jaws and two sail luff ties fastened to mast and hoist away. In the lowered position the mast, boom and gaff with sail attached, and mizzen rest in holding fixture on the cabin top and a crutch in the cockpit.

The tabernacle was welded up from ½” aluminum that is through bolted astride a double thick (one inch) bulkhead. The mast pivots on the upper bolt and the lower bolt is inserted and fastened once the mast is standing. The 1/8” ss shrouds are attached to galvanized chain plates with turnbuckles and are left in place when the mast is lowered. The forestay attached easily to the bowsprit bracket via a pelican hook. The gaff bridle is also made of 1/8” ss wire rope. Setting up is fairly simple – the mast is manually hinged into place, the lower tabernacle bolt inserted (temporary hold). The forestay in fastened via the pelican hook. Boom and gaff jaws and two sail luff ties fastened to mast and hoist away. In the lowered position the mast, boom and gaff with sail attached, and mizzen rest in holding fixture on the cabin top and a crutch in the cockpit.

(Randy Wheating photo)

Transom and Motor Well

The motor well is slightly smaller than show in the drawings to just fit two Honda gas tanks, one forward and one aft of the mizzen/rudder post. The transom is constructed from one piece with a simple cut out for the 5 hp Honda. Holes in the transom facilitate motor well drainage. The stern deck is also a single piece with cutouts for the mizzen and rudderpost. There is no cut away between the cockpit and the motor well as shown in the drawings.
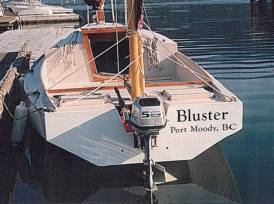
 (Randy Wheating photo)

(Randy Wheating photo)


Other Modifications
  • Blocks on gaff halyard and centerboard pendant to ease lifting.
  • Wooden strips on seat fronts to fit cross boards that can then hold floorboards flush with seat tops creating a huge cockpit sleeping platform. Boom tent to follow.
  • Watertight inspection hatches on cockpit bulkheads (accessible from cabin and lazarets) to create a usable yet watertight compartment.
  • Tiller extension for comfy steering.

Now it’s me again – Jamie speaking, I mean.

I haven’t given a lot of details about Wayward Lass, since there are several articles about building and sailing her already. But if you want to compare Randy and Chuck’s modified boats to what you’ll get by following the plans, look back through some previous newsletters. There’s a good picture in the last issue.

I like the bridge deck idea, I considered this myself, but decided against it. Don’t remember why, now. The wide cabin is a popular idea – other builders I’ve corresponded with or met have spoken of making the cabin as wide as the cockpit. The raised cabin would be welcome when you’re inside it, but I think it would have to be very carefully done or it would spoil the beauty of the design. That said, however, I have to admit that both Full Gallop and Bluster look pretty good!

The hulls on all three boats here are built as designed, at least below the waterline. Apart from weight and how it’s distributed, the only things left to make a difference in performance are the sails.

Bluster and Full Gallop have jibs set on bowsprits – I think jibs on Chebaccos need the bowsprit to work properly. I also have a jib, built according to the sail plan and set with the tack at the bow, (no bowsprit) but I rarely use it as it doesn’t work very well. Going to windward, it luffs when it is not sheeted in and upsets the flow of air to the main when it is. It does work when boomed out for running, but it’s too small to be very effective. It showed some potential when used in stronger winds with the mizzen, and no mainsail, but I haven’t explored that fully. I think it might be useful if you’re caught out in bad weather and have room to run. I think you could reach all right too, but would make a lot of leeway.

I don’t plan to add a bowsprit, but I am considering a reaching (asymmetrical) spinnaker for light winds, as shown on page 131 of Bolger’s 100 Small Boat Rigs. This would be set on a spinnaker pole that would serve as a very long bowsprit. I’m still working out the details, but stay tuned.

Wayward Lass’ main sail is different from the others, having eight inches of roach – all other things being equal, the roach adds a little speed. The downside is that battens are necessary to support the roach, and the batten pockets chafe. I’ve replaced these once already because I made them too light and two of the three battens wore right through the forward ends.

Both Chuck and Randy built their sails from Sailrite kits, and are very pleased with them. I can confirm that they look great, and seem to set well. Quiet a few builders have used Sailrite kits for main and mizzen now, and all the comments I’ve heard have been positive. So if you can’t borrow the school gym to lay out your sail, or don’t want the design headaches, Sailrite looks like the way to go.

At Sucia we didn’t do any controlled tests or scientific comparisons (also called races), but one day everyone sailed over to neighboring Patos Island. Wayward Lass was almost the last to get away from the anchorage, so I was out of the action and didn’t even see Full Gallop and Bluster sail together. However, I heard they performed about level with each other, and both skippers came away pleased with their boats.

The next day we were a little more organized, getting all three Chebaccos out together so John Kohnen could take some pictures for us. Outside of the WoodenBoat article comparing cold-moulded, plywood and lapstrake versions, this is the only time I know of that three Chebaccos have sailed in company.
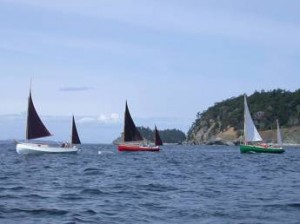
Three Chebaccos, with Sucia Island in the background. Bluster is in the lead, Full Gallop is in the middle and Wayward Lass is coming up behind. (John Kohnen photo)

Three Chebaccos, with Sucia Island in the background. Bluster is in the lead, Full Gallop is in the middle and Wayward Lass is coming up behind.
(John Kohnen photo)

We can’t say yet which boat will be faster. On this occasion, Wayward Lass had an edge, since Chuck was still getting to know Full Gallop, and Bluster was towing a dinghy – very small, but still a handicap. However, the rendezvous was enjoyed by everyone who attended and we plan to hold another in 2005. We’ll be sure to organize some real match (grudge) racing then, so stay tuned!

***

Racing Micros and Floating Sheep Bridges – David Lewis

Never have editors for friends.  “Write an article for me,” they whine.
“Where’s my article I bullied you into agreeing to?”  I swear, it never ends.

As if I didn’t have enough to do, what with keeping my sheep wormed and happy, getting my steers to the butcher, finding customers, building the  infrastructure for a farm while working full-time planning new telecom and  network systems for an entire company move.

Here comes Richard, “You live five minutes from a lake, and you have a  Bolger Micro that you haven’t sailed in two years.  Surely there’s a  sailing story in there somewhere.”

Uh huh.

Ok, let’s see.  Well, something rather amazing did happen the other day.
Not so much sailing as “rafting” but…

My farm is split down the middle by a creek which, with all the rain we’ve  been having, is not a small one these days.  There’s only one spot that is  passable by man or truck and you don’t do it without getting wet.

Now that’s just fine for my cattle, they’ll plod through anywhere that’s  below their chests.  But my sheep are a bit more finicky.  And shorter.

So I decided it was time to build a bridge.  Now shoestring budget that I  have, I wanted to do this for next to nothing.  In fact, free was a good  target.  I could have gone and bought a culvert, buried it to 40%, put  fill and cement around it, and had a decent bridge for, oh, I don’t know,  $2000, $5000, something like that.  Or I could use my muscles, my  ingenuity, and materials I already had and keep the cost below a hundred.

I have about two hundred railroad ties sitting around collecting sheep  poop.  Some of them are light (well, relatively light) and some of them  are so heavy I can barely get them into the truck.  Heavier than water in  other words.  Being a bit lazy, I used whatever weights happened to be on  the top of the pile.  Some were heavy, some were light.

I hauled fourteen of them out to the crossing and laid two parallel to the  flow and ten across those two.  I tied them together with three poly-ropes  and laid the remaining two ties crosswise on the lower and the upper end –  to make a two-sided “bowl” that I could then fill in with a layer of rocks  and dirt on top of that.  Then I began filling in either side with rocks,  the plan being to build up ramps that would be level with the top of the
bridge.

I went and bought some threaded rod and some of those aluminum tent  stakes.  I would put two rows of threaded rod through the top two ties,  parallel to the creek flow.  I would drive four stakes down through the  top of the two ties.  This would help prevent those ties from pushing out  as weight was added between them.

Then there was about a week where I didn’t get a chance to work on my  bridge.  Then it rained.  Not heavy but it kept up for most of the day.

Then yesterday I went to put in my threaded rod.

I’m sure you’ve all figured out what happened.  Bridge gone.  Just not  there.

I started tramping down creek to find it.  I passed numerous spots where I  was sure it could NOT have passed, it being so shallow there.  I finally  found it about a mile downstream, hung up on a fence across the creek and  still tied together with the poly rope.

Knowing how heavy those dang things are, it still amazes me that it made  it that far.  Now I get to figure out how to pull the timbers out of  there.  Could a culvert and cement be in my future?

***

On Contributing – Chuck Leinweber
dscf0046

If you are reading this article, you probably had a few minutes to kill and happened here by accident.  Perhaps you have this site bookmarked and check it regularly for new material.   Maybe you’re sitting at your desk taking a coffee break, or using your laptop at the beach in front of a five star hotel with WIFI.  If you are here, you probably like reading about boats and boatbuilding.  Where do these articles come from?


There are literally thousands of people writing blogs.  Who needs more blather on some website?  How much is there that can possible be of interest to some boatbuilder? Admittedly, Duckworks does post something new each day, and the Chebacco News posts great articles, but we’d be willing to bet you would like to see more about the subject you are particularly interested in.


Which begs the question.  Do you have an obligation or better yet a desire to add your opinion or experience? As an editor, I can categorically tell you that if you take the time to put your thoughts down, they will be appreciated.  Not just by frustrated editors like Richard and me, but also by all the other folks out there who are waiting to read what you have to say.


Whether you want to write about a Chebacco or some other boat design, you may be unsure how to proceed.  Rule one.  Just get the words down.  Type one word and then the next, and keep right on going. What are some guidelines?  I thought you’d never ask.


Your readers want to know how you did everything, especially if you came up with a novel way of accomplishing some of the more tedious parts of boat building.  The process is always of interest.  Just this afternoon, I puzzled over the assembly sequence of the boat I am building.  The instructions given in the plans are not always minute, and can sometimes be called obscure, so the voice of experience (yours) is always appreciated.  And if you’d like to wax poetic, rant and rave, or better yet, insert some humor, please feel free.  Your voice is what makes what you write special.


If possible, include photos.  This implies that you thought you might want to write something before you started building or before you took that cruise.  We always carry a camera, except the one time we didn’t even know it was still in the truck until we were ten miles from out launch point.  A digital camera is especially nice for web articles, and also nice because you can take about a million photos and never need to load new film.  Let the editor know where you would like each photo to be placed in the article by numbering them and indicating where each should be.  Digital photos are easy to enhance, easy to crop, easy to save in a compressed format that web editors like.   Most of us have scanners and can also use regular photos as well.


When you are done, ask a friend, your significant other, or the guy sitting next to you to read it through.  It is always hard to critique your own work.  Have them check for clarity first.  Does it make sense; does it read smoothly.  If they have grammar skills, take advantage of them.  If you intended to be humorous, it is good sign if they laugh out loud.  If they ask you where they can go to start boat building, you know you are on the right track.  If no friendly readers are available, at the very least, RUN YOUR SPELLCHECK and read the piece out loud to yourself.


I will throw in a bit of grammar advice.  Don’t use the word ‘then’.  (And then we did this, and then we did that, and then she…..)  Don’t start a sentence with the word ‘and’ or ‘so’.  Get rid of words that don’t need to be there, especially if they repeat what you just said.  The words ‘very’ and ‘really’ can almost always be omitted.  .


Last but not least, a little abstract speculation about what makes one article stand out from all the rest.  The very best are like the ones you hear when sitting around a fire at a messabout.  The fish tales, the shark tales, the alligator tales.  The time you fell in and the boat sailed off without you.  Tell what really happened—don’t pretty it up.  We want to hear about the good, the bad, and the ugly.  Let your personality, your opinions, your unique point of view loose in what you write.  Your public is out there waiting.

This website lives by submissions.  Richard depends almost totally on readers for content.  I happen to think that this makes for honest and real reading – the experiences of amateurs who get no pay for their writing and no commissions for any products that they promote.

Editors are pretty flexible, but we do have some druthers. We like to have articles in some form of text format. You can copy and paste the article into the body of an e-mail, or you can attach just about any kind of word processor file to an e-mail instead. A file on a floppy disk or CD mailed by regular snail mail will work. I have even typed up hand written material, though that is a bit of trouble. Pictures can be sent for scanning, and will be returned promptly. If you have digital versions of the photos, they can be e-mailed or sent on a disk. The best format is .jpg without too much compression. Send as many as you need to illustrate the article. We may cull a few.

If you have certain places you want pictures to go, simply make an insertion note at the appropriate place in the text <**insert boat01.jpg**> or let us do the picture placement. We’re pretty careful.

Thanks for taking the time to write up the details of your project. I assure you it will be of great interest to boat builders and wannabees.

Chuck Leinweber
Duckworks
608 Gammenthaler
Harper, TX  78631
www.duckworksmagazine.com

Chebacco News 37

Building the CLC.

I’m building the Bolger Chebacco, Light Cruiser edition. Or, CLC. I have a Michalak designed AF2, but the wife doesn’t like going sailing in it. She has specific complaints; she doesn’t like changing sides during tacking, it’s too hot when I like to take it sailing, when the wind is calm and the water is smooth. She may have a point here, and the electric motor on Entropy, while it moves the boat around, is pretty slow. She likes to go sailing when the wind and waves are kicking up, but this is when I get anxious about the AF2 being capsized, and when we are pounding annoyingly into the waves.
So, AF2 “Entropy” is for sale and CLC “Schrödinger’s Cat” is born.
The CLC has a pilot house for shelter in the rain, permanent hard dodger for shelter from wind and sun. The boat is 7.5ft wide, and according to the designer it would take “hurricane force” winds to knock it over. The basic boat is self righting up to 90 degrees, and should be even better with the pilot house. The hull is well proven, and handles sweetly in rough water. Even the roughest lakes in OK should present no challenge. The CLC has two bunks, a head, and a small camping style galley, so we should be able to go camping in the boat for a weekend, assuming we can stand each other for that long.
She has a folding mast to make trailering simple and quick. I can setup Entropy in 15 minute, and take her down in 20. This includes tying the sail onto the mast. The folding mast on the CLC should knock at least 5 minute off both ends of that. Also, the CLC has a dedicated slop well on the centerline aft for a motor. Lots of money is designated to buying a NEW outboard, that will start on the first pull, and will push the boat at hull speed. So, even if there is no wind, I can leave the mast folded and we can go motoring!
I’ve decided to take my time on this one, though the wife swears I’ll be done by Thanksgiving, the the response from my sailing buddy when I told him I was taking my time was “ya, right”. Do I have a reputation or something?
I’m using 1/2″ MDO for the boat. It’s about as good as you can get without spending three times as much and getting marine plywood. It is even argueable that it is better than some marine plywood, as the paper face will prevent checking in the plys that would let water in. Here is a picture of a piece that spent three months in my dishwasher. It’s in absolutely perfect condition, and you can’t even tell it’s been soaked with hot water a couple of times a day for months. Quite amazing, actually.

DSC00008_3

Everyone asks, “do you need to take the paper off?”. No. The paper is stronger than the wood. Test joints made by myself and others, using the Payson/Carnell fiberglass butt joint technique, always break in the wood layer, by ripping the wood fibers apart. Never in the paper, in the epoxy, or in the glass. Here is a picture of a test joint tested destructively.

DSC00009_3

Here are a couple of pictures of the making of the 24X8 panels for cutting the topside out. There is a backing block of 1/2″ ply behind the joint, which the clamping block you see screws into. I’m using wax paper to keep the epoxy from sticking to the boards. This is problematic, it sometimes gets glued very good to the epoxy, and takes a wire brush on a drill to separate! Sometimes, though, it pulls right off. Go figure. Will be using polyethylene from now on, it doesn’t stick at all. My garden is in the background, where I grow cardboard boxes.

DSC00012 DSC00013

I put a layer of light glass cloth, 1.34oz, on the parts of the boat where rainwater might collect, before the boat was assembled. This is to seal the wood in that area and prevent rot. I also glassed the centerboard case inside and out, and coated the centerboard with graphite loaded epoxy for reduced friction and abrasion protection.  I’ll be glassing the insides of the stub keel, and the insides of the rudder post housing, as well as the slop well. The ground tackle compartment got a coating of limestone loaded epoxy as well as the light glass, but I may go over this will graphite loaded epoxy as well.
Here is a picture of the bushing I made out of UHMW poly for the centerboard to pivot on.This is 10 thou bigger than the pin, so there is a loose enough fit that the centerboard will bear on the case and not the pin when under side loads. It was turned on the lathe to be a press fit into the centerboard, and notches were cut out of the flat sides of the bushing with a hacksaw. It was hammered into the hole cut in the board, then the notches were filled epoxy and wood flour, and the whole assembly glassed over. The holes for the pin were cut later.

DSC00009_2

Here is a picture of the bearing plate for the centerboard pin. This is designed to take the load from the pin and distribute it to the wood in the centerboard case. There are extra layers of glass reinforcing the wood under this plate.

DSC00006_3

Also, the design modifications for the CLC remove the bracing from the top of the case provided by bulkhead 4. So, I will make sure that the 2x boards surrounding the case both outside on the keel and inside under the floorboards are securely fastened to the centerboard case, to transfer side loads to the hull.
Here are the watertight hatches for the boat. These are Bomar hatches, which I got for a WONDERFUL price from http://www.thriftymariner.com . From West Marine they would have cost $450. I got this whole box of hatches for $134. You should all buy something from this guy to help keep him in business! The hatches on centerline will be of the sliding type built by myself. They will be rain and spray tight, but would leak if immersed. But, they are on the centerline, so I can get away with them not being airtight.

DSC00010_3

Here I am adding reinforcement and biaxial cloth to the transom. I’m making this boat as strong as I know how. This reinforcement is in case I ever want to test with a 15 hp motor, and to be able to not worry about the motor bouncing off on the wonderful roads here in OK.

DSC00003_4

Here are the bulkheads, centerboard, and centerboard case, cut out and waiting to be assembled outside.
DSC00004_4 DSC00005_4 DSC00007_3
Here I’m laminating up the stem out of 1/4″ plywood. Bill Samson recommended laminating out of scraps of 1/2″ ply. I tried that, but couldn’t get them to take the bend without cracking. As it was, I had to get the 1/4″ wet for it not to crack. Realized a couple of weeks later he meant to laminated it SIDEWAYS, with piece already cut to the shape, and not to bend the pieces. Duh.

DSC00001_3

I ‘m using a cheap shelter from Harbor Freight to keep the sun and rain off the boat. I’m hoping for a mild winter. I added rope bracing and tied the corners down. It seem to stand up the wind pretty good so far, we’ve had gust to 40mph, and it barely moves. I also drilled and pinned the assembly together, so there is more than just the tarp holding it together!
DSC00010_2 DSC00011_2
Here are the bulkheads and forms setup outside under the shelter. I didn’t build a strongback for the boat, though I toyed with the idea. The topsides have alignment lines on them, and putting legs on one of the forms and one of the bulkheads allowed me to screw the topsides on and have a self supporting structure. The rest of the bulkheads were installed, then legs added to carry the load, and everything carefully leveled. The bottom was installed, next, and the stem trimmed to size.
DSC00001_6 DSC00003_7 DSC00004_7 DSC00005_6
The bilge panels were laminated in place, using thick paper to take the shape off the assembly. There are a few gaps, and it needed a little trimming, but epoxy covers most screw ups, and makes craftsmen of us all. The forward fg butt joint clamping blocks were left in place while the bilge panels were twisted into shape, to prevent any possibility of the joint coming apart under the extreme stress of the twisting..
DSC00001_4 DSC00001_5 DSC00004_6
This took a LOT of force, I wound up having to use three high tech ropes in the spanish windlass mode to get the thing bent. I was seriously supprised the ply didn’t snap!
DSC00003_5 DSC00004_5 DSC00005_5
I plan on leaving the ropes in place till I have the chine jointed filleted and taped on the outside, and filleted and taped on the inside forward of bulkhead one. Also, I will fillet and tape the forward sections of bulkhead one that intersect with the bilge panels. Hopefully, then, when I pull the ropes, the panels won’t move much!
I could have done it the recommended way and laminated up two layers of 1/4″ ply, but I’m not sure it would have been any easier. I would have had to drill a couple to four hundred holes to clamp the boards together properly for lamination, and would have had to make a 1/2″ – 1/4″ fg butt joint. Plus, I wanted to see if the ply would break when I bent it!
Today I sanded off the excess epoxy putty form the “spot epoxy” phase, and glassed the chines, as well as the front of the bulkhead one/bilge panel joint.
I realized a couple of days ago that my back always complains when I do a lot of hand sanding. Harbor Freight had an inline air sander one sale for $29, and it is wonderful! I did have to make a couple of field modifications, the exhaust is wet (even though I have a dryer on the air line), and it was spraying water on the place where the paper clamps to the sander. This was causing the paper to get wet and tear off way before it was used up. A couple of deflectors solved that problem. I’ve even come up with a way to convert the thing into a power long board, for faring the hull! I’ll post pictures in the next issue of Chebacco.

DSC00001

***

Hi Richard

Just got back from the Port Townsend Wooden Boat Festival in Port Townsend,
(where else?) Washington.  This year, for the first time, a Chebacco was in
the show.

Jerome McIlvanie has done an absolutely beautiful job on his lapstrake
version (see Chebacco News 28, October 1999.)  Both the boat and finish are
immaculate, and the varnished hatch and cabin doors (doors, not drop
boards!) are the icing on the cake.  I wish I could send you a picture, but
I didn’t think to take one – too dazzled, I guess!  John Kohnen was there,
though, with camera in hand, so maybe he would forward one for the Chebacco
page, if asked.  Maybe Jerome will send in a write-up on his building
experiences as well, it would be very worth-while.

Wayward Lass was in Port Townsend again, but she was down in the “other”
marina.  We’ve had a lot of small craft warnings, and Friday was no
exception, but the strong winds (up to 25 knots) weren’t expected until the
afternoon. When I left the dock at 6:05 am, there was no wind at all, and
there wasn’t enough to make sailing worthwhile until 7:30.  Once the sails
were up, I left the motor going in order to cross before the small craft
warning came to pass.  I’ve never motorsailed before, it’s always been one
or the other – but it worked well, with the speed over 6 knots most of the
time.

My new Garmin 12 GPS keeps me on track as well as giving me the exact speed
over the bottom.  It told me the tide sweeping down between the San Juan and
Canadian Gulf Islands was pushing me over 20 degrees off course, and made
adjusting for this a breeze.  It also provided added peace of mind when the
early morning fog advanced to meet me in the middle of the Strait, dropping
visibility to a couple of hundred yards.  These handheld GPS units are great
little helpers — I had my compass course, and expected the fog to lift
shortly anyway (it did), but still….

I rounded Point Wilson, 2 miles north of Port Townsend, at 11:40, and shut
down the motor.  I had a great sail down to Point Hudson, where the town is,
pulling ahead of a bigger boat, who was still motoring (their main was up,
but sheeted right in, while the wind was behind us.)  Once around Point
Hudson, I sailed close past the entrance to the Festival at the Point Hudson
Marina, and on down the shore between all kinds of boats, both anchored and
sailing around.  Decided it was too good to stop, so I gybed and went back
to Point Hudson for another go round.

Saturday was the day the BolgerList guys were to meet.  We mostly got
together at the CLC booth (met John Harris of CLC there), then moved over to
the café for cinnamon buns – but they didn’t have any this year!  Tragedy!
Still, we managed.  Those present were John Kohnen, Derek Waters, John
Ewing, myself, and Miles, whose last name I didn’t get – sorry, Miles.
Afterwards, we went down to see Jerome’s boat, and found Alan Woodbury
there, with his father in law, Roger.

Did the docks then – my favourites were Jerome’s Chebacco (we need a name
there, Jerome) and a Lyle Hess Renegade, the design that Serrafyn was built
to, I believe.

We met up again at Wayward Lass about 1:30, and went for a sail – John,
John, Alan, Roger and myself.  (Derek had his family, and Miles was off to
hike the Olympic Mountains with his wife.)  Alan took the helm and we headed
out past Point Hudson, then over to watch the schooner race.  We had a good
view of the start, then followed the race down to the first buoy.  On the
return leg, we saw Jerome on the water and sailed over to say “Hi”.  The
wind had about dropped by then, and he was just taking down his sail as we
approached.  Still looked great, though.

We also saw a Martha Jane, owned by Bennett from California – the boat’s
name was Steadfast.  She looked good, and Bennett told us he’s sailed her
all over, including Florida and the East Coast.  Although we were going in
similar directions from time to time, we didn’t get into a head to head
race, so we can still both hold to our conviction that our boat is superior!
I will say, though, that the lug sail looked very impressive.

That was about it for boat showing.  Jerome, Alan, John Kohnen and myself
had dinner together at the little café by the Boat Haven – good fish and
chips and great milkshakes!  After that we went our separate ways.  I was
worrying about the weather for the next day, so I tuned in to the weather
channel on VHF.  It sounded like the forecast was improving, but it was
still expected to blow hard again in the afternoon – and in the morning I
could expect to lose 2 knots to the tide.  Gradually the conviction grew
that the best time to head home was right then, even though it would take
most of the night, and I still had some stuff I wanted to do first.

Anyway, I left the dock at 10:30, with my battery operated nav. lights
duct-taped to the masts.  Even before I reached Point Hudson I was getting a
lift from the tide – 6 knots at half throttle.  I rounded Point Wilson at
10:55, and 20 minutes later I was making 8.7 knots over the bottom!  (Normal
motoring speed is about 5.5 knots.)  It was almost a windless trip, except
for a bit of breeze in the Point Wilson area, so I didn’t have the sails up
at all.  It was chilly, I was glad of the Mustang Cruiser suit, with hat and
gloves on as well.  After the fog on the way over, I had bought a radar
reflector in Port Townsend, and I was glad of it as I passed three big
freighters in the dark. I saw the lights of each in the distance, but
couldn’t tell what they were until they were about a quarter of a mile away,
when they suddenly materialized out of the gloom and became these huge
ships.

I reached the Customs dock in Victoria’s Inner Harbour at 4:18 in the
morning, called in, then got my head down for a couple of hours before
making breakfast and heading to Fleming Beach and the launch ramp.  A great
night’s trip to end a great weekend.  If I’ve missed anyone or mispelled
their name, I apologize.  See you all again next year.

Jamie

***

Hi Richard,

here are some pictures of our newborn
chebacco “Kitty Hawk”.

Cheers,
Vincenzo

kittyhawk1 kittyhawk2 kittyhawk3

Hi Richard,

thanks for you nice message. I made the wooden blocks out of black locust
using drawings on “the rigger apprentice” by B. Toss as templates.

The tabernacle has worked well, so far. As I had mentioned, I did not like
the original turnbuckle system to hold the mast, and replaced it with a
steel fence-like piece (I will try to take a picture of it).

Yes I did leave room for the gaff between boom and the folded mast and, just
like you plan to do, I keep the boat under a tarp with the sail and rigging
attached with the mast folded down.

The sails were made by a professional sailmaker (veleria Zadro in Trieste)
that is one of the few in this country to know how to cut a gaff sail. Thanx
for your suggestions about the sails. I will try to increase the draft on
the main by playing with the halliards and the boom out haul, and see if that
improves things. Zadro refused to cut the mizzen dead flat! Any way I am now
trimming it flatter than it looked in those early pictures. I am also
experimenting the mizzen with a conventional boom instead of the sprit.

The aft hatches are made as in the plans and they seem to be good enough to
keep rain and spray out; of course some water would get in case of capsize
or if swamped by a big wave.

I will try to send you details of the blocks and tabernacle.

Yes, things around the back of the cockpit and the motor/slop well are
indeed a bit different than in the plans. I will send you pictures of the
details. Anyway, the idea was to make the cockpit self-baling when the water
reaches the level of the seats; So there is an oval cut at that level in the
back of the cockpit that drains in the slop well that has the round drainage
holes that you noticed. These holes serve the double purpose of keeping
things in the slop well and of accepting some rubber flaps (not yet on in
the picture!) mounted on the stern that would act as valves. The flaps are
needed only to prevent BIG waves coming from astern from spilling water in
the well (and in the cockpit!) while letting water go in the opposite
direction. At some point I will have to do some sort of swamp test to verify
all this!

Ciao,
Vincenzo.

***

When I came to Tulsa for flight school I owned a 14′ O’day Javelin sailboat. I
brought it along. On October 31st, 1987 my roommate and I decided to go
sailing. It was in the 80’s, which was un seasonal for that time of year. The
water, however was pretty cold. He had never been sailing. I had sailed a
little, but no formal lessons.

Background: The last time I sailed in Ohio before coming to OK it was a wild
time. A highschool buddy and I took the boat up to the lake. When we got there
a big thunderstorm was approaching the lake, and all other boats were leaving.
We looked at each other and said “What the F***”. We put the boat in the water
and rigged it. By the time we had the sail up it was raining cats & dogs. We
started out of the boat launch and the gale force winds hit. Man did we have
the time of our lives! The bow was cutting through the waves like we were at
sea! She was hiked over and water was running into the cockpit area from the
low side. Water was POURING from the mainsail onto us. It was an awesome time!
(I/we didn’t realize how STUPID that was!)

Back to OK… My roommate and I got the boat out onto Keystone with no
problems. We had sailed around for about an hour. Then we noticed a storm
developing to the south. (Little side note here… an Ohio storm does not
equal an Oklahoma storm .. unknown to us..) I announce “Hey, no it’s gonna get
fun!” LOL!!! Boy was THAT an understatement!!! The winds were so strong out of
the south that I reefed the mainsail quite a bit, and dropped the jib
altogether. I was getting frightened. (Did I mention that I swim like a
ROCK!?) I started back towards the boat launch, but of course it was to the
south. Directly into the wind. My buddy (who had never sailed before) kept
telling me to put the sails all back up and lets have fun. I finally listened
to him. We started tacking back and forth to get to the boat launch.

It was on the third or fourth tack when the wind shifted drastically and with
great force. It grabbed the mainsail and “jibbed” it. (It took it from one
extreme to the opposite side all at once — and fast!) The momentum took the
boat right over. We capsized in a heartbeat.

Both of us clammered up on the bottom of the boat. At first it was funny. We
were laughing. Then I heard her taking on water. The lifejackets were neatly
stowed in the cuddy cabin. Nice, eh? I tried swimming under and getting them,
but my feet keep getting tangled in the rigging. (Did I mention that I swim
like a ROCK!? LOL!!) It had “full floatation”, but it had taken on so much
water that we were unable to keep it “righted” each time we tried.

At the time of capsizing we were only a couple hundred feet from the launch.
By this time the wind and current had blown us out into the middle of the
lake! (Did I mention that I swim.. Oh yeah..never mind) All day long we had
not seen ONE person on the lake. My buddy made a very brave move, which I
still appreciate to this day. He decided to swim for shore from the middle of
the lake! It was horrible to watch. Each time his head would go below a swell
in the water, I thought he had drown! I was standing on the bottom of my boat
yelling for him all the way! I know he couldn’t hear me with the wind, but I
had to do something. It seemed like he swam forever. When he finally made it
ashore, he was dead tired. He waved to me. Then he limped up the hill and out
of site looking for help.

Ok.. now it gets funny. After my friend’s ordeal.. this Bayliner with 4 dudes
partying goes by! I scream.. they come over and I get on their boat. I tell
them to let my sailboat sink because I don’t care anymore! They were great
about it and lashed it, still capsized, to their Bayliner. When we got to the
launch I notice that it had banged the side of their boat up pretty bad. I
don’t think they noticed since they were so stoned. LOL! My buddy finally
comes back over the hill and I am standing by my car! LOL!! Poor guy!

Final side note. After getting it onto the trailer I could not pull it until
enough water drained out to get the trailer fenders up off the tires. It took
2+ hours to drain! LOL!!

That night we treated ourselves to a steak dinner. We had our picture taken
with our waitress. I still have that photo, and the memories. What a great
friend!

Ok.. I’m all mushy now. 🙂

That’s my Keystone story.
Keith

Chebacco News 36

How to get the Best out of your Chebacco-20

image002

Fraser Howell

Jamie Orr

Tim Smith

Bill Samson

Background

These days, probably over 95% of 20 foot sailboats are rigged as Bermudan sloops, with a tall mast, supported by shrouds and spreaders, a triangular mainsail and a jib or genoa foresail, with, possibly, a spinnaker for downwind work.

In contrast, Phil Bolger’s Chebacco-20 is a cat-yawl, with a short, unstayed mast, a high-peaked gaff mainsail with a relatively long boom, and a jibheaded mizzen sail with sprit boom.

There are loads of experienced sloop sailors around, but very few experienced cat-yawl sailors to advise Chebacco owners how to get the best performance out of their boat under a variety of conditions.

The authors have pooled their experience of sailing their Chebacco-20s to produce this little document. We don’t necessarily agree on everything – Chebaccos tend to vary a little, depending on how they were built, how the sails are cut, and so on. Anyway, here goes!

First of all, a table of the rig arrangement that works best for various wind speeds:

Beaufort Number Wind speed (knots) Mainsail Mizzen
1, 2 and 3 1 – 10 no reefs set
4 11-16 One reef set
5 17-21 One reef furled
6 22-27 Two reefs furled
7 and up >28 Furled furled (use OB)

Notes:-

1. You may want to reef earlier (by one Beaufort number) if sailing single handed. The body weight of a crew can make a great difference to how the boat handles.

2. You might be surprised to read that the mizzen should be furled when the main is reefed. You might think that this would lead to lee helm, but in fact we have found that the tendency for the heeled hull to round up into the wind counteracts this and even gives some weather helm.

3. Leaving the mizzen set in strong winds makes the boat heel a lot, adds little to forward drive, and generally makes her harder to handle.

4. Under most circumstances it is perfectly OK to leave the mizzen furled, but you then lose the possibility of heaving to using the mizzen.

Heaving to

The mizzen sail helps you to heave to. All that needs to be done is to release the main sheet and centre up the mizzen so that the boat weathercocks. She won’t lie with her head directly into the wind, but will still lie pretty close, which is helpful if you want to drop the main to take in a reef. If you want to make sure she heaves to on starboard tack, shove the tiller to port – The boat wants to sail backwards when hove to, and this makes sure she settles down on the tack where you have ‘right of way’ – handy when reefing!

Reefing

It’s much better to reef before setting out, than doing it on the water – especially single-handed. In other words, look at the weather forecast before setting out and reef according to the worst weather you’re likely to encounter on the trip. If you’re caught out, reefing is most easily done by heaving to, using the mizzen to hold the boat head to windward or, if you’ve got a crew, putting on the OB and heading to windward while one of you ties the reef in.

Furling the mizzen

The mizzen is very easy to furl and unfurl. Most people simply slacken off the snotter (the sprit tensioning line), line the sprit up along the leach of the sail (leaving it attached to the clew), then twirl the sprit so that the sail wraps itself around it. The end of the snotter can then be used to tie a half hitch or two around the mast and sail to keep it tidy. Unfurling is even easier; undo the half hitches holding the mizzen furled, and let it unwind (- the wind will help you). Be careful that the sprit doesn’t whack you on the head when eventually it comes out! The final step is to tension the snotter.

The Centerboard

The Chebacco-20 behaves just like a large dinghy. You’ll get the best out of her by lowering the centerboard for beating and reaching, and raising it for running before the wind. With the Chebacco being shallow hulled, though, a little bit of board left down, off the wind, can improve handling.

Partially raising the centreboard can help, too, when heavy weather helm develops.

Of course the Chebacco has a shallow salient keel, and is well mannered even when beating with the board up. She does make a lot of leeway in these circumstances, though.

Sailing Backwards!

If you live among crowded moorings, you might want to master the trick of sailing backwards from your mooring to get into clear water. This is achieved by letting the mainsail fly, and backing the mizzen. You can steer using the tiller – tiller to port to move the back-end of the boat to starboard, and vice versa. Once you’re in the clear, you can harden in the mainsheet and you’re sailing!

Sail trim

The Chebacco is capable of pointing pretty high, and should tack through 90 or 100 degrees in reasonable sailing conditions. It is fatal for performance, though, to strap the mainsail in tight. Remember that the boom is very long and that the main should lie at an angle rather like that of, say, a genoa on a conventional sloop. So the end of the boom should never come inboard of the corner of the transom or all you’ll get is a heeling effect with little forward drive.

The mizzen should be trimmed to give just a little weather helm. When the weather blows up you’ll find that the mizzen needs to be let out to such an extent that it’s flapping. That’s the time to furl it. Some of Phil Bolger’s designs have used fully battened mizzens, on the theory that they can be feathered without slatting. He has had varying reports on how effective this is. This would call for a halyard and other expenses and handling complications.

Using a jib?

It is possible to fit a jib to a Chebacco. Fraser Howell has added a short bowsprit and flies a 60 sq. ft jib which counteracts weather helm nicely, as well as giving extra drive. It is hard to manage the jib without a crew though.

Under Power

Maximum speed under power (4.5 hp) is 5.5 mph. Efficient speed under power is 4.5 mph, at which you’ll get approximately 9 mpg with a 4.5hp motor. The point being made is that a 5hp motor is perfectly adequate for reaching hull speed.

Short shaft motors are OK, but if you are sailing single handed and go forward to adjust things at the mast end, the prop will lift clear of the water. The same will happen in steep seas. If you’ve no worries about the OB grounding, then a long shaft motor may be preferable.

Summary

The above notes were prepared by a group of sailors with actual experience of sailing their Chebacco-20s in a variety of conditions. Anybody else with actual experience in a Chebacco is very welcome to add their two cents worth to this document.

***

Dear Richard,

First of all thank you very much for taking up Bill Samson’s newsletter and setting up such a wonderful new chebacco website. I found the new articles very interesting and looking forward to the next one.

Maybe a nice addition to the site would be some kind of Chebacco registry. It could have basic information (and maybe a picture) of the boat and contact info of the owner.

After a long gestation, KITTY HAWK our lapstrake chebacco, finally hit the water of the Venice lagoon.
She has been built as specifed in the plans except for the mast tabernacle (as designed in the “cruising version”) and a bridge deck (a-la-Story). Hull is painted black with cream deck, stained cabin sides and coamings, teak rub-, toe-rails and trims.

I am in the process of learning to sail her (playing around with halyards, outhauls, etc.) to get the most out of the sail). It seems to me that she could use a little more sail area-around here it is mostly light winds (or too  much wind) and  KITTY HAWK has a little trouble keeping up with the local fleet of flat bottomed traditional luggers. One of these boats of size comparable to a chebacco spreads about 300 sf of canvas! So far I have not been able to break the “5 knots wall” even in 15-20 knot winds”. She does have a bit too much weather helm in stronger breezes, so I think I’ll experiment with a jib (around 50-60 sf) on a bowsprit.

Nevertheless, I’m really impressed by the stability and maneuverability of the boat under sail. She is also great for camping, except for the gloop-gloop-gloop chortle on the laps that resonates in the cabin and takes some getting used to! She is a real beauty and is receiving a lot of attention from the other members of the sailing club where I keep her, which, aside from some handsome trad luggers is mainly populated by ugly duckling fiberglass boats. The tabernacle set up is essential for passing under bridges in and around Venice. It was made according to Bolger’s plans, but the whole thing is awkward to set in place single-handed and might have to be modified. On Sunday Kitty Hawk posed for a photo session under sail and will send you photos as soon as they’re developed.

keep in touch,
Vincenzo.

***

Chebacco News 28

cropped-image1.gifChebacco News 28 – October 1999

Kelani Rose is Launched!

ch283

Jim Slakov’s KELANI ROSE struts her stuff.

Jim Slakov, of Sechelt BC reports:

Well we launched the Kelani Rose (daughters Kelly and Annie and wife Rose) near the end of May, and have sailed about a dozen times since then. The weather in June was abysmal and not what we call summery at all, but July and August so far have been great! As I’m just learning to sail, we pick our days, and miss the windiest ones, perhaps saving them for later. One day the wind blew about 15 knots and that was very exiting, the boat took it well and didn’t show any signs of stress. I didn’t know about lifting the centre board when running with the wind…of course we’re commiting some of the classic errors for beginners . .. like getting into irons after a failed coming about, and ending up sailing backwards for a spell ( I know now to sheet the mizzen to correct that)… the transom does drag a bit sometimes, there is a 6 horse, 60 lb. outboard on the bracket, I think I’ l l throw a little more weight up front and see what happens, it’s not serious in any case and doesn’t seem to affect the performance… the Kelani Rose will self steer when the conditions are right, and some very experienced sailors have been aboard and complimented her on her handling ability. All in all I can’t think of anything I would change were I to build another, except to put a better quality line on the centre board ( I used a cheap 2nd hand prawn line and saved maybe 50 cents), so that will have to be removed in the fall.

There is a wooden boat show in Vancouver at the end of August, in which Kelani Rose will strut her stuff and hopefully do the name Chebacco proud! Am going to get some pictures taken under sail , soon I hope, and send them off to you… signing off for now, Jim Slakov… my email address is woodventures@uniserve.com

As it happens, Jim did do us proud and won first prize in the ‘Best New Construction’ category! Kelani Rose also got an excellent writeup in the ‘Coast Independent’ newspaper. Readers of Chebacco News will be interested to know that Jim made extensive use of cherry wood in her construction, and very beautiful it looks, too. The masts are of yellow cedar and the other spars of Douglas fir. He reports that the mast is up and the boat ready to go within 15 minutes of arriving at the slip.


Itchy and Scratchy goes from strength to strength:

ch286

Itchy and Scratchy . . .

Fraser Howell continues to experiment with the sails on his strip-built Chebacco Itchy and Scratchy:

Hi Bill

It is too windy to go out today. I’ll catch up on correspondence. Last time I wrote about the set of my mainsail, leech possibly too tight, too much depth for anything but light breezes. I tried a couple of things. I replaced the mast hoops with lashings that hold the luff closer to the mast, except at the tack. This pulled material out of the “pocket” and reduced the depth of the sail quite effectively. I also restrained the boom as if with a down haul to put more tension than the weight of the boom into the luff. That tension is set by the main hoist which has a 2:1 purchase.

These measures have flattened the sail, and reduced weather helm. I think it is faster, but I haven’t sailed in company, so cannot confirm it. I increasingly enjoy experimenting with the sail shape in different wind strengths and tacks. Varying tension on the foot, luff, the angle of the gaff, size and sheeting of the headsail. By the numbers Chebaccos should be fast, but I have not found that is always easy to achieve. Some days it is no fun at all, and my boat seems reluctant to do anything easily. Other times it is a joy to sail, balanced and fast.

Cheers;

Fraser


Jerome McIlvanie makes progress:

ch287

Jerome’s Chebacco . . .

Jerome McIlvanie of Yakima WA reports:

. . .I put an extra 1/4″ ply on the bottom, glassed, sanded and painted for six months. Turned it over, fitted out the inside, moved the cabin aft six inches, put an extra bulkhead clear across between aft cockpit and seat bulkhead. I enclosed it and built in an insulated ice box as shown in WoodenBoat magazine. It doubles as a seat also. I raised the sides of the cabin 2″ and put on 1″ or so more crown in the top. I used 2 layers of 1/4″ ply glued and screwed to 4 laminated bows out of long, thin 1 3/4″ square. I cut eh hole out for the hatch and used it for the sliding hatch. I glassed the top. For the centreboard and used 1 1/4″ thick black polyethylene. It’s tough but machines nicely and is a little heavier than the leaded ply CB.

Hopefully next year it will be in the water.


Another Epic Cruise in Lark

ch284

LARK heads north to Cape Cod . . .

Tim Smith of New York City reports:

I suppose a literal-minded person would say that our Chebacco cruising season stopped for the winter, in the sense that the boat was hauled and wrapped, and the children had a school year, and there was Christmas, and snow. But all that was really an interlude between voyages, one that gave us barely enough time to work on our wish list. Item one on the list was good bedding, so we bought two Coleman air mattresses and a battery-operated pump. Next we located a pre-fab galley box, with compartments to hold pots and pans and drawers for cutlery. I had thought for a while that a rudimentary electrical system would be nice, and lo and behold, there in the West Marine catalog was a 12-volt battery, sealed in a plastic case, with two ports for cigarette-lighter-style connectors. Turns out that it fits in the well beside the mizzen step; with an extension cord run into the cockpit, it can power the GPS, lights, VHF, what have you.
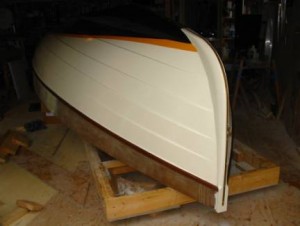
Next we ordered a new mizzen. The old one had tried to commit suicide at the mooring in a gale, when the clew, which had a bronze fitment on it, came loose and beat itself to pieces.

Then we decided we needed a tender, and so built an Auray Punt during the cold months. I picked the design because it looked good for t owing and could carry four, and promised to be easy to build. It went together with no surprises, though I made the botttom out of 3/8 inch ply instead of the 1/4-inch specified. Of course the punt wasn’ t quite finished by the time the provisioning season was over.

Our Chebacco, called Lark,went back in the water toward the end of June. It’ s an easy job for one person, now that the mast-stepping slot is installed and the trailer has extra bunks. I rigged a brailing line through the beehole in the mizzen mast to help keep the new sail secure: furled it by grabbing the clew and rolling it up into a sausage against the mast, then belayed it, and lashed the brailing line in a descending spiral around the whole works. It seemed tight, though the very top of the sail was too stiff to lie down properly. Left Lark on the mooring feeling pleased.
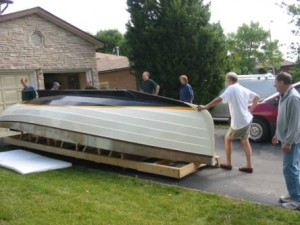
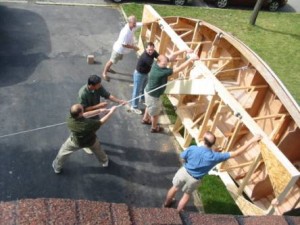
That night a storm blew in, and it stayed for the morning. I drove down to the dyke with my son just to have a look. The mizzen had stayed furled all right, but Mother of God – the wind had lifted the whole works, mast and sail, up out of the step and halfway out of the partner, and the rig was swinging around drunkenly, wedges scattered like broken teeth. We got the mess under control, my boy learning some brand new words along the way. Evidently the small stiff spot at the head of the sail had caught enough of the gale to pull everything loose. There is one other yawl in our local waters that has a sprit-rigged mizzen, and more than once I’ ve seen the sail flapping forlornly at the mooring after a big blow. Does this mean simply that there is room in one small town for two morons? Or is there a lost art of spritsail furling that other readers may know about? We addressed the problem by winding the mizzen around an d around the mast and cleating a line to the clew, which seemed to do the trick. I’ d love to hear what others have done.
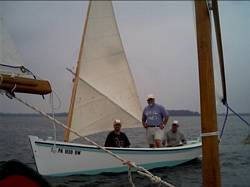
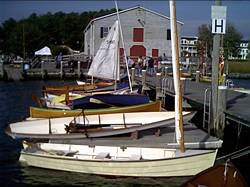
Howling wind was a theme of the early part of the summer, and we had lots of practice sailing the boat single and double-reefed – a boon , actually, because we learned a lot about her limits. One fine blustery afternoon I had three experienced dinghy racers aboard and one very game novice, and we decided to leave one reef in when we should have had two. We sailed out into Nantucket Soun d into the teeth of a 20-knot southwest wind kicking up 4-to-6 foot waves. The boat was stable and fast; the sail was exhilarating, wet, and not too alarming. Crawling forward to secure the anchor on its sprit, I got a good look upward along the mast, and couldn’ t quite believe the bend it was taking. Under those conditions the rudder seemed small, but we were pushing it. One nice thing about this kind of sailing in the Chebacco, as opposed to a conventional cat: I find this boat much easier to jibe in a big wind. We used to dread the maneuver in a Marshall 22, but now don’ t give it a second thought, and that ‘ s a handy thing in a crowded harbor.

The strong southwest wind prevailed, but we were bent on cruising and constrained by a schedule, so one Frid ay morning in July we loaded our new gear aboard and took off, intending to head for Nantucket Island, about 25 miles to the south. We decided to tow a dinghy. Big mistake. The Auray Punt wasn’ t yet launched, so the dinghy we took along was an old family warhorse, a relatively heavy design by F. Spaulding Dunbar with little rocker and a lot of wetted surface. It towed nicely as we left the harbor, then slowed our progress perceptibly as we nosed out into the sound. Then we stopped thinking about it for a while because a quite amazing wind blew up and stayed up, making a wicked short chop against the falling tide. We weren’ t traveling anywhere far in those conditions, so we turned tail and ducked into the lee of some local barrier islands for a daysail.

Near sunset we anchored by the beach, spotted couple of guys digging clams, bought some, cooked them up with garlic and white wine, and ate them as the sun went down. The new air mattresses were a great success. With the cooler on one side of the centerboard trunk and the galley box on the other they were amply supported, and we slept snugly under the boom tent, kids in the cuddy. The next morning it was still blowing like hell. With a double reef in, we headed back out into the sound to see what progress we could make.

Towing the dinghy it was tough going to windward, wet and slow. I don’t recall what the currrent was doing, but the GPS said we were making little more than 2 or 3 m.p.h., and that was up hill and down dale. When we gave up at last and reached back for the harbor, our speed didn’ t improve much: I’ d guess that the tow cut our speed in half on all points of sail. “Maybe next time we should leave the dinghy behind and take advantage of the boat’ s sailing ability,” my wife suggested. I thought of some suggestions in return, but stifled them.

Three weeks later we had another stretch of vacation and another shot at a Nantucket trip. We got provisions together and waited for fair weather, which wasn’ t long coming. On a Friday morning with a 10-15 knot breeze we tucked in a reef and headed south – a glorious sail with the wind on the port quarter, the boat happy as a mallard. With the dinghy left at home on the beach, we made the trip in about five hours. The children played blackjack in the cuddy, declining to tell us how they had learned the game.

Nantucket is an island choking on its own wealth, a Yankee playland for the gilded age. Which means, among other things, that its harbor is jammed full of fabulous boats. As we were going into the harbormouth, Endeavor, the J-boat, was coming out. And once we were well inside it was like a crowded parking lot. We picked our way easily through the fleet, sailed up to a beach at the foot of Main Street, found room enough to swing among the Boston Whalers in a couple feet of water, and waded ashore. We spent the night with friends who have a house there.

Morning came, and the weather report was discouraging. The day itself promised fair weather with a Northeast breeze, but the next couple of days were to be gray and wet. Rather than turn the children off to cruising, we decided to head for home. We wandered down to the beach – steps ahead of Bill and Hillary Clinton, in town for a fund-raiser – and found Lark aground. She wasn’ t hard aground, just stuck in the sand, bow afloat, a couple of extra inches of waterline showing at the stern. But the tide was falling, and would be for another four hours. My wife, my son and I stood backwards against the transom and heaved. Nothing. We got our hands under her, lifted, and heaved some more. She moved. Four more good grunts and she was afloat.

It was a long close reach home, a sail of about six hours in a 10-12 knot breeze and bright sunshine. The kids tried their hands at sailing. The boat hummed along; the trip was sublime. For the record, we did, finally, get the Auray Punt painted and launched. She’ s the fourth Bolger in our fleet: besides Lark there’ s a long Diablo and an Elegant Punt. The Auray Punt is a really nice rowboat, swift and steady. I’ d say she’ s a little bit less stylish in three dimensions than in two, although when she’ s coming at you head-on, showing her flare, she’ s got real panache. Towed behind the Diablo, she tracked nicely. She’ s light, so maybe next year we’ ll try towing her somewhere with the Chebacco. Or maybe not. Lark has a big heart, but she’ s no tugboat. Which means, I suppose, that my wife was right. Happily, she doesn’ t know how to find this URL, so she’ ll never know.

ch285

Tim Smith’s stretched Diablo and Auray Punt . . .


Jamie Orr and Bill Samson talk boats

Jamie Orr of Victoria BC was visiting Scotland in August and dropped by to see Bill Samson and to go for a sail in Sylvester. The ‘sail’ was more of a ‘motor’ due to lack of wind, but we O.D.’ed on boat talk and had a great time. Jamie’s sheet ply Chebacco is nearing completion and should be in the water next year. Jamie left these photos of his mast slot, which has a neat sliding cover:

ch281

Cover closed . . .

ch282

and open.


New email address and URL for Chebacco News:

Bill Samson can now be contacted on : bill.samson@tesco.net

Chebacco News is at http://members.xoom.com/billsamson

Snail mail to Bill Samson, 88 Grove Road, Broughty Ferry, Dundee DD5 1LB, Scotland.

Chebacco News 26

Chebacco News

Number 26, May 1999

kangaroo

GINA – on Kangaroo Island, Australia

GINA

Colin Hunt, of Victoria, Australia, sent me this picture of GINA – Clive Colenso’s lapstrake Chebacco. He reports a good, dry boat which has been surveyed for charter hire. The waters around Kangaroo Island can get pretty rough. GINA has the cockpit modified to be self-draining with approximately ½ cubic meter of underfloor stowage for outboard, anchor etc.

Colin asks if anyone has the offsets for any version of Chebacco on a computer file in .DXF format? This might lend itself to CNC routing, to allow mass production of Chebaccos!

Chebacco –25 . . .

Simon Jones (also in Australia) reports:

I’m building directly onto the bulkheads which I have moved to new stations , I am intending to rig her with a jib and a small bowsprit to accommodate anchors and larger foresails ( reachers etc, ) the interior has been enlarged to give full sitting headroom and quarter berths as well as a big double forard , taking out the centreboard has allowed me to cut the keel down to a flat keelson reducing draft and giving me a nice companionway to stand in with the hatch open , ( I’m just running thru all the alterations I can think of here ). I have closed in the cockpit at the stern to give me a large lazarette for storage, the cockpit is still 7′ long so plenty of day room … I have jumped up the deck height 6″ all round and instead of a flushdeck style cabin I have changed to the standard box cabin as in the 20 with a 5″ side deck (just enough for one foot, the other using the cabintop) while this is pretty thin its enough to go forard if necessary, however I hope to use

my forard hatch for most foredeck work . I’m keeping the mizzen as I have always found them to be worth every penny.

I’m currently epoxying everything as its obviously easier than doing it after construction, and I hope to have her in the water before the end of the year as I have the luxury of being able to work on her pretty much full time.

Your idea of having a Chebacco meet sound great! … I’d love to fly over to Canada and be in it…. That’s one fantastic cruising ground they have there and a chance to sail there should never be missed (falling in the water however is a one off!…. your firth would be warm by comparison) ok …I wont bash your ear about it all any more … I’ll be sure to get piccies to you when I have them.

Cheers Simon.

Well! This’ll be one interesting boat. As far as I know, it’ll be the very first Chebacco-25 to be launched. Watch this space!

Plywood – your views –

Tim Fatchen – yet another Australian, writes:

[WBS in Chebacco News #25
“So – Write to me about your ideas on plywood. I’ll fess up first – I
used pretty cheap Far-Eastern ply labeled BS1088, though it was
clearly nothing of the kind. It has frog-hair thin outer veneers, and
thickish inner ones. On the other hand the glue is certainly
waterproof and there are few if any voids in the inner veneers. My
theory is that glass/epoxy sheathing would make it acceptable, and
so far I’ve had no problems (3 years after launching). Let’s hear your
stories!”]

Bill, you clearly took the road favoured by the elite. From your
description of the plies, we fairly clearly used the same source for
Flying Tadpole in 1991, except ours was a grade down and didn’t try to
pretend to BS1088 (unless the BS stamp was added later to boost sales).

Nevertheless, still good waterproof glue and very few voids despite the
froghairthin outer plies. After seven years of abuse in Flying Tadpole,
the only problems which have arisen are two or three spots where
checking of the top ply has occurred (a series of slits about 1/2 inch
long, look like razor nicks) and we haven’t bothered doing more than
give them a lick of paint. Longevity was helped by through epoxy
encapsulation.

Our Nymph, even older (1989), was made from the same ply. Even more
abuse, sits for months at a time under the oak tree, gets roughly hurled
onto decks of houseboats occasionally, always makes landfall on sharp
stones lurking in the mud…Various nicks, dings and scratches in the
bottom, brutally neglected, but still absolutely sound (and originally 3
coats of epoxy inside and out, but no fibreglass).

In both cases, the ply was very heavy, though – I suspect mangrove wood
as the inner plies. Only real objection to it is that it’s a dog to work
compared with gaboon – splinters. I’m reminded of this as we’re still
using odd leftovers of 1/2 inch (not as good as the 1/4 inch was for
voids) as backing plates for deck hardware, battery boxes etc.

So that’s seven and ten years respectively of both use and neglect, the
latter being harder on boats…

Tim & Flying Tadpole

A few notes on the Chebacco’s properties

By Giuseppe ‘Pippo’ Bianco

Like most of the CN readers, I’m particularly intrigued by Phil Bolger’s designs and I have purchased plans for the Micro, Long Micro and Chebacco. The latter is very close to what I need: the most boat which conjugates sheet plywood construction, easy transportation, launching and hauling with a trailer, comfort and safety. I’ve not been able to find any data like righting moments and seaworthiness index for the Chebacco, so I decided to try to compute them by myself. After all, I’m a scientist by profession, so, I said to myself, this shouldn’t be too difficult… Well, that is true only in part. A complete analytical description of the interaction between a sailboat, the wind and the sea waves is almost impossible, and probably the only way to get comprehensive and reliable results would be building the boat, stuff her with instrument (like inclinometers, accelerometers, strain meters), sail it in a variety of conditions while recording the data, analyze them and draw the proper conclusions. I’m pretty sure that nobody carries out such measurements except maybe large, well funded designing companies working on super racers involved in world class competitions. So, in the amateur’s world, one is forced to use a mixture of common sense and a few empirical formulas.

A few basic numbers are needed to make a first assessment. Carl Adler (early readers of the Common Sense Design’s Newsletter will recall him as the Micro prototype builder) runs a great interactive sail calculator on the WWW which allows direct comparisons between any pair of sailboats listed in his database, recently integrated by myself with the relevant data for the Micro, the Long Micro and the Chebacco. The URL of his page is http://www.image-ination.com/sailcalc.html.

The parameters one needs to know for each boat are the length at water level (LWL), length out all (LOA), the beam, the displacement and the sail area. For the Chebacco those numbers read as follows (in metrics, yeah):

LOA=5.99 m; LWL=5.04 m; Beam=2.26 m; Displacement=789 kg; Sail area = 16.35m2.

The sail calculator crunches those numbers and rapidly comes out with the following sentences for our boat (compared hereafter with the corresponding data for the Micro and Long Micro):

Category: racer. Carl classifies the boats into four categories: racer, racer/cruiser, cruiser/racer and cruiser, in descending order of performance. Micro classifies as racer/cruiser, while Long Micro gets a cruiser score.

Capsize Ratio: 2.5. This number is an indicator of a boat’s ability to resist to the capsize: a value lesser than 2 is considered good; the higher the number, the more vulnerable is the boat. Micro gets 2.0, Long Micro 1.8, so both are stiffer than the Chebacco.

Hull speed: 5.5 knots . This figure depends only on the LWL. Micro 4.7, Long Micro 5.3.

Sail area displacement ratio: 19.5 . This is an indication of how powerful a sail plan is with respect to the vessel’s displacement. Values around 18 and higher indicate high performance boats. Micro gets 17.5, Long Micro 23.5.

Displacement length ratio: 170 (light). Micro sports a huge 411 (heavy), Long Micro an average 274 (moderate).

Length to beam ratio: 2.24. Micro gets 2.21, Long Micro 2.63. A value of 2.7 is considered average; 2.2 is low.

Motion comfort: 10.6. This numbers depends on a complex way from displacement, length and beam: the higher the number, the more comfortable is the boat. Micro gets 17.8, Long Micro boosts a 20.1.

Be warned that sometimes the ratios above are not plain ratios, but rather complex expressions involving odd powers of the parameters. A good description of the formulas used to compute the above parameters is given in  http://home.att.net/~hcyoung/formulas.htm

Well, the empirical formulas above confirm what the Chebacco sailors know already about her being spirited. Her capsize ratio is apparently not so good, such as the motion comfort index which is worse than the Micros’.

Not content yet with these numbers, my next step involved some more in-depth analysis. There are two ways to do that. The first is the old-fashioned one: grab a (modern) scientific calculator and a ruler, make measurements on the plans and compute the sought-for parameters, following algorithms commonly found in books on boat design. The second consists in modeling the boat in a dedicated computer program, which in turn will do all the number crunching. Commercial hull design programs are very expensive and barely worth the expense by an amateur: the free demo versions are, in my opinion, almost useless. Luckily enough, however, there are a few nice complete programs around, available free of charge on the WWW. The ones that I know better are Carene40 and Carene50 by Robert Lainé, Hulls by Gregg Carlson and Hullform 6S by Blue Peter Marine Systems. The Carene family is nice and robust, but it’s a bit lacking when one needs to compute the static properties of a boat. Hulls is great, with the only possible exception being the limited number of sections allowed to model a hull. Hullform 6S is probably the best and most complex, yet relatively easy to use, but unfortunately it doesn’t perform the plate development as the first two. On the other end, it’s not limited to hard chine hulls, and comes with a nice user’s manual.

I decided to use Hullform 6S to do my analyses. The first step has been to input all the sections as described in the table of offsets of the Chebacco’s plans. This is quite straightforward. I did that using the 42″ water level as baseline: the end elevation view of the resulting hull is shown in the figure below, where on the right half is the forward view and the left half is the aft view. The scale is in meters. This is very close to the drawings on the original plans, even if admittedly not perfectly fair. I didn’t consider the keel to keep things simple.

chebend (2)

Now, in order to perform the static analysis, one has first to balance the hull. I found that my synthetic hull balances very well (i.e. the pitch angle is very small) using the center of buoyancy positions given in the plans, with a few cm tolerance. Using a nominal displacement of 789 kg (1740 lbs.), the plans indicate a bottom draft of 0.193 m, while I find a bottom draft of 0.205 m. This is a difference of 12 mm. Alternatively, to sink the boat at the nominal draft, the displacement would have to be 710 kg (1565 lbs.). I don’t know which one is the correct number. Please note that this is the bottom draft (canoe body draft), not the keel draft.

The nice thing with Hullform is than one can compute the righting moment as well as other parameters for any heel angle. Let me warn you however that my analysis is oversimplified. It doesn’t take into account the combined effect of masts, sails, crew position, wave effects, and so on.

Another warning here: the righting moment computation requires knowledge of the position of the center of mass of a boat, around which the boat rotates when heeling. Longitudinally it has to be in the same position of the center of buoyancy, but the unknown here is its vertical position. This is tough to compute and actually, in the real world, it moves together with the crew and all the stuff on the boat. I first set the center of mass of the Chebacco on the waterline plane, but I’m not sure whether this is true or not. According to Bill Samson, this is a bit too optimistic, so, following his suggestions, I’ve performed the same calculations two more times, respectively lifting the center of mass by 0.1 and 0.2 meters.

Last warning: apparently Hullform treats any hull as if it was completely decked at the sheer level, even if there is no mention of this in the user’s manual. The Chebacco is not decked for a good part, so my results are optimistic.

Nevertheless, after 111 runs of the program, here are the plots of the computed righting moments with respect to the heel angle for three different vertical positions of the center of mass, referred to as VCG (vertical center of gravity).

Image6 (3)

My first (VCG=0.0 m) synthetic hull gets the sheer into the water at about 35 degrees of heel. It is apparently self righting up to about 115 degrees, but over that angle it goes all the way down to settle upside down. Looking at the numbers, there is no chance to right it back by pulling on the centerboard… Note also how the curves move downwards when VCG increases, indicating the well known effect of worsening stability. For VCG=0.1 m, the sheer at midships gets submerged at an heel angle of about 40 degrees, and the righting moment vanishes at about  degrees. Finally, for VCG=0.2 m, the sheer gets under water about 45 degrees and the boat is self righting up to about 95 degrees of heel.

An important number used to assess the stability of an hull is the ratio between the area under the curve with positive righting moments to the area over the curve where the moments are negative. In our first case (VCG=0.0 m), this ratio is about 2.7, reasonably good, but it goes down to 1.9 for VCG=0.1 m and to 1.3 for VCG = 0.2 m. After having computed these and several more parameters (actually Hullform does everything), one opens “Principles of yacht design” by L. Larsson and R. E. Eliasson at page 54, enters those numbers in the equations therein and computes a magic number, called the Dynamic Stability Factor (DSF). The Chebacco’s parameters for VCG=0.0 yield DSF=11, placing our beloved boat among the “inshore” vessels. This classification, endorsed by the International Standard Organization, classifies vessels into 4 categories following the water conditions they’re qualified for: sheltered (DSF<10), inshore (10<DSF<25), offshore (25<DSF<40) and ocean (DSF>40). The most penalizing for the Chebacco is the so-called Beam Displacement Factor, which apparently indicates that the beam of the Chebacco is too wide with respect to her typical displacement. However, increasing the displacement is not that effective in getting better figures for the DSF, and this apparently confirms that Phil Bolger and Brad Story are right (surprised?) when they say that additional ballast would be useless in the Chebacco. On the other hand, a slightly narrower beam (e.g. 2.0 m instead of 2.2 m) would have boosted the DSF to much more seaworthy values. The situation obviously worsens for VCG=0.1 (DSF=9), and for VCG=0.2 m (DSF=7). Hence, based on the above criteria, the 20′ sheet ply Chebacco is marginally qualified for inshore waters.

It needs to be said however that this flaming of the wide beamed boats came after the infamous Fastnet disaster in 1979, in particular because those boats are more easily capsized due to the action of big (b-i-g) and breaking waves and, when capsized, are more stable upside down. I don’t think that any Chebacco sailor would ever try to test his boat in really bad seas, so watch the weather forecasts… In any case, like Bill Samson said elsewhere in the CN, this reasoning is academic because there’s no notice yet of a Chebacco having been capsized.

Given the flared sections of the Chebacco’s hull, I tend to think that the computed DSF values are a bit underestimated, and I would conclude by saying that those boats “…are very good in rough water and forgiving in squalls and with prudent and skilled handling and not exceptionally bad luck would get over the North Sea, or the ocean for that matter; but by present day standards they are inshore and fair-weather boats”.

P.S.: for those who didn’t catch it yet, the last sentence is Phil Bolger’s opinion on his Chebaccos. I’m by no means an expert in boat design, and my speculation should only be considered as the result of a few pleasant hours of work of an amateur boat builder during a rainy week-end. Nevertheless, I would love to hear PCB’s opinion on this “paper”…

Bibliography

Lars Larsson and Rolf E. Eliasson 1994. Principles of Yacht Design. Camden, Maine: International Marine

Howard I. Chapelle 1936, 1994. Yacht Designing and Planning. 2nd Edition. New York, London: Norton

Philip C. Bolger 1994. Boats with an Open Mind. Camden, Maine: International Marine

Tabernacle and Bowsprit

David Neder writes

I am located in the city of Waukesha, Wisconsin. About 90 miles NNW of Chicago
or twenty miles due west of Milwaukee/Lake Michigan.
I am attaching photos of the “Anna C”.

Agf00001
Bow with tabernacle and short sprit.

Since the boat will be trailered and I am too long in the tooth to wrestle with a mast, I added the tabernacle. Its section modulus in both the x and y axis is twice that of the mast at the pivot
point.


Materials: 1/2 Fir Marine Plywood, Ribbon strip mahogany plywood, mahogany, red oak, West Epoxy, Fiberglass. Two part poly-urethane paint on the exterior. Interior is paint with Acrylic paint with a fungicide. Construction is taped seam.

David J. Neder

And finally

David sent some other images, too, but there’s no more room in this issue. Neither is there room here for all the plywood-related comments, so they’ll have to be held over as well.

Please send your contributions to me, Bill Samson, 88 Grove Road, Broughty Ferry, Dundee, DD5 1LB, Scotland. wbs@sol.co.uk