Chebacco News 78 – Richard’s interesting project

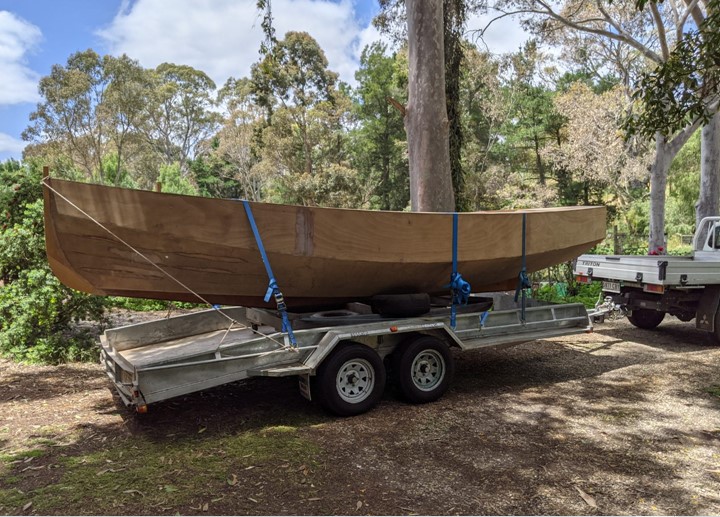
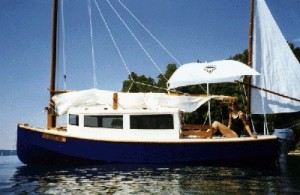
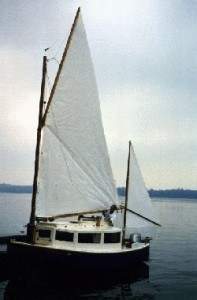
Richard Cockburn wrote to me in November 2022. He had purchased a partly completed hull from Duck Flat wooden boats in Adelaide, Australia. The advertisement is still up on their website https://duckflatwoodenboats.com/boats_for_sale/chebacco-21ft-glass-house-design/ but I guess they will take it down soon – it sold over a year ago!

Richard agreed a good price and brought it home.

It turns out that it was no ordinary hull. A glasshouse cabin but an off centre centreboard. He asked me for details of the numerous variants of Chebaccos and he also corresponded with Suzanne. (I was obviously helpful because Richard made a useful donation to the website – Thanks Richard)

Richard continues:

Dear Andrew,

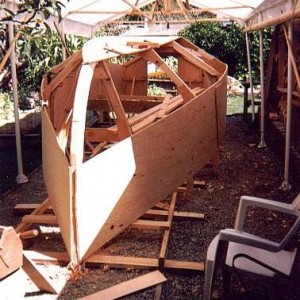
This is the history of my progress finishing the bare  hull of “Glasshouse version” I purchased the end of November 22.

The first steps were to establish what I had bought because after examination it is a combination of the standard version, Glasshouse, with an offset larger centre plate with pivot some 600mm further forward than standard.

In detail the versions divide at the waterline.

Below the water line it is the standard Chebacco with the rudder ending at the stern and no ballast.

Above the waterline the hull has the 150mm deeper sides of the glass house version.

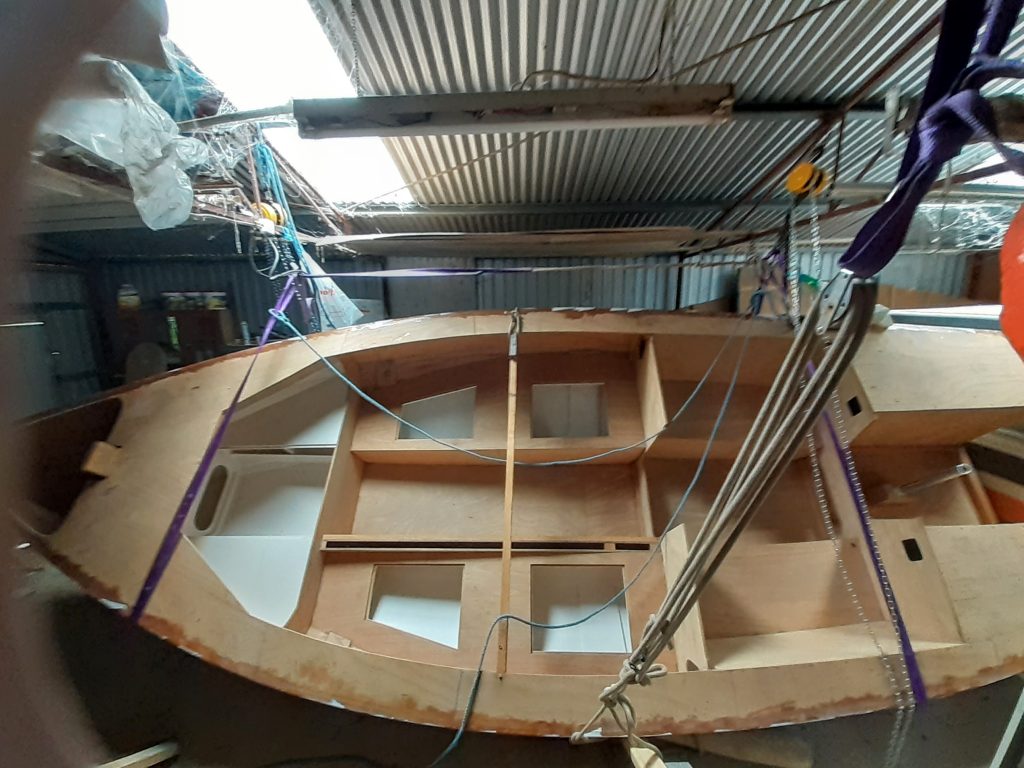
Internally the cabin is as per glasshouse version.

After reading the information you provided I also at the same time contacted Susanne Altenburger through Bolgerboats.

Armed now with copies of MAIB of all the versions published

As I want to sail in the gulfs Spencer and  St Vincent – semi Off shore – the design is now as follows.

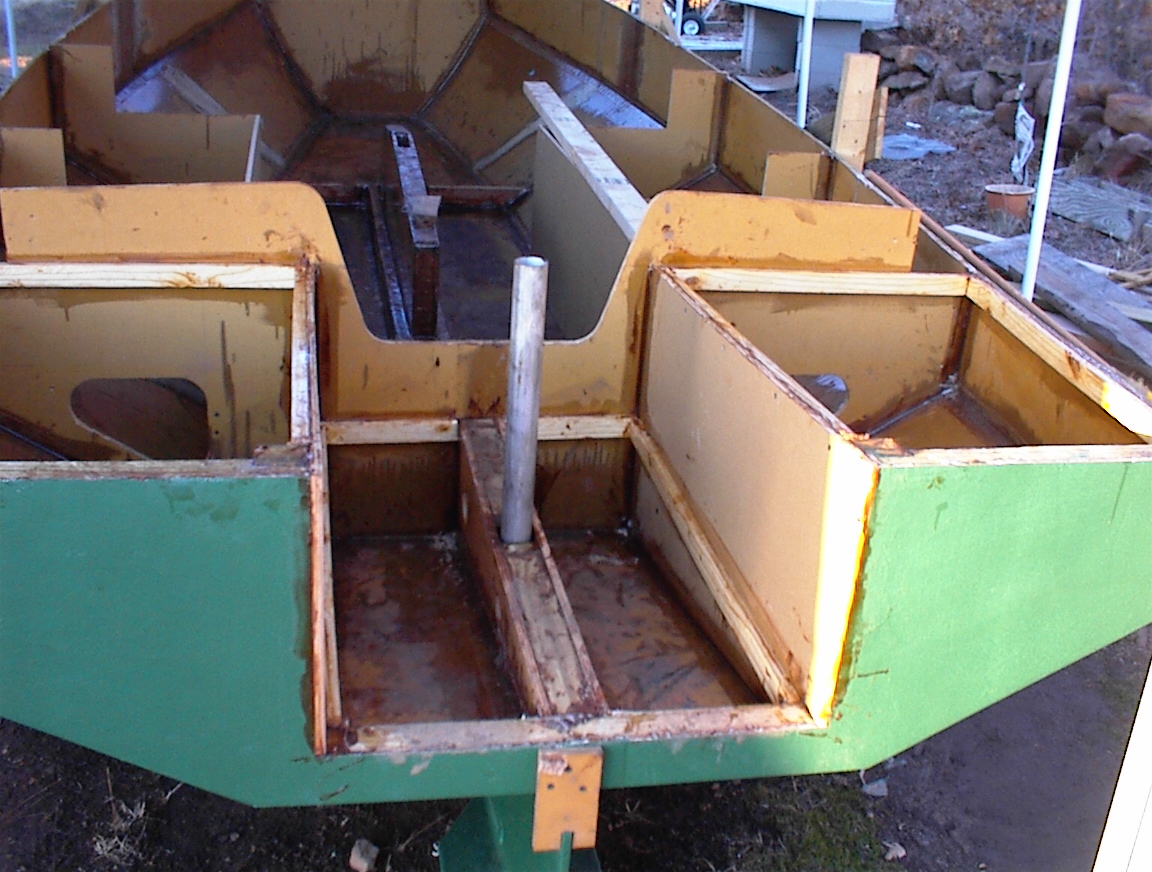
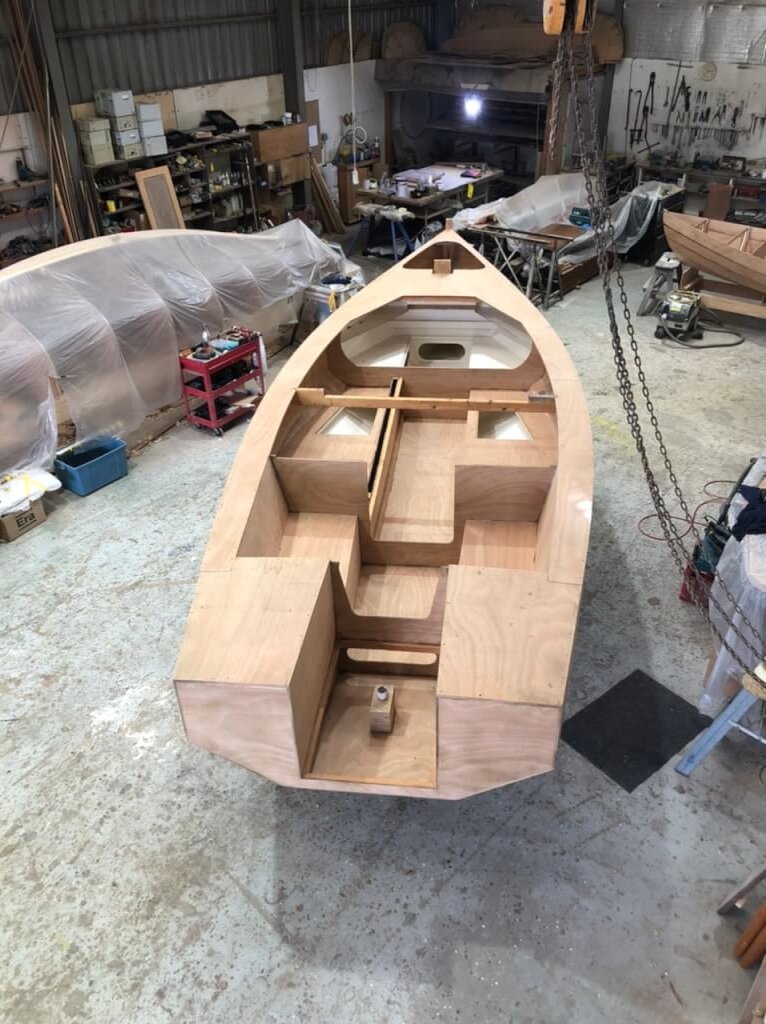
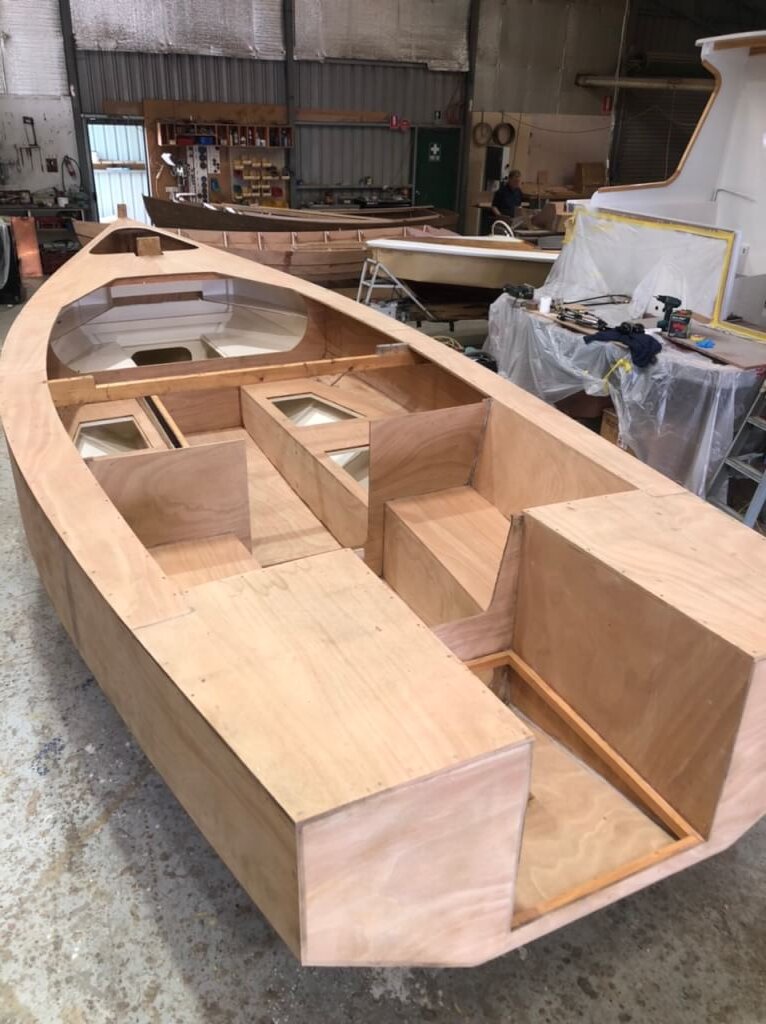
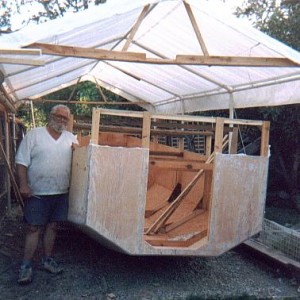
  • Cabin extended out to almost to the gunnels, for extra stability in case of knockdown.
  • forward hatch to make reefing and anchoring easier and safer.
  • Cockpit kept the 1100mm rather than sitting with feet at the top of the keel making the cockpit self draining.
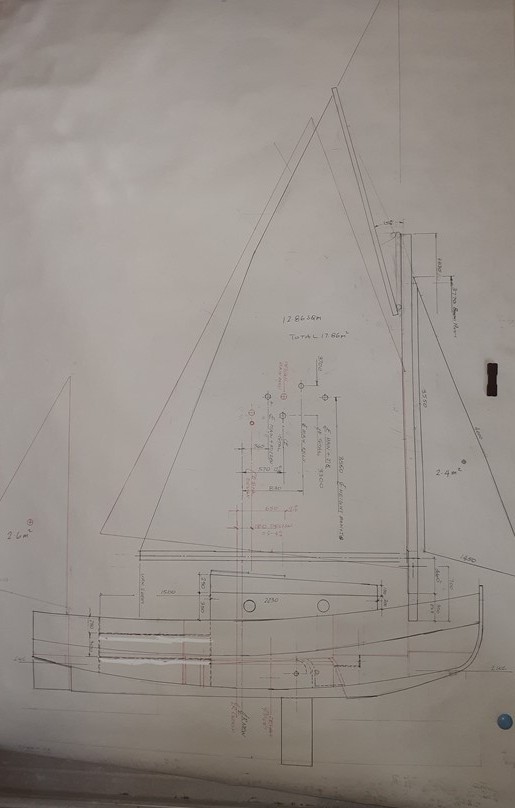
  • Sails I have existing sails and mast  from the Piver Tri I used to own, so will modify the main and make a mizzen from them. At this stage the main looks like it will be square headed but the same area as design. This moves the C of E approx 200mm further forward than standard. Equivalent to the change suggested for the cruising version .

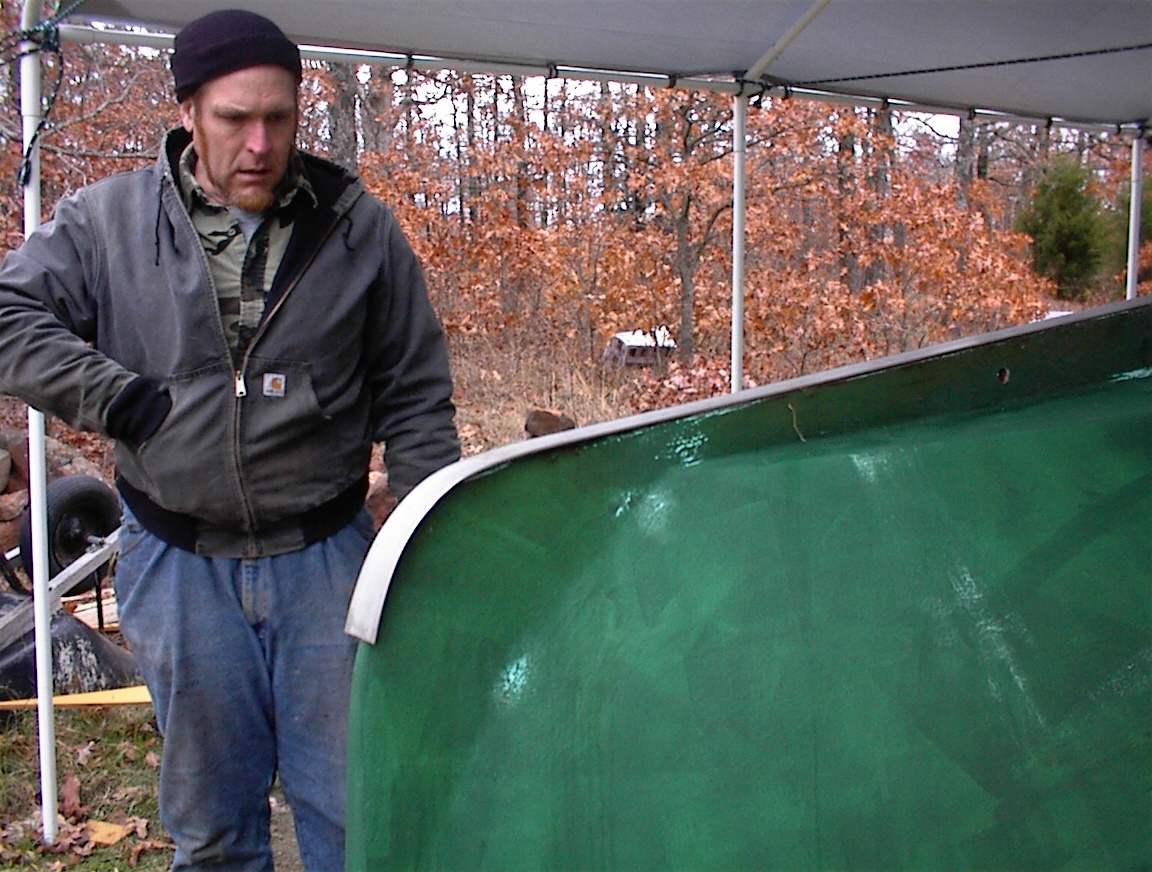
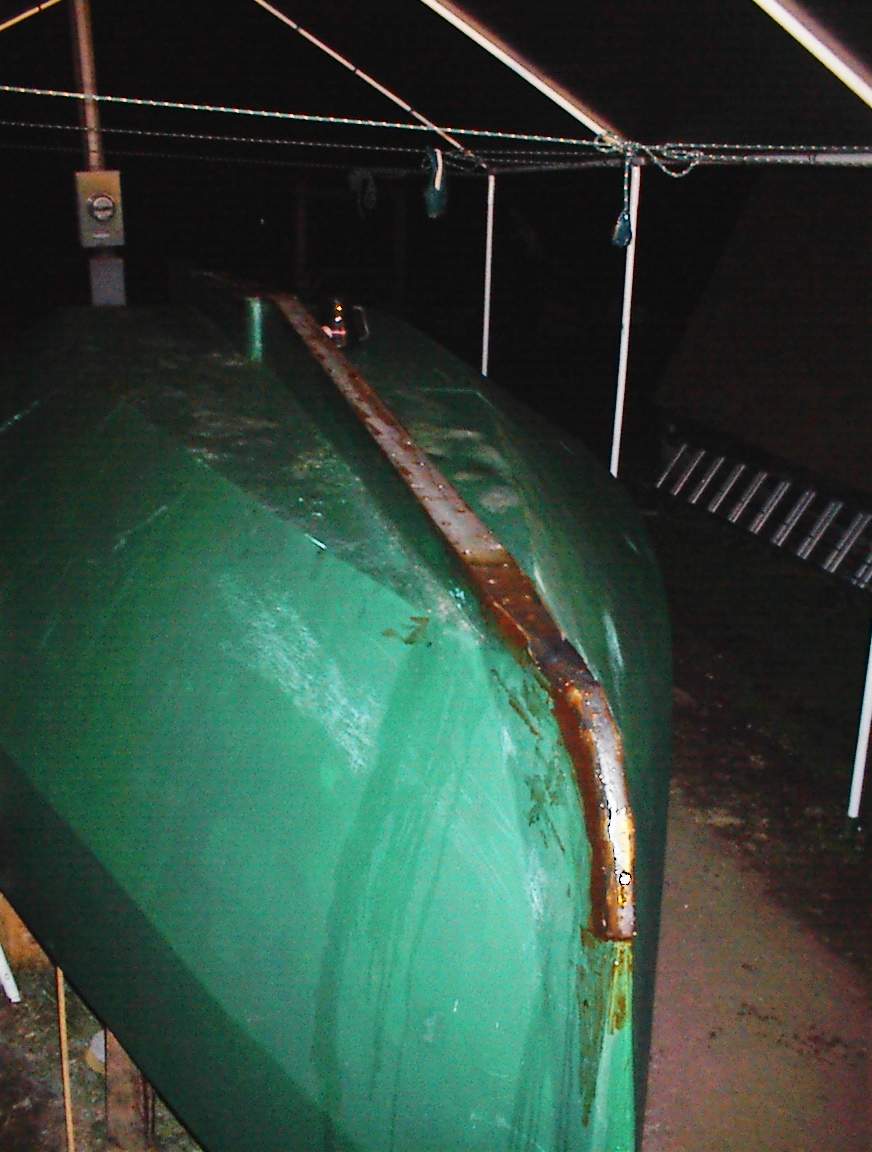
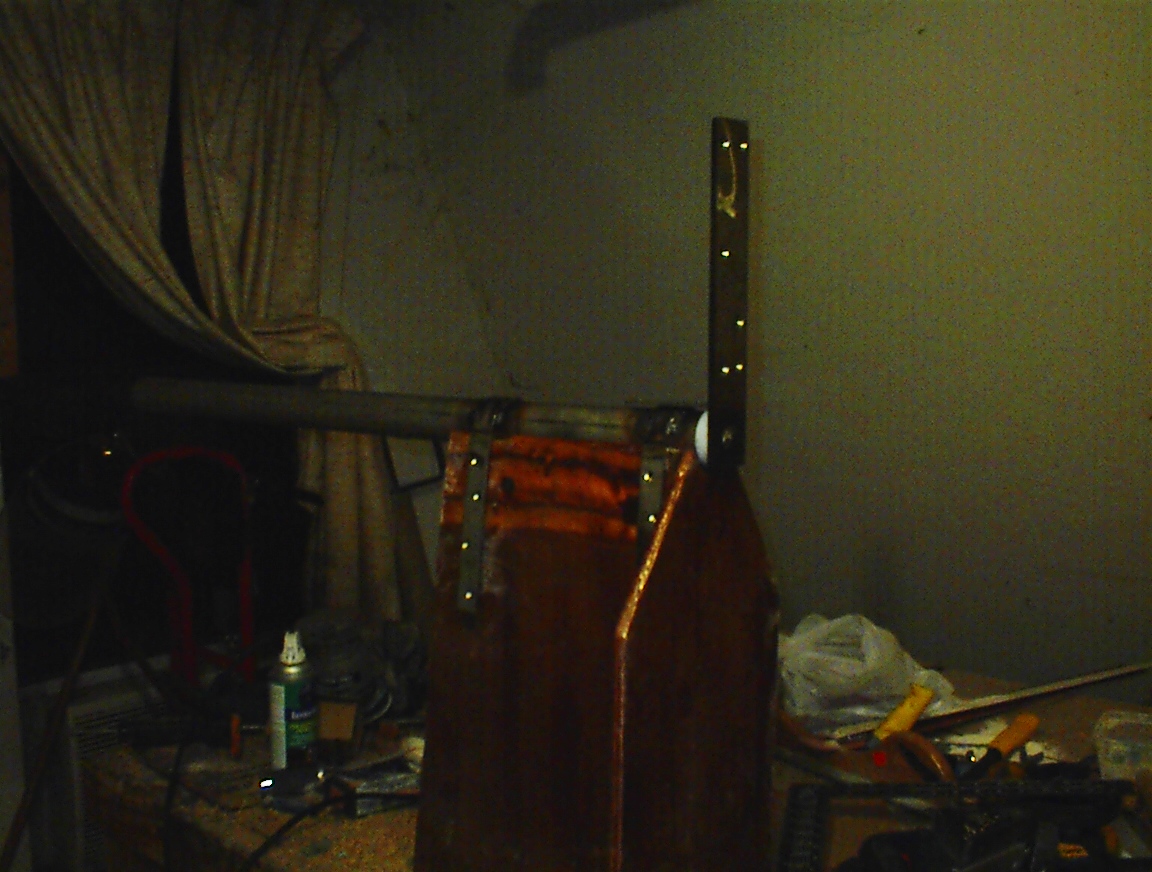
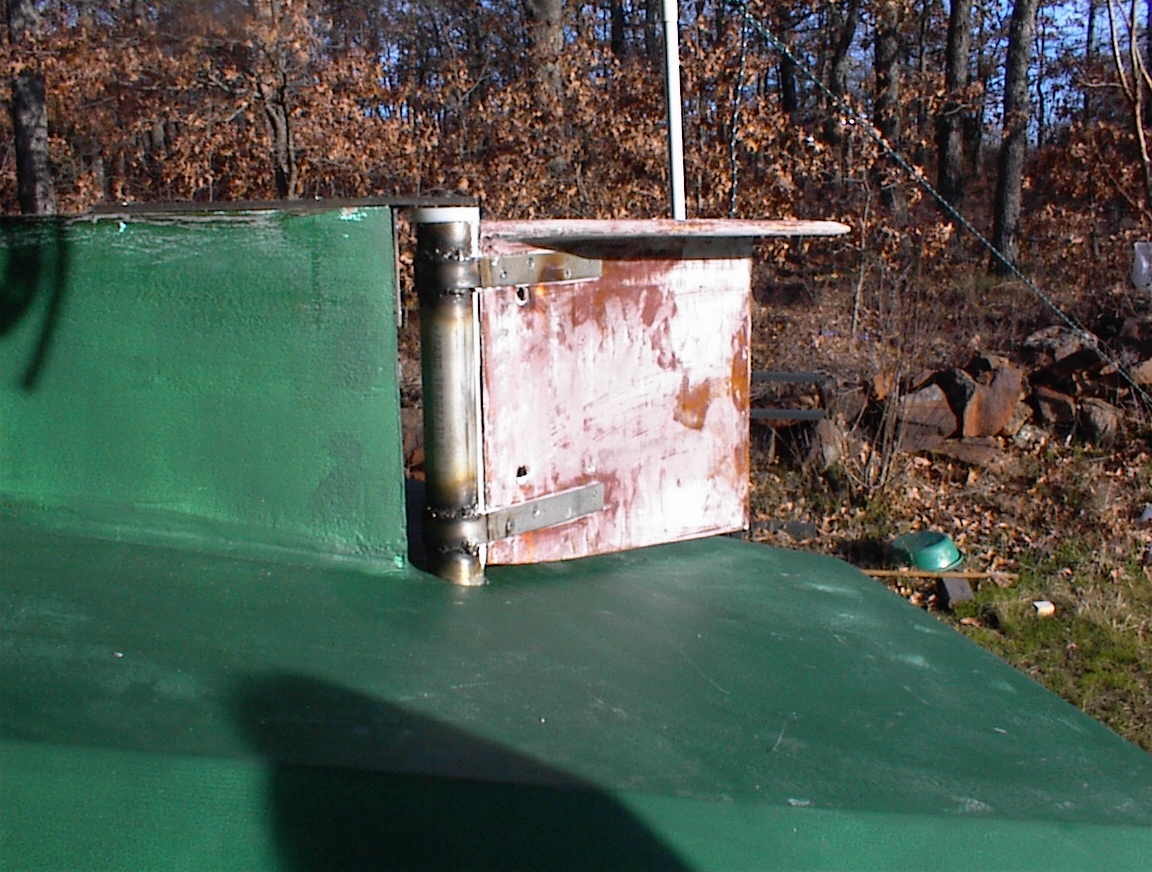
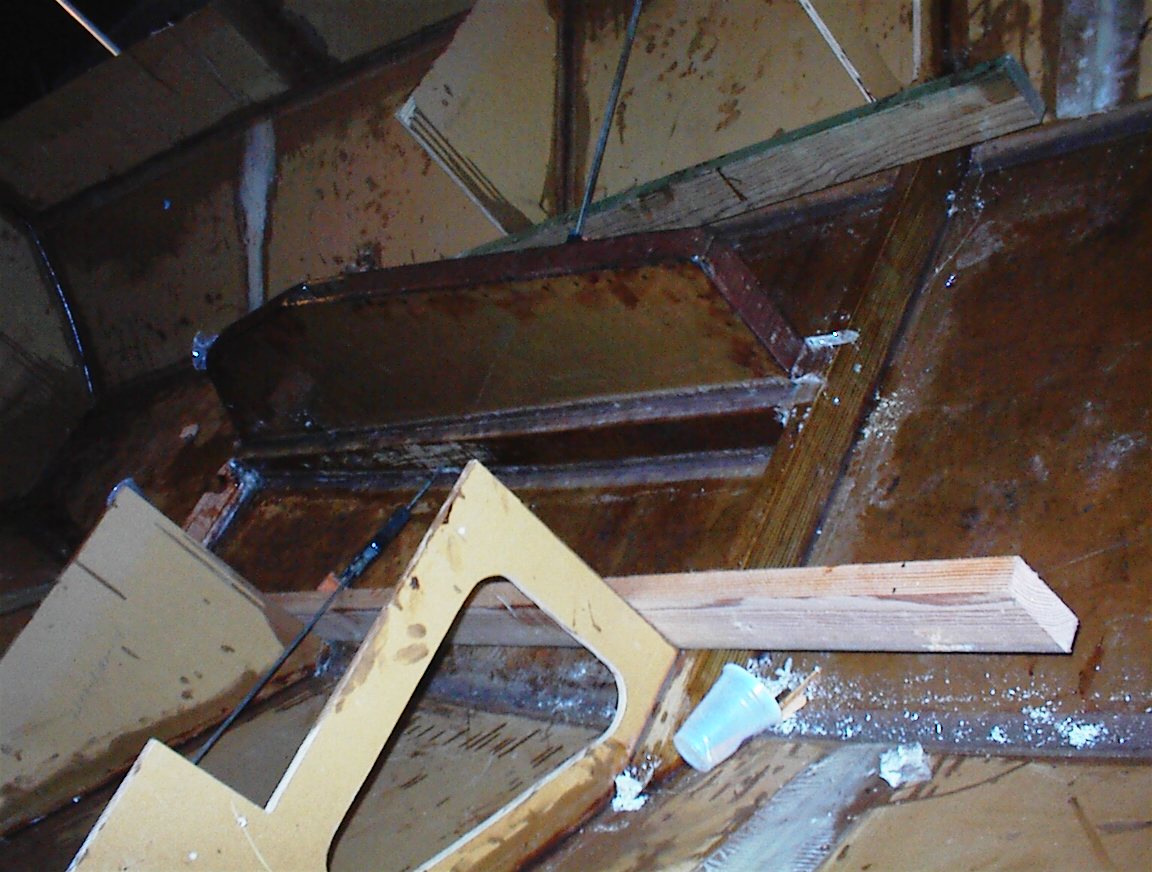
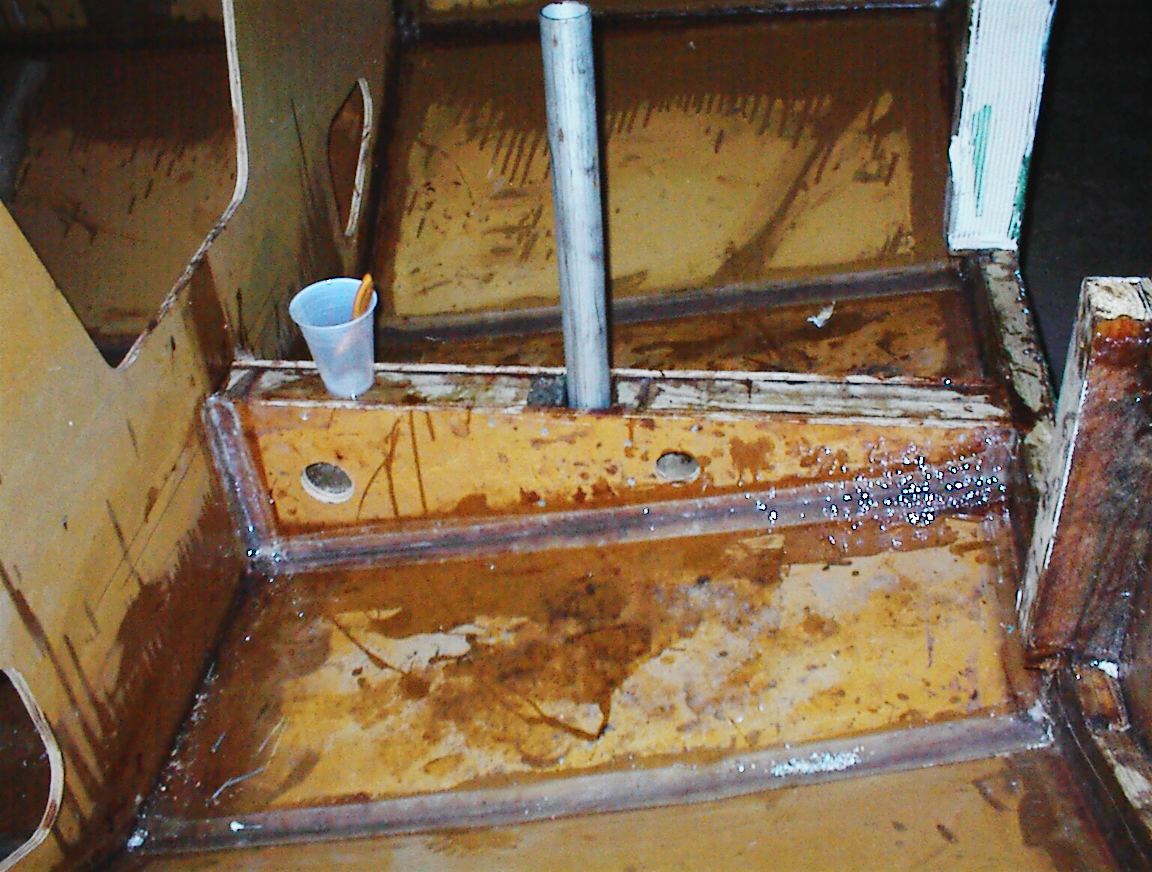
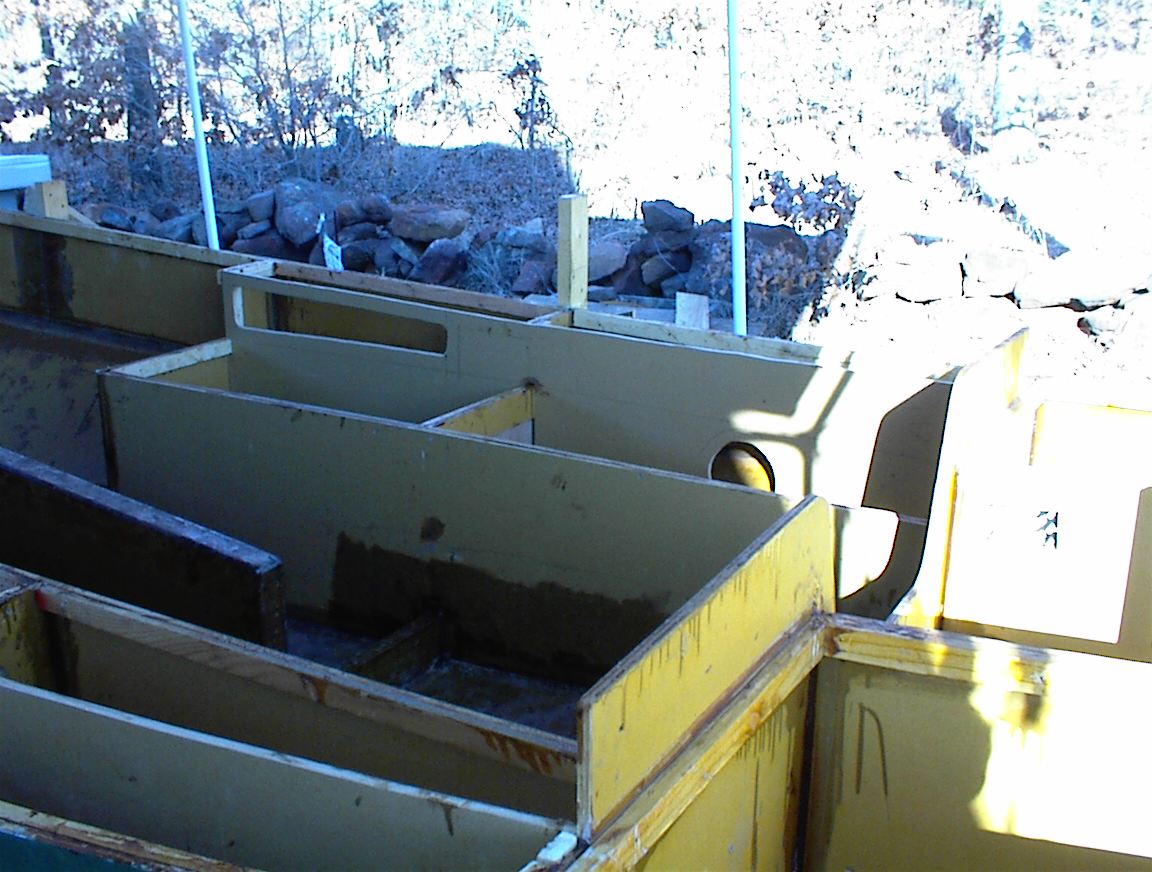
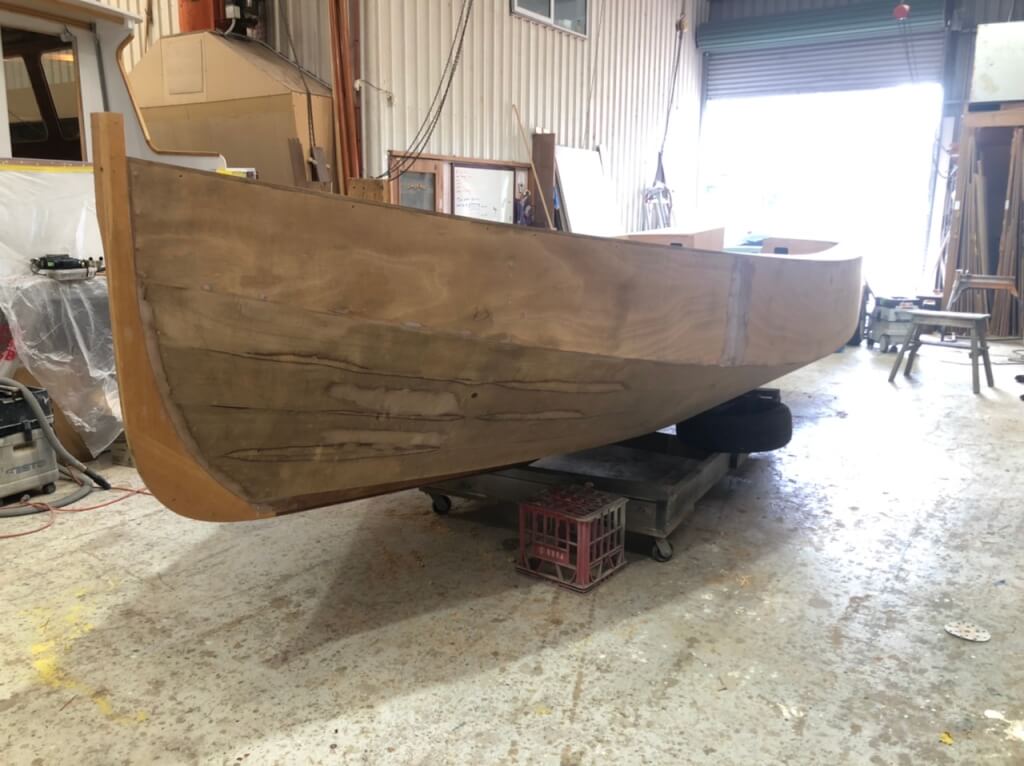
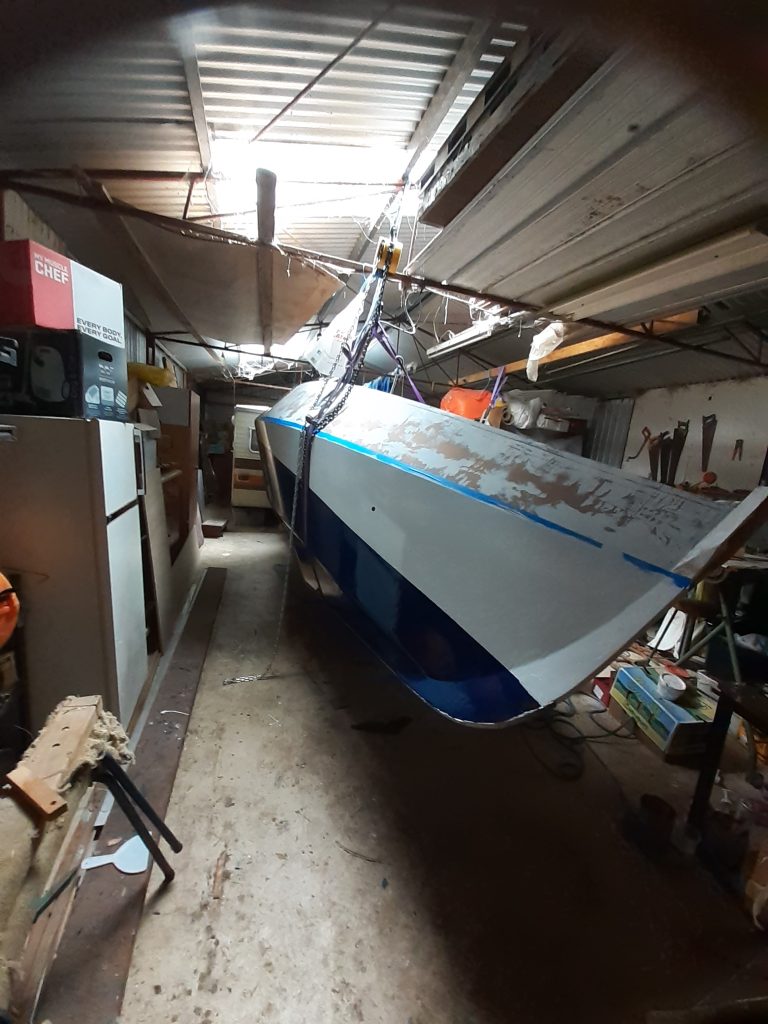
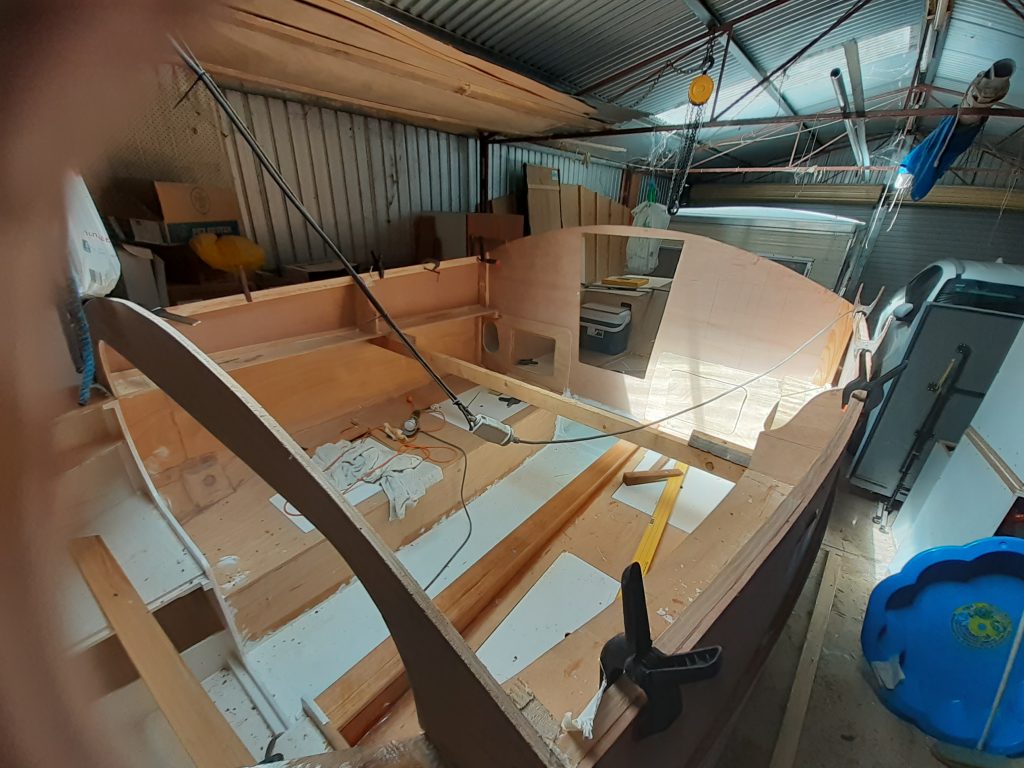
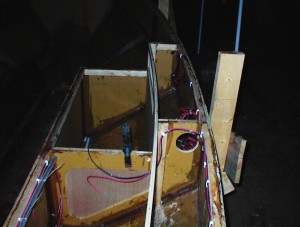
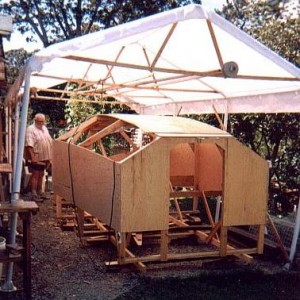
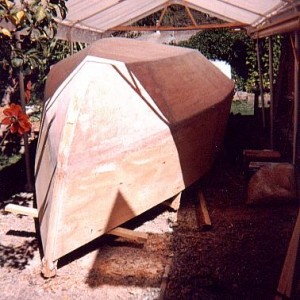
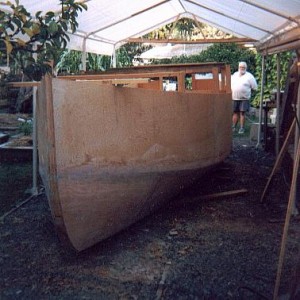
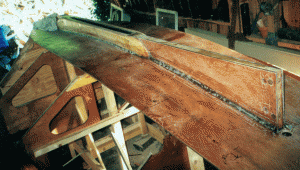
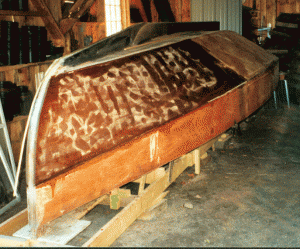
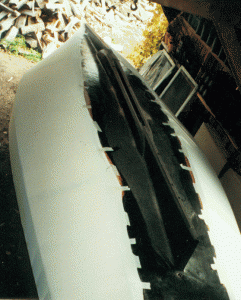
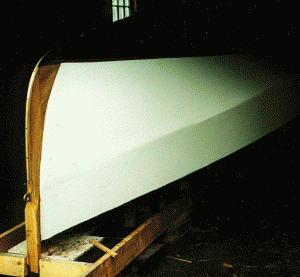
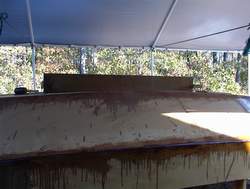
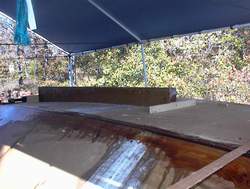
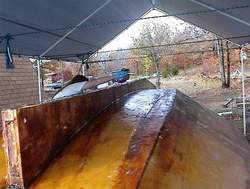
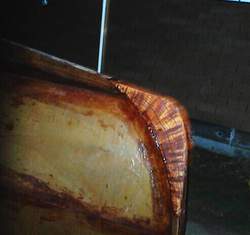
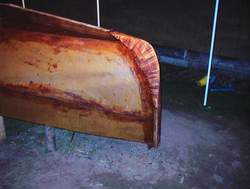
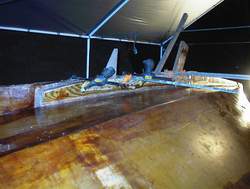
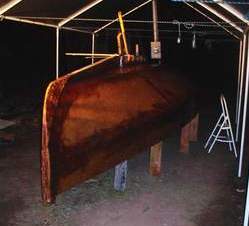
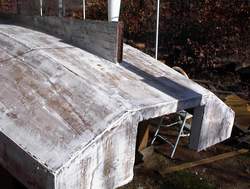
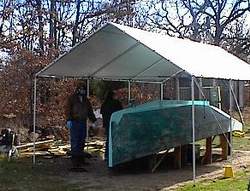
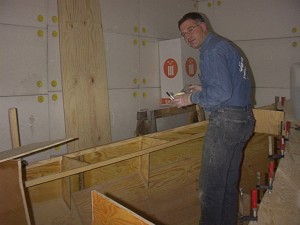
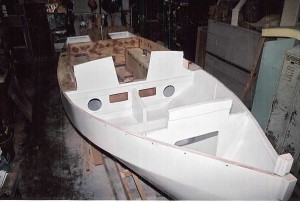
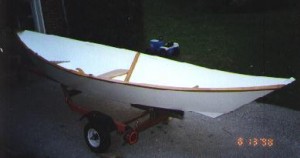
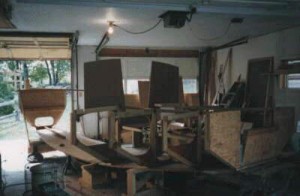
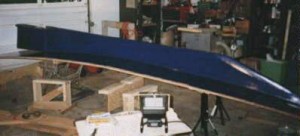
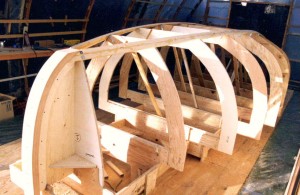
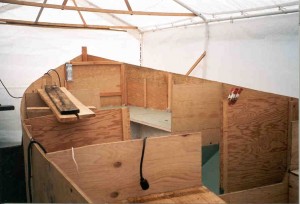
I have glassed and painted the  bottom fitted the Bulk head and framed the cabin. Cockpit and aft  deck have the floors fitted awaiting glassing along with finishing the  centre plate coating .

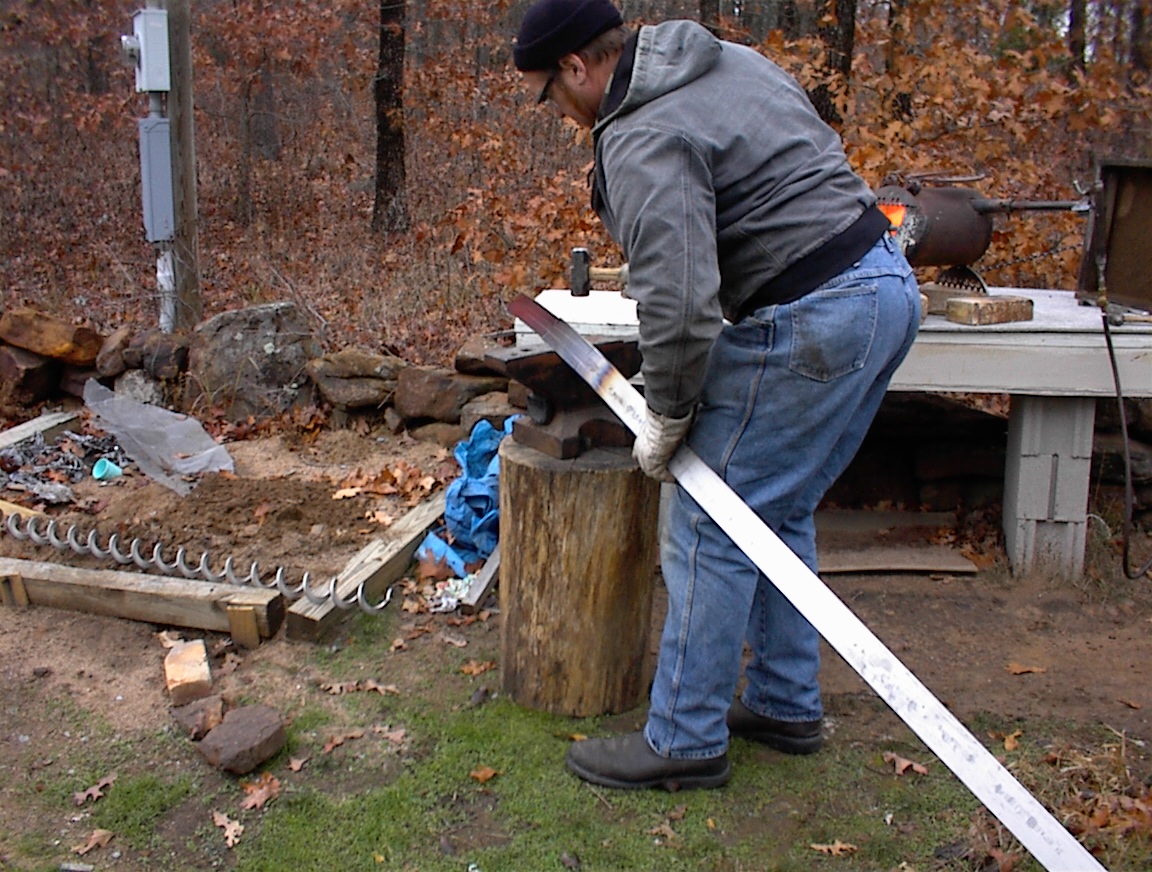
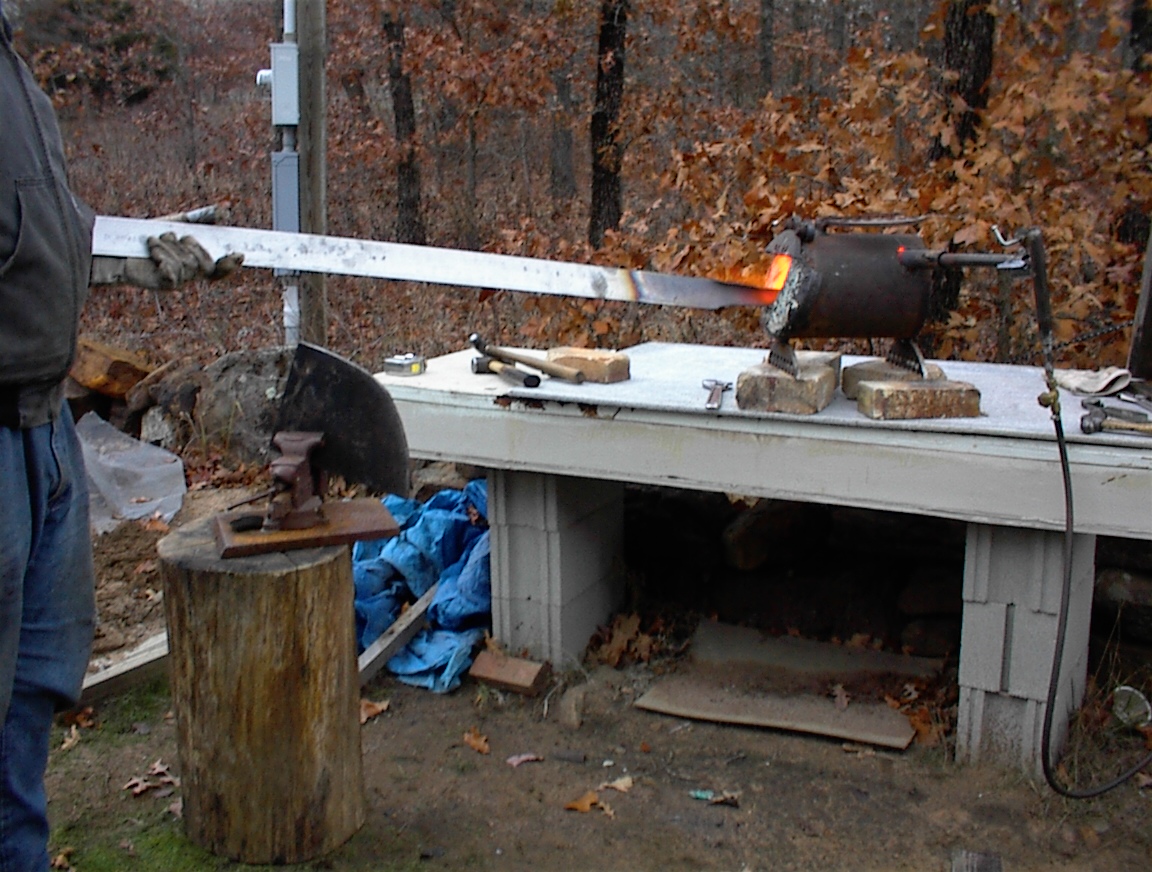
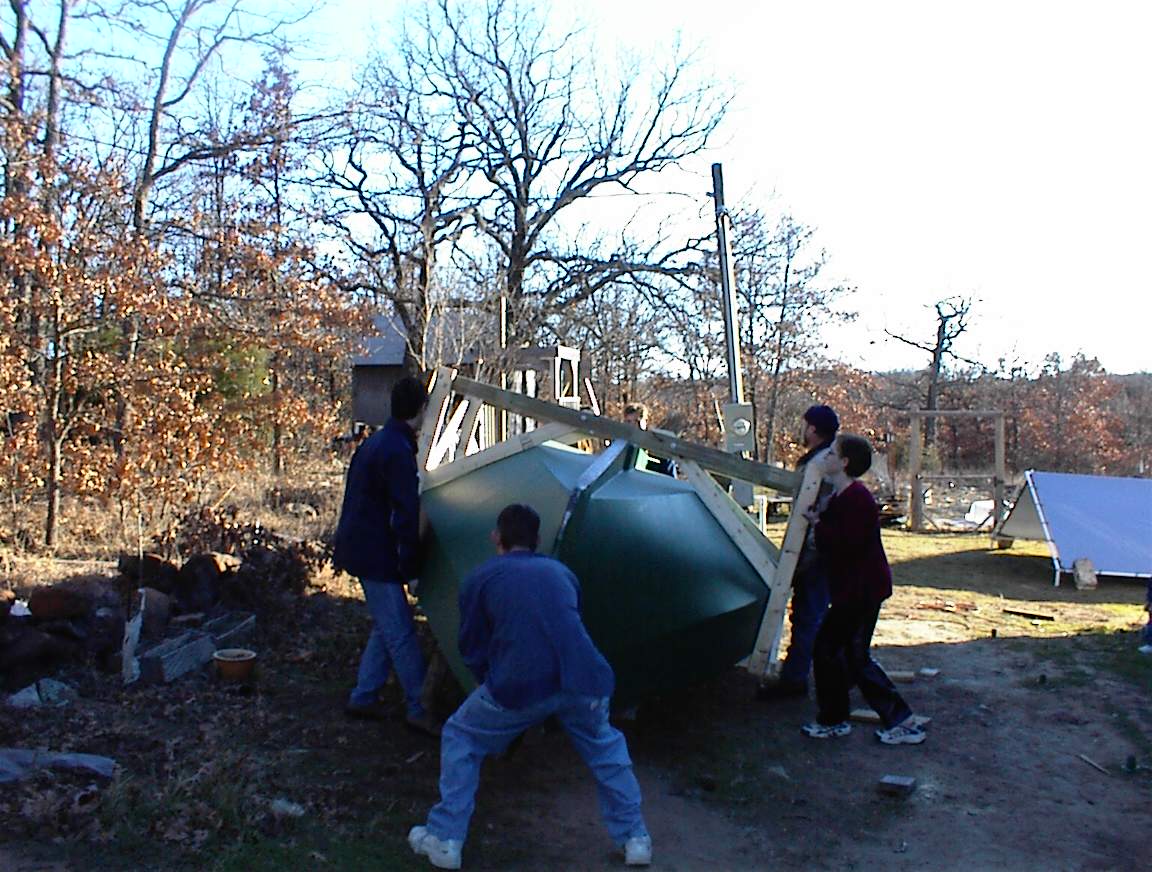
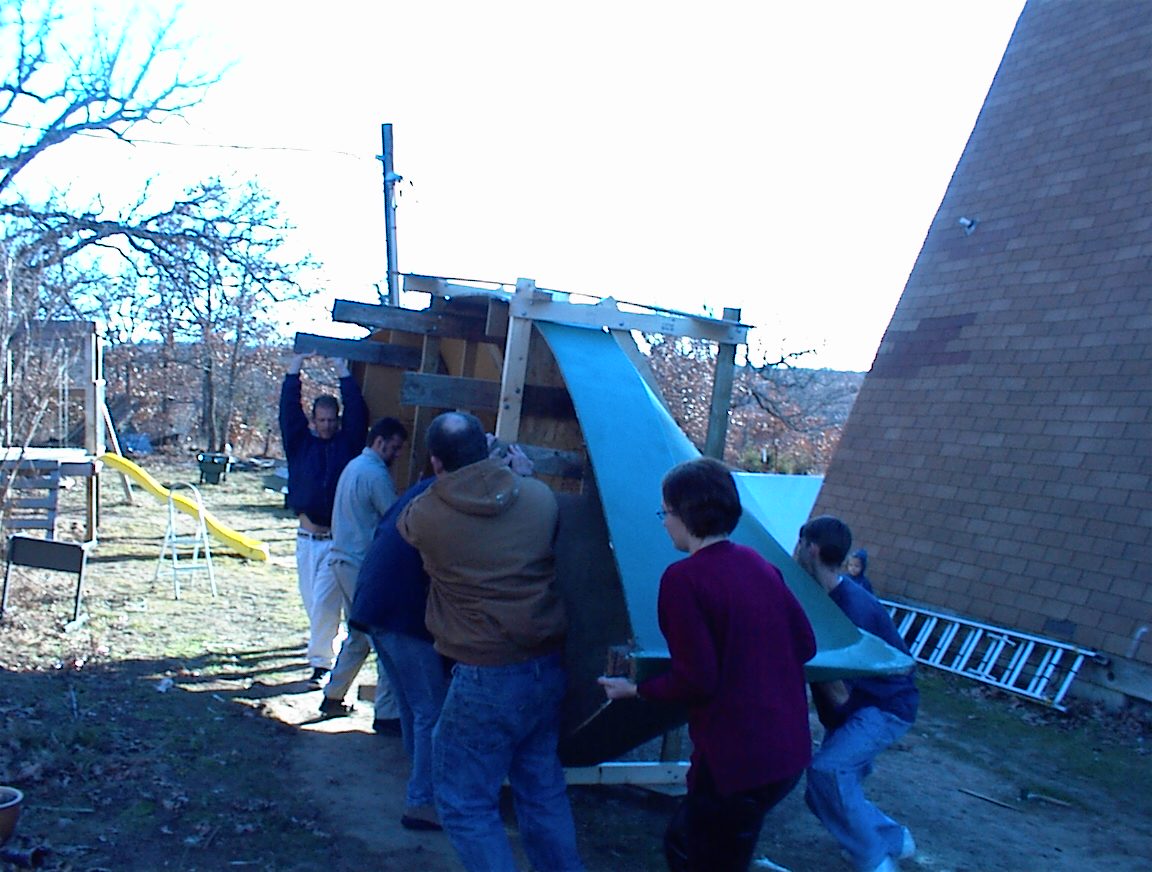
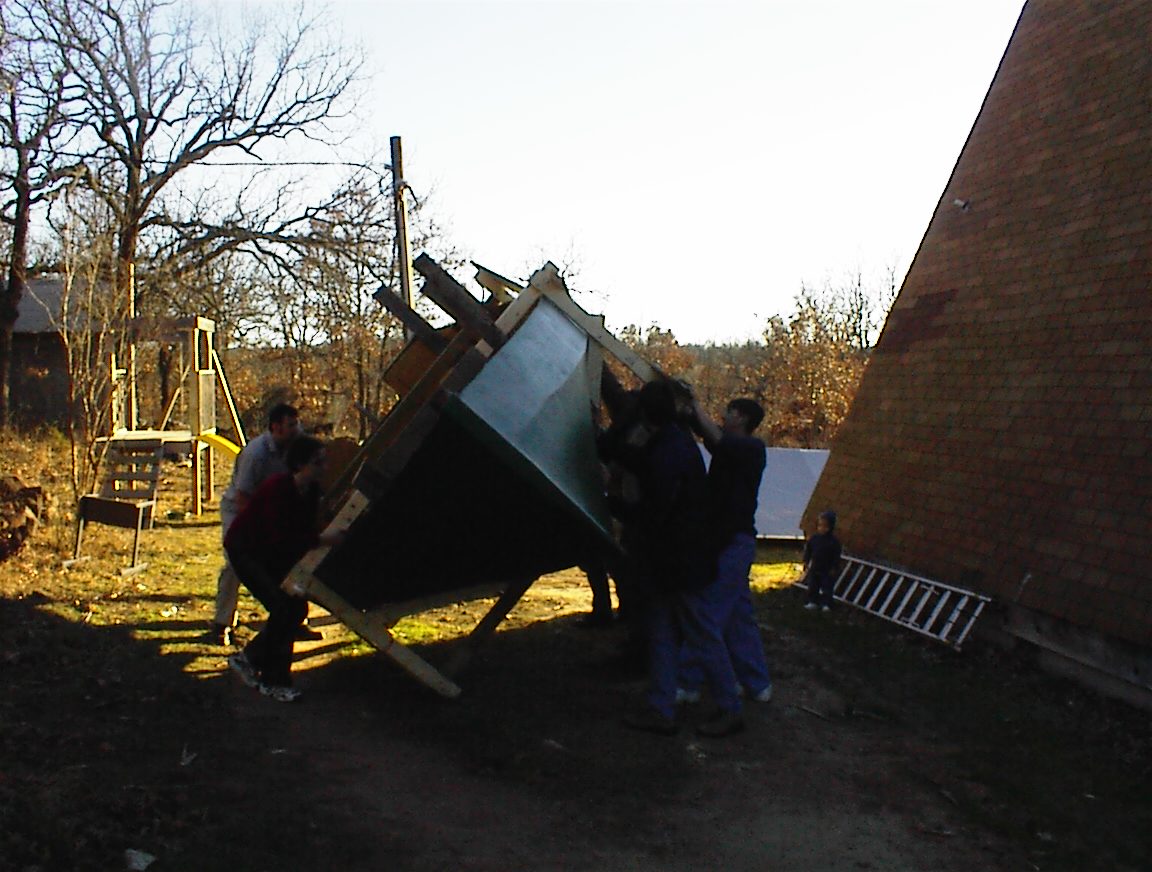
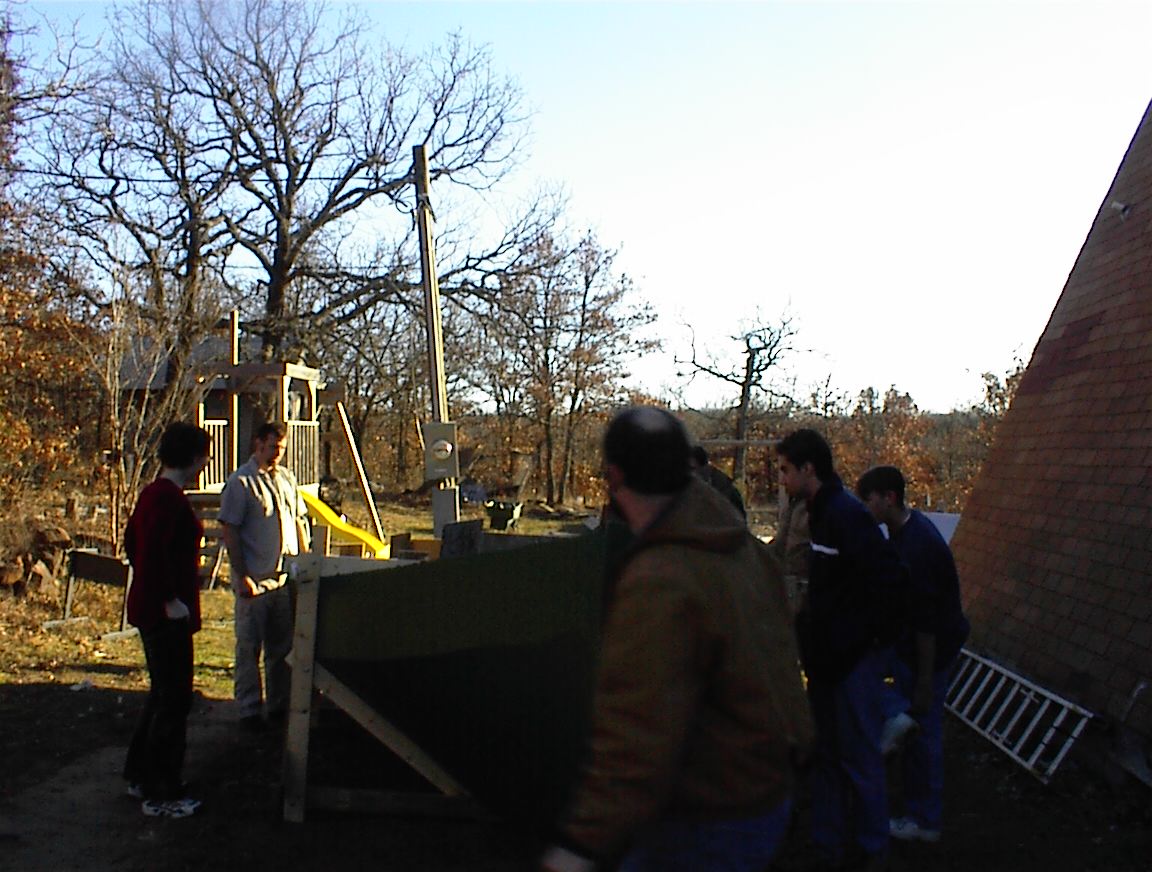
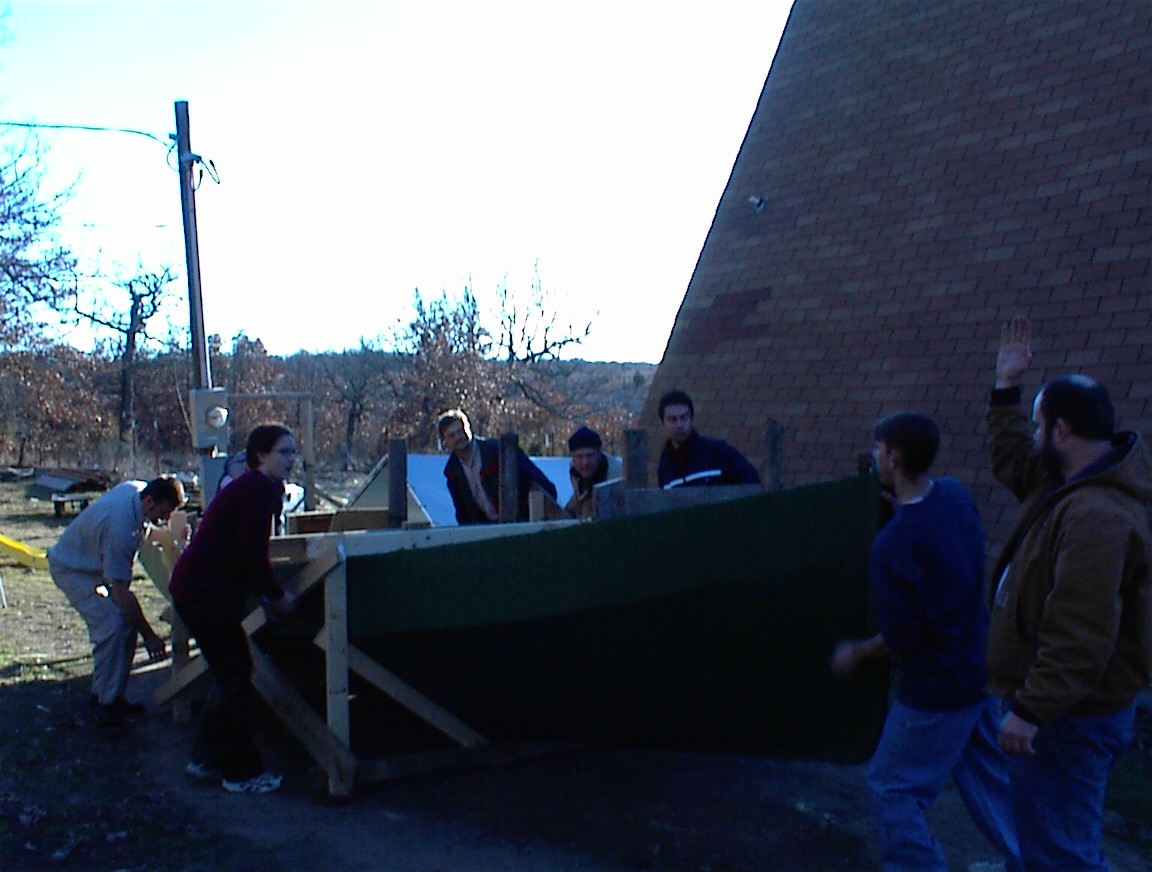
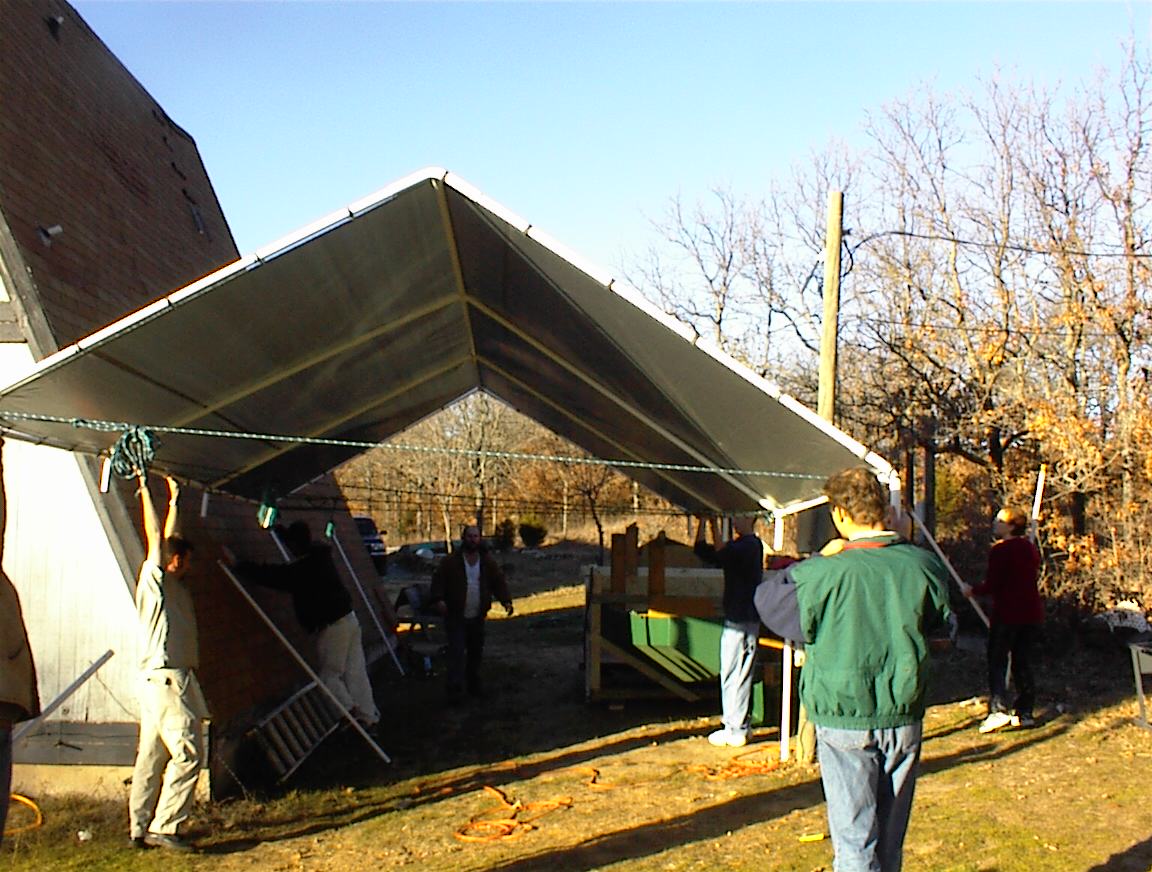
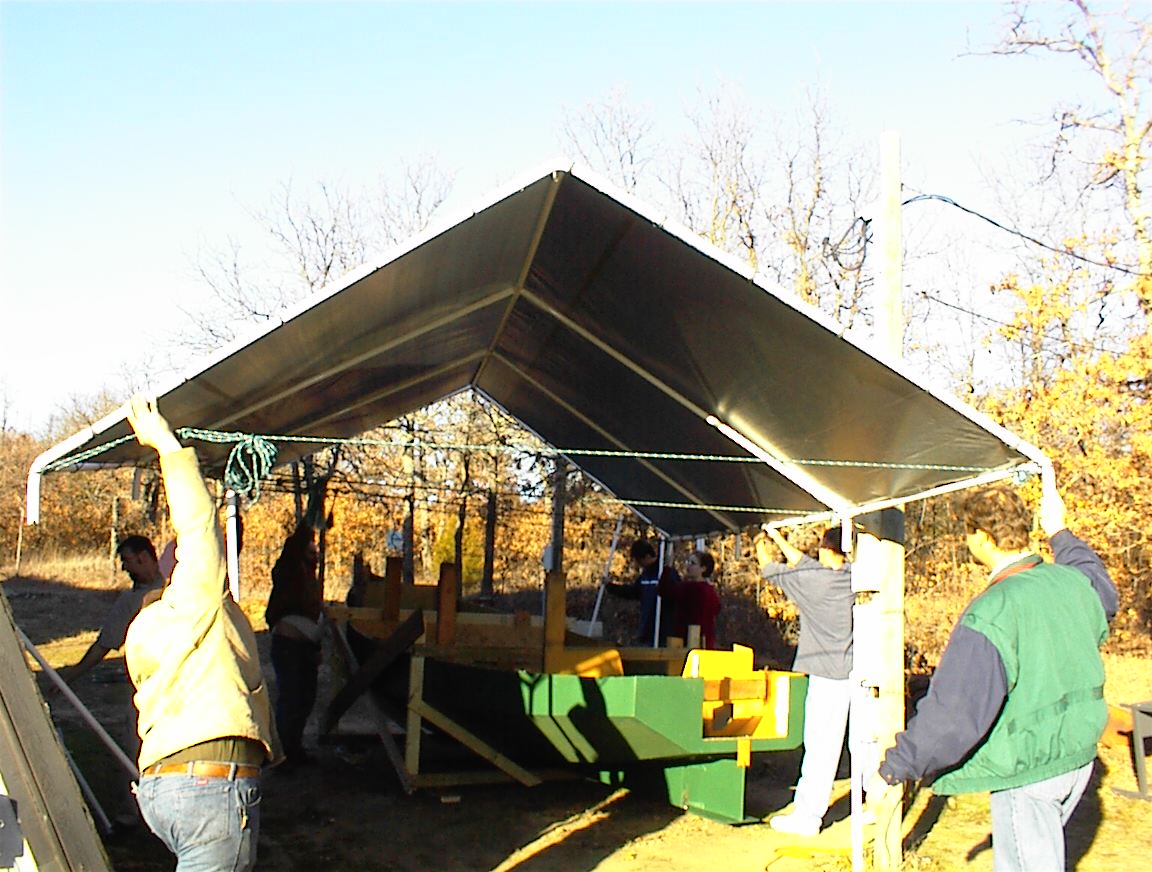
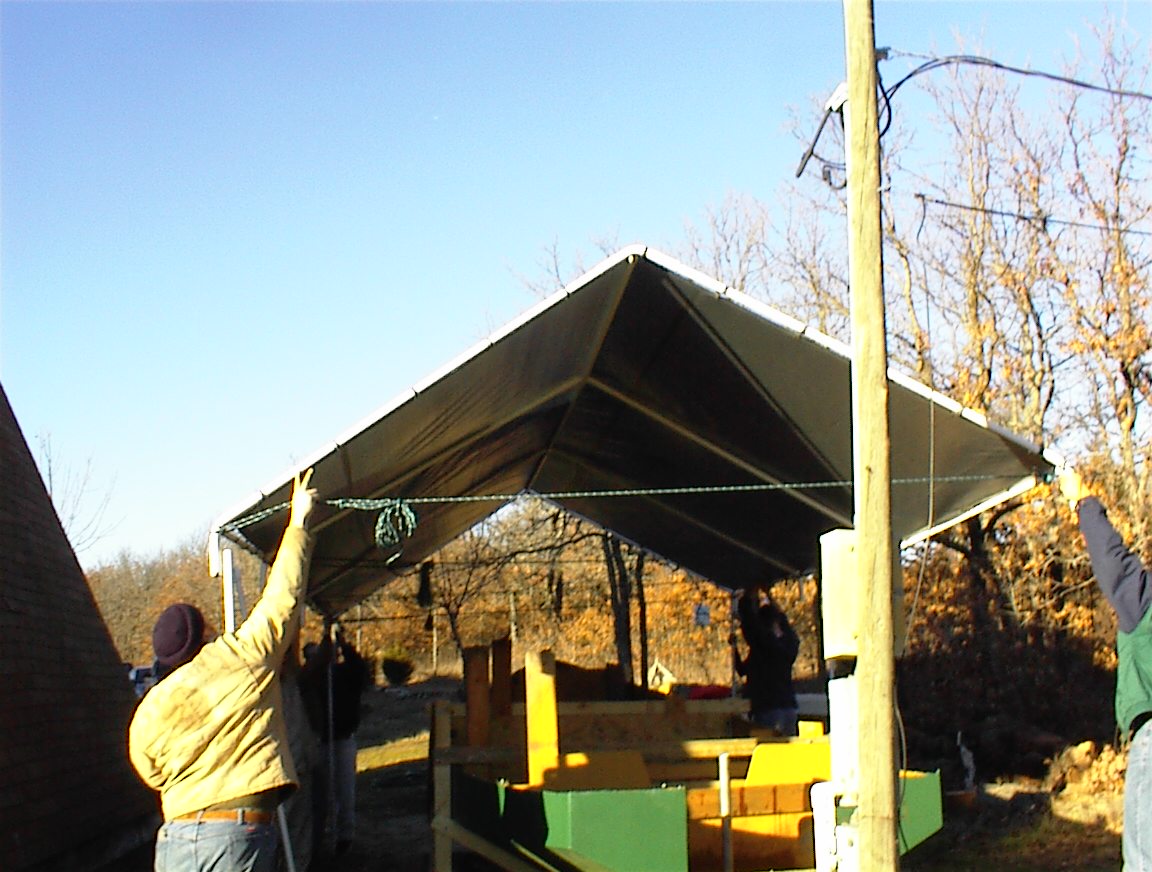
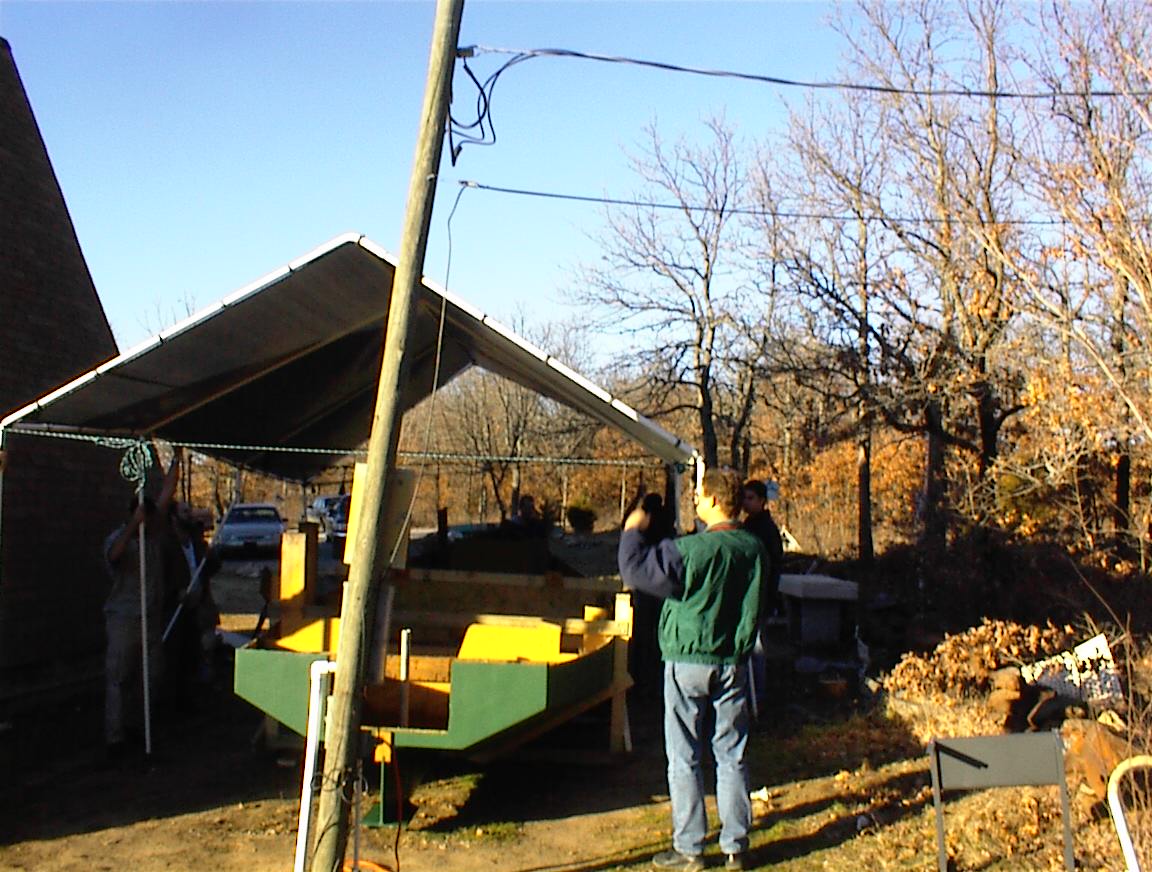
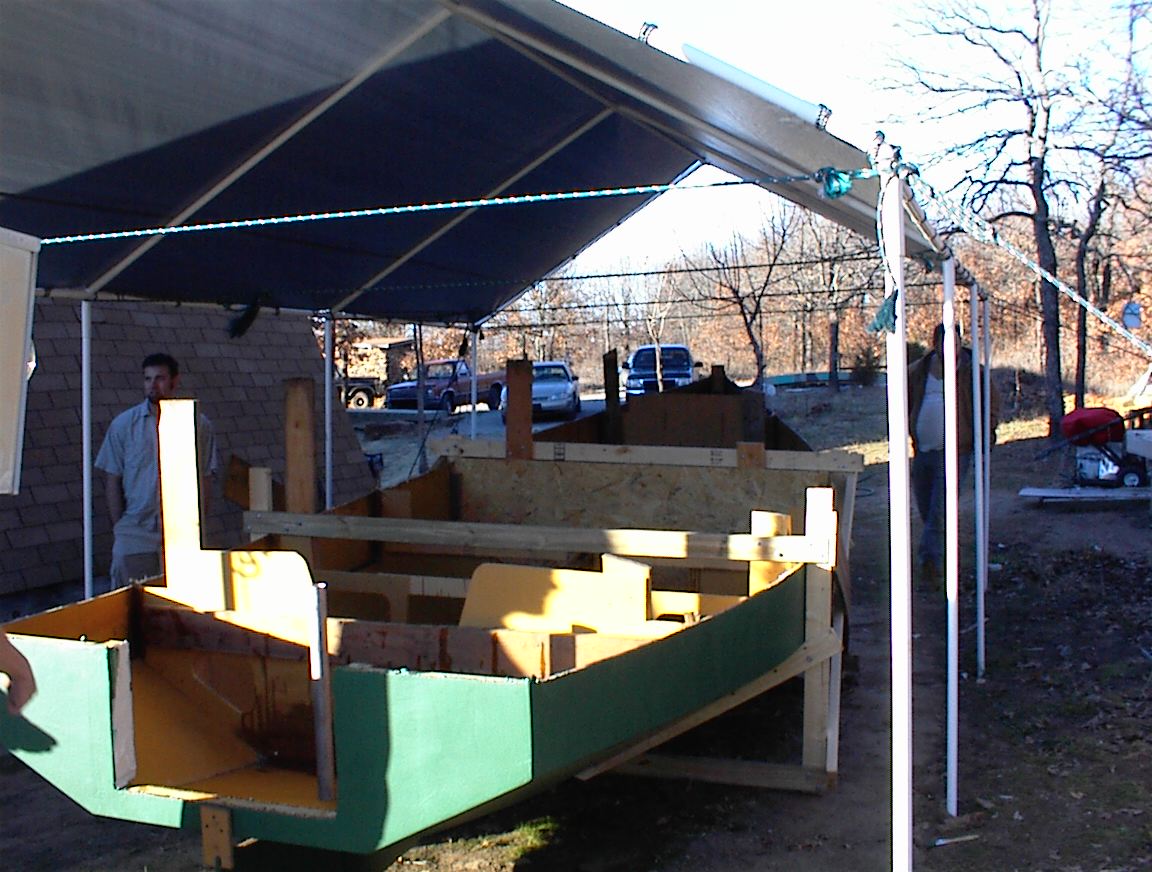
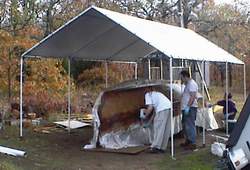
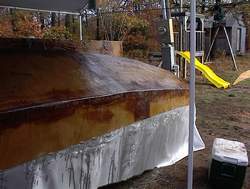
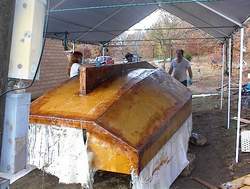
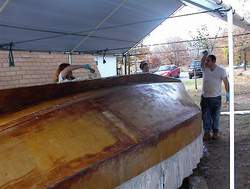
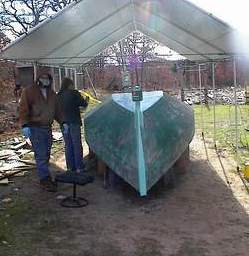
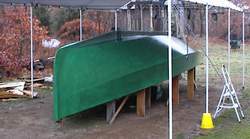
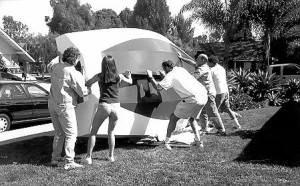
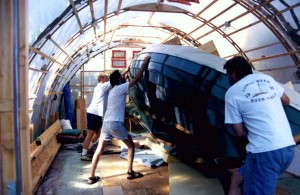
I turned the hull back upright on my own using 2 chain blocks and a rope and tackle photos attached

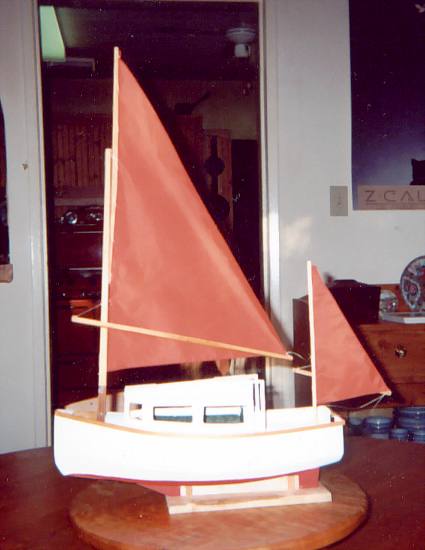
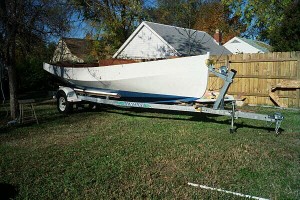
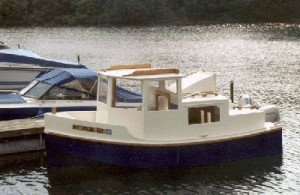
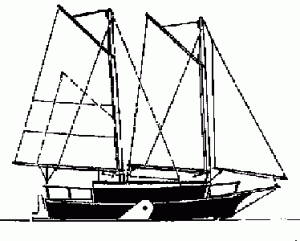
Along with photos as it is now and sketch of what it will look like completed . It is still a work in progress but planning for mid 24 completion . This is 6months later than planned

Regards

Richard

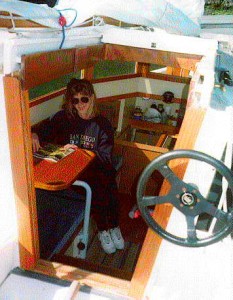
I think this is going to be a really comfortable cabin! Well done Richard.

Now a short story about a chance meeting of “The Chebacco club”: Last month I was trying to catch a tram home and I walked past a chandlery, so I dropped in to browse and chat. I was describing my rudder to the salesman when another customer called out from the other end of the isle “you are talking about a Chebacco!”. It turns out that Graeme had just bought a Chebacco that was to be delivered in the next days from interstate. He had studied the Chebacco.com site in anticipation. Fancy that, recognizing a Chebacco owner from overhearing a verbal description of a rudder end plate! Well welcome to the club Graeme! I hope you email me a story about all the fun you will be having in your Chebacco.

By the way – If you want to support the Chebacco.com website, the largest collection of Bolger boat material on the internet, there is a donate button down near the bottom of each page. A few dollars would be appreciated as it costs me a couple of hundred each year.

Chebacco News 39

Intro and flipping the CLC

A lot has happened since the last issue of Chebacco. I’ve finished the armor for the keel, flipped the boat, and am now working on the inside. Pictures and annotations below.

I had the bright idea (I thought) of offering Chebacco plans for sale on this website. I’ve had a couple of “where can I get these from” requests. I know that PCB&F have been burned by this in the past, so I was going to take my lead from Chuck Lienweber and Jim Michalak, and offer only the convenience of purchasing online, for a small fee and the credit card costs. I would take an order with Paypal, and fax something to PCB&F saying “send plans to so-and-so, check is in the mail). I faxed PCB&F with the idea.

Susanne called me and discussed, at length, this subject. “Why can’t they just send us a check?” seemed to be the gist of it. I did mention that JM’s plans sales have DOUBLED since Chuck started offering them online, but she didn’t seem interested.

Anyway.

There are now 20 boats in the registry. Wonder what the percentage is that aren’t registered? I think it’s traditional in statistics to use the SWAG method and just make up a number. Therefor, I degree that for every 1 boat registered we have 9 boats not registered, making the total number of Chebaccos something like 200…!

I’m hosting a messabout at the local lake here in the muddy waters of Oklahoma. Link to the left.

Jamie has two article in this issue, and I have two as well. Come on guys (and gals?), send in those articles. And pictures, lots of pictures! I understand that not every boat builder is a writer, but a few words and some pictures would be appreciated by all the readers. (Plus, pretty soon you will get tired of the pictures of me building the CLC!)

In this issue, I also have an article on the electronics for the CLC. I’m selling the LED regulator I made for the LED’s on my boat as a kit, so if you are wanting to play around with these super efficient and almost indestructible lights for you boat, you should buy one!

Also in this issue, I’m putting online an Adobe PDF file compiled by Mike Haskell. This is basically the entire Chebacco website, compiled and searchable! It is a 21mb download, so if you have a slow connection you might consider letting Google do your work for you and doing “site:chebacco.com something to search for” at their website. Or, buying the CD from Chuck . No longer available for download from the Chebacco.com site

Anyway, (again)

Here are the boat pictures
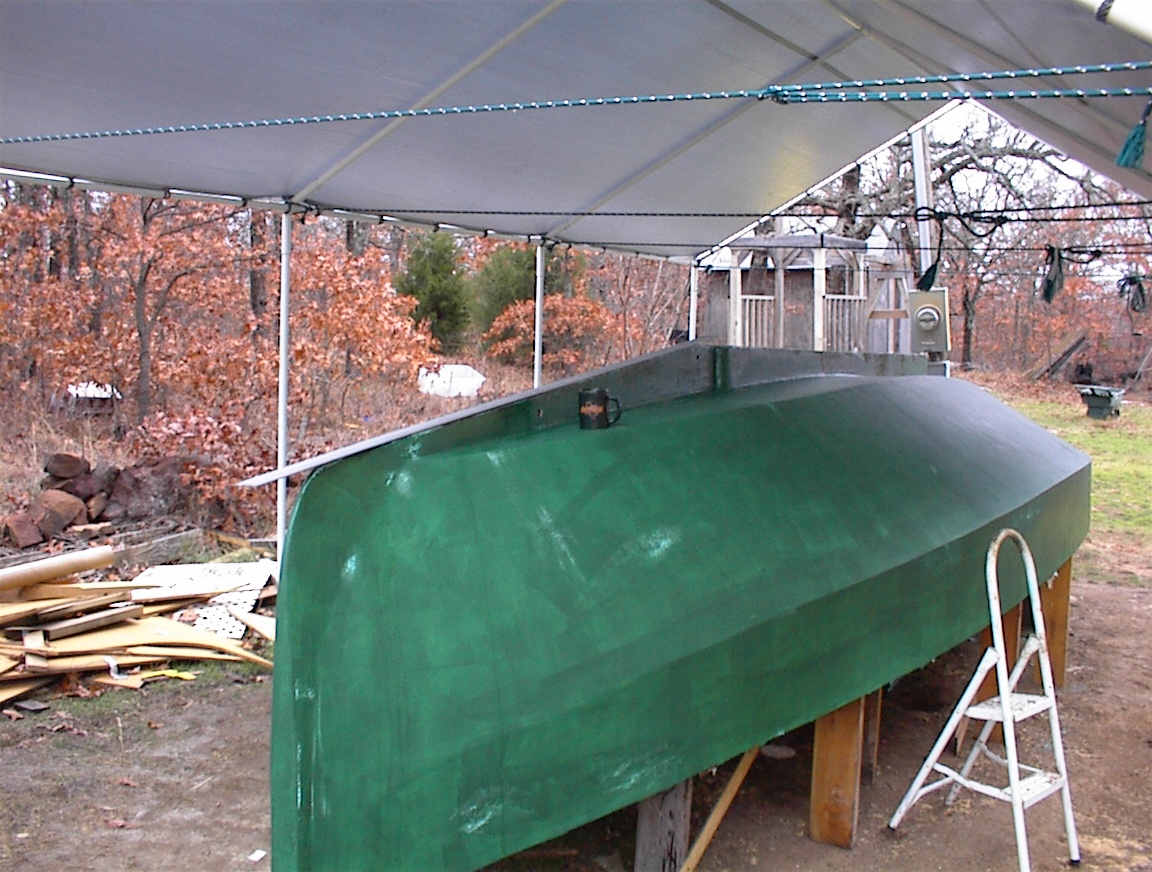
1DSC00001_3 1DSC00003_3 1DSC00005_2

Here is a friend of mine I enlisted to help with the metal work. I wanted the front half of the keel to be armored to take groundings. Mike here has a home forging setup, while I have a home casting setup. Here you see him prepping the 1/8″ stainless steel keel armor for forging.

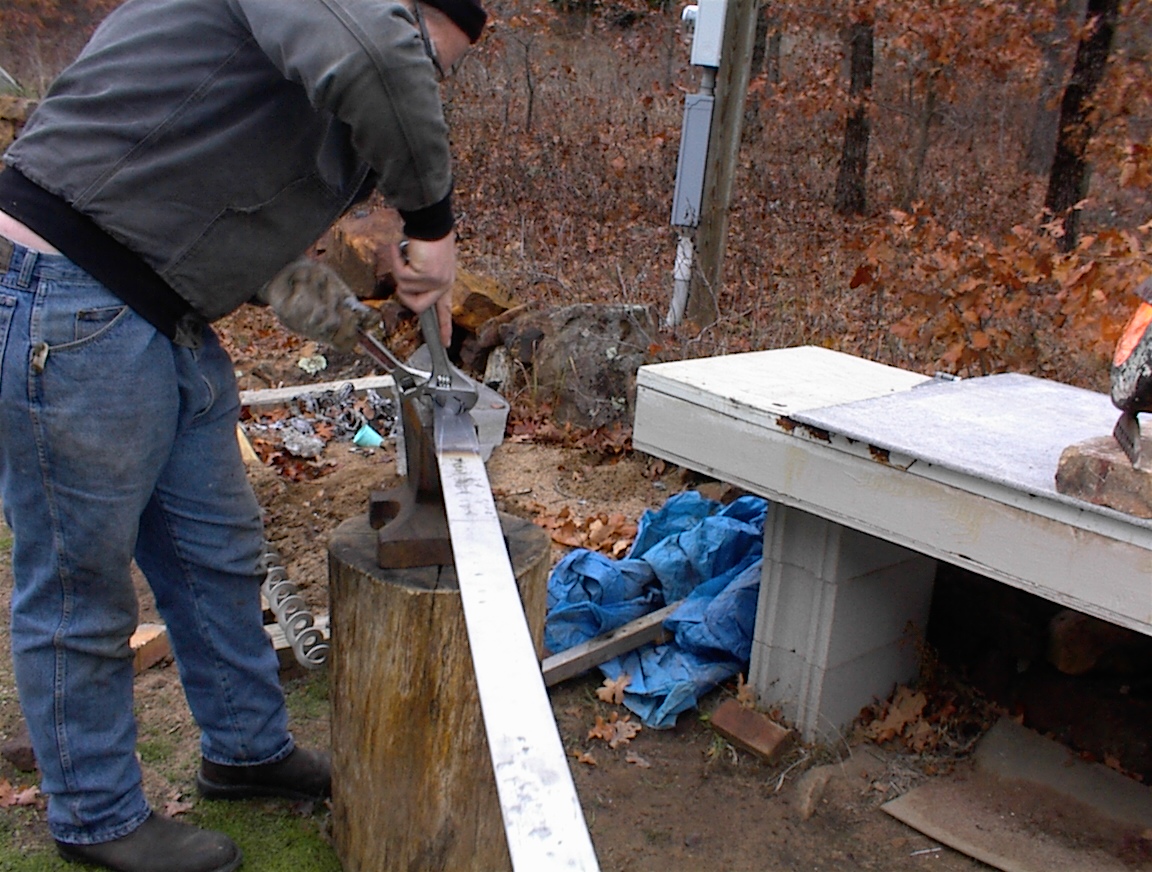
1DSC00006_2 1DSC00007 1DSC00008_2

I could have just cut it off, but I wanted it to wrap up and around the cutwater, sort of like an icebreaker keel. Here Mike is forming the part that wraps around the cutwater. Note the forge made from a freon can, sitting on my sandbox.
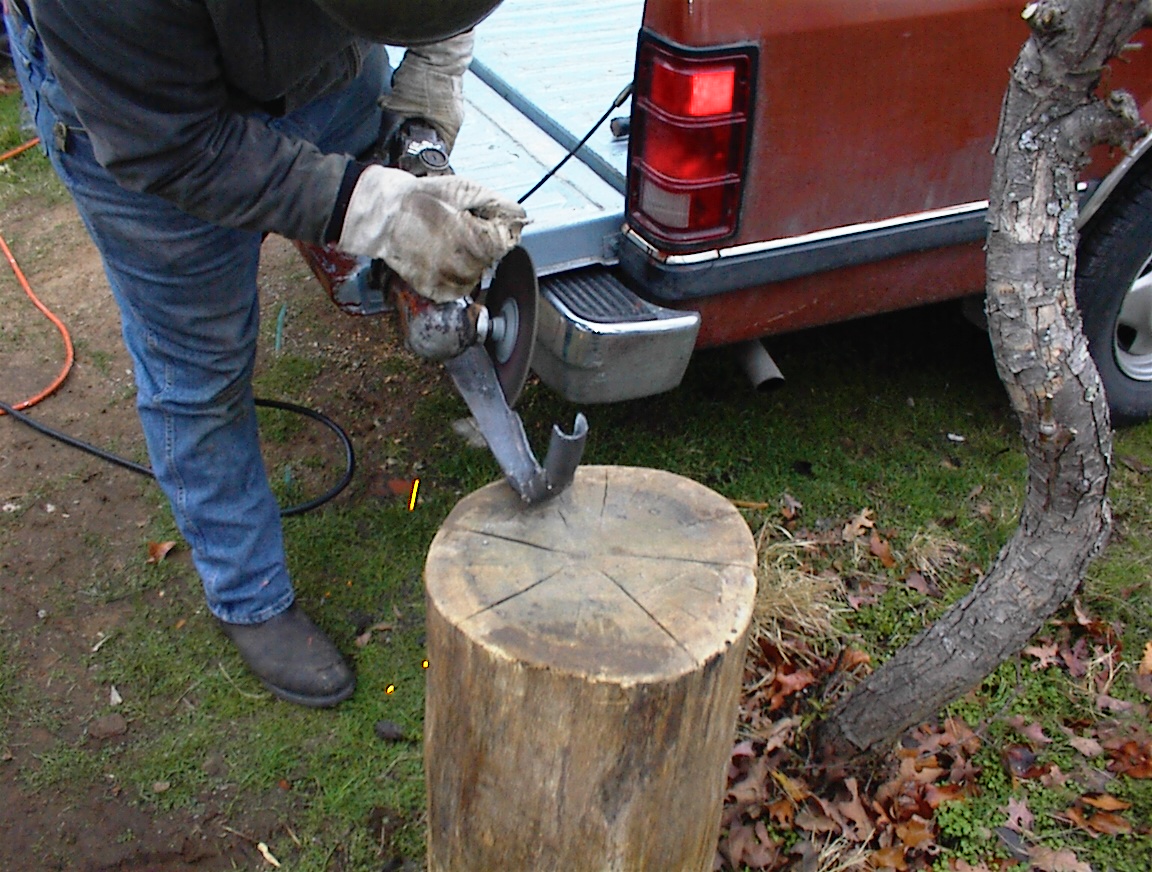
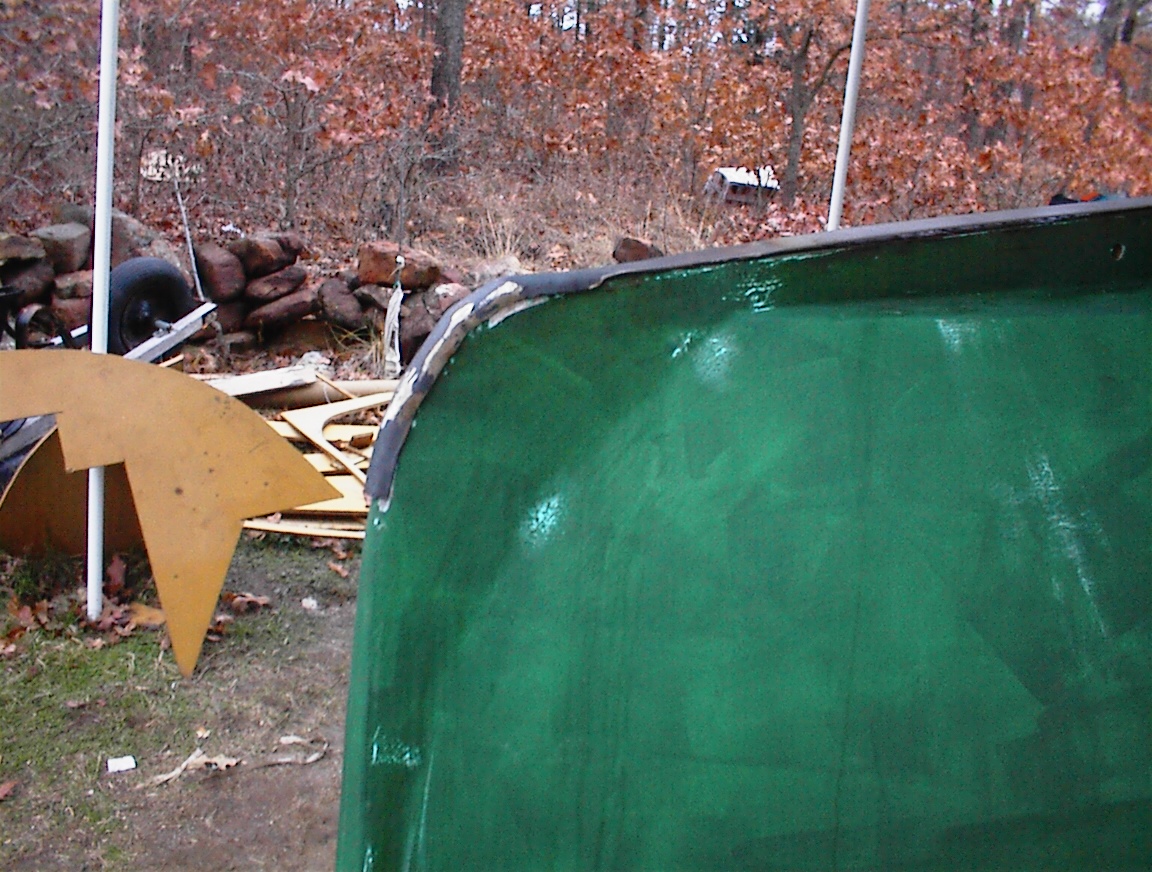
1DSC00009 1DSC00010 1DSC00011Almost done, doing some trimming with Mikes heavy duty grinder, and doing the final fitting to the boat. On the right you see where I have attached the keel strip with a bunch of countersunk stainless screws and lots of epoxy.
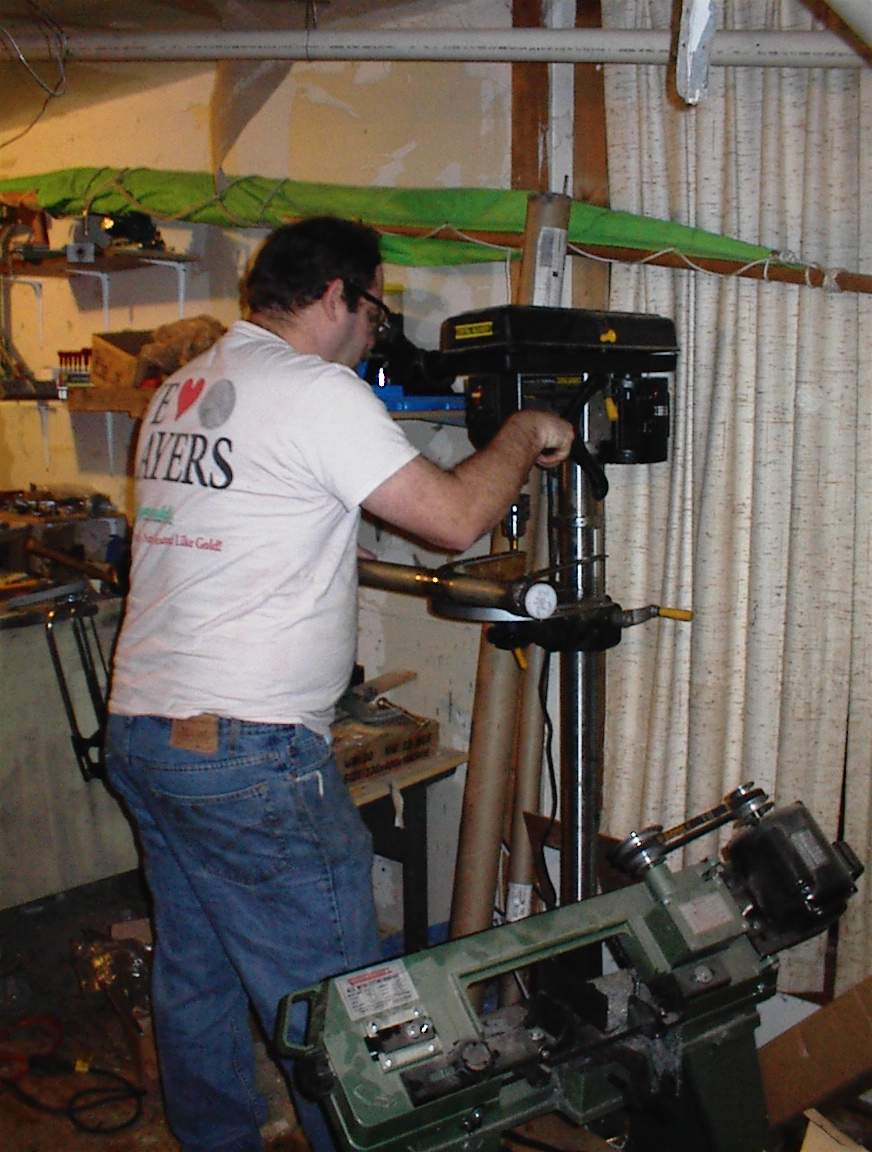
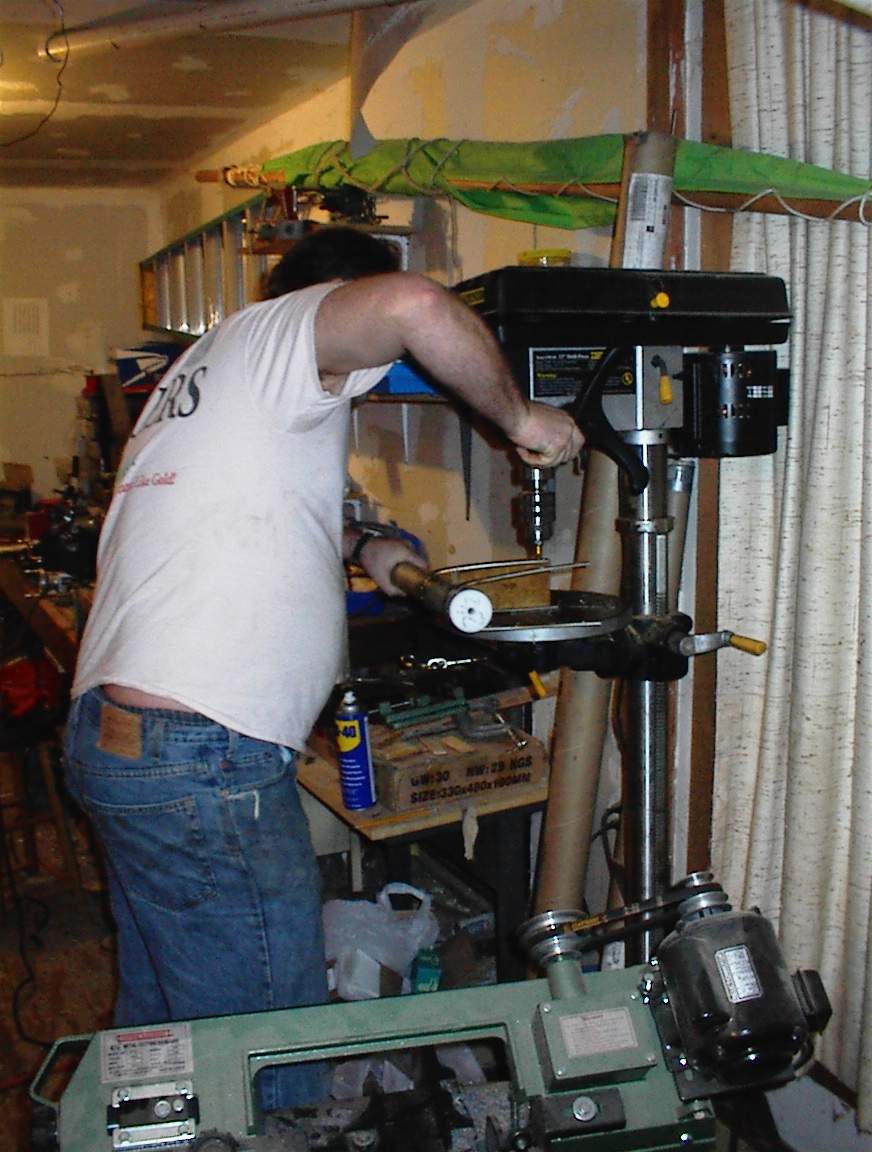
2DSC00001_6 2DSC00003_5 2DSC00004_4Here is me working on the rudder, drilling the holes to attach the stainless to the rudder itself. I made the front of the rudder a bit wide, but some trimming with the flap wheel on the grinder and you can barley notice.
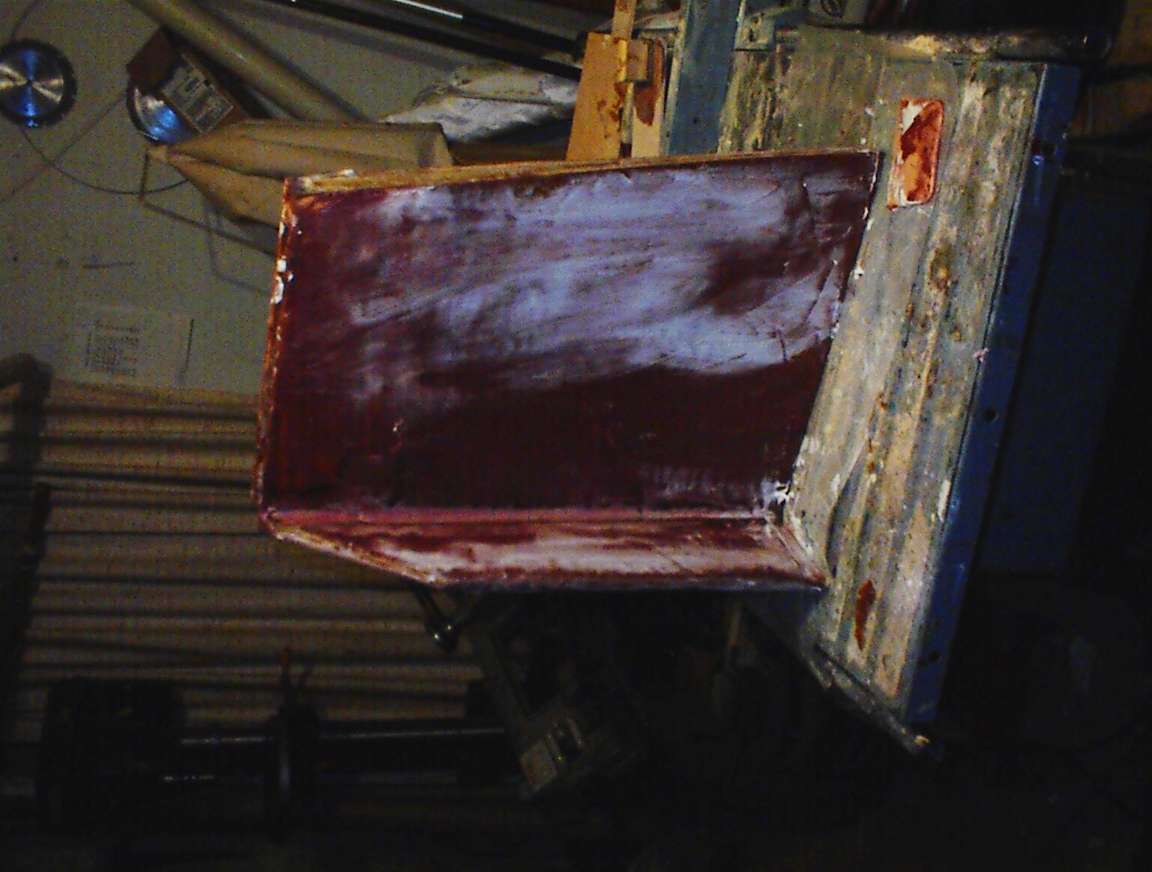
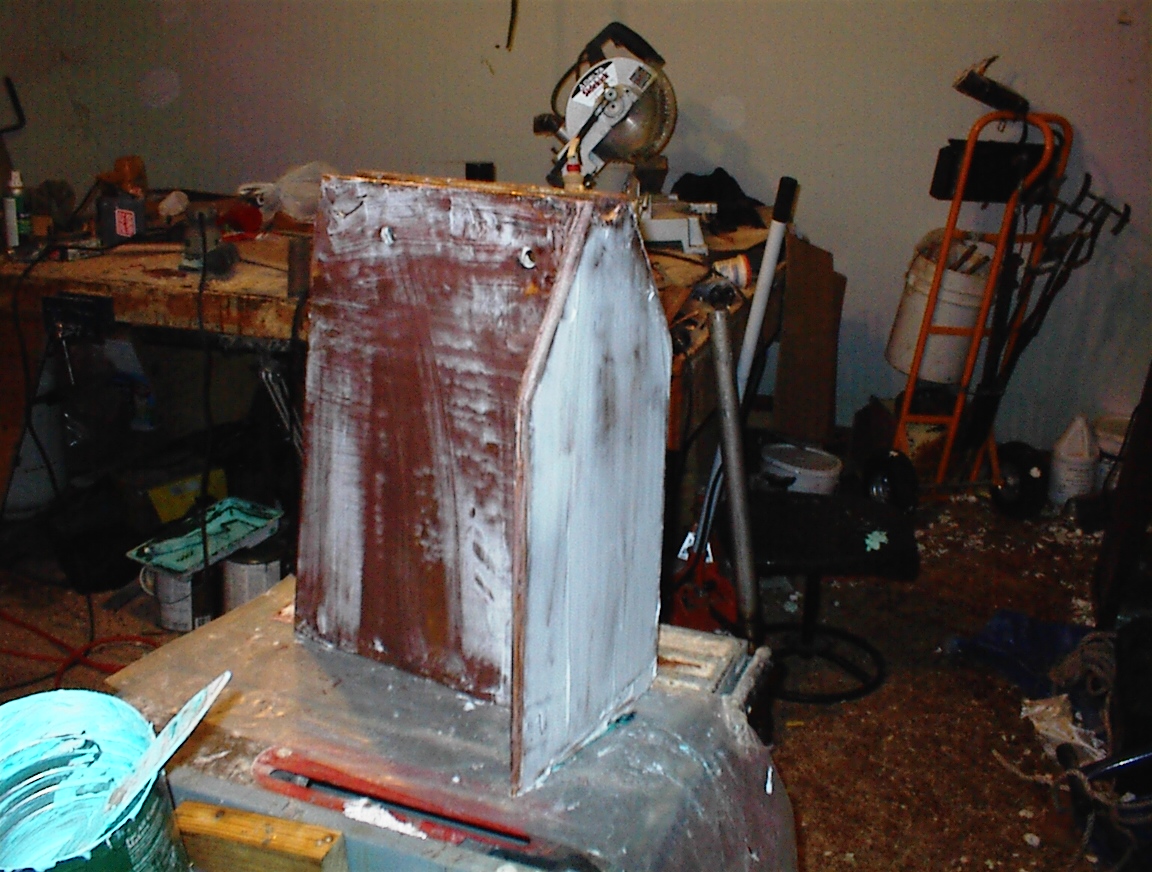
2DSC00005_3 2DSC00007_3 2DSC00009_3Here the rudder is in the middle of the sanding operations, and to the right it is attached to the boat. On the top of the right photo you can see the UHMW bushing that the rudder turns on. Under the top rudder support I’m going to put another bushing, with a flange fitting on the rudder post. I’m hoping the rudder will bear only on the UHMW poly and no on the wood and glass of the hull.
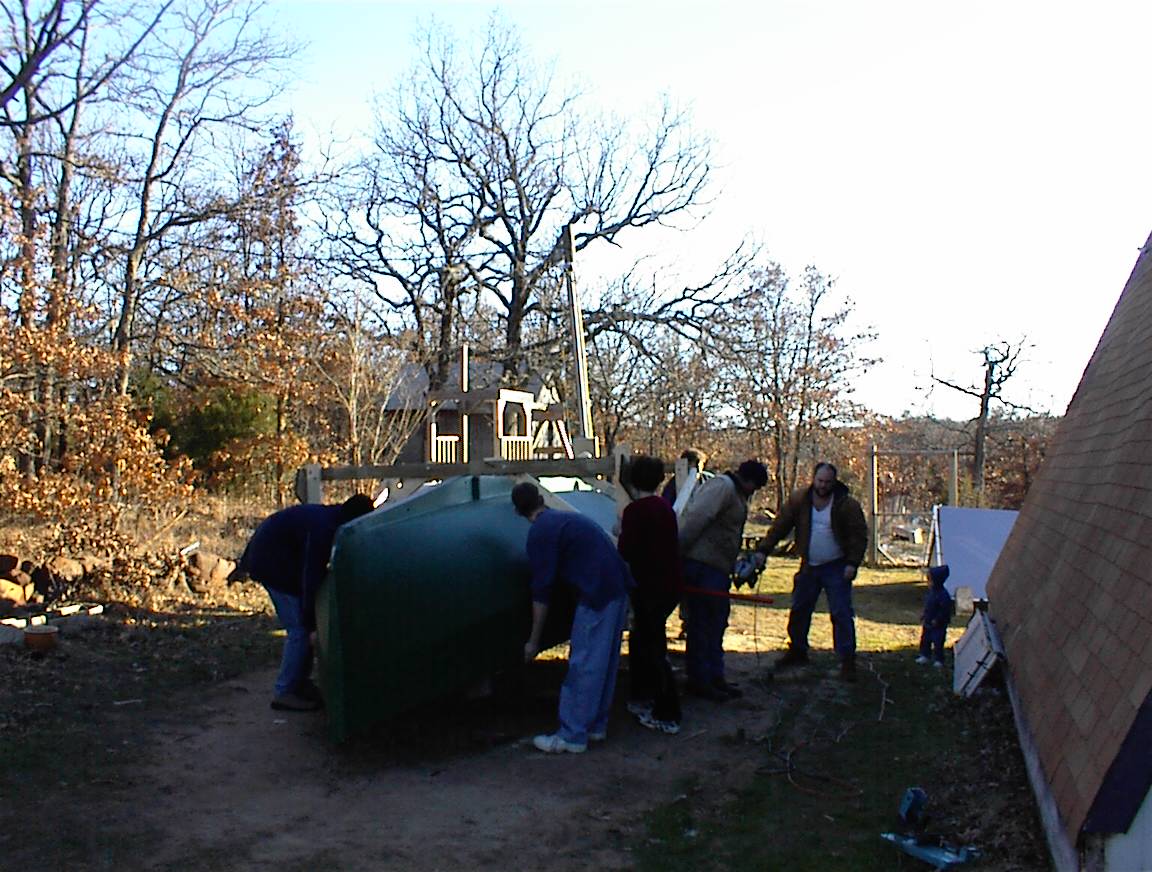
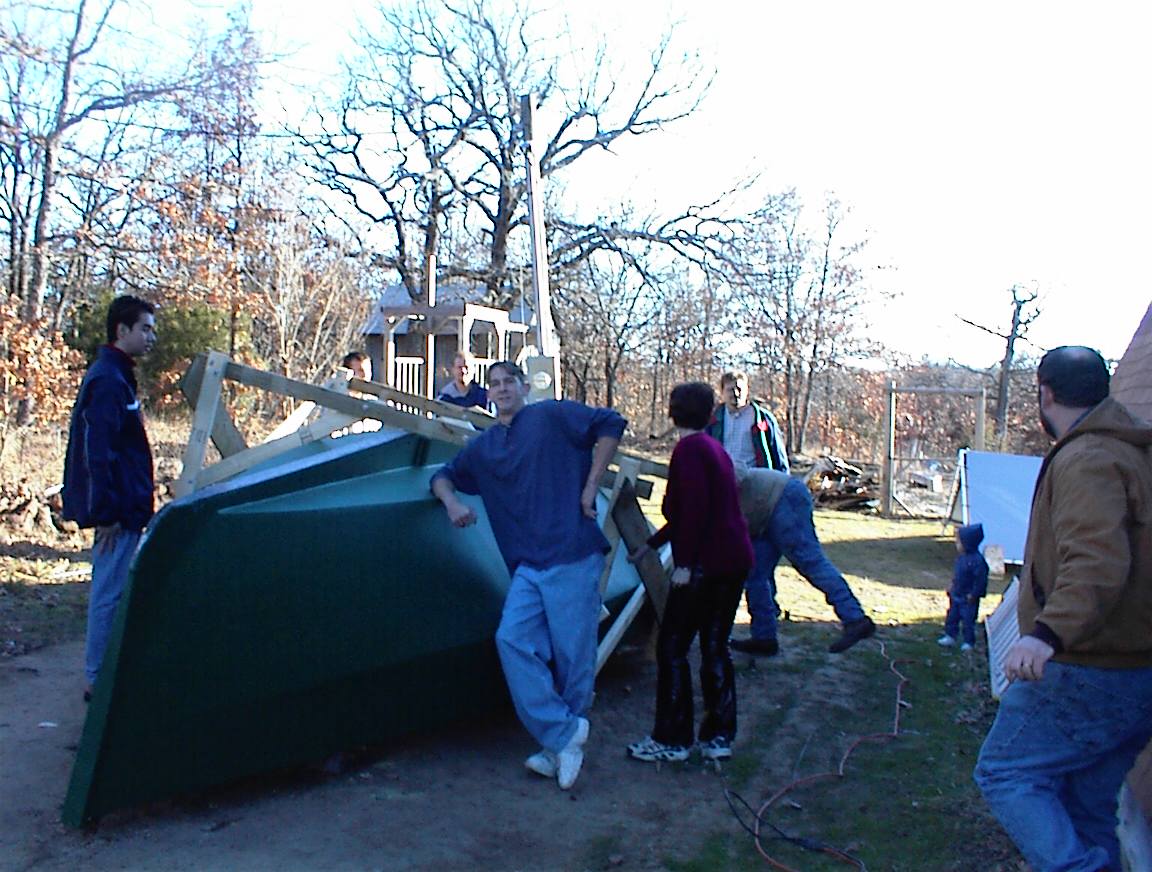
3DSC00004_6 3DSC00005_5 3DSC00006_5Lift, scoot, tip, lift, scoot, tip, etc. I learned from my mistake with turning (and dropping) the last boat. I built a frame around this one, lots of handholds, and with the frame it would sit on the side without being held. Made it into a two part operation.Here we are commencing the turning operation. We jacked up one side, and cut the “building legs” off, then let it down. One of the girls wanted to invite a bunch of friends over for barbecue, and I said it would be ok as long as they helped flip the boat. (We didn’t tell them till they got here. hehehehe) The designated camera person was late comming out with the rest of us, so I didn’t get any pictures of the canopy coming down.
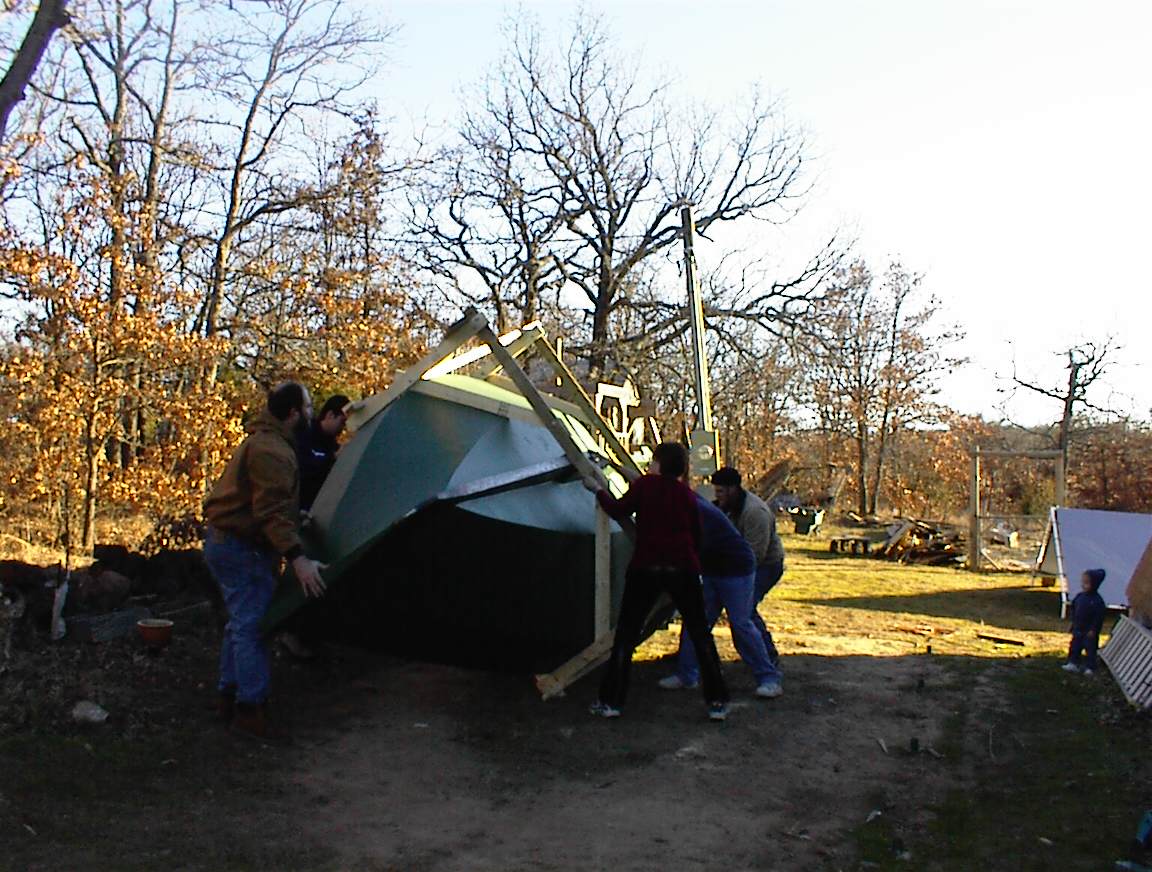
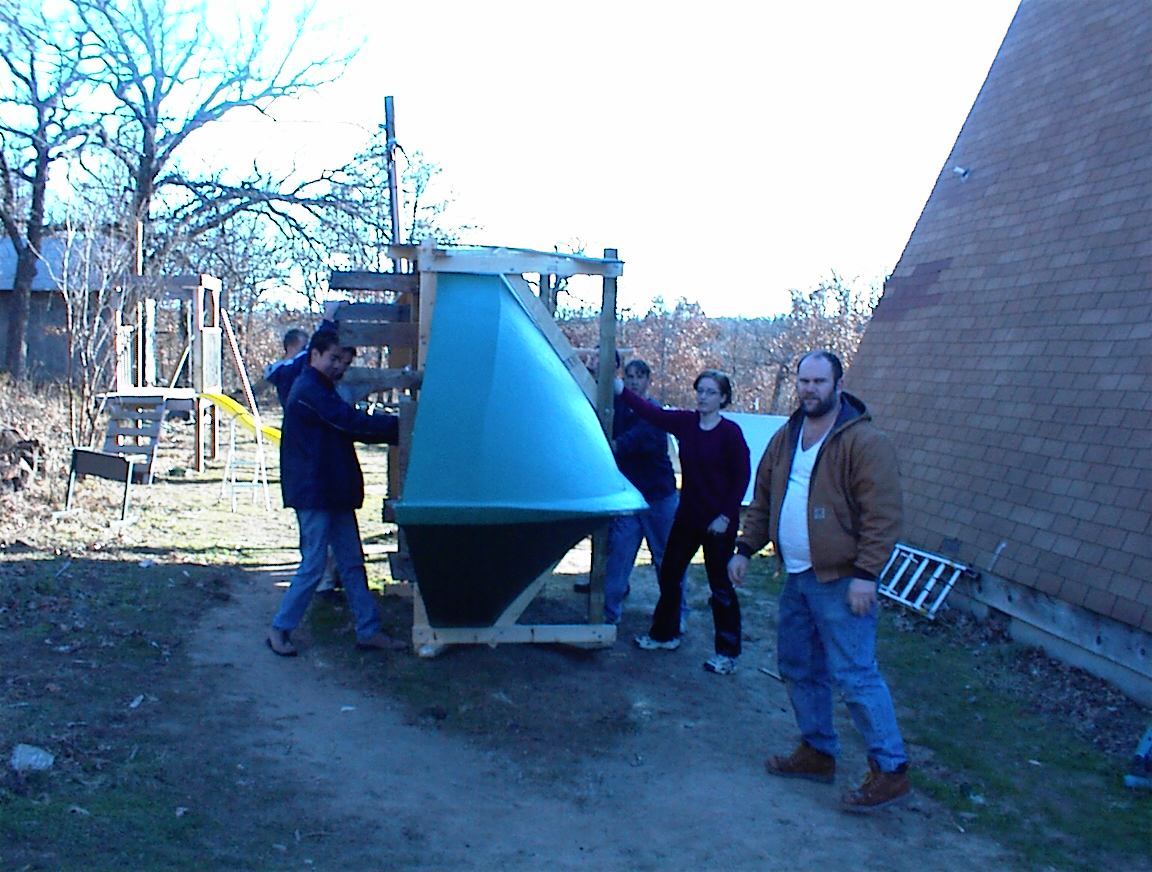
3DSC00007_5 3DSC00008_5 3DSC00009_53DSC00010_33DSC00011_33DSC00012_2Over she goes! Didn’t drop this one. We are adjusting it to be centered on the canopy, and level (at least side to side, I made all the panels square with bulkheads, which are canted a bit. It’s not level front to rear, but that doesn’t affect anything) “NO! Don’t put a block under the rudder!”

Final tuning and adjusting.3DSC00013_2 3DSC00015_2 3DSC00016_2
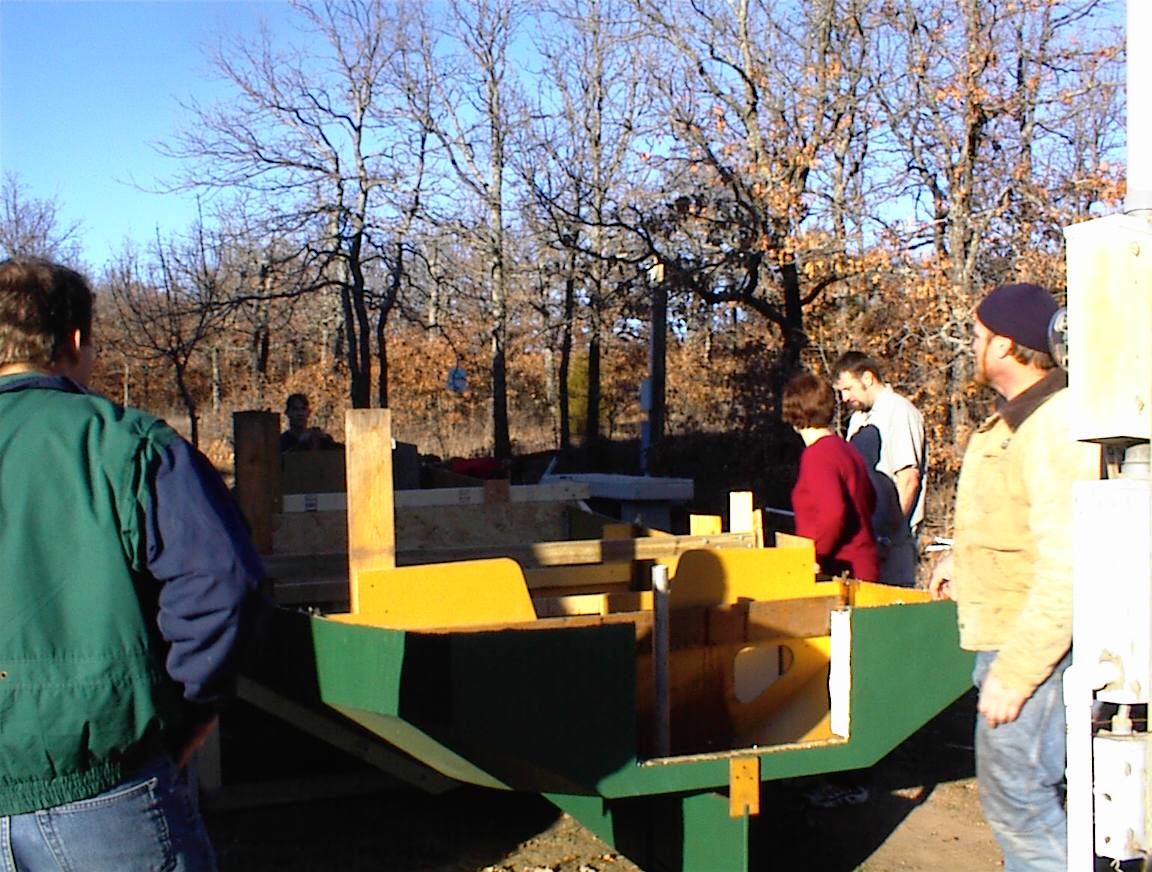
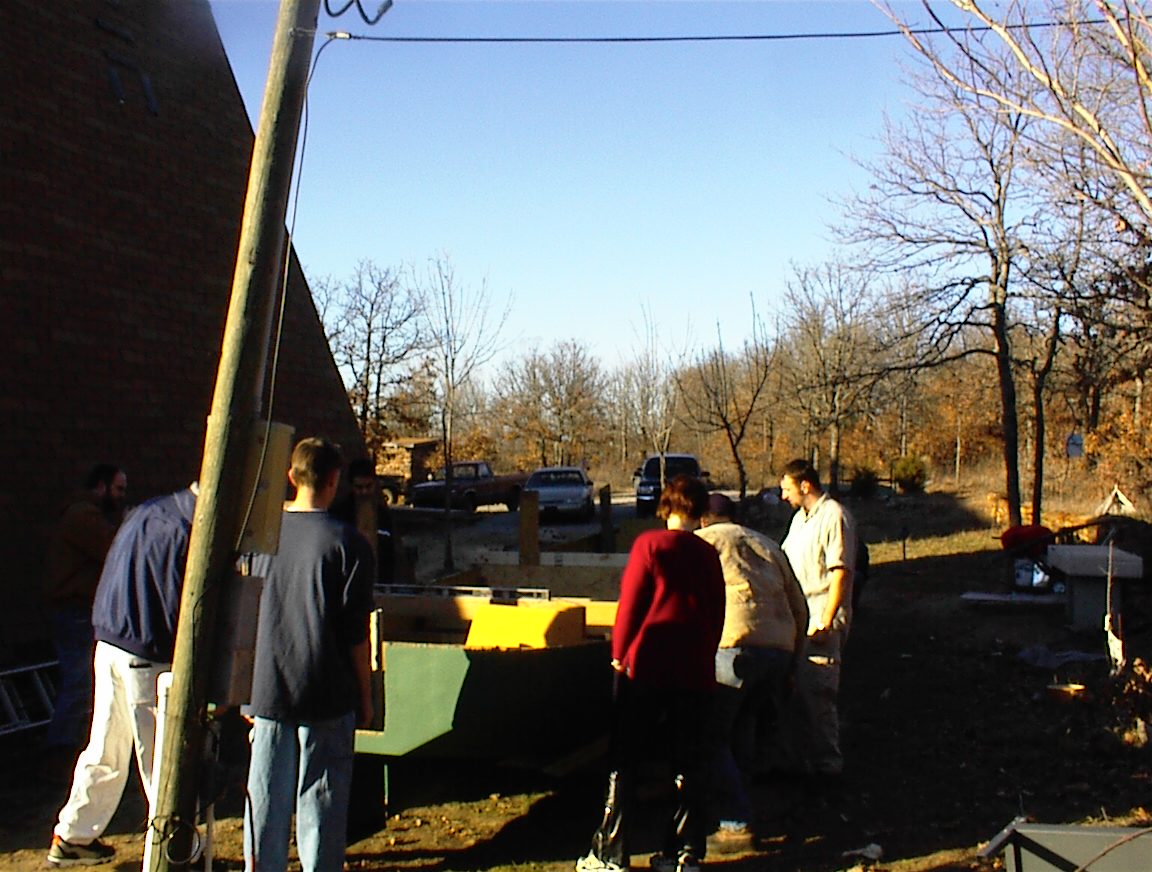
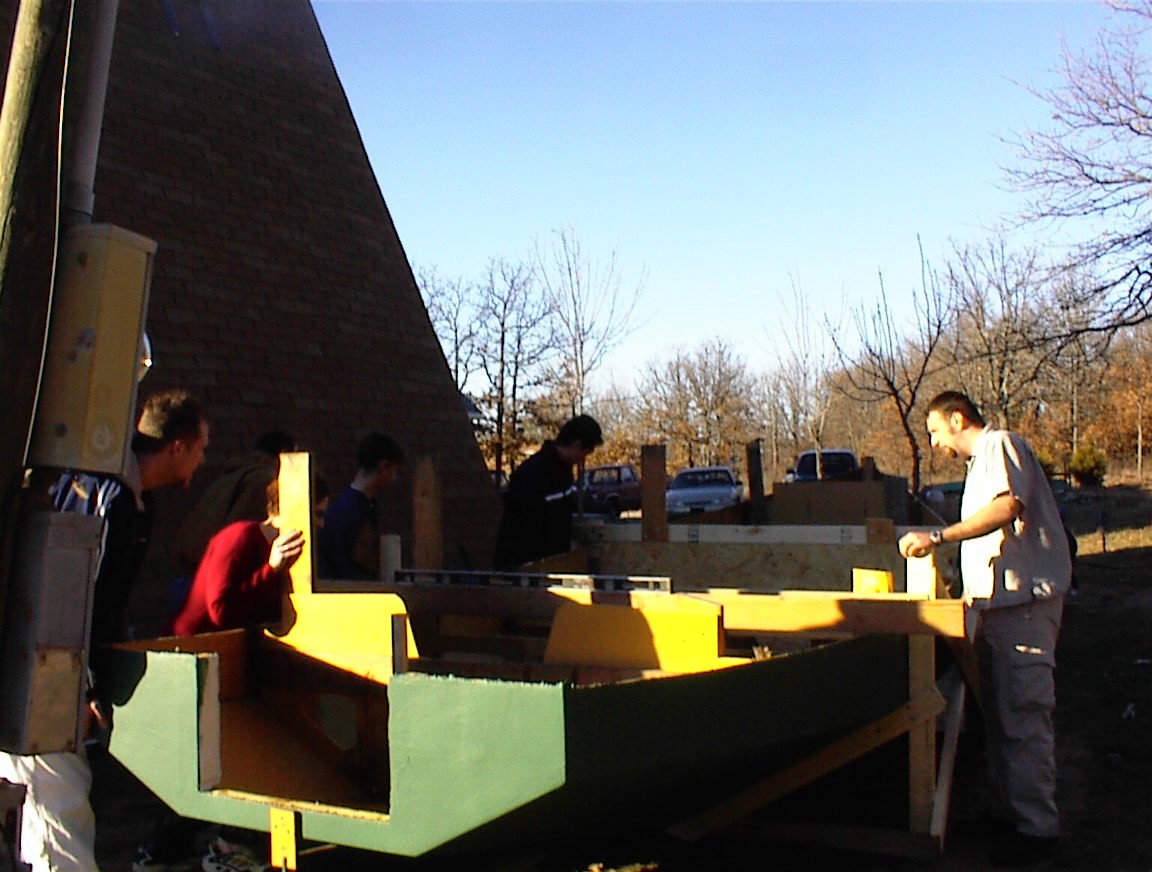
Starting to move the canopy back in. Much to big for one person to carry, but doesn’t weigh much.Turning crew inspecting the boat. Yes, I know the power pole is slanted. It’s been that way as long as I’ve owned the property. Doesn’t seem to cause any problems.
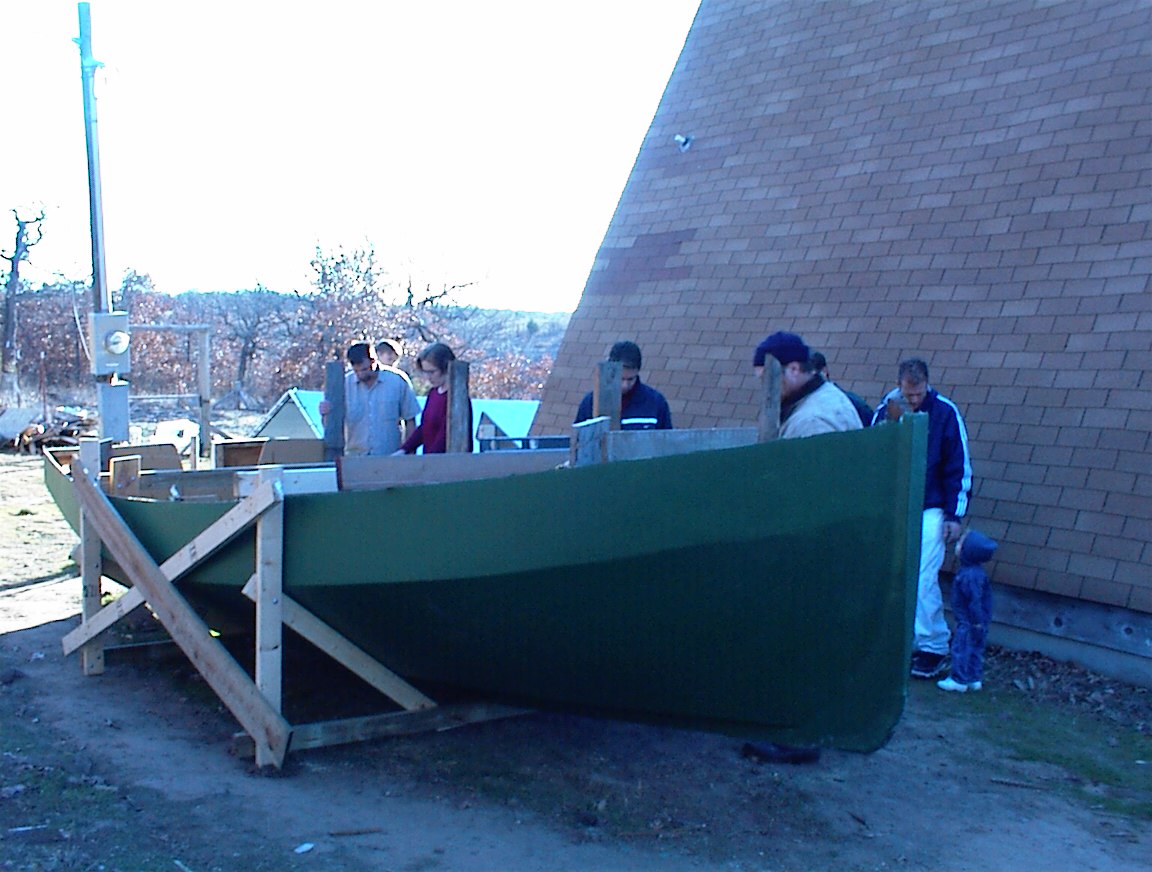
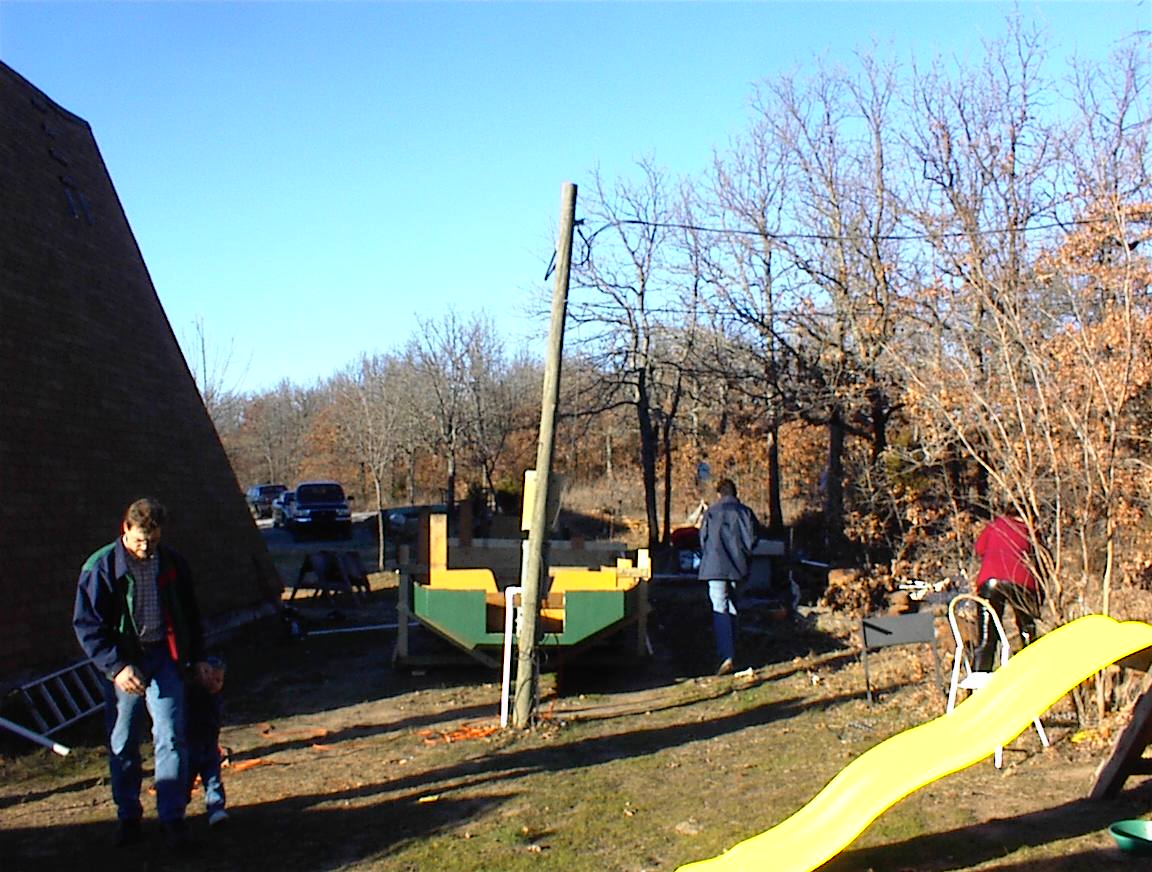
3DSC00021_2 3DSC00023_2 3DSC00024_23DSC00025_23DSC00026_23DSC00027_2Six people hold the canopy, six more insert poles. Makes me glad the girls have so many friends!
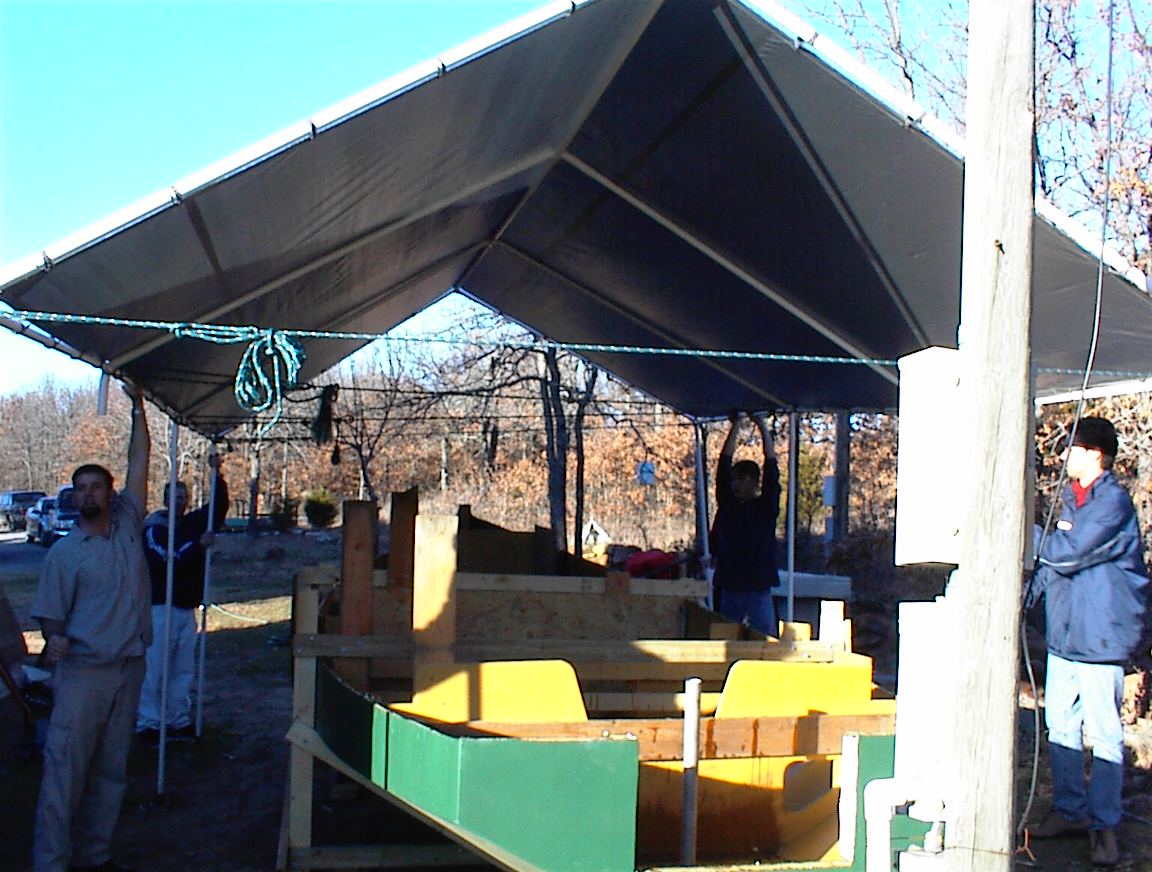
3DSC00028_2 3DSC00030_2 3DSC00039Final tweaking, and tie the canopy back down.
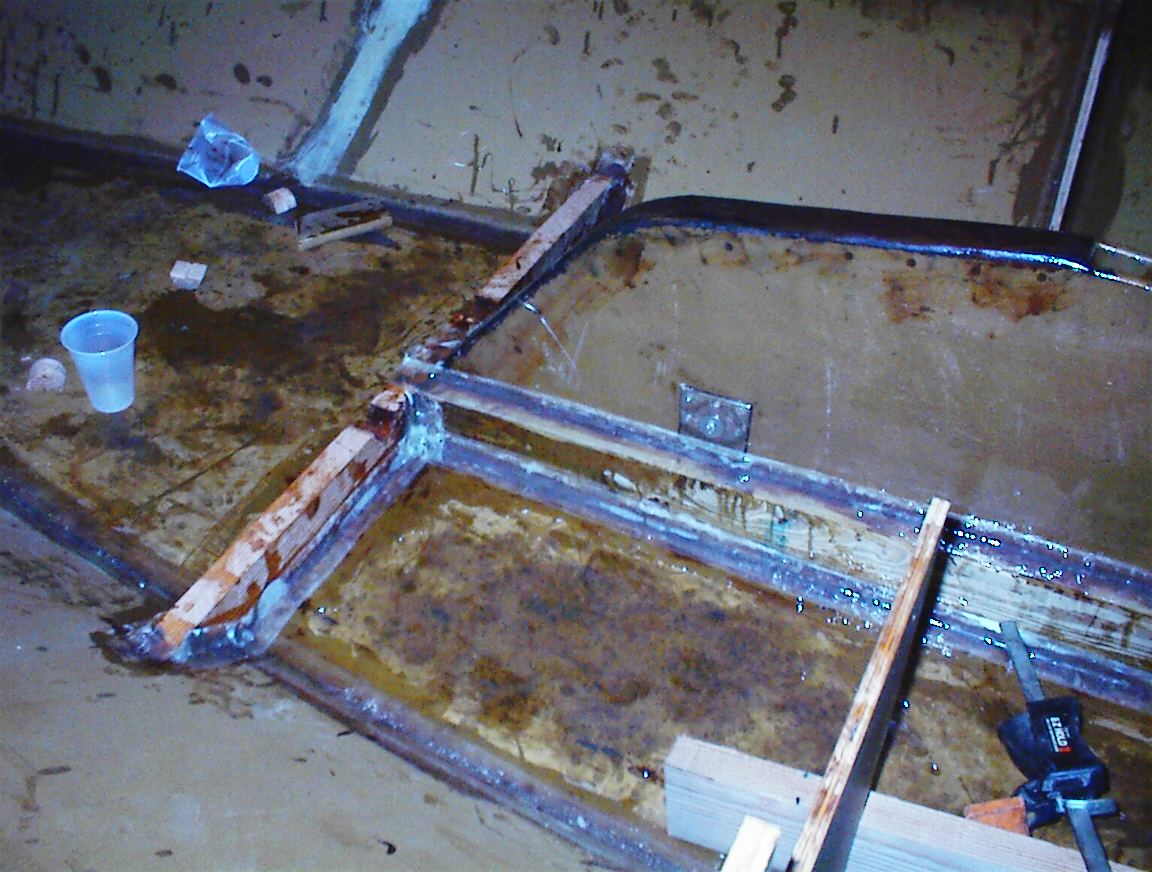
4DSC00001 4DSC00003 4DSC00004The left two are pictures of the centerboard interior bracing. The CLC doesn’t have the bracing on the top of the centerboard case that the regular Chebaccos do. Notice the several layers of tape and generous use of epoxy putty. And, yes, I did cut the drain holes on the wrong side of the board. It will be under the floorboards, and the only issue will be small triangular area between the berths that won’t drain back. But, since the cabin is closed, doesn’t have a bilge pump anyway, and this will be covered by the floor boards, I’m just not worrying about it.

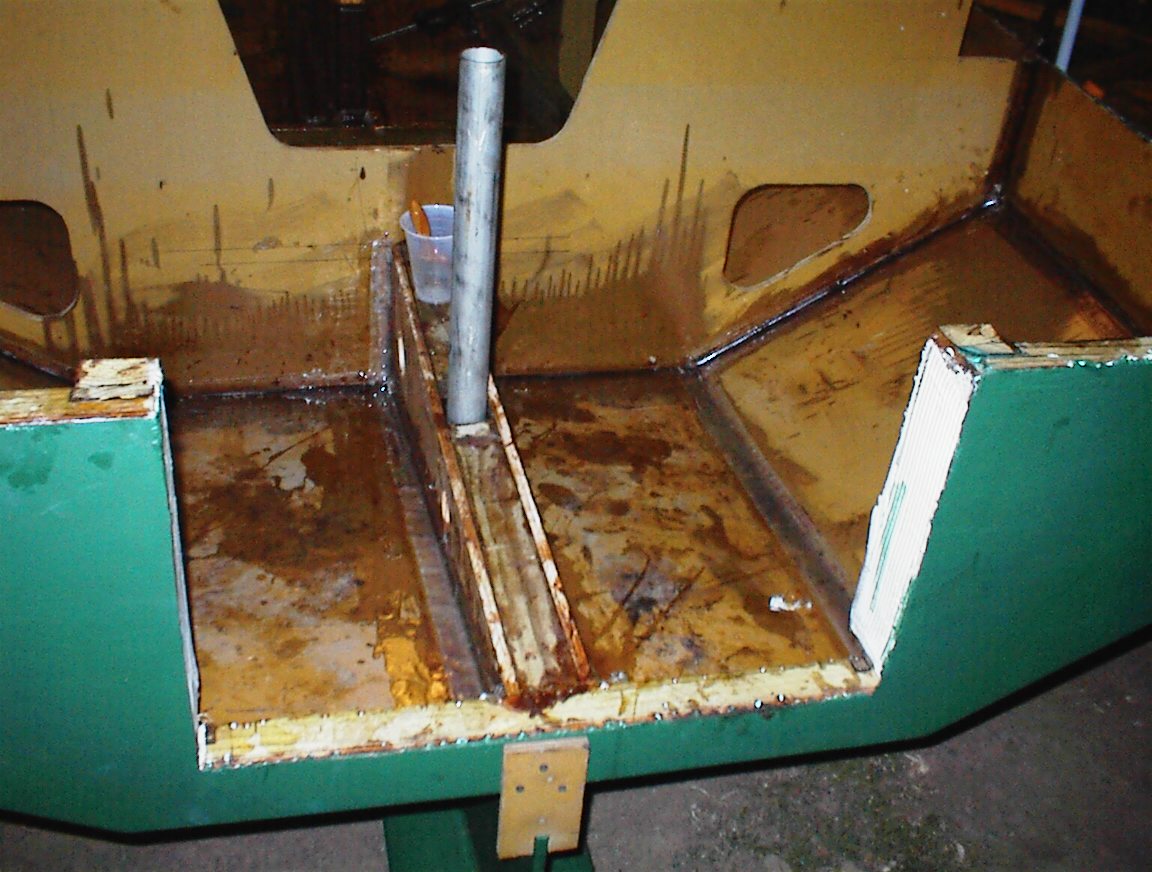
To the right you see the through hole for the rudder, and the aft well substructure. There would have been closed off spaces inside this structure for moisture to gather. The MDO and pressure treated is pretty good stuff, but I cut ventilation holes anyway. I’m putting two small deckplates on the bulkhead in the left of the picture. I know the plans call for this to be open, but I want the added floatation if the cockpit is ever flooded.
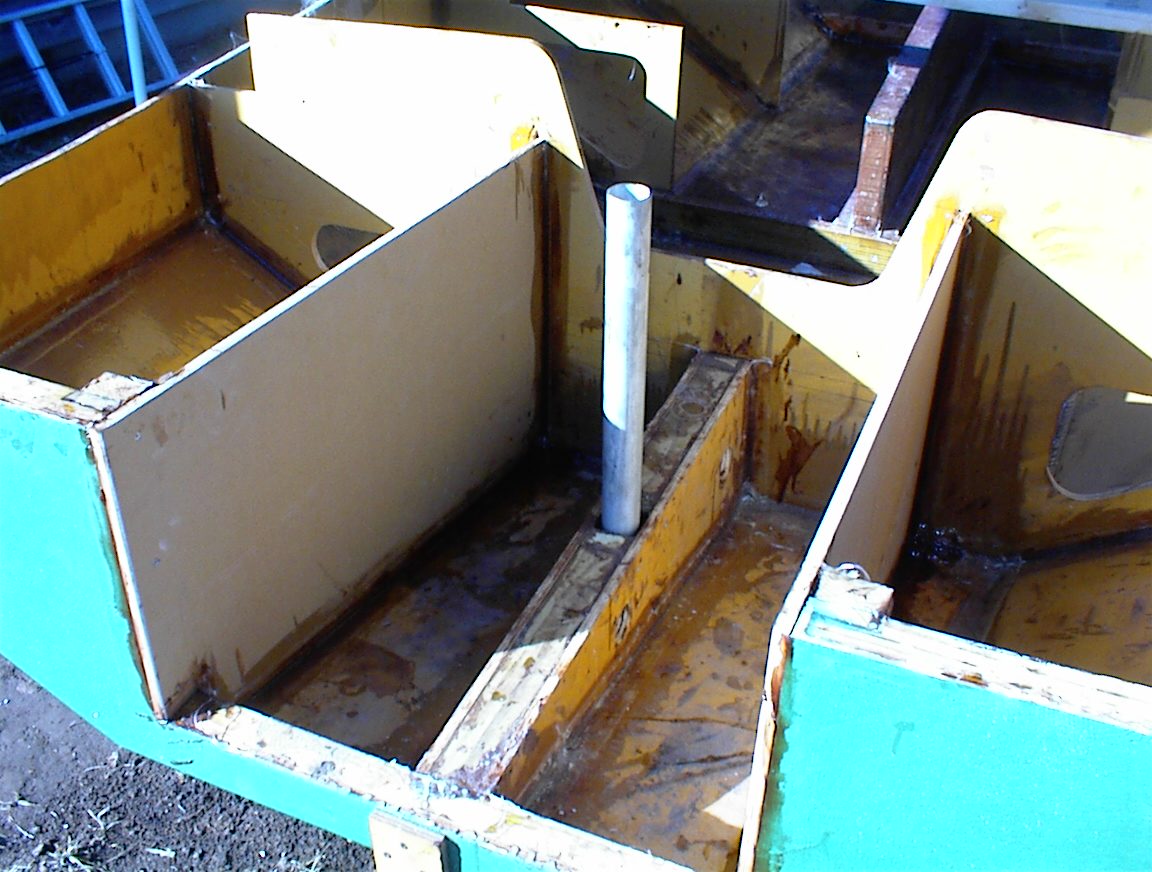
4DSC00005 4DSC00008 4DSC00001_2When I was building this section, I really noticed the lack of pictures of this particular construction detail on the web. Hence, you see lots of these pictures here! In the right two photos I have installed the walls to the aft floatation/storage boxes, and the framing for the motor well floor.
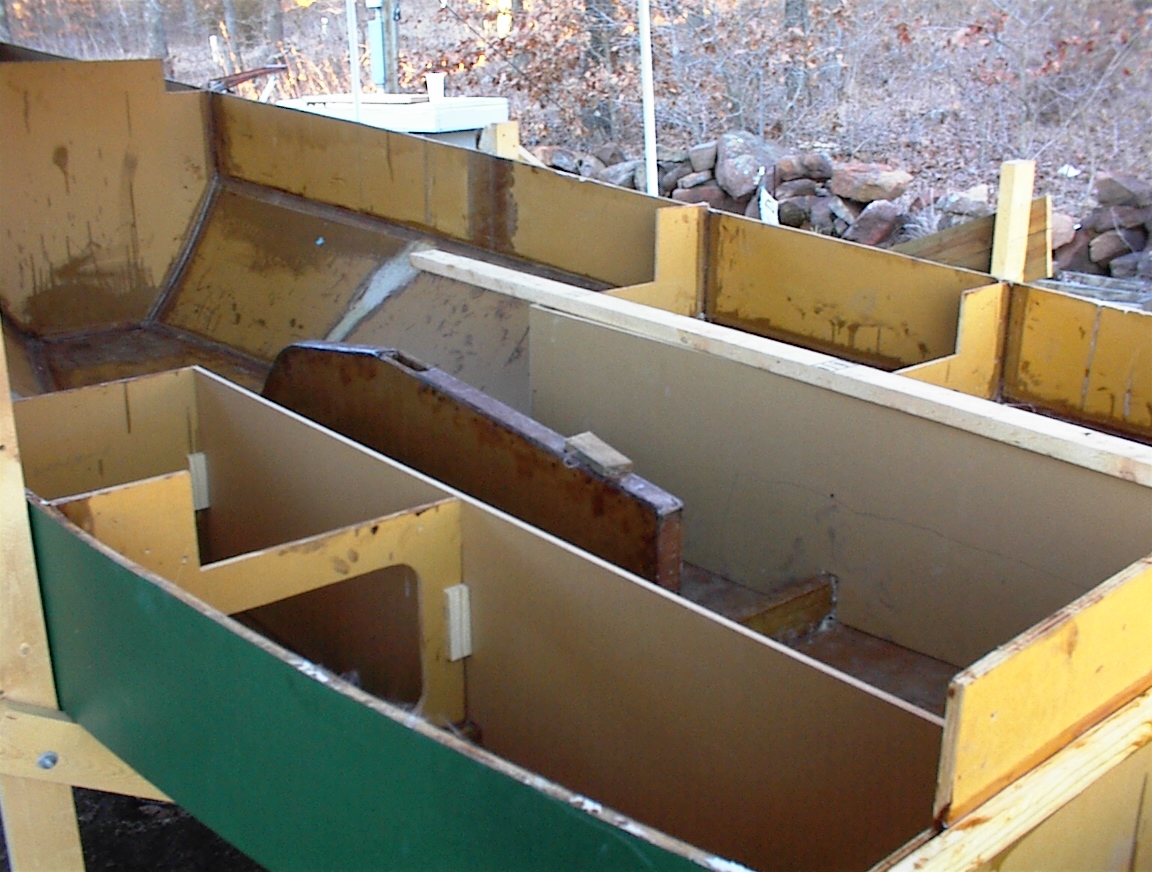
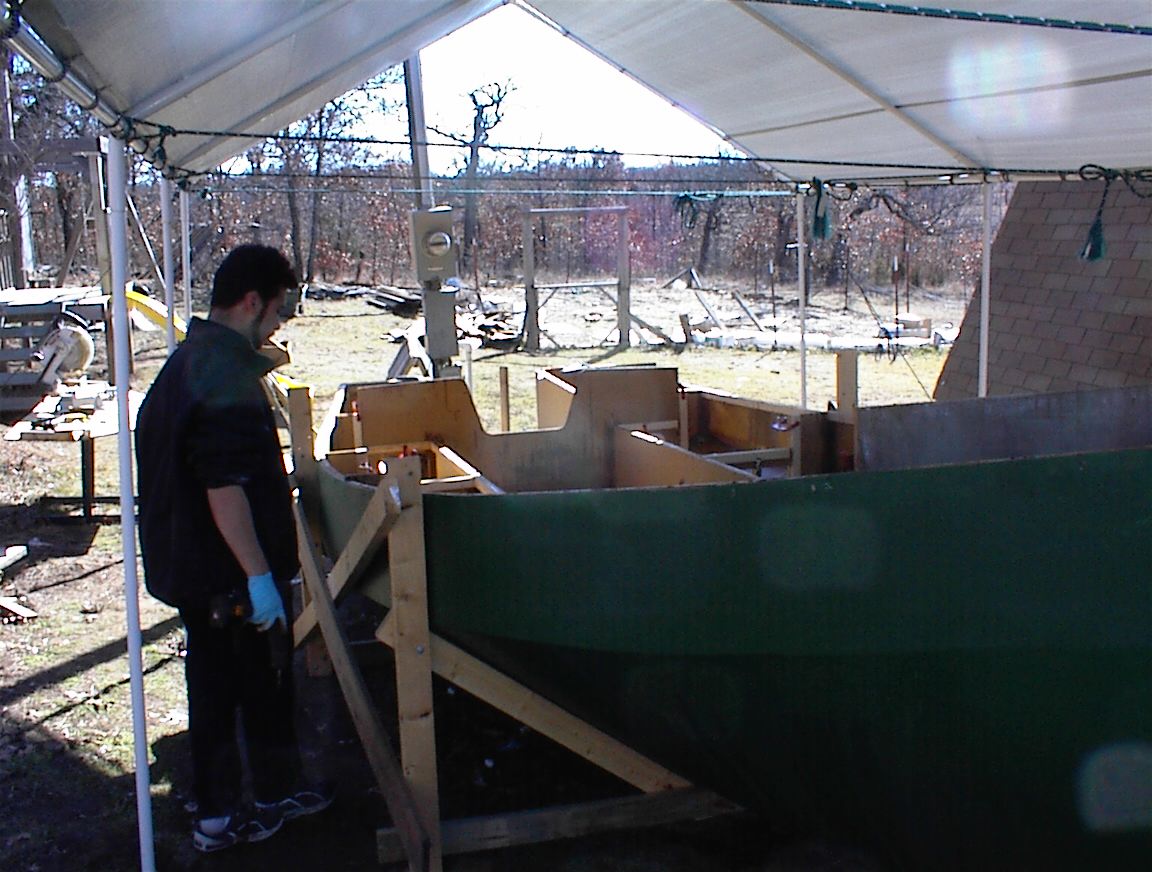
4DSC00003_2 4DSC00003_4 5DSC00006In the left photo I’m attaching the sides of the “seats” (which will also be the head ad galley). Attached them to cleats on one side, taped the other, pulled the cleats, and taped the remaining joint.s Center photo is my new power tool. He does a pretty good job, I can turn him loose on something and do something else myself. Very handy to have around, I would suggest you buy one. On the right you can see the framing for the top on the ground tackle compartment. I’m going to cover this over and put a Bomar hatch from Thrifty Marine (see resources) in. Rain and spray proof.
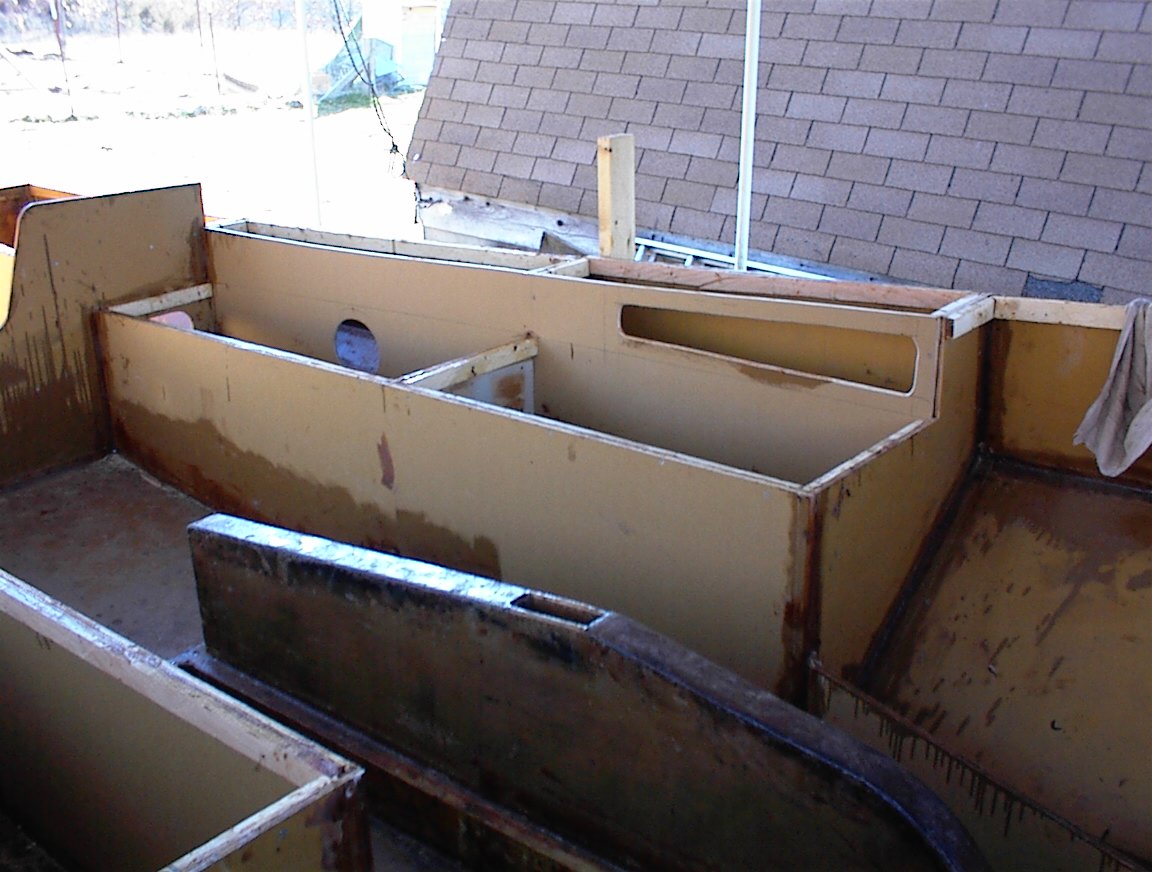
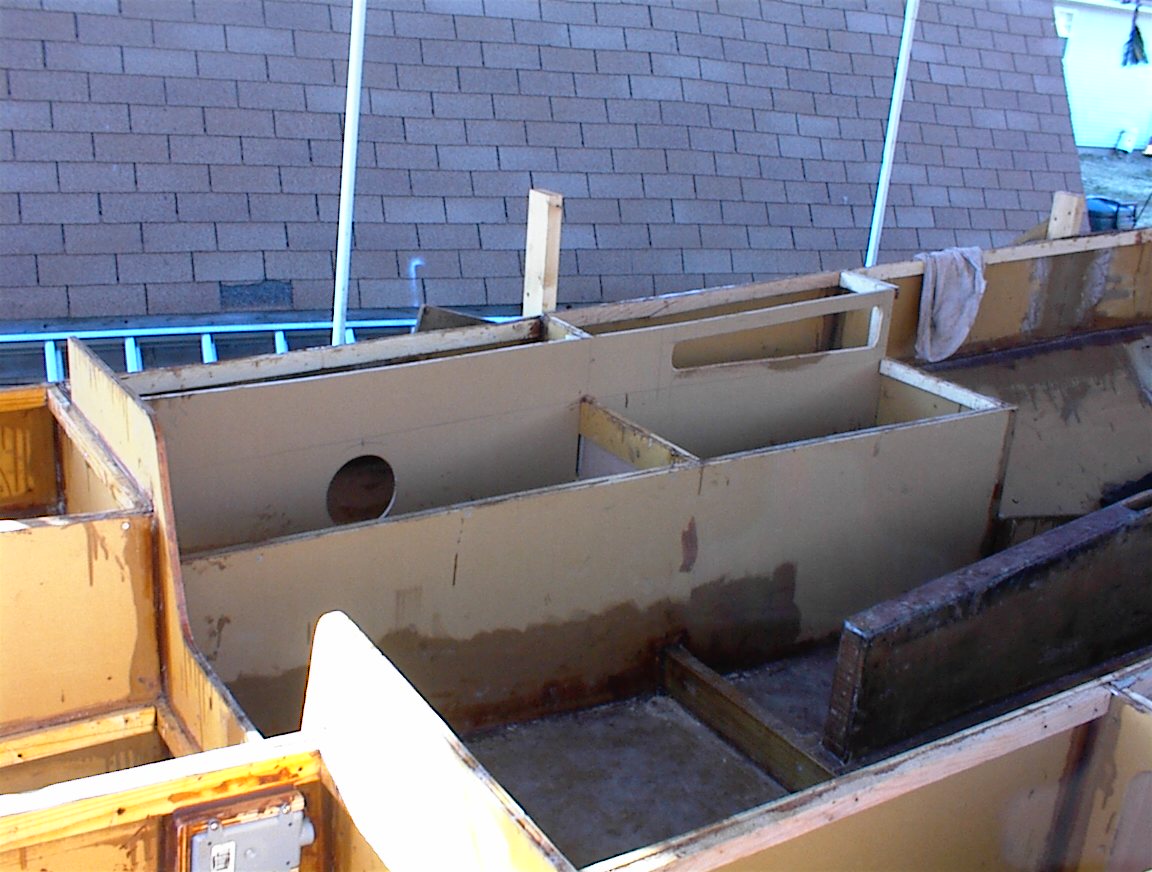
DSC00004 DSC00003 DSC00001Here you see pictures of the storage compartments I’m building. Not on the plans, but in a 20ft boat you can’t have to much storage. The compartment behind the seat will be accessed by opening the seat hatch, opening the deck plate covering the round hole, and reaching through the hole. Not the easiest access, but I’m thinking of storing light dried goods in there, maybe bread, that kind of thing.

The other storage area will be accessed through a hinged door over the galley and behind the head. For light dishes and toiletries, respectively.


You can see the layer of light glass on the bottom of the side of the seat, to protect against standing water in the cockpit.
5DSC00001_4
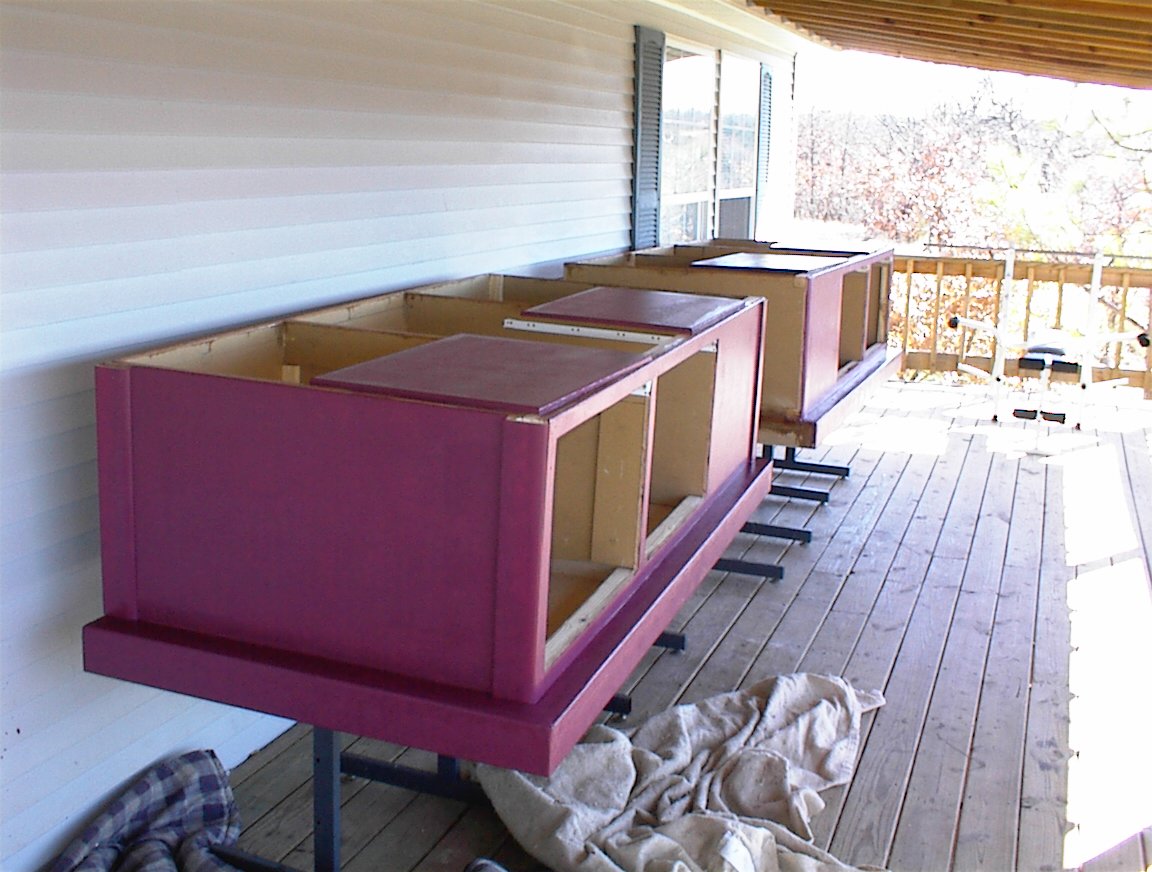
***HEY, how did that picture get in here? This is the new bed I made the wife for the anniversary. It does show how boat work spills over into regular life. This was built in two halves, out of some of the spare 1/2″ MDO from the boat. Two halves so it would be easy to take into the bedroom. The lip around the top was filleted and glassed, so it would take the strain big people and little cats getting into bed.

Hi again, Richard

The weekend before last, Dad and I took a drive over to Bill McKibben’s place to say hello and see his modified glass-house Chebacco.  It’s going to
be BIG!  He’s going for comfort in the interior, raising the sides a foot over the already higher (I think) designed sides.  When the cabin goes on,
it’ll be big enough for full standing headroom!  There’s a vee berth going into the bows, with a galley along the port side, and a head compartment, I
think.  Also there will be quarter berths under the (shortened) cockpit seats.  Bill thinks more ballast will be needed to offset the added weight
up high, and is considering modifying the keel, and/or carrying inside ballast, maybe extra drinking water in portable containers.  There’s
certainly lots of room.
Picture_No_1

Bill’s braver than most.  The hull is from the Chebacco offsets, so the underwater shape is as designed, but for the topsides he’s working from the
model he made (Chebacco News #33, Feb 01), and the interior is in his head.  He says its all an experiment, but I think he’s pretty well
thought it out.  The model looks good and extra ballast should make it stable.  Beth said she prefers the fast motorsailor, since it will take them
home in a hurry if the weather turns sour, but Bill is quite keen on the new, slower boat.  It’s modelled after something he saw in Desolation Sound,
a power boat hull and cabin converted into a motor-sailor, with davits added for a substantial dinghy as well.  Bill says it combines everything he wants
into a tidy package.  The boat that inspired him was about 25 feet, and Chebacco is only 20, but I don’t think that’s going to stop him.  Including
davits.
Picture_No_2

Bill’s model looks good, so once the ballasting is worked out, the full size motor sailor should turn out well.  I’ve attached some pictures of the
progress to date — unfortunately I couldn’t get far enough away to show the whole boat at once, as it’s under shelter.  The frame at the stern may be
converted into support for the davits, or could be removed, Bill is still pondering that one.
Picture_No_3

Bill’s plans for moving the hull out of the shop may be helpful to someone  else — he is leaving the keel off, so he can put rollers under the hull and
just push it where he wants it.  Then he’ll add the keel once he’s got the boat clear of shop, yard, flowerbeds, and so on.

I hope I haven’t misrepresented anything here — if I’ve got it wrong, Bill, my apologies.

***
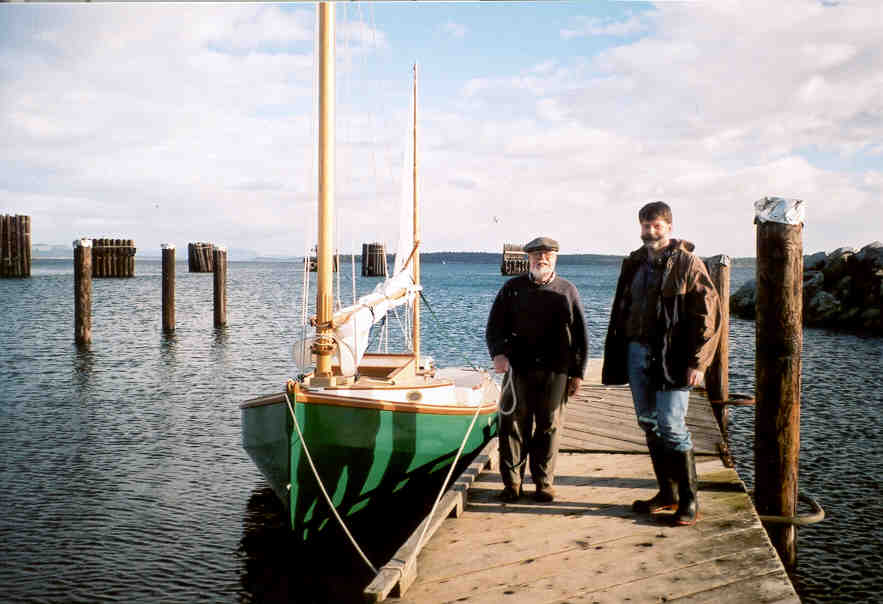
Tom_and_Jamie

Hi Richard

I had a visit from fellow Chebacco builder Tom McIllwraith (from Halifax) on January 12.  He had occasion to visit Vancouver, and dropped in on a couple
of wet coast Chebacconists while he was in the area.  On the weekend before, he called on Randy Wheating to check on progress of Randy’s (as yet
un-named) sheet ply Chebacco, then last Saturday he caught the ferry over to see Wayward Lass.  Tom’s not a stranger to Chebacco sailing, having been out a few times with Fraser Howell in his strip built Itchy and Scratchy.

Tom’s done a lot of thinking about modifying his boat to make it slightly less Spartan in accommodation.  As well as angling the coamings for lounging
in the cockpit, he’s thinking about making the cabin wider – in line with the cockpit sides, I think, — and just a bit higher.  He and Randy had a
good discussion – here’s what Randy had to say:

“I spent a couple of pleasant hours on a rainy Sunday afternoon with Tom in the boat “shop”.

It never fails to give me a neat feeling to meet a kindred spirit, from across the Straight, country or world that has laid awake at night or
pretended to be attentive at a meeting while puzzling over some obscure Chebacco detail in his mind.  It is really a pretty small club when you
think of it.

Tom and I swapped many ideas and modifications until the moment of truth when we each confessed to our biggest “oops”.  That is, a mistake that
has passed the point of correction.”

(I’m not including any “oopses” here – I’m sure every boat’s got one or two, but when 99.9% of people look at a boat, they see only the big picture, not
the details.  Good thing, too. — Jamie)

I have to agree with Randy about the kindred spirit part.  Since I got involved in building and sailing Wayward Lass I’ve met a whole raft of
interesting people, and have learned a lot from them as well as enjoying the chat.  The internet and this newsletter are great tools for this, of course,
but the personal visit is still king.

Tom and I hoped to go for a sail, but when we took a look at the Strait of Juan de Fuca, just after he arrived at the bus depot, it was a mass of big
whitecaps – no way!  The marine forecast was still showing gale warnings, although things were supposed to ease later.

We headed to my place, and had a solid session of boat talk, climbing around Wayward Lass.  After that, and a bite of lunch, I phoned my dad up in
Sidney, about 15 miles north and around the corner from the Strait.  He obligingly went for a short walk, and phoned back saying that it didn’t look
too bad, the racers were out and he hadn’t seen any reefs in their sails. So we hooked on the trailer and drove to Tulista Park in Sidney, my
favourite launch ramp.  Dad came out to see us off, and for Tom’s benefit, I timed the rigging-up, from stepping out of the van to getting back in for
the launch.

Rigging up took 28 minutes on this occasion, a bit over the average, but not a whole lot.  I’ve only once come close to 15 minutes, when I’d put
everything away properly the time before.  This time, we started with a disorganized collection of ropes and sticks.  I’d only laced on the mizzen a
couple of nights before, not very well as we found, and all the ropes were just dropped in the after lockers.

Honda started on the second pull, and after an interesting 180 between the pilings, thanks to the wind, we headed out.  The wind was pretty well from
the west, straight off the shore, so we put up the sails right away and shut down the motor.  I’d put them away with a reef still tied in on Boxing Day,
and we left that in.  Because we would have to beat back to the ramp, we took a quick turn to windward, just to see how strong the wind really was –
no problem, the single reef was enough, maybe 20 knots of wind, but not much wave action because of the wind blowing away from the land.

We headed easterly, towards Sidney Island, with its mile long spit and friendly lagoon, on the other side of Sidney Channel.  The mizzen wasn’t
very helpful while running – with a strong wind it tends to push the stern around.  However, I kept it up because it helps us heave-to so nicely.

After a while, we became aware that the wind was picking up.  The way home was now patterned with white, and looked quite different.  We turned to
windward again — and gave up any thought of going all the way to the spit. We’d have had a very long beat home if we’d gone on.  Wayward Lass was
sailing well, but going against the waves threw up some heavy spray.  Tom got into the Cruiser suit, but not before he soaked up some of that spray.
Going to windward in these conditions, I was glad to have a second body for ballast – he kept the worst of the spray off me, too!

It was wet, but we made good progress.  However, after a long tack to that brought us near the shore, but still quite a ways north of the ramp, there
were a couple of very strong gusts.  These challenged our favourite designer’s assertion that nothing short of “hurricane force winds or heavily
breaking seas” will tip a Chebacco.  Rather than chance becoming the first Chebacco ever to capsize, I let the mainsheet run free, and we hove to for
the second reef.  The only other sailboat in sight at the time was a biggish one (40 feet?), and it was reefed down too.

Tom must have wondered if I really knew what I was doing.  The reef lines (pendants?) for the second reef were still in the cabin.  I got them out,
and tied the tack down quickly enough.  However, to get the foot tight enough it was necessary to rig the clew reef line properly, from boom to
reef ring back to boom then pull it tight to the cleat.  Meanwhile we were sailing merrily backwards at about 3 knots, away from our destination.  I’m
not entirely sure why, but every time I was about to tie off the end of the clew reef line, after all that leading here and there, the bows would swing
off the wind and the boom would fly out to the side.  I eventually got the reef tied, but it was a real circus there for a few minutes.  I think the
mizzen luff and snotter weren’t tight enough, as the wind was making bags in the sail – also I had to pull the boom inboard to run the clew line through
the ring, rather than letting the boom fly loose.  Bottom line is have your reefing lines rigged before you need them!

Wayward Lass was fine again with the two reefs in.  I estimated the wind at 25 to 30 knots at this point, no idea what the gusts reached.  Take this all
with a grain of salt if you want, it’s only a guess.  The waves were much less than they would have been if the wind hadn’t been off the land, since
they couldn’t build up on such a short fetch.  I poured Tom a cup of tea and put it down beside him (he was steering now) but it promptly went into the
bilge.  Tom very nicely said he was too occupied to drink it anyway.  I poured a cup for myself, but it was full of salt spray almost immediately,
so I gave it up too.  Not too long after, I suggested that we’d had all the fun we could take for the day, and since it would take quite a while to work
our way up to the ramp, we might start motoring.  Good old Honda started again without complaint, and it was down sails and home.

Tom assured me he’d enjoyed the afternoon (I hope you weren’t just being polite, Tom.)  I enjoyed it myself, despite feeling like an idiot at times –
out of practice and very disorganized.  Another time we’ll suit up completely at the start, and rig all the reefing lines too.  Oh, yes, and I
won’t leave cups of tea unattended!  Still, it’s got me all fired up again, and I’m planning some more sailing as soon as we stabilize a couple of new
projects at work.

I see I’ve got a bit carried away talking about the sailing (again! – call it a character flaw.)  I really meant to concentrate on Tom’s visit,
because, as Randy pointed out, it’s great to see Chebacconists from other parts of the country (world?).  It was fine meeting you, Tom, and I hope
anyone else coming out this way will call, and maybe we’ll get them out for a quick one too.

Tom, I also hope you’ll will write up your building experiences and tell us about what modifications you decide on, and let us see some pictures.  The
world can’t have too many Chebaccos!

Jamie Orr

***

There once was a man, who spent much more money than he should have, to have LED lights on his boat. This is the same man who decided he HAD TO HAVE a CNC router, built one from scratch, then used it twice.
Anyway, for no particular reasons, other than I thought it would be cool, and I wouldn’t have to worry about leaving the anchor light on all night, I decided I MUST HAVE lights on my boat that were based the new, ultra efficient, bright white LED’s.
I bought my LED’s mainly from http://www.bgmicro.com/, They run, according to the spec sheet from Nichia, at 3.6-4v and output 5600 mcd (mili candela, whatever that is) in a 20 degree fan.
I had originally planned to have eight of the lights, masthead, forward red, forward green, aft, two cabin lights, and two reading lights. Also, I had planed to run 12v to the lights, and do the voltage conversion there. Red and Green lights would be using red and green LED’s.
I read everything I could find on LED flashlights, and LED lights. There is a lot of information on the ‘Net on the subject. A lot of it worthless. One site recommends using a 7812 voltage regulator and three of the LED’s in series (so each gets 4v). Bought eight of these, the next day someone pointed out that the specs for this regulator require the input be about 3v over the output voltage. I.E., I couldn’t run it off a 12v batt and get a consistent 12v out of the regulator.
So, I had the bright idea of using the 7808, which puts out 8v, and having TWO of the LED’s in series. When the eight of these arrived I wired one up on the breadboard and presto, I had light! Wired eight of the LED’s up, and left them on. When they say “bright white” they mean it, had eight spots behind my eyes for hours before I decided I needed to wear shades to play with these things.
I left the 8 LED’s running and had supper. Afterwards, I discovered that THREE of the things had burned out!. What the BLEEP!?!
Some carefull checking determined that with the two in series, the voltage drop over one would be, say 3.9v, and the drop over the other would be, say, 4.1 v.
So, I figured I needed to drive the blasted things with EXACTLY 3.6v. There is a problem with this, this is apparently an odd voltage, there is no “78036” or whatever. So, I decided to make my own variable voltage supply, one for each light, and go to town. Bought, again, eight, LM317’s, and associated resistors and whatnot. Wrote a spreadsheet to calculate the values for the resistors so I could have the thing put out 3.6v. Wired it up. Plugged LED’s in and they were DIM! A little checking and it turned out that any kind of load on the thing and the voltage would drop…. Net research showed other people having the same issue, but couldn’t find a solution. Still a mystery there.
Time to step back and think about this. Maybe I should just have one voltage regulator, and wire 3.6 v to the switches, and out to the lights. I could do some kind of current regulator, but I wanted the simplicity of running the same voltage out to whatever light I wanted, and just hooking up as many LED there as I needed. Dug and dug and dug. Found a national semiconductor manufacturer who has a wonderful website with all kinds of information on it. They sell an IC that looked like, with a little work, it would make a wonderful regulator for the boat! (about this time I’m thanking someone for the VoTech electronics I took as a kid, back in the day)
A little soldering, a magnifying headset, some tweezers. Presto, one central, efficient, source of 3.6 volts for the LED’s lights on my boat!
BTW, I’m selling a kit to put these together. Kit price is $75, follow instructions at the “store” link to the left.
The kit uses a surface mount board the manufacture sells, with all the regulator components on it. The board comes from them fixed at 12v, and I use a magnifying headset, tweezers, and a pointy soldering iron to change it to work as a variable voltage source, to get 3.6v for the LED’s. The kit includes an etched board to mount the manufactures board on (as a daughter board) and all the hardware needed. I’ve removed the 2.7k itty bitty surface mount resistor and connected a wire to go to the variable resistor on the “mother” board.
DSC00005 DSC00006 DSC00007
As you can see in the pictures, I’m using a nice fancy, bulkhead mount enclosure. Got this, and lots of other neat stuff fromhttp://www.allelectronics.com. Give them a look see, they have neat stuff!
After all this, I discovered that the bright red LED’s I was going to use for the red bow light wouldn’t work at 3.6v. They go dim and get hot.<sigh> I guess I’m putting white LED’s in the colored fixture.
tn_1DSC00006_2 tn_1DSC00007_2 tn_1DSC00008_2
Here are some pictures of the masthead light with and without the cover. I bought the Series 25 fixtures from Boaters World, the price was reasonable, and I wouldn’t have to make them.
PCB&F writes (what does it say when you start referring to people by their initials?). The designer of the Chebacco light cruiser, Susanne Altenburger’s (who just denied that the Chebacco was “her” boat, in a rather LONG phone call), writes that you should use “two 6V deep-cycle batteries capable of around 215 Ah at 12V”. Now, were am I going to find those things? Nothing in the marine stores, nor in the auto shops. Can’t buy them online, the shipping would kill me. Walking through Sam’s club one day, but what do I see on the way out but a 6V, deep-cycle, 215 Ah, GOLF CART battery! Yippee! And, the things only cost $45 each. Nonstandard size, though. Will have to make my own box for them.
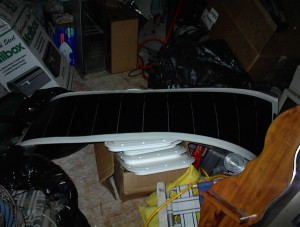
 3DSC00009
A 32watt, flexible, solar panel will top off the batts, and keep them topped off when the boat is in storage mode. I could have saved quite a bit and went with a hard panel, especially as it is going to be mounted on to of the cabin and there is no danger of it being walked on. However, the hard panel were looking awful heavy. 33lbs for some of them! So, I decided I needed the flexible, light weight ones.
There is a story here, these things were going for around $300 on ebay, and everywhere I saw them. Caught one on ebay with a buy-it-now for $240. GOT IT. Hurrah! Saved money!
Then, I was discussing solar panels with my friend Chuck, and he said he got his from here: http://www.solar-electric.com/.
Guess what, they had my panel too. FOR $187!!! AHHHG!
Then, when writing this article, I looked again and found the flexible panels at the above URL for $296. Huh? Read the description for the $187 panels. It appears that these are basically the flexible ones, in a frame. Same technology, but added weight of an aluminum frame and a galvanized steel backing! They weigh 10.6 lb, where the flexible one weights 4.7 lb. So, for an extra $53 I purchased a reduction of 5.9lb in the weight of the panel. Will it make a difference? Maybe, maybe not. But, any weight I can save above the CG counts!
Will put a clear window in the tarp that goes over the boat so the batts charge in when the boat is in storage, as soon as I figure out a cheap way to do this. May use the storm window sealing kits from the Home Despot or something.
Anyway, a 6.5 amp SunSaver charge controller will make sure I don’t overcharge the batteries, and I’ll get the 5amp alternator option when I get the motor.
2DSC00001 2DSC00003 2DSC00005_2
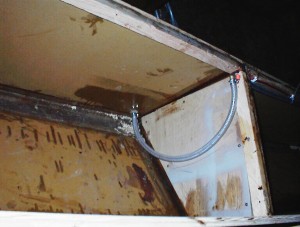
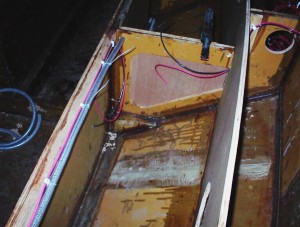
I had originally planned to run conduit for the electrics, but as you can see in the picture, I didn’t. I decided they would take up two much space, and instead ran the wires as shown. I was carefull to pre-run any wires that would be in closed compartments.
Here you can also see the plumbing for the bilge pumps and the drain for the built in icebox. I went from the pumps directly to 1/2 flexible tubing, to try to minimize the drain back when the pump is off. The bulkhead and there’ll fittings I made myself, from scratch!
Nice to have your own homemade foundry and machine shop!
***

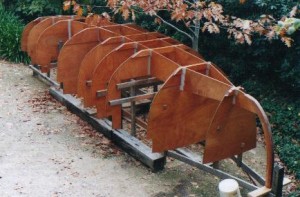
(So, I guess only people in Australia can build 25ft Chebaccos… Looking good Simon! -Ed)

G’day Richard , a couple of pics of the boat .

Cheers Simon.
MuddyMay01 MuddyProfileMay01

Chebacco News 38

Hello Richard:


I want first to thank you for continuing Bill Samson’s work in editing the Chebacco News. I have learned a great deal from this newsletter and appreciate very much Bill’s work on behalf of Chebacco builders.


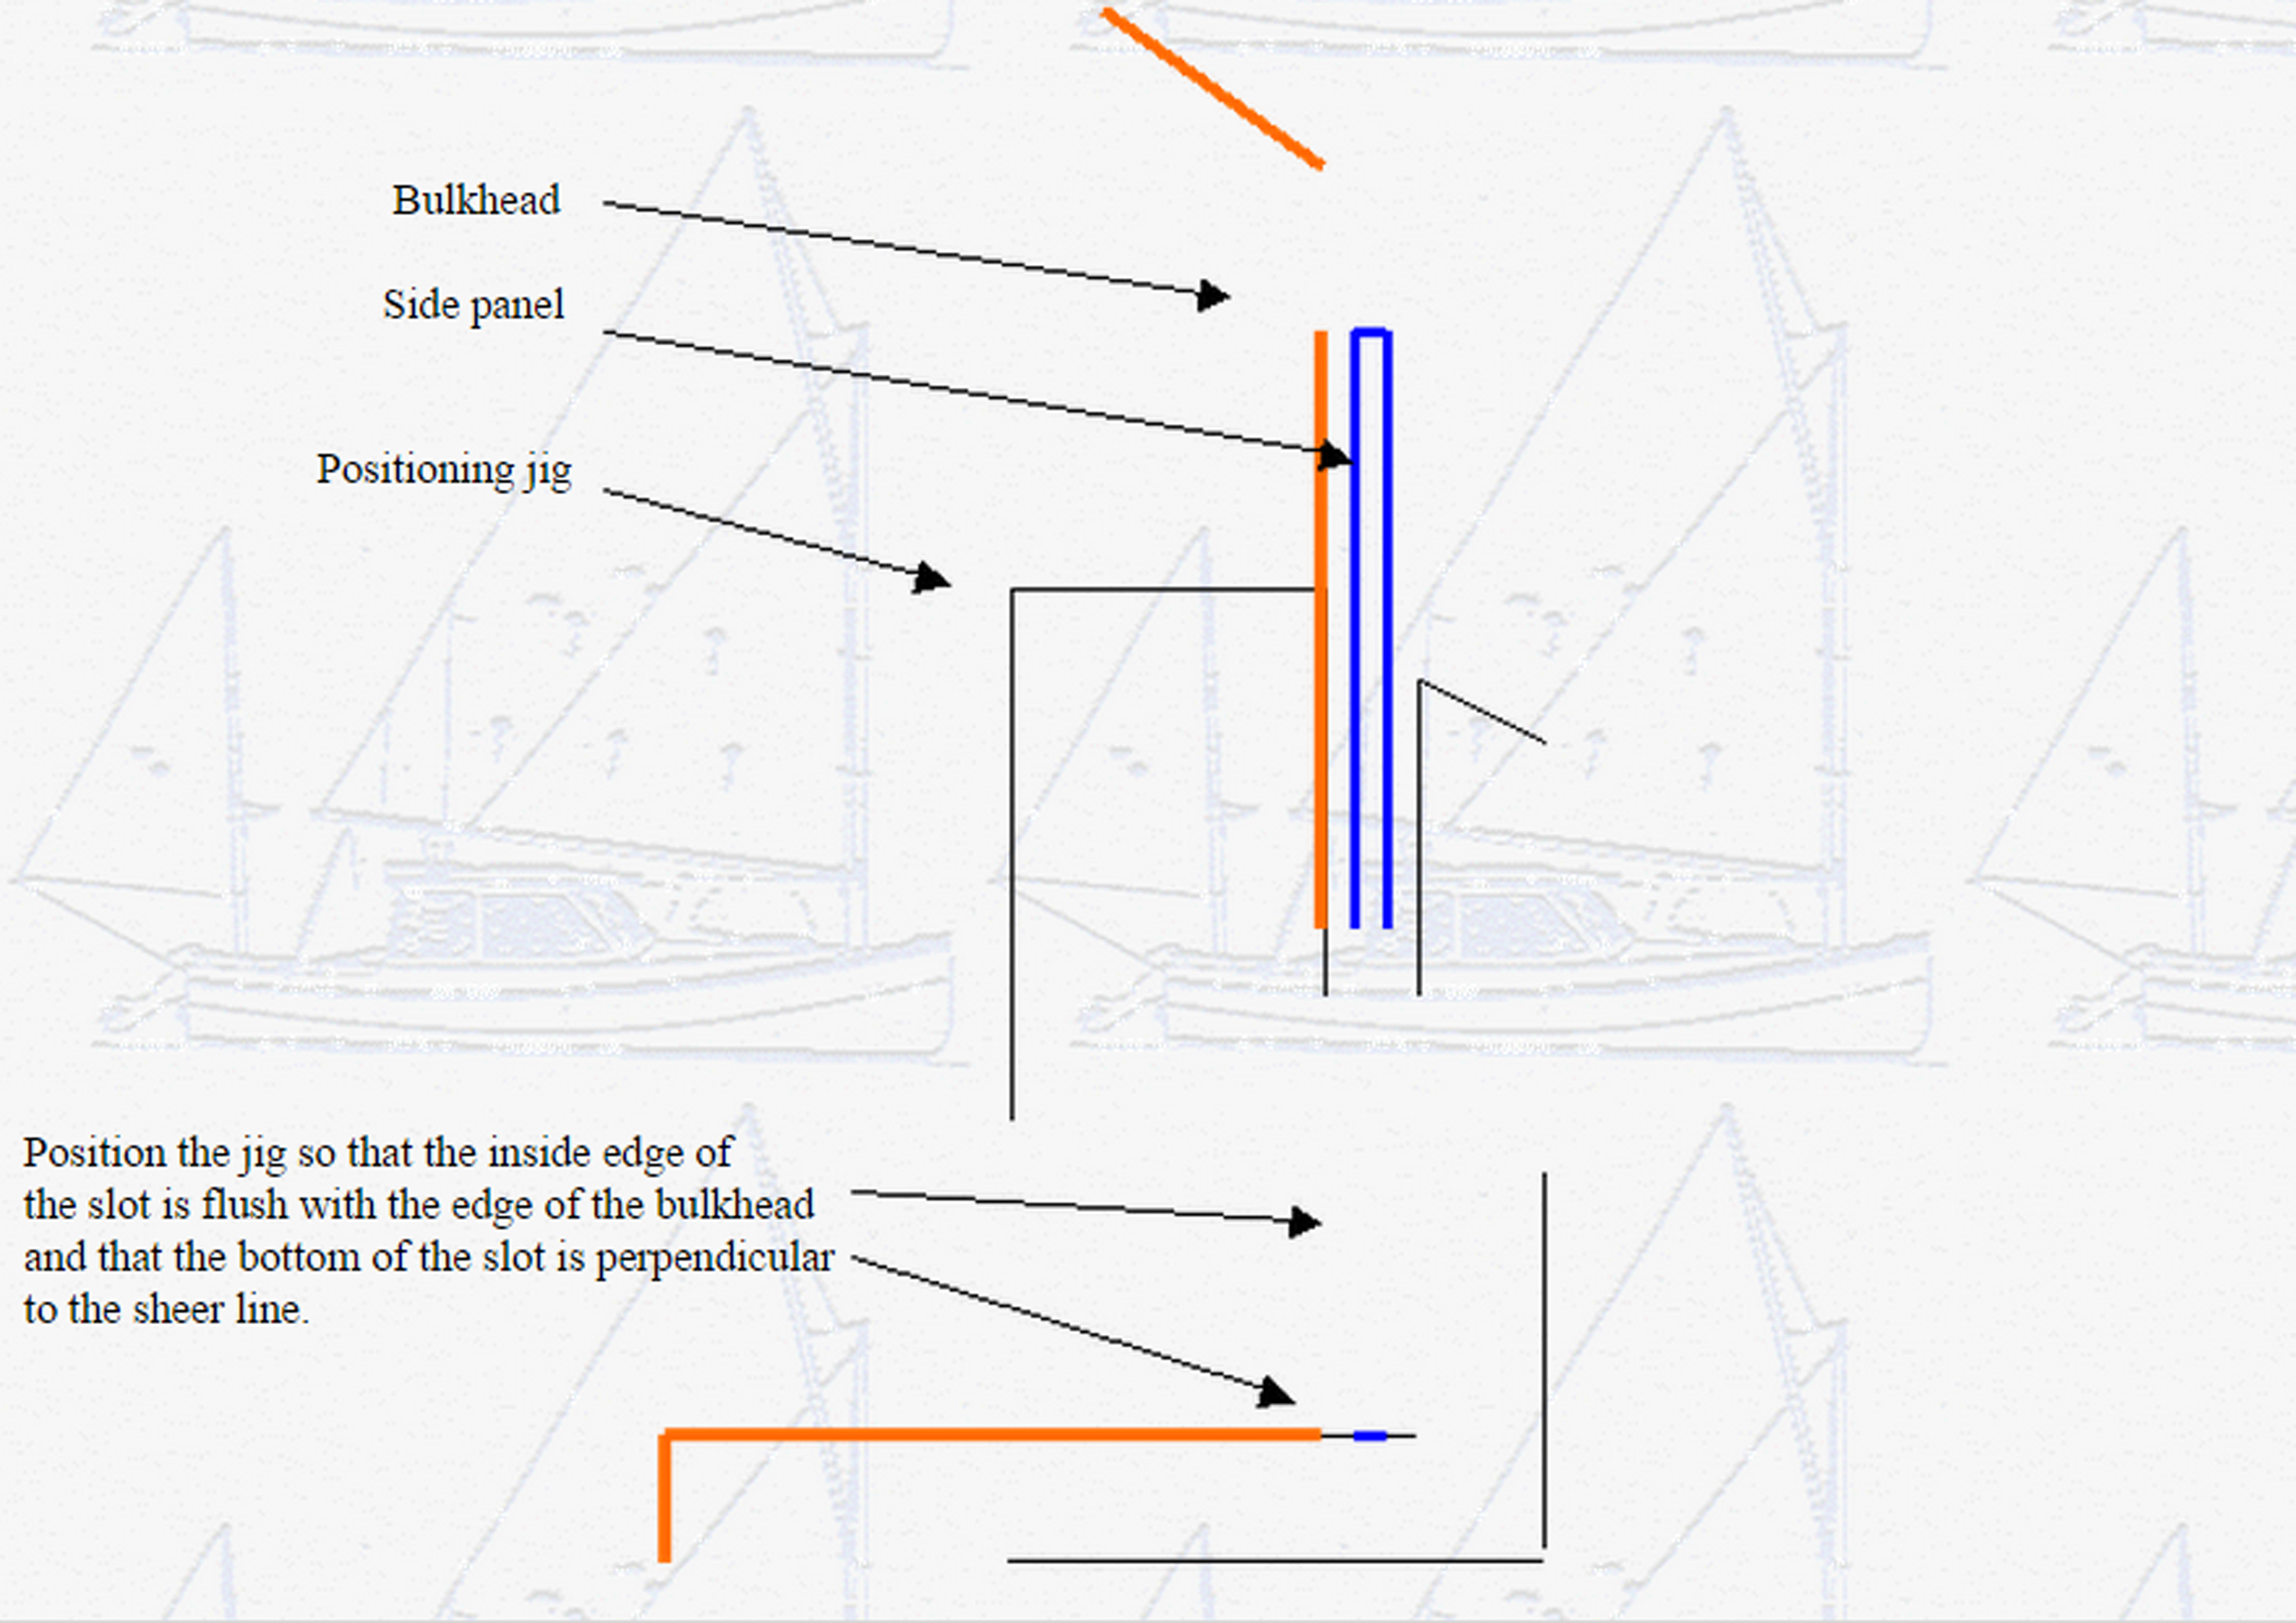
In his very helpful description of the building sequence for the sheet-ply Chebacco 20, Bill describes how he installed the two hull side panels by suspending them from the ceiling while he fitted them. Since I am building outdoors and do not have a ceiling, I had to find another solution.
 

My approach, therefore, was to cut out six small jigs out of scrap plywood (I actually used the cutouts from the bulkheads.). These were screwed temporarily to bulkheads # 1, # 4, and # 6 as shown in the diagram below. The side panels were then dropped into the slots, three on each side, and I was able to take my time in positioning the panels. When the epoxy fillets were complete on one side of the bulkhead and the panels were permanently fastened at bow and stern ends, I removed the jigs and made the fillets on the other side of each bulkhead.


Side Jig 2

I found this to have been very easy and I hope that it might be of use to others as well.


Regards, Tom McIllwraith

Halifax, Nova Scotia

***

Hi Richard,

Thanks for the nice job on the last issue of chebacco.
Here are the pictures of blocks and tabernacle fitting
that you requested.

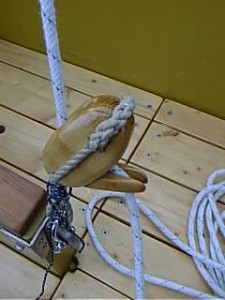
block1.jpg 1 block2.jpg 1
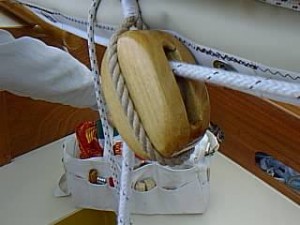
Blocks are made out of locust with a brass sheave spinning
on a 5 mm brass pin (Fig. Block1.jpg).  They run nice and smooth
as long as the hole in the sheave is a bit larger (e.g. 5.25 mm)
than the pin. As I mentioned before, I made patterns
by magnifying the drawings in the “Riggers apprentice”
by Brion Toss. I also fitted the block on the centerboard
case with some kind of slotted tongue (Fig. Block2.jpg)
to jam the sheet, a home-made simple substitute for a camcleat.
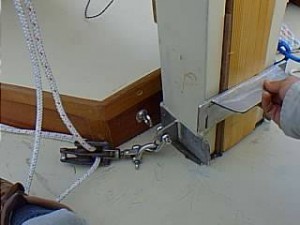
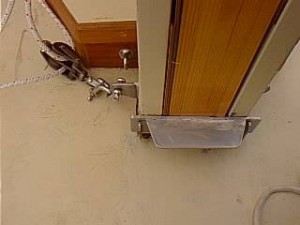
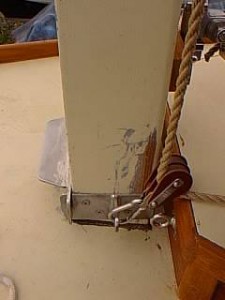
taber1.jpg 1 taber2.jpg 1 taber3.jpg 1

The stainless steel fitting for the tabernacle was “invented” and made by
my friend Roberto Ginetto. There is a U-shaped part that goes around
the back and sides of the tabernacle. This part is screwed onto the tabernacle.
The front part is removable (Fig. taber1.jpg) and goes on the u-shaped part
like a “fence”. The U-shaped part also has “ears” (Fig. taber2.jpg) to attach
the double turning blocks for the throat and peak haliards (starboard side,
Fig. taber1.jpg) and topping lift + jib haliard (port side, Fig. taber3.jpg).
As you can see, things are still a bit scratched and unfinished around there
but the whole thing works well and is very easy get on and off single-handed.

Let me know if you need more explanation or other info.

Cheers,
Vincenzo

Do you have any close up pictures of the hinge on your tabernacle?

Also, I notice you have the forward section closed off. What is the distance from the hing to you locking mechanism?

How do you raise the mast? You use the jib line as a forstay, do you use it to hoist the mast?

It appears your mast is rounded up top, but square on the bottom. It is square up to the double reef position of the gaff?

Have any closeups of your gaff saddle?

Hi Richard,

It is very easy to raise the mast, I just stand on the cabin roof and walk it up, it takes only a second then to block it with the metal fence. I do not use the jib haliard as a forestay or to raise the mast, although I guess that could be done.

The mast must be rounded all the way above the hinge point, otherwise the gaff jaws will not be free to swing around when hoisting or lowering sail (acting as a wrench around a bolt) and might bust at the first gust of wind! So, the mast is left square only in the part that goes into the tabernacle.

I will take close-ups and measures over the weekend.

Buon vento,
Vincenzo.

Richard,

the distance from the pin of the hinge to the bottom of the locking mechanism is 67 cm.
The width of the steel plate of the locking mechanism is 6 cm.

I made the curved gaff jaws epoxying 2mm oak lamination to a final thickness of 24 mm
(see attached pictures)

gaff1 gaff2 gaff3

Cheers,
Vincenzo

Did you use the 1 inch stainless steel rod described in Chebacco News 18 for the pivot pin?
I’m thinking of going a little thinner, to have less of a hole in the mast.
Did you do any kind of reinforcement for the hole in the mast?

The round plate with the three screws, this is the bearing plate for the pivot pin? Are all the mast forces taken by this plate, or is it a loose enough fit that the mast forces are taken by the box section of the tabernacle?

PCB&F says: “Since we know of no widely available source for them any more, we are proposing a ‘home-made’ gooseneck. It uses two stock ‘heavy duty’ SS gudgeons to accept a 1/2″ SS eyebolt which then connects via another ‘undersized’ bolt loosely to two SS tangs that are screwed to the forward sides of the boom; there should be enough freedom for the boom to move any which way, including twist from the sheet-pull. ”

I was never sure what exactly they were saying. It looks like you have a 10 inch or so long, 1/2″ thick  rod between the upper and lower brackets (gudgeons?) on the tabernacle face. I can’t see, but I’m assuming you then have an oversized eyebolt that slides up and down over this rod, is attached to the front of the boom, and acts as your gooseneck?

I used 1 inch bronze rod for the pivot pin.

To avoid having the pin bearing directly on wood, I screwed steel plates
(with a 1 inch hole for the pin), one screwed to the side of the mast, the
other to the side of the tabernacle, so the forces on the pin should mostly bear on the steel plates. The plates you see in the pics are just plywood plates that prevent the bronze pin from working its way out of the hole.

You are exactly right about my gooseneck. The pin is 12 X 30 mm stainless steel. I made it so long with the idea of rigging a downhaul to tension the luff. However the throat halyard is enough to give plenty of tension, and the sliding up and down of the boom is just a useless complication when hoisting or lowering the sail. I am going to cut that rod!
Pics of gooseneck details next weekend.

Vincenzo.

***

From: “Bill Samson” <bill.samson@tesco.net>
To: <richard@spellingbusiness.com>
Subject: New Chebacco growing on Vancouver Island . . .
Date: Sunday, November 11, 2001 2:41 AM

Hi Richard,

Just had these pics from Bill McKibben via Chuck Merrell of his ‘glasshouse’
Chebacco Motorsailer that’s coming along well.

Bill has raised the topsides a little more than is shown on the plans, but
(I think) kept the overall height the same.  You remember the pic of his
model on one of my last Chebacco Newses?

Anyway, Bill would be delighted if you included one or two of his pics in
your next issue.

Cheers,

Bill Samson

>Speaking of pix, the attached just came in from B&B for the NW Chebacco.
>Will put them on his web page.  They were taken in Aug and September.  I
>have a hunch he’ll have it complete by sometime next summer.  BTW, that
>green foliage, higher than the cover in Picture #1 is Beth’s corn crop from
>last summer.  I had some they brought down.  Delicious!
>Chuck
>NWCheb01 NWCheb02 NWCheb03 NWCheb04 NWCheb05

***

Hello Richard!  A short note with 3 photos for your next Chebacco e-zine, the main purpose being to show how I’ve tried to build a Chebacco over the summer.  As cold weather now comes over the Massachusetts hills here, I’ll soon be forced to close down boatbuilding work although I’m hopeful that an Indian Summer will come about to allow the finishing of the hull and flipping.  Even in snow I’d flip her!

Stealing Horses Keel
Photo 1 shows the keel on top of the bottom panel.  It was my assumption that it would be much easier for me to work at placing the keel without the bilge panels in place.  A step ladder under the bilge panel space allowed closeup work, to see into the centerboard slot, to work on finishes such as they are.

 Stealing Horses Bilge Panel

Photo 2 shows Stealing Horses with her bilge panels in place.  The front 8 feet is composed of 2 layers of 1/4″ plywood with the first brought into shape with Spanish windlass action, and the second secured with a buttering of thickened epoxy and many sheetrock screws forcing the outer to the inner panel per Jamie Orr’s earlier description of how to do this.  The aft sections of the bilgepanel are 1/2″.  A brass half-oval strip extends over the inner stem, awaiting the outer stem for attachment.  The strip along the forward keel, along both centerboard cheeks, down the aft keel but shy of where the rudder post attachment will be placed.

Stealing Horses Xynole

Photo 3 shows the bilge and topside panels covered with xynole cloth prior to wetting out.  The keel and most of the bottom has, as the photo shows, been cloth-clad and coated with epoxy laden with graphite.

At this time — late October — the large xynole sheets have been wetted out and received 3 coats of fairing compound which cured just before the cool weather.  Now the job of sanding the hull is sporadically underway.  The outer stem–composed of built up planks of rosewood–has been lag-screwed and epoxied to the inner stem.  The lagscrews are recessed into the inner stem and set in bedding compound.  By the way, Jim Slakov (who built an exquisite lapstrake Chebacco) suggested to me one of his embellishments: that a small wood wedge be eventually epoxied to the inner stem to hold the mast at an intermediate stage when raised.  The idea is to stand in the cockpit and raise the mast to this point (contingent on one’s height and muscle power), and then to leave it semi-raised and secured by the rachet effect of the wedge while climbing to the cuddy roof to complete the job.

I’d like in what remains of this building season to get the hull sanded and the waterline scribed to the hull–I’d like of course to do more like paint and flip–but I’d settle for this.  Soon I’ll be forced to unscrew the ladder strongback of the boat forms from the ground stakes that level it.  The coming frost will of course heave these stakes and I’m concerned that the hull not be stressed so I’ll let it float atop frozen ground.  Then an accurate waterline will be impossible.

Semi-gloss marine enamel was bought for a 2-coat job above the waterline (to be placed about 2″ higher than the design waterline) with the graphite-laden epoxy coming up from the bottom.  Kirby Paints was kind to test their various paints and primer on a sample of my plywood/my epoxy to see how to proceed (no primer was deemed necessary).

For those considering a sheet plywood version of the Chebacco the following is a list of major materials and their sources that I’ve used:
1.  Meranti marine plywood (LS 6566 grade) from Noahsmarine.
2.  Locally grown spruce, encapsulated in epoxy.  Some island-grade rosewood brought back from the South Pacific some time ago.
3.  Xynole cloth from Defender instead of fiberglass cloth because of a concern for puncture and abrasion resistance.  Xynole, however, absorbs epoxy like a blotter.
4.  Epoxy, fillers, and fiberglass tape from Raka Epoxy.
5.  Fasteners from Jamestown Distributors and Hamilton Marine.  Hamilton sells a nice through-bow silicon bronze eye bolt for pulling the boat to the trailer. I went to Jamestown for silicon bronze ring nails and screws, bedding compound.
6.  Sails, sewn over last winter, from Sailrite kits.
7.  Kirby traditional marine paint for the topsides / bilgepanels that are above the waterline.

Cheers, keep warm,

Dick Burnham

Stealing Horses stem paint

Here is our Chebacco with 2 coats of oil-based Kirby semi-gloss white on her.  The outer stem is as yet unfinished but we plan to sand it down and to varnish it.


Dick Burnham

***

Hi Richard

New email address  – ‘rwheating@telus.net’

Apologies for not thanking you sooner for your work on the Chebacco News.

I live in the same corner of the world as Jamie Orr.  He lives on Vancouver Island and me on the main land.  My Chebacco has been in the works since 1995 (!)  I was searching for just the right boat project (my first) when I read the Chebacco article in the Wooden Boat magazine.  However this would be a test of my dedication as my wife and I were just starting our family which I was to discover dramatically cuts into ones free time…
My boys are now seven and five and I am able to pick up the pace so to speak.  Just tonight I have done the final tidying up and dusting in preparation for spray painting my boat.  Mine is the standard sheet ply variety Chebacco with some modifications such as raising the cabin two inches and widening it out to the coamings.  I have also gone with a one piece ( a la Brad Story) transom with drain holes.  The forward bulkhead I doubled in thickness (to one inch) to allow me to mount the mast, using a tabernacle, directly onto the cabin roof.   I have some ideas for the tabernacle but would be very interested in other CB readers experiences with this.
Hope to launch this before January and then spend the spring on the trim  and spars.  Thanks for the sail info.  I will likely go with the Sailright kit.
I will send along some photos in the near future.
Thanks again,

Randy Wheating
Port Moody, BC
Canada

***

Sanding the CLC

Everyone has been saying that this will be a cold winter. To which I have invariably replied “NO, it will be a mild winter, so I can finish the boat!”. And you know what? With the exception of a couple of days of snow, it has hardly gotten below 50 degrees yet… spooky.

DSC00029 DSC00032 DSC00033

These are pictures my homemade power long board. To the left, I have just disassembled the inline air sander I bought from Harbor Freight. Center is where I have made up some small mounting blocks, and countersunk some 1/4″ flat head screws in it. To the right, I am gluing the blocks to the sanding board with some 5 minute epoxy. Note that the blocks are attached to the sander during this operation, this is the only way to make sure they are glued exactly the right distance apart, so they fit on the slide of the air sander perfectly.

DSC00034 DSC00035

After testing my setup on the boat, I realized the slide on the sander was some kind of plastic, and bent all out of shape when the board was forced to follow the curve of the hull. What you see in this picture is a 1/4″ x 1″ length of cold rolled steel, used to keep the slide stiff and reduce the wear. Still got some wear using the sander, and had to return it to the store. I’m not sure it was all related to my setup though, as I’ve had this exact type of sander before, and had the same problems with it. I’ve since ordered a Campbell Hausfeld air sander from HF. They had it in the catalog for $16.99, about $40 less than I could find it anywhere else. The card in the mail said it was back ordered, and I can’t find it online any more… Not sure if it was a typo or what, but it appears they are going to send it to me.

To the right, you see where I have taken the sanding pad and used glass tape to strengthen the attachment of the spacer blocks to the board. The sandpaper was attached to this board with contact cement, 3M Super 77 spay adhesive. Application of the heat gun on high while pulling the paper off made changing to a new sheet a breeze. I used 36 grit paper, the kind that worked with the inline sander. At about $7 for a box of 25 at the local HF. Went through two boxes.

DSC00030

On the left here I am squaring up the rudder assembly, and on the right it is set aside for the epoxy to set up. I used three layers of the 2″ tape I got frommarsales1@aol.com I bought five 50 yard rolls of 2″, 6oz tape from him for $35, you might email him and see if he has any more. The tape is a satin weave and doesn’t wet out as easily as some of the more open weaves. You have to pre-wet your surface, then apply your tape, then wet the outside. Give capillary action a few minutes to work the epoxy in, then work any remaining bubbles out with your thumb. This tape is a bit more work than a more open weave would be, but well worth the saved money.

I make the rudder a bit thick for the post, so I trimmed it down some with a flap wheel on the angle grinder. Also, I flared the aft end on both the blade and the wing down to a finer point than on the plans, in an attempt to save a bit on drag.

DSC00001 DSC00003 DSC00004

Here you see the centerboard case going in. In the picture on the left I have just dropped it in, I had to cut a notch out of the board you see to get it to drop all the way down. Center is a side view, and right is a view of one of the cleats used to hold it. If you look in the picture, you will see that the cleat only has one screw. This is to allow the case to be levelled from underneath, before tape and epoxy is added.

On the right you can see a one of the bilge panel spices, still covered with the remnants of the wax paper used to keep the clamp board from sticking. I later went back with a wire brush on a drill and got this off.

DSC00003_2 DSC00005 DSC00006

On the left you see the crew applying glass and epoxy to the hull. This was a major operation, glassing the entire hull with 6oz cloth. Made more interesting by it being in the 60s, and by my being out of slow set epoxy. We only had one pot start to cook off on us, and I was able to dump and spread it before it had smoked too much.

Center you see a good shot of the cloth hanging off. In the future I may try to trim closer to the hull before applying the epoxy. I wasted quite a bit of glass here, as after it gets a few runs of epoxy on it, about the only thing you can do with this stuff is throw it away.

On the right, you will see where it looks like I spiced onto the back of the keel. This is caused by me splicing onto the back of the keel. Measure twice, cut once. Then cut again. Also note the brown under the glass. I used the last of my slow cure hardener to spread wood flour and epoxy over any sections that weren’t exactly smooth, so the glass would lay even. I learned on a previous boat not to use phenolic micro balloons under the glass. They aren’t very strong in tension, and I had a section de-laminate on me during sanding. This boat is being made as strong as I know how to make it, so the only putty under the glass is wood flour based.

DSC00007 DSC00008 DSC00009

The left two shots show a good view of the cutout for the motor well. Also, note that the glass is folded over twice on the transom, and right under where the rudder will be. This required a bit more work faring the hull, but the added strength may come in handy some day.

DSC00010 DSC00011 DSC00012

More shots of us desperately spreading epoxy and chasing bubbles, before the epoxy set up.

DSC00024 DSC00025 DSC00026

The two pictures on the left are of the stem after it is attached. I agonized for days over whether to finish it “bright” or not. finally, looking at the pictures I have in the Chebacco News issues showed that most people were painting over it. In addition, I REALLY wanted to cover it with a layer of glass. So, it is made up of cutouts of plywood, laminated together. Notice the radial lines on the stem? This is where I broke the belt on the hand power planer, and had to use the chain saw to finish the carving… <grin>. The stem had a liberal coat of putty applied to the bottom and then was attached top and bottom with a couple of temporary screws. After the putty set, a little sanding was done, then more putty, and a couple of layers of glass cloth went over the whole assembly. This coming Saturday a friend is coming over to help me forge a piece of 1/8″ stainless steel to the shape of the cutwater, so the keel armor will extend from the bottom up and around the cutwater! Should be very cool.

DSC00027 DSC00028 DSC00031

On the right we have applied a coat of glass bubbles and wheat flour as a faring compound. Notice the line starting halfway up the bilge panel next to the transom? This is where the bottom and the bilge layers of cloth overlap. I have two layers of glass over the bottom chine to add to the strength.On the left, I’m attaching the cheek plates over the centerboard case. I broke with tradition, and foil shaped them in the best bolger tradition, with the flare on the sides and bottom matching. Hopefully this will reduce some of the turbulence caused by this protrusion of the keel.

This notched trowel process took a LOT of epoxy. More than glassing the hull! Oh, well, it allows me to fill in the low spot, and will give a smoother hull. Helping to decrease resistance and turbulence.

DSC00001_2 DSC00003_3 DSC00004_8

This is the boat after MUCH sanding. The girls decided they would volunteer to sand the boat instead of buying me a birthday present. Their mistake! <evil grin>. I only had them sanding for a couple of weeks… They did a wonderful job, though. The odd color scheme is my attempt to vary the color of each successive layer of filler. No reason, I had the pigment and though I’d experiment.

On the left we are just starting to apply the leftover Interlux barrier coat primer from another project. I put a little of the green pigment I had left into the white primer, and it turned the yucky blue you see. We turned the boat into a swimming pool! I didn’t have quite enough for the entire hull, but that’s ok. I experimented with the paint, and it stuck to unwashed, unsanded, smooth epoxy with no qualms. Even stayed on after a couple of days in the dishwasher, and hardened up nicely after a couple of weeks.

On the right, you see the hull with paint on it. We are putting it on in many thin layers, to avoid runs. In this picture we still need a couple of layers of paint. The green is a color I got from mixing three gallons of various shades of green deck paint purchased at the local close out store. At $2.88 a gallon, I bought 12 gallons, even before testing on the epoxy!

Anyway, that’s all for now, next issue I’ll have pictures of the forged armor for the keel, and pictures of the boat turning, currently planned for some time in January. Also, I’ll show how I figured out the welding of stainless steel on a cheap wire feed welder.

Richard Spelling

From the muddy waters of Oklahoma.

Chebacco News 33

Chebacco News 33 – February 2001


A New Chebacco Motorsailer

ChebMS1

Bill and Beth McKibben of Sidney BC, Canada – the prolific builders of many Bolger boats, including the Breakdown Schooner and the Fast Motorsailer, are turning their thoughts to a Chebacco Motorsailer, and have built this model as their starting point. The keen-eyed among you will notice that they’ve raised the topsides a smidgen, and have used the Solent Lug rig in preference to the more usual gaff rig. It looks wonderful, and will make a great addition to the growing fleet of British Columbian Chebaccos.


A Swedish Chebacco

edstrom

Björn Edström writes:

I have built a Chebacco 20 in sheet ply coated with epoxy and fabric
both in and outside because I used only 9 mm plywood on the whole
construction. The boat was launched in September this year, so far it
has only been one weekend sailing this year, the interior is not
completed.

Built: 1999 – 2000
Launched: September 2000
Name: WOODY
Owner/builder: Björn Edström, email: bjorn.edstrom@posten.se
Location: Stockholm/Sweden

I will send more pictures from the launching when the film is developed


Mary-Beth, Too

Mvc-004f

Dave Neder has made a great ‘gold plater’ job of his sheet ply Chebacco, “Mary-Beth, Too”. He writes:

. . . The mast is hollow. It consists
of a marine ply box section sheathed with Sitka Spruce and Red Oak at the
gaff throat position.

The tiller is from a 26′ “Lancer” sail boat. It was contributed by a
friend of mine. The coaming is made of ribbon stripe mahogany ply and
mahogany lumber. I cap all exposed ply edges and I built narrow hand rails
all around into the coaming. The drawings show flush sides, but since I
need a better grip, I added the rail.

The hatches are water tight. The out board motor’s gas tank is under the
port hatch. The motor will be old 9.9 Johnson from the “Lancer”. The 12
Volt battery is under the starboard hatch. Their centers of gravity are
equidistant about the centerline.

The cabin hatch cover is shown closed portions of the cover, trim and pen
boards are made of red oak. It is common here and I like to work with it.
The two cleats are for the peak and throat halyard.

I am going to trailer the boat. I have a wide choice of sailing lakes
including Lake Michigan. Lake Michigan is about twenty miles from my front
door. One comment about sailing on Lake Michigan; it is about 90% Ho Hum
and 10% sheer terror. Moorings in my area are filled up and expensive even
if you can find one for sale or rent.


I am presently building boom crutches to hold the masts and booms while
trailering the boat. I will send photos as things progress
Our goal is to sail this spring.
Regards Dave

Yet another Chebacco growing in BC!

Randybow

Randy Wheating writes:

Hi Bill

It was my pleasure to have finally met you in person at the Port
Townsend Wooden Boat Festival last fall. I turned my hull over this
past June. I went the brute force method with the help of six friends.
Before the ‘flip’ I cut out a notch in the cross pieces of the strong
back. I added a little padding to the notches and when we turned the
hull we set the keel into these notches and there she stood – upright
for the first time! A little shoring up and leveling and the hull was
for me to climb aboard.

As you may be able to see from the attached photos, I have made some
minor alterations. I have increased the width of the cabin about six
inches per side – flush with the cockpit coamings. The cabin top was
raised two inches.

The forward bulkhead I made one inch thick (laminated two half inch
pieces of plywood) as this will be the main support for my mast
tabernacle. I cut a square hole, for no particular reason, rather than
the round one as shown in the drawings.

The space under the cockpit seats will be sealed with air tight
inspection hatches for dry storage and floatation.

I added an eight inch bridge deck and made some cut outs in the main
bulkhead, from the cabin, for extra storage.

Like Brad Story’s boats (I believe) the aft cockpit is not cut through
to the motor well. A one piece stern deck with port and starboard
hatches with cover this area. There will be a small access hatch in
this deck just forward of the rudder post that will just allow me to
drop a 3 gal fuel tank into this space. A second tank will sit just aft
of the mizzen.

The rudder and post are aluminum. I fabricated an epoxy/cloth/mat tube
just larger than the rudder post OD which was then bonded between the
hull and motor well floor. This should create a nice water tight
passage for the rudder post.

Since taking the photos I have temporarily reinstalled the original
forms into the cabin and have started on the cabin sides.

With luck I will get her into the water later this year.

As always I enjoy the CN and appreciate your fine work. You must come
back to the West Coast in a couple of years for a cruise when all four
BC Chebaccos are in the water!

Take care,
Randy Wheating
Port Moody, BC, Canada

Pete has flipped

Upright

You’ll remember Pete Respess’s ‘poor man’s laser level’ from the Chebacco News #32. Pete has now flipped his hull, and I must say that waterline looks fantastic!

Skip flips, too

skipflip


Skip Pahl, in Southern CA, has flipped his handsome sheet-ply hull. In case you’re wondering, about half of his helpers are on the other side of the hull!

Skip writes:

So. Cal.’s apparent “one-and-only” Chebacco is not dead, however, progress
has been mighty slow.

A few weeks ago we had our annual neighborhood block party, an event that
provided me with lots of horsepower for turning the boat. We kicked-off the
party with the boat turning and everyone was delighted to be a part of the
effort. They have been watching the building for nearly three years now! By
scheduling the turning early in the picnic (before the beer), we accomplished
our task without a nick or scratch.

A note about striking the waterline: Last year I found the world’s cheapest
laser level for $39.95 in the Radio Shack Christmas catalog. It produces a
fine laser line as well as the standard spot! I mounted the level on a piece
of plywood attached to the top of a camera tripod and then leveled the
platform north, south, east and west) with a mark on the cutwater were I
wanted the waterline to start. After the first arc gave me a series of dots
from the cutwater to midships, I rotated the level on its leveled platform
and marked dots from miships to stern. I the stretched 3M fine line (1/4″)
tape along the pencil marks and arrived at a clean and satisfactory
waterline. This is a good system if you don’t have a great deal of work space
around the boat.

Best wishes to all!

Skip Pahl
Carlsbad, CA

pahltejeda@aol.com

That’s all for this issue

Not a terribly technical one this time – just a showcase of the fantastic efforts that are going on around the world. It seems to me that the number of Chebaccos is growing at an ever-increasing rate, as of course, a beautiful design like this deserves.


Keep in touch, everyone!

Bill Samson,

88 Grove Road,

Broughty Ferry,

Dundee DD5 1LB,

Scotland

bill.samson@tesco.net

Chebacco News 30

Chebacco News 30 – June 2000


Number One . . .

Chebacco_1

The first Chebacco

Peter Vanderwaart writes:

This is Chebacco number one being introduced to the world by Brad Story at the Small Boat Show in Newport, Rhode Island. This is the original cold-molded boat. Visible in the picture are several features that have been changed in the later, more-refined designs: outboard rudder, bolt on outboard motor bracket, rope traveler across the cockpit. The workmanship on this boat was absolutely first class and museum quality. The hull was molded and the frames fitted afterward, and the fits were perfection. As was the varnish. As was the paint. I can not say who is in the boat in the picture, but went I got on the boat, the persons aboard were Brad Story and his wife, and Peter Duff. I’m still sorry that I did not climb right into the cabin to see what it was like when I had the chance.

Peter Vanderwaart


And the latest . . .

shed1

The stocks are set up . . .

From Paul DiPasquale

Hi Bill,

Well, I’ve taken the first steps toward construction of a new Chebacco.
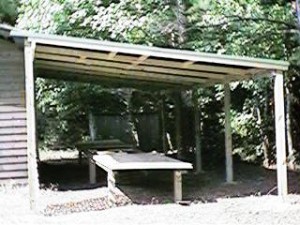
The plans are in hand and the shed (see attached photos) is built.

I took two weeks to build the shed, which is approximately 30’x12′. It
will serve as a boat building shed when needed and a garage
extension/carport when not otherwise occupied. The backbone was part of
the construction project also…built with pressure treated 4×4’s, 12ft.
in length and “scarfed” together with steel construction brackets.
I might add, for anyone thinking of such a project, the cost of shed and
backbone was under $500.00 U.S.

I started laying out bulkheads and frames this week and hope to have
bottom and sides done in a few days. I am planning to use AC plywood and
Epoxy Resin throughout the boat. One thing worries me a bit and that is
the ambient temperature in this area. We are near Myrtle Beach, South
Carolina and in summer the temps, even at night are close to or above
70%F. I guess we will see what happens when I start mixing batches of
resin and hardener.

I have to admit my anxiety level is kind of high, but I keep asking
myself “what is the worst thing that can happen” (other than waste a
bunch of time and money)? This is balanced by pictures (in my head) of
me and my new Chebacco sailing happily around the beautiful islands and
clear blue water of the Florida Keys.

If there is a Chebacco owner anywhere in the southeast U.S who is
willing to let me have a look at his/her boat please let me know. My
time is my own and I am always ready to travel.

Anyway, enough rambling for today! I’ll keep you posted as things move
along and hopefully will be able to share some construction photos too.

Best regards,

Paul DiPasquale
Conway, South Carolina, U.S.A

email: d4951@sccoast.net


Chebacco Motorsailer for sale

Bob Cushing writes:

Hi Bill,

Just a note to let you know my Chebacco Motorsailer is for sale  -I
want to keep building so I have to keep selling. We sold our Microtrawler to
a local jewelry store owner and he loves it. If you know of anyone who might
be interested please send them to us and we will be as flexible as possible
on pricing. It is essentially a new boat -very little use and professional
build quality w/new honda 9.9 w/remote controls and new galv trailer ,
thanks,

Bob Cushing     315-687-6776    rbrtbobcat@aol.com

There’s a write-up on Bob’s superb motorsailer in Chebacco News #17 and #24. That should make your mouth water.

Aussie sleeping arrangements

Tim Fatchen (AS29 owner) writes

In discussions about sleeping arrangements, I haven’t seen the following
mentioned, yet it makes the smartest approach to sleeping accommodation
in an overnighter or yea, even within the floating luxury of an AS29. It
is—

—the traditional Oz swag (as carried by suicidal kleptomaniac musical
swagmen) or its more recent incarnation. For those unfamiliar, the
traditional form is a large oblong of proofed heavy canvas (truck
tarpaulin standard) cunningly folded about blankets, pillows, thin
mattresses etc, suitable for rolling out on ground of any condition.
The more modern variants come with a pre-sewn semi-bag shape, zippers,
flyscreens, God-wot things.

Lurking within my own swag, which doubles as work bedding when in the
arid interior, are a continental quilt (doona), sheets, a backing
blanket, 4 inches of foam as mattress, a space blanket, two pillows. All
are weatherproofed by the canvas, and easily carted about, hurled into
sleeping cabins etc.  Looks neat, is very warm, won’t get wet with the
occasional watchkeeper  taking off wet oilskins in the galley, or for a
Chebacco, the canvas will shed the occasional splash.  Much more elegant
and effective than soggy sleeping bags and the hopeful wet blanket. Buy
one if buyable (NZ, Oz). Make one if not.

Tim Fatchen

Sounds interesting, and very practical! Now, if I could just get some of the junk moved out of Sylvester’s cuddy . . .

A Cautionary Tale

I went mad on Monday, and took out Sylvester in a blow of wind. A scary
experience!

When I rowed out it was an F4 and I decided, prudently, to put in two reefs.
Boy! Am I glad I did? The wind kept on rising, and even with the two reefs
in, she was soon on her ear, with the lee gun’l under, water lapping over
the coaming, and quite hard to steer – probably because the rudder was
mostly out of the water! She was very sensitive to the way the mizzen was
set – probably because the mizzen is getting nearly as big as the main, when
two reefs are in. Steering had as much to do with working the sails as the
rudder. I’ve heard Light Schooner folks saying this, too.

The nice bit was that she could be balanced to go to windward without any
weather helm, though a little weather helm is nice to have in these
conditions.

I started getting seasick (getting up to F6 by now) and started the OB,
dropped the main, and motored back to the mooring. I approached the mooring
from downwind, but whenever I slowed down on my approach, the head fell off
and I had to start another circuit. BTW – one feature of the Chebacco I
don’t like is how far away the OB is from the cockpit; with boom,
boom-crutch, mizzen and what not in your way when you want to get at it to
throttle back, switch off, steer or whatever.

At the third attempt, I approached the mooring under full power, grabbed it
on the way past and hooked on. I was wrestling my way back to the OB to
turn it off when the prop snagged the mooring strop! I had to resort to a lot
of foul language to get it untangled.

I was thoroughly seasick by the time I had her all squared away, and rowed
ashore.

It’s not an experience I’d care to repeat, at least not single handed, but
it is comforting to know that the boat behaved herself in these conditions –
even making decent headway to windward!

BTW – the wind strength increased further that night. Gusts of 80mph were
recorded on the Tay bridge!

Bill Samson

And finally

I did have another couple of contributions, but haven’t been able to clarify the images that came with them. Amybe next time . . .

Bill Samson can be contacted on : bill.samson@tesco.net

Chebacco News is at http://members.xoom.com/billsamson

Snail mail to Bill Samson, 88 Grove Road, Broughty Ferry, Dundee DD5 1LB, Scotland.

Chebacco News 24

Chebacco News

Number 24, December 1998

ch245

Tim Smith’s Chebacco LARK – with nine(!) people aboard.

LARK (and Tim Smith) show us how it’s done –

Tim Smith writes:

Dear Bill,

Sitting down to write you an account of our first family cruise in our Chebacco, my ears are ringing with cognitive dissonance. I’ve just returned from a trip to the Royal Huisman Shipyard in the Netherlands, where the zillionaire founder of Netscape is having a boat built: a 155-foot cutter with three staterooms, crew quarters for eight, a mast that will clear the Golden Gate Bridge by 30 feet, and 40 miles of copper wire to link the 24 on-board computers. I’m thinking, if I had all the money in the world, would I want a boat like that? Sure. But I’d never let go of the Chebacco.

Our boat was bought second-hand: it was built by Brad Story for Sister Krista Mote and featured in Chebacco News No. 7. I had been planning to build one, and had ordered plans and measured the garage door, when I saw a classified ad for Sister Krista’s boat (she was moving up to a bigger cruiser to accommodate nieces and nephews, and was quite sad about the sale.) I thought, why not cut out the middleman, go sailing right away, and get a boat built by Brad himself?

We took possession of the boat in the winter of ’97, and spent much of the next summer learning to sail her out of Chatham, Mass., on the elbow of Cape Cod.

One clear lesson: she had been built without the mast-stepping slot-she wasn’t configured for trailering-but after the drama of stepping the mast on the beach with three strong friends, I knew I wanted the slot. Another lesson: She’s so beautiful that things became practically embarrassing. People followed us around. The week we launched her the local paper splashed a big photo of her on the front page, just for the sake of atmospherics. One guy ogled us from the beach with his binoculars while his girlfriend lay by his side, topless and ignored.

Chatham is catboat country, with a big population of fiberglass models, mostly Marshalls and Herreshoffs. The Chebacco outsails just about all of them. She points higher, she’s generally faster, and she takes off across the flats to windward in a foot of water, which the others just can’t do. We had a lot to learn about sailing a divided rig, but by summer’s end we were pretty confident. Except for one thing: we never did get out into a big blow, to test her limits.

Last winter I had the mast slot installed by the estimable Pease Boat Works, a local yard. They also installed a bow-eye for trailering, and removed, planed and re-glassed the centerboard, which had swollen stuck.

Summer vacation arrived, and we were ready to go cruising: me, my wife, and the two kids, ages eight and four. We gave ourselves three days, figuring we wouldn’t push it. Loaded a cooler, a propane stove, sleeping bags, a cell phone and a GPS, and took off in a light rain, telling ourselves we’d just head west along the lower Cape and see how far we got in an afternoon, maybe just to the next harbor.

The tide was with us, and the wind picked up, and we flew along the coast on a broad reach-past Harwichport, past Hyannis, and all the way down to Osterville well before nightfall, a distance of twenty miles or so. We were averaging seven or eight m.p.h. as measured by the GPS. Tucked into Osterville harbor, anchored in a shallow spot away from the clustered moorings, and settled down for the night.

That’s when we realized we’d made two mistakes. One, we forgot the garlic. Two, I’d bought sleeping pads that were too thin. The kids slept fine in the cuddy, which has thick cushions covering the whole cabin sole, but my wife and I tossed and turned on the cockpit benches under the boom tent.

Morning dawned sunny, warm, and absolutely still. Where to go? Someplace with beds. We realized that we were just a few miles across Nantucket Sound from Martha’s Vineyard, a big island where old friends have a house. My wife, Priscilla, got on the phone. Sure, they could give us a shower and a bed, and we could even tie up at their dock. So we cranked up the 4-horsepower Yamaha and motored away from land. The Chebacco (which is rechristened Lark) handled big powerboat wakes with aplomb. She generates enough apparent wind under power to make the sails draw, so there is a pleasant steadying effect. We motorsailed along, shutting the engine down when breezes came up, starting it up again when the wind died.

We reached the Vineyard by midafternoon, called again for directions, and sailed around a sandy point to our friends’ house. Henry, our host, is a person of some ceremony (he was once the U.S. ambassador to Austria), and clearly had been waiting for years for the chance to greet a vessel at his dock. There he stood, waving. When we got within a hundred yards, my heart sank: This dock had been built for swimming, not for boats, and the sharp hood ends of four-by-fours poked out wickedly every few feet. But we couldn’t bear to disappoint Henry, so we put a lot of fenders and cushions over the side and tied up gingerly for a decent interval. I put the wife and kids ashore and skedaddled, anchoring off the stony beach within easy wading distance of shore. That night we had grilled tuna, good company and soft beds.

Day three dawned with a nice breeze, and we headed back for Chatham. We had two choices: head due north to the mainland and sail east along the shore, the way we had come, or angle straight across the sound–a much shorter trip of some 30 miles, but in open water. The sky was clear, the tide was with us, the forecast was fair, and what the hell, Bolger has written that you could sail one of these things safely across the North Sea if you handled it (ahem) competently, so we made sail and headed straight across.

Before long the Vineyard was out of sight behind us and the mainland a thin line on the horizon. The wind picked up, gusting to perhaps 20 knots, and the seas began running at 4 to 5 feet. Not dramatic, but the boat signalled firmly and politely that it wanted a reef. We hove to and reefed with ease, thanks to the wooden blocks my brother had carved and screwed to the boom, not unlike the ones in a previous issue of Chebacco News.

And then we flew home. At one point, as we surfed on a broad reach in the steep following sea, the GPS registered 9.9 m.p.h. The boat’s manners were fine; our four-year-old slept most of the way in the cuddy, and our eight-year-old danced around in the cockpit, thrilled. We took a little spray aboard, and briefly considered a second reef, but she is so stiff on that second chine that it wasn’t necessary. At this speed there seemed to be some weird harmonic effect at the stern, a groaning sort of noise that came from the rudder when I hauled on the tiller. (I looked, afterwards, and nothing was amiss). We learned two things about the tiller, actually: one, when spending the night aboard, you can get it out of the way by raising it vertical and lashing it loosely to the mizzen. And two, you need every inch of it to control the little rudder in a big wind and quartering sea. My brother had been after me to cut eight inches off the tiller for the sake of cockpit space, but now I won’t do it.

By the time we reached Chatham it was really blowing, and there were very few other boats around. My left arm got a little tired working the tiller, but I suspect that I’ve got a lot to learn about trimming the sails for balance. We scudded into Stage Harbor, our home port, sailed right up to the beach, dropped the mainsail, and unloaded in ankle-deep water.

That homecoming crystallized for me one of the many things that make this boat so loveable. Sometimes it behaves like a big boat, and sometimes like a small boat. Its great virtue is that it knows when to do which. It can blast across thirty miles of open water without making you fear for your children’s safety, and then nose up to the shore and be manhandled like a daysailer. Hats off, Phil Bolger.

ch247

LARK at anchor, off an unmistakable Cape Cod coastline.

Fraser Howell has an adventure, too –

Hi Bill;

Had a blistering sail yesterday. The wind was a steady 20 Kt, gusting to 25 or 30. Started out with main only, one reef. With the wind slightly aft we averaged 6.5 kt. We had a hand-held GPS and it showed up to 8.5 mph during the gusts!! We were not as fast on the return trip. For the first time I had to put in a second reef. A wet trip with spray accumulating to about 3 inches in the cockpit over a 3 hour sail. At one time the lee rail was well under. I’ve never even come close to burying a gunwhale on Itchy and Scratchybefore. With the second reef, the sail area is only about 75 sf, and it is

difficult to tack with such a small sail area, and no mizzen.

This was the windyest weather I’ve had her out in. I was glad to have a crew, because it was hard work. The boat and rig held up well.

Cheers; Fraser

A cautionary word from Bob Branch

Hey Bill, I was just rereading the Oct issue (looking to see if the next was posted yet…) and noticed that in some owners desire to experiment with jibs they are using mainsails from other boats (eg lasers). The shape of a main is all wrong for use as a jib. The draft is in the wrong spot (too far aft) and will thus create alot of heel (not conducive to good Chebaccoing upwind) and if you increase the halyard tension on the jib (also I believe not conducive to good Chebbacoing) the leading edge of the sail will become real round… not conducive to pointing. Just tell folks to go to a local sailmaker and hit on finding a used dinghy jib. Even when old it will give a better shape than using a main off something else. But don’t say it in a non political way. (Ahhh, the joys of being a newsletter editor… how well I remember…. hmm. Hey! I now forget! Wow, is that a load off my mind!)

Bob

Bob Cushing’s Chebacco Motorsailer –

Bob Cushing sent me some great photos of his motorsailer version of Chebacco:

ch241

Chebacco Motorsailer under sail

ch242

The Chebacco Motorsailer’s roomy cabin.

Bob Cushing writes:

The pictures are of the Chebacco Motorsailer on Cayuga Lake, one of the central NY Finger Lakes – about 35 miles long – one to two miles wide – in the rolling hills, wine-making area of NY state; also the home of Cornell University and a little remaining ’60s culture, i.e. organic farming, VW vans, Vegetarian restaurants etc. Quite a nice area. There was very little wind that day, so the Chebacco was just ghosting along with Mary taking pics from shore.

When there is a good wind it handles it great – rarely needs reefing and will see up to 7.4 mph on the GPS.

Plenty of room for two in the cockpit area – could actually seat four but would be quite tail-heavy then. As you can see from the pics I’ve added a steering wheel and remote motor-control assembly on the starboard sude of the entryway to the cabin. It looks kinda odd but works great. You just pin the tiller in center position with a U-bolt when you want to use the steering wheel under power. Docking – especially backing up, is much better this way – just like a very nimble powerboat. Of course you can also use the tiller/rudder under power if desired. Wheel and throttle-shift are quick-release. Unscrew a coupla knobs and both have a second mounting position inside for power operation in really inclement weather. There’s a vent cover/gas fill/pump out fitting in the cockpit. It’s hinged and swings up to reveal a 25 gal fuel tank. Also under here is a pump-out fitting for a Porta John which meets Canadian regs.

Halyards are pulled through a rope-clutch setup with cleat behind for backup – much easier than before when I had to alternately pull and cleat off each halyard as I worked the gaff up into position. I now have two blocks on each halyard instead of one and can actually pull both through the rope clutch with one or two hands without them backing down unless I release the clutch lever (cost $75.00) – not cheap but so much easier and safer to my mind.

The interior shot shows the dinette table, access to loads of storage under the cockpit, under all bunks, john and toolbox are under the step, stove, sink, watertank and cooler all go up front ahead of the bunks.

The main hatch was enlarged to twice normal size so you can open over half of the interior for full standing room. There’s also a small lift-out hatch over the galley area and the front window swings open. All windows are tinted lexan and curved as are the sides of the house – very strong – with 1″ perimeter with many screws. There’s lots of foam floatation in front, under the outer bunks and in back under th rearmost storage areas. A large hole in the bottom would probably result in only about one foot of water in the hull.

The mainsheet swivel assembly is mounted on 1″ thick plywood which is bolted to the mizzen tabernacle. The rope traveller is slightly behind this. I’m thinking about making a solid traveller and mounting it about 3″ farther back.

The mizzen sheet pulls through a curved pipe (Brad Story copy) and then to a cam cleat – works fine and one less line.

This boat might beFOR SALE if someone really wanted it as I have the building disease and would kinda like to build an AS-29 (AS-35?), but I also really like this boat so it wouldn’t be cheap – extremely nice finish with teak floors etc

rcushing@cvsi.com

Bob has also recently prototyped Phil Bolger’s sleek Cruising Kayak design – featured in the October 3rd 1997 issue of ‘Messing About in Boats’. It has a ‘trunk’ for storing a substantial amount of camping gear.

ch244

Bob Cushing paddles the prototype of Phil Bolger’s Cruising Kayak

Light Dory for sale –

dory

Bill Parkes writes:

Gloucester Light Dory, 15 1/2 feet long, Douglas Fir Marine Ply on oak

frames, silicon bronze fastened, white oak seats, rubbing strake and

rail cap, spruce oars, all bronze fittings. $750. Trailer extra $300

Call Bill Parkes 731-1039 evenings or 787-7342 daytime; or

wparkes@budget.state.pa.us

Painting tips from Jamie Orr

I’ve been continuing with the two part paint, and thought I’d send this follow up to my last experience, in case you can use it for the News.

A few months ago I used two part polyurethane paint on the outside of the hull, now I’ve been painting the inside and found it harder because of the corners, butt blocks, bulkheads and so on that break up the surface into small sections. Because of the smaller sections, I put on the primer and first coat using a brush only. However, I wasn’t happy with the job, as the brush marks were very visible. The paint tacks up very quickly and by the time a section was covered, the paint was starting to get sticky, and hard to brush smooth. The corners and other obstacles made this worse.

For the second coat, I went back to a 9″ foam roller (WEST brand), tipping it out with a synthetic bristle brush, and ignored the corners until I had done all the area accessible by roller. (I was surprised just how much I could reach with it.) After this was done, I went back to do the corners and tight spots with the brush and a small (3″) roller with about a 1 ¼” diameter (nameless cheapo brand). By this time, the previously rolled on paint had had time to set up and so I didn’t mark it up when I brushed over the edges. I’ve switched to bristle brushes because the foam brushes were getting too flabby too fast and had to be changed frequently. The bristle brushes will last a whole session, and I like them better for poking into the corners.

I also took extra care on the second coat to have the paint at the recommended temperature so the viscosity was right (i.e. smooth and not so sticky). With the lower daytime temperatures now, it helped to store the paint indoors the night before, and I watched the thermometer for the right time to start painting.

I’m pleased with the results. After the first (all brushed) coat I was pretty fed up, but the second coat has cheered me right up. Using a roller gets a much more even coat, and does it faster and more easily to boot. Even the little 3″ roller made the tight spots easier.

I didn’t have enough paint on hand to do both coats the same day, so I had to sand to take the shine off the first coat. If I were doing it over, I would arrange to do the second coat right after the first – this would save the sanding and (possibly) give a better bond between coats.

To keep the toxic paint off me, I used the same disposable overalls and organic filter mask, sleeve protectors and gloves as before. I’ve had trouble with safety glasses fogging up, so often don’t use them with resin or paint. However, this time I got a scare with the primer – as the brush came off the edge of a bulkhead, some paint splattered, and at least two tiny drops hit my face, one at the corner of my eye. Luckily, it didn’t do more than sting for a second, so I guess the tears washed it out almost before I realized what had happened. I’ve since found that with new and stronger elastic on the face mask, and with it tightened right up, I can wear the safety glasses longer – even got through the whole session last time without having to take them off.

Merry Xmas!

That’s all we’ve got space for this time, so some material will need to wait for the February issue. Nevertheless, keep your photos and stories coming in. Have a good festive season.

Bill Samson, 88 Grove Road, Broughty Ferry, Dundee DD5 1LB, Scotland

wbs@sol.co.uk

Chebacco News 17

Chebacco News

Number 17, September 1997

Bob Cushing launches the first Chebacco Motorsailer

chglhs1c

Bob Cushing’s Chebacco Motorsailer Congratulations to Bob Cushing for building and launching the first example of the Chebacco Motorsailer – the ‘Glasshouse’ version referred to in Phil Bolger’s book ‘Boats with an Open Mind’. This version has a fixed ballast keel and no centreboard. The tiller is positioned to allow the boat to be helmed from within the spacious cabin. Bob writes:

We have sailed the Chebacco Motorsailer 3 times now and finally had some good wind on our last sail. With winds of about 20-25 kts and 2-4 ft waves on Seneca Lake in upstate New York we sailed downwind for about 15 miles. We had both reefs in as we were not sure of how wild it would get but as it turned out it was quite docile running downwind in these conditions – one reef would probably have been adequate. Speeds were in the 5-6 kt range as measured by the GPS. Speed under power with the 9.9 Honda have been measured by the GPS to be 7.0-7.5 kts max and 5.5 kts a more reasonable (i.e. quiet and comfortable) speed under power.

The boat is very comfortable with 7 foot berths, a dinette table to port, which can pivot to center, a kitchen area up front with sink, stove, cooler, food storage and 6 gallon water tank. There is a lot of storage space under the bunks and throughout the rear of the boat under the decks. A porta-john with pump-out capability is kept under the step, along with the toolbox. A small built-in fuel tank is behind this. Tinted Lexan windows were used throughout. The front-center opens and four Beckson round ventilation ports w/screens elsewhere. Trailing and launching is quite easy from a standard bunk-type boat trailer. Setup time is about 20 minutes – Take down and pack up about 30. This will be shortened by some 5 – 10 minutes with some simplification of procedures and fasteners. The mast is laminated from fir and weighs 60 pounds – not too hard to step – walk it up on the roof as one end rests in the tabernacle. The actual lifting/pivoting weight once it is in the tabernacle is probably only 30 – 40 pounds. The sails were made from a Sailrite kit. They are made from 5 ounce dacron and went together pretty easily using a home sewing machine and two people working together on large sections.

All in all a really nice little trailerable motorsailer.

Bob Cushing

b.cushing@csss-a.cvsi.com

chglhs2c

Another view of Bob’s Chebacco Motorsailer

Phil Bolger writes:

Bob Cushing lights up our lives. Amazing, and wonderful, how fast he does good work. The boat looks nice and I am inclined to think it’s a better bet than the more-or-less conventional ‘cruising Chebacco’ we’ve been discussing. . . . the idea of sitting in shelter, right on the pitch axis and center of buoyancy, has a lot to be said for it.

Phil

Bob Cushing has built a number of Bolger boats, including the Fast Motorsailer and the Microtrawler. I understand that Bob’s Microtrawler is currently up for sale –

microtrc

Bob Cushing’s Microtrawler – FOR SALE!

If you are interested in buying it, Bob can be contacted at 5998 E. Lake Road, Cazenovia, NY 13035-9323, USA, or at the email address above.

A Tool for fairing Epoxy Fillets:

Burton Blaise writes:

One of the great advantages of building hard chined hulls by the “tack and tape” method is that even amateurs such as myself can put a hull together with minimal time and effort. However, working on my Chebacco 20 hull, I found it difficult to cut the bilge panels with sufficient accuracy to give me beautiful, fair outer seams at the chines (where the bilge panel meets the topside and bottom panels). In fact, this type of building technique cannot do otherwise than produce ugly seams where

hull panels meet since the plywood edges are not bevelled to ensure perfect mating of the pieces. Therefore, such seams (especially outer seams) must generally be made fair before applying glass tape by globbing on putty (thickened epoxy) and then smoothing on with a putty knife or other straight edge to produce a nice, fair and eye-pleasing chine. (This also adds to the strength of the joint).

Working on my Chebacco 20, I was finding this to be a pretty demanding task, with a great deal of fussing and several successive coats of thickened epoxy necessary to produce a half-way decent looking outer corner. Thinking that there had to be an easier way, I eventully came up with an idea for a simple tool which enables me to create perfectly fair outer corners in just one pass. Perhaps such a

gizzmo is already known to the more initiated boatbuilders, but for the rest, here is my idea:

Take two tongue depressors or other flat, straight edged pieces of wood (e.g., paint mixing sticks), place (stack) one on top of the other, and drill a small hole through the two stacked pieces at one end. Then pass a short screw through the hole and tighten with a wing nut to create a pivoting point. You now hold a very simple device which greatly facilitates the task of fairing an outer corner or chine along a

compound curve on a hull. To use, simply glob thickened epoxy on the seam to be faired, then open the fairing gizzmo (spread the sticks apart) and rest the straight edge of one blade (or stick) on one of the hull panels and the other blade on the adjoining panel, and slowly, steadily draw along the seam making sure that both straight edges rest firmly on the panels at all times. The gizzmo automatically and smoothly adjusts to the changing curves and angles between adjoining panels as you go along the hull. The result is a perfectly smooth and fair outer corner or

chine in a single pass, with only minor touch ups to be done later. I’ve used this on the Chebacco hull and have found it to work like a charm! Once the resin sets, I then apply the glass tape and fill the weave with unthickened epoxy, according to standard practice. Hope this is helpful to someone out there!

Burton

Rigging a Chebacco:

Burton wrote to me again:

While I am nowhere near the stage of having to rig a Chebacco yet (as is quite obvious from my recent correspondence with the Bolgerphiles group!), I am starting to think about the details of the rigging. Now, I really have very little experience with sailboat rigs in general (my Gypsy’s rig is so simple that it does not prepare me for the more complicated cat-yawl rig of the Chebacco), and the details shown

on the Chebacco building plans leave me with more questions than answers. For instance, I’m not relly clear on what exactly lazyjacks are, or how to set up the toppinglift, nor do I know much about reefing and pendants & such. I wonder if, for the benefit of the uninitiated, you might consider devoting part of an upcoming “Chebacco News” issue to the art of rigging a Chebacco, perhaps even including some detailed drawings of how to set up her rig and some explanations of the different elements (sheets, halyards, cleats, pulleys – er, blocks, that is, etc.). I

suspect that we novices could stand to learn a lot from your own and other builders’ experiences – some food for thought at any rate.

Chat with you soon!

V. best,

Burton

My reply was:

Briefly, the halyards and the topping lift (which I have on the port side of the sail) go through blocks at the top of the mast, down to blocks at the mast foot, then back to cleats on the cabin roof at the front end of the cockpit.

The topping lift, if it was paired with another on the starboard side, would constitute a pair of Lazyjacks, which simply guide the gaff and sail down onto the boom when they are lowered, rather than falling off to one side. Lazyjacks often fork into 3 parts on the boom, to help gather the sail better. I’m not comfortable with lazyjacks because they need more line and complicate things. I like to get everything out of the way when I snug the boat away under its cover. The more lines, the more

complicated this would be.

A reefing pendant is a line which is attached to one side of the boom, just aft of the corresponding leech cringle which becomes the clew when the sail is reefed, is led through the cringle, then down to a block or fairlead on the other side of the boom, then led forward to a cleat where it can be cleated off when the sail is reefed. A similar pendant can be installed at the luff. When both of these are hauled tight, the sail is reefed all but the tying of the reefing points – which isn’t that important. With two lines of reefing points (as in the Chebacco’s sail) two pendants are needed at the leech, and two at the luff, with cleats for each.

That’s all I’ve got on my sail, apart from the mainsheet, which is straightforward.

Cheers,

Bill

Inexpensive epoxy

Dick Burnham writes:

After reading Reuel Parker’s “The Sharpie Book” I was newly informed that

only about 4 or 5 firms manufacture epoxy. Parker buys direct, it seems,

from Shell Oil. A place in West Palm Beach, Florida (admittedly distant

from Scotland) sells an epoxy (RICO?) in a 15 gallon kit that includes

hardener and resin for about $377? I called them on their 800 number and

seem to recall that it was about $30 – / gal. Which, if its the same, is

soooo very different from West epoxy at $80/. The name of the WPB place is

in the appendix of Parker’s book.

Epoxy Woes!

Burton Blaise has been having problems with epoxy. He sent an email to the Internet Bolgerlist – read on:

I desperately need help from all ye bolgercolleagues experienced with epoxy . All summer long I’ve been using epoxy (a 4:1 mix from Gelcote International) quite successefully in assembling my Chebacco 20 hull. In typical warm summer weather, the epoxy would cure within about 24 h, to the point where it could be sanded. Occasionally, the epoxy would remain sticky even after curing for 2 days, but this sticky stuff (which I assume is amine blush) would come off readily by wiping with a wet cloth, and the epoxy could then be sanded.

Recently, however, I’ve been experiencing some difficulties with the same epoxy, and frankly, I’m at wits end to know what to do. About a week ago I did a few last touch ups (fairing and filling) with the epoxy and taped the last few seams around the keel. After 3-4 days of curing, I washed the sticky surface thoroughly with water as usual. I should point out that, other than being sticky on the surface, the epoxy seems to have hardened. When I started to sand, I noticed that the sand paper was clogging very quickly, and that the epoxy was not sanding into a fine dust (as it has been during all previous sanding sessions), but rather was either not sanding at all or just coming off in little waxy bits. In fact, in many spots the recently epoxied surfaces remain hard but tacky. I’ve tried washing several times with water, and even with acetone , but the surface remains tacky (even at the present time, fully one week since

the epoxy was applied, it remains tacky and cannot be sanded). When I tried scraping the epoxied surface using a cabinet scraper, I get a very thin gummy film coming off but nothing else. Washing with acetone followed by scraping does not improve things. Now, I’m pretty certain that I’ve measured the resin and hardener correctly, and in fact am using the same approach (and materials) that have worked well all summer.

The only thing different is that we have been getting some cooler, damp weather lately (particularly at nights, when its been going down to about 10 C), with a few rainy days. However, we’ve also had some warm days where the temperature in my tarp boatbuilding shed should have been more than sufficient for curing epoxy.

Well, now that you’ve read my sad story, could some kind soul please offer me some suggestions on how I can deal with this problem? Right now I’m stuck at this stage, since I need to be able to do some sanding before I can apply the final glassing over the entire hull. I’m especially anxious to complete glassing and painting of my hull by the end of September, so that I can turn her over and make some progress on the deck structure before having to call it quits for the winter. Is there anything that can be done, or has something gone horribly wrong with my epoxy, or my technique, or whatever?

Sure looking forward to some suggestions from y’all. Many thanks in

advance.

Burton

The Internet Bolgerphiles duly replied and the conclusion was that the problem was probably caused by a slight excess of hardener in the epoxy mix (a lesson for us all!). The solution that was adopted by Burton was to scrape off the bad epoxy. He tried a cabinet scraper, but the best solution was to use fragments of broken glass as scrapers.

Meanwhile, if anyone has any other theories/solutions, please send them to me and I’ll include them in a future issue.

Butt Block Woes:

You’ll recall that in the last issue, problems were reported with butt-strap joints giving out when the panels were bent into position. Jamie Orr comments:

I used the same plywood butts on my Chebacco that Burton did, but reinforced them with 1″ #10 bronze screws. This also solved the clamping issue. The soft bronze is nice because the screw can be countersunk without worrying about breaking through the other side, the point is easily ground off when it does break through. Although Burton has fixed his problem, adding screws might provide more peace of mind.

After looking at the sailing pictures, I feel inspired all over again. I’m having problems staying on my time line, but still plan to flip this Summer.

Jamie Orr

A later email said:

I thought I’d add another comment.

When I joined the pieces of bilge panel (first layer of 1/4 inch), I did the first joint on the boat. This was OK, but for reasons since forgotten, I took the panel off (only tacked on) and did the second one on the flat. I think that if I build another boat in this style, I will do all the butt joins flat, as it’s easier to clamp. Also, the edges beyond the buttstrap can be easily edge glued and will then stay in line rather than twisting apart and having to be held in place when fastening to the hull.

Of course, if you are fastening to the hull at the same time, the last point doesn’t apply, but I try to tackle only one thing at a time.

Jamie

Progress report

Jamie Orr also reports progress:

Hi, Bill

I’m at the stage of “designing” my sails, and thought I’d touch base with you. So far you’re the only builder I’ve heard of who also made the sails as well.

I think you said somewhere that you cut the mizzen very flat. Was that dead flat or only relatively flat? Can some shape be induced by slacking off the snotter?

On the main, I started out thinking that I would use a vertical cut, very plain. However, now I’m thinking that it might be more useful as a learning exercise to go the whole nine yards, with horizontal cut, roach, battens and all. I’ll probably change my mind a time or two yet, as I’ll be doing the mizzen first. This is all winter work — I’ll start as soon as the weather becomes a problem for boatbuilding.

On the boat, I now have the hull glassed (six ounce), except for some work on the keel. One of the high points of the hull was carving the stem — it always feels so good to work with real wood after a long spell of plywood and fibreglass. I used the band saw to cut the profile and rough out the taper, then block plane, spokeshave and chisel to finish it off.

I laminated the bilge panels out of 1/4 inch plywood. I glued and fastened the first layer on, and let the epoxy set up before I started the second layer. To guard against voids between the layers I pre-drilled holes on eight inch squares, in the outer layer only, after the pieces were cut to shape. I rolled some unthickened epoxy on to both layers, then spread a generous amount, slightly thickened, on the outer piece (outer, because it was lying flat and so the epoxy couldn’t drip or drool). I started with the

middle piece, and started fastening from the centre of that, using self tapping, pan head screws to draw the layers together. Working outward both ways from centre helped make sure that air and excess epoxy got pushed out.

When I put the end pieces on, I started fastening from the butt joints and worked to the ends of the hull.

The screws were number 8’s, and almost none of them stripped the threads in the hole. Where this did happen, I just rammed another one through both layers, right beside it. At the butt joints, I put them in four inches apart and got a nice tight joint each time. Butts were about a foot away from those in the first layer. I used a cordless drill to drive the screws. Power is almost a necessity here due to the working time of the epoxy, especially in mid-summer. I used 287 screws altogether, and it took a solid four hours, with no breaks, to do both sides, from the time the first batch

of epoxy was mixed. My dad helped position the panels, but we only had one drill for fastening — I had a back-up drill on hand, but it was too new to use near epoxy unless the first one failed!

I filled the joints at the edges right away, so that if any blush formed, it wouldn’t be deep down in the joints where my sandpaper couldn’t reach. The joints were already sealed with masking tape on the inside.

I have a big clean up planned, so I’ll try to remember to take some pictures when I’ve done that — the site is not suited to well laid-out photos, but we’ll see what happens.

Jamie

On the subject of sailmaking, I replied:

Yes the mizzen is cut DEAD flat. It assumes some shape anyway, especially if the snotter isn’t twanging tight, and more if the snotter is slackened.

I cut my main with horizontal cloths, broadseaming the seam that goes through the tack and one either side, down to no broadseaming at the peak. You need the double-reefed main to set as flat as possible, therefore broadseaming at the peak is a bad idea. I carried the broadseaming back about 30% of the way from the luff, to keep the maximum draft well forward, to avoid weather helm. It worked! Likewise, the

curves on luff and foot should have maximum depth about 30% up/back from the tack. These curves were about 6″ deep, but that was just guesswork on my part. I’m not sure whether more, or less would be better.

Bolger Plans

Plans for all versions of the Chebacco and all other Bolger designs are available from Phil Bolger and Friends Inc., Boat Designers, P.O.Box 1209, 29 Ferry Street, Gloucester, MA 01930, USA. Phil enthusiastically recommends Dynamite Payson’s books. They are ‘almost a necessity’ for building many of his designs.

And Finally

That’s all we have room for this time. Please send me your news:

Bill Samson, 88 Grove Road, West Ferry, Dundee DD5 1LB, Scotland

Chebacco News 13

Chebacco News

Number 13, January 1997

ch131
‘Sylvester’ ghosts home at sunset.

Taped Seams – How many layers?

A couple of readers contacted me recently about the taped seams of the sheet-ply Chebacco. In essence they were asking how many layers of glass are needed on each side of the joint. I asked Phil Bolger for his advice. He replied:

. . . two layers of tape inside and out, including the overall sheathing outside (which is highly recommended), is entirely adequate, and that the second layer on the inside is not critical. Dynamite Payson’s experiments with a single layer inside and out suggest that the veneers will let go before the tape does, but we did break a single- taped joint at the tape in half-inch plywood. These joints are not very highly stressed oncce assembly is complete.

Cruising version of the Chebacco 20

You’ll remember that I canvassed opinion some time ago about possible demand for a cruising version of Chebacco with raised deck and more accommodation so as to be suitable for more extended cruising than the original Chebacco. Phil writes:

On the cruising version of the Chebacco 20, we have done no more than think about it sporadically, and probably won’t do more on it on speculation. If there was enough interest for a group to club together and raise among them US$1000 to commission it, we would be stimulated to give it the attention it should have to be worth doing at all.

If anyone is interested in being part of such a group and (hopefully) coordinating it, please write to me so that I can put you in touch with each other. My address is given at the end of this issue of Chebacco News.

Bob Cushing’s high-sided Chebacco

ch133
Transom and bulkheads are in place on the keel and bottom

ch134The ballast keel and bottom are constructed first

Bob Cushing reports progress on the construction of the first high-sided Chebacco-20 – the ‘Glass House’ version. He writes:

I am starting on the sides now and expect to be done and in the water with it this spring. I am not a sailor so this will be my learning boat. I may try and get a look at some regular Chebaccos before attempting the rigging of mast, sails etc. as I am a complete novice at that.

The plans are quite good, as Phil’s always are but much of the building details are up to the builder. Expansions are given for the bottom panels but not for the bilge panels (- those are fitted and sized by hand). Actually I think it is easier to just back an approximate sized piece of ply up to the side and bottom panels and using a fairing stick trace the pattern out right from the boat bulkheads and then double- check against expansion measurements.

I am using a mixture of woods and plywoods. AC fir and MDO plywood. The MDO (medium density overlay) was tested for myself and another builder by Gougeon Brothers (the WEST System guys) as to strength of epoxied joints and it tested fine – just as strong as regular plywood epoxy joints. Framing is mostly Douglas fir with some oak and basswood.

I will keep you posted on progress. Feel free to post my address for others who have queries –

Bob Cushing, 5998 East Lake Road, Cazenovia, NY 13035 USA
b.cushing@csss-a.cv.com

Bob also sent me a photo of a very nice Microtrawler which is for sale with or without outboard and trailer. Enquiries to Bob at the above address, please.

Lapstrake Chebacco is turned over!

ch137 Jim Slakov and friends turn over the hull

Jim Slakov, of Sechelt B.C., Canada recently turned over his lapstrake Chebacco’s hull. He’s progressed a lot since then:

My Chebacco is coming along fine; today I fit the cabin sides, which are 1/2” cherry (as are the sheer planks, coaming seatback, and all the wood trim in general, including the outer stem). I made short deck-beams, dovetailed into the carlin, to hold things in place before the decking was glued and screwed on. So far the mid bulkhead is in place, and the foredecks, and cabin sides; I’m beginning to see why you call these big dinghies. My neighbour calls it a hippy-boat, I thnk that’s a compliment, what? I’m opting for the mast slot rather than a hatch and will probablyy refer to ‘Gray Feather’s mast boot and mast hatch when the time comes.

Jim also sent a picture of the moulds. Notice that he uses chine logs, rather than the epoxy/glass fillet specified in the drawings –
ch138
Jim Slakov’s moulds, showing chine logs.

Sechelt is the only town in the world with two Chebacco News readers in it! Jim tells me that Garry Foxall, also of Sechelt, helped with the turnover. Garry is planning to build a sheet-ply version this winter.

June Bug – a perfect tender

ch132
Bill Samson happily rows ‘Tweety Pie’ – ‘Sylvester’s tender

Some issues ago I reported that, on Phil Bolger’s recommendation, I was to build a June Bug as tender to ‘Sylvester’. I completed ‘Tweety Pie’ some weeks ago and am very pleased with the result. She rows smartly, is manoeverable, light (just over 100 pounds), and very stable – important in a tender where non-sailor guests are to climb on and off the boat.

If, like me, you plan to keep your Chebacco out on a mooring in open water, and need to row against tides to get there, then the June Bug is perfect. If you plan to build one as a tender, be sure to make the gun’ls good and strong; they take a lot of beating when coming alongside in a chop. Mine were a bit skinny (rather thinner than specified on the plans) and I subsequently had to beef them up.

As well as using the ‘Tweety Pie’ as a tender, I’ve also enjoyed rowing her for pleasure in the Tay Estuary – sometimes with a passenger. She’s at her most enjoyable in calm water; her flat bottom pounds noisily in a chop, though progress is little impeded.

Instuctions for building the June Bug appear in Dynamite Payson’s book ‘Build the new instant boats’. Full scale plans can be bought from H.H. Payson & Co, Pleasant Beach Road, South Thomaston, ME 04858, USA.

A successor to Black Skimmer

Those of you who haven’t yet committed yourselves to building a Chebacco may well be interested in Phil Bolger & Friends’ design #639 – a sharpie schooner of about the same size as Black Skimmer. #639 is 23’6”x7’1”x1’2” with a schooner rig similar in layout to that of the Light Schooner (or ‘Scooner’). Lateral resistance is provided by leeboards. Interestingly, Scottish designer Iain Oughtred was reported in Classic Boat magazine as having Black Skimmer as one of his top ten favourite designs of all time. When Phil discovered this he wrote:

It’s a little ironical that the plug for BLACK SKIMMER (long a favourite design of ours, too) comes just as we finally produced a design to supercede it; about the same size, but with a schooner rig, water ballast, and a ‘Birdwatcher’-type raised deck, to be more seaworthy, more roomy and easier to transport by road trailer. The new design, first of a class, we hope and think, is well along in construction.
sharpe3
Profile of the Black Skimmer Successor
[ Thanks to Chuck Merrell for this scanned image]
[If you want to order plans you can get them from Phil Bolger & Friends Inc., Boat Designers, PO Box 1209, 29 Ferry Street, Gloucester, MA 01930, USA.]

Rigging a Chebacco-20

Those of you who are building a Chebacco-20 and have little or no experience of rigging a cat-yawl may be interested in how I did it on Sylvester.

At the mast head three blocks are needed – one for the peak halyard, one for the throat halyard and one for the topping lift. I put three stainless eye-bolts through the mast head, as attachment points for the blocks. The eyes for the peak anad throat halyard blocks are on the aft side of the masthead, and the eye for the topping lift block is on the port side. The blocks were all of the fixed eye/becket type, 1 3/8” x 7/16” for the topping lift, and 1 3/4” x 1/2” for the halyards. You can spend a lot, or a little on such blocks, depending on whether you want plain or ball-bearing. I went the low cost route and used Barton plain blocks , ST2 and ST3.

ch135
At the partners, where the mast goes through the cabin roof, I put upright blocks on the cabin roof to turn the halyards and topping lift , allowing them to be led back to the cockpit. A single upright block was used on the port side for the topping lift, and a double on the starboard side for the peak and throat halyards. These were 1 3/4” x 1/2”, Barton UB3 and DUB3 respectively.
ch136

I put 6” horn cleats on the cabin roof either side of the companionway hatch, one to port for the topping lift and two to starboard for the halyards. One refinement worth including is three little plastic fairleads to lead these lines past the hatchway slides, which they would otherwise foul.

I used 1/2” braided line for the halyards and 3/8” for the topping lift.

The main sheet arrangement is best described by following the sheet from its attachment to the becket of a fixed eye/becket block (Barton STB4) which is lashed to the clew end of the boom. From there it travels through a fixed eye block (Barton ST4), which is shackled to the rope horse and then back up through the block at the clew end of the boom. From there it goes for’ard to another ST4 block lashed to the boom just above the end of the centreboard case and then down to a Barton 522 stand- up block and swivel with camcleat which is bolted to the top of the centreboard case.

The main sheet is 1/2” braided line.

The mizzen sheets lead from the sprit-boom end, one either side, to fairleads at the port and starboard quarters, on top of the aft buoyancy tanks either side of the outboard well. From these fairleads they come for’ard to camcleats on top of the buoyancy tanks within easy reach of the helmsman.

That’s all there is. If you go the economy route, like me, it’ll probably cost about £150 ($225) for the fittings mentioned here. I must say that these fittings have been perfectly satisfactory, so far. Going the luxury route with, perhaps, ball bearing fittings by Harken, you could probably spend three or four times that much.

One of the great things about the Chebacco is that it has so few fittings – no winches are needed, no shrouds; a delight to Scotsmen of whatever nationality!

‘Toulouma Too’ for sale:

Sister Krista is reluctantly offering her Chebacco for sale. Reasons for the sale are that she needs more space and amenities due to expansion of crew numbers, so she is upgrading to a larger boat. Here are the details: For Sale: 20-ft Bolger Chebacco cat yawl, plywood version built by Brad Story, 1991. Excellent condition (top-sides and deck painted Spring 1996). Kept under 80% cover. 4hp Yamaha 1991. Extras (all new, 2-3 years old): Origo alcohol stove 2 (4” thick) custom-made sleeping cushions (1996) cockpit tent with screens porta-pot flag staff and flag Call: 609 461-0658 evenings, Monday through Thursday 609 698-1863 evenings, Friday, Saturday and Sunday
News, enquiries etc should be sent to me:

Bill Samson, 88 Grove Road, West Ferry, Dundee, DD5 1LB, Scotland
Email:- wbs@sol.co.uk
1

Chebacco News 12

Chebacco News


Number 12, November 1996

[All issues of Chebacco News can be seen (in glorious colour) on the World Wide Web at: http://www.tay.ac.uk/mcsweb/staff/wbs/chebacco.html]

image2
Bill Samson’s ‘Sylvester’ impersonates the Chebacco News logo

The first ‘Glass-house’ Chebacco?

Bob Cushing (b.cushing@csss-a.cv.com) emailed to tell me that he is building the high- sided Chebacco motorsailer, dubbed the ‘glass-house version’ by Phil Bolger (Boats with an Open Mind – pages 225-227). As far as I can tell, this will be the first to be built to this design. Bob writes:

I have started building the highsided Chebacco motorsailer – have the bottom, ballast keel and rudder built and some of the bulkheads. I will be turning it rightside up shortly and starting to install the bulkheads, stem and sides.

Bob also mentions that he has built the Microtrawler (currently for sale!) and the Fast Motorsailer (both described in BWAOM). He hasn’t added the sailing rig to the Fast Motorsailer, yet, but is so pleased with its performance under power, he may not add it.

Lapstrake Chebaccos

Gil Fitzhugh reports steady progress on his lapstrake Chebacco. He is currently fitting out the hull:

The forward bulkhead is in, the aft one is cut out and the hidden one at the backend of the centerboard trunk is spiled. The aft bulkhead has a pretty top that I wanted to cover with a curved strip of laminated mahogany – two tight bends one way and two the other. It worked, but what a job! Bulding boats is duck soup. Building yachts, on the other hand . . .

I just hope, that with all that loving care and attention Gil is lavishing on his Chebacco, he can screw up the courage to dump it in the water when the time comes!

Gil also tells me that he is seriously thinking about putting on a bowsprit and jib, following the glowing report from Fraser Howell in the last issue. He has put a substantial breasthook into the hull so that a short bowsprit can be bolted through the deck and breasthook.

Another lapstrake Chebacco builder, Jerome McIlvanie, of Yakima, Washington reports that he built his hull right side up, turned it over using the pulley and ropes method (see Chebacco News #1) for painting. He then plans to turn it back over to finish it off.

Yet another builder who has decided to build the lapstrake version is George Cobb, of New Brunswick, Canada. He writes:

I won’t have building space for another 2-3 months. In the meantime I have completed the lofting and am well along on the spars. I would like to hear whether anybody has used a gooseneck on the boom and its merits and drawbacks as compared to gaff jaws.

I went for a sail in Fraser Howell’s boat three weeks ago. The winds were light but it was still a very enjoyable sail. I especially enjoyed nosing up to a beach and going ashore.

George Cobb

If you use a gooseneck on the boom you’ll be in good company, George. Sister Krista’s ‘Toulooma Too’, built by Brad Story (see Chebacco News #7) has a gooseneck. It certainly looks very neat and works well. I used jaws on my boom because I like low-tech things that are easily fixed, wherever I am. The only slight advantage of jaws is that the height of the boom above the deck can be adjusted using the throat halyard – but this is no big deal.

Another sheet ply Chebacco?

I am sometimes accused to being rather biassed towards the sheet ply version of the Chebacco. OK – I fess up! (- you’d think I was an American or something -) I am biassed. So it gladdens my heart to hear that another one is about to start taking shape. Garry Foxall, of British Columbia, writes: I am going to build the sheet ply version, although Jim Slakov’s [a lapstrake version] is so pretty it makes me want to do that instead. However, I have a number of other projects that must be done, and I think that the sheet ply one will be faster.

I hope to begin cutting out bulkheads and temporary frames this month. December is when I hope to begin the actual construction.

Jim Slakov lives a few miles away. He turned his hull over in the early summer and is now working on the centerboard trunk. He is a cabinetmaker by trade and his workmanship is beautiful. It makes one feel envious.

Garry.

Chebacco a tad big for you? How about a Catfish Beachcruiser!

John Tuma, of Fremont California has launched his Catfish Beachcruiser (a recent Bolger design). He has called it ‘Catfish Lounge’, in view of the astonishingly spacious cockpit/cabin. John writes:

The hull form is similar to the sheet ply Chebacco . . .

The particulars:
LOA 15’1”
Beam 6’6”
Draft 15”
Trailer weight ~800 lbs
Displ (sailing) ~1000-1200 lbs
Sail area 139 square feet

She has a long, shallow keel and no centreboard, giving an uncluttered interior. The deck is raised to the height of the top of the coaming and there is a narrowish walkway down the centre which forms the cockpit when sailing, and can be easily covered over at night to give sleeping accommodation (rather like the Birdwatcher, but less extreme). So you get a huge cockpit and huge sleeping accommodation, too.

image1
John Tuma’s ‘Catfish Lounge’

John emailed me to say:

The Lounge offers commodious seating, occasionally excellent dining, and often an excellent view. Performance to windward is not as slow as I first thought. I had my sailmaker join me for an afternoon on the Oakland Estuary, and we played with the various controls. Throat halyard tension was improved with the addition of a 2-to-1 purchase, and greater luff tension improved windward performance in light airs. In heavier conditions or with a lightly loaded boat the increased luff tension tends to induce weather helm. I did not expect the rig to be so sensitive to tuning, so now I feel I’m learning about sail controls all over again.

I’ve also found the lounge to be sensitive to loading. Four adults and two children can fit without trouble, but the boat doesn’t sail well with that much weight (at least not when chips and dip are more important than weight placement). Very slow to get going, and slow downwind. The increased momentum made tacking in light airs easier, the deeper profile reduced leeway. However, I’ve been having fun with the sideways motion, and a downwind dock can be taken by stalling the boat and sliding in sideways. I do have to be careful though, as the same thing would happen on a lee shore. I have also found that the Lounge likes to be sailed on the bilge panel, and flies on a reach when that far over. Is the same true of the Chebacco?

John

It certainly is! The downside is, though, that the greater the heel, the greater the weather helm. On balance, I like to sail my sheet ply Chebacco with a little heel, but not with the gun’l under! Sailing singlehanded, as I often do, this can mean taking in a reef earlier than when I have a crew to sit on the weather bench.

First, the model . . .

James (Skip) Pahl, of Carlsbad, California, writes:

I’ve just started my 3/4” to 1’ model. The hull is done and today I’m beginning the post-turn-over interior work. I am hoping the model comes out looking as sweet as the one you built. [Aw! Shucks! – B.S.] It might give courage at the office during a week that seems an unnecessarily long interruption to one’s time on the water.

I was fascinated by Fraser Howell’s recent comments about his bowsprit and jib, and wondered if his Chebacco points higher than those with cat rigs or might require reefing later since the jib tends to relieve the weather helm when the main is overpowered. Also, I’d like to learn how he installed the bowsprit. It seem to me that, with a careful job of tapering the spar, it could look great with the 19th century lines of the boat.

I’d also be grateful for your thoughts about using plastic laminate on the interior or the centerboard trunk and of using an aluminium plate for the centerboard.

Skip

Well, Fraser, some of this is for you to look into. Formica-lined centreboard trunks have been used successfully by boatbuilders for a long time now. I only wish I’d heard about it before spending days glassing the inside of my trunk! I’d be very wary of an aluminium centreboard. Made to the same thickness as shown on the plans, it’d be very heavy and would probably need a winch to raise it. A thinner one would need a narrower trunk and might get bent and jam up. You’ll recall that Fraser laminated a central core of aluminium in plywood, giving the same weight/density as the lead- weighted plywood centreboard of the plans (see Chebacco News #11).

Skip also emailed Gil Fitzhugh and myself asking how to fit the carlins and cuddy sides. Gil replied:

. . . there are floors at roughly stations 2 3/4 and 3 3/4. After they and the inwale are in place, you can tie the carlin to those floors and inwale with string, or wires and turnbuckles, like this –

carlin

By adjusting the tension on the strings you can pull the carlins into a fair curve relative to the sheer in both profile and plan view. Note that the top and inside faces of the carlin, to which the deck and cuddy sides will be fastened, are unobstructed. After you’ve fastened the deck and cuddy sides to the unobstructed faces of the carlin with screws and epoxy, the carlin ain’t goin’ noplace, never again . . .

My own approach is rather cruder. I left in the temporary molds 2 and 3, and used these to determine the shape of the carlins. Once the cuddy sides and side decks were fitted, I crawled into the cuddy with a handsaw and chopped the molds up so they could be removed. Untidy, but it works!

Professional advice available

Bill Buchholz has recently returned to the USA from Finland, where he supervised the building of a modified Chebacco at the boatbuilding school in Hamina. Bill has kindly offered to provide advice to amateur builders of Chebacco. He can be contacted at Apache Boatworks, RFD 4517, Camden, ME 04843, USA, phone 207-236-8048.

Weight aft, Mizzen Sails and Mast Boots

Peter Gray of Queensland, Australia refers to Jamie Orr’s query about weight at the back end of the Chebacco. He writes:

I was concerned about this with Grey Feather. The rudder was built of steel-

pgray1

so instead of the Oregon mizzen mast weighing 12 kgs I used a second hand windsurfer mast costing $50 and weighing 2 kgs. I got the sailmaker to sew a sleeve in the mizzen sail to go over this. It works really well. I also have an 8 hp Johnson outboard weighing 27 kgs. I have found this combination of items works well (weight and function).

pgray2

About the mast slot and sealing it – this was also of major concern to me as I don’t like water in the hull. I made a hatch cover for the slot and a boot for the mast.

pgray3

Grey Feather went to the Brisbane (Down by the River) Festival on August 23-24. This was a celebration of the 150th year of Newstead House, house of the Governor of Queensland, Australia. The house is on the banks of the Brisbane river. Incorporated with these celebrationswas a heritage and vintage boat show. Gray Feather was part of this and was met with great enthusiasm

Peter Gray


And Finally . . .

Please keep your news coming; whether about sailing or building or even just dreaming. This is your newsletter and we can all benefit from each others’ experience. For the first time, in this issue, I have devoted some space to a Bolger boat which isn’t a Chebacco – John Tuma’s Catfish. Please let me know whether I should occasionally discuss Bolger designs which might be alternatives to Chebacco, or whether I should stick strictly to Chebaccos.

Happy building, sailing, modelling, dreaming, . . .

Bill Samson,
88 Grove Road,
West Ferry,
Dundee,
DD5 1LB,
Scotland.

w.samson@tay.ac.uk