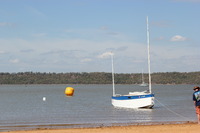
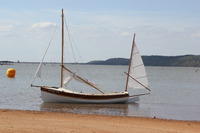
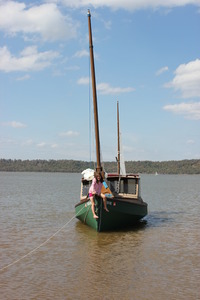
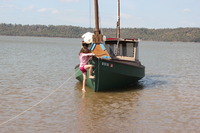
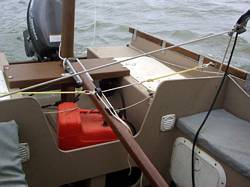
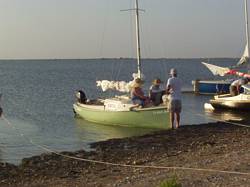
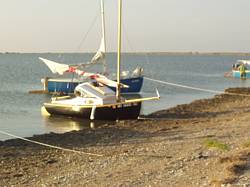
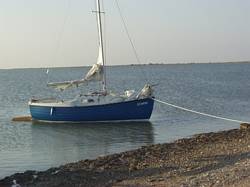
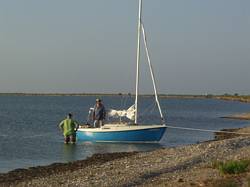
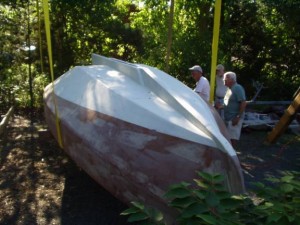
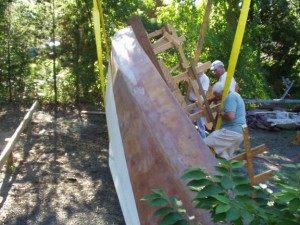
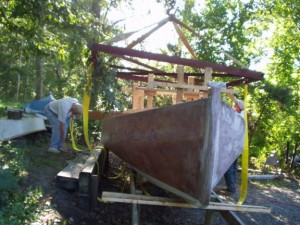
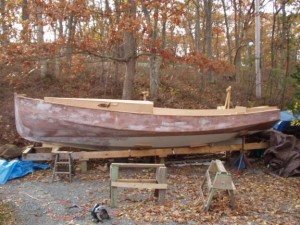
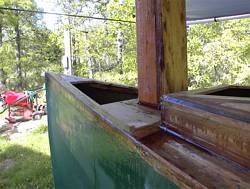
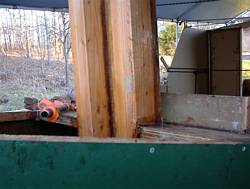
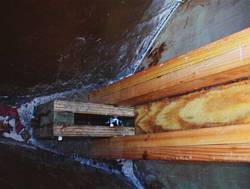
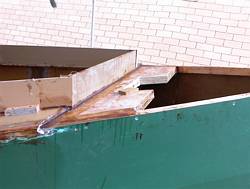
Chebacco News 63 – Octagonal or round mast?

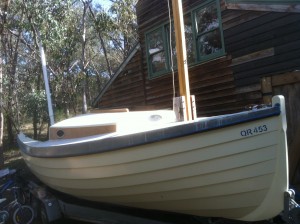
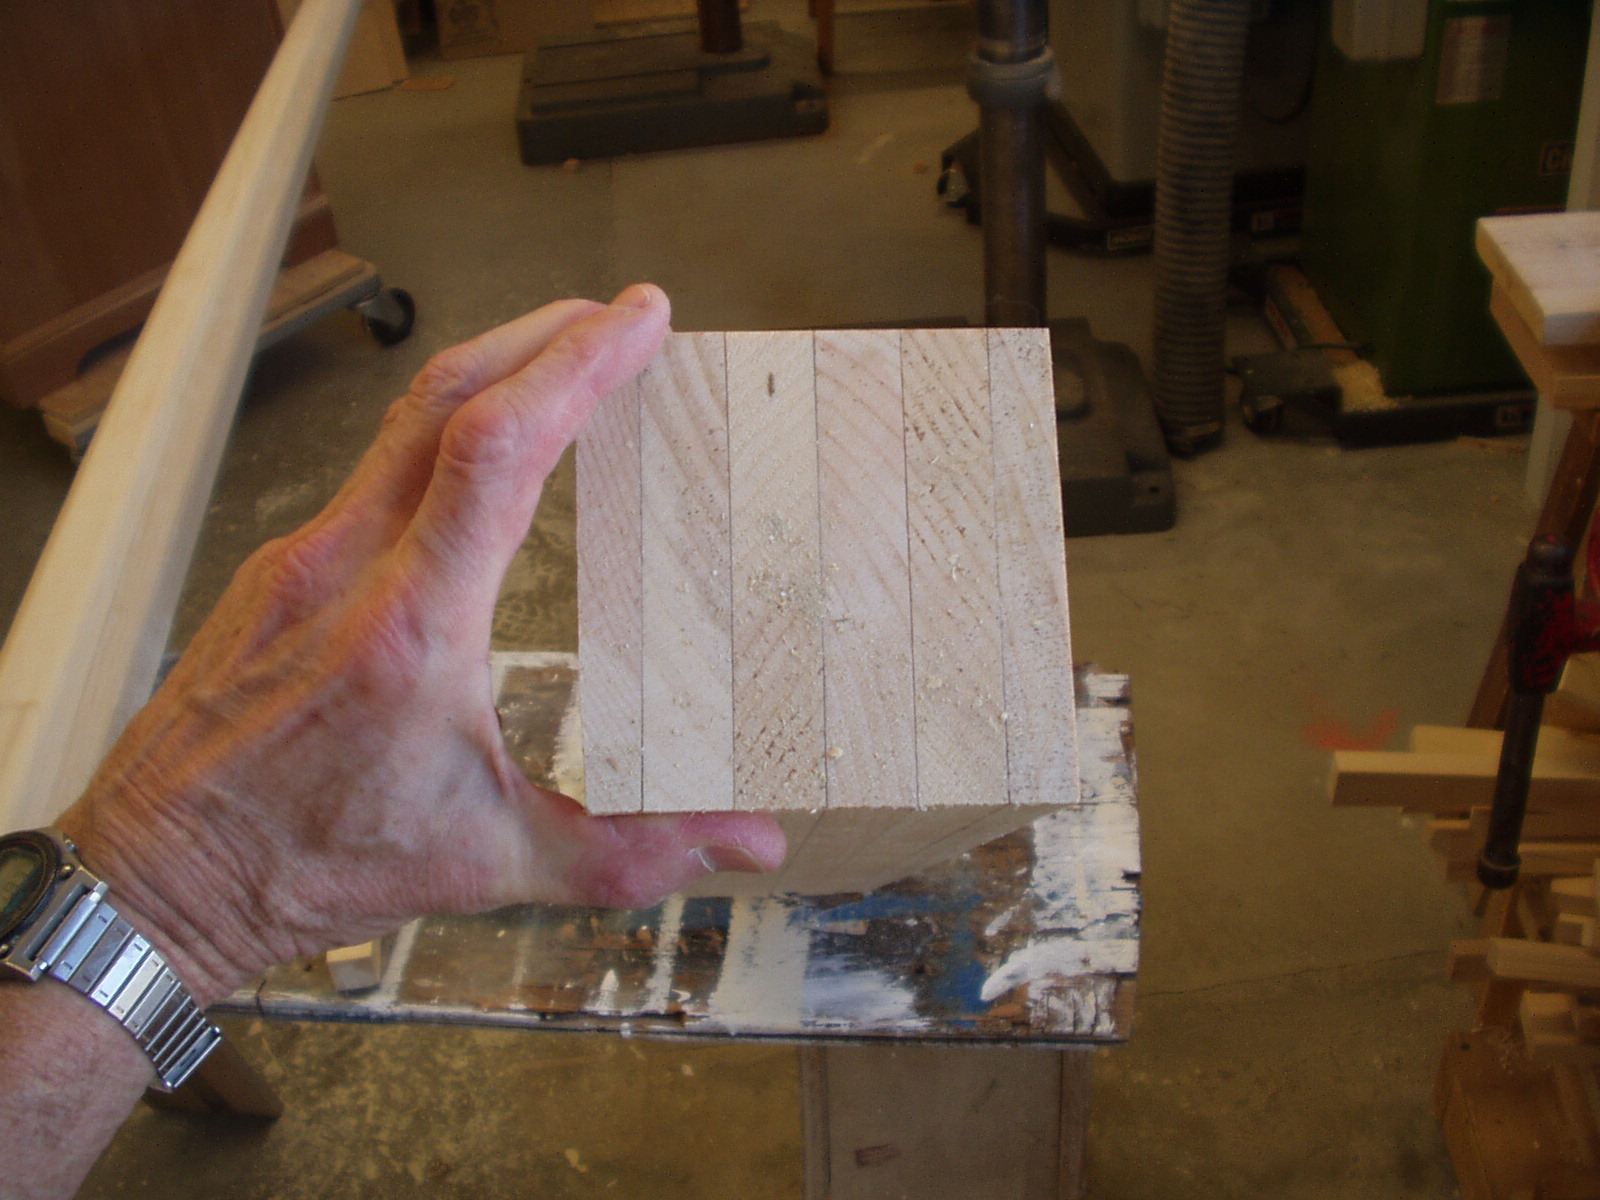
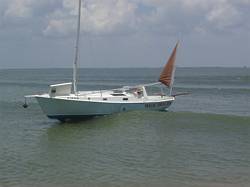
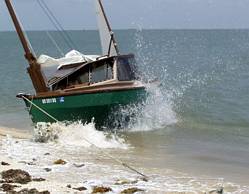
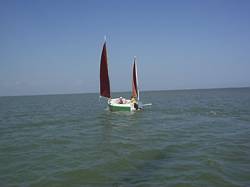
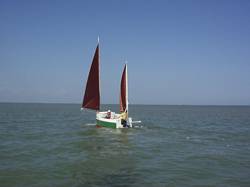
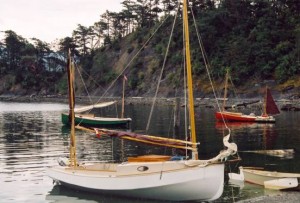
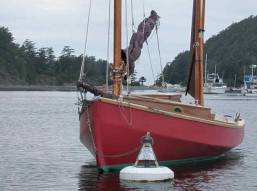
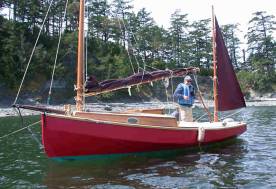
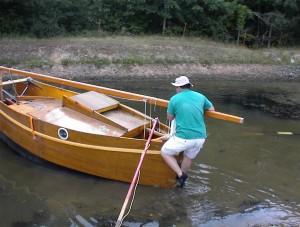
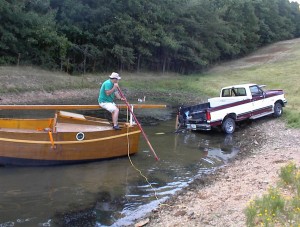
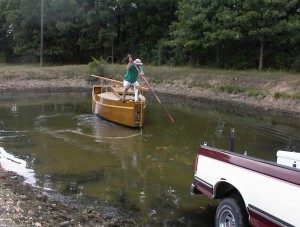
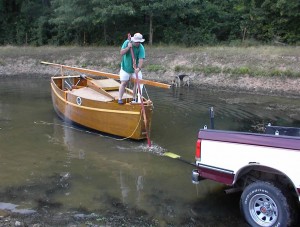
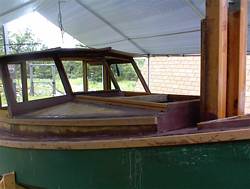
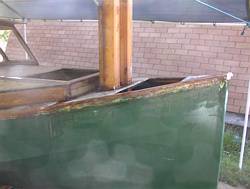
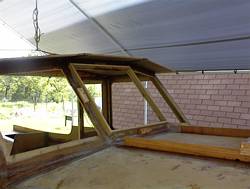
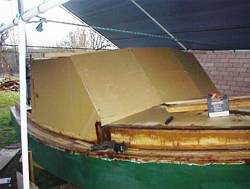
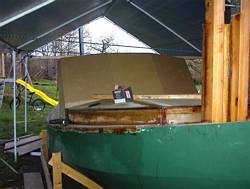
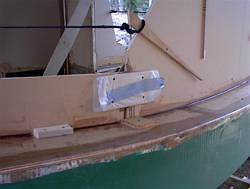
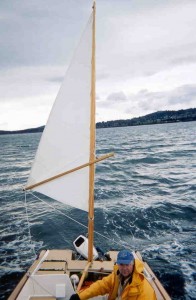
When I built the birdsmouth mast for Khaos, my Chebacco 25, I liked the look of the eight sided stick. So I rounded the corners and varnished the beautiful octagonal showpiece.

The Octagonal mast

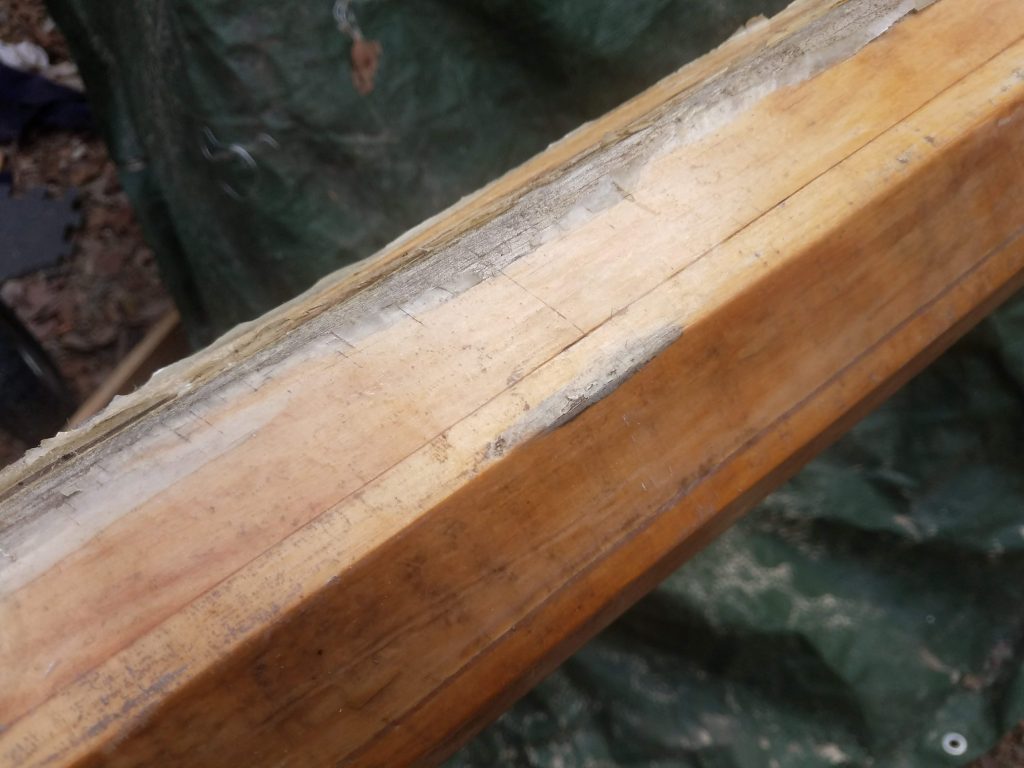
But that turned out to be the wrong thing to do, The varnish didn’t like protecting the corners and after a time cracked and let in water. After some more time the water got into the timber (Queensland hoop pine) and the swelling caused cracks to form.

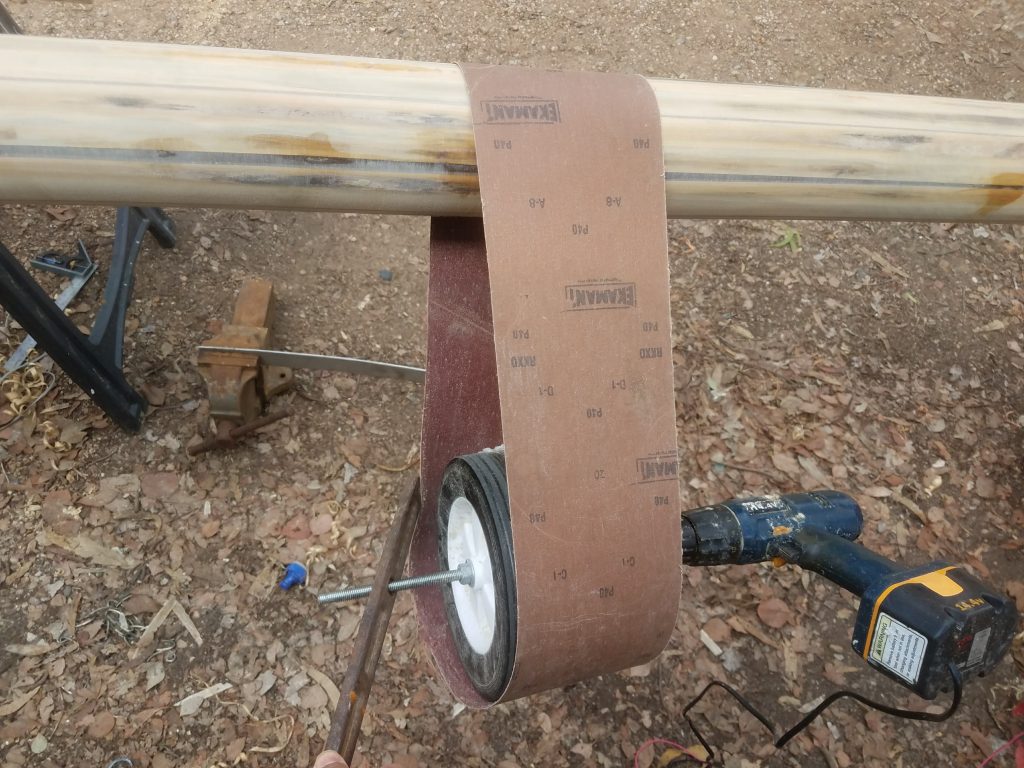
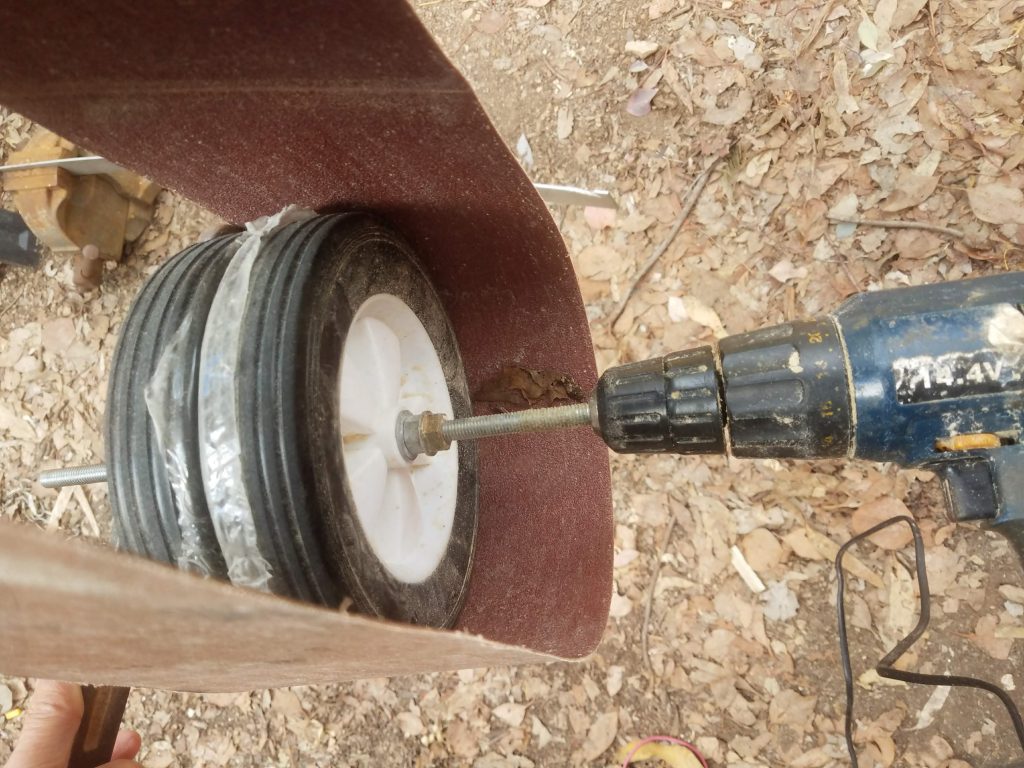
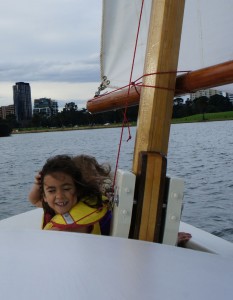
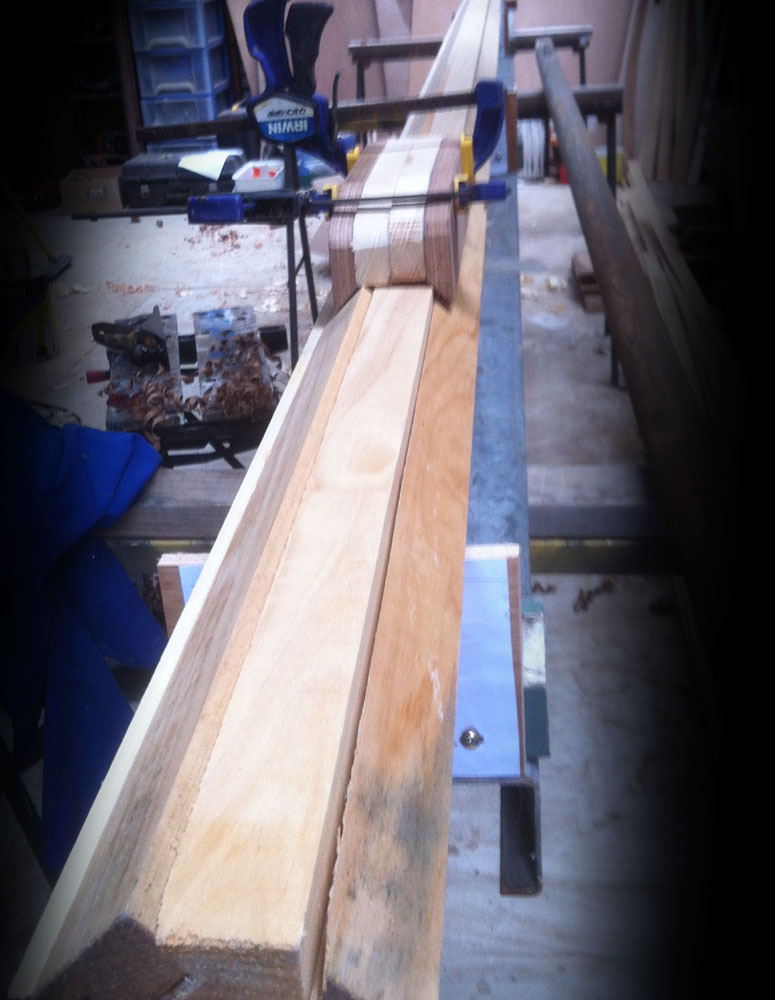
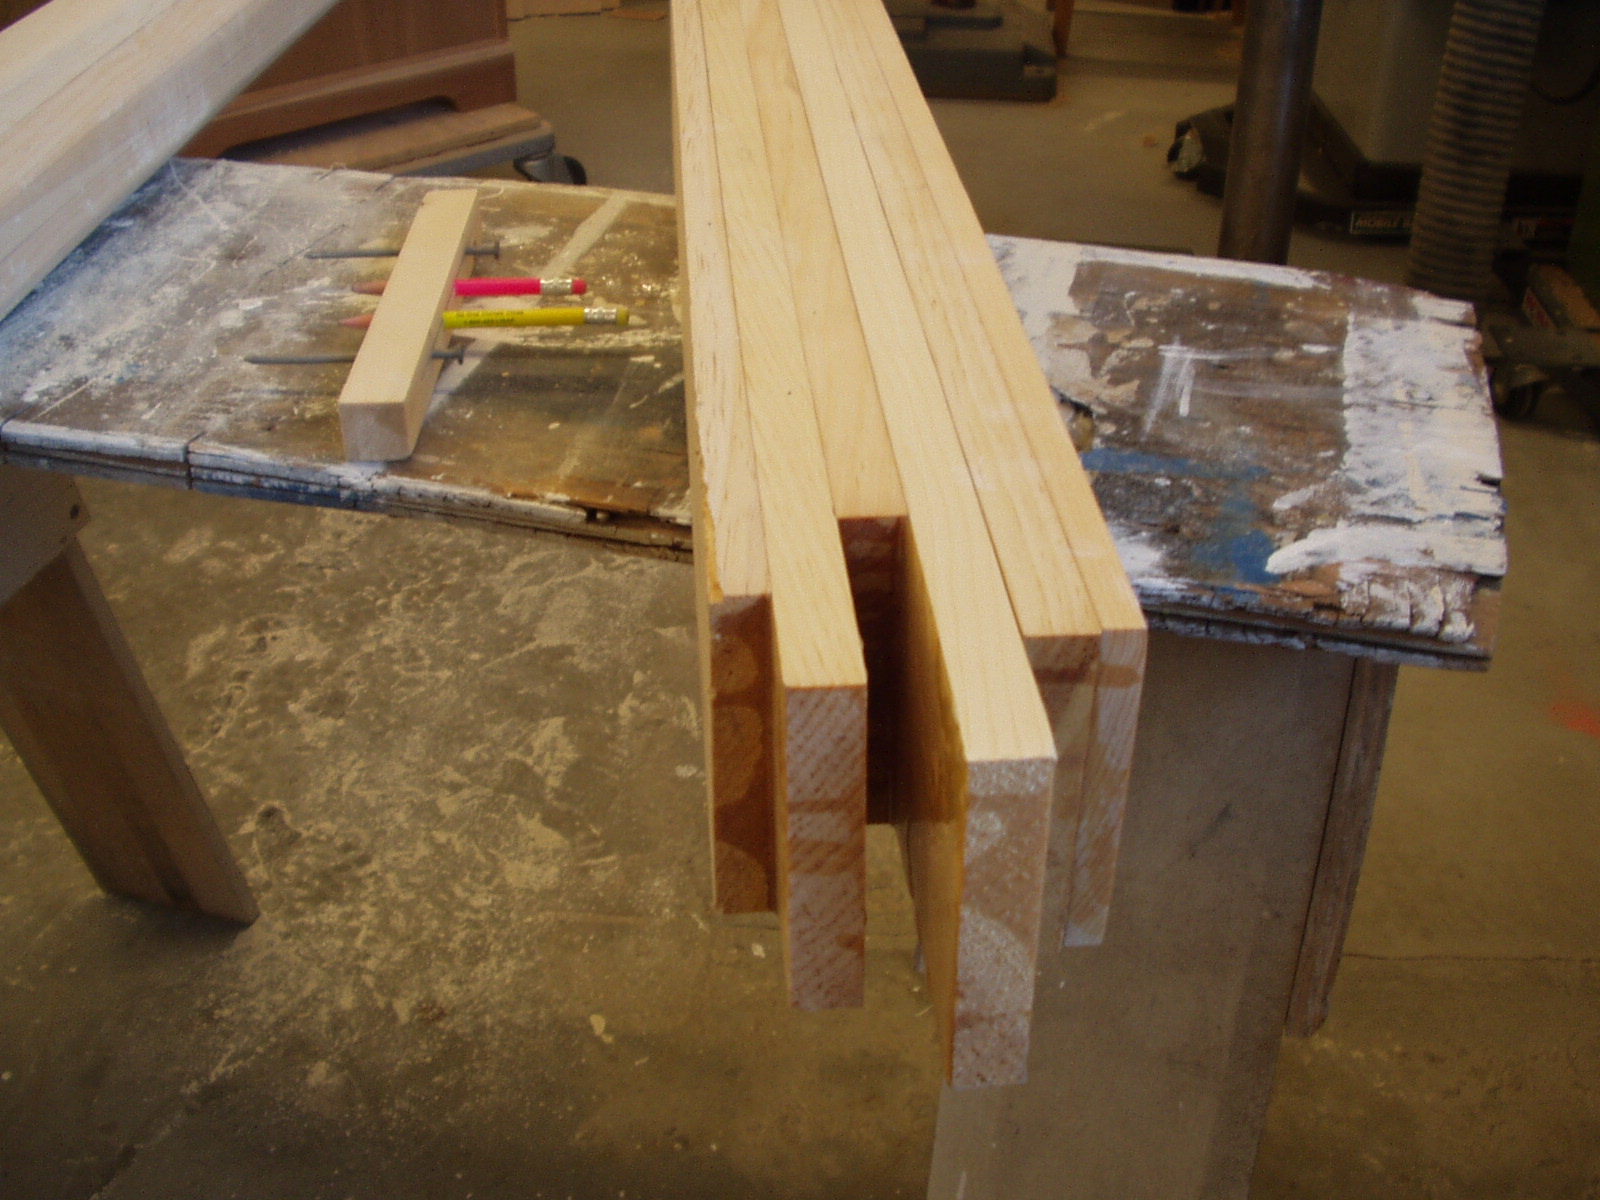
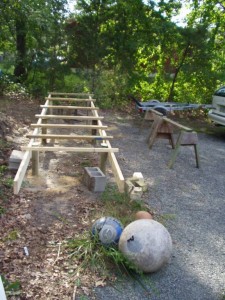
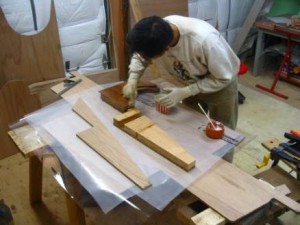
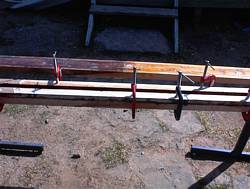
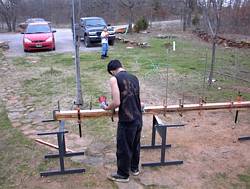
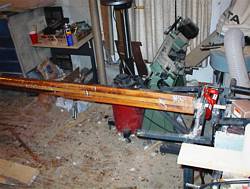
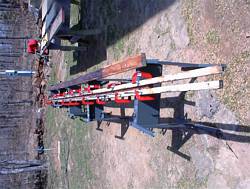
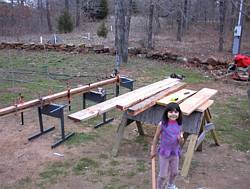
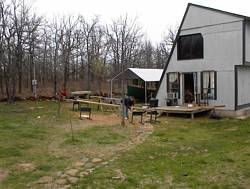
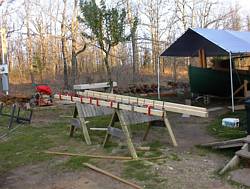
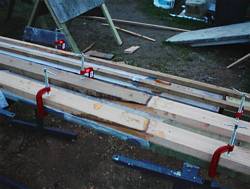
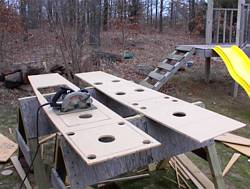
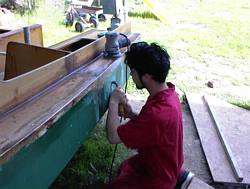
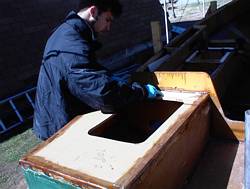
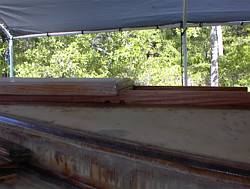
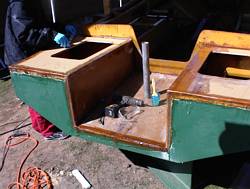
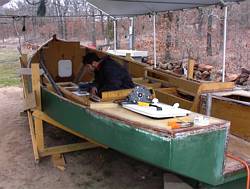
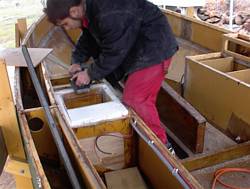
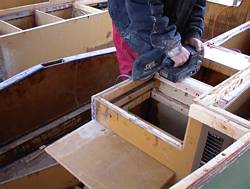
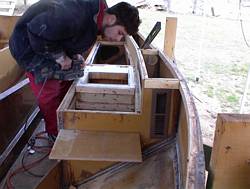
So, over the last few weeks I have removed the mast from the tabernacle and put it on saw horses outside my shed. Epoxy filled the cracks. Planing took 8 sided to 16 sided. More planing took 16 sided to 32 sided. At this point I made up a sanding contraption with an old drill, threaded rod and two plastic wheels.

This contraption is the third version I made, I discovered that the rubber tyre was important for grip and that the tyre must be a larger diameter than the mast. None of the websites I visited mentioned this fact, but it is critical, the friction on the driving tyres must be more than the friction on the mast itself, otherwise you end up sanding the driving tyres not the mast. For geometry reasons the larger diameter tyre has more contact area than the smaller diameter mast and this results in more friction between the tyre and the inside of the (inside out) sanding belt.

I started with 80 grit and ended with 220 grit.

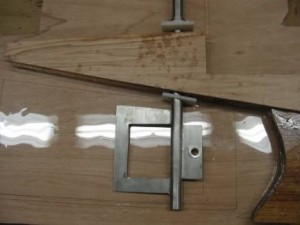
I held the other end of the rod with a bit of steel with a hole in it. Simple.

This turned out to be the only way to practically sand this mast. 5″ x 20′ turns out to be a lot of sanding and completely impractical for hand sanding. Even then it took me two weeks of sanding sessions (limited by my stamina)

The round mast looks good too.

Andrew

Chebacco News 60 – raising the centreboard

I had a question about how to raise the centreboard on a chebacco.

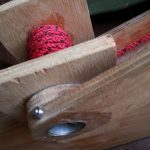
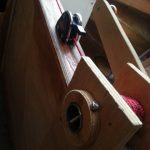
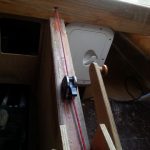
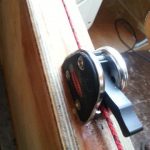
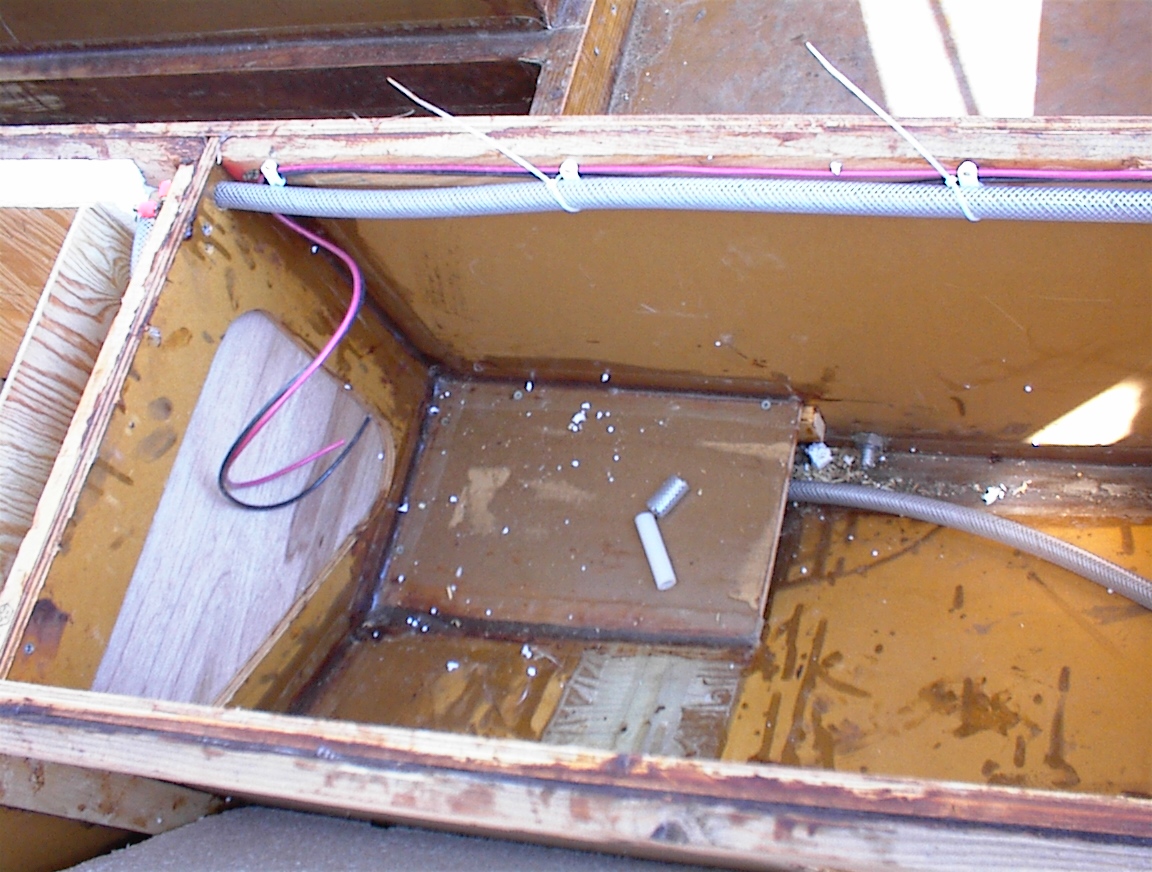
The centreboard is not very heavy and it is possible to raise the board without mechanical advantage, but I wanted it to be easy for anyone to operate the board.  I looked everywhere for a simple cheap winch but in the end it was easier to make one.


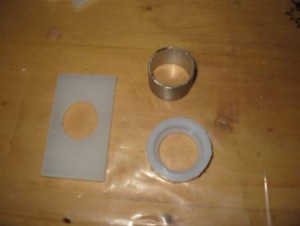
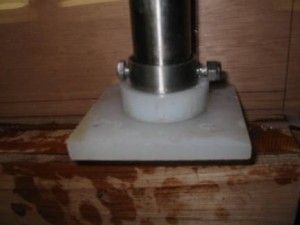
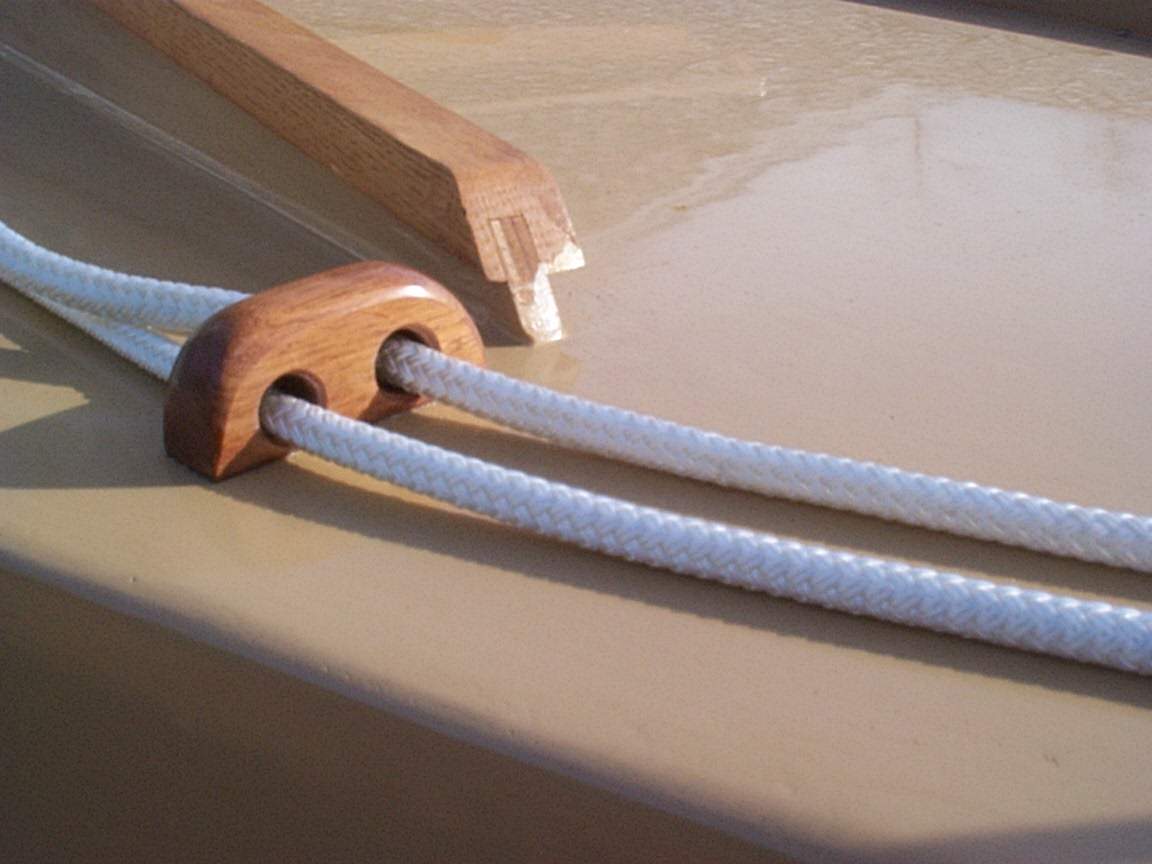
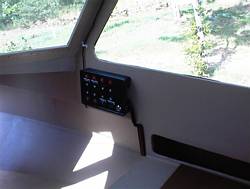
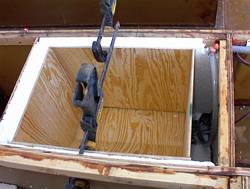
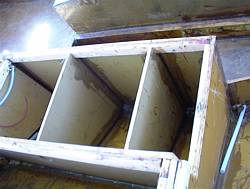
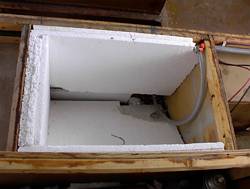
The winch is mounted to the top of the case inside the cabin. The spindle is a stainless steel tube and you can see I made plywood washers held on with a through bolt.  The 4mm spectra line is clamped in an off the shelf cam cleat and the line passes through the cabin bulkhead and round a sheave down to the plate.

It was a relatively simple job – more time was spent/wasted looking for an off the shelf solution than actually making the winch.  I do not see why a Chebacco 19 centreboard couldn’t be raised the same way, but just plain muscles work too.


Andrew

Chebacco News 57 – Tabernacle

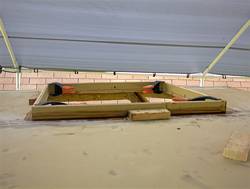
 Mast Tabernacle 

Tabenacle 3

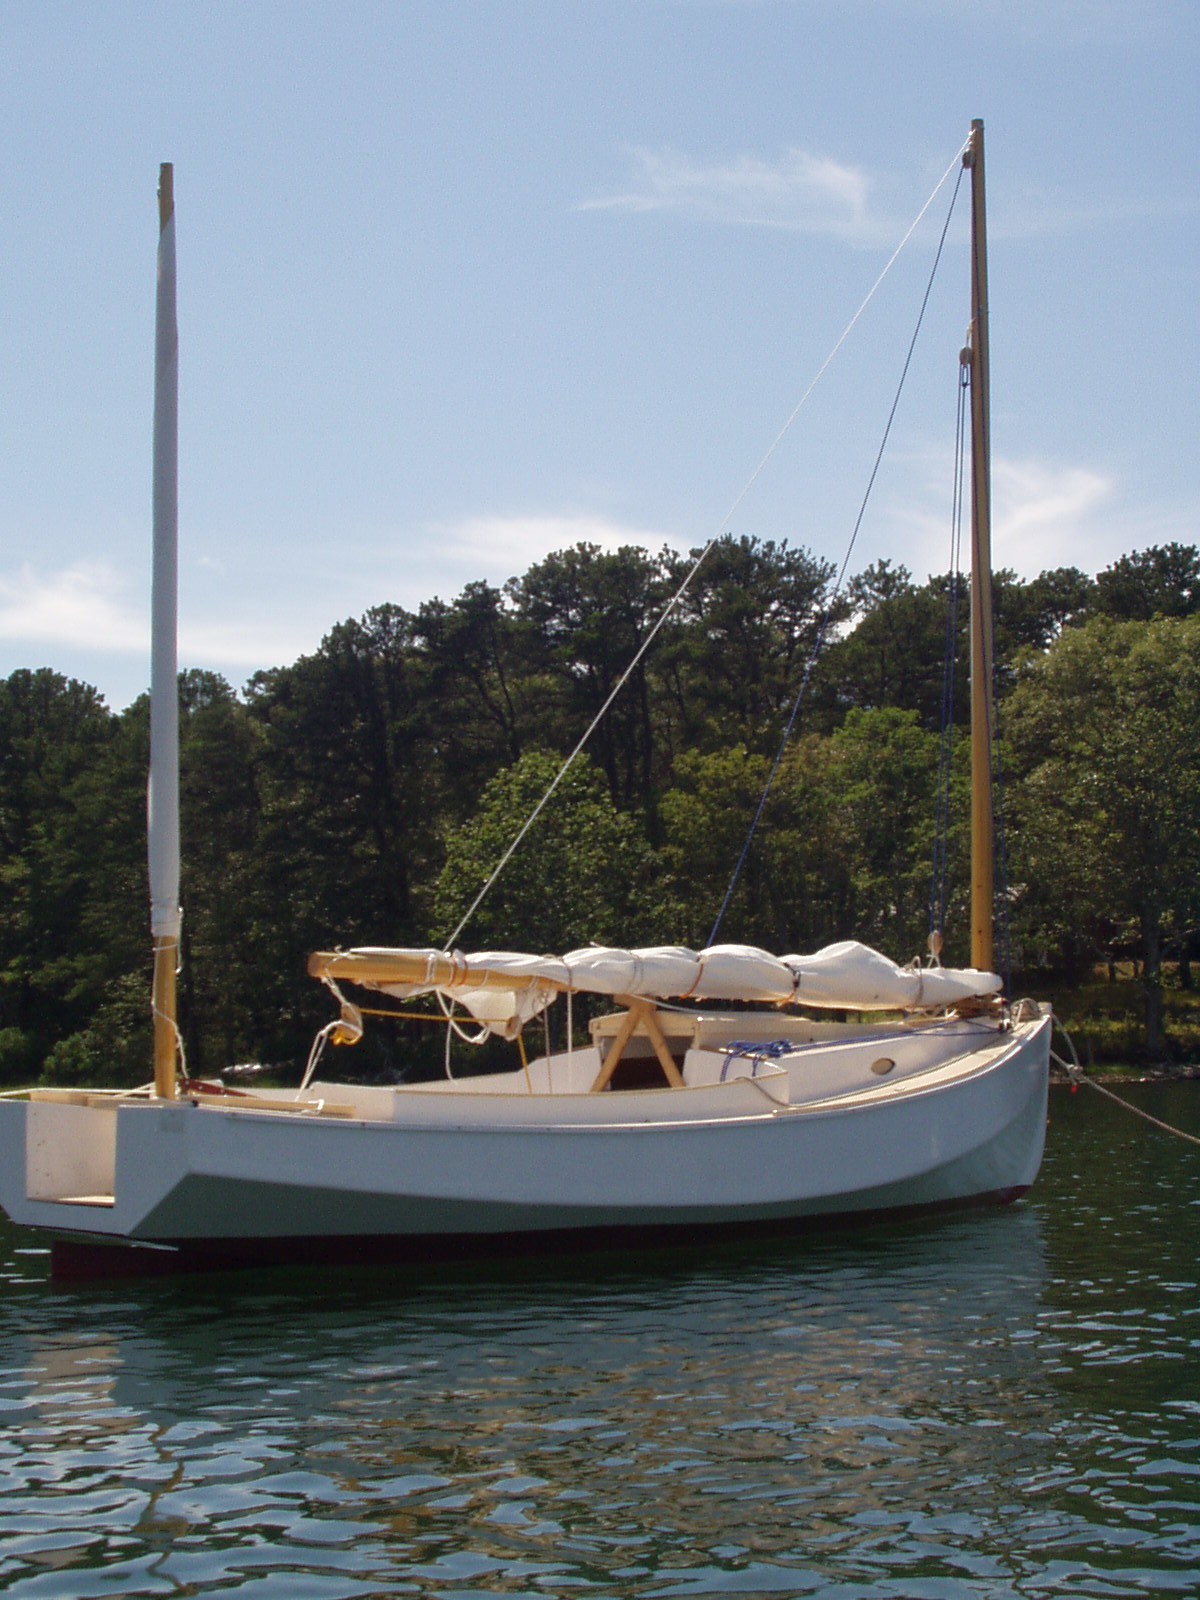
Chebacco designs all have relatively short unstayed masts.  They are easy to store, and quick to put up.  I really like Bolger’s thinking here – it always irks me that when I sail with friends in their trailer yachts, that you spend between one and two hours in the carpark setting up and packing away.  My Chebacco takes just a few minutes to get ready or to pack away.

There has been some discussion about the different ways to step the Chebacco Masts.  The original design had a short slot in the deck with an insert piece, the RD has a somewhat more sophisticated clamp at the partner with turnbuckles.  The cruiser introduced a tabernacle (hinge).

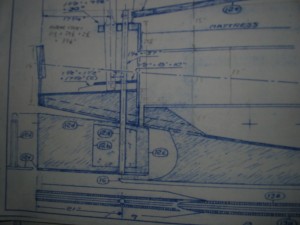
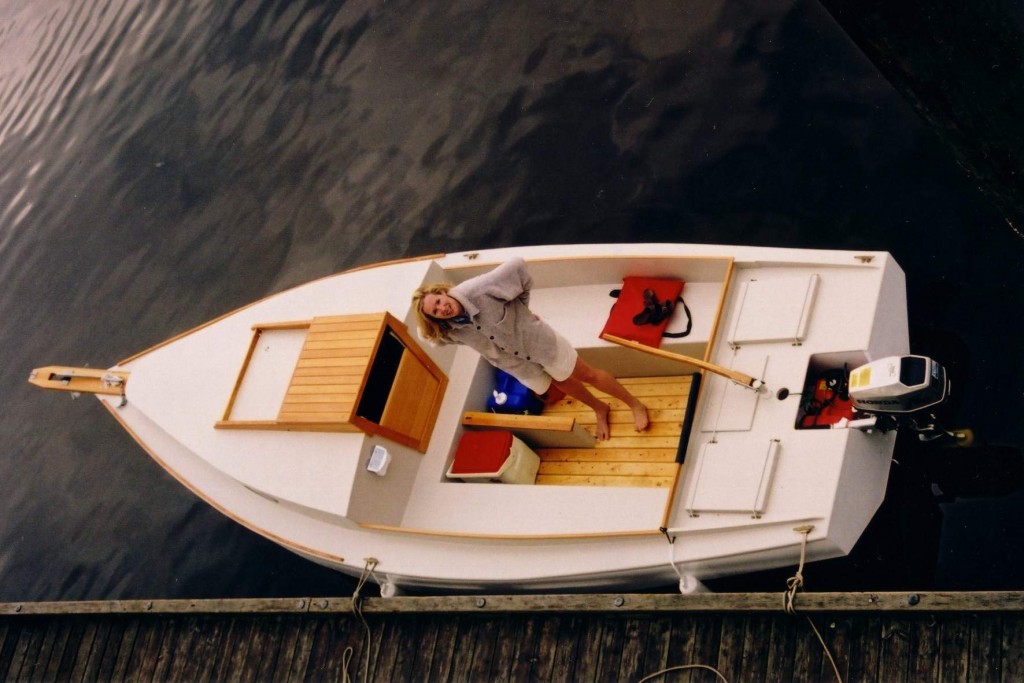
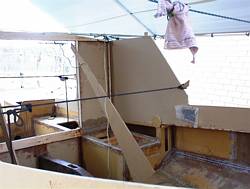
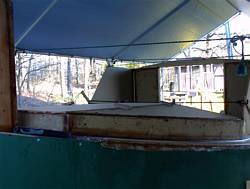
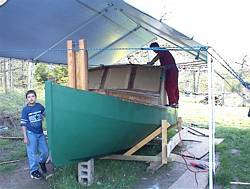
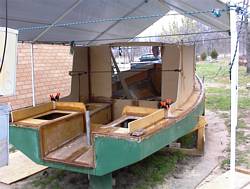
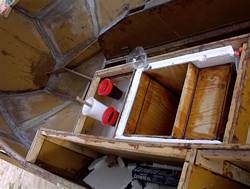
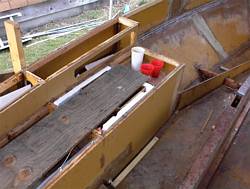
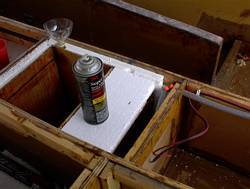
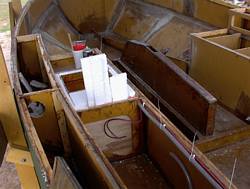
The Chebacco 25 has a 5″ x 20′ hollow timber mast and the design calls for an under/over retaining partner arrangement.  I was concerned that the mast may still be difficult for one person to step, so I decided on a tabernacle setup.  I further decided to counterweight the foot of the mast to make stepping and unstepping a one handed 10 second operation.

(I was inspired by descriptions of yachts and barges on the Norfolk Broads shooting bridges – getting the sail and mast down, getting under the bridge and then getting underway again in a few minutes.)

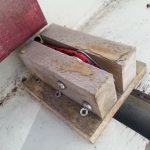
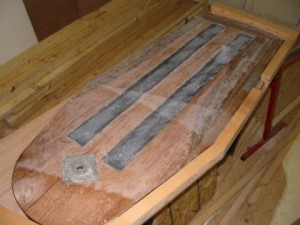
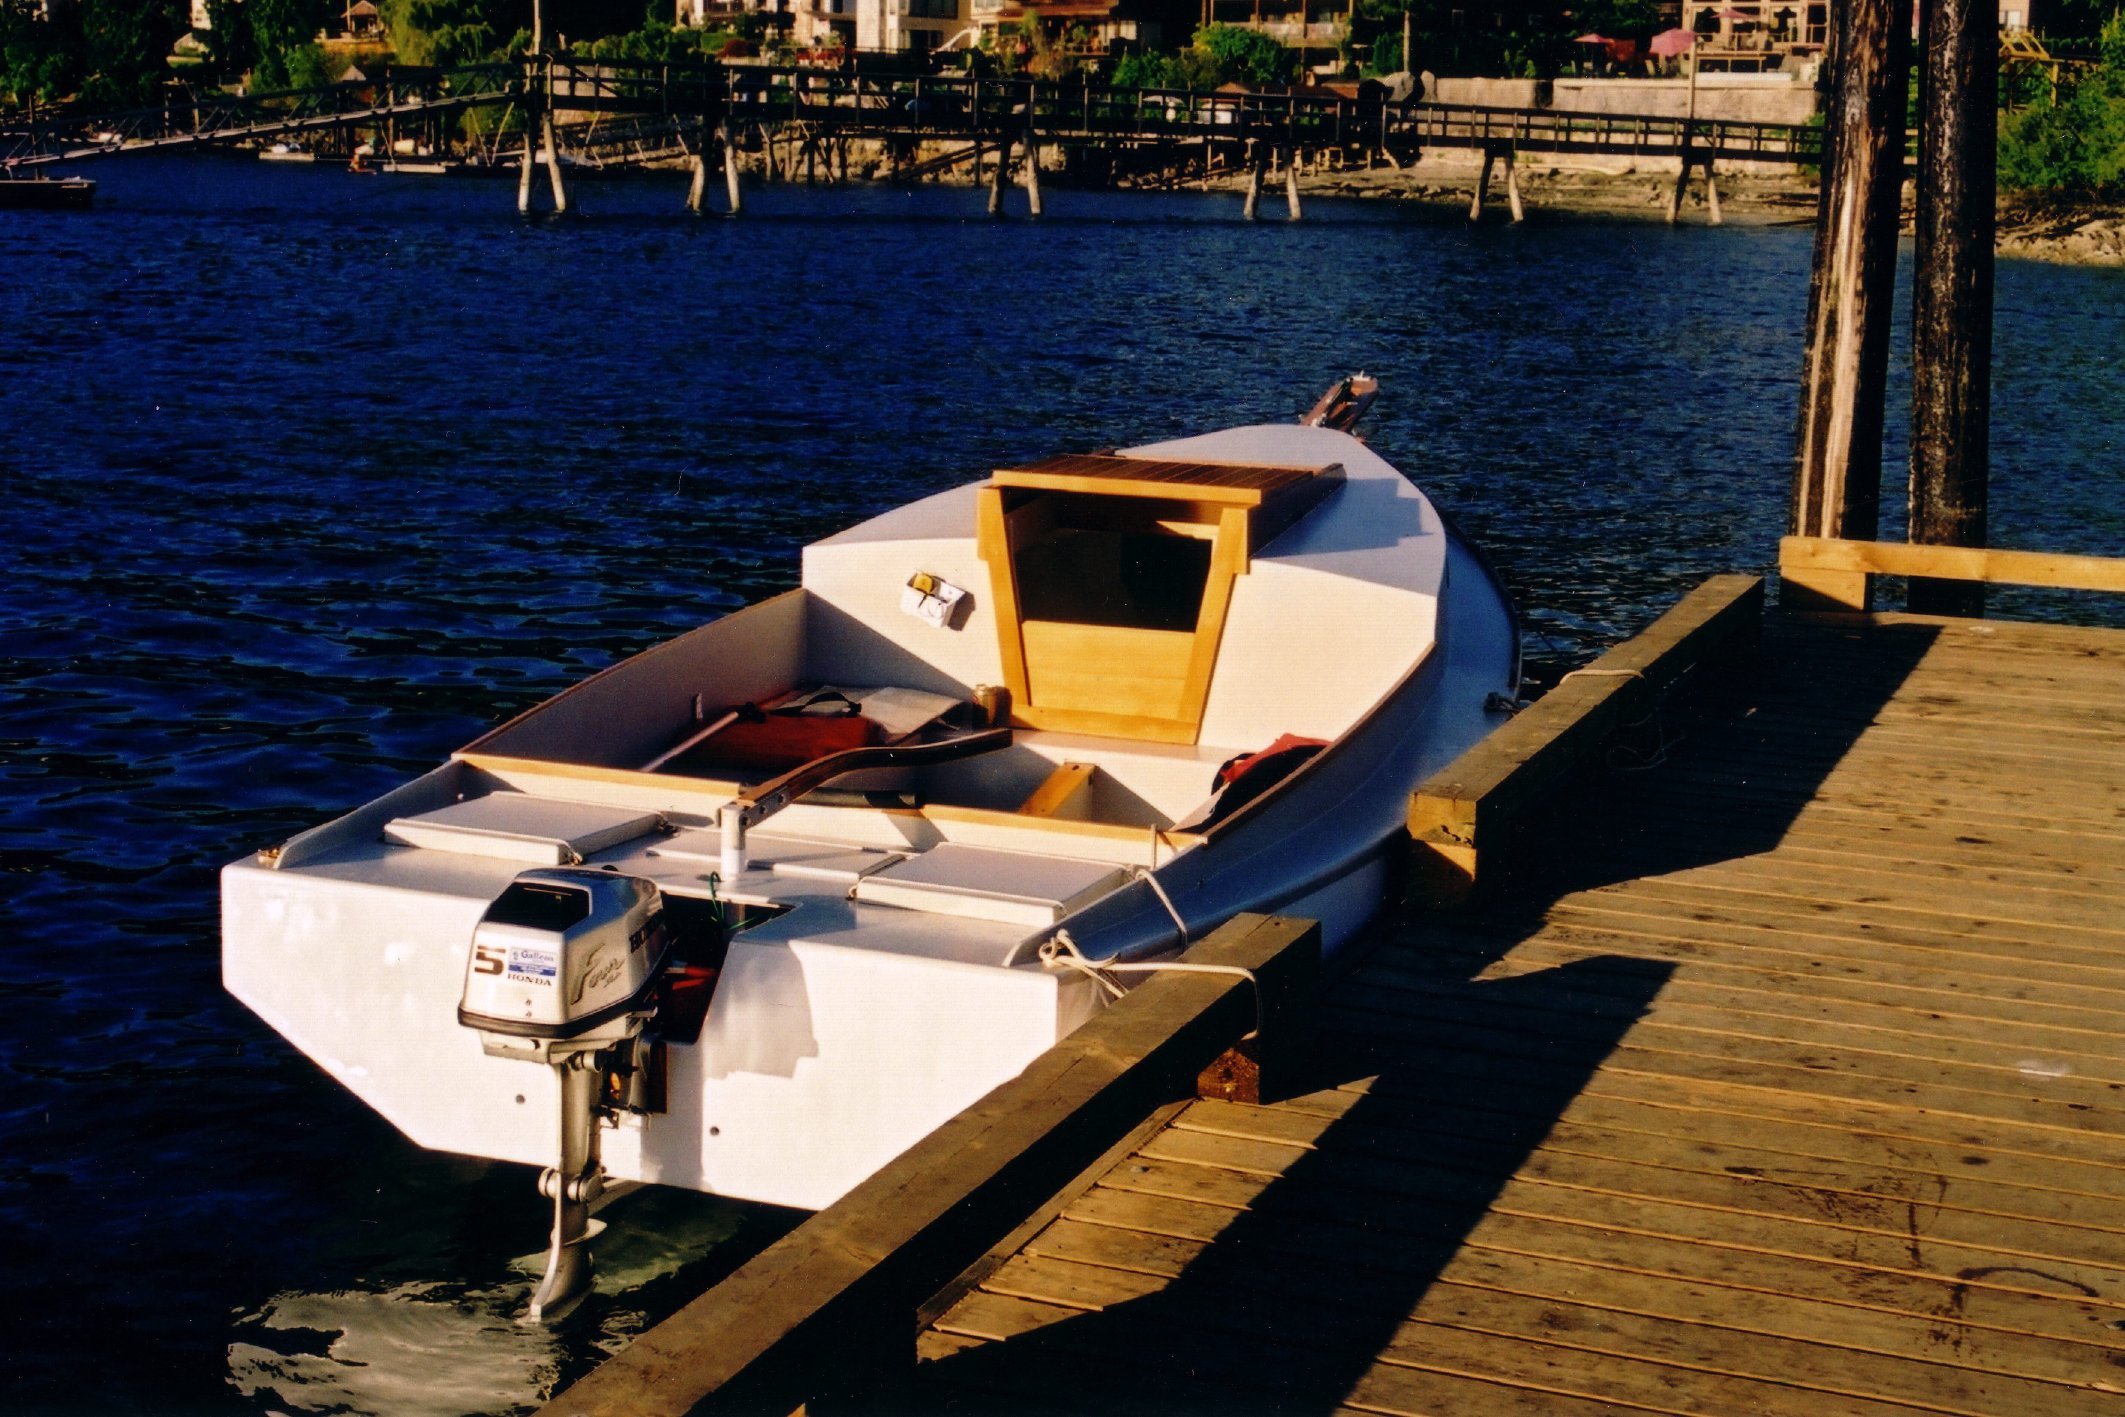
The mast is a birdsmouth hoop pine construction, 5″ at the step tapering to 3″ at the masthead.  The bottom 3′ is filled with lead shot (I think I managed to get 20kg in before sealing the filling hole with a wooden plug).  The hinge pin is set about 12″ above the deck so that the mast folds neatly on the cabin roof and is held by two stout Douglas fir partners.  These partners are bolted to a bulkhead which is further reinforced by a 6×2 crossmember extending from gunwale  to gunwale.  The hinge pin is 1″ solid stainless bar held with “R” clips on either end.  This size is not needed for strength but I am hoping the large diameter will reduce the wear in the bearing holes over time.  The bearing holes in the partners and the mast hinge block are lined with graphite filled epoxy.

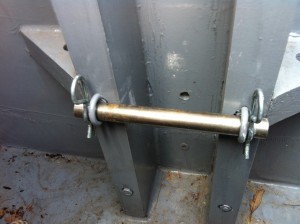
All of the weight of the mast is supported by the hinge pin, the foot of the mast does not rest on a step.  The hinge pin does not go through the mast itself but through an offset hinge block that you can see in the photos.  This is partly for strength but also to make the mast stand while I am fitting the retaining pin.  When you lift the mast it gets to a point where the counterweight takes over and the mast stands itself up.  The retaining pin is a piece of rod that crosses in front of the foot of the mast through a couple of metal rings.  I jam a small wedge in between the retaining rod and the mast to stop any movement fore-aft.

It works!  My 10 year old son can step the mast in a minute.  I don’t need to store the mast for road transport because it is shorter than the hull, I just tie it down to it’s crutch.  I suspect my mates envy my extra hour and a half on the water while they are fiddling with shackle keys and gin poles.

Andrew

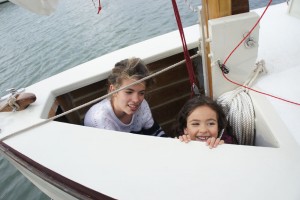
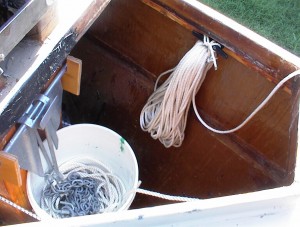
P.S. you can also see the anchor/anchorman well in these photos, this is a feature of the Chebacco 25 only.  I have found this handy for standing in while raising the anchor or while working on the mast (as Bolger intended).  I have also found it VERY useful for storing children in …

P.P.S. dont forget to email me your Chebacco stories to publish <My Christian Name>@Chebacco.com

IMG_1597

Tabenacle 4

Here you can see a hole in the bulkhead where I had intended to run a line from the base of the mast to a winch inside the cabin.  The counterweighting of the base of the mast instead made this redundant and much simpler.

Retaining pin holds the bottom of the mast in place

Retaining pin holds the bottom of the mast in place


Chebacco News 55

2011 “World” Pudleduck – Richard Spelling

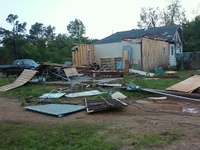
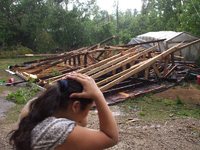
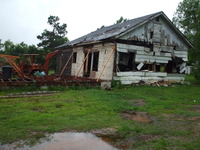
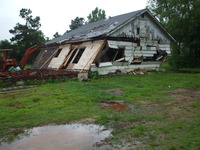
Sorry, it has been quite a while since I have updated this site. You see I kind of get obsessed with things. I was building a house for me and the kids to live in. Then a tornado came and blew it away. So then I was re-building a house to live in…

thumb.0SSPX0090 thumb.0SSPX0114 thumb.0dscf1331 thumb.0houseedit1other things and picking up the pieces. (both literally and figuratively)

The only time I have had the boat out was a couple of weekenders to Eufala, which I write about in this issue.

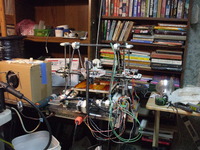
Other than that, my current obsession is the 3D printer I built.

thumb.0DSCF1944 thumb.1IMAG0158

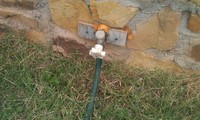
It’s a Self Replicating Rapid Prototype Machine, a 3D Cartesian Robot using Fused Deposition Modeling. I call it “Bob”. To the right is the faucet handle I printed to replace the one that was busted by the tornado when it scraped the well house off to ground level.

thumb._DSCF1427 thumb._DSCF1433 thumb._DSCF1434 thumb._DSCF1435

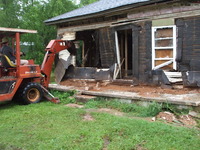
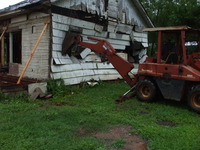
Also, my tractor had the good graces to die right in front of the shop, and to wait till after I used it to push the remanents of the old house down… so I had to fix my tractor so I could get the boat out… 🙂

Oh, yeah, and I’m Divorcing the wife I re-married. My “re-wife” as a friend calls her. I think I have learned my lesson this time.

Only misshap on the trip this year was that the exit off the turnpike was right after the toll booths. I mean like 25 feet. I was in the far left lane so I could use my pike pass, and there was NO WAY I could have made that turn. Oh, well. GPS sent me on a different route this year than it did last year. I have ignored it before to my peril, so I followed it’s instructions this time. Last year I almost blew a trailer tire. The second one, both from Pep Boys. Granted I am running them right at the load limit. I was able to put on the spare and limp to a tire place, who had real load rated trailer tires to sell me, so that worked out.

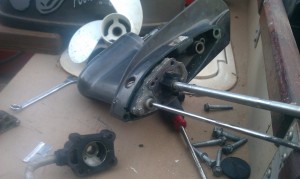
Well, also when I was getting the boat ready, I discovered the motor wasn’t pumping water out the tell-tale. I took it apart and just flipped over the impeller wheel for now, after greasing it up with a fancy teflon based greese. The fun part was the six hours I spent trying to get the bleeping lower end to fit back on. I finally gave up and went to bed. In the morning I got up, spun the shifter lever around 180 degrees, and it it went on like it was designed that way. Go figure.1IMAG0157

The messabout was held again at the Monies place at lake Eufuala. Better organized this year, with the tents in the back and even lined up. The Monies provide free food, but myself and others chip in cash to cover their expenses. Hopefully they do not take too much of a hit on the food costs.

thumb.3IMG_0010 thumb.3IMG_0034 thumb.3IMG_0038

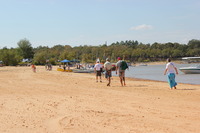
I could barely squeeze the truck and trailer through all the cars, and someone told me the ramp was un-usable, so I had to go to the state park down the road and launch. I walked up from the beach, where there was a LOT of boats, on friday night, just after dark. Beached the boat way on the end by a Micro that looked vaguely familiar.

thumb.2IMAG0159 thumb.2IMAG0160 thumb.2IMAG0161

Walked up to the Monies place and there were people on a loudspeaker. How weird. Jim Michalak and two others were speaking about plywood… and it looked like they were selling raffle tickets. And t-shirts. Unfortuantly, these were WHITE t-shires. I have no businsess owning white t-shirts… They finished talking, and we all went to get food. Talked to Jim and responded that I had built a 3d-printer when he asked what was up… All the old friends were there, except Chuck

thumb.4IMG_0049 thumb.4IMG_0066 thumb.4IMG_0067

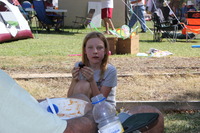
Visiting with friends, Mia (ex-step grand daughter) make a new friend or two, I check email on my smartphone.

thumb.5IMG_0018 thumb.5IMG_0025 thumb.5IMG_0027

This was the second annual “world” puddle duck gathering. Very reasonably held in October when it’s not so bleeping hot outside. Puddle Ducks are small square boat, a racing “class” boat, but interestingly only the hull lines are fixed, everything else is alowed to be changed. This basically lets you play designer as well as race your boat. Very Interesting, but not interesting enough for me to want to make one and race… lol

thumb.6IMG_0013 thumb.6IMG_0030 thumb.6IMG_0091 thumb.7IMG_0081 thumb.7IMG_0082 thumb.7IMG_0085

Next day they had various events, which I ignored. Funny how I can drive hundreds of mile to meet friends and boat builders, then be unsociable… 🙂 I went sailing back to the ramp to pick up the things I had printed to show Jim et. al. Water level was much lower this year than last, with the dangerous hidden stumps at least sticking out of the water this year! Interesting that they were all about the same height. I assume oxygen lets them rot above the water line. I tried to avoid the stumps and the racing course.


thumb.8IMG_0093 thumb.8IMG_0097 thumb.8IMG_0099


Lots of boats.

thumb.9IMG_0120 thumb.9IMG_0134

Kids swiming. Daughter playing disaffected teenager.

thumb.aIMAG0166 thumb.aIMG_0110 thumb.aIMG_0112 thumb.bIMG_0122 thumb.bIMG_0123

***

Chebacco Bluster – Randy Wheating
Hi Richard, here is a small article…
Bees on the High Seas
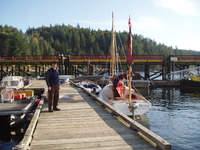
Well known Chebaccoist Jamie Orr and our friend and fellow small boat enthusiast Curtis joined me aboard Chebacco Bluster for a fall sailing day in October 2008.  We launched at the picturesque Gibsons Landing Marina.  Gibsons is a small town a short ferry ride away from West Vancouver, British Columbia and famous as the setting for the long running CBC television series “The Beachcombers”. 
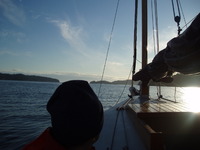
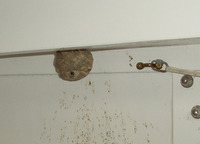
With had no particular  plan beyond getting out on the water, we spent a leisurely morning tacking north against the ebbing tide of Shoal Channel .  It was one of those lovely sunny fall days with just a hint of chill and contentment in the air.  Just as we were breaking out the lunch Curtis noticed what appeared to be a bees’ nest inside the cabin.  I took a peek and sure enough it was.  When we were preparing to launch I just tossed our cooler and bags into the cabin with out really looking inside.  The bees must have moved in while Bluster was stored in the driveway under tarps.  I was pretty sure the nest was abandoned but thought in prudent to wait until we were docked before and closer inspection.  Nowhere to run on a twenty foot sailboat a couple kms away from shore! 
Bravely we continued on until reaching the New Brighton public dock on Gambier Island.  We tied up and went ashore to visit the quaint general store there.  Back aboard we motored back to Gibsons Landing where we secured a berth in the marina for Bluster.  My last duty was to bundle up and crawl forward in the cabin to knock the bees’ nest into a paper bag.  As we hoped, no live bees.  I did notice Curtis was well back but had his video camera ready just in case!  Thanks for a great sailing day Jamie and Curtis.
Randy Wheating
Chebacco Bluster
thumb.PA180002 thumb.PA180008 thumb.PA180012 thumb.PA180019_edited-1 thumb.PA180024 thumb.PA180034_edited-1
***

Rigging – Skip Pahl

Hi Richard, Happy to send you some stuff. Here’s s shot of her on the day I finished the rigging.

thumb.218_1841-1 thumb.Leaving_catalpa_3 thumb.Sails_Rigged

***

Chebacco 25 Downunder – Andrew Yen

Hi Richard,

I built my first rowboat on a dare from my pre-school aged son (see: http://www.boatbuilder.com.au/images/stories/mag/smiggy.pdf ). Then my second son wanted to out-do his brother so I built him a sail-boat (a Bolger Cartopper). By then the boat building and the sailing bugs had bitten!

My dilemma was that I have three young adventurous children and my largest boat was an older 15′ trailer-sailer. I needed a bigger boat, a versatile trailerable boat with a shallow draft, occasional accommodation for five, easy to sail, good looking – and I wanted to build it. Over years of study I kept coming back to the Chebacco design. I like the look of the lapstrake version. But I had reservations about 20′. While much bigger than my current trailer-sailer I wondered if a growing family of five would find it too cramped.

This logically lead to a serious study of the Chebacco 25.

There were a number of down sides:

  • As far as I can tell only one has been built and that one was highly modified.
  • Phil wasn’t going to be around to give advice.
  • The design had not grown and progressed like the 20′ version has over the years.

But on the up side it was light for its size, small enough to tow behind my 4WD but with generous cockpit accommodation. And it was attractive. It has that Chebacco lineage.

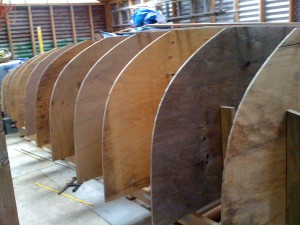
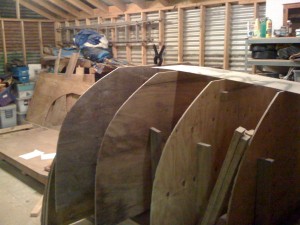
Six months ago I started using the offsets in Boats With An Open Mind to mark and cut out the moulds from some scrap ply I had. Cost so far $0.

Then I made a building frame from left over timber from a construction project my company was working on. Cost so far $0.

Then I put it all together and it started looking like it might be a boat some day. Cost so far $0.

I had a decision to make – my investment so far had been about two months of evenings in the shed. This is the point where I was going to have to spend money. Susanne Altenburger wrote to me offering plans and building details as I was pondering whether to commit or not. She suggested that I could adapt the lessons learnt on the Chebacco 20 to the Chebacco 25 and gave me some clues as to how.

That did it. I realized that I had been committed since I first saw the design in BWAOM.

I have now scarfed the bottom and fitted a modified sternpost/rudder-stock housing. This rudder stock housing will accommodate a version of the Chebacco RD’s balanced rudder design (see Ben Ho’s description on Chebacco.com).

Iain Oughtred’s book on plywood clinker construction has been very helpful as I work out how all the part will fit together. Attached are some photos. Sorry that it is hard to stand back and take good photos when there is the frame of a 25′ boat in you 28′ shed! I will keep you updated as I make progress, or you can follow progress on a website my mate has started putting together http://sites.google.com/site/warrandytewoodenboat/Warrandyte-Wooden-Boats

Regards,

Andrew Yen Victoria, Australia

photos_004 Chebacco_25_064 Chebacco_25_034

***

MY CHEBACCO AFTER LAUNCHING – Unknown author

(The hole in the bottom of the boat)

Launching went well and the mast was easily stepped using the mast slot. She floated well and looked good.

Then, WATER! But not where I wanted it: When my friend Pete and I sailed her away from the dock for the first time, water started coming up the rudder shaft and making its way down toward the cockpit. We didn’t notice it at first because we were enjoying the quiet sail and looking at the sail to check the shape and so on.

When I built the after-deck/rudder post support I epoxied one side but left the other side open so that I could check what I was doing when I installed the rudder shaft. I had drilled a hole to accommodate a two inch post as shown in the plans and built the rudder post box support to that size shaft but obtained and used a solid brass shaft a little more than one inch in diameter. Then when I installed the last side of the rudder post box I was not careful in sealing it- I figured I would like access to check on things. So while the rudder shaft surroundings were rugged they were not waterproof.

Pete and I removed the mizzen mast and partner, then the “after deck” and removed the side of the after deck support. I applied 5200 caulking as much as possible and had trouble free sailing after that. Until…

I borrowed a 5 hp outboard and mounted it so I could see if it would be enough to push the Chebacco against the wind and tide. Alas, the weight of the motor lowered the waterline at the rudder post hole and the forward motion of the boat combined to bring water aboard at such a rate that I had to pump continually while we motored back to the mooring. So the 5200 didn’t solve the problem completely. I was surprised at the amount of water that came aboard.

When Hurricane Ophelia threatened heavy rain I chose to haul the boat rather than worry about the rain settling the boat low enough to bring more water aboard.

Back on land I removed, again, the mizzen partner, the after deck, and pried off the still removable side. I know water molecules are very small, and there are lots of them (says Avogadro), but I was amazed by the flow of water into the boat.

I removed the rudder completely and studied the box that enclosed the rudder post. There were no obvious voids.

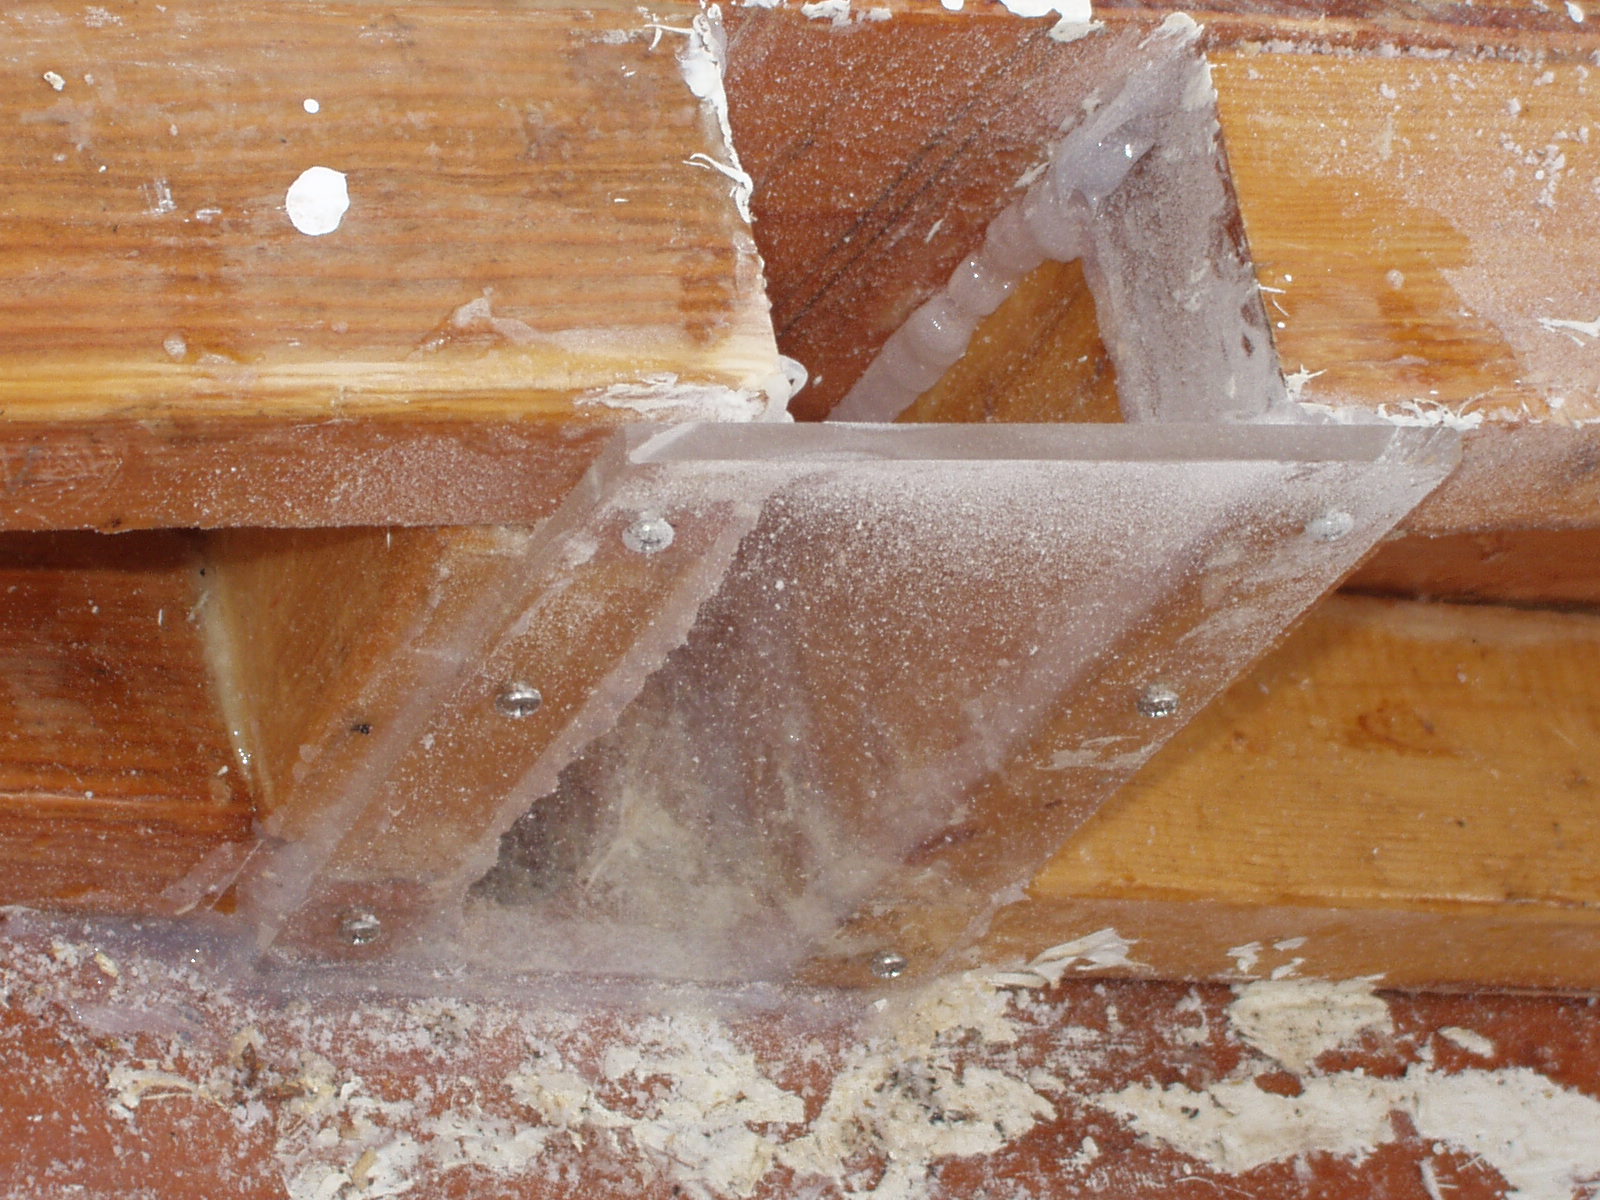
I temporarily stuck a piece of thin transparent acrylic over the rudder post box with some sticky window caulking stuff and covered the hole in the bottom of the boat making, in effect, a small but columnar aquarium. When I filled it with water the water level quickly dropped, leaking around the caulking.

I found a thicker piece of Plexiglas, bought a tube of 100% silicone caulking and scraped the gunk from experiment number one. I drilled six holes to screw the plexi to the frame, applied the silicone as carefully as possible and attached the plastic with screws. I waited overnight. I dumped more water into my tall thin aquarium-like rudder box and it seemed that I was in business. So it’s winter now in New England and in the Spring I’ll do another check. My current plan is to leave the Plexiglass in place since the rest of the after deck support is very strong. It is very ugly to look at because I used 5200 while the boat was still in the water and I got it all over the place. Also my woodworking skills are workboat level at best. This whole area is covered, though, by the afterdeck.

Moral: seal that rudder box well.

OLYMPUS DIGITAL CAMERA

OLYMPUS DIGITAL CAMERA

She was in the water for only about three weeks and I never fully tested her but I had a list of things to attend to. (I used the few days after launching to make a list of adjustments.) She sails nicely in next to zero wind but I have not yet sailed her with a reef. She has a neutral helm in light wind but rounded up quickly in small gusts. I don’t know how much weather helm she’ll have and won’t know till next spring because I hauled her two days before hurricane Ophelia was scheduled to perhaps dump rain on us.

OLYMPUS DIGITAL CAMERA

***

Notes on making the mast for my Chebacco. – another unknown author

I’m sure many will find fault with what I’ve done but I had a good time with this project.

I needed stock for a nineteen foot mast, four inches around. Some others have had access to good stock from old buildings (or perhaps even trees!) but I did not.

I probably should have explored using construction staging planks but it was too late, I had already purchased clear pine at the suggestion of the guy who was helping me with the project. I sanded bevels for scarfs, imperfectly, (I had considered using a plane but thought I could sand them better- now I’m not so sure). I glued the scarfs with epoxy to get enough length – I made six long planks out of twelve shorter ones. I then epoxied three sets of two, and finally epoxied the pairs together to make the full blank.

OLYMPUS DIGITAL CAMERA

I had access to a very large floor-model power planer so we planed the blank square. It looked great!

OLYMPUS DIGITAL CAMERA

It was quite straight and smooth.

The plans showed a taper for the last few feet of the mast so marks were made on all sides of the blank. Then a straight edge was used to mark the taper on all sides. I was a little afraid to use a power planer at first, so a hand-held plane was used to remove stock on the first side. This was a real workout, even with a sharp tool, but it was quite satisfying. However, I tried a hand held power planer on the remaining sides and found that I could control the removal quite well and the results were probably better with the power tool. Once the taper was cut on all sides, both ends, the stock was ready for 8 siding.

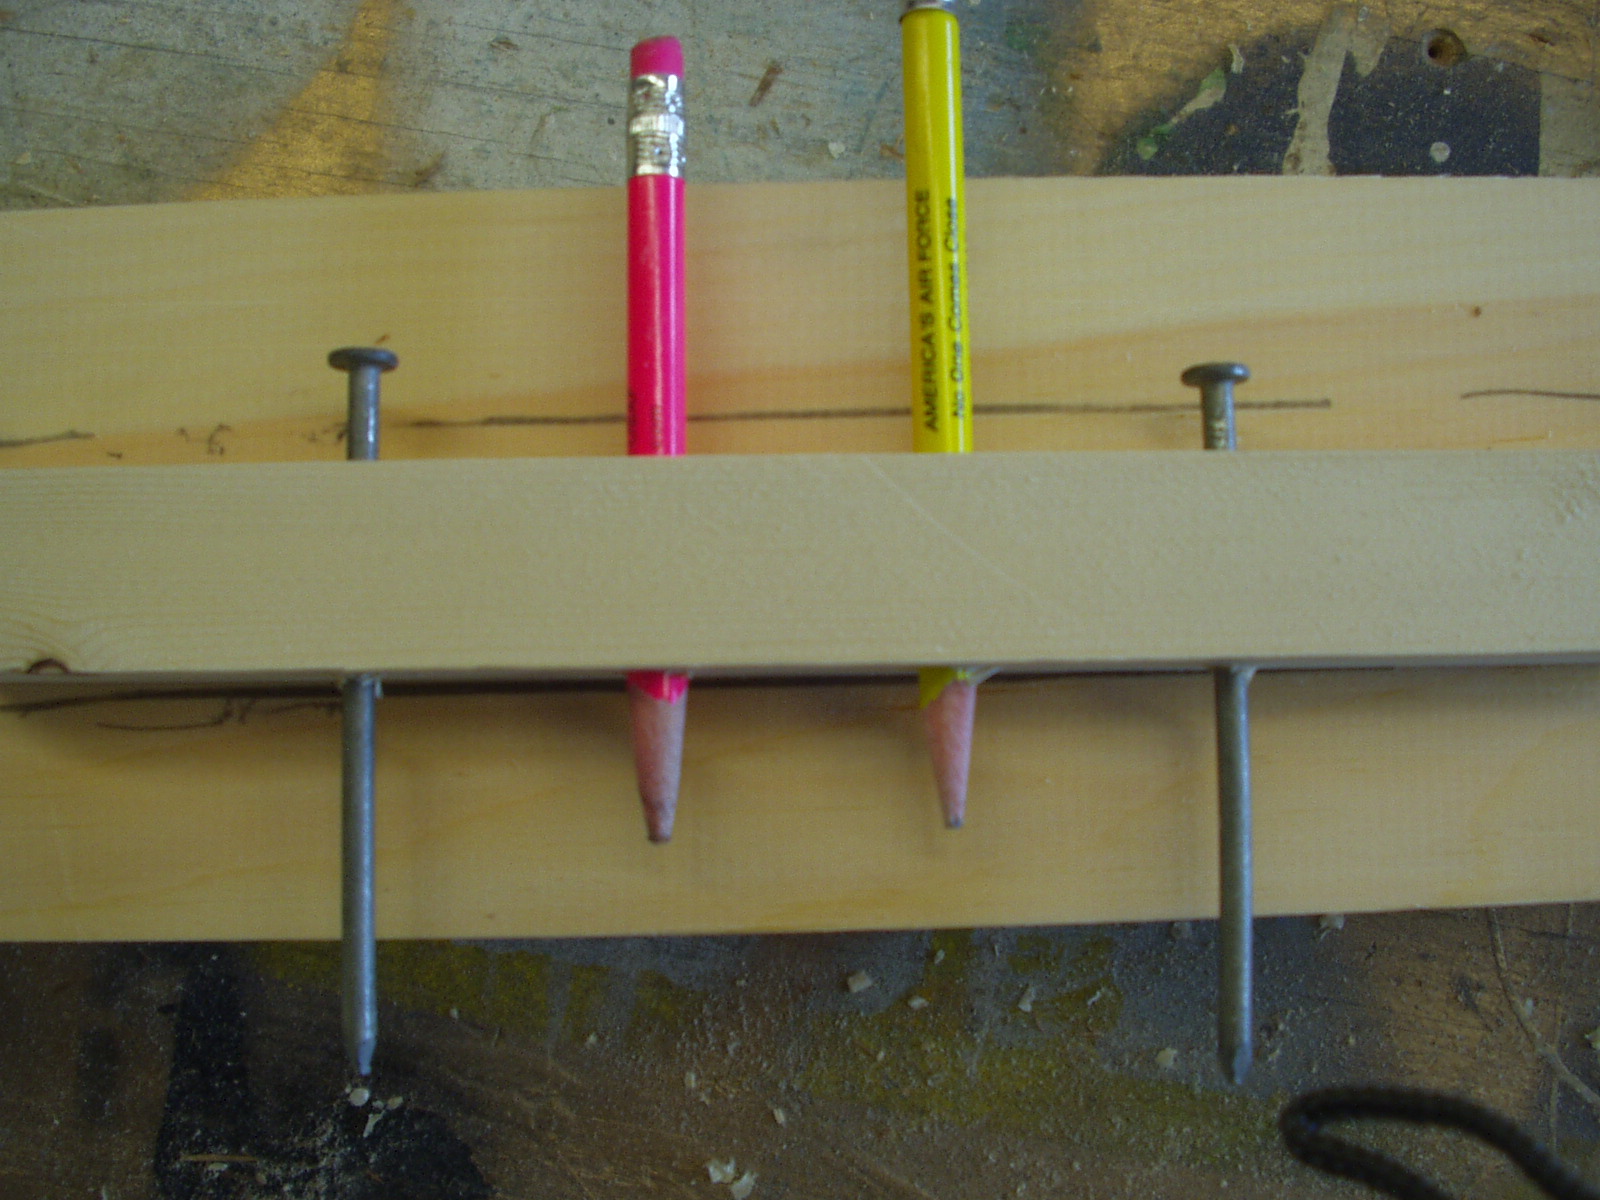
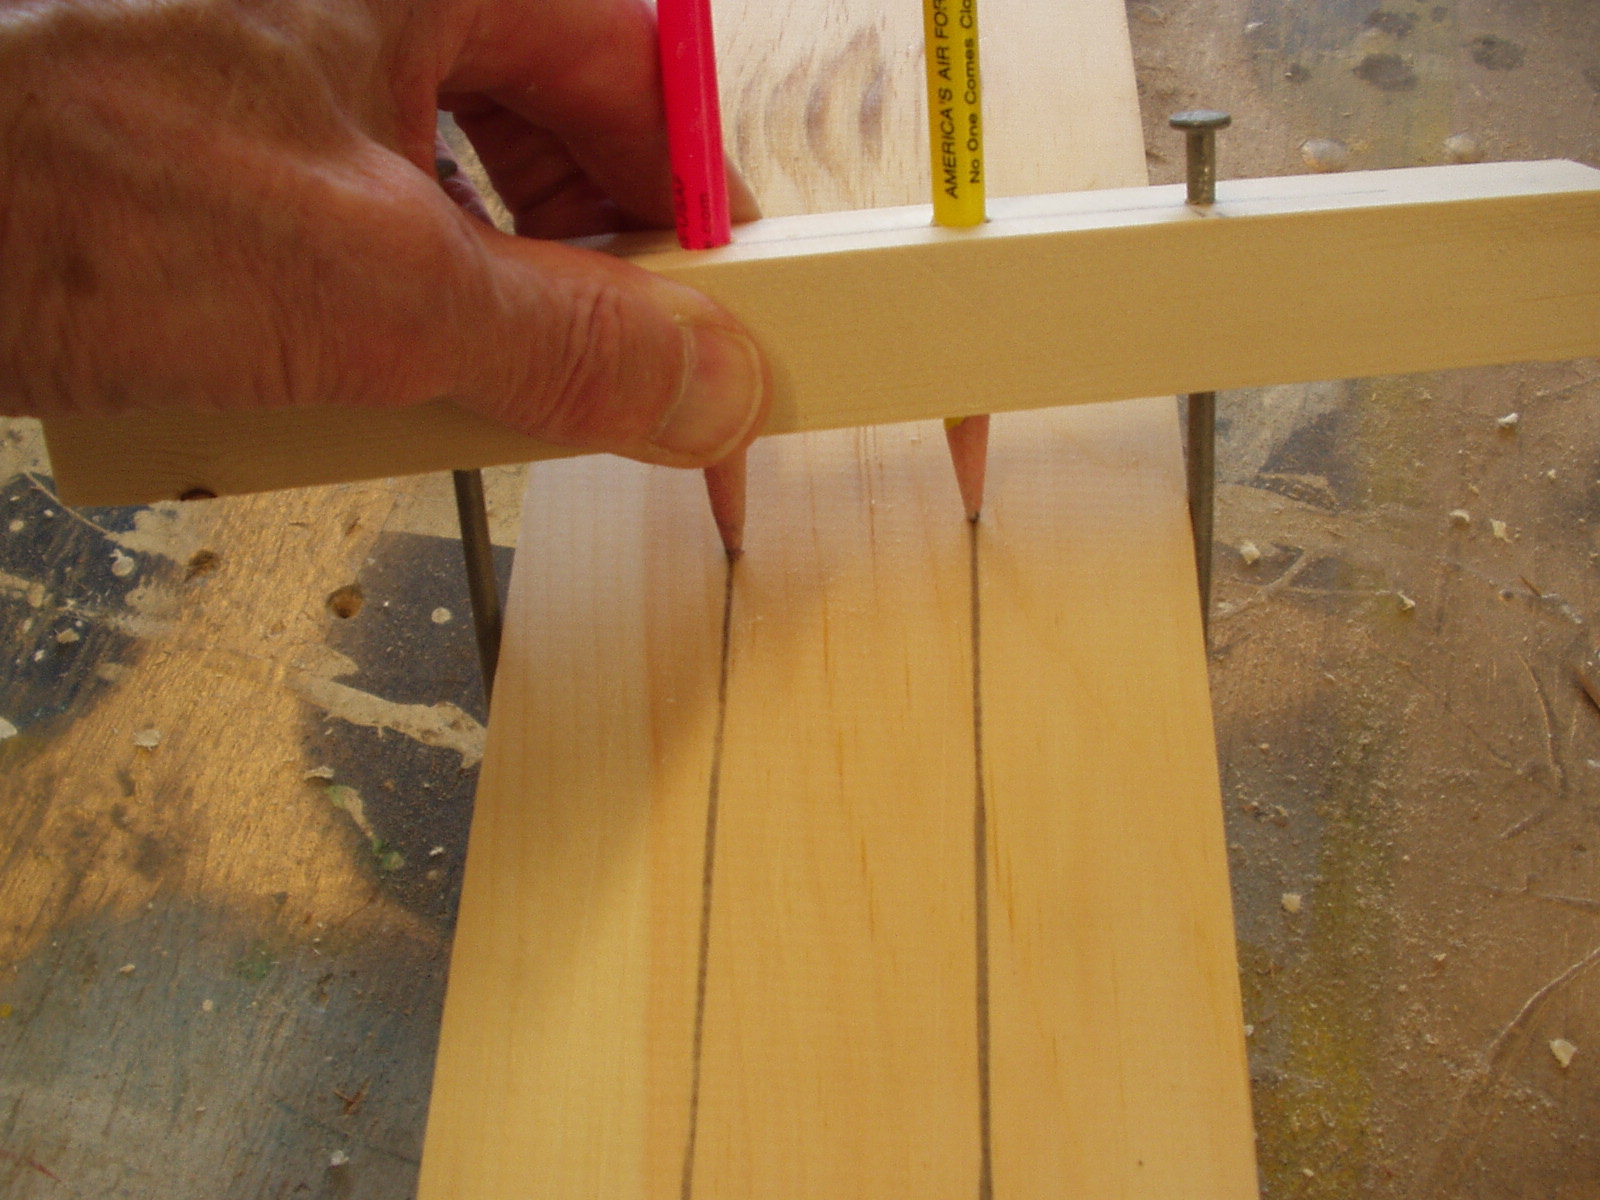
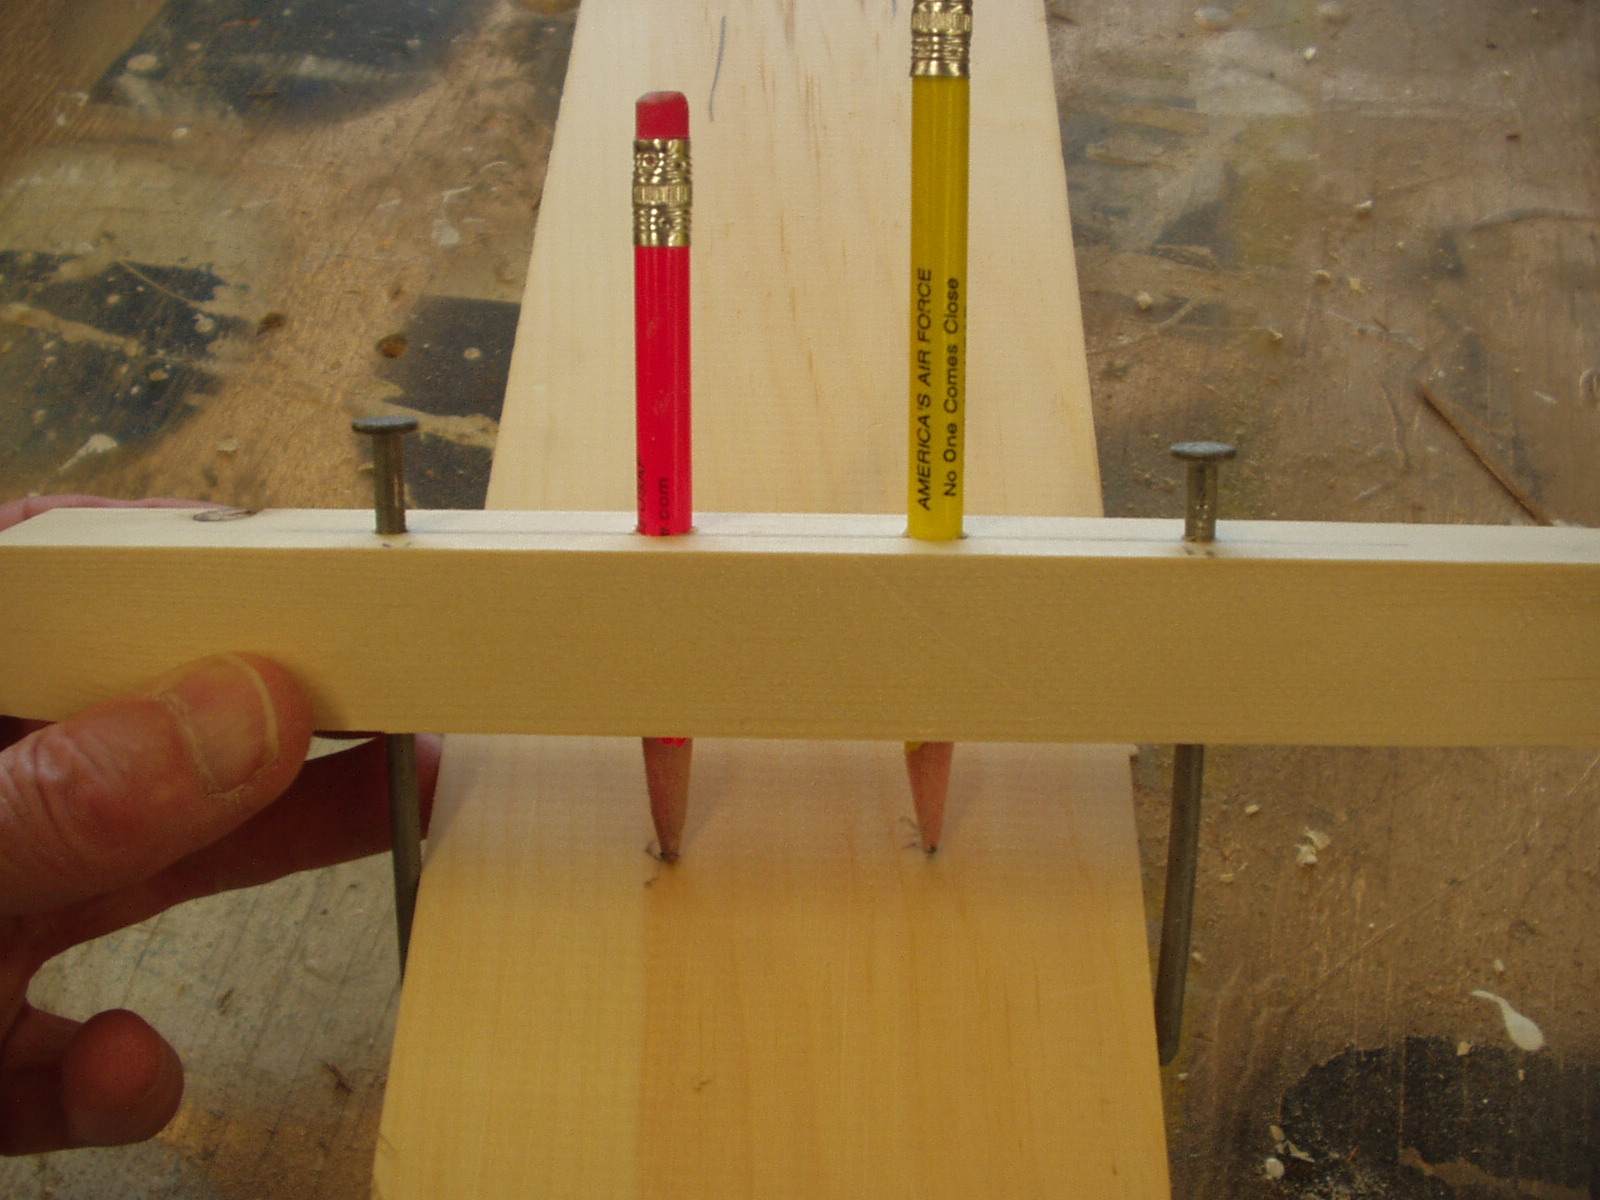
The jig for 8 siding is easy to make. I cut a stick about an inch square from a scrap of 2×4. (I wanted enough thickness to hold the pencils without wobbling). I drilled holes for nails positioned at the outer edge of the mast blank. The holes were slightly smaller than the nails to grip them tightly. I then divided the distance between the nails (distance between the sides of the mast) into thirds and drilled holes to grip two pencils 1/3 and 2/3 of the distance between the nail holes (nails not inserted yet). I hammered in the nails which extend down the sides of the mast blank. I pushed the pencils into the jig so that the tips showed enough to make marks.

OLYMPUS DIGITAL CAMERA

The jig moves along the blank, and when the blank tapers toward the tip the jig slides along at an angle and continues to make nice even divisions.

OLYMPUS DIGITAL CAMERA

OLYMPUS DIGITAL CAMERA

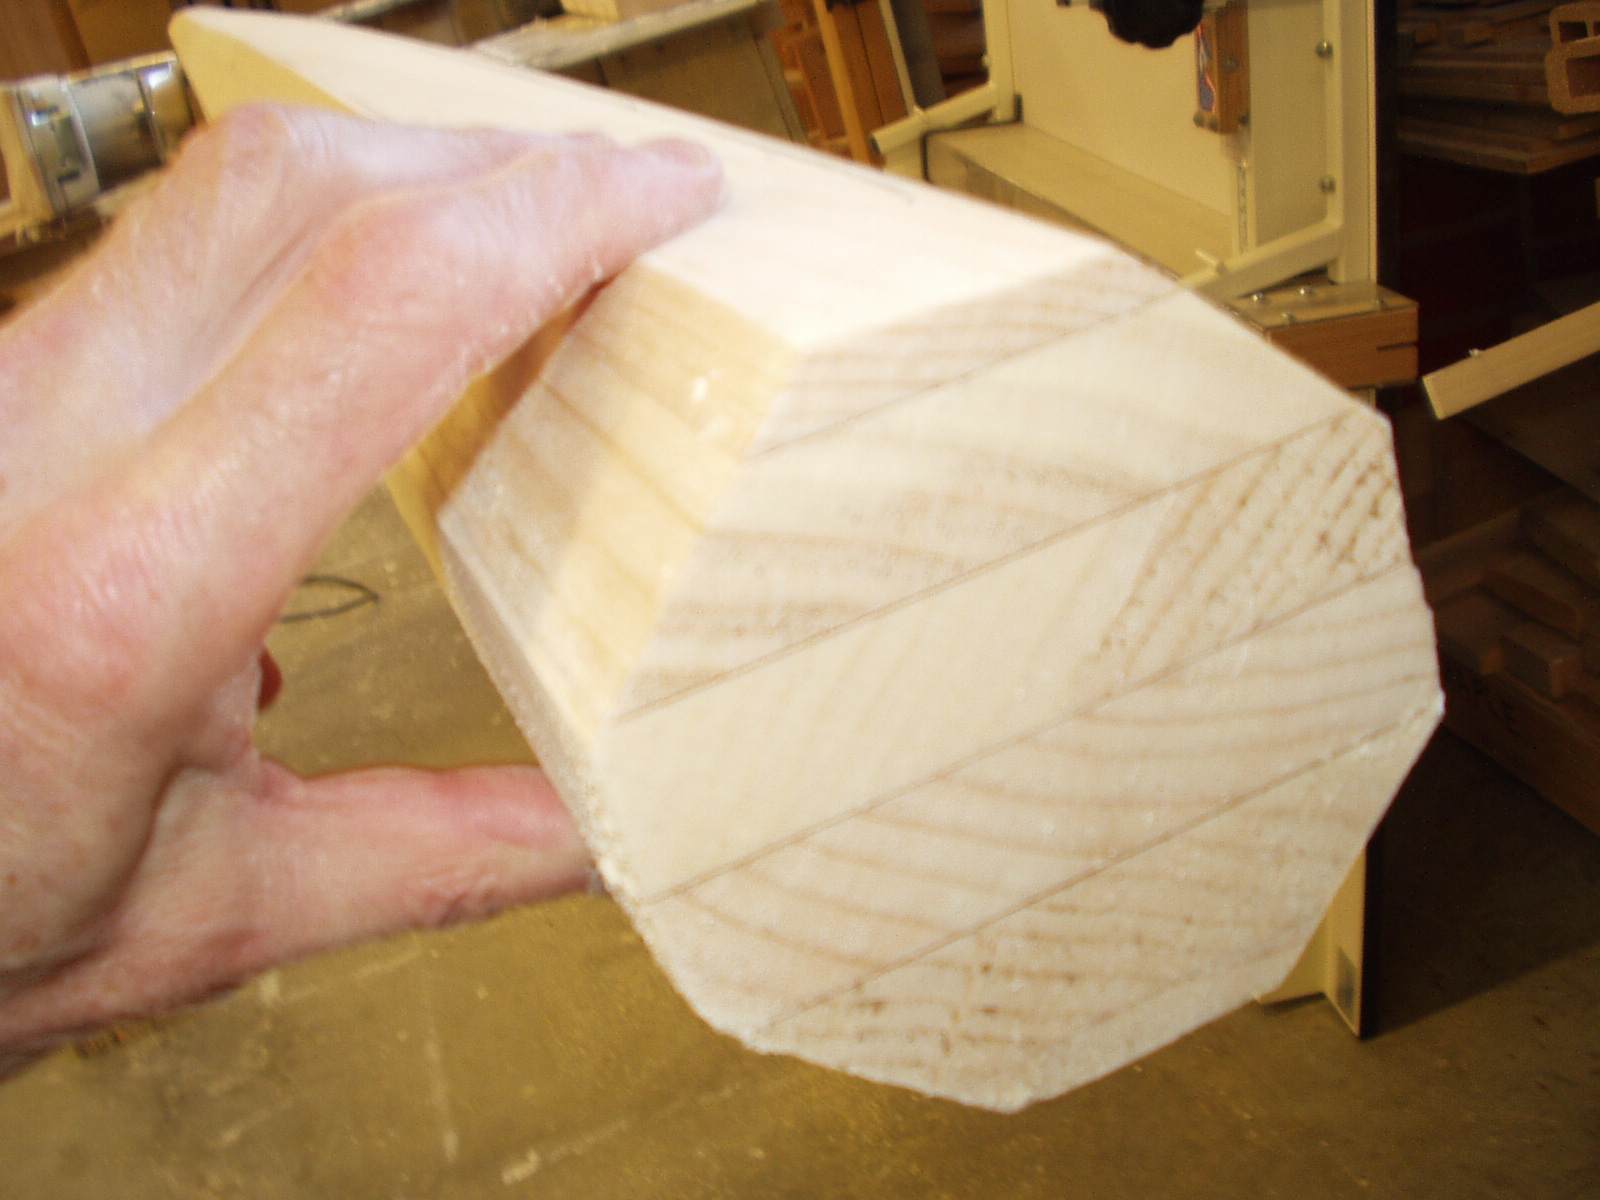
The hand held power plane was again used to remove the four corners down to the marks. Again I found the tool quite easy to control and I was able to get reasonably close to the marks. I was very happy because it looked like a mast (to me anyway). I decided I liked the hard sided look so I am not going to 16 sides and round. I’m just going to soften the hard edges leave it as is.

OLYMPUS DIGITAL CAMERA

Chebacco News 50

News, questions, and boats for sale.

News:

Been a busy summer for me, and apparently for everyone else as well.  The last couple of months it’s just been too hot to go sailing, though I may make it out today.

Not a whole lot of contributions this issue, but the few we have are very good. Enjoy.

Chebacco Richard

Questions:

Chebacco’s for sale:

***

A Summer of Boating – Richard Spelling

In preparation for the much anticipated messabout in Port Lavaca, I decided it would not necessarily be a bad idea to check the boat and trailer out, before I towed them 1200 miles.

Matagorda Bay is a huge body of water, at least when compared to most inlandlakes, with about a 10 mile fetch for the prevailing wind to push up waves.

Anticipating larger waves on the trip than I was used to, I decided to give the boat a workout at the only local lake that even approaches the conditions in Matagorda Bay. Oolagah, north of Tulsa, has about a 10 mile fetch running north-south, and is famous in the area for good sailing. On the morning of the Oolagah trip, the weather man was predicting light winds, but I decided I would ignore him and go anyway.

When I got there the wind was absolutely perfect for the trial, a steady 14 knots directly from the north, right down the length of the lake. I have a hard time judging wave size, but it was rough enough for the flat bottom of the boat to drop off about every third wave. I sailed to windward for about 4 hours, going the 10 miles or so to the hiway bridge on the other end of Oolagah, slamming and pounding and splashing the whole way. Much fun.

While doing this, I experimented with sheet to tiller self steering systems for the Chebacco. I have reservations about using them on an unballasted boat, but I tried anyway. Not much success, the sheet didn’t want to move the tiller, even though I’d spent hours making sure it turned freely. Finally connected a bungee to both sides (see pic), and that worked, after a fashion. When the boat fell off, the hydrodynamic pressure on the rudder would push the tiller over, and the boat would head up. When it headed up too much, the bungees would pull the tiller over the other way, and the boat would head down. This setup maintained 4-4.5 knots for hours on end. While I could have sailed a bit faster by hand, I enjoyed sitting there and watching the tiller move on its own, relaxing, and drinking Budweiser.

tn_P1010003 tn_P1010007 tn_P1010008

The run back to the ramp was quite fun, and the boat got bounced around by the 2ft or so of chop. Enough chop that I got used to it, and built up more confidence in the boat– Which was kind of the whole reason for going out…

tn_P1010016 tn_P1010013 tn_P1010012

The GPS came in pretty handy, too, as I wasn’t familiar with this lake at all, and would have taken a couple wrong turns without it.

Pulling the boat out, the winch post on the trailer snapped at my weld… one of these days I’m going to learn how to do that right. Anyway, was able to get the boat back on by bracing the winch with some wood, and rewelded it when I got back to the house. Another good reason to take the boat and trailer on a “trial” sail, I guess.

Part of the trip prep was to see how well the wife’s mini van pulled the boat, to make sure we wouldn’t have any problems taking the van to Texas. I pulled it to Pryor with the F350, and then we swapped tow vehicles and towed it to Grand Lake, to meet a friend of the family.

The van towed and launched the boat just fine. We sailed around a bit in light air, and got a couple of admiring comments from people in quarter million dollar boats, then headed back to the ramp.

The van pulled the boat out just fine, but after I got out to make sure the boat was sitting right on the trailer, I couldn’t get back into the van! I must have hit the lock button or something when I got out. So, the van is sitting there blocking the ramp, with the trailer half in and half out of the water, engine running, and all doors locked. How annoying.

Mique, my wife’s friend, drove her back to the house to get the spare key, and I had to sit there and explain to everyone who wanted to use the ramp that they couldn’t, and why… The most generous comment I got was “It happens to the best of us!”

The trip to Lavaca was uneventful, with the exception of the three or so times I had to pull out the GPS to verify where we were. Some of the road signs in Texas are problematic…

At the last gas stop, in Port Lavaca itself, there was a smaller production sailboat and a guy with a British accent there. (Cortez 16, Noel Nicholls, ed) The wife was curious, so I sent her over to ask directions. Not because I couldn’t find the place (we had the GPS), but so she could talk to the guy. ( Note from Pat –He neglects to mention I warned him that he had to be nice to people with plastic boat because not everyone is privileged enough to have a wooden boat!)

Noel and another fella were there setting up their boats when we got to the ramp. I pulled in behind them, setup Schoedinger, and pulled around them to the ramp… while they stood there with open mouths…

As I sail up to the van and our chosen pagoda, some guy on a huge production boat says “Hi, Richard”. Hey, I recognize that voice! It’s Tom Cole, down from Texoma, with his Shearwater 28, the replacement for his Micro 19.

While Tom is setting up to take me for a ride in his new boat, a container ship comes into port. I grab the camera and start taking pictures, pretty neat, it passes really close to the beach…

tn_P1010002 tn_P1010003 tn_P1010004 tn_P1010005 tn_P1010006 tn_P1010007 tn_P1010008 tn_P1010011 tn_P1010014

Hey, is that a wake coming?

tn_P1010015 tn_P1010016 tn_P1010017

Well, shit.

tn_P1010018 tn_P1010019 tn_P1010020 tn_P1010021 tn_P1010022

No damage, but Pat says “After what I have just seen, I think my laptop will be safer in the van”

About the time for the Patagonia raid, Tom, George and I sailed over to Keller Bay to recon the area. Didn’t find a perfect spot, but the ocean side of the bay seemed to be doable. A very organic spot, with mussel clusters in the water, reeds in the salt marsh, etc. Very pretty, very nice. Then the sun set.

tn_P1010026 tn_P1010027 tn_P1010028 tn_P1010029 tn_P1010032 tn_P1010033 tn_P1010034 tn_P1010035 tn_P1010036 tn_P1010037 tn_P1010038 tn_P1010039 tn_P1010040 tn_P1010041

One thing I didn’t consider, of course, was that “organic”, and “marsh”, mean mosquitoes. While not any bigger than the variety in Oklahoma, they certainly were more numerous… And they thought that the inside of the windows in Schroedinger was a perfect place to spend the night.

Having been warned, we had netting to sleep under. However, they seemed to be getting through it. While this was probably just a combination of my imagination, the itch from the salt from the water, etc, it was enough to keep Alana and I up, which kept everyone else up. Finally, Pat says “Take me to a hotel”.(Note from Pat— Richard gave in FIRST. This was his trip and I was bound and determine to tough it out. I went outside and wrapped myself in mosquito netting, folded myself up and laid with my face over the side of the boat where it was cool. It really wasn’t all that bad for me, but there were some hot and itchy people complaining all night. I laid there thinking things like.. “I wonder how much he values his marriage” and “I wonder how Richard could get home if I just get in the van and leave.” Fortunately, he is a man that is smart enough to know that if he was miserable, I was even more miserable. He did suggest that we sleep on the beach but I vetoed that and paid for the hotel and then refused to camp the rest of the weekend. He was secretly relieved to come back at night to a shower and a dry, comfortable bed.)

Here, of course, is where the GPS really came in handy. Pitch black and an unfamiliar shoreline, there was basically no way we could have headed back without the GPS. We motored back to the beach, packed the boat up, and rented a hotel room.

Seeing as one of the things this trip was to do is see if I could take everyone on the boat on a trip, I would have to consider it a failure in that respect.

The next day was the messabout, which was quite fun. I even enjoyed being sociable, and seeing all the boats. I got to sail Tom’s Shearwater, and Chuck’s Ladybug, the latter bringing back all kinds of memories. (Note from Pat –Richard did seem to enjoy himself and the shrimp Mary cooked and the boudin that Tom brought made the meal memorable for me. The boxed wine helped with the whole trip as well, LOL)

Later in the afternoon I made the perfect anchoring maneuver– Almost. I sailed up to the beach, raised the board, and let the sheet out. Then I threw the bow anchor over the stern when the boat was about 150 feet from shore. It spooled out, dragged a bit, and set at a perfect distance to spin the boat around. When the stern of the boat was spun around it was only 10 feet from shore, so I threw the stern anchor onto the beach and headed up front to take in the slack on the bow anchor. Perfect. Except I forgot to cleat off the stern anchor, so the rope spooled out and went in the drink!

During the messabout, someone commented on the name of my boat, and that only about 20% of the people out there would get the joke. I told him that his figures were way off, that more like 2% got it…

That afternoon, I had another chance to ride a big wake. Here comes that same ship, dragging another wake behind it! I hop in my boat, and turn it into the wave, pulling on the well set anchor for five minutes as NOTHING happens. No wave. No wake. Not even a ripple. Go figure.

tn_P1010042 tn_P1010043 tn_P1010044 tn_P1010045 tn_P1010046 tn_P1010047 tn_P1010048

The trip back was relatively uneventful, we stopped and for lunch at a rest area, and met Mom for dinner when we passed her place.

The Midwest Messabout was only three weeks after Port Lavaca. Having learned my lesson from Lavaca, I took only one person with me to Rend lake. I had originally planned on driving there Thursday, but the transmission on my Tacoma went out and I spent Thursday putting a new one mostly in. Friday, Alana and I drove down in the spare truck.

It was almost dark when we launched, and the sun had set by the time we got to the messabout area. I visit for a bit, then proceed to set the anchors so we could get some sleep, so we could get up early in the morning.

Then, this guy comes over and says “Will you help me go find my bird?” Thinking I had misheard him, I reply “Excuse me?” “My pet parrot got loose, and it flew over the lake. Can we take your boat out and look for it?”

Well, how could I turn that down? So we headed out into the failing light, with this guy and his daughter standing in the forward hatch saying “Sweet Pea. Here Sweet Pea.”…

I would run the motor for a bit to build up some speed, then we would drift and they would call for their bird. Eventually, it was pitch dark, and we had found no bird, so we headed back. All this time I’m thinking that Sweet Pea is probably over the horizon singing “I’m Free! I’m Free!” …

After we got the anchors set and went to bed, it started to rain and the wind picked up. The wind was coming almost directly from across the lake, and pulling on the bow anchor. I worried about it pulling out, as the boat was bouncing around quite a bit, and the anchor was holding us only about 20 feet from a bunch of very nice wooden boats on the beach.

Finally, I realized: 1) I had set it going about 3 knots and it had stopped the boat dead. 2) I had about 100 feet of rode out, and the water was only about 10 feet deep, if that 3) And finally, if it did break free I would probably ground out before I got close enough to the other boats to damage them.

So I finally got to sleep. (after I changed into dry clothes. Amazing how being dry, snug, and comfortable helps you sleep, no?) Where I dreamed I was awake and worried about the anchor pulling out… Don’t you hate recursive dreams? So, if you spend all night asleep, dreaming you are awake, does that count as sleep?

The next day was quite fun, I got to meet lots of interesting people, then immediately forget their names…

tn_P1010020 tn_P1010021 tn_P1010022 tn_P1010023

There was even a Light Schooner there! Which I later rescued… Rob Rohde-Szudy launched his light Schooner on it’s maiden voyage. With his wife, two SMALL kids, and one BIG dog. We saw them paddling it out of the launch cove.. Then we saw the storm coming… I helped Steve Lewis get the motor on his power skiff, and he headed out to give them a tow. Then I got to looking at the angle his boat was pulling, and I thought about the people who died on Keystone in a storm, in a boat bigger than Steve’s… So I headed to mine and started pulling the anchors. Alana decided that she had to go with me, and came running. I told her to stay on shore, but she pretended not to hear me. I wasn’t worried for myself, so there was no reason to not let her go, so I threw her a life jacket and we headed out.

The wind was blowing 15-20 knots, and the waves had kicked up to about 18 inches. Not bad at all, 2 of the last 4 times I had been out had been in worse water, though not in pouring rain.

By the time I got out there, Steve was already pulling them back, but the nose of his little skiff was up in the air about three feet, and the transom was below some of the waves, so he had no issues with handing off to me.

I cleated the tow rope to the stern anchor cleat, and we headed back in. I had to signal to Rob to straiten out, as his boat was crabbing sideways in the water and I was worried about us digging one of those hard chines into a wave and capsizing his boat.

After it calmed down a bit, I snapped a picture of him under tow.

tn_P1010027 tn_P1010028 tn_P1010029

When we got them close to the shore, the dog decided that he had had enough and abandoned ship. Alana was quite impressed with the whole operation, and I have to say I had a blast doing it.

Checked out a bunch of other boats, and enjoyed chatting with everyone. Was especially impressed by Dave Seaburg’s D4, which even had a homemade roller furling system.. Almost made me want to put a bowsprit on the Chebacco, so I could build my own roller furling system!

On the long drive back, I decided I’m going to sell the F350. I got passed one to many times by F150’s towing 30ft travel trailers, going uphill at 80 mph! I’m thinking a diesel 4×4 with an extended cab.

Had a chance to weigh the truck and trailer on some 18 wheeler scales at one of the gas stops. Truck weighs 6750 lbs, and the trailer weighed in at 3220 lbs. With 300 pounds of the trailer on the tongue, I figure the trailer and boat weighs in right at 3500lb. Say 700lb for the trailer, and 2800lb for the boat. About 1000lb heavier than I had figured, but still within the towing capacity of my vehicles (Note from Pat – which means that the boat is still small enough to be towed by the Volvo convertible I am drooling for.)

Hope you enjoyed the pictures. Laters.

***

City Centre Sailing 2004 – Richard Elkan

Hello Richard

Jamie Orr dropped me an email saying you were looking for Chebacco material and suggested I got of my a**e and wrote something. So here it is, sent to two email addresses as Jamie wasn’t sure which one I could get though to!  Thanks for all your efforts in keeping us Chebacconists
in touch.  Richard Elkan

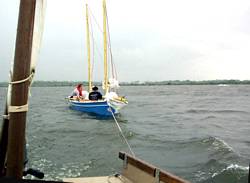
I live in London and I’d like to take you on a Chebacco trip down the London River, if Richard will permit me. Perhaps you are wondering what the London River is? Well most people would call it the River Thames but the traditional name for the Tidal Reaches of the Thames is the London River and that’s where we are going. We are voyaging on Sylvester a wonderful Chebacco, built by Bill Samson and purchased from him, by myself in 2003. We will travel from Sylvester’s mooring at
Shadwell, which is about a mile downstream from Tower Bridge to Gravesend about 25 miles further downstream, a five hour journey, with the ebb tide.

tn_bridge

So it’s a twenty five minute drive from my house near Highgate to Shadwell. Sylvester is waiting patiently on her mooring, but to get her out there was quite an event and presents a view of a Chebacco that most owners will never have seen and yes my heart was in my mouth as one thing you learn very quickly on the London River, is that you if you want to go anywhere, and more importantly get back, you sail with the tide. A third hour Spring tide will run at 6 knots and my 3hp Yamaha just doesn’t cut it against this, if the wind drops! So Gravesend it is!  I have done this trip there and back in a single day, I have also done it single handed . But I must confess this trip is a
compilation of many individual trips, so if the sky changes from blue to black, the reason is the pictures might have been taken 6 months apart and if Sylvester changes from an all White to Cream Hull and Fawn Cockpit, it’s for the same reason. So professional continuity artists,
look away now!

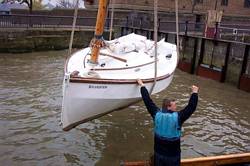
700 kilos of Chebacco was craned from the Quayside to the water. ( If your wondering how much this cost, the answer is nothing, as the crane was booked for a morning and only had to lift a workboat and Drascombe longboat in, Sylvester just kind of slipped in alongside.)


What goes up………

tn_Sylvester_on_Crane tn_Sylvester_on_Crane_2

Must come down.      Nice to have helpful friends!!!!!!!

So here we are at the mooring below (photo courtesy of Jamie Orr) rigging up and getting ready for the off. In the background is Canary Wharf, the new East End of London, situated on the Isle of Dogs, so called as this was where King Henry VIII kept his hunting dogs. The dock entrance (shown above) is to the old Shadwell basin, famous in our family as being the place where my late father in law moored up in his Submarine on the occassion of the coronation of Queen Elizabeth (the 2nd that is)  See we’re almost related to royalty.

mooring3

So we rig up and cast off and head down river with the tide. As you can see the river is only about 400 yards wide here. It can be a very busy river. Most frequent are pleasure boats taking site-seers down to Greenwich or the Thames Barrier or the Hydrofoil river buses travelling at 30+ knots and completely silently at that, can be scary!!!! There are working boats too, such as tugs with waste barges in tow or the sand carriers which are small freighters. Weirdest of all is when the very big Cruise Liners come up to moor along side the Belfast or even Aircraft Carriers that come up as far as Greenwich. It is not without it’s risks. A friend of mine had his Wayfarer Dinghy moored about twenty yards from Sylvester. A tug was turning a French Warship at Shadwell and “got it wrong”. He took out my friends mast, turned him turtle and snapped the mooring chain. The harbour master saw fit to moor what was left of the dinghy to Sylvester’s transom, still up side down!!!! I was none too pleased and asked  him to remove it before the mooring dragged. One thing I have learned on the London River is that manoeuvrability is of great importance. To this end I always keep the mizzen set, even in winds up to force 6. Often on the river you may only have one chance to tack, before you run out of water and hit the embankments. So hauling in the mizzen really powers the boat through the wind and you never get caught in irons or find your tack has failed. From Shadwell to Greenwich is just under an hour and rather than any kind of chart, you just need a good street map to indicate the river side pubs, many of which we visit from the water if the river bed is exposed and the tide is flooding. Try it on the ebb and it could be six to seven hours before you can float off again. You have been warned!

tn_Grerenwich4

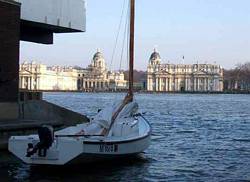
Here we are moored up at North Greenwich, on the north bank of the river. Opposite is Sir Christopher Wren”s beautiful Royal Naval Hospital in Greenwich proper. I once saw a Dolphin in this reach of the river and have seen a Seal playing around the moorings as far up as Shadwell.  Most common in the river are the eels. These are still fished by commercial fishermen, albeit on a very small scale. Delicious when smoked, disgusting when “jellied”, which I am afraid to say is the traditional East End of London delicacy. Just out of picture is the Trafalgar Tavern, a great pub to visit by boat. We leave Greenwich and carry on past the Millenium Dome and down to the Greenwich Yacht Club of which I am a rather new member. It has a great club house built on stilts out in the river. The government built this great new structure for the club when they were forced to leave their old site so that the Dome could be built. Many people will tell you that this is the only good thing to come out of the Dome fiasco. It is still unoccupied since 2001. GYC arrange for cruiser racing and it appears that Sylvester has got herself involved in a race. Here we are trying to outrun some club member’s yacht, he hasn’t a chance!!!!!!

tn_Race_1

Having acquitted ourselves reasonably well in the race (by NOT coming last!!!!!) we head back to the club house for long drinks and tall stories.


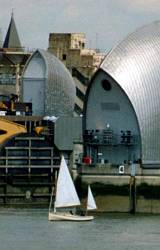
Greenwich Yacht Club is very close to the impressive Thames Barrier, that is designed to keep London safe from flooding.(photo below) It is necessary to call up the barrier control on the VHF radio and ask permission to pass through the barrier. One interesting thing I have discovered about Chebaccos is that they are invisible to radar! Stealth boats, no less!  Despite the fact that I always wait until I am within sight  of the barrier, the barrier control (call sign London VTS) always ask me where I am (they could see us if they looked out of their window), but they are glued to their radar screens. So never assume your all wooden Chebacco will be seen by other boats’ radar. They like us to motor through the barrier and I do if sailing upwind. On a run it is ok to sail through but try and beat through and you can get into a real pickle as the winds do all sorts of strange things between those weird shape pilings.

tn_Sylvester_ barrier

Once through the barrier and safely past the Woolwich Ferry, which is a free car ferry that carries around 50 cars at a time across the river the river begins to widen gently. Here I have experienced great fun with wind over tide conditions. This part of the river can kick up a real chop, especially toward the south bank. I don’t know why here particularly but you sure get a lively switch back of a ride with a spring tide against a force 4 wind. Sylvester’s flat bottom does tend to pound into the chop, causing much spray and laughter, as long as you are not the foremost crew member, who takes the brunt of the spray and keeps the rest of us dry!!!


Here is a picture of the author of this tale. The building right behind the mizzen is the Woolwich Ferry South Terminal with a ferry in dock. Level with my eyes is the Thames Barrier, we have just passed throughand the tall buildings are Canary Wharf, in the distance. Traffic from here on is limited to commercial vessels and private craft. Gone are the pleasure boats and river taxis. Still there are plenty of moored barges and other oddities to be on the watch for. We pass Fords of Dagenham, where Ford cars used to be built. It is now being transformed into a research centre for the automotive industry. The ebb sweeps us down past the moorings of Erith Yacht Club where a very Bolgeresque mini schooner is moored. (below) You can see how the nature of the river has changed. This south bank is now salt marshes and home to many birds. I always like this reach, as it is a view of the river unspoilt by the twentieth century and you can imagine the tall ships of yesteryear sailing up and down this great river.


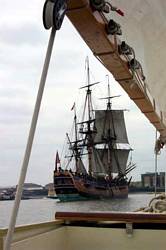
Sometimes you don’t even have to use your imagination. Sometimes they just appear, just like this one……….

tn_Endeavour_Thames_May_04_06

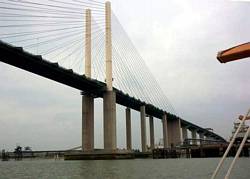
The Endeavour……… you can tell by the surroundings that Captain Cook is not on board, in this incarnation. I can tell you I got an immense shock when I turned round, whilst helming Sylvester and saw this coming up silently behind me. Still on we go and underneath the most recent of the London River Bridges, the elegant Queen Elizabeth 2nd bridge, carrying the M25 motorway over the river.


There is still a lot of industry round here and we have lost the salt marshes under petro-chemical installations. Still Greenhithe is still an interesting  village and there is plenty of maritime history, if you know where to look. Not long to go until we reach Gravesend. First we come to Tilbury a very interesting Passenger Ferry Terminal for London. Once incredibly busy but now much reduced in importance. It also the site of a seventeenth century fort, still totally intact and quite fascinating to visit. From Sylvester we view a huge Japanese cruise ship and get a cheery wave from one of her crew standing by the terminal building.


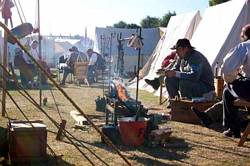
And so on to Gravesend our destination. I could show you pictures of the old town, the sailing club, the trots of pilot tugs that tow the large shipping up to the Pool of London or even Princess Pocahontas’ grave (for she is buried here) but I won’t as I haven’ got any pictures, but what I have got is a record of what actually was awaiting us on this trip………………something to appeal to our American brethren and what all good Englishmen get up to on a sunny summer weekend………..


Re-enacting the American Civil War…….what else!

tn_civil

Happy sailing to all,  Richard Elkan, London.Strange what you see from a Chebacco on the London River!  and I’m really not making this up.

Richard

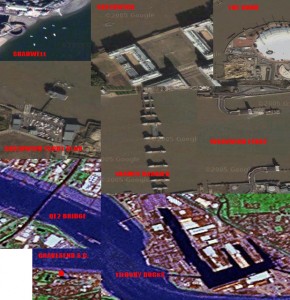
P.S. Having just discovered Google Maps, I realise you can follow the course of this trip from Shadwell to Fords of Dagenham, in high resolution satellite imagery. Shadwell is easily identified by the the seven moored boats in the river. At the time of this photograph Sylvester was not one of them! You should be able to identify the Isle of dogs (big U bend in the river) Greenwich, Greenwich Yacht Club (on the south bank), the Millenium Dome (big white circular blob) the Thames Barrier (obvious), the Woolwich Ferry (terminal on both banks) and Fords (on the north bank, just before the hi-res imagery runs out. From here we are in lo-res but you can easily make out the QE2 Bridge, Old Tilbury Docks ( a weird L shape of blue on the north bank) and finally the built up area is Gravesend.

Thanks

Richard Elkan


Landmarks

***

Chebacco Building – Marston Clough

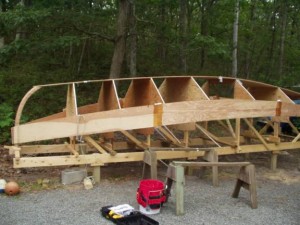
BEGINNINGS 2001

I had already built a Bolger Bobcat (Tiny Cat) to be used with a Beetle Cat mast and sail that my brother owned. That boat has served me well but some time passed and I guess I got itchy to build again. I had long admired the Chebacco, having seen the article in Wooden Boat some years ago.

So I ordered the plans and in August 2001 I bought my first pieces of plywood and started laying out some of the molds at the end of my summer vacation. I planned to build this boat mainly during summer when I wasn’t doing other things.

In the fall I bought wood for the mizzen mast and spars. With the help of a friend at the school where I taught, and with his good tools and skills, a hollow mizzen mast was built using the “birds- mouth” method as described in Wooden Boat. We both enjoyed this process, especially in January when there is little boating to be done in New England.

I ordered a set of sails from Sailrite and started sewing the mizzen during my Christmas vacation from teaching school. I used a twenty-five year old portable sewing machine from Sears and worked primarily on the kitchen and living room floor. I found the instructions and kits to be very easy to follow. It was not especially easy, however, to roll up the cloth and sew the longs seams on this small machine. Overall it was a satisfying challenge and good use of winter.

02 MORE PREP

In the summer of 2002 I continued laying out pieces such as the stem, transom and centerboard case and gluing them up. This was inside work and I like to be outside so I fished and played with my other boats. I did a little more work on the sail before school started again and then more sewing when winter set in.

2003 SETTING UP

This year I was ready to take the frame pieces out of the cellar- my goal was to have a boat-shaped skeleton set up before the ground froze.

In June I cleared space in the yard, moving some earth around to make a place large enough to fit the ladder.

My schedule for boatbuilding took a back seat when I contracted to sail as cook and seaman on a small freighter from Massachusetts to Suriname (returning with wood for real boat builders). That’s another story but it removed six weeks from my building plans.

Before I left was able to mark and cut bottom and side panels.

When I got back from my sea trip I worked hard to get boat-shaped sculpture made.

I made my ladder frame stand off the ground somewhat- partly because the ground was uneven and partly because I wanted to be able to get under reasonable easily. I ended up making sort of a bulkhead next to the frame on one side.

image002

To be honest, I found it a good challenge just to get the spacing of the frames correct from the plans. Setting up the frames on the ladder took some tinkering to get things plumb and level and fair to a batten. It was satisfying however to see the outline of the boat.

image004 image006

It took some time just to get the proper heights translated from the plans to the real thing.

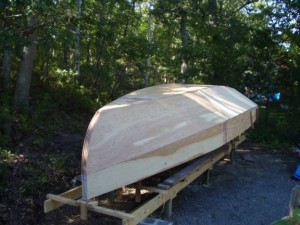
I continued by adding the stem, transom, side panels and bottom panel.

image008 image010

The bilge panels were an enormous job and even though I had been as careful as I could at each stage there were gaps that would need to be filled with generous amounts of epoxy.

image012

I fitted the centerboard soon after this shot was taken, before the bilge panels were finally fitted.

As November (2003) began I covered the boat and moved inside for the winter. The panels were epoxy tacked at this point, except for the outer layer of the bilge panel forward which was done in two layers. During the winter I finished up the mainsail, hand sewing the grommets which was a pleasant way to spend a winter evening.

2004 THE YEAR OF EPOXY

Actually the epoxy didn’t stop in 2004 but as I look at my log, from May to November, the constant word is epoxy. Cover the seams with epoxy. Fill the seams with epoxy. Epoxy this. Epoxy that. Fill, fair and sand and sand and sand.

image002

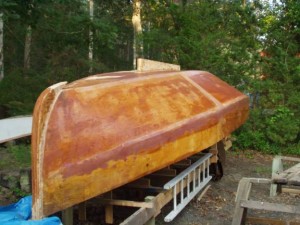
This picture shows that I glassed the hull before adding the keel pieces. In the forward section I ended up making the keel solid, laminated from construction fir. Aft of the centerboard there is a hollow plenum as shown in the plans. The ladder turned out to be useful since my frame is fairly high off the ground.

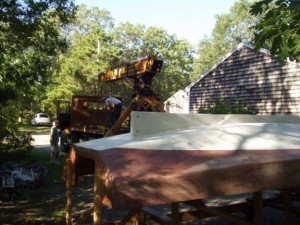
The big event of the summer was turning her over- a job made quite easy by my friend Jerry who owns boats (he’s a very good sailor) and a boom truck (from his construction business).

image004 image006 image008 image010

Now I had a large wooden bathtub and I worked through the fall both to begin the interior and decks, making sure I covered her carefully each night.

image012

Many of the pieces in this photo have not been fastened yet.

In November I closed her up completely with layers of tarps laid over a homemade frame. Despite one of the snowiest winters ever the frames and tarp worked well.

Marston Clough

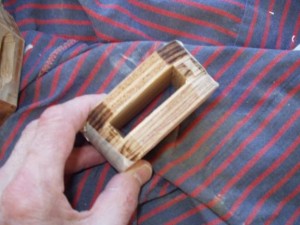
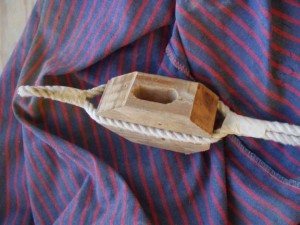
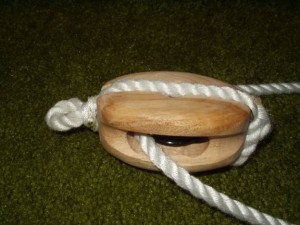
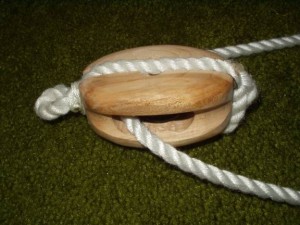
Notes on making blocks for my boat:

It was (is!) winter here in New England and I had time to work indoors on boat related projects, so I decided to try my hand at making some blocks for rigging as well as making the mast.

Some time back I had looked on the web and finally found that Dave Goodchild had fooled around with making his own blocks using plywood. I found this information atwww.boat-links.com page 37 (and even then it was hard to find). It is worth searching for.

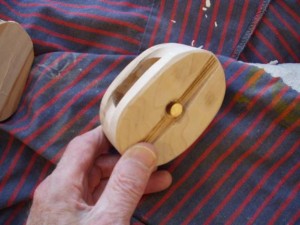
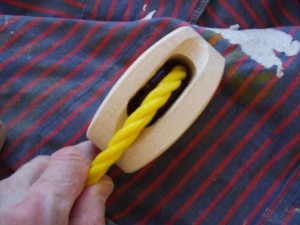
The Goodchild method uses two outside pieces of plywood for cheeks and two smaller pieces as spacers for the sheave. See my crude model.

image002

With that as a model I looked for a source of sheaves and found the Duckworks site and ordered a few of their affordable nylon sheaves. The Duckworks people were (are!) great.

My brother also found an article in Wooden Boat #41 that showed how to make a wooden block from a solid piece of wood. This is a good article. Brian Toss made a beautiful piece and I wanted to try my hand at that method even though I’m not a craftsman.

I took a chunk of 2×4 and made a crude mock-up.

image004

This mock-up is about four inches long and roughly half as wide.

Thus encouraged I bought a chunk of maple and tried to make a few blocks. I should have been a little more careful drilling out the cores because I didn’t always get the holes lined up. You need to clamp the piece to keep it from moving around.

I drilled the core first, then cut grooves into the sides for the line to go around the block, then cut the corners and started smoothing. I first tried using a bolt for the pin but opted to try some bronze rod instead. I was going to try cotter pins to hold the bronze in place but had trouble drilling it, which was just as well because a closer look at the WoodenBoat article revealed that Mr. Toss relied on the line around the block to keep the pin in place.

I bought some line and reviewed how to splice two lines together. I’ve still got five more splices to make, but I’m encouraged by the result of the first one.

image006 image008 image010 image012

***

2005 Small Boat Rendezvous – Sucia Island – Randy Wheating

image002

Bluster, Wayward Lass and Full Gallop at Fox Bay, Sucia Island

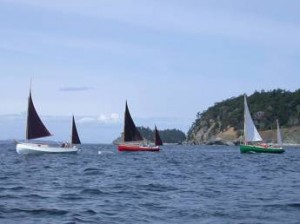
The 2005 Small Boat Rendezvous was held on Sucia Island, San Juan Islands July 8th to 11th, 2005. This second annual event attracted an assorted collection of 14 small boats from British Columbia, Washington and Oregon. Included in the group were three Chebaccos – Wayward Lass, Full Gallop and Bluster.

Jamie Orr and his father Les sailed over from Vancouver Island on Friday. I towed Bluster from our home in Port Moody (near Vancouver) to Bellingham, Washington on Saturday morning. Joining me this year was my wife, Lisa Rae Devries, and boys Jacob and Sam. At the excellent Squalicum Harbour in Bellingham we met up with Chuck Gottfried and Dean Bishop launching Full Gallop. Bluster and Full Gallop motored in tandem across Bellingham Bay to the point where we set sail for the run up Hale Passage. We eventually lost our wind and motored the remaining distance to Sucia Island. Bluster detoured slightly to check out the pretty Rolfe Cove marine park on the west end of Matia Island. Made landfall at Fox Bay around 3:00 pm. and joined the small boaters already gathered there.

image004

Jacob takes Bluster’s helm while Sam rides in the dingy, Fib

The remainder of this day and the next were spent socializing, relaxing, exploring and taking short boat trips. On Sunday the three Chebaccos practiced a synchronized routine and photo-op.

image006

Wayward Lass and Full Gallop

By noon on Monday everyone had dispersed to various take out points or in the case of Wayward Lass and Full Gallop to continue a week of exploration in the beautiful San Juan Islands.

The weather turned nasty on our return trip to Bellingham with winds gusting to 25 knots and one meter waves with whitecaps on the nose. The three and a half hour outbound trip turned into a six hour return voyage. Crew and boat performed brilliantly.

Pilot_House_2_t

Pilot House

As with the 2004 Small Boat Rendezvous this was great fun and we all look forward to this or similar events in the future. Many thanks to Jamie Orr for all his work making this happen.

Note: http://members.shaw.ca/jamie.orr/index.htm is the web site for e interested in more information and photos.

Randy Wheating

Port Moody, BC

Chebacco News 49

News, questions, and boats for sale.

News:

Well, the long anticipated calendar is a bust. My preferred publisher was having health and technology issues. I may still do one using cafe press, but since I only received one order for the one that didn’t work, a calendar really isn’t hight on the priority list of things to do. Been kind of quite, only took the boat out once since the last issue. You would think that being unemployed would give me plenty of time to do that, but for some reason it didn’t work out that way. I plan on going to a couple of messabouts this summer, I’ll take pictures and write something up about them.

Let’s see, we had vandals posting all kinds of php based scripts in the registry, taking advantage of the facility that was there to allow you to post pictures. I’ve locked down the registry, so if you want to edit your entries, or add a new one, just send me an email with the relevant details. You can also send a picture, if you want, and I’ll include it.

Speaking of email, I was getting 300+ spams, and at least 20 trojans, a day, do I’m bouncing all email sent to my old email address. I posted the new email address on this site, but it wasn’t a couple of days before I started getting spam and worms again. I believe they scan the web and dig email addresses out of webpages. Working on that theory, I have implemented a script based form to send me email. Sorry for the inconvenience. If you are wanting to send in an article for publication, just send me an email with the form and I’ll tell you my direct email address.

We have ten articles this issue, if you include this news sheet. One if even a contribution about writing contribution, (a meta article, an article about articles! hehe), by Chuck Leinweber of Duckworks fame.

Thanks for all the contributions for this issue, and I hope you enjoy it.

Chebacco Richard

Questions:

Noted a mizzen comment by Donna D’Agostino and Vincenzo Ciminale in Italy.  Pass on to them the notation a windsurfing boom for their mizzen ashes snap on in a minute, can be extended to multiple lengths and can be hyper lengthened with 1″ thin wall aluminum tubing.  It would get them out of the business of “walking the boom” as they tack.
Dave Godsey

Chebacco’s for sale:

***

Free time and boat cruising – Richard Spelling

Well, my 9-month sojourn into the ranks of the unemployed is finally over.

I’m working night shift, on an Air Force base, 100 miles from the house, but it beats the alternative.

You know, I always thought that if I ever became unemployed, I’d just fall back on my non-IS skills, or take some low paying IS job. I found out the hard way that the companies with the lower paying IT jobs are all bargain shopping, and think you are over qualified if you have more than one certification. If the first thing they ask you when you send them your resume is “what are your salary requirements?”, this is a bad sign. Or they want you to have a BS in computer science, 10 years of experience, and then want to pay you $10 an hour…

As for working non-is type stuff, I tried that. Still have a going concern manufacturing variable output forge blowers and DC motor kits. Of all the things I tried in an attempt to rustle up money during my “vacation”, building those was the most enjoyable, and made a decent profit. And I tried a bunch of things, from mowing lawns, to doing handyman work, to doing computer consulting, to putting in concrete slabs. All doable, but not enjoyable, partly do to the physical labor involved, but also do to the fact that they involved starting over, and wasting all the time and money I’d spent getting my degree and certifications.

The kicker was calling the “work force investment” people for retraining, and being told I couldn’t go to any CDL or welding classes because I had a BS degree. (!)

Let’s see. Still don’t have a car/boat port to put the chebacco under,   I’m currently using a “super tarp” I picked up on ebay. Basically a gray tarp, but not the cheap crap you get at Wal-Mart. Speaking of Wal-Mart, anybody remember when shoes lasted more than a month before the sides came apart? Sandals lasted almost as long? Remember back in the day, before Sam died, when you could return stuff to Wal-Mart if it broke? Ah, those were the days.

Anyway. Invitation to my wedding: “Oh, by the way, I’m getting married. Jan 1st, 2005, First Christian Church, Pryor, Ok. I’m marrying the preacher. Elvis will be there. You are invited.”

Yes. I got married. Again. To my ex-wife. Hey, there are no rules; I can do what I want. Besides, you really don’t know how important things are to you till you almost loose them… which is another story. And yes, Elvis was there.

So, I’m living in OKC, and in Mannford, and in Pryor. I stay in my apartment in the city during the week (horror of horrors, I hate it), go to the cabin in the woods on the weekends to work on blowers and controllers, and go visit the wife and kids in Pryor once a week. Well, shit, life sure was less complicated when I was unemployed and single. As my wife/ex-wife/wife used to say: “This damned job sure interferes with my free time!”

Incidentally, one of the options I was considering, if I didn’t find a job, and the money ran completely out, etc, was to go sailing and just not come back. Extended cruise. Got bored at work last night and got to wondering how far I could have gotten in my 20ft semi-open boat. Some reading on ocean cruises leads me to think I need to stay away from open water… <nervous laugh>

Then I got to trying to figure out how big a boat I would need… I think I like the idea of sailing into the sunset much more then I like the reality of it. I’m definitely a fair weather sailor, any waves over a foot or two just slow the boat down and annoy me. And big movements of the boat are only fun on occasion.

Maybe I do have the perfect boat. Keep this job long enough to pay everything off, then maybe instead of sailing into the sunset, I should hook the Chebacco up to the back of a nice tow vehicle, and head off to non-open water! hehe Wonder how big the waves get on Baja?

Anyway. I’ll write a more boat-oriented article for the next issue. If you don’t think I should be writing non-chebacco related articles for this webzine, feel free to write the editor… 🙂

Or, even better, send in your own boat/chebacco related stories, and I’ll publish them instead of boring you with the editor’s life!

Laters, fair weather, and stay employed.

***

Bluster, San Juan Islands – Randy Wheating


Hi Richard

Thanks for all the work on the Chebacco News.

I have attached a photo of Bluster motor sailing into Hale Passage, San Juan Islands.

This was taken by Gary Powell while under tow.  Gary and his daughter Kate were sailing his engineless dory as we were all returning to launch ramp from our very enjoyable Small Boat Rendezvous on Sucia Island this past July.  The wind had died off so we just tossed them a line for the final leg.

Fair winds,

Randy Wheating

Port Moody, BC

Bluster_Hale_Passage

***

Chebacco Progress – Howard Sharp

Dear Richard,

Daytime temperatures of 10ºF, not friendly to epoxy work, have brought my building progress to a halt.  I’ve tried electric blankets, a small
electric heater under the boat running 24 hours a day, but it’s still below freezing in my uninsulated garage.

I started in April of 1993, as I see from the letter Phil Bolger sent with the plans. I decided on lapstrake construction, which I was already used to.   Building has been slow, as work and family obligations take precedent, but I am close to flipping the hull at last.

I lofted the boat full size, simultaneously working out the planking layout, using the method Iain Oughtred describes in his lapstrake building manual.  I was able to loft the permanent bulkheads with the plank lands, so I could build them into the boat.   I’m using meranti ply from Noah for all the lower strakes and the bulkheads – anything which may end up being submerged in water.  The rest will be occuome. The meranti is a little splintery, but I believe it has more natural rot resistance than occuome, and I’ve actually found fewer voids in the meranti than the occuome.

The stem and the transom are locust.  I happened to have some lying around, otherwise I wouldn’t recommend it – it’s very hard to work with, and of course very heavy.  However I’m  confident that the stem on this Chebacco will never rot and will demolish just about everything that it meets.    The transom runs straight across to include the motor mount, like Brad Storey’s boat.  I didn’t understand the implications of this until I found out that the 10º angle on the original design accommodates the default mount on most outboards!    For me that’s still not a dealbreaker, as it’ll be stronger, and I think it looks better.  The boat will have an 18″ bridge deck.    I’m toying with idea
of an electric propulsion system, and I’m still wondering whether or not to build a small bowsprit, partly for use with a jib, but mainly as
a cathead for carrying an anchor.

As soon as the weather warms up I’ll be putting dynel on the bottom and garboard, and I’ll paint the whole using Kirby’s enamel.

The name I’m not sure of yet.  Loosey Goosey springs to mind (along the lines of Itchy Scratchy).

Love the website.

All the best,

Howard Sharp.

tn_IMG_0457 tn_IMG_0460 tn_IMG_0514 tn_IMG_0536 tn_IMG_0541


The last boat I built – 10 years ago!  It’s an Iain Oughtred design, Ptarmigan, 11′ OAL.  The Chebacco fits into the garage with 2″ to spare,  My dream has always been to build something bigger – say about 4 tons.  The sheer size of the Chebacco has been a lesson in what I can expect if I go ahead with something bigger.

***

A Blustery Weekend on the Sunshine Coast – Randy Wheating

Lisa, Jacob, Sam and I spent a windy and wet at times extended weekend, August 20-22, with our Chebacco Bluster on the Sunshine Coast of British Columbia, Canada. This well known boating area is northwest of Vancouver and for us involves a one hour drive on either side of the Howe sound ferry crossing.

A heavily loaded Bluster was launched at the Halfmoon Bay public ramp and we were under way by 12:30 Friday. We motored a northwest along the coast via Welcome Passage to Smuggler’s Cove Marine Park. With its narrow entrance and various rocky arms this park is described in our guide as resembling an alpine lake. The boys went for a swim while we anchored for lunch. The new rope style boarding ladder was tested and works fine.

Next we motored a short distance to Secret Cove, a large three arm cove containing an assortment of marinas, private homes, and such. Tempting to stop at the ‘boat-in’ pub for a quick pint…

A quick trip across Welcome Passage lead to Buccaneer Bay Marine Park, situated on a narrow strip of land connecting North and South Thormanby Island. We landed at low tide and portaged our gear and provisions across the beach to a sandy and but fairly exposed campsite. Bluster was anchored just off the beach where she swung merrily at anchor in the 15 to 20 knot winds. The kids explored the beaches while Lisa and I set up camp before kicking back.

image002

Lisa in the galley, Buccaneer Bay Marine Park

Saturday dawned gusty and wet – not great family sailing weather. Fortunately for us my friend Ryan with his kids aboard their 37 foot steel ketch ‘Makoolis’ joined us and we were able to seek comfortable shelter with them. Unfortunately for Ryan, he anchored a little close in and became good and grounded on a sand bar with the falling tide. We tried all the exciting stuff like rowing his 65 lb CQR anchor to deeper waters and winching away but alas, lost race with the tides. The remainder of the day was spent drinking wine, playing cards and preparing dinner (those gimbaled stoves really work) up to a 30 degrees angle until the tides released us. No damage done. Of course if we were in a Chebacco we would have just jumped in the water and pushed her off, but I didn’t rub it in.

For the second night at anchor I set the mizzen and this did wonders at calming Bluster’s swinging in the winds. Having no experience in exposed anchoring I was very pleased with holding and reset abilities of my 5 kg Claw (Bruce copy) anchor when the wind shifted through 180 degrees overnight.

With a stiff onshore breeze we executed a near perfect (if I do say so) team beach extraction on Sunday morning:

  1. Broke camp and assembled the gear just above tide line.
  2. Rowed Fib (dingy) to Bluster, furled mizzen and warmed up engine.
  3. Raised anchor and motored to position where winds would blow Bluster onto beach near gear pile.
  4. At the point where there was still sufficient motoring depth dropped anchor then moved to windward stern cleat.
  5. Paid out anchor line until bow hits sandy beach then made her fast from the stern cleat which would held Bluster’s bow onto the beach and prevented a wind from turning her beam on.
  6. Lisa and the boys smartly relayed the gear to boat where I stowed it below.
  7. Team scrambled aboard and I hauled us off the beach with the anchor and spun the bow to the wind.
  8. Hauled Bluster to deeper waters where Lisa fired up the engine and powered us away.

Moderate westerly winds and swells from the Straight of Georgia met us as we exited Buccaneer Bay. Bluster had a great run down Welcome Passage under mizzen and jib after which we finished off the day exploring Halfmoon Bay and checking out the Merry Island lighthouse.

I was very pleased with the performance and balance of the jib/mizzen sail combination. Considering the gusty conditions and the fact that we had the kids aboard this reduced sail area gave us a comfort level that allowed us to just enjoy the ride. Our close reach speed (GPS) averaged three knots. The addition of the reefed main would have likely improved the performance but we were in no great hurry. Jacob and Sam split their time between snacking in the cockpit and below where they played cards, read and wrestled. Lisa manned (womanned?) the helm the entire homeward leg while I fiddled with the lines, charts, cameras and such.

image004

Jacob, Randy, Sam

Hauled the boat out at the public ramp, prepared and ate a late lunch, kids went for a final swim and we were able to catch the 4:00 pm ferry and be home for the evening news.

A terrific family weekend adventure.

Randy Wheating

Port Moody, BC, Canada

***

MASCF St. Michaels MD – Ed Heins

This was my first trip to the Mid Atlantic Small Craft Festival In St. Michaels.  In fact it was my first small boat gathering (messabout, gawkabout, BSabout) of any kind, and I was planning to present my long suffering project Chebacco  “Boudicea”, to the boatbuilding world.   I’m sure this was painfully obvious to many of my on line contacts, who diligently waded through ubiquitous questions and pre launch drivel.  I, by the way, suffer from all the common boatbuilder maladies; procrastination disorder (PD), designer second guessing syndrome (DSGS), complete confusion complex (CCC), and ham fisted knuckle busting wood butcher disease (HFKBWBD) sometimes known as ($%$&#@!!).   In addition to those common ailments however, this past September I was also suffering from a significant case of butterflies about dragging this project four plus hours around the infamous DC beltway, and an irrational fear that assuming we negotiated the trip without problem, that surely the Chebacco would reward my seven years of labor by, if not sinking outright, at least exhibiting some indication of my complete lack of skills, acumen and abilities.   Thankfully, none of that happened.


Departing New Market Virginia at about 3PM Friday Oct1, we cruised sedately along I-81 and I-66,  spent two hours creeping the 30 odd miles around DC on the 495, sat in the predictable Friday evening bay bridge traffic and arrived St. Michaels at about 9:30 PM.  We had reservations at the Best Western in town, and that seemed like a great place to park.  I’d made contact with Dick Burnham previously to give me a hand with the launching, and the next morning as we drove through the Maritime Museum parking lot, his red pickup fell in behind.  We launched at the town ramp next to the St. Michaels inn & marina, just around the point from the museum.  Seeing the festival for the first time and approaching from the liquid side is pretty spectacular.  The Museum has about three piers and they’d added a floating extension at the end of the tee on the largest to accept more boats.   We found a space to squeeze in at the very end of the tee and rigged a couple fenders to try to keep from sharing paint with the museum.


We were in good company.  A Bolger Lilli, a folding schooner,  a Jesse Cooper, and some of Jim Michalak’s designs.  (Maybe next year I’ll cartop my “Tween”, one of Jim’s sailing dink designs, which was my first project).  Chesapeake Light Craft were there in force.  I was surprised that my wife, Debs, having existed with her things being squeezed into half our garage for so many years, seemed to think we should take on a CLC sweetwater 16 canoe. Like I need encouragement…..


Saturday afternoon we had the opportunity to take Dick & Ula Burnham out for a spin. .   I’m very interested in seeing how Dick attacks some of the Chebacco’s rather quirky bits as he finishes “Stealing Horses”.  It would be great to see a couple of these cat yawls sailing together someday.  Although we didn’t have much air to play with, I was completely satisfied with the way the Chebacco handled.   We were able to tack, jibe, I guess we found virtually every point of sail and I’m pleased at how close winded she is.   Later that afternoon, Richard Elkan of London & “Sylvester” dropped by the end of the pier and we again made a cruise around the area, this time with the rest of the Heins family aboard..  Whereas Dick and I have no idea what a Chebacco should perform like, I was pleased that Richard didn’t seem surprised as we sailed sedately through the moored boats.  Then again, I managed not to get him wet, or hit him with the boom, so his expectations may have been low.   At the end of the day though, it’s great to talk face to face with the  owners and builders we’ve exchanged emails with.


So many other things at the show; John Welsford was great as expected,  the Redwing that’s in the current WoodenBoat magazine was there, my son enjoyed the kids activities.  I’ve got nothing but Kudos to the folks that organized and made the show happen.   Only thing that could have been better, maybe a couple more Chebaccos?  Maybe next year.


tn_Dick_Ula tn_MASCF_Chebacco tn_MASCF_Chebaccoside tn_MASCF_Richard tn_MASCF1 tn_Pier_1

***

Chebacco Update – Ben Ho

Hello Richard,

I am making slow but steady progress with my Chebacco, mainly building the major components first before I start on the hull which will take up most of the available work space. The following are a few photos on items that I’ve done differently.

Center Board: Instead of using lead, I’ve sandwiched the CB with 4 long pieces of ¼” mild steel. It should make the CB much stronger and hopefully will better withstand a lateral grounding. The total weight is about 60 lbs, a bit heavier than the standard construction.

The glued up and shaped plywood CB:

image002

Center channels routed in for the two steel bars to lay flush. One side of the bars is threaded to accept the through-bolts. Sitting at the corner is the hinge assemly that will go on the CB trunk.

image004

The CB sheet will go through this U-bracket. Since the bracket is gripping the thin edge of the CB, I made it 6” long with 4 through-bolts in order to spread out the load. I specified a small eyelet to tie the line, but the welding shop decided that it should be a larger hand-hold instead. Oh well.

image006

The CB glassed, dry fitting in the CB trunk.

image008

These S.S. T-nuts are ideal for holding the mounting plate on the trunk:

image010

Gluing up the CB trunk; the white piece lining the inside surface is counter-top laminate. This stuff is incredibly resistant to abrasion – I run my sander with 60 grit paper on it for 2 minutes, with no visible wear at all!

image012

The completed CB with a couple of coats of Interlux paint. To protect againt wear & tear, I build up a ¼” finger of epoxy along the bottom edge. A half-oval bronze strip will be further added on, once I figure out where to get them.

image014

Chebacco Raised Deck

OLYMPUS DIGITAL CAMERA

Sometime ago I commissioned PB&F to modify the Chebacco, mainly to enlarge the cabin by lengthening and raising it, and to move the after-deck back by the same amount in order to keep the cockpit length. The Chebacco Raised Deck is the resulting design. I subsequently decided to stay with the existing plan, because I’ve already started on it and also I prefer the old look. However some design changes are excellent ideas which I’ve gone ahead and implemented on mine. I will cover some of them here.

One of the biggest changes is the whole area near the transom. The rudder is now a balanced rudder with a tab forward of the rudder shaft, increasing the overall rudder area by about 25%. Due to the larger rudder and also the last bulkhead having moved aft, the keel skeg is no longer directly supporting the last bulkhead as in the original design. Hence there’s a fairly complex ‘backbone’ added to strengthen up the whole section:

image017

The transom backbone is a solid piece 2.5” thick, supporting the mizzen mast, rudder stock, and the slop well. The design calls for this to be one continuous piece as part of the keel. The rudder runs through the center of this piece. The small hole to the right of the ‘backbone’ is the drain. The cockpit is now a raised, self-draining cockpit.

I find it too cumbersome to have such a huge, complex keel, so I broke it down and built the transom backbone as a separate component, with a large part that goes below the bottom panel and will be solidly glued to the keel later:

image020

Bushings for the rudder, made from high density polyurothene (i.e. kitchen cutting board), and a stopper ring cut from 1/16” SS tube that fits the outer diameter of the rudder stock.

image022

Another deviation from the original design: I am concerned about mounting the rudder on a plate that protrudes a fairly long distance from the keel. What if some 300 lb gorilla sits onto the rudder while the boat is on a trailer? Instead of mounting the rudder off the keel, the transom backbone is a much better alternative. It provides a strong, balanced position to hold the stock with simply a stopper ring. The ring is glued to a PVC cap to provide a larger surface area, which rides on a nylon bushing. The bottom bushing shown in the picture is to be half-recessed and screwed onto the bottom panel, to protect the rudder from going up and grinding onto that area.

image024 image026

That’s it for now. Time to get back to work!

Cheers.

Ben

***

Chebaccos Three! – Jamie Orr

image002

That’s Bluster in front, Wayward Lass on the left and Full Gallop on the right.

(Randy Wheating photo)

Last July, a fleet of small boats rendezvoused at Sucia State Park in the San Juan Islands. It was a great weekend, and you’ll find various accounts of it on the web, my own was posted on Duckworks in September. But what is of immediate interest is that there three Chebaccos in the fleet. These were Bluster, built by Randy Wheating of Port Moody, BC,Full Gallop, built by Chuck Gottfried of Springfield, Oregon and Wayward Lass, built by me Jamie Orr, (that’s me) of Victoria, BC.

Wayward Lass and Bluster have both been seen in these pages before. Chuck’s Full Gallop, however, is brand spanking new, being completed and launched only one week before landing on Sucia! How well she looked and sailed shows the massive effort made by Chuck to finish in time for the gathering.

All three boats are the sheet plywood version, but they aren’t identical. Wayward Lass is built as designed, but both Chuck and Randy made changes here and there. The most noticeable being that both made the cabin bigger and added a bowsprit. Randy also built a tabernacle/step for the mast, with standing rigging, while Chuck made his cockpit self-draining by raising the cockpit sole (floor). A benefit of the self-draining cockpit, besides the obvious one, is a lot of storage space. When cruising in Wayward Lass I’ve found storage is tight – we have to move all our stores to the cockpit when we want to sleep in the cabin.

Here’s Wayward Lass (green) and Bluster (white) on the beach at Sucia, among some of the other boats. Chebaccos are a little heavy to pull up and down the beach, but they have no problem nosing in to load and unload. A stern anchor can be helpful getting off again. (John Kohnen photo)

Here’s Wayward Lass (green) and Bluster (white) on the beach at Sucia, among some of the other boats. Chebaccos are a little heavy to pull up and down the beach, but they have no problem nosing in to load and unload. A stern anchor can be helpful getting off again.
(John Kohnen photo)

But Chuck and Randy can speak for themselves and describe the changes they made.

Here’s Chuck, about Full Gallop

Full Gallop incorporated several modifications, including a raised cockpit sole, raised and widened cabin, a bridge deck, curved seats and footwell sides, and a bowsprit. The raised sole was inspired by the need to keep the boat at a dock, and so be self-bailing thru Oregon’s rain. The added plus was a huge storage space under the floor, accessed by a watertight plastic hatch.

image006

Full Gallop’s cockpit,…

…her sloping cockpit sides and her stern.

…her sloping cockpit sides and her stern.

Here’s the bowsprit rigging.

Here’s the bowsprit rigging.

This shows the height of the cockpit sole.

This shows the height of the cockpit sole. (John Kohnen photos)


The cockpit floor is an extension of the rear ‘slosh pit’ floor at the stern. I didn’t want thru-hulls, so extended the floor such that it would drain thru large limber holes and out the stern. The floor extends forward to a bridge deck that’s set even with the centerboard trunk, with the bridge deck ending about 4” above the cockpit floor level. The floor is pitched about 1” overall, to drain to the rear.

The bridge deck extends 2’ back from the rear cabin bulkhead, and is designed with access on one side of the C/B trunk from outside thru a weatherstripped lid, and the other side accessed from inside the cabin. Part of the cabin bulkhead was removed to provide the inside access, and the area reinforced.

The result is vastly increased storage under the cockpit sole accessed thru the watertight hatch, and additional storage inside the bridge deck, accessed on one side from the cockpit, and the other from inside the cabin. The storage areas are quite deep, averaging over 14” deep in most places, and low in the hull. The shallower footwell doesn’t seem to be a problem, as the coamings are generous and the seats relatively wide.

I set a full-length carlin to support the deck, cabin sides, and seat backs and coamings, with decks approximately 9” wide at the cabin. This let me slope the seat backs outward and cabin sides inward, primarily for aesthetics. A mahogany block is set at the transition between seat backs and cabin sides, which align only at the deck level. The cabin is 2 ½” higher in the back and 2” higher forward, and probably 6” wider throughout. I installed heavy breasthooks to support oak mooring bitts and a bowsprit that butts to the front of the cabin, with that area and the area of the mast slot heavily reinforced with ply and oak gusseting. No gorgeous Jonesport cleat, like on Wayward Lass!

I flew a jib from the bowsprit until I pulled the luff wire out of it. I’ll experiment with setting the jib flying, tho I use a rope stay to steady the free-standing mast. In all, the modifications are not readily apparent unless you’re familiar with the design, but all made good sense for my needs and work passably well. I value the storage, and yes, Jamie, you can sleep below without moving everything!

Now, from Randy, about Bluster

Starting from the bow and working aft are some of the personal modifications I have worked into the construction of Bluster

Cabin

Bluster’s cabin roof has been raised two inches from the drawings and the sides extended out flush with the coamings. These changes add to the interior space at the expense of side deck width, reduced to about eight inches, which with the toe rail has not been a problem move forward.

A small bridge deck straddles the centerboard trunk with cut away in the bulkhead to allow access to this storage area from the cabin.

Bowsprit

This is a plank style bowsprit (overall 1.25”x9”x26”) that is contoured on the inboard end to match the curve of the forward cabin top face. A galvanized steel, two part bracket is bolted to the forward end as an attachment point for the forestay. The 5 kg Claw anchor resides on a roller in the center of the plank, aft of which is the main mooring cleat. The 15 ft chain and 150’ x 3/8” anchor rode pass through the side deck via a deck pipe and are stored in a bucket within the forepeak.

Here’s the bowsprit…

Here’s the bowsprit…

... and here it is again.

… and here it is again.

(Randy Wheating photos)


Tabernacle and Rigging

The tabernacle was welded up from ½” aluminum that is through bolted astride a double thick (one inch) bulkhead. The mast pivots on the upper bolt and the lower bolt is inserted and fastened once the mast is standing. The 1/8” ss shrouds are attached to galvanized chain plates with turnbuckles and are left in place when the mast is lowered. The forestay attached easily to the bowsprit bracket via a pelican hook. The gaff bridle is also made of 1/8” ss wire rope. Setting up is fairly simple – the mast is manually hinged into place, the lower tabernacle bolt inserted (temporary hold). The forestay in fastened via the pelican hook. Boom and gaff jaws and two sail luff ties fastened to mast and hoist away. In the lowered position the mast, boom and gaff with sail attached, and mizzen rest in holding fixture on the cabin top and a crutch in the cockpit.

The tabernacle was welded up from ½” aluminum that is through bolted astride a double thick (one inch) bulkhead. The mast pivots on the upper bolt and the lower bolt is inserted and fastened once the mast is standing. The 1/8” ss shrouds are attached to galvanized chain plates with turnbuckles and are left in place when the mast is lowered. The forestay attached easily to the bowsprit bracket via a pelican hook. The gaff bridle is also made of 1/8” ss wire rope. Setting up is fairly simple – the mast is manually hinged into place, the lower tabernacle bolt inserted (temporary hold). The forestay in fastened via the pelican hook. Boom and gaff jaws and two sail luff ties fastened to mast and hoist away. In the lowered position the mast, boom and gaff with sail attached, and mizzen rest in holding fixture on the cabin top and a crutch in the cockpit.

(Randy Wheating photo)

Transom and Motor Well

The motor well is slightly smaller than show in the drawings to just fit two Honda gas tanks, one forward and one aft of the mizzen/rudder post. The transom is constructed from one piece with a simple cut out for the 5 hp Honda. Holes in the transom facilitate motor well drainage. The stern deck is also a single piece with cutouts for the mizzen and rudderpost. There is no cut away between the cockpit and the motor well as shown in the drawings.

 (Randy Wheating photo)

(Randy Wheating photo)


Other Modifications
  • Blocks on gaff halyard and centerboard pendant to ease lifting.
  • Wooden strips on seat fronts to fit cross boards that can then hold floorboards flush with seat tops creating a huge cockpit sleeping platform. Boom tent to follow.
  • Watertight inspection hatches on cockpit bulkheads (accessible from cabin and lazarets) to create a usable yet watertight compartment.
  • Tiller extension for comfy steering.

Now it’s me again – Jamie speaking, I mean.

I haven’t given a lot of details about Wayward Lass, since there are several articles about building and sailing her already. But if you want to compare Randy and Chuck’s modified boats to what you’ll get by following the plans, look back through some previous newsletters. There’s a good picture in the last issue.

I like the bridge deck idea, I considered this myself, but decided against it. Don’t remember why, now. The wide cabin is a popular idea – other builders I’ve corresponded with or met have spoken of making the cabin as wide as the cockpit. The raised cabin would be welcome when you’re inside it, but I think it would have to be very carefully done or it would spoil the beauty of the design. That said, however, I have to admit that both Full Gallop and Bluster look pretty good!

The hulls on all three boats here are built as designed, at least below the waterline. Apart from weight and how it’s distributed, the only things left to make a difference in performance are the sails.

Bluster and Full Gallop have jibs set on bowsprits – I think jibs on Chebaccos need the bowsprit to work properly. I also have a jib, built according to the sail plan and set with the tack at the bow, (no bowsprit) but I rarely use it as it doesn’t work very well. Going to windward, it luffs when it is not sheeted in and upsets the flow of air to the main when it is. It does work when boomed out for running, but it’s too small to be very effective. It showed some potential when used in stronger winds with the mizzen, and no mainsail, but I haven’t explored that fully. I think it might be useful if you’re caught out in bad weather and have room to run. I think you could reach all right too, but would make a lot of leeway.

I don’t plan to add a bowsprit, but I am considering a reaching (asymmetrical) spinnaker for light winds, as shown on page 131 of Bolger’s 100 Small Boat Rigs. This would be set on a spinnaker pole that would serve as a very long bowsprit. I’m still working out the details, but stay tuned.

Wayward Lass’ main sail is different from the others, having eight inches of roach – all other things being equal, the roach adds a little speed. The downside is that battens are necessary to support the roach, and the batten pockets chafe. I’ve replaced these once already because I made them too light and two of the three battens wore right through the forward ends.

Both Chuck and Randy built their sails from Sailrite kits, and are very pleased with them. I can confirm that they look great, and seem to set well. Quiet a few builders have used Sailrite kits for main and mizzen now, and all the comments I’ve heard have been positive. So if you can’t borrow the school gym to lay out your sail, or don’t want the design headaches, Sailrite looks like the way to go.

At Sucia we didn’t do any controlled tests or scientific comparisons (also called races), but one day everyone sailed over to neighboring Patos Island. Wayward Lass was almost the last to get away from the anchorage, so I was out of the action and didn’t even see Full Gallop and Bluster sail together. However, I heard they performed about level with each other, and both skippers came away pleased with their boats.

The next day we were a little more organized, getting all three Chebaccos out together so John Kohnen could take some pictures for us. Outside of the WoodenBoat article comparing cold-moulded, plywood and lapstrake versions, this is the only time I know of that three Chebaccos have sailed in company.

Three Chebaccos, with Sucia Island in the background. Bluster is in the lead, Full Gallop is in the middle and Wayward Lass is coming up behind. (John Kohnen photo)

Three Chebaccos, with Sucia Island in the background. Bluster is in the lead, Full Gallop is in the middle and Wayward Lass is coming up behind.
(John Kohnen photo)

We can’t say yet which boat will be faster. On this occasion, Wayward Lass had an edge, since Chuck was still getting to know Full Gallop, and Bluster was towing a dinghy – very small, but still a handicap. However, the rendezvous was enjoyed by everyone who attended and we plan to hold another in 2005. We’ll be sure to organize some real match (grudge) racing then, so stay tuned!

***

Racing Micros and Floating Sheep Bridges – David Lewis

Never have editors for friends.  “Write an article for me,” they whine.
“Where’s my article I bullied you into agreeing to?”  I swear, it never ends.

As if I didn’t have enough to do, what with keeping my sheep wormed and happy, getting my steers to the butcher, finding customers, building the  infrastructure for a farm while working full-time planning new telecom and  network systems for an entire company move.

Here comes Richard, “You live five minutes from a lake, and you have a  Bolger Micro that you haven’t sailed in two years.  Surely there’s a  sailing story in there somewhere.”

Uh huh.

Ok, let’s see.  Well, something rather amazing did happen the other day.
Not so much sailing as “rafting” but…

My farm is split down the middle by a creek which, with all the rain we’ve  been having, is not a small one these days.  There’s only one spot that is  passable by man or truck and you don’t do it without getting wet.

Now that’s just fine for my cattle, they’ll plod through anywhere that’s  below their chests.  But my sheep are a bit more finicky.  And shorter.

So I decided it was time to build a bridge.  Now shoestring budget that I  have, I wanted to do this for next to nothing.  In fact, free was a good  target.  I could have gone and bought a culvert, buried it to 40%, put  fill and cement around it, and had a decent bridge for, oh, I don’t know,  $2000, $5000, something like that.  Or I could use my muscles, my  ingenuity, and materials I already had and keep the cost below a hundred.

I have about two hundred railroad ties sitting around collecting sheep  poop.  Some of them are light (well, relatively light) and some of them  are so heavy I can barely get them into the truck.  Heavier than water in  other words.  Being a bit lazy, I used whatever weights happened to be on  the top of the pile.  Some were heavy, some were light.

I hauled fourteen of them out to the crossing and laid two parallel to the  flow and ten across those two.  I tied them together with three poly-ropes  and laid the remaining two ties crosswise on the lower and the upper end –  to make a two-sided “bowl” that I could then fill in with a layer of rocks  and dirt on top of that.  Then I began filling in either side with rocks,  the plan being to build up ramps that would be level with the top of the
bridge.

I went and bought some threaded rod and some of those aluminum tent  stakes.  I would put two rows of threaded rod through the top two ties,  parallel to the creek flow.  I would drive four stakes down through the  top of the two ties.  This would help prevent those ties from pushing out  as weight was added between them.

Then there was about a week where I didn’t get a chance to work on my  bridge.  Then it rained.  Not heavy but it kept up for most of the day.

Then yesterday I went to put in my threaded rod.

I’m sure you’ve all figured out what happened.  Bridge gone.  Just not  there.

I started tramping down creek to find it.  I passed numerous spots where I  was sure it could NOT have passed, it being so shallow there.  I finally  found it about a mile downstream, hung up on a fence across the creek and  still tied together with the poly rope.

Knowing how heavy those dang things are, it still amazes me that it made  it that far.  Now I get to figure out how to pull the timbers out of  there.  Could a culvert and cement be in my future?

***

On Contributing – Chuck Leinweber

dscf0046

If you are reading this article, you probably had a few minutes to kill and happened here by accident.  Perhaps you have this site bookmarked and check it regularly for new material.   Maybe you’re sitting at your desk taking a coffee break, or using your laptop at the beach in front of a five star hotel with WIFI.  If you are here, you probably like reading about boats and boatbuilding.  Where do these articles come from?


There are literally thousands of people writing blogs.  Who needs more blather on some website?  How much is there that can possible be of interest to some boatbuilder? Admittedly, Duckworks does post something new each day, and the Chebacco News posts great articles, but we’d be willing to bet you would like to see more about the subject you are particularly interested in.


Which begs the question.  Do you have an obligation or better yet a desire to add your opinion or experience? As an editor, I can categorically tell you that if you take the time to put your thoughts down, they will be appreciated.  Not just by frustrated editors like Richard and me, but also by all the other folks out there who are waiting to read what you have to say.


Whether you want to write about a Chebacco or some other boat design, you may be unsure how to proceed.  Rule one.  Just get the words down.  Type one word and then the next, and keep right on going. What are some guidelines?  I thought you’d never ask.


Your readers want to know how you did everything, especially if you came up with a novel way of accomplishing some of the more tedious parts of boat building.  The process is always of interest.  Just this afternoon, I puzzled over the assembly sequence of the boat I am building.  The instructions given in the plans are not always minute, and can sometimes be called obscure, so the voice of experience (yours) is always appreciated.  And if you’d like to wax poetic, rant and rave, or better yet, insert some humor, please feel free.  Your voice is what makes what you write special.


If possible, include photos.  This implies that you thought you might want to write something before you started building or before you took that cruise.  We always carry a camera, except the one time we didn’t even know it was still in the truck until we were ten miles from out launch point.  A digital camera is especially nice for web articles, and also nice because you can take about a million photos and never need to load new film.  Let the editor know where you would like each photo to be placed in the article by numbering them and indicating where each should be.  Digital photos are easy to enhance, easy to crop, easy to save in a compressed format that web editors like.   Most of us have scanners and can also use regular photos as well.


When you are done, ask a friend, your significant other, or the guy sitting next to you to read it through.  It is always hard to critique your own work.  Have them check for clarity first.  Does it make sense; does it read smoothly.  If they have grammar skills, take advantage of them.  If you intended to be humorous, it is good sign if they laugh out loud.  If they ask you where they can go to start boat building, you know you are on the right track.  If no friendly readers are available, at the very least, RUN YOUR SPELLCHECK and read the piece out loud to yourself.


I will throw in a bit of grammar advice.  Don’t use the word ‘then’.  (And then we did this, and then we did that, and then she…..)  Don’t start a sentence with the word ‘and’ or ‘so’.  Get rid of words that don’t need to be there, especially if they repeat what you just said.  The words ‘very’ and ‘really’ can almost always be omitted.  .


Last but not least, a little abstract speculation about what makes one article stand out from all the rest.  The very best are like the ones you hear when sitting around a fire at a messabout.  The fish tales, the shark tales, the alligator tales.  The time you fell in and the boat sailed off without you.  Tell what really happened—don’t pretty it up.  We want to hear about the good, the bad, and the ugly.  Let your personality, your opinions, your unique point of view loose in what you write.  Your public is out there waiting.

This website lives by submissions.  Richard depends almost totally on readers for content.  I happen to think that this makes for honest and real reading – the experiences of amateurs who get no pay for their writing and no commissions for any products that they promote.

Editors are pretty flexible, but we do have some druthers. We like to have articles in some form of text format. You can copy and paste the article into the body of an e-mail, or you can attach just about any kind of word processor file to an e-mail instead. A file on a floppy disk or CD mailed by regular snail mail will work. I have even typed up hand written material, though that is a bit of trouble. Pictures can be sent for scanning, and will be returned promptly. If you have digital versions of the photos, they can be e-mailed or sent on a disk. The best format is .jpg without too much compression. Send as many as you need to illustrate the article. We may cull a few.

If you have certain places you want pictures to go, simply make an insertion note at the appropriate place in the text <**insert boat01.jpg**> or let us do the picture placement. We’re pretty careful.

Thanks for taking the time to write up the details of your project. I assure you it will be of great interest to boat builders and wannabees.

Chuck Leinweber
Duckworks
608 Gammenthaler
Harper, TX  78631
www.duckworksmagazine.com

Chebacco News 48

News, questions, and boats for sale.

News:

Chebacco calendars are here! I’ve worked out a “print to order” deal with a retired printer friend, so delivery will take a couple days beyond the mailing delay. Price is $20. Standard offer extended, if I use your picture in the calendar, you get one at my cost.

—————————————————————————————

For those of you waiting for the next installment of “Samantha”, Paul says he can’t make the deadline for this issue, but will try for the next one.


Questions:

Richard
Thanks for the great work on the new issue.  Honest, I WILL get you an article on my boat, I will, I will.  I read the request from Ben regarding the larger cabin.  This seems to be a popular option, including on mine (tentatively ‘Tabby II’).  Since there’s no address, I thought I’d forward to you. I decided to modify mine once it was turned over.  With the molds out of the cabin, I decided that the head space was just too small for comfort. Unfortunately, the molds were already cut, so I had to ‘dummy up’ the expansion.  I spliced in plywood on the bulkheads expanding the width out to the coaming, which allowed the framing to run continuously from the bow to stern, and raised the roof line 3″ in the back and 2″ at the front of the cabin.  All the plywood was simply fitted and ‘patched’ with an overlapping layer, epoxied in place.

These changes required a bit of scratching about to arrive at the lines for the cabin sides (no interior molds anymore, remember?).  Lots of string, straightedges, and bent plywood resulted in the desired taller and ‘canted’ cabin sides (15 degrees).  Roof was laminated from two 1/4″ layers, a bit complicated but minimizing the stress and deflection of the somewhat light roof framing.  Because the raised roof could potentially stress the mast partners a bit over the initial design, I added liberal reinforcing to that area, which should be bomb-proof by now.

Some of the other mods I added include a raised cockpit floor to facilitate draining thru the motor well area (no thru-hulls) and a plastic, pre-fab hatch to access the area under the cockpit floor.  I also added a bridgedeck extending to the rear of the centerboard trunk, with one side accessible from the cockpit, and the other from below (I cut away part of the bulkhead and reinforced the area.  The seats are curved to pick up the curve of the seat backs, and I cut out panels for accessing the under seat area.  These (along with the bridgedeck access) will be secured and rubber-stripped for watertightness, as well as having little rain gutters built in, draining into the cockpit and out the back.  The result of these mods is a huge increase in secure storage areas: under floor, under seat, and in the bridge deck (both
inside and outside access).

Few other mods worth mentioning, or that haven’t been done better by others.

I added two nice oak mooring bitts, which will support a bowsprit for a jib I’ll experiment with later.  Sailrite did the sails in tanbark, and Honda will provide the power.  I intend to rig ‘cost effectively’ with sand-cast bronze blocks secured with marline wraps – strong, cheap, and good looking.  Plus, you can fix it with your pocket knife, anywhere.

I used lots of recycled lumber, including a load of mahogany pallet lumber I found years ago and have had laying around.  I drill and plug the nail holes with bungs, and it looks OK, and, always remember, free is a very good price. Spars will come out of some gorgeous 20′ long clear fir 2×10’s that came off a church demolition as fascia boards.  This stuff was seasoned and dry before I was born.

Must run.  Thanks again for the great work.  I’ll get some pix and words to ya soon, including some info on our (along with Jamie Orr) planned ‘Sucia Island Sail-In’ in the San Juans July 10 of this year.  We hope to have at LEAST 3 Chebaccos – Orr, Wheating, and hopefully mine.

Chuck Gottfried
Fall Creek, Oregon

Chebacco’s for sale:

Hi Richard,    My Chebacco Motorsailer is for sale -It was shown in
Chebacco news # 17 and 25   , built in 1997  and has had very little use so it looks
like new and is available with or without motor and trailer. Price for boat
alone is 7500.00
Thanks, Bob Cushing       rbrtbobcat@aol.com      315-687-6776   located in
Cazenovia, n.y.
How’s it going?  I wanted to let folks know about my decision to sell my Chebacco.  I really love this Catboat but I love my girlfriend more and want to pursue that a while.  The boat is built exactly to Phil’s Specs.  The trailer was purchased new for $1,300 a couple of years ago and the 1997 Force five hp. Outboard was purchased new for $800 as well (it sat on the showroom a long time I guess).  The sails were purchased as a kit from sail-rite, the mainsail being sewn by a professional, and the mizzen sewn by me since it was small and manageable.  I launched this boat for the first time in April of this year and have taken one two week trip and several small day trips so far.  There are a few normal scratches on the hull and the spars but nothing out of the ordinary.  The hull is planked in Douglas Fir Marine plywood and the floors and roof framing are Douglas Fir.  There are a couple of floors made of Southern Yellow Pine and the trim is all White and Red Oak.  The sliding hatch was cold molded and then veneered on the inside and out with White Oak as were the drop boards – no sign of wear on any of these components.  All trim and spar varnish was Epifanes WoodFinish Gloss and it shows.

Bill Samson listed his for 4,500 lbs. Sterling which is approximately $6,500 I think.  I would like to ask $6,500 to start and see what happens.

Thanks Richard.

Pete Respess
Hopewell, VA

***

Strait of Juan de Fuca – Jamie Orr

Hi Richard

I was about to email you to see when your deadline was, and bingo!  Found a brand new Chebacco page on the web.  Good to see activity from other builders.  Sorry to hear about your job problems, but I’m sure a new opportunity will appear soon, I can’t see you sitting still for long.

Always nice to see a picture of Wayward Lass front and centre, but I wonder if you could make a small fix.  Chris probably didn’t know, and I missed it, but we should have given John Kohnen photo credit for the picture of WL arriving in Port Townsend.  John is the man behind the “Mother of All Maritime Links”, and provides pictures for many of us at local events.  He lets us use his pictures freely, so it’s only right to recognize him when we go public.  Can you add something like “photo by John Kohnen” to the page?

Come to think of it, John would make the subject for a good small boat article — have to give that more thought.  Meanwhile, going back to my opening remark, I have a write-up of sailing in Sylvester, Bill Samson’s old Chebacco, on the Thames River at the end of January.  I dawdled in writing it, and I’ve missed this issue, but I’ll send it along shortly — might as well polish it a bit more, now.

And just for the hell of it, here’s the latest picture of Wayward Lass, taken in the Strait of Juan de Fuca looking south to the Olympic mountains in Washington State.  Don’t expect you to publish this one, I’m just showing off our local scenery.  Got it from a stranger who was photographing a kite-surfing event — saw him pointing his camera our way so when I saw him later at the ramp I asked if he had any good ones of WL.  He emailed several, I like this one the best.

Cheers, and I’ll get that article in soon.

Jamie
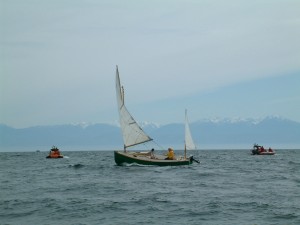
May_04_edited

***

Sylvester goes to London – Jamie Orr

January 31st, London, England.  I’m standing outside my hotel, about to be picked up by someone I’ve never met who will take me to a boat that would have been laid up by now, except that its hauling-out has been delayed just so that I can go sailing!

Sound a little unusual?  Not at all, not to a Chebacco sailor!  Richard Elkan is the new owner of Sylvester, built by Bill Samson up in Dundee, Scotland.  When I emailed Richard to say I’d be in London and could we meet, he immediately offered a days sailing, even though he had planned to have Sylvester out of the water for the winter by then.  Another example of a friendly and hospitable Chebacco sailor!  (This was to be my second time in Sylvester – I first saw her (him?) in Dundee in 1999 when owned by Bill.)

Richard was right on time, and off we went to the Shadwell Docks, one of the oldest docks in London.  It’s no longer used for commercial shipping, but is home to a large and active sailing/kayaking group (see their website at http://www.shadwell-basin.org.uk).  There is good size basin for small boats and training, and since the river is tidal at Shadwell, it is protected by a set of locks, like a canal.

While we waited for Graham, the third member of the crew, Richard tested an elderly Seagull outboard motor – it hadn’t run for a while, and took a few pulls, but nonetheless rasped into life.  Must be true, what Seagull folks say about their engines!  Graham arrived about then, so off we went.

Sylvester lives on a mooring in the river itself.
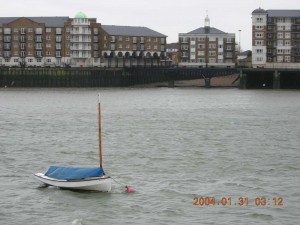
Mooring

Since the wind was howling down the river and kicking up a good chop, Richard thought it best if he and Graham went out to the boat in the dinghy, then picked me up from the beach – a gravely strip along the edge of the river.

It didn’t take them long to strip off the cover, raise the sails (with both reefs firmly tied in) and cast off the mooring.  Sylvester fell off on the starboard tack, flew away to the other side of the river then back towards me and the beach.
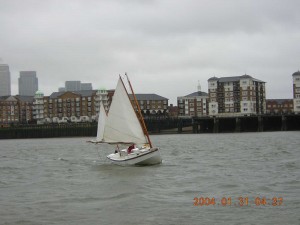
Flying

Richard stopped her, head to wind in about a foot of water, I jumped in and she shot away again.

As I said before, the wind was coming down the river, about 20 knots worth, at least.  As well, the tide was ebbing, adding its strength to the river’s current.  Richard had planned to take the ebb tide down towards Gravesend then come back on the flood, but given the strength of the wind, we decided to start off upriver/upwind to be sure of getting back again.  And what a sail it was.  Even with both reefs, we had to pay strict attention, luffing through the gusts.  Soon after we set out Richard handed me the tiller and I started a new chapter in my sailing career.  Not only did I have to keep us upright, but also make what progress I could up the river, tacking every minute or two and keeping a sharp eye out for other river traffic – including cruising restaurants!
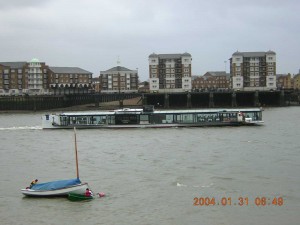
A_restaurant

I didn’t have to worry about the mizzen, which was a big help, as Graham handled that throughout.
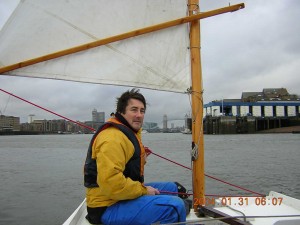
on_the_job

The banks of the river are lined with wharves, pilings and moored boats, and the tourist boats go up and down in a never ending stream.  This was on the last day of January — I dread to think what it must be like in summer!  I don’t think I disgraced myself, but after each tack to the other side and back, my progress could be measured in inches.  So I took the easy way out and gave the helm back to Richard, saying I wanted to capture the experience on my new digital camera.  He showed me how it ought to be done, routinely leaning Sylvester over farther than I’ve ever had my own Wayward Lass – well, maybe I was that far once, but I thought I was going over that time!

I was quite impressed with how Richard and Graham worked as a team to gradually bring us up to the bend in the river where I could finally see Tower Bridge.
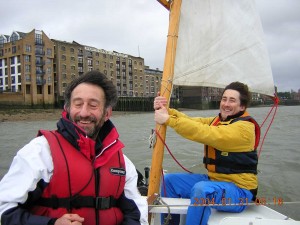
Richard_and_Graham

However, that was our limit for the day, and it had taken two hours to come perhaps half a mile up the river!  We turned around and zig-zagged back down, so we could reach instead of run.  In a very few minutes we were turning into the wind with sails flogging so I could step off onto my beach again.  Sylvester was off on the instant, and was halfway across the river before I had waded ashore.
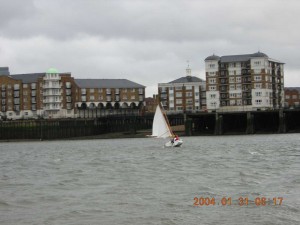
going_away

When Sylvester was moored again and the guys had joined me ashore, Graham said goodbye – it was his birthday and his family were waiting for him to come home so they could start the party!  Richard showed me a few of the sights along the Thames, we even drove under the river (which is new since when I last drove in London.)  We stopped at a boatyard where someone is finishing a Nigel Irens Romilly, but unfortunately the yard was closed and we couldn’t see the boat.  It’ll be interesting to see how Romilly compares to the Chebacco – roughly the same size, accommodation and even a similar rig, at least superficially.  Big difference in cost, though.

After a while, Richard noticed that the river hadn’t risen since we came ashore, so he phoned the local authority that measures these things.  They told him it hadn’t risen for three hours, although it should have.  The wind was strong enough to hold back the tide!  Good thing we didn’t go downstream, we’d still have been there!

We were just in time to see a bit of the Maritime Museum at Greenwich, this was a treat for me as Shackleton’s lifeboat, the James Caird, is on display there.  I snapped a picture before I saw the sign saying “no photographs”, but I’d probably have broken the rules anyway, Shackleton is one of my heroes.
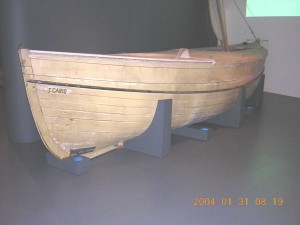
James_Caird

Standing with my hand on the Caird’s gunwale, I couldn’t imagine what it must have been like for the men who sailed her from Antarctica to South Georgia.  And how did they find their way?  I have trouble getting a decent sextant reading when I’m standing on dry land, never mind bouncing around in a 20 foot boat.  Giants indeed.

Closing time arrived far too soon, and we had to leave.  Our next stop was the nearby Greenwich Observatory, where we took pictures of each other astride the Prime Meridian. (It’s painted on the sidewalk!)  However, the pictures didn’t turn out very well, probably because of my lack of experience with the camera, so I can’t show them to you.  You’ll have to visit and see it for yourself.  When we went back to the car, we found we were locked in, but someone arriving for the night shift kindly let us out!  We finished the evening at Richard’s where his wife served us up an excellent dinner.  I stayed later than I probably should have, but was enjoying myself too much to leave.

When I finally pulled myself away, Richard walked me down to the local station, and I caught the Underground back to my hotel – amazingly good train system, every city should have one just like it.  And that was the end of a truly wonderful day.  My heartfelt thanks to Richard, and Graham, for it.

Richard hauled Sylvester the following week, for painting and other work.  He sent this picture of her when she went back in the water, he’s done a really nice job.
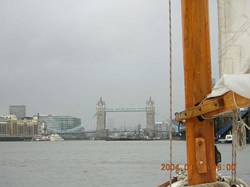
tn_Tower_Bridge

***

Chebacco scale model – Ben Ho


Hello Richard,

I have completed my 16:1 scale model for the lapstrake Chebacco I am planning to build. It’s a very useful exercise for me and well worth the time spent. Attached are a couple of pictures:

1. The strong-back and the molds have been set up, bottom in place. To help level up the molds and to hold them in alignment, I over-lay all the molds
on the body plan, align them longitudinally, drill two holes through them, and used bamboo skewers as the alignment rod.
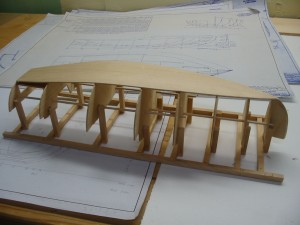
102-0264_IMG
2. The laps were glued on one by one, held in place with a combination of elastics, masking tape, and clothes pin. The laps and decks are made of 1/16
maple veneer which is very easy to work with. Wish the real thing will be as easy!
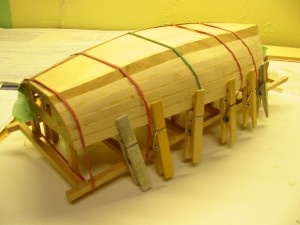
100-0039_IMG

3. The completed model. I’ve enlarged the cabin slightly. The model has served the purpose of validating the offsets, molds, and construction steps. I think I will leave out the spars.
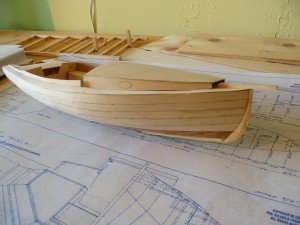
100-0041_IMG

Cheers

***

Some photos – Dave Neder

Good Afternoon Richard
Attached are some photos I took while getting ready for sailing this year.
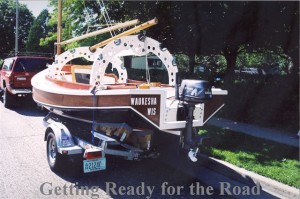
Scan0004

I installed the wedge shaped removable bunks to support the stern. Because of the shape of the rudder, the stern overhangs the trailer.  It seems to ride OK without any strain on the boat.  Barrel bolts prevent the wedges from sliding out while travelling.
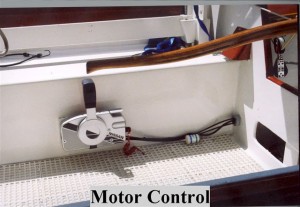
 

Scan0003

The Motor detail shows the chain/turnbuckle system to keep the motor centered when using the motor.  The eye bolts holding the turnbuckles
are offset so that the chain/turnbuckles relax when the motor is tipped up for sailing. The remote control cable run thru a water tight fitting in the motor
well wall. The motor controls are mounted on the starboard cockpit wall.

Getting ready for the road shows the 5HP Nissan. The mizzen is set ready to tip the mast.
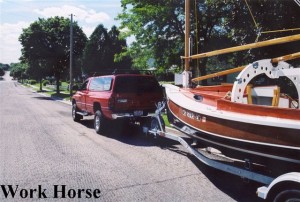
Scan0006

The truck (work horse) has carrier bars attached to the truck cap.  If I  am going to use Mary Beth,too as a motorboat, I store the unneeded spars on the carrier bars.  For traveling on the highway the spars are stored on the white saddles and covered with a boat cover.
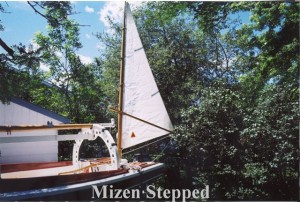
scan0005

I am thinking about adding a jib.  I would like to contact Fraser Howell  for locations of sheet block and other dimensions and any help he might offer.
Regards
Dave Neder

***

The Building of Johanna, A Chebacco on Steroids – Michael Johannessen

Richard,

Thanks for keeping the Chebacco news alive.

I hope you like the story and feel free to use as you wish.

Would it be OK to register it on your site?

I also hope you gain employment soon.

Regards
Michael Johannessen
Melbourne
Australia

———–

Having harbored a desire to build a proper boat for some time, I satisfied the itch by reading home built articles for a number of years.

However the itch got worse and had to be cured.  I have built lightweight racing dinghies in the past and I just had to build another but bigger and
more comfortable boat as I get older.

I wanted a boat capable of good seaworthiness in sheltered and coastal waters, reasonable sailing and motoring performance with accommodation for
my wife and I for up to a week.  As we plan to cruise rivers and lakes, A shallow draft design was mandatory.

I was seeking a design that had modern features but with strong links to the past, particularly the North East USA Catboat, the traditional English
sailing craft as well as the local Couta boats here in Australia.

The Phil Bolger designed “Chebacco” was selected as a prime candidate and after discovering on the internet “The Chebacco Newsletters” edited by Bill
Sampson, I was provided with the necessary inspiration and confidence.  A visit was made to Duck Flat Wooden Boats in Adelaide where the plans for the
sheet ply version of Chebacco were ordered.

The Chebacco is a very pretty boat but the 19’6″ length was a little shorter than I wanted, the accommodation limited and I liked the look of the lapstrake hull.

Mr Bolger’s sweet lines were keyed into the Vacanti Prolines Hull Shape and Stability Software package and the hull expanded till the beam was at the maximum towing road width of 2.4Metres. The overall length turned out to be 6.3Metres.

To develop the planked lapstrake hull shape, the second chine was removed in the software and the underwater shape adjusted until the original waterline was met.  The total displacement increased by approximately 100kg to 900kg when fully laden. No specific inclusion for ballast was made.

A generic CAD package was used to convert the Prolines offsets to a set of construction plans.

Other modifications to the design included a solid keel, sealed cockpit and cabin floors and increasing the cabin size.

The boat was built from plywood with all external areas sheathed in either glass of dynal.  Polyurethane paint was used over an epoxy undercoat to minimize ongoing maintenance needs.

The boat was built the right way up using the 16mm plywood bottom of the boat is a solid foundation for attaching the bulkheads, molds, transom and stem.  The hull bottom jig consisted of 15 stations set at the fairbody height to firmly support the bottom of the hull during the planking phase.

The hull was constructed in three stages, firstly right way up, then upside down and finally right way up again.  Lifting the boat out of the shed twice made working on the boat easier but has twice as much stress as a single turnover.

In general, the following construction sequence was followed, keel built and installed in the Hull Jig, hull bottom fitted to the keel, centreboard case fitted to hull bottom, transom installed, female molds installed, hull planked and bulkheads/inwhales installed.

Half a dozen of my Yacht Club mates helped turned over the hull. A low key first turnover party held.

The next phase of fairing, sheathing and painting of the outside hull was a most boring, messy and demanding.  Building a lapstrake boat is a once in a lifetime experience. Turnover party two was a major milestone as the next time the boat emerged from the shed it would be for the launch.

The final phase of the work took the longest and included completing the hull interior, the cockpit/decking, cabin, rudder, motor and the electrical
and plumbing work.

Launching was successful and as expected the boat floats above the designed waterline until the masts and rigging are installed.  In the meantime 70Kg
of lead in the bow is being used to trim the boat. With the 20HP Honda 4 Stroke on full throttle, the maximum hull speed is almost 8 knots and at 25%
throttle, the speed is 5knots.

As I will using it as both a power and sail boat, I have fitted a steering wheel to control the outboard engine when not under sail.

Like all home built boats, the estimated construction time was very optimistic. As I could only work on the boat at weekend, the one year estimate stretched to five years. Visits to your website helped during the construction.

The next project is to build the spars and turn the power boat into a sail boat – maybe in six months time.
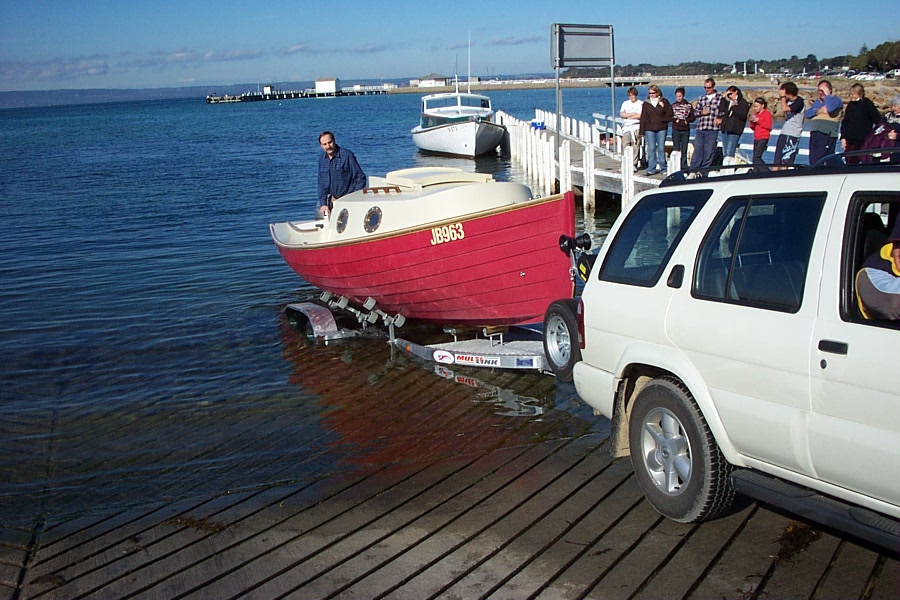
DCP_0014 DCP_0018 DSC01270

***

Wayward Lass in the Canadian Gulf Islands – Jamie Orr

Our 2004 Cruise

This year our annual cruise was in home waters instead of driving to the north end of the island.  This meant I had only a 35 minute journey to Dad’s place then another 5 minutes to Tulista Park in Sidney, saving us two days on the road.  We left the dock at 11:20 on Saturday morning, motoring out onto a flat calm sea.  We steered slightly north of east, passing to the west of Forrest Island.
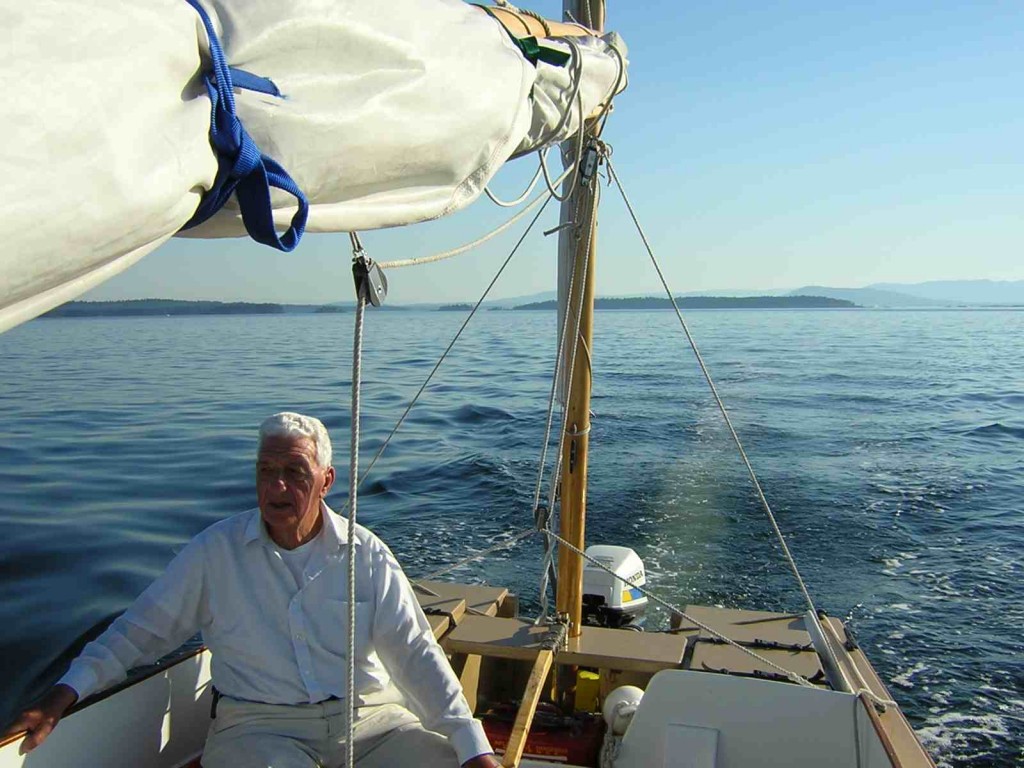
Setting out

Setting out

At 11:45 a touch of wind came up from the south, so we raised the sails and motor-sailed past Domville Island, finally stopping the engine just north of Brethour Island at 12:15. It took us until 1:30 to cover the next mile, sailing slowly against the ebbing tide until we neared Fairfax Point on Moresby Island.  The Current Atlas showed a weak counter-current in our favour, close in to the shore, that would give us a lift around the point and over to Pender Island, our goal for the night.

The Current Atlas lied.  At 5:30 we were still trying to round Fairfax Point.  We’d tried it close in to the land and we’d tried going well out from the point, but either way the little wind we had could not overcome the adverse current.  At one point we crept up the shore, not tacking until our bows were practically on the beach, but although we reached the point, we could not get around it.  Eventually, at 6:15, the tide weakened and we passed the point.  However, it was a hollow triumph, because the wind also died away completely, leaving us drifting down Haro Strait, away from Pender.

So Honda came to the rescue, and we finished the day by motoring into Bedwell Harbour on the south side of Pender Island, and anchoring in the marine park there.  The mooring buoys were all occupied, and the area around them was crowded with anchored boats, but we left them all behind, tucking ourselves into the shallows behind Skull Islet at 7:30, only a few yards from shore.
Here’s Bedwell Harbour, taken from behind Skull Islet

Here’s Bedwell Harbour, taken from behind Skull Islet

We first visited Skull Islet about eight years ago, when chartering in company with another family.  On that occasion we took up a couple of the mooring buoys, but with small children along, we just had to row over to Skull Islet to look for buried treasure!  No golden treasure, but we took away some good memories.

On this trip, we were just thankful that the rocks around the islet ensured our privacy.  This was just the first of several times that we appreciated the shallow draft of a Chebacco. We put up the shelter and cooked up our supper, and by the time we’d cleaned up after it was quite dark.  I pulled the inflatable out of the after locker where it lives and put it on the cabin top to pump it up, there not being enough room in the now-covered cockpit.  There wasn’t really enough room up there either, but the inflatable has two main chambers, both of which go all the way around.  I was able to get the first one tight enough to let me row ashore to finish the job.  I did a little exploring by flashlight, then rowed back to Wayward Lass where we turned in for the night.

In the morning we had a good breakfast, fortifying ourselves for whatever the day would bring.  By 9:00 there was sufficient wind coming into the harbour from the southeast that we were able to recover the anchor and sail out of our corner without using the motor.  However, I have to confess that with all the rocks showing around us (it was low tide) we did start the motor and let it run in neutral while we did this.  Just a bit of insurance.

Bedwell Harbour is connected to Port Browning on the other side of Pender Island by a narrow channel, crossed by a road bridge.  Both Bedwell and Browning are bays that cut deeply into the island (it’s two islands actually, North and South Pender) so the channel is relatively short, but winding.  Since both the wind and the tide were going our way, we thought we’d see if we could get through the passage under sail alone.  We’d turned off the engine by now, and were confident enough that we left it sleeping.
 

The entrance, between the buoys

The entrance, between the buoys

The channel was sheltered, and little wind followed us in.  At one point we thought the wind was going to turn against us, but after one or two flaps of the mainsail, everything went back as it was and we carried on, the tip of the gaff clearing the bridge with a healthy margin.
 

The bridge

The bridge

As we neared the end of the passage, the wind grew steadier again, until we had a good sailing breeze from the mouth of Port Browning, which faces east.  Once clear, we turned and ran to the head of the bay to have a look around.  The most interesting sight was what appeared to be a Viking ship.  However, when we sailed closer, we could see that it was a large clinker built (lapstrake) boat with a false stem and stern added.  It looked very authentic from out in the bay, I guess that’s a lesson not to examine things too closely or they’ll spoil your illusions!
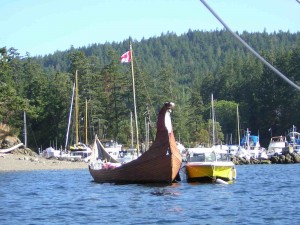
Vikings in the Gulf Islands!

Vikings in the Gulf Islands!

We turned and tacked between the boats anchored off the shore, working our way towards the entrance to Port Browning.  We had a notion to sail to Saturna Island, since we were so close.  However, the closer we got to the mouth of the bay, the stronger the wind blew, and before we reached the open water we stopped and tied a reef in the mainsail.  As we passed into Plumper Sound between Pender and Saturna, the reefed mainsail was quite enough to keep us moving along at hull speed.  To reach the southern point of Saturna was going to mean a long, wet, uncomfortable beat, and while we had no doubts about Wayward Lass’ ability to get there, we weren’t convinced that we wanted to go to all that trouble.  So it was up with the helm and let her run northeast with the wind, leaving Saturna astern.

The tide was still flooding north, but the Current Atlas showed a contrary current coming southeast down Plumper Sound.  With the weight of wind in our sails, though, the current was academic.  We carried on at hull speed, occasionally exceeding that when we caught a wave and surfed down its face.  Another small sailboat was motoring along behind us and we were easily drawing away from him until he exchanged motor for sail.  Even so, we still pulled ahead, but more slowly.

As Plumper Sound narrowed into Navy Channel between Pender and Mayne Islands, we held to the port, or southwest, side, thinking we would turn down Swanson Channel and south around Prevost Island.  This turned out to be a mistake.  While our speed dropped, the other boat drew level then ahead, gaining half a mile in a matter of minutes.  To make matters worse, the wind off the point was fluky while the current against us became stronger.  So for the second time, we took the easy way out, and followed the other boat, now just a dot in the distance, up Trincomali Channel to the north side of Prevost island.

This was a successful strategy, although we never did catch up to the other boat before our paths separated for good.  In no time we were past Prevost, turning southwest into Captain’s Passage towards the town of Ganges on Saltspring Island.  We were able to get through without tacking, then ran downwind again until it was time to take in the sails and use the motor to negotiate the entrance to the government wharf.

Saltspring is the biggest of the Gulf Islands, and Ganges is the biggest town on Saltspring – which is not to say it’s big compared to other places!  But it has a number of docks, I think there are two public docks and at least one marina, although I’m not very familiar with them and could be wrong here.  We tied up at the Centennial (public)Dock at 1:30, and as it was still early, we had no trouble finding an open space.  Rafting up is normal procedure at the public docks, but I don’t want to be on the inside of a raft-up because Wayward Lass is only 20 feet long with a lot of shape.  It would be hard to avoid rubbing somewhere.  However, it never came up as we were on an inside dock and none of the folks who came in later came our way.

We bought some items I’d forgotten, like a pancake flipper and a thermos, and renewed the ice in the cooler.  Then we rigged the boom tent as an awning against the hot sun – we had great weather, never a drop of rain, but it did get very warm at times!
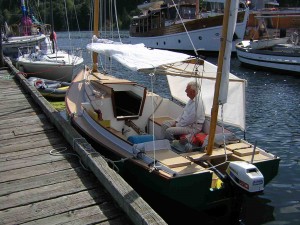
 

The boom tent worked well as an awning

The boom tent worked well as an awning

There was an interesting selection of boats moored around us.  Several fishing type boats were undergoing renovations, and there looked to be a community of live-aboards, or at least very regular visitors, on the docks.  One of the visiting boats was the Mary Adair, owned by Robin – I didn’t get his last name, but he recognized our boat from last summer. It was he and his crew that Randy Wheating and I met at Sidney Island, when they came to take the old dock out of the lagoon.

The Mary Adair is a big William Garden ketch, and Robin has been rebuilding her for five years.  I forget the numbers, but he’s replaced numerous frames, a lot of planking, and I think the whole deck.  The new frames are in two pieces, steamed separately then glued together in place, the planking is red cedar.  What struck me most, though, was the lovely smell of yellow cedar below decks.  The interior is all done in that wood and looks as great as it smells.

Robin hadn’t sailed her a lot yet.  He’d got the mainmast and sail from a schooner, and he’d left off the mizzen until he could try out the main alone.  He’d also got a lot of ballast to put back, she was riding very high so a cautious approach was a good thing!

After breakfast next morning, we motored clear of the docks and set sail right away.  The wind had swung round a hundred and eighty degrees, coming now from the northwest. However, this meant we could run back out of the harbour, so we had an easy start.

My parents used to have a house overlooking Ganges Harbour, behind the chain of islands (called the Chain Islands!) on the northeast side, and it wasn’t unusual to see a boat lose its propeller on the shallows between the islands.  After a good look at the chart, I decided we could safely cross behind the line of islands so we picked out a gap and sailed up to it close hauled, raised the centre board for a moment as we crossed, and we were over.  However, I got a surprise when I looked at the chart again and realized I had missed an entire island, and crossed somewhere else entirely!  Again, I was glad to have a shallow draft boat.

We reefed again before we reached back through Captain’s Passage to Trincomali Channel, so were ready for the full force of the northwest wind – an estimated fifteen knots, with gusts to twenty, at most.  However, whitecaps stretched away as far as we could see, so we prepared for some wet sailing.  With one reef, Wayward Lass handled things easily and we settled down to enjoy a fast journey.

The wind was actually more from the west than the north, so we were able to make long and short tacks, almost making our desired course on the long ones.  Again we found ourselves overhauling a motoring sailboat, (not the same one) and again it raised its sails and started moving faster.  This time, going to windward, the sloop rig with its big genoa gave him the advantage and we started to drop behind.

The wind was great while it lasted, but as we approached Wallace Island it started to die away.  By the time we had shaken out the reef it was almost gone.  We kept moving, but very slowly.  Our friend with the genoa was having even worse problems, he was close in to shore and going nowhere, and we gradually caught him up until he restarted his motor and moved off.  A few minutes later we followed his example, and motored into Conover Cove on Wallace Island, a popular anchorage.

Our draft again allowed us to anchor away from the crowd, in the shallows at the south end of this long and narrow cove.  It’s not long and narrow the way you’d expect, but instead has a narrow entrance at right angles to the island (also long and narrow) and to the long axis of the cove itself.  We chose the southern end.

We’d had a short day again, so I had time for a good walk on the island.  I looked at some old cabins, the last resident moved away in the 1980’s I think, and the whole island is now a park.  I also walked across the island (a very short walk) and looked out over a now calm Trincomali.
 

Trincomali from Wallace Island

Trincomali from Wallace Island

We finally got an earlyish start the next morning, leaving at 8:40.  Our tide calculations worked out, we still had three inches under our keel at low tide, just before we left.  We motored out and put up the sails again as soon as we cleared the entrance.  The wind was from the same direction as the previous morning, but not as strong, so we didn’t reef. We were in Houston Passage now, and wouldn’t rejoin Trincomali until we passed Wallace and its neighbors to the northwest.

We had planned to stop at Clam Bay the previous day until the wind failed.  This bay is made by Thetis and Kuper Islands, which are like one bigger island with a muddy strip between them.  This muddy strip has, I believe, been dredged in the past.  In any case, the chart says “boat passage at high water” and we’d looked forward to trying it.  However, we wanted to make the most of our wind, so we tacked on past Clam Bay, promising ourselves we’d stop on the way back.

As we sailed along, a de Havilland Twin Otter, (a twin-engined seaplane) came flying along at only about a hundred feet.  As we watched, it lost more height then landed in the middle of the channel.  It idled along for a while, then put on the power again.  However it didn’t take off, but raced over the water for a mile or two, making a long curve as it went.  After a further time of doing nothing much, it powered up again, taking off this time.  We couldn’t decide why it was doing this, but when it came back later and landed a second time, we decided it had to be some kind of training exercise.

Our destination for today was Pirate’s Cove, a marine park on De Courcy Island, one of another chain at the north end of Trincomali.  Once we could point past the north end of Thetis, we made a long tack, all the way over to Yellow Point on Vancouver Island, setting ourselves up to make Ruxton Passage, a small pass immediately south of De Courcy, on the next tack.  We had to pass through the chain in order to reach the entrance to Pirate’s Cove, on the east side of the islands.

Dad had the helm, and we made excellent progress towards Ruxton.  However, just short of the passage, a power boat passed in front of us, and it was as if he just took all the wind with him.  We were left bobbing around in a chop with only the slightest breath of wind.  However, Dad persevered, and just barely got us through Ruxton before the current started running against us.

It was 4:00 in the afternoon by now, so we said we’d give it another hour before starting Honda.  We mostly drifted for the next fifty minutes, moving slowly southeast, the wrong direction.  Then, with ten minutes to the deadline, the breeze came back from the northwest and we started sailing again.  We took a long tack out into the main channel, then aimed for the entrance to the cove.  Some care is wanted with this entrance, the cove runs northwest/southeast, as does the island, and reefs run northwest from the point guarding the entrance, even beyond the marker.  And if that’s not enough, there are more rocks on the island side, narrowing the entrance further.  However, these are well marked, so as long as one doesn’t cut any corners and stays between the marks, all is well.

We passed the reef on a close reach, gybed and ran down between the marks.  There were a number of yachts already anchored, but there was a good looking space for us in the middle of them. We were being followed by a big sailboat under power, so we didn’t fool about looking for a better place in case we lost this one.  As soon as we reached the right place, I rounded up and dropped the Danforth from the cockpit, the rode already being in place over the bow.  Wayward Lass surprised me, carrying more way than I expected, and for a minute the anchor rode streamed out behind us.  She soon stopped and drifted back but I kind of wished I’d held on to the anchor a few seconds longer, because by the time I let out the right amount of rode for the depth, we were closer to the next row of boats than I had planned.  But not close enough to make it worth moving.
 

Sunset from Pirate’s Cove, showing the entrance markers

Sunset from Pirate’s Cove, showing the entrance markers

The wind that had brought us into Pirate’s Cove was now blowing at fifteen knots or better.  Pirate’s Cove is somewhat exposed to the northwest, the same direction as the wind, so we went to bed expecting some rolling and noise from the waves.  That didn’t keep us awake, though, after a second day of windward work.  Our anchor also gave us no concerns.  The Danforth has held the light Chebacco in worse conditions, despite weighing only eight pounds.  Others weren’t so lucky, though, and I was woken at 2:30 by bright lights reflecting off the white boom tent.  We could see a sailboat moving around downwind from us, they must have been dragging.  Once they re-anchored, it quieted down again, but in the morning it was apparent that they weren’t the only ones to have trouble.  Several boats had moved, and others had disappeared, presumably looking for better protection.  The big boat that entered behind us was one of the ones that had gone.  Wayward Lass hadn’t moved an inch, nor had the Cal 20 directly downwind from us.  Let’s hear it for little boats!
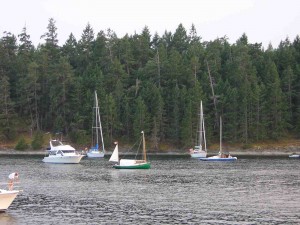
 

Inside Pirate’s Cove

Inside Pirate’s Cove

It was time to be thinking of going south again.  I had entertained hopes of reaching Nanaimo and logging some time at the Dinghy Dock, a harbour pub there, but it wasn’t to be. Too much windward work.  Oddly enough, if we’d had the usual summer winds, or rather lack of them, we’d probably have made it, but by motoring.

In any case, we motored out of Pirate’s Cove at 8:00 with the wind still blowing a good fifteen knots.  When we put up the sails, we put a reef in the mainsail, expecting the wind to be stronger out in the channel.  We were surprised to find it weaker instead, so we took out the reef and turned downwind.  We had a very pleasant run back to Clam Bay, arriving at 9:50 – much less time than it took us going the other way!  Since low water had only been an hour and a half earlier, we anchored off the cut and watched the water rise.
 

Watching the tide rise

Watching the tide rise

At 10:30 I got impatient and pulled up the anchor.  We motored slowly along until we grounded on the mud, then I pulled up the motor.  As you know, a short shaft motor only extends exactly as far as a Chebacco’s skeg, but there was a chance we might drift sideways and bend something expensive.

Two views of the cut:
 

Looking back
Looking back

Looking ahead

Looking ahead

In fact, we had a slight current with us, so as the water level rose, we would unstick and drift forward.  We used paddle and boat hook to keep her aligned when we grounded, so we weren’t pushed broadside across the channel, but it was easy work.  We eventually made it through at 11:30, the shallowest part being right the western end.  We started the motor just long enough to push us into Thetis Island Marina, where we hoped to get showers.

Unfortunately, only those boaters who paid for moorage overnight could have showers, due to a scarcity of water.  We were welcome to fill up our five gallon container, though, and we also hit the café for two big pieces of pie and a couple of large mugs of coffee.  In less than an hour we cast off again, drifting away under sail.

The wind was disappointing on this side of the island.  We managed to sail out of the harbour into Stuart Channel, but made very little progress after that.  We wanted to go down the east side of Saltspring Island this time, through Sansum Narrows to Genoa Bay.  It eventually became apparent, even to us, that it wasn’t going to happen under sail, not that day anyway, so we fired up Honda and furled the sails.

Honda gave us a pleasant journey, making nothing of the fact that the tide had turned against us at the narrows, and we tied up at Genoa Bay, tucked into larger Cowichan Bay, at 7:15.  The office had closed, but the shower building was open, so we were much cleaner and felt a whole lot better when we presented ourselves at the restaurant.  This was our treat, the only meal we ate “out” on the trip.  However, neither of us were really hungry, so we concentrated on the appetizers and desserts, leaving the entrees for another time. The beer was good, too.

The office was still closed when we left the next morning – unusual for a marina to be keeping banker’s hours at that time of year.  (I called a few days later and ‘fessed up, and paid by credit card.)  We motored out of Cowichan Bay, hoping to find some wind, but this was to be our big motoring day.  We did sail for a while from Cape Keppel to Isabella Island, along the south shore of Saltspring.  However, with a strong feeling of déjà vu, we couldn’t overcome the current flowing against us around Isabella – it’s right against the land, more like a point than an island when seen from the sea.

So we called on Honda again, and motored off northeast, towards Prevost Island again.  We could have been back at our starting point in Sidney in under an hour, but we weren’t ready to go home just yet.  By mid-afternoon we closed our circle around Saltspring Island (and a few others) and were nearing Active Pass, between Galiano and Mayne Islands. When people come to Victoria via BC Ferries, Active Pass is what they remember from the trip.  It’s two miles long but only three or four hundred feet wide at times, and it feels like the big ferries are going to graze the sides as they negotiate the two ninety degree turns in the pass.

So naturally, we wanted to sail through this marine freeway.

It’s not as dumb an idea as it sounds as first.  The ferries stick to their specified routes, and despite appearances, there’s a lot of water left for the rest of us.  As well, they sound their horns before coming around those corners, so there’s lots of notice given.  There’s also the schedule, but with the number of vehicles to load in summer, sailing times can be delayed so we didn’t count on that.  In any case, we arrived at the pass with a light north wind, which, if it had kept true, would have taken us through on a broad reach.  But inside the pass the winds were fluky and unreliable, and the current, which was just barely still with us, swirled around in circles as it moved eastward.

We were about half a mile into the pass when I heard a ship’s siren.  I wasn’t sure which end it came from, as it bounced off the islands, but that didn’t matter.  We started the motor and moved to the south side, away from the ferry track.  A minute later, the Queen of Saanich came into sight from the west, doing about 20 knots.  She passed us on the other side of the channel, then before she was out of sight a smaller ferry appeared from the east.  We thought this must be the ferry that services Galiano Island, stopping at a dock in Sturdies Bay, just inside the eastern end of Active Pass.  As it went by we could see a third ferry approaching, so held our position until the big Spirit of Vancouver Islandhad also passed us, heading west.
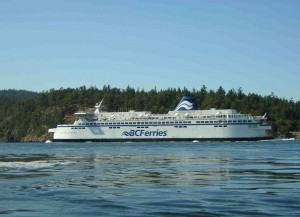
The Spirit of Vancouver – don’t mess with this one!

The Spirit of Vancouver – don’t mess with this one!

That was it for ferries.  It would probably be an hour before the next one came through, but we didn’t try to sail any more because the wind wasn’t reaching us in there.  I furled the sails and we completed our transit under power, turning south once we reached Georgia Strait.

We travelled southeast along the “outside” of Mayne Island to Edith Point, where we turned south and negotiated some small channels that eventually led us to Winter Cove, between Saturna and smaller Samuel Island.  On the north side of this cove is Boat Passage, a narrow opening to Georgia Strait.  The current was flowing into the Cove, so we felt safe in having a look – a strong current in the other direction could have left us stuck in Georgia Strait, and having to go the long way around to get back again – a matter of several miles.  As it happened, we had enough power to get out, and of course coming back was no problem.

As we motored over to our chosen anchorage, we altered course slightly to avoid a short pole sticking out of the water.  This was nailed to a deadhead, a water soaked, partly sunken log.  Next time we’ll give it a wider berth, though, because not far from it was another one, unmarked.  We were too late to go wider, we only had time to change course enough to go between the deadheads – not the preferred action, in case of yet another one!

This area has diurnal tides, two highs and two lows each day, and the highs and lows ususally vary in height.  The tide table showed a rising tide for most of the afternoon, then a drop of less than a foot, followed by another rise until after midnight.  Only then did the level really start to drop, and it wouldn’t be really low until mid-morning the next day. This was important to us because we wanted to anchor off the old log dump, where the park is now.  No one else was anchored this close because of the drying rocks and mud shown on the chart.  We did the math, and decided that as long as we were out of there by 9:00 in the morning, we’d be all right.
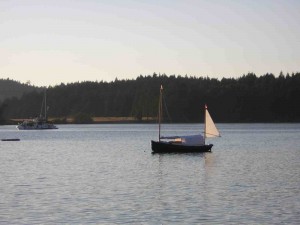
 

At anchor in Winter Cove, with the boom tent up

At anchor in Winter Cove, with the boom tent up

After a sound sleep, we were up at 6:00 and glad to see our calculations were sound.  We thought we’d better not waste time, but there’s a lot to do each morning to get under way, particularly as we were sleeping in the cockpit.  We stowed the air mattresses and rolled up the sleeping bags so we could put the floorboards back where they belonged, took down and folded away the boom tent, cooked breakfast and cleaned up after, then finally deflated the dinghy and stowed that away.  So it wasn’t until 8:00 that we were ready to pull up the anchor.  By then the bottom was coming up fast, if we’d waited until our 9:00 deadline, we might have been hard aground.

We left Honda alone, raising the sails instead.  Dad took the helm and I pulled in the anchor, everything went according to plan and we sailed clear, enjoying a good sneer at another boat that was motoring out.  (Yes, I can be a jerk at times.)  We were able to clear all the reefs and rocks on a broad reach, then turned towards the wind as our course became clear.  We planned to cross Plumper Sound and retrace our path through the channel between North and South Pender.  The wind was from the southeast, and at first we thought we’d have to tack our way up to the entrance to Port Browning.  However, as we left Saturna, the wind backed around to the south and let us point almost directly at the entrance.  We had a fine sail over, only needing one short tack to let us weather the point and run down the harbour.

No sightseeing this time.  We went directly to the channel, starting the motor as we neared it.  We left the sails up but we were completely sheltered from any breezes.  We were through in a minute and had the engine stopped and out of the water again.  As we worked our way up Bedwell Harbour, against the wind, we wondered whether to stop for fuel. However, the wind was doing a great job, so we thought we could count on it to take us at least half way home and we’d definitely have enough fuel then.  So although our next tack took us within yards of the fuel dock, we turned away again and carried on.

Once out of the harbour, we could easily make our course, passing south of Fairfax Point on Moresby Island, where we spent so much time the first day.
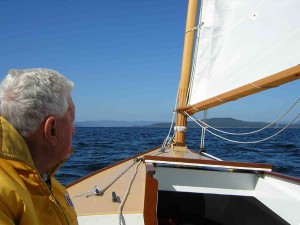
Nearing Moresby Island, going home

Nearing Moresby Island, going home

Although the wind kept blowing, it wasn’t as strong as it had been, so we thought it best to go as far south as the wind would let us.  This way, we hoped to use the tide, which was about to change to flood, to our advantage.  This meant we would ideally pass upwind of Forrest Island.  Dad held the helm steady as we crept up to the island.  He didn’t quite make it without tacking, but only a very short tack was needed.  From there we could easily round Sidney Spit and carry on across Sidney Channel to the boat ramp.  We passed the spit about noon, docked at 12:45, and had Wayward Lass on the trailer, ready to roll, by 1:30.

Another cruise was over.  This one was a huge success, we had expected light and variable winds, and a lot of motoring, but instead we had more sailing than on any other cruise, and good sailing at that.  And no rain!

***

Launching Day – Ed Heins

After 6 years 2 states and 4 places of residence, I managed to launch Boudicea, the Chebacco that  has doubled as a garage ornament for far too long.

We approached launching day with appropriate plans for celebration including a  christening bottle of some not-for-consumption concoction all neatly enclosed in netting, blue blazers, and Deb, my British Lady wife, well rehearsed in her best QE2 accent .

All great ideas, however they didn’t get used today.  In fact we launched into probably the most inappropriate venue I’ve ever seen.  (Unfortunately, while  the Shenandoah Valley in Virginia is resplendant in natural wonders, it exhibits a complete lack of sailing venues)  Nevertheless, we dunked the boat and celebrations may follow at a later date and location.

The good news.  1) The trailer rig travelled without a hitch. It’s apparent I need a tongue extension for shallow ramps, but more on that later.  2) we didn’t take on any water we didn’t understand. Yes, the centerboard pivot leaks a bit, but that is a project yet to come.  3) I didn’t fall off the boat, do a bad “Caber Tossing” impression with the main mast, or otherwise.  and 4) I arrived at the launch site with everything I needed for a normal set up and launch.

Now the bad news.  1) Lake Shenandoah ( a pond to anyone other than a realtor), is small, narrow, shallow (something the locals are either unaware of, or unwilling to share).  Hence we had to push the boat off the trailer, and reloading it was an experience.  2) I’ve got a problem in the gaff rigging that will be resolved before the next attempt at a sail. Please ignore the  poor sail set in the attached pics.  3) Probably the worst occurance however was a jammed centerboard in the down position.  I placed a block on the  board to give better purchase which worked well in dry tests, but apparently after numerous groundings ( refer to item 1, !@###$%^ shallow pond)  the block has managed to twist in the trunk.  We managed to get the board back up, but damage assessment is on hold till the morrow.  Oh well, the great thing about building a boat, is that the repairs are just a continuance of the project.

Next on the agenda is the Atlantic small craft festival in St. Michaels MD.  I’m confident that my trailer rig will allow me to get it there.  Beyond that it’s anybody’s guess.   If anyone should see a statuesque British woman smacking a blue hulled Chebacco with a netted bottle, be advised that things are probably going better the second time around.

“Let the chips fall where they will.  I’ve got boats to build.”

Cheers y’all.

Ed Heins

New Market VA
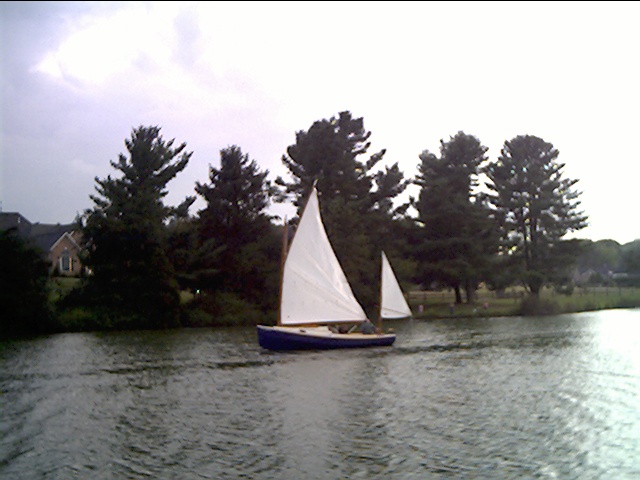
Boudicea_1st_sail Launching_day launching_day_2

***

Blow-by-blow – Dick Burnham

“Stealing Horses” waits to bolt from her stall, but first…

The construction of the sheet plywood Chebacco, “Stealing Horses,” continues in spurts and stops.  I’m learning boatbuilding as I trip merrily along.  Last summer we were only able to flip the hull.  This summer we’d hoped to wrap up the building and start the sailing, but that didn’t happen.  Nevertheless, for what it might be worth, here’s a report.

Since most articles today are on cruising (those lucky ones, huh?), and previous reports were focused on hull construction, I’d like to report a bit on the building of those things above the topsides and inside, just to inspire would-be builders that it is all doable, and pleasurably so.  While some have suggested that this work equals, in time, the work of hull building, let me say: Not so!  This second phase, what Robb White in MAIB called “furniture building”, is more time consuming.  There’s lots more pieces and figuring and head scratching for a novice like me.

photo1

Here, from the cockpit looking forward, can be seen the various stringers and carlins for the seats, the deck, and the cuddy roof with mast slot.

photo2

The photos show “Stealing Horses” with the cuddy, deck, and cockpit seats about ready for covering.  The cuddy walls are solid ½” thick rosewood, saved from previous travels. The cuddy roof carlins are the same wood, but the deck and other framing members are spruce which is encapsulated in epoxy.  Building the cuddy walls was a matter of repeated fittings so that the bottom hit right and there was extra height on top.  As others have suggested, I cut the elliptical windows while the trunk was flat on sawhorses.  With the trunks in place, the bottom carlins were then added, with ring nails and epoxy.  Then the top carlins of the walls were added after using bendy battens to get it right.  Next, the other roof-framing members were sized and put in, with recessed silicon bronze screws that were bunged.  Epoxy is always used to butter the joints.

The rounded nosepiece of the cuddy was made up of several 1” thick wood pieces, fitted through trial and error, and put in with epoxy. It was shaped in place with a handsaw, a rasp, and sandpaper on a board.  (I’ve since bored a hole in its prow and inserted a coin from the South Pacific, setting it in epoxy that will be UV filtered with varnish.)

The tops of the carlins and the cuddy wall were shaped to final form with a handheld power planer and a belt sander (36 and 50 grit!).  I did this portion “wrong” as, according to Phil Bolger, he’d premised his detailing based on a sequence that had the the deck down before the cuddy trunks.  Nevermind!  I had it done before I wrote to him!
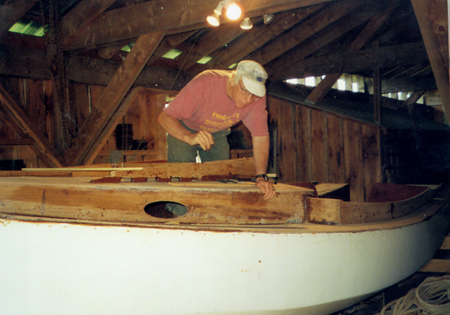
photo3.

The cuddy roof went down easily with two layers of ¼” plywood.  The curve was fun to do and was easily accomplished with ring nails and epoxy.  I prepainted the cuddy ceiling but it was accidentally smeared with thickened epoxy and now I think that prepainting was a waste of time.  The sliding hatch runners went on as did the framing for the mast slot hatch—screws and epoxy.  The hatch was a head-scratcher, but I’ve worked it out, adding extra hand-holds and/or places for lines to be tied.

photo4

Xynole fabric in epoxy covered the deck and cuddy roof.  The process I’m using, taken from Reuel Parker’s book, “The New Cold-Molded Boatbuilding”, is this: roll regular epoxy on the plywood (it is, by the way, Meranti marine grade – I think grade BS6566 – from Noahsmarine in Toronto).  Then, the next day, tape the xynole down and squeegee into it one coat of epoxy (my epoxy guy, Larry at Raka Epoxy, suggested adding some fumed silica to this and the next step for some thickening—I did this).  The day after, roll on one more coat of epoxy.  The cloth is now hard and “rough” and was then sanded down just a bit for a finished ‘roughened’ surface good for footing but not too rough for those who will slip!  This will now receive 2 coats of semi-gloss paint (I use Kirby’s and have selected a color that won’t have too much glare).

The curved returns of the coaming were built up and installed, and I’ve added a veneer of about 3/16” thick wood to the forward bulkhead of the cockpit as well as to the outside of the coaming.  A continuous band of natural wood runs from the cuddy prow all the way aft along the coaming to the transom. This will be varnished and hopefully look nice against the white topsides.

The rubrails have been put together from pieces, shaped, epoxied on the backs and I plan to paint them with repeated applications of Kirby’s “Salty Dog Deck Oil” – a pine tar based mixture for these pieces of wood that will be subjected to abrasion.

That’s where I am in September.  Before frost and winter arrive, the hopes are to paint the deck and roof, install the rubrails and the trim at the cuddy roof edge, varnish the wood, and start mast building.  Working up steam to have a go at the masts and gaff, I’ve built a sample section using the hollow ‘birdsmouth’ design idea that was featured in WoodBoat magazine (July/August 1999).  At the same time, however, I’ve put the sicklebar onto the tractor and am belatedly out in the field mowing, so who knows what will get done!

photo5

***

Kitty Hawk in the Po Delta – Vincenzo Ciminale

Dear Richard,

Attached is a photo of Kitty Hawk with all of her sails up, gliding along in the Po Delta with barely any wind. In August 2001, Kitty was launched with standard Chebacco main and mizzen sails. From the start it was clear that she would need additional sail area for the very light winds that prevail in the Venice lagoon during the summer months. We first rigged up a jib on a retractable bowsprit, with a jib roller. The jib, which  is about 5.5 square meters (about 60 sq ft), adds at least one knot of speed and corrects Kitty’s weather helm. When the situation really gets desperate, we rig up the mizzen staysail. This sail is about 4 square meters and is a recycled jib from a traditional lugsailer. The mizzen staysail works well on long tacks, from close-hauled to broad reach. To tack, we have to detach the tack of sail sail and walk it around the boom and reattach it.
We would like to launch an idea – a Chebacco foreign exchange program. For example, we would welcome other Chebacco sailers to visit and use our boat for a weekend in the Venice lagoon, and would appreciate the possibility of sailing other boats and meeting other Chebacco sailers.
Buon Vento
Donna D’Agostino
Vincenzo Ciminale
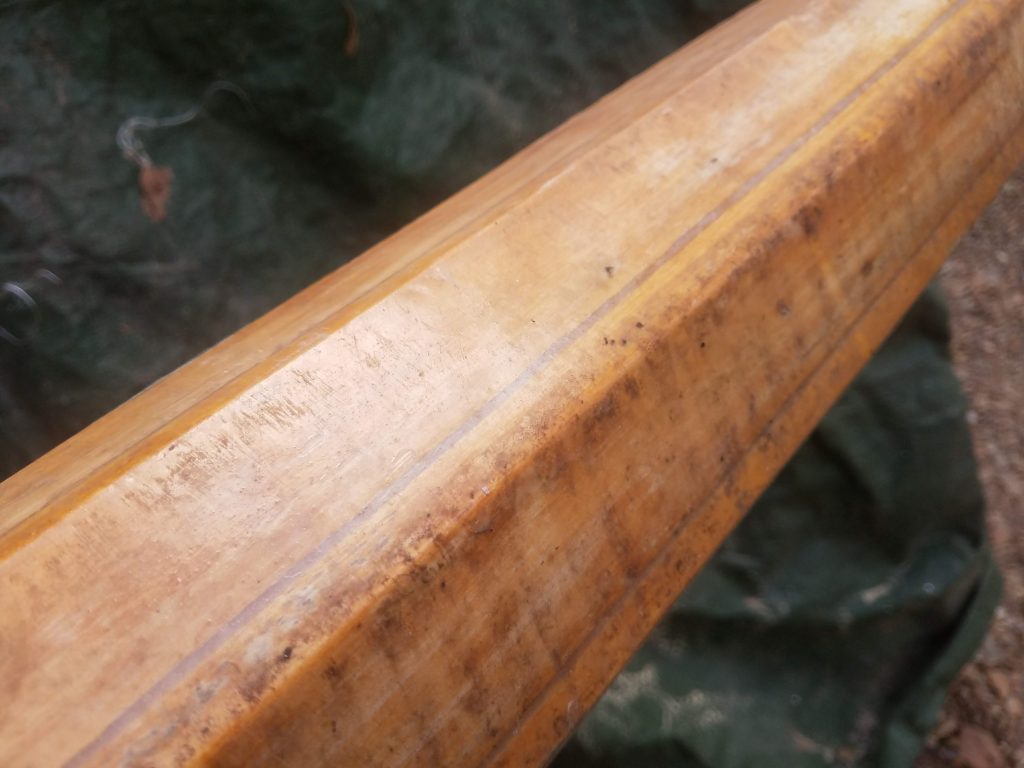
 IMG_0977 IMG_0978 IMG_0980

Chebacco News 47

News, questions, and boats for sale.

News:

Last issue started out with “There will be a calendar!” This was perhaps overly optimistic… 🙂 Life, as life so often does, has interferred. With any luck I’ll have one ready for 2005.

Questions:

Hello Richard,
After watching the Chebacco web site for almost 2 years, and having read the Archive files several times over, I’ve decided to build the 20 ft Lapstrake Chebacco. I’ve made the crucial first step – ordering the plans from PB&F. I will probably build a scale model first. But before I do any serious work, I will need to extend my garage (a standard 19′ by 18′ double garage) by 6 ft. Hopefully that will happen as soon as snow melts!
I am interested in making the cabin wider and longer to make it more accommodating. Can you send a request out to the webzine – to those who have made similar modification, I would much appreciate any input, ideas, photos, etc.!
Regards

Ben Ho

Waterloo, Ontario

Chebacco’s for sale:

SOLD! http://rockland.villagesoup.com//Community/Story.cfm?StoryID=23239 (ed)

—– Original Message —–
From: “Paul Thober” <paulthober@yahoo.com>
To: “Richard Spelling” <richard@chebacco.com>
Sent: Thursday, May 20, 2004 8:39 AM
Subject: Selling Samnatha

> Richard, I am attempting to sell Samantha. If you know of anyone who might be interested, please inform them. I owe the city of Rockland a little in excess of $700 and would be happy to sell her for that amount.
>
> Paul Thober

***

Life is Change – Richard Spelling

Well, a lot has happened since the last issue. Articles have been slow in coming, and I’ve been too busy to write anything. Apparently, everyone else has been too!

Finally got the new place set up, and was working on the shop and the car/boat port. Then, I must have driven over one of those surprise generators they bury right after those “dangerous intersection” signs.

There was a systems crash at work, and the newest backup for that system was two weeks old. They started going after the girl in charge of the system, and I spoke up and said, basically, “I was in charge of backups, here is what happened, it wasn’t her fault.”

So, they fired me instead.

I am now in the ranks of the unemployed. I’m sending out resumes, and trying to start up my budding business. However, I was caught flat-footed, as I had grown comfortable at this place. Out of some, perhaps misguided, sense of loyalty, I had stopped my usual practice of looking through the paper and sending out resumes to interesting jobs.

So.

If any of you folks have been holding back contributions to the webzine, now would be a good time…

 ***

hollow keel comments – Marty Clough

Hello Richard

Phil Bolger was kind enough to respond to questions I asked about the hollow keel on Chebacco.  I thought you might wish to include portions of these two attachments in the next newsletter.  My own Chebacco is covered for the winter ( cheap plastic tarps) with much work to be done before I get to the keel. Marston Clough (use my hotmail address which you already have- “cloughm@hotmail.com”

—————————————————————-

November 23, 2003

Dear Mr. Bolger,

I purchased my Chebacco plans from Dynamite Payson rather than directly from you (an option I wasn’t aware of somehow) so I understand you may choose not to comment, but I have a question about the hollow keel.  Some of the builders seem to build to plans but many opt for a solid keel, built up various ways.

I would be pleased to build to the plans (especially after reading your comments about the Reiver) but I am concerned about marine growth on the inside of the box (the boat will sit on a mooring in Tashmoo on the Vineyard, where water temperatures and nutrients allow fast growth of unwanted stuff).

  • Won’t barnacles and sponges and all sorts of growth occur on the inside of the box, possible creating

o      Deterioration of the box

o      A horrible smell when I store the boat in my backyard

  • Other than building simplification, are there strong structural drawbacks to making a laminated solid keel?

My Chebacco still has a ways to go, but I am finding it an entertaining and challenging project.  If you can comment, I would like to share your comments with the Chebacco.com website which has been a good source of continuing inspiration and support.

My brother Brad got me started as a Bolger-phile by purchasing a Gloucester Gull from Dynamite many years ago and car-topping it from Maine to the Vineyard ( he still has the boat more than 30 years later).  I’ve built the Teal (my wife’s favorite) and Bobcat (“tiny cat” -with a Beetle Cat mast and sail) and look forward to your honesty in boats, books and Messing About.

Sincerely yours,

Marston Clough

Vineyard Haven, MA

————————————————————-

Phil Bolger responds:

“The first boat I did with a hollow, free-flooding keel was launched in 1972.  I had the same concern, but in fact it did not happen.  We took one side off after several years and found the plenum perfectly clean.  We’ve done quite a few since and not trouble has been reported”

“The object was to avoid the shrinking and swelling of the components of a solid deadwood…”

“A solid keel or a skeg built up wholly of plywood would not have this problem; it would be that much heavier on the trailer.”

***

A Visit to the Port Townsend Wooden Boat Festival

From Chris Bennett with comments from Jamie Orr

Lass-1I’m still not clear on just why we chose to spend a night at anchor when we could have been in our warm beds, but have to admit it allowed an early start on Friday.  The anchorage is a beautiful little cove, with good shelter, and I plan to visit it again sometime soon, this time with the family.We began our voyage on the evening of Thursday Sept 4, planning to cross the Strait of Juan de Fuca from Victoria to Port Townsend that evening.  However the marine forecast advised of a small craft warning.  Being in no mood for an uncomfortable wet trip, we retired to a nearby Chinese restaurant before sailing to nearby Chatham Island.  We dropped the hook in 2 fathoms, set up the boom tent, and turned in for an early night.  John Ewing took the cabin and Jamie Orr and I slept under the boom tent.  Jamie’s boat, a Chebacco 20, named ‘Wayward Lass’ has cockpit floorboards that can be raised to create a comfortable sleeping platform and we spent the night under the stars listening to the wind blowing off the strait.

The next morning we sailed for Port Townsend.  Fog, strong currents, and occasional tidal rips kept things interesting and we were glad to have a hand-held GPS to assist with navigation.  The main hazard in a fog-bound strait crossing is ship traffic so we flew a radar deflector from the main flag halyard and kept a close watch for ‘rivets in the fog’.

This was the foggiest trip out of the four I’ve made to Port Townsend.  Going over, at least it was clear when we started, but coming back we found ourselves in fog almost immediately.  We carried on, which highlights the dangers of deadlines and steady jobs.  This wasn’t a very good decision – there was no danger of getting lost, but there are several big ship lanes in the strait, not to mention tug and barge traffic, which I like even less.

After a few hours, the sun appeared and the wind died away so we motored until just off the entrance to Puget Sound where the wind began to pick up.  We hoisted sail and turned the corner to Port Townsend.  In the distance gaff rigged cutters, tall ships and graceful sloops criss-crossed the entrance to the port and we had a glorious sail amongst this fleet of classic wooden boats.  We landed at the town marina fuel jetty and after clearing customs relaxed with a beer in the cockpit. Jamie’s friend John Kohnen joined us after securing his Jordan skiff Pickle (you may have run across John’s amazing nautical web site – ‘The Mother of All Maritime Links’).  The evening was spent sampling local brew and blues music at the Port Townsend Brewery and enjoying fish and chips at a nearby “classic” eatery, before turning in for the night at our marina berth.

I don’t know how I’d survive Port Townsend without fish and chips at Sea-J’s.  They’re right by the Boat Haven, and always seem to be open when I’m hungry.

Saturday dawned cloudy and threatening rain, but we soon forgot the weather in the excitement of attending one of North America’s best wooden boat shows.  (Second only to the Depoe Bay Wooden Boat Show and Crab Feed!)

While Jamie and John met with some of their friends from Oregon and Washington, I visited the boats and listened to some of the speakers at the show.  There were more than a hundred boats on display ranging from strip built kayaks and sailing cruising canoes through stout cutters such as the Pardey’s Taleisin to substantial sail training vessels.  I admit to a bias toward the smaller boats, but despite this, there was much to keep me occupied. Sam Devlin (a boat designer and builder in nearby Olympia) had a number of boats on display including a newly designed 19 foot stitch and glue catboat – The Wompus Cat.  I chatted with one of Devlin’s boat builders who has built the Devlin Egret for his personal use.  This is a 15 foot rowing/sailing skiff that looks like a slightly beamy dory.  It was the first boat that I built and I found it interesting to compare notes on the conversions he had made to improve her sailing and cruising capabilities.  John Guzzwell’s Dolly was there, although her new owners, a Japanese couple, seemed a little embarrassed by all the attention.  Dolly is based on Guzzwell’s Trekka, a 21 foot Laurent Giles design that Guzzwell sailed alone around the world in the 1950’s.  Other boats of note included a beautiful Fox Island 22 designed by Joel white, two Lyle Hess cutters (sister ships to Lin and Larry Pardey’s famous Seraffyn), Carol Hasse’s beautifully maintained Nordic folkboat, and a gold-plater version of Ian Oughtred’s MacGregor sailing canoe.

The show’s speakers were equally interesting and I attended talks on cruising in small open boats, sail making, and rigging.  Carol Hasse, based out of Port Townsend, was one of the founders of the festival more than 25 years ago and has built a reputation for crafting the world’s finest cruising sails.  After listening to her detailed explanation of the differences between typical sails and those built for extended cruising, I came away with an increased appreciation of the art of the sail maker.  From the presentation by rigger Brion Toss, I learned that you should not increase the size of your standing rigging in order to make your boat ‘stronger’.  Doing so simply increases the strain on the boat because you need to use higher tension to correctly tune the thicker wire.  From the small boat cruising talk, I learned that one should pay attention to the contour lines on a chart.  In areas subject to tidal currents (such as the strait we had just crossed), closely-spaced contours indicate steep underwater slopes that can cause lumpy seas and tidal rips.  On our return trip, we were to see this in practice as we crossed several of these areas, nearing Victoria.  In the afternoon Jamie and the two Johns went for a sail in Wayward Lass to get a close up view of the schooner races.  We met for supper and then wandered back to the festival where we took another turn around the displayed yachts before turning in.

It’s always fun to sail at Port Townsend, but the high point of my (and Wayward Lass’) day was passing Bryony, a 45 foot cutter – I must admit though, that she had a reef in her main, and as soon as she shook that out, she was gone!  Watching the schooner race we stayed out of the way of the racers, but saw some (I think) non-competing schooners from very close as they overtook us — the Lynx, a replica 1812 Privateer (a topsail schooner of maybe 100 feet) went by to windward only a few feet away.  Barlovento won the schooner race by so much, that I think they should offer another first prize for the “First Finisher after Barlovento”!

That night, Jamie’s new tarp was put to the test as rain and wind battered our shelter.  The weather forecasts were misleading on the eve of our final day, predicting much stronger winds than actually occurred.  We put off our planned 4 am departure based on these forecasts, but decided around 8 am that it would make sense to catch the remainder of a favorable tide.  We departed under motor and the return crossing was uneventful, with conditions mild enough to permit a brew-up in the cockpit.  We enjoyed a cup of tea as we motored with favorable currents for the first couple of hours.  The remainder of the crossing was against a 1-2 knot current and the wind rose enough after lunch to give us a gentle sail into Oak Bay Marina. Jamie cleared us through customs and retrieved the tow vehicle.  We were home by supper, tired, but content after a weekend fully immersed in sailing and wooden boats.

Juan de Fuca Strait is a big place, and the forecasts are usually pretty accurate, but they missed by a mile on Saturday night.  However, we did get some rain squalls in the marina that wet the bottom of our sleeping bags.  The rear of the shelter is wide open, which is fine at anchor, but in the marina, we can’t swing to face the wind.  Luckily, most of the rain came in on Chris’ side!


Overall, it was another thoroughly enjoyable weekend at another Port Townsend Wooden Boat Festival.  See you next year!  (If the weather gods smile!)

***

Samantha – Paul Throber

In January of 2002 I moved to Portland, ME where I anticipated starting a new chapter in my life. A new job opportunity turned sour just weeks after I arrived. The same day I was fired I was offered another job that I accepted with a starting date in about ten days. I went skiing, relaxed and regrouped; thanking my lucky stars that fate had smiled on me once again. A couple of days later I came home and found a message on my phone from my new employer saying that he had decided not to hire me after all – lucky stars, my ass.

image002

The author

So there I was: unemployed, more than a little bit in shock and not in any state of mind to go out looking for another job. What to do? Driving north up the coast one day with my friend Susan, I talked about my long-held dream of building a boat, the Gypsy plans that I had bought many years earlier and had always found some excuse not to build. Now is the time, Susan suggested, I had the time and a bit of money that cried to be spent. It was like a revelation. The decision was made.

Within a few days I had rented some “indoor” space at a local boatyard and had started building myself a Gypsy. Little more than a month later I was out sailing on Casco Bay. Then I started thinking about another boat – something a bit larger that I could actually cruise in with a modicum of comfort.

The Bolger Gypsy, Helen P. Foster, nears completion

The Bolger Gypsy, Helen P. Foster, nears completion

I wanted a boat that was small, handy, affordable, and reasonably easy to build, A catboat was what seemed best to me – the most room for a short boat, shallow draft, simple rig and seaworthy. I bought plans for one of Witholtz’s catboats from Woodenboat, but was intimidated by the complexity of the construction and returned them. My next choice was Bolger’s Chebacco – which I felt confident I could build, as it is the same type of construction as the Gypsy. I ordered the plans and sails from H. H. Payson.

The Chebacco did not exactly fit my concept of what I needed – particularly I thought the cabin far too small for cruising comfort. In my opinion the standard Chebacco is really a day sailor that can be used for camp cruising. My solution was to lengthen and widen the cabin and to raise the cabin roof. I also raised the sheer by 4”. I eliminated the centerboard in favor of the keel shown on the cruising version of the Chebacco in “Boats With an Open Mind”.

Samantha is built entirely of common building materials: ACX plywood, spruce and fir. All of the wood and plywood were selected after much shuffling through the stacks – I would estimate that I rejected over 90% of what I looked at. For the plywood I looked for a good C side and for the least amount and smallest voids. For the solid wood I looked for good straight grain and minimum knots. I mostly bought 2 X12’s and 2 X 10’s and then ripped them to the desired dimension. This is quite easily done with a circular saw with a ripping guide. The result can be clear, quarter sawn lumber.

Where fasteners are used, they are sheet rock screws and ring-shank nails. The fasteners were almost entirely used to hold things in place until the epoxy cured. I used MAS epoxy for all gluing, filleting, fiberglassing and fairing.

All the outside surfaces of the hull, cabin and cockpit are sheathed in at least one layer of 6 oz.cloth. All joints have at least two layers of cloth on the outside and a layer of cloth or a 1 x 2 stringer on the inside. The stem and keel have four layers of cloth on the outside.

I left all the frames/molds/bulkheads in the hull and they are all filleted and glassed in place. There is a 2 x 4 floor screwed and epoxied to each frame and to the bottom panel.

The keel is solid and is made from 2 x 12 stock with ½” plywood cheeks. There is 150 lbs. of lead in the keel. The keel is epoxied in place, has 3″ screws down through the bottom panel on 3″ centers, is generously filleted to the bottom and the fillets are glassed with three layers of 6 oz. cloth.

I used Harken blocks, fairleads and cam cleats throughout. All the running rigging is ½” Dacron 3-strand. All cleats, pad eyes, etc. are stainless. Auxiliary power is provided by a 6 hp Tohatsu 4-stroke outboard that also charges the 80-amp hour lead-acid deep cycle battery.

Electrical equipment includes a VHF radio, navigation lights, a cabin light, a Garmin Etrex GPS, a Ritchie Navigator compass, a Sony Walkman CD player, and a cell phone.

Samantha at anchor near Galesville, MD

Samantha at anchor near Galesville, MD

The first construction I did was to build a strongback. I used two 20’ 2 x 6’s spaced 3’ apart with the ladder “steps” at the frame positions. I temporarily set this up on legs to use as a surface to build the spars and to scarf the hull panels.

The main mast I made of three layers of 1½” scarfed spruce with the scarfs staggered along its length. The mizzenmast, gaff and main boom I made of two layers of spruce. I shaped them with a circular saw, power plane and a belt sander.

I cut the scarfs for the plywood with the power plane and belt sander. I glued the scarfs in the following way: first a 4’ 2 x 6, then a piece of plastic sheeting, then the plywood sheets, another sheet of plastic, then a 4’ x 6” piece of ½” plywood. I then clamped this all together with two rows of sheetrock screws on four inch centers. The scarfs are reinforced on both sides with a 1’ wide piece of 6 oz. Fiberglass.

I laminated the stem pieces of ½” plywood and shaped them with the power plane and belt sander. I cut out the frames making numbers 1, 2, 3, 4, and 5 taller than they needed to be because I was still not quite sure how high to make the cabin roof – I wanted to get the hull turned over, mock up the seats and actually see where the top of my head would be. I set up the frames and inner stem on the ladder, cut the hull panels and assembled the hull – all quite straightforward except the forward section of the bilge panels. These I laminated of two layers of ¼” plywood as is recommended. This is good advice as its still a formidable challenge to coax these into the correct shape. This was the most difficult part of the construction of the boat. I glued the two layers together with epoxy thickened with wood flour and pulled the panels together with sheetrock screws on 3” centers. After the glue cured, I removed the screws and filled the holes. I backed the joint where the laminated section meets the ½” bilge panel with a 6” wide piece of ½” plywood.

I faired the hull, struck the waterline using a T-square, and applied the bottom paint. Ten friends helped me turn it over which made the job quick and simple.

I framed in the settees between frames 4 and 5. They are 14” high and there is a 28” wide foot well between them. Forward of and level with the seats is a V-berth. All the volume beneath the seats and berth is storage bins accessible through hatches cut from the top surfaces.

To provide clearance for my head while sitting I made the cabin roof 39” above the aft end of the settees. (I’m 6’ 5” tall.) The forward end of the cabin roof is 4” above the deck.

The cabin roof has the designed curvature and is ½” plywood. Frames 2, 3, and 4 are left in place with a depth of 3 inches at the sides and roof. These frames are solid beneath the seats and berth. The companionway hatch is 36” wide and extends from frame 4 to frame 5 – the sides of the opening are above the 90-degree waterline. I also put a small hatch, 1’ foot square, in the cabin roof between frames 1 and 2 for ventilation. Both hatches have double coamings.

The interior showing frames 3 and 4

The interior showing frames 3 and 4

The cockpit seats are deck level and the foot well of the cockpit is 14” deep. The cockpit coaming is 9” high.

I made the cabin windows from ¼” polycarbonate – two 6” x 12” elliptical windows between frames 2 and 3 and two 10” x 30” rectangular windows between frames 4 and 5, behind the seats. These are bedded in silicone on the outside surface of the cabin sides and screwed on 4-inch centers.

I installed the rudder, glassed and painted the boat and then it was time to launch – and none to soon as it was two days before I had to out of my apartment. So down the ramp and into the water she went. And as one of the men at the yard said, “She floats like a duck.”

It was the end of August, I was planning to sail south and I still had much to do – I worked feverishly wiring the boat, stepping the masts, rigging the boat, bending on sails, going on trial sails, fixing things that didn’t work right, building a dinghy (a Nymph) and then finally on the morning of September 10, 2002 I set sail and reached out of Portland harbor and onto the swells of the Atlantic. It was a fine sunny day with a moderate breeze.

Samantha with a nice following breeze

Samantha with a nice following breeze

Next: Sailing south

***

Boudicea gets ready to launch – Ed Heins

It sometimes seems like the final stages of my large projects go on forever………  Boudicea, the Chebacco that may yet be built, as you can perhaps tell by the poor accompanying photograph is getting very close to becoming a functioning sailboat.  A sailboat, that is, as opposed to the garage ornament that she’s been for a majority of the past decade.   Still, the closer launching comes, the more that seems to need doing.   This past weekend, I managed to get the sails bent on for the first time, and after playing tag with the thunderstorms rolling through the Shenandoah valley, I finally got a calm spell lasting long enough to hoist, and do some adjustments to the rig.  Aside from the feeling of accomplishment to see her dressed out in sailcloth, it was an opportunity to appreciate the work of the folks at Bhondell.   I think the leech planking on the main sail for instance, adds quite a traditional look and hopefully will be as functional as it is pretty.   Since I’m a couple hours from any sailing water, I’m now deep in the minutia of details that are as frustrating as they are important to have done.  There’s the stand up block for the mizzen rigging that was lost in shipping, the reefing system that sure as God made little green apples I’ll need because I can count on it blowing up a gale on launch day, and a method to secure the spars for transport.  I should make a better set of main hatch boards but she’ll float without em.   Seems as though the tasks just keep on coming.  Nevertheless I can see the end of an era looming nearer.
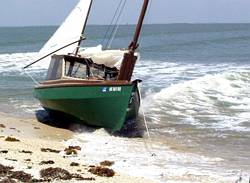
Current plans are to launch her late this month probably at a very small lake here in the local area just to be sure she keeps the water on the outside.  At the same time I can tweak any launching issues that might arise without having to drive several hours to discover launch problems.  Then, I think the Chesapeake or the James River beckons.

Any Virginia Chebacco sailors who fancy a spring messabout please let me know.

May09021

***

New Chebacco goes down the ways – Mike Haskell

On a rainy, nasty May day, Carruss went into the waters of Merrymeeting Bay. The planning and discussion for her construction had begun in the summer of 2002 when Russ Dyer and Mike Haskell combined their sets of Chebacco plans to construct a strip-built soft chine Chebacco. With Russ taking the lead, providing the money, materials and most importantly the heated garage, construction began in the winter of 2002. Mike took care of the lifting, tunking, heavy looking on and photojournalism.

Construction slowed during the summer of 2003. The hull was turned during the fall of 2003. Then back into the shop for final detailing through the winter of 2003 and spring of 2004. In April of 2004, she came back out of the shop for rigging and preparation for launch.

Construction notes—Carruss is fiberglass over pine strip Chebacco. Russ lofted her lines from a set of plans for the lapstrake version. Other construction details were modifications and combinations of the sheet-ply and lapstrake plans. Russ sewed her sails from the Sailrite Kits for the main and the mizzen. Her power will be supplied by a 6h.p. Evinrude Yachtwin.

image001 image003 image005

Some of the detail work that Russ fabricated. The chocks and line guides are hand-made rosewood—they are absolutely beautiful.

image007

Rigged and backing into the Cathance River one of five tributaries of Merrymeeting Bay

image009

On the water for the first time!!!

image011

Her first cruise—across the river to the docks on the far side. There Russ will finish her outfitting.

Chebacco News 42

On the Road Again – Jamie Orr

Being the further adventures of the good ship

Wayward Lass

in Clayoquot Sound (for chart, turn to the last page)

image002

Yes, Wayward Lass has been on the road again, this time to Tofino on the west coast of Vancouver Island, to explore Clayoquot Sound. Clayoquot is made up of a number of inlets, with three major islands, Meares, Flores and Vargas. Meares Island was the centre of considerable attention a few years ago, when logging and anti-logging interests clashed over clear-cutting on the island. Meares is also the most interesting island from another point of view, as it lies completely within the sound, and can be sailed around without venturing onto the open sea. Flores and Vargas islands guard the outer edge of the Sound, providing sheltered waters on their eastern sides.
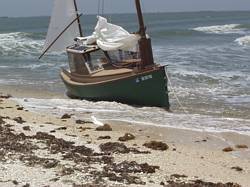
Saturday

I was supposed to get away with my dad, Les, in June, but work kept me in Victoria for another month. We didn’t know it at the time, but this turned out to be a blessing – in the whole week, we were going to have lots of sunshine, almost no rain, and a good sailing breeze for part of every day. We arrived in Tofino about 3 o’clock on Saturday afternoon, after a five hour drive from Victoria, and launched soon after at the 4th Street Public Docks (shown in the “cover” picture) . We found parking for the van and trailer only three short blocks away.

We left the docks at 4:40 pm, and motored north for a short distance through Deadman Passage, with sand banks to port and rocks and mudbanks to starboard. I should note here that as we travelled, we frequently left one channel for another, with the tide changing between fair and foul almost as often. The tide was ebbing on Saturday evening – in Deadman it was on our starboard side, as we turned west in Heynen Passage it was in our favour, then when we turned north again to Maurus Channel it was dead against us.

About 8:30 we anchored in a small cove on the northeast side of Vargas Island. This was still close to Tofino, and turned out to be on a busy corner. While well sheltered from weather, it was wide open to the wakes from the numerous water-taxis and whale watching boats that passed the entrance every few minutes. These carried on until late – not a good recipe for a peaceful night!

image004 Wayward Lass at anchor in the morning, with Lone Cone (on Meares Island) in background

Sunday

Next morning was a bit quieter, and we cooked up bacon, eggs and toast for breakfast before the traffic got going. Then we got moving, under power since the wind wasn’t up yet – this was the general pattern for the week, no wind in the early morning, a bit in the late morning, a quietish spell then a good breeze in the mid afternoon, lasting until evening. Once out of our cove, we headed northwest to Millar Channel, where we turned north. Near the top of Millar, around noon, a light wind came up, so we put up the sails and stopped the motor. (About the same time, we saw the only porpoise we were to see on the trip.)

At the north end of Millar Channel, Obstruction Island splits the channel into two – the passage to the west is fairly straight, but Sulphur Passage to the east is a more interesting, winding around corners and islands. We thought we’d make use of the favourable wind and the last of the flood tide, not to mention our shallow draft (a great comfort at times!) and sail through this route. The wind became fluky and unreliable behind the island, but never totally deserted us. At the most eastern part of the passage, we were drifting more than sailing, but once around that corner, we could feel some air again, so were able to beat down the next leg and see our way between Obstruction itself and the last islet of the chain next to it. Once through, we were quite pleased with ourselves.

We now faced a long beat westward to Sydney Inlet. The tide was starting to ebb (having changed channels, we now had the ebb in our favour), but the wind was against us. I lost count, but I believe we crossed and re-crossed that inlet a dozen times, with the wind strength going up and down, and often changing direction due to the hills and valleys either side of the channel. We finally rounded the point and started south down Sydney Inlet. Unfortunately, by this time the ebb was almost done, and the wind had gone around to the south, following the line of the channel, leaving us still fighting for every inch. Our goal was Hot Springs Cove, just around the corner at the mouth of the inlet. After all our work we were determined to reach Hot Springs, and we passed up one or two inviting bays on the east shore of the channel. One of these had several kayaks pulled up on shore, and tents on the beach. Smart kayakers — it took us another hour to reach the final point, and then we just could not get around it. The wind was almost completely gone, while a strong current was coming around the point against us. We tried for a good hour, but were either pushed back into Sydney Inlet, or towards the rocks where the gentle ocean swell was breaking in a most ungentle way. In the end, it was Honda to the rescue, and we motored into Hot Springs Cove, arriving at the Parks’ dock 10 minutes later. During this short stretch, we had the only rain of the trip, a shower that lasted until we had the shelter up. Since Hot Springs Cove was our only pre-determined destination, we celebrated with wine and a spaghetti dinner, with an excellent meat sauce brought from home.

Our galley arrangements might be of interest. To start with, we don’t carry a cooler on board. It would be too bulky, and we couldn’t keep the ice long enough anyway. Our solution was to put the perishables under the floorboards in the cabin. We kept bacon and eggs for three days this way, and they were still good – we finished them by then so I don’t know how long they might have lasted. Hard sausage, butter and cheese were still good at the end of the week. There was a bit of mould on the cheddar, but we scraped it off and the rest tasted fine. Beer and soft drinks went under the floorboards in the cockpit, since a bit of salty water won’t hurt them. The rest of the “galley” went in two plastic storage boxes. These are convenient, and the soft plastic doesn’t mark the paint when they’re moved around. Our stove is a two burner camp stove that runs off one pound propane bottles. The stove goes under a cockpit seat and the bottle, once started, is stored in the cockpit, in the open space under the motor well.

Monday

The next morning, we were up bright and early (well, early anyway) and by 7:00 were on the trail to the hotspring itself. This trail is about 2 km long, and is boardwalk all the way, with lots of stairs up and down. The spring starts a few metres above the high tide line, the water first appearing as it falls over a small rocky cliff – I found this natural shower a little too warm to stand under. The hot water then runs through a series of rocky pools, cooling as it goes. These pools are more or less natural – some rocks have been re-arranged to better hold the water, or for comfort – but they’re still small, rocky pools in the end. The best has a gravel bottom, and is big enough for 4-6 people (depending how well they know each other) to sit comfortably. We were lucky in that only two other people were there when we arrived – what it’s like when the tour boats come in I don’t know! However, I’d hate to see it developed – for me, the appeal is in the unspoiled surrounding. Happily, since the point is a Provincial park, it’s likely to stay as it is for a while at least.

After our soak, we hiked back for some breakfast, then at 11:00 we left Hot Springs Cove to go down the outside of Flores Island. This route is open to the Pacific swells – nothing between us and Japan – so we were careful to get an up to date weather report from the VHF. Favourable winds were predicted later in the day, but as there was no wind when we set out, we started off motoring. Once we were clear of Hot Springs Cove, a light south-west wind did appear, but it wasn’t enough to make us put up the sails just yet.

image006 Next stop, Japan!

We thought we might be able to start sailing at Rafael Point, an hour away, where the coast falls away to the southeast, and we could hold a course without tacking. As we approached Rafael Point, I saw a puff of spray shoot up from the surface. After a second, I realized it was a whale spouting! Soon we were able to make out three or four grey whales. First the spout would appear, then the whale’s back would appear as it started to dive. Once or twice we saw a tail come briefly out of the water – just like on the postcards!

image007 Here’s the only picture we have of a whale – see the grey hump in the middle of the grey sea? The mist is the spout, several seconds old.

We were pretty thrilled, but didn’t hang about too long – we were still very conscious of being on an exposed shore in a not very big boat.

Instead, we got the sails up as planned, and managed to sail slowly down the coast, but the wind wasn’t really strong enough. – the rocking and pitching from the swell was making the gaff and boom thrash around, so eventually we dropped the sails in favour of motoring again. Passing an unnamed point two or three miles southwest, we saw another group of three whales, so we were well pleased with our morning.

South of Flores Island, we motored back into sheltered waters, eventually turning north again into Millar Channel, this time turning into smaller Matilda Inlet to dock at Ahousat, where we topped up the gas tank, and re-filled our 5 gallon water jug. We decided to stay the night there, and take advantage of the special at the cafe (sweet and sour meatballs.) There’s a sizable marine railway at Ahousat, and at high tide that night they were going to put a fishing boat back in and haul a 53 foot cruiser – a huge fibreglass beast. The cruiser had lost one of its propellers, but the owner had spare props and shafts aboard. I went along at 10 pm and watched the show. The operator of the ways, who also runs the store and everything else there, gave instructions to the cruiser’s owner and several other men on the cruiser as to where he wanted it placed in relation to the supports, then disappeared up to the winch end of things to fire up the engine and start hauling. It was a very smooth operation, finishing with the boat out of the water, but still overhanging it, so actual repairs were to start once the tide allowed. (I took a look in the morning, at low tide, and the two inch stainless steel shaft had snapped off cleanly, just outside the “A” bracket. I’m told this is not an uncommon happening with stainless shafts on big boats – just one of those things rich people have to cope with.)

image010 Wayward Lass at Ahousat, looking across Matilda Inlet to the Indian village of Marktosis

Tuesday

We ate breakfast at the café (moral decay setting in!) then took a look at the chart. Our decision was to go around Meares Island, particularly as both wind and tide should be in our favour for several hours. We fired up Honda and set off back down Millar Channel, but we fairly soon felt some wind and put up the sails. About then, one of Tofino Air’s floatplanes came along, not wasting much fuel on altitude – it was so low that it swerved around us rather than flying over! Soon after that, we left Millar behind, cutting inside both beacon and rocks at the point in order to avoid any extra distance in the light wind. (By watching the local traffic, fishing boats and water taxis, we got a good idea of where it was safe to cut corners.)

image012 Sailing close inshore in light wind.

On leaving Millar, we turned northeast, sailing between some small islands on the way to Cypress Bay. On the way, we passed Hecate Bay, which used to be a big centre for logging activity. There was a big chip barge and a tug moored in the bay, but it didn’t look like a lot was going on.

image014 Here’s Dad toughing it out in Cypress Bay

At the north end of Cypress we lost the wind, so were motoring as we passed through the narrow entrance to Quait Bay, which opened out into a sizable sheltered anchorage, with enough room for a hundred boats. There was a big floating resort moored on the northwest side, catering for sports fishermen, but we didn’t attempt to land there, instead continuing on around the bay then ducking out an even smaller passage to the east of the main entrance.

The wind returned nicely about this time, and we were able to sail eastward towards the narrows at the north end of Meares Island, getting through them just before losing the flood as well as 95% of the wind. We had thought, in our innocence, that on reaching the east side of Meares Island we would pick up the ebb going south, but found that the current was flowing the wrong way! Some study of the chart and the guidebook showed that the flood goes all the way up the west side of Meares Island, across the north end, then down the east side (where we now were) before turning up Tofino Inlet in a northeast direction. And of course the ebb goes back the other way. The tide also flows east and west through Browning Channel south of Meares, but Browning is narrow, so a lot of water takes the long way north around Meares. All of which is to say we blew it and didn’t get any help from the ebb tide.

We started the motor again, heading south and looking into Mosquito Harbour, which is much nicer than its name. Coming out we were able to use the local wind and sail a mile or two, but once clear of Mosquito Harbour, we lost the wind – all the bays we looked into had their own winds blowing out, but I’m not clear on just what causes these.

We by-passed the next bay, since we could see down to the end, and the wind was blowing strongly out of it anyway. At the southern end of our channel, we turned east towards Tofino Inlet, not noticing right away that the wind had come up behind us.

When we did notice, it was hardly worth putting up the sails, so we kept on motoring around into Island Cove, then into another, tiny cove on the south shore of that – absolutely no wind here. As we putted slowly in, getting ready to drop the hook, we saw a young black bear foraging his way along the shore. He stopped and sniffed the air when he heard us, but didn’t pay us much attention beyond that. We passed by about 20 feet out, then circled for some more pictures. He just kept working his way along, and by the time we had the anchor set, he was out of sight. Made a great end to the day.

This also made me realize that I have to invest in either contact lenses or a new camera. I have an old Olympus SLR, but when I focus the camera now, I’m also compensating for my eyesight, so the resulting pictures aren’t as sharp as they used to be!

image015 A young black bear on the shore of Island Cove

We also saw (and heard) an eagle spiral almost vertically down to the beach, but before he could do more than peck at something he found there, five crows arrived and started to verbally abuse him with great enthusiasm. The eagle took himself off, pursued by one particularly aggressive crow.

Wednesday

As was usual by now, there was no wind as we started off at 8 o’clock, so we were motoring as we got properly into Tofino Inlet, heading towards the Kennedy River. The chart indicates this should be navigable, at least at high tide, all the way to Kennedy Lake, but there are drying areas, as well as at least one bridge with no clearance indicated. As the tide was low, we settled for going up only a few hundred yards before turning downstream again. We also looked into Kennedy Cove next door, where some old pilings were all we could see left of a cannery that thrived (throve?) there years ago.

Continuing up the inlet, we looked into another cove, slipping behind some small rocky islands to come out the back door. Dad was steering while I watched for rocks from the bows – I could see a rocky ridge below us as we passed out of the bay, but it was safely under our keel.

image017 Here we are up the Kennedy River, looking downstream towards the river mouth

Travelling the rest of the way up Tofino Inlet was an enjoyable if uneventful trip, getting a little sailing when the wind appeared for a short time, but motoring most of the way. We’ve found that a lower setting on the throttle gives almost as much speed as a higher, but it’s a lot quieter, so it felt like we were loafing along. We passed several small islands, including two that together almost cut off the head of the inlet from the outside world.

My goal was to have a swim once we reached the far end of Tofino Inlet, as the guidebook said this was the warmest water in the area. Okay, that may be so, but the rest of Clayoquot Sound must be damn cold! Up here it wasn’t quite gasping cold, but I didn’t stay in long. Getting back in Wayward Lass, I used as a step a line strung between cleats at either end of the cockpit – something I’ve thought about for recovering a man overboard. When I stepped on it, the line swung under the overhang of course, but it still helped me get aboard by on my own.

image019 Here’s a view of the head of Tofino Inlet

Just about then, about 12:20, the wind came up, a healthy one at last – maybe 10 knots. We motored clear of the islands and got the sails up about 1:00, then started tacking back down the inlet – do I need to mention it was against us? No? Okay then, I won’t.

We crossed the inlet at least five times, working our way southwest. As we left the last of the bigger islands behind, it started to blow harder, and we started to take some spray

aboard – lots of whitecaps by now. By the time we were back down near the south end, it was well over 15 knots, so we ducked in behind a handy island at about 2:30, and put in a reef. Then it was across the inlet again to Grice Bay on one long, wet thrash!

At its western end, the inlet narrows considerably, feeding into the even narrower Browning Channel. and the wind was funnelling through these at an estimated 20 knots by now, so sailing through seemed unlikely to succeed. In which case, we thought we would motor through Grice Bay. This large bay is mostly mud flats, with a narrow channel winding south of a biggish island to join Browning Channel further west. We thought it might be a challenge keeping off the mud, but it turned out to be dead easy, since the tide was well up. We navigated down what we thought ought to be the channel anyway, to be on the safe side. It was a trouble free journey until some floating weed choked the cooling water intake on Honda. Luckily, it also caught around the prop, and the change in engine sound caught our attention. I stopped the motor and cleared away all the crud, after which it started again on the first pull.

Once out into Browning Channel, it was just one long plug into the wind. Since the tide was going with us, it was a wet plug as well, with a sizable chop thrown up by the battle between wind and tide. We pounded a bit, but didn’t have to slow down. With the favourable tide we managed over 6 knots a lot of the way. The eastern entrance to Tofino has a big submerged rock blocking the channel, and our (old) chart didn’t show any aids to navigation, but we thought we would give it a shot, rather than add a couple extra miles to go around. A good decision, since we found a pair of lateral buoys marking the channel in – these were very close together, no more than 25 feet between them, so I was glad we didn’t have to judge it by the kelp alone! These markers must be fairly new, since the guidebooks don’t mention them – our Waggoner guide is only 2 years old. We arrived at the 4th Street docks at 4:45, and downed a couple of pale ales to celebrate.

image022 Les Orr in Wayward Lass, at the 4th Street docks, in Tofino

These docks are mostly reserved for commercial fishermen, so are busy all day and a good part of the night, but about 20% of the space is available for pleasure boaters. We shared “D” finger with a couple of big sailboats headed (separately) around Vancouver Island.

Waggoner passes on a glowing recommendation for the Rain Coast Café. We went there and found that he’s absolutely right, but he forgot to mention that quality costs. Our visit left a large hole in my wallet, although it was unquestionably the best halibut I’ve ever tasted, and the peanut butter pie was right up there with it!

Thursday

The forecast for Thursday morning accurately predicted fog, but it cleared early at Tofino, so after a quick bite at the Coffee Pod Café, (which I recommend highly for good foodand for its prices) we cast off for Lemmens Inlet. Right off the bat the engine sucked in some green, hairy weed floating at the dock and had to be cleared. Once we’d done that, we paddled clear of the crud and re-started. Once you get past a couple of islands to the north of Tofino, Lemmens Inlet carries on straight north, trying hard to cut Meares Island in half. It doesn’t quite make it, but it does provide a great day of sheltered, fog-free travel. Motoring up it, we took the narrower western route when the passage divided, successfully getting around the north end of the island by scraping past what we think was an oyster farm moored just off the shore. We wanted to look into a small unnamed bay to see if it would do as a shallow water anchorage, but ran into some eelgrass (a new Kevlar variety, I think) that wound itself firmly around the prop. I pulled up the motor and worked at clearing the grass while Dad started paddling our way out of the weed patch. It’s funny, in 2 ½ years, I haven’t had a problem with weed, but in these last two days we were stopped three times by it. Once out and clear, we abandoned the bay, since it was on the wrong side of the eelgrass, and headed on up the inlet. The next bay along is known as God’s Pocket, and it’s a good sheltered anchorage. We poked into another tiny bay inside, (God’s Watch Pocket, perhaps?) that was just Wayward Lass sized for anchoring. There was one nasty rock to avoid near the entrance, but once we were in, it was almost as nice as our nook in Island Cove.

As we came out into the main part of God’s Pocket, the wind came up, so we upped sails and motor and sailed out of the bay, then right up to the end of Lemmen’s Inlet. We had a good run going north, where we turned and started beating back south. Since the flood was running later every day, and we were up to Thursday now, it was still running and we had that against us. However, the wind was reasonably steady, and we made good progress back past God’s Pocket, (showing off to the two big sailboats still anchored there) down to where the inlet narrows between the mud banks. The wind was lighter now, but steady, so we kept sailing. I got out the lead line, but found I wasn’t able to get good results – maybe I need more practice, or maybe we were still moving too fast. Anyway, we found we could see the bottom in time to tack, so we were able to avoid any embarrassment. Eventually we sailed right out of the bottom of the inlet, feeling very smug (again!)

We were now at the east end of Heynen Passage, and had to work to windward again to take Deadman Passage back to Tofino. (No matter which way we turned, we had the wind against us because it was being funnelled by the land, and we were travelling generally west.) The current was stronger now, and we were making slow progress. On the plus side, though, the water had covered the mud, so we crossed our fingers and took a short cut over the banks east of Deadman, on the wrong side of several rocks and islets – we could just nicely make our course on a close reach. We could see the bottom, about four or five feet down, but as our maximum draft with the centreboard down is only four feet, all was well.

Once through, it was still too early to quit, and as we were pointed at the channel leading to the open sea, (well, not quite open, one more biggish island south of Vargas still offers some shelter) we carried on past the town. Off the point on the northwest tip of the peninsula where Tofino is located, is another small island. This effectively blanketed our wind, and we bobbed around near the rocks for a while, but the ebb finally pushed us out to where the wind could reach us again. We sailed around to a nearby cove where we had been told there were mooring buoys and safe anchoring. Didn’t see any mooring buoys, (found out later they’d been removed) and the wind blew right into the bay, where some healthy (for surfing) rollers were beating up the beach. Nowhere I’d want to anchor, for sure. We worked up to windward a bit, then turned back towards town. We got stuck in the same wind shadow, but this time the tide couldn’t help. We finally got through when the wind picked up, and we had a royal run down the length of Tofino’s waterfront – got a big thumbs up from the guy on the seaplane float, I wish we could have had a photo from there too.

Since no one was at the loading/unloading dock at the end of “D”finger, and it was parallel to wind and channel, a landing under sail looked like a good idea. We don’t get to practice these much, (I think this was our first) I wasn’t sure of our turning circle, and we had a good stiff breeze behind us now, so I was somewhat shy of hitting the dock. As a result, the first attempt positioned us nicely parallel to the dock, but 10 feet away. We were able to keep turning, though, and circled, making the second half of the circle into two 90 degree turns and finishing stopped against the dock, just like we knew what we were doing. After we moved to an overnight spot, it was back to the Coffee Pod for dinner. (I hate to admit it, but every time we were at a dock at mealtime, we caved in and went to a restaurant – brought half our food home with us. Ate well, though!)

Friday

On Friday the fog finally caught us. It was thick and grey, and only a few water taxis were going out. I guess with radar, GPS and digital charts they can handle fog without much trouble. We had a leisurely breakfast (at the Coffee Pod again!) and did what chores we could find on the boat – not many left after five full days on board. Then we remembered that we had the van nearby, so we topped up Honda’s remote tank from the spare can, and took the can for refilling. To Uclulet, 30 miles away.

Rather than unhook the trailer, and wonder where to leave it, we pulled it along. The spare gas can fitted nicely in the “U” channel for the keel, and a bungy cord kept it there, so we didn’t have the smell of gas in the van – very convenient.

We actually filled up before Uclulet, but we carried on, right through the town out to the southernmost point – both Tofino and Uclulet are on peninsulas, one north and one south. Then we located a boat ramp for future reference – not very fancy, and expensive, but quite usable for Wayward Lass. We could see fog around parts of the inlet there too, showing that we weren’t missing any sailing, so we took time out for a coffee.. However, it doesn’t do to take chances, so we were soon back on the road to Tofino.

image024 Fog on D dock, at Tofino’s 4th Street docks.

As it happened, when we reached Wayward Lass the fog was definitely clearing, so we cast off right away. The tide was low, so we were careful to keep between the markers in Deadman Passage. There’s a dirty big sandbank on one side, and a dirtier big rock on the other to keep you honest, here. Once we had a clear course through, we got the sails up and worked our way through both Deadman and Heynen passages, and into Maurus Channel. At the point where we turned up Maurus Channel we ran into the fog again, however, we had the radar reflector to keep the water taxis off, and the GPS to back up our dead reckoning. Before the trip, I had entered waypoints from Tofino to Hot Springs Cove, in case of fog, and we were back on part of that route so these waypoints were ready if needed. We were in thickish fog for a mile or so, then we sailed out of it and left it behind. We sailed to the point beside our first night’s anchorage, where the tide and wind coming around the north end of Vargas Island met us head on, then started the motor, thinking of an “outside” trip around Vargas. However, a weather check told us that fog was still thick outside, and 25 knot winds were predicted for the afternoon, so we abandoned that idea. We’d been tossing it around for a couple of days, but between fog and higher winds forecast out there, we hadn’t tried it. I guess we were lucky to have had one great day outside the islands, never mind asking for more. Instead, we turned north for Cypress Bay and raised the sails again, planning to anchor for the night in Quait Bay. We now had the wind behind us, as well as the flood tide, so we were soon making good time, hitting 6 knots at times.

About mid-afternoon, I thought I’d try out the jib. This is shown as an option on the Chebacco sail plan, and I made one last winter. I haven’t had much luck with it, but haven’t used it much either. I decided that if I got all the strings just right, I could set such a small jib without leaving the cockpit. It took a couple of trips to the bows to get the strings set up, of course. At the beginning of the week I had put a line up to a block to use for this and/or the radar reflector, so at least I didn’t have to climb the mast! Finally, everything was ready. I put the sail on the cabin roof and started pulling the halyard and downhaul (there’s no stay, the jib is set flying.) It went forward and up as planned, but the sheets took the opportunity to wrap themselves firmly around the downhaul, and it took two more trips forward to sort this out. I should have kept a firm tension on the sheets as the sail went forward, I think.

While I was doing this, Dad sensibly kept us on a bit of a reach, rather than running straight downwind, so I wouldn’t get whacked by the boom if we gybed. However, it was getting to be time to gybe before we ran out of water. We noticed the lee-side mizzen sheet had caught in the pulled-up motor, so I loosened that and cleared it, then Dad started to put the helm over. However, I hadn’t pulled the mizzen sheet back in enough, because the mizzen sail suddenly swung forward in the cockpit with us! Dad put the helm back where it was, to stop the gybe. But the wind got behind the main anyway as we worked to clear the mizzen, and we had a lulu of an uncontrolled gybe. We saw it coming, so no one was hit by the boom or caught by the sheet, but the gaff finished up vertical, ahead of the mast on the windward side, with the mainsail wrapped around the mast to leeward and the boom cocked up at a jaunty angle! Luckily, we were able to gybe back and clear it all, and then gybe a third time onto our new course before we hit any rocks (remember why we started all this?) A fair bit of a schemozzle, but personally, I blame it all on the jib.

We sailed a while longer with the jib set, but it really is too close to the mainsail to work properly. So far it’s been a failure – other Chebacco sailors, Fraser Howell for one, have successfully used a jib, but only with a bowsprit, and I have no plans to add one of these at present. I’ll keep the sail anyway – maybe I’ll want it for a downwind run sometime when it’s blowing too hard for the main.

By now we were nearing Quait Bay. We took in the jib, with my patent “from-the-cockpit” method working smoothly this time, and chose our course to allow for the brisk wind, which of course promptly died. Dad still had the helm and he persevered, slowly working us into the entrance. At this point, we felt a slight breeze follow us in, and we kept that all the way to a nook at the far end of the bay, where we rounded up to anchor at 4:45. I didn’t drop the anchor immediately when we turned, as I wanted to back down a few feet.Wayward Lass, though, didn’t want to stop sailing, and forged ahead in the light air, even with the mainsheet slack – I guess the wind was light enough that the weight of the boom held the sail in position. So we anchored first, then furled the mainsail, then lifted the anchor off the bottom and backed down as first planned.

Ham with rice was on the menu, and I tried to follow my wife’s instructions for cooking the rice, but couldn’t make the stove simmer. Instead, I turned the heat right off after bringing the water to a boil, but this way the rice was taking forever to cook. To while away the time, I took in the mizzen, which had been left up, sheeted amidships. Right away, we started to sail around the anchor, even with the rode in the Jonesport cleat, leading directly over the bow. I put the mizzen out again, sheeted it amidships, and bingo! – we were head to wind again, dead steady. Then I added more water to the rice and boiled it into submission. We had the last of the wine to celebrate a successful cruise, and to distract us from the now soggy rice.

While we were anchored here, we saw a burst of bird life. An eagle snatched something out of the water and landed on a rock on shore to eat it, and a kingfisher also dove in for his dinner – didn’t see if he got anything, but he flew away and didn’t come back. We saw some divers (later identified as red-breasted mergansers) patrolling the water’s edge. They would put their beaks and eyes under water, then swim quickly along. One suddenly put on an extra burst of speed, and dove under. A second later it was on the surface again, flipping a fish around in it’s beak, then bang, the fish was gone. Evidently this was a prime spot for fish dinners!

Saturday

After a peaceful night, we were up early to take advantage of the ebb to get to Tofino. I’m not sure why, as we were motoring again and could have easily beaten the tide. Still, it’s the nautical thing to do, right? The forecast didn’t mention fog at all, but still called for winds of 20 knots on the outside, so the round-Vargas idea stayed dead. It was time anyway to get back to town, and get on the road home. To speed things along, we didn’t have breakfast, just grabbed a snack on the way.

As we travelled south, we passed a tug pulling a barge, loaded with a grapple and a grader, towards Hecate Bay, so maybe things aren’t as dead there as they looked. We also had a second sunrise as we motored along, as the sun climbed above a narrow but heavy layer of cloud in the east.

I was thinking that despite our early arrival at Tofino, we’d have to wait for the tide to bottom out, then rise a bit before we could recover the boat, since on such a low tide the water would be down to the end of the ramp. However, the tide behind us did it’s work well, we made 6 knots over the ground most of the way, on an estimated 5 knot throttle setting, and with this on top of our early start we arrived two hours before low tide. I hustled off for the trailer, and after several attempts managed to get it in far enough, without putting one wheel or the other in a hole. Then I went over to “D” dock where Dad was waiting with Wayward Lass. Usually I like to be ashore to guide the boat on by hand, particularly since I learned that the keel can hit the ends of the steel frame if it misses the centre bunk, but in this case I was too lazy to walk all the way back to the ramp. We both stayed aboard, and made a “hot” landing, luckily putting the keel right in its U-shaped bunk. Definitely more luck than skill, since the current was pushing us sideways at an unknown rate!

And that was the happy ending to an entirely satisfactory cruise of Clayoquot Sound. We hauled Wayward Lass out, unloaded and unrigged her, then before starting for home, stopped for a last breakfast at (where else?) the Coffee Pod Cafe.

image026

Life is good!

The Chart

When I read accounts of coastal cruising, I always want to see where they went, so I’ve attached a copy of the large scale chart for Clayoquot Sound. Brown indicates land, blue is water, and green is where it dries at low tide. I’ve roughly indicated our track in red. The numbers refer to places mentioned in the text. I’ve emphasized the shoreline, but haven’t attempted to show all the rocks and small islands. My hand may have slipped here and there, so if you know the area and something doesn’t look right, it probably isn’t. If you’re reading this on-line, it’s going to be small, but hopefully you can enlarge it enough to read the numbers and see some detail. If on hard copy, a magnifying glass helps.

image027

The chart is plagiarized from the Canadian Hydrographic Service chart number 3640. This is an old chart, (my copy of the chart is about 25 years old,) which was superseded when the hydrographic service changed over to metric charts. My apologies to the Service, along with my thanks for this and all the other excellent charts they produce.

***

Launch of Buster – Randy Wheating

Scan1 Scan10001 Scan10003

Hi Richard

Congratulations on the launch of your Chebacco.  Built and launched in
one year, that is light speed from my perspective.

I finally launch my Chebacco, Bluster, at the Stave Lake (one hour east
of Vancouver) public ramp on July 7th.  I have been puttering away on
this boat for over five years.  I still need to build the masts and
booms and I have purchased the Sailrite kit all of which will be next
winter’s project.  I am thrilled with the final results.  She handled
the five adults and two children easily for the inaugural one hour
cruise on a typically warm and rainy west coast day.

Bluster is a sheet ply Chebacco with a few minor changes:
The keel is laminated solid fir
Cabin top is raised two inches and the cabin sides pushed out to
line up with the coamings.
Transom is one continuous with a cut out for the motor
Motor well is slightly smaller (fits two 3 gal gas tanks)
Coaming is continuous along the aft section (no cut out)
Rudder and rudder post are welded aluminum
Mast to be deck mounted on a welded aluminum tabernacle; shrouds and
fore stay required
Plank style bowsprit with anchor roller and fore stay for jib

I splurged out and purchased a 5 hp Honda four cycle outboard motor
which I am very pleased with.  I purchased the optional ‘power prop’
designed for displacement hulls.  This prop gives me about 1/2 knot more
speed over the standard prop at all throttle settings.

On the weekend of July 13th  Lisa and I took Bluster out for her first
salt water and overnight trip.  We live close to the end of the Port
Moody arm of Burrard Inlet (the mouth of which is the city of
Vancouver)  We planned to travel the end of Indian Arm which is the
longest arm of Burrard Inlet, the end is about 30 km from Vancouver. We
launched at Rocky Point at 6:30 pm on Friday night and we were dropping
the hook around 8:30 pm in Bedwell Bay off Indian Arm.  I am new to
anchoring so I reset the anchor once and tested it before we tucked into
our cockpit candle light dinner.  We spent a fairly comfortable night
but awoke several time to check on things.  I noticed that Bluster would
dance around in the slightest of breezes (up to 180
degrees) not  on the anchor but just on the weight of the anchor line.
The large, heavy,  motor yachts  in the anchorage did not budge.   Maybe
the mizzen and centreboard would buffer this movement.  The night was
warm and the mosquitos  had a go at us.  Note to me – need a screen for
companionway opening.

Up at 7:00 and motoring away from anchorage by 7:45.  We cruised over to
the village of Deep Cove and tied up at the public wharf. Walked  into
town a found a cafe for a big breakfast.  After this in a warm but light
rain we motored north 18 km to the end of Indian Arm.  Stopped once to
brew up a coffee on my single burner hiking stove.

We motored steadily all day and the Honda (with standard prop at this
time) just purred along.  GSP gave us 5.5 knots at half throttle and 6.1
at full.  Even at a fast idle we moved along at 2.9 knots. Used
approximately 3/4 of the 3 gal gas tank for the entire cruise.  Lisa
thinks we should skip the sails as it will just complicate the fun and
she would lose her seat on the front of the cabin top.

Arrived back at the ramp around 3:30 pm on Saturday at an extremely low
tide.  No retrieval problems.

Since this trip we have been out for several day cruises with the
children (Jacob 7, Sam 5) for family fun.

I have attached some photos.

Thank you Richard for all the work in maintaining the Chebacco site.

Randy Wheating
Port Moody, BC
Richard Spelling wrote:

> Wonderfull looking boat. Looks like you spent the 5 years well.
>
> Why solid wood keel?
>

Years ago, when I was getting around to the keel, I had never heard of a hollow
keel and it seemed vulnerable in the case of groundings or trailering.  I also
had a supply of really old rough cut 2″ boards in my father’s barn that need a
purpose in life.  Through work (industrial fiberglass manufacturing) I had
access to some kevlar scraps that I used to encase the keel.

>
> Transom and aft deck looks good, why did you do it that way?

I though the original drawings were odd in that it cut away all but 2″ of  the
transom and then bolted a motor mount plank across the hole.  Therefore, after
much pondering, I went with the solid transom.  I needed to attach a little
wedge to the transom to get the motor angle right.  I recall Brad Story’s
version have a solid transom.

I also did not care for nor understand the purpose of the big cut away into the
motor well from the cockpit and then adding a plank for the mast/tiller so I
made this solid and added a little access hatch under the tiller to get at the
forward part of the motor well (through which I can slip a 3 gal Honda gas tank)

>
>
> BTW, love your floor boards. Look much better than mine. Pine?

These boards are the cheapest wood on the boat – scrounged from a lift on
utility grade 1×4 spruce we use for pallet building at work. I just cut to fit,
rounded the edges and varnished.  My plan was to replace with some nice fir
boards in the future but the pallet wood seems to look fine.

>
> Welded aluminum rudder post? 2″ I thought of doing that, but didn’t think it
> would be strong enough.
>

So far, so good.  I copied  Fraser Howell’s idea and I have access to an
excellent welder at work who could whip it up for me.  I fabricated all the
metal work (tiller bracket, chain plates, anchor roller mounts, fore stay
brackets) and had these professionally galvanized.

>
> Interesting, you are trading standing rigging for a simpler tabernacle, and
> a usefull jib. Let me know how it turns out. Don’t forget the compression
> load on your mast now.
>

I do not expect the standing rigging to be a big deal and I wanted a nice tight
fore stay for the jib.  The mast is actually to be cabin top mounted on an 1/2″
thick by 9″ tall hinge.  I laminated the forward bulkhead to 1″ thick to act as
a compression post.  Cut a square hole in it rather than a round one as per the
drawings.

>
> Don’t let Lisa convince you to loose the sails. There is something about
> flying along in silence with nothing but the wind pushing you that can’t be
> matched by motoring.
>

You certainly do not need to convince me.  I am busting to get sailing.  Lisa
has not really had any sailing experience to speak of so I am eager to share
this with her.  I have learned to go slow.  As they say:  “When the momma is
happy, everyone is happy.”

Cheers,
Randy

***

Miscellaneous boat ramblings – Richard Spelling

“It’s a Chebacco. No, it’s a yawl, not a ketch. Yes, I built it. Thank you.” Well, if nothing else I meet lots of people.

At least they don’t think it’s a fake boat!

You know, life is funny sometimes. I built this boat to take the family, and in particular the wife, out camping and sailing. The wife likes the boat, but she still left and took all the kids. Life is change, I guess. At least I got a boat out of the deal. Know any girls who like to build boats? More to the point, know any girls who like boat builders ?

Img22 Img20 Img16

Img10 Img04

Out sailing, some of the hard to get pictures of your boat sailing. Quite windy, put in a reef and went splashing through the big waves where the wind had a couple of miles to build up waves just after this. Beat to windward, run back and beat to windward again. Much fun, got water on the inside of the windows! (hatches were open). Ex 6 year old stepdaughter had a blast.

tn_DSC00001 tn_DSC00007

Hey! I want one of those. Picture of a powered parachute buzzing around. Right is a picture of the recycled electrical panel I made for the boat. Was a panel for some computer equipment I salvaged from the trash. Some 50 cent switches and fuses, and some holes bored on my homemade milling machine, and presto, switch panel.

DSC00004 DSC00005 DSC00006

Anchor well, anchor rode, and launching rope. Wedge under motor to give proper trim angle. I put this on because the back would dig in at full throttle, and I thought the trim was off on the motor. Back still digs in, I guess I’m climbing over the bow wave. No matter, when the motor is tilted up it rides lower with the wedge, less chance of water going up the exhaust and into the cylinders now. Also, you can’t pull the motor off strait up, you have to slide it off sideways now. And, there is a plate screwed on with with epoxy blocking the screwdriver slots on the soft brass screws to prevent sideways sliding. Theft prevention. Right is battery charger.

tn_P9020001 tn_P9020002

Foam and boards to go on the seats and the berths. Going to try my hand at upholstery. Note clean empty living room. One advantage of being single again, I can work on boat stuff in the house!

tn_P9020005 tn_P9020006

Prototype of hitch mirror. Doesn’t work, moves and gets out of alignment due to the wonderful roads here in Oklahoma. Thought was to let me see the hitch in the rear view mirror for hooking the boat up singlehanded. Designing Mark II now. Right is a picture of the storage areas under the berths.

DSC00008 DSC00009 DSC00010

Here we are launching a friends Micro in Grand Lake so we can work on the trailer without jacking the boat up. This is so we can take both boats out sailing.

DSC00011 DSC00012 DSC00013

DSC00015 DSC00016 DSC00017

DSC00018 DSC00019 DSC00021

DSC00022 DSC00023 DSC00024

OK, I lied. It wasn’t Grand Lake.

DSC00025 DSC00026 DSC00027

Modifications to the trailer to fix the lights, and to encourage it to sink…

DSC00028 DSC00029 DSC00030

David: “I’m not going in there!” Me: “It’s not like it’s a sewer or something!”

DSC00031 DSC00032 DSC00033

DSC00034 DSC00035 DSC00036

Me: “Yuk!”

tn_DSC00037 tn_DSC00038 tn_DSC00039

Hint: Do not drive an old trailer with 8 inch wheels in a rocky field with holes deeper than 8 inches, you will break leaf springs. Right is emergency repairs.

tn_DSC00040

Micro goes back in it’s barn. I guess we are only taking one boat out.


***

—-Original Message—–
From: Richard Spelling [mailto:richard@spellingbusiness.com]
Sent: Monday, March 25, 2002 10:52 AM
To: Mike Haskell
Subject: Re: Request in next newsletter

Sure, no problem. Maybe we should ask them to register so
everyone has thier email addr?
Put the side decks on, and started the mast this weekend.

—– Original Message —–
From: “Mike Haskell” <mike@AdventureQuest-USA.com>
To: <richard@spellingbusiness.com>
Sent: Monday, March 25, 2002 9:45 AM
Subject: Request in next newsletter

Good morning Richard,

When you complete the next newsletter, would you put in this request:

To all Chebacco lapstrake builders. My name is Mike Haskell and
I plan to start building a lapstrake Chebacco in the summer of 2002. By scouring past articles in the Chebacco News, I have deduced that the following may have, or have built or are building lapstrake Chebaccos:
Marc Lindgren
Allan Bell
Bill Parkes
Bill Meier
Jerome McIvanie
George Cobb
Gil Fitzhugh

Would each of you be willing to respond to me off list. I’d like to have your e-mail addresses, so that I can contact you to see whether or not I can pick your brains as I get into this project. Gil, since you and I have already correspnded, you need not contact me again–I have your address and you are currently at the top of my “When I Need Help Call______” list.

Thank you to all who respond–and there is a prize. If you ever get to Maine, stop by Bowdoinham, we’ll go sailing or kayaking, and I’ll treat you to a bowl of the best lobster stew you’ve ever eaten.

Sincerely,

Mike Haskell

Mike Haskell, President/CEO
Adventure Quest-USA
Leadership That Gets Measurable Business Results, Guaranteed!

Forging Business Leaders Who
-Create Effective Work Teams
-Increase Productivity
-Deliver Measurable Business Results
mailto:mike@AdventureQuest-USA.com
http://www.AdventureQuest-USA.com

Chebacco News 40

Intro and more building the CLC

aDSC00008_2Well, I’ve sold my AF2. Entropy retired to a happy home in sunny Arizona. Pays for the outboard on the CLC. Interestingly enough the buyer, according to his friend (who we delivered the boat too), has an occupation of “rich kid”. I think it’s neat that he could afford any boat in the world, and wanted my homemade one!

Looking very much like a boat.

The standard thing that people said when I was building the AF2 was “how are you going to get it out the door?” The standard thing people say about the CLC is “It looks like a boat”. As you can see from the pictures below, it does look like a boat. Just not a sailboat!

Windows, what to do.

I finally decided to go with Plexiglas/acrylic instead of Lexan/polycarbonate. Decided to do my own tinting instead of paying the extra for the tinted acrylic, not sure I saved any money, and in the long run may need to redo all the windows. However, they would be easy to switch out, in that event.

Battery adventures

Well, the money I saved by going with the Sam’s Club golf cart batteries turned out to be not any money at all. I have this bad habit of doing that, I’ll do something to save money, and wind up spending more then if I had just gritted my teeth and did it right to start with. Have to work on that.

When I was installing the batteries I noticed acid leaking from on of them when I moved it to the boat on the hand truck. Not good for a sailboat (even one that looks like a power boat) that the batteries would leaks when tilted. Decided to get the West Marine version of the golf cart batteries, even though they cost twice as much as the Sam’s batteries, on the theory they wouldn’t leak. Two weeks after I placed the order, West Marine still didn’t have them. Canceled, and paid twice as much again, for MK gel sell batteries with the golf card form factor.

bDSC00004_9 bDSC00005_6The Westco Battery guy said “they probably double stacked them”. Right on the side of the box it said DO NOT DOUBLE STACK. (not really a box, more a cardboard half cover for the batteries)Then, when they came, one of them had a smashed in center cell. With some encouragement http://www.westcobattery.com/ sent a replacement. When it arrived, it was three! I originally had complained because a couple of the bolts were missing. Apparently they sent two new batteries then. Then when I convinced them the cell was smashed too much, they sent a replacement for that. Swapped out the bad one and sent the three back. (on their dime)

Interestingly, the shipping guy was having a cow that I would claim the batteries were damaged. I told him it was between him and WestCo. He put the three batteries on the hand truck to haul them up the driveway, and guess what, only two would fit.  So, he stacks the third one on top. Is that “double stacking?”

bDSC00004_4 bDSC00018
I remember a conversation with a guy who had built a very pretty wood and epoxy boat about the size of the Chebacco. He said he had used 10 gallons of epoxy and I remember asking “why so much?” I hope Larry at Raka likes me; I stopped counting at 30 gallons…boat epoxy, and more epoxy

mast, titebond

tn_mDSC00003_4 tn_mDSC00001_7 tn_mDSC00001_6
Left hand picture here we are clamping the spacer boards on the mast, Made the mast hollow so the wires for the anchor light would have a place to run. Right show the sanding crew hard at work.Here are some pictures of the mast. On the left I’m using pallet wrap to pull some of the wrinkles out around the transition from square to round. Primitive vacuum bagging, without the vacuum or the bag.

tn_mDSC00001_4 tn_mDSC00003_7 tn_mDSC00001_5

Decided I would laminate the other spars with TiteBond II instead of epoxy, save money, and it’s still stronger than the wood. Need lots of clamping pressure with TiteBond, every “C” clamp I have is in this picture. Someone on Yahoo suggested there might be “creep” problems using TiteBond. Don’t know about that, they aren’t under constant load. Just have to wait and see what happens.tn_mDSC00001_13 tn_mDSC00012_3

Nice picture of the scarphs for the mast. Bottom of the mast is doug fir, top is red cedar.

Going to redo the gaff hollow ala birds mouth, gaff to plan is a bit heavier than I like. Also, decided the other night to scarph up plywood scraps, so this should be an interesting stick. Then again, I may save that for a latter project, and just use the stick as is for now.
motor, mounting board

Motor is in, rather heavier than I thought it would be, though it’s probably right to spec. Will worry about installing the alternator kit later. Actually, could have waited to buy the motor, can’t put the motor mounting board on yet ‘cuz it would block easy access for getting into the boat. Made the mounting board out of sheathed plywood instead of oak, will put a 1/4″ aluminum plate for wear resistance. Also, I’m putting wedges under the mounting board on the back of the boat, instead of making mounting brackets ala plans inside the motor well.

Camper Works

Sad to say I had (and am still having) a bad experience buying something online. I bought a porta potti from a place called “Camper Works”. After 4 weeks it still hadn’t showed up. I started sending them emails, which were ignored. I started calling them, and they kept giving excuses. I finally got disgusted and canceled the order, and ordered from a place called “Camper World”. The Thetford 135 from Camper World showed up in a couple of days. Then, a couple of days later, the one from Camper Works showed up! It had been shipped THREE DAYS after I called and canceled the order. I shipped it back, and the guy said he would send a check….

Well, I haven’t gotten a check back. I guess I’m going to have to call Discover Card and do a charge back.
thriftymarine

Had a similar experience with Thrifty Marine. They have such good prices on their Bomar hatches that I ordered some more deck plates from them. A trivial order, $18, but I paid promptly and expected the hatches to be shipped. 6 weeks later they hadn’t been, and emails were not being responded to. Had to call, and kept getting excuses. “I’ll ship them first thing in the morning”.

Finally had to send an email threatening to report them to Paypal for fraud. This got my hatches sent, for some reason. Owner said he would “make it up to me” on my next order. Needed another 10” round hatch for the front, asked how much. He said he would ship it gratis on Wednesday (neat, that would make up for the hassle!), but it’s been three weeks…

I’ve added a warning on the “resources” page, buy from them at your own risk.

Trim

tn_trDSC00003tn_trDSC00004tn_hDSC00003_12
Splurged on the trim for boat, figured if I spent this much time and money on the boat, I would like some trim that looked good. Bought about 12 board feet of Honduras mahogany. Expensive wood, almost as much as teak, could probably have got lots more red oak for the same price. As it is, I’m going to get some mahogany stain and put it on, make it look even redder.

tn_sDSC00009_2 tn_sDSC00008 tn_sDSC00001
Here are some pictures of the berths. I made access holes in the berth tops instead of having the whole top pull out ala plans. Stronger structurally, and looks better I think.


tn_dDSC00013tn_dDSC00015tn_tDSC00014

Here are some picture of the seats going together. Note alcove and ventilation hole.

tn_tDSC00003_14tn_tDSC00004_11tn_tDSC00005_8tn_tDSC00007_6

Some pictures of the tabernacle.

tn_cDSC00001_15 tn_cDSC00004_10 tn_cDSC00009_4

Scraping paint runs, faster than sanding. Laying out cockpit coaming. Note that the only joints on the boat that are not stitch and glue are where I fastened something to a closed compartment and couldn’t access the bottom. This requires a LOT of tape, but I have NO end grain or plywood edges exposed for water to get in.

tn_cDSC00001_12 tn_dDSC00004_3 tn_dDSC00004_13
The forward hatch will be sliding; the rest of the hatches will be hinged. Bought hatch hinges but they don’t work like I expected, and I think I’m going to sell them on Ebay and use treadmill belt and bungee cords for the hatch hinges.More pictures of the coaming going together, some pictures of the deck. To the right, picture of the sliding hatch on the forward deck. Also not to plans, plans showed a narrow hinging hatch.

tn_dDSC00005_2 tn_dDSC00005_3 tn_dDSC00006_2More sanding, and another picture of the forward hatch.

tn_dDSC00006_3 tn_dDSC00007 tn_dDSC00007_7Top hatch being “stich and glued” in with cleats and clamps. Note the profile of the deck on the right. Plans show a rounded curved deck. Decided that a stitch and glue hard chine deck would look better and go with the rest of the boat.

tn_dDSC00009_5 tn_hDSC00001_2 tn_hDSC00003_13Some pictures of the pilot house. Kind of looks like a tank or something, eh?

tn_hDSC00001_14 tn_hDSC00003_11 tn_hDSC00003_12More pictures of the pilot house.

tn_hDSC00004_12 tn_hDSC00005tn_hDSC00004_2

tn_hDSC00005_7 tn_hDSC00005_9 tn_hDSC00006

tn_hDSC00006_6 tn_hDSC00008_5 tn_hDSC00008_6

Note the rag tied to the rope. Only took me about half a dozen times running into the rope to put the rag there. I guess I’m a slow learner.

tn_hDSC00009_6 tn_hDSC00010_6 tn_hDSC00010_7

tn_hDSC00010_8 tn_hDSC00011_3tn_hDSC00012_4

Redhead says it feels “creepy” inside the pilothouse. No windows yet.

tn_hDSC00013_3 tn_iDSC00001_3 tn_iDSC00003_2Side decks give plenty of room for walking. Starting to work on the icebox. Laying out the panels for marking.

tn_iDSC00003_3 tn_iDSC00005_4 tn_iDSC00006_4 tn_iDSC00007_3 tn_iDSC00008_3 tn_iDSC00010_2
Icebox going in. Offset top so cabin/cockpit bulkhead won’t span the lid. Right I’m foaming the extra spaces out.

tn_iDSC00011tn_iDSC00012_2tn_iDSC00014_2

More icebox work, center picture is the compartment for the potti.

tn_iDSC00015_2tn_iDSC00016tn_iDSC00017

Board holding down the styrofoam, expanding foam, well, expands, so it was trying push the rest of the styrofoam up. Stuck the pieces together with 3M spray adhesive.

tn_vDSC00001_8 tn_vDSC00003_8 tn_vDSC00004_5

My experiments into vacuum bagging. Bagging the aft mast step to make sure the glass sticks down to the wood on all the odd corners. Without bagging I would have hat to do it in several stages, and do a lot of sanding. With bagging I can do it all at once, and only need to scrap off the creases left from the bag.

-Chebacco Richard

***

LED lights, take two:

The other day I received an email from Ken James about LED lights and regulators.

This is nothing strange, every time I write an article on how to do something, someone will pipe up, “you know, there is a better way”.

Which is as it is should to be, I suppose. Peer review and all, certainly makes for a better end product. For instance, talking to various people has convinced me that the best way to power LED’s is though current limiting, and not a fixed voltage regulator. Not to say that the fixed regulator won’t work, but there is an easier way. Or, maybe it isn’t even an easier way, in some circumstances, but it removes the complicated and expensive voltage regulator and replaces it with a cheap IC at the light locations.

Anyway, I had built the prototype (mark 3) LED anchor light the other day using current regulator IC’s from National Semiconductor, some resistors to set the current limit, and some bright white 5.6 candela LED’s from BG Micro.

Then I get this letter from Ken James. “Several years ago, over ten now, I had the idea of using leds for nav lights. Retired from the USN, went sailing a bit, then started building led lights. Been at it ever since. Solved all the problems you have encountered, including many you haven’t discovered yet, from what I read on your web site 😉 . So now I sell the lights, atwww.deepcreekdesign.com.”

Funny the people you meet online.

It was actually the high price of the LED lights at Deep Creek that decided me to make my own!

And you know what, after exchanging 16 or so emails with Ken there, I’ve come to the conclusion I probably didn’t save a whole lot of money making my own lights. But, like homemade boat building, that is not really the point.

For instance, Ken pointed out that with the 20 degree spread of my BG Micro LED’s a boat would have to be hundreds of feet away to see the anchor light. Seems you need a 60 degree vertical spread to be “legal”. Not that I was too concerned with being legal, but I was kind of concerned with getting run into…

So, to make an anchor light with 20 degree 5.6 candela LED’s I would need:

360/20= 18 LED’s to make a circle of light. But, since they need 60 degrees of vertical spread TOO, I would need three rows of the 20 degree LED’s, so I would need 18*3 or FIFTY FOUR of those LED’s (which are showing up everywhere and Ebay for about $2.50 each for some reason). Since I really only need 4.2 candela for 2 mile visibility (Ken’s numbers) I would need (4.2/5.6)*54= 40 of the expensive little buggers. There is $100 in LED’s right there. Plus circuit boards, regulators, etc, I’m just about at what Ken charges for his light!

<sigh>, story of my life.

But wait, he doesn’t use 40 LED’s on his lights, now what is going on here?

Well, firstly Ken uses a “pulse regulated driver”. This means he uses a high efficiency switching regulator, and drives the LED’s with pulses of electricity. This gets more “visibility” with the same power output.

Also, Ken uses surface mount LED’s with an output of .66 candela. You are thinking that this is quite a bit smaller than the 5.6 candelas of the LED’s I was playing with. Well, you must understand that candelas is a measure of brightness, and not total light OUTPUT. His small surface mount LED’s only put out .66 candelas, but they put them out in a fan of light 140×60 degrees.

Let’s see, that is .66 candelas at 140×60, or 5544 candela degrees (is that even a measurement?)

And, 5.6 candelas at 20×20 is 2240 candela degrees.

So, he is using LED’s that are about 2.5 times as efficient as well.

Could I make one using his LED’s? Yes. Nichia sells to the public, but not cheaply. Bought a couple of dozen NSSW440 surface mount white 60×140 LED’s, and used 18 of them for my anchor light. Here is a picture.

Incidentally, if you want to use the surface mount LED’s, you will need a board. I’m considering selling a kit for these lights. If you are interested, email me.

Well, if I can’t save money making my own anchor light, at least I can save money by making my own LED bicolor light then!

Maybe, maybe not. Ken pointed out that if I’m not careful I would have “zone overlap”. That is where the beam from the colored LED’s overlap and from directly in front of the boat people would see a white light… not good. He was even kind enough to mention ways to get around this problem.

I could certainly build a cheap bicolor light. Would it be as good as the professionally hand made ones at Deep Creek? Probably not. Would it be safe to go sailing with? Probably.

Am I going to build my own lights? You are damn straight. Life, like sailing, is not about the destination, but is about the trip. Making my own LED anchor lights has turned out to be very good learning experience. In the process I have made new friends, learned quite a bit about electronics, and added the skill of etching circuit boards to my boat building skills.

If all you are wanting is efficient lights for your boat, you should buy them from Ken. His are well engineered and come with a warranty.

If you want the learning experience of making your own lights, or just want to tinker, you should make your own. Ask me questions, I’ll be happy to help you out.

-Chebacco Richard

***

Hi Richard

No earth shaking events to tell you about, but we had a visit from Bruce Hector on Saturday, and got out for a nice little sail with him.  We managed
some good speeds for a designed waterline of around 18 feet, which other builders might find encouraging — we exceeded the theoretical hull speed
for that waterline by about half a knot, by GPS.  We did that with and against any tide there was, so they were honest numbers.

We also tried out the optional jib, at least to windward, which folks might find of interest.  All the votes aren’t in yet, but it looks like anyone
thinking of sewing up a jib might also think of adding a bowsprit.  I like my Jonesport cleat too much to take it off just yet so I’m going to keep
playing with the jib on other points of sail.

I have a couple of pictures of Bruce on board — there are still a few shots on the roll to use up, but will do that and get them developed by the start
of next week.  No idea how they will turn out — I forgot the camera, so I bought a one-use Kodak.

Cheers,

Jamie

Hi Richard

Finally got these developed.  Only snapshots, but much better than I hoped for with a disposable camera.  Pity the photographer isn’t more skilled.
I’m sending all I have of Bruce, you choose which you want to use.  None of them look too wild, or show any spray flying, because I waited until we were
on a nice stable reach before to using the camera.

So how’s S’s Cat coming along?  I’ve been cleaning up some old epoxy snots inside W.L.’s cabin — they’ve only been there for two and a half years!  I
didn’t attend to them at the time because I wanted to get launched, then there was always some other reason not to fix them.

Been giving some thought to storage for cruising gear, too.  Last year we mostly used the cabin for storage, not sleeping, but I’m trying to keep a
lot of stuff out of the living area by using the space under the seats and up by the mast.  I might add more storage type hammocks under the side decks
too — we have one each side right now, and they’re great for small stuff. I went to great lengths thinking up the perfect galley box for all the
kitchen stuff, but when I made a mock-up of corrugated cardboard, I decided that I preferred the current Rubbermaid bins.  I may still make up a
mini-version to keep thermos flasks and cups to hand but not underfoot.  I guess this (storage) may be one reason why two-footitis is such a common
boater’s disease?

Gotta run,

Jamie

BruceHector1 BruceHector2 LesOrrandBruceHector1 LesOrrandBruceHector2

***

Around James Island

As Randy Wheating noted in the last “Chebacco”, it’s good to see visiting boatbuilders and/or boatnuts from other parts of the world.  This weekend I had a visit from another builder – not a Chebacco builder (yet) but a Micro fan.  I thought it was my duty to point out how he had strayed from the path of righteousness, and how better than to take him out in the One True Boat, a Chebacco?

Bruce Hector, of Kingston Ontario, was visiting family in Vancouver, and caught the early ferry over to Vancouver Island on Saturday, April 6, to say hello and see Wayward Lass.  This ferry lands at Schwartz Bay at the north end of the Saanich Peninsula, only 2 or 3 miles from Sidney, where we often launch.  I drove out with the boat and met him at the Safeway parking lot there, then we picked up my dad, Les, and headed over to the boat launch at Tulista Park.  We rigged up in about half an hour, and left the dock about 9:30 am  with a good south wind, something between 10 and 15 knots, I think.  A small craft warning was posted, but the highest winds forecast were 20 knots, sometime towards evening, so they just barely qualified for the warning.  Once clear of the dock, breakwater and other obstacles to navigation, we put up the sails and let out the sheets to reach eastwards towards Sidney Island at well over 5 knots (motoring, we top out about 5.5 knots).  Once near the island, we decided to turn upwind to make it easier to return, so we tacked and headed back over Sidney Channel.  However, between reaching earlier, and the wind veering round a bit to the west, we couldn’t do much better than go back the way we’d come, even when close-hauled.

Also, the wind had picked up a bit, maybe a steady 15 knots and a bit more in the gusts, so we stopped to put in a reef once we got a bit away from Sidney Island.  The mizzen did its usual job of keeping her head to wind while we tied in a single reef.  Bruce pointed out that the shore was getting pretty close by the time the sail was peaked up again, so we got under way before finishing the reef points – these are mostly to keep things tidy anyway, the tack and clew rings take the strain.

After getting well back to the west, nearly in line with the westward side of James Island, we tacked again and were able to free the sheets slightly as we went into the channel between Sidney and James Islands, on James Island’s eastern side.  Once well into the channel, James Island cut off some of the wind, but we kept moving, if a little slower.  As we approached the south end of James, the wind was maybe 15 knots again.  When we thought we could weather the south end of the island we tacked, but found the wind had gone even farther round to the west, and we couldn’t sail the course we wanted.  While we were discovering this, the wind blew us back onto the starboard tack, so we continued on with that, close-hauled this time.

In what seemed almost no time at all, we were far enough over to turn north again, this time easily aiming for the channel between James Island and the Saanich Peninsula (Vancouver Island).  As we sailed up the channel, the wind became freer, so our beat turned into a reach again, this time on the port tack.  The wind was lighter again, so we took out the reef in the main, and tried putting up the jib.

This is a new sail for Wayward Lass, it’s shown as an option on the sailplan, and this only was its second time out.  I can’t say it’s a great success – in fact, I would say it’s a waste of time trying to sail to windward with it.  Without a headstay, it’s hard to get the leech tight – but even when it’s reasonably tight, the sail is too close to the main.  If the sheet is pulled in enough to stop the sail flapping, the jib backwinds the main.  If the sheet is loosened to where the jib doesn’t spoil the wind for the main, then the jib flaps. Maybe there is a theoretical point where everything works, but we couldn’t find it.  Experiments will continue.

Once we stopped fooling with the jib, and had the full mainsail drawing properly, the GPS hit 6 knots several times, even though what little tide there was, was against us (it had shown just over 6 knots on the southern leg.)  The wind would not have been more than 15 knots (estimated.)

Sidney was coming up fast by now.  It was only around 1:00 pm, but we were all getting a bit cold, so decided to quit while we were still having fun.  The mizzen came into play again, keeping us head to wind while we furled the main – the GPS reported 1.8 knots in reverse at this time!  From the time we stepped off the boat until we were in the van, ready to go, only about 20 or 25 minutes passed.  We drove up to Robin’s Donuts, but couldn’t find parking for the van and trailer close by, so carried on to Dad’s place.

We finished off the last thermos of tea, along with some of Dad’s home-made oatcakes and jam while we talked and looked at Bruce’s boat photos – he owns a houseboat, has built a Nymph, Diablo, Pirogue and most of a Micro so far, not a bad variety at all!  He someday hopes to build a plywood aircraft carrier to accommodate an ultra-light STOL plane — that’ll be one for the album, not to mention the TV news and a few headlines!

What with the early start and very cooperative wind, Bruce was able to get away in time for the 3 o’clock ferry back to the mainland.  I hope he enjoyed his trip to Vancouver Island and around James Island.  That was probably the best sail we’ve had ourselves out of Sidney.  Good wind, (but not too much,) we all had good protection from the spray, lot’s of good food and drink (thanks for the beer and sausage, Bruce!) and the reef lines didn’t get tangled.  What more is there?