Chebacco News 38

Hello Richard:


I want first to thank you for continuing Bill Samson’s work in editing the Chebacco News. I have learned a great deal from this newsletter and appreciate very much Bill’s work on behalf of Chebacco builders.


In his very helpful description of the building sequence for the sheet-ply Chebacco 20, Bill describes how he installed the two hull side panels by suspending them from the ceiling while he fitted them. Since I am building outdoors and do not have a ceiling, I had to find another solution.


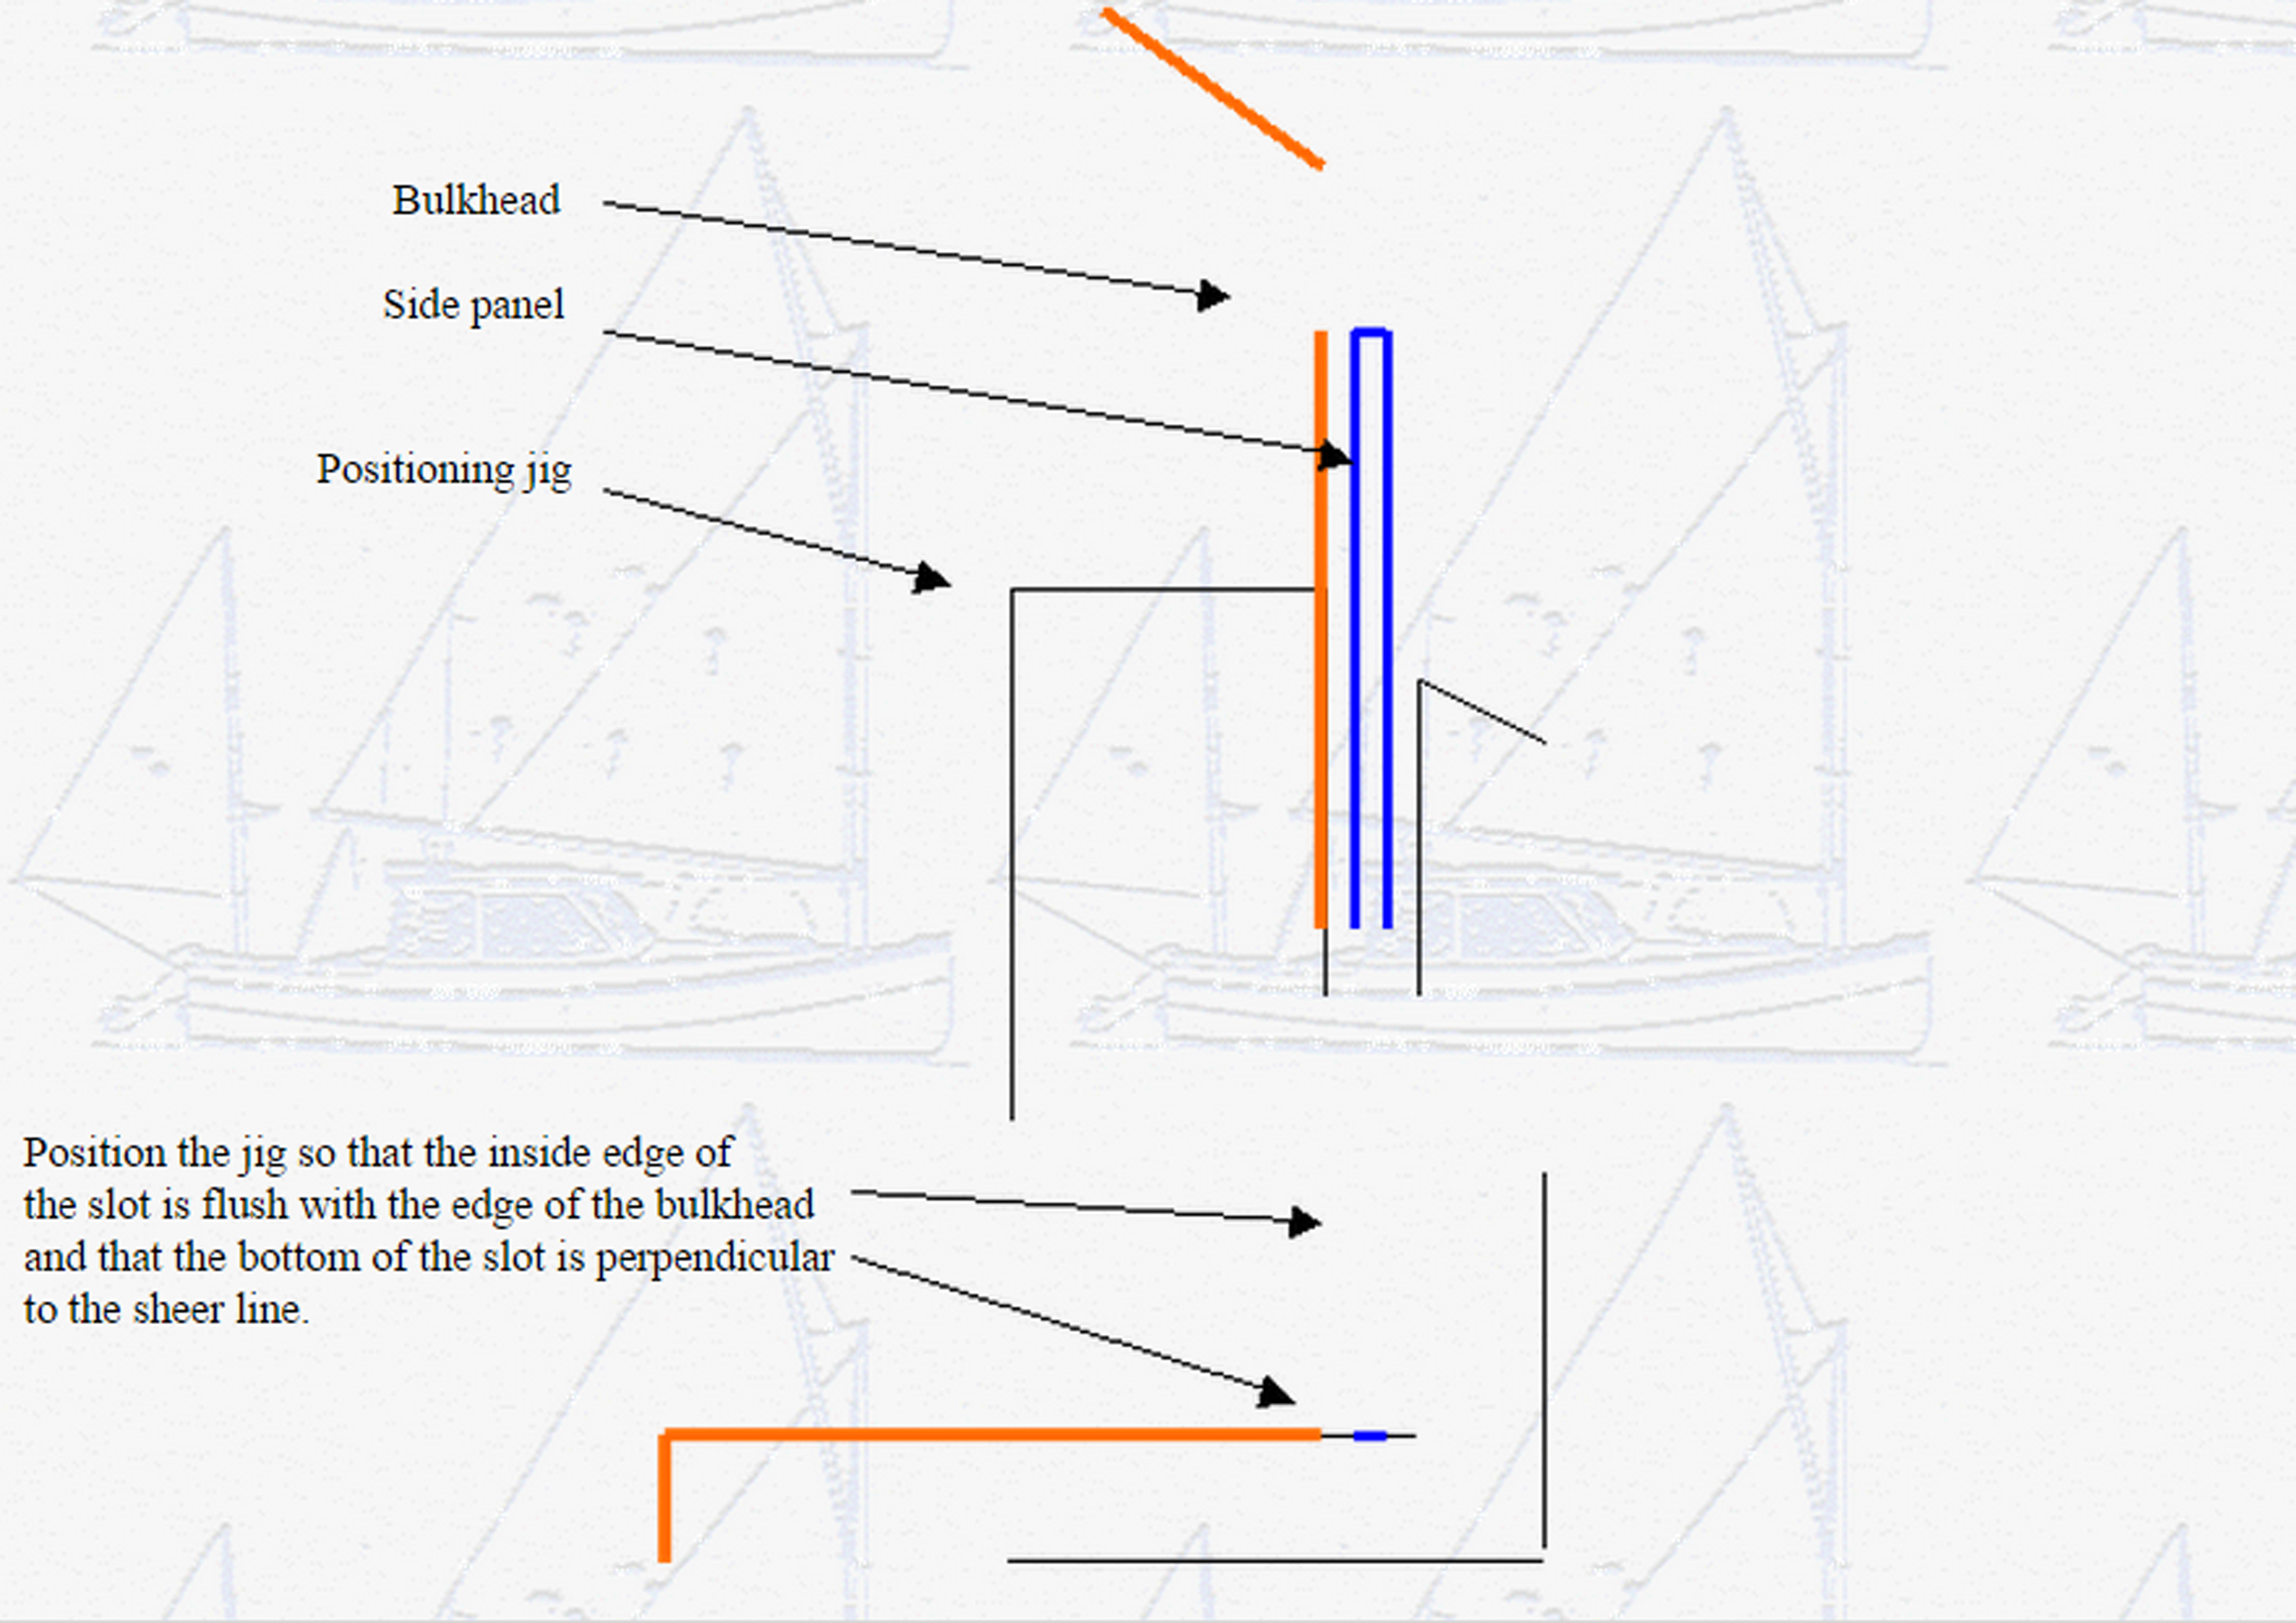
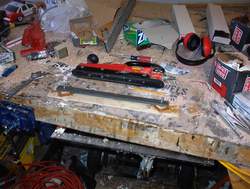
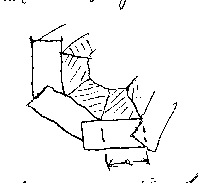
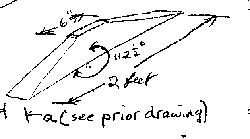
My approach, therefore, was to cut out six small jigs out of scrap plywood (I actually used the cutouts from the bulkheads.). These were screwed temporarily to bulkheads # 1, # 4, and # 6 as shown in the diagram below. The side panels were then dropped into the slots, three on each side, and I was able to take my time in positioning the panels. When the epoxy fillets were complete on one side of the bulkhead and the panels were permanently fastened at bow and stern ends, I removed the jigs and made the fillets on the other side of each bulkhead.


Side Jig 2

I found this to have been very easy and I hope that it might be of use to others as well.


Regards, Tom McIllwraith

Halifax, Nova Scotia

***

Hi Richard,

Thanks for the nice job on the last issue of chebacco.
Here are the pictures of blocks and tabernacle fitting
that you requested.

block1.jpg 1 block2.jpg 1
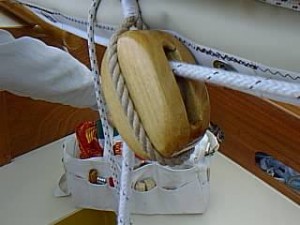
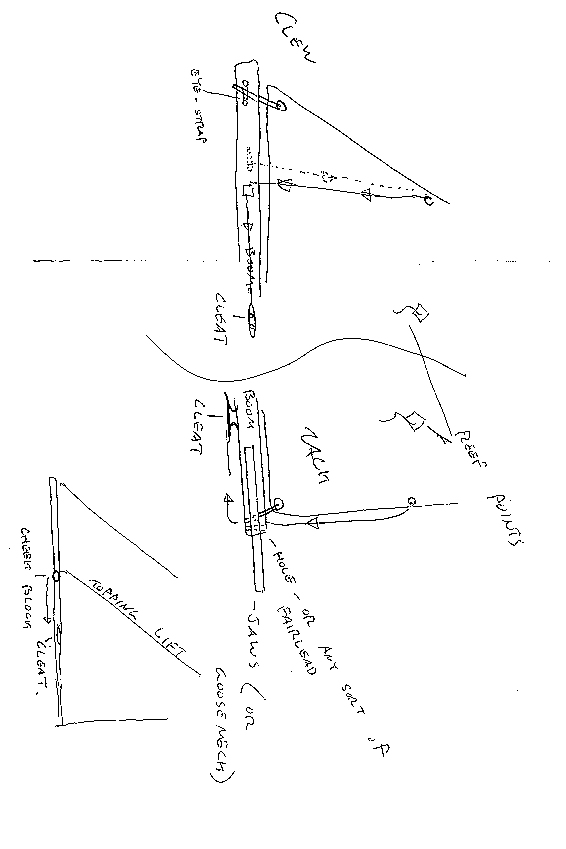
Blocks are made out of locust with a brass sheave spinning
on a 5 mm brass pin (Fig. Block1.jpg).  They run nice and smooth
as long as the hole in the sheave is a bit larger (e.g. 5.25 mm)
than the pin. As I mentioned before, I made patterns
by magnifying the drawings in the “Riggers apprentice”
by Brion Toss. I also fitted the block on the centerboard
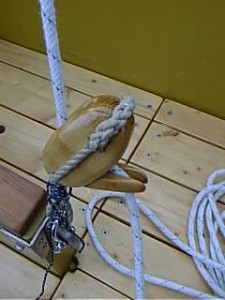
case with some kind of slotted tongue (Fig. Block2.jpg)
to jam the sheet, a home-made simple substitute for a camcleat.
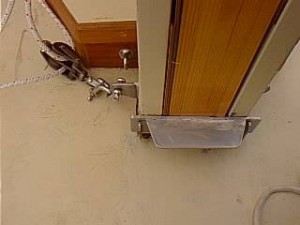
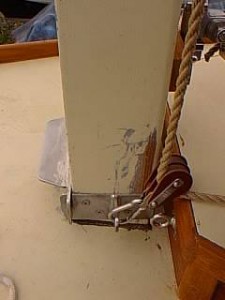
taber1.jpg 1 taber2.jpg 1 taber3.jpg 1

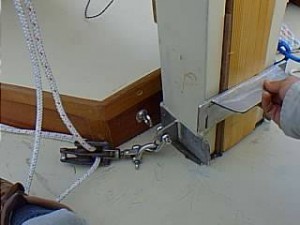
The stainless steel fitting for the tabernacle was “invented” and made by
my friend Roberto Ginetto. There is a U-shaped part that goes around
the back and sides of the tabernacle. This part is screwed onto the tabernacle.
The front part is removable (Fig. taber1.jpg) and goes on the u-shaped part
like a “fence”. The U-shaped part also has “ears” (Fig. taber2.jpg) to attach
the double turning blocks for the throat and peak haliards (starboard side,
Fig. taber1.jpg) and topping lift + jib haliard (port side, Fig. taber3.jpg).
As you can see, things are still a bit scratched and unfinished around there
but the whole thing works well and is very easy get on and off single-handed.

Let me know if you need more explanation or other info.

Cheers,
Vincenzo

Do you have any close up pictures of the hinge on your tabernacle?

Also, I notice you have the forward section closed off. What is the distance from the hing to you locking mechanism?

How do you raise the mast? You use the jib line as a forstay, do you use it to hoist the mast?

It appears your mast is rounded up top, but square on the bottom. It is square up to the double reef position of the gaff?

Have any closeups of your gaff saddle?

Hi Richard,

It is very easy to raise the mast, I just stand on the cabin roof and walk it up, it takes only a second then to block it with the metal fence. I do not use the jib haliard as a forestay or to raise the mast, although I guess that could be done.

The mast must be rounded all the way above the hinge point, otherwise the gaff jaws will not be free to swing around when hoisting or lowering sail (acting as a wrench around a bolt) and might bust at the first gust of wind! So, the mast is left square only in the part that goes into the tabernacle.

I will take close-ups and measures over the weekend.

Buon vento,
Vincenzo.

Richard,

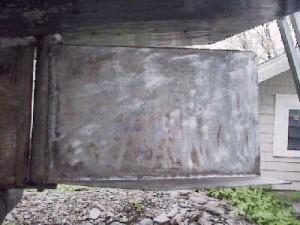
the distance from the pin of the hinge to the bottom of the locking mechanism is 67 cm.
The width of the steel plate of the locking mechanism is 6 cm.

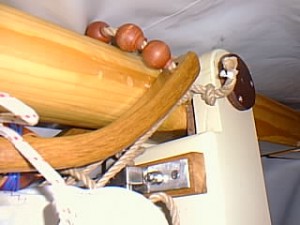
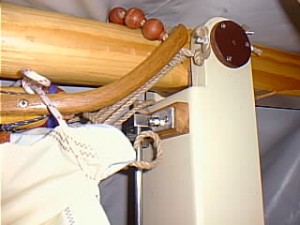
I made the curved gaff jaws epoxying 2mm oak lamination to a final thickness of 24 mm
(see attached pictures)

gaff1 gaff2 gaff3

Cheers,
Vincenzo

Did you use the 1 inch stainless steel rod described in Chebacco News 18 for the pivot pin?
I’m thinking of going a little thinner, to have less of a hole in the mast.
Did you do any kind of reinforcement for the hole in the mast?

The round plate with the three screws, this is the bearing plate for the pivot pin? Are all the mast forces taken by this plate, or is it a loose enough fit that the mast forces are taken by the box section of the tabernacle?

PCB&F says: “Since we know of no widely available source for them any more, we are proposing a ‘home-made’ gooseneck. It uses two stock ‘heavy duty’ SS gudgeons to accept a 1/2″ SS eyebolt which then connects via another ‘undersized’ bolt loosely to two SS tangs that are screwed to the forward sides of the boom; there should be enough freedom for the boom to move any which way, including twist from the sheet-pull. ”

I was never sure what exactly they were saying. It looks like you have a 10 inch or so long, 1/2″ thick  rod between the upper and lower brackets (gudgeons?) on the tabernacle face. I can’t see, but I’m assuming you then have an oversized eyebolt that slides up and down over this rod, is attached to the front of the boom, and acts as your gooseneck?

I used 1 inch bronze rod for the pivot pin.

To avoid having the pin bearing directly on wood, I screwed steel plates
(with a 1 inch hole for the pin), one screwed to the side of the mast, the
other to the side of the tabernacle, so the forces on the pin should mostly bear on the steel plates. The plates you see in the pics are just plywood plates that prevent the bronze pin from working its way out of the hole.

You are exactly right about my gooseneck. The pin is 12 X 30 mm stainless steel. I made it so long with the idea of rigging a downhaul to tension the luff. However the throat halyard is enough to give plenty of tension, and the sliding up and down of the boom is just a useless complication when hoisting or lowering the sail. I am going to cut that rod!
Pics of gooseneck details next weekend.

Vincenzo.

***

From: “Bill Samson” <bill.samson@tesco.net>
To: <richard@spellingbusiness.com>
Subject: New Chebacco growing on Vancouver Island . . .
Date: Sunday, November 11, 2001 2:41 AM

Hi Richard,

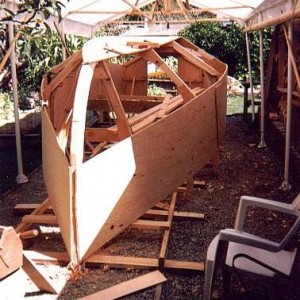
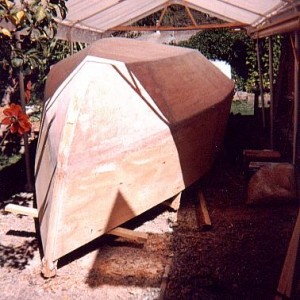
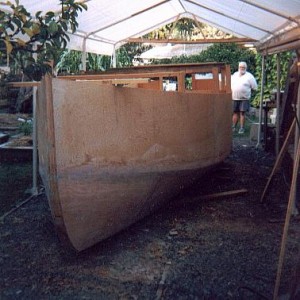
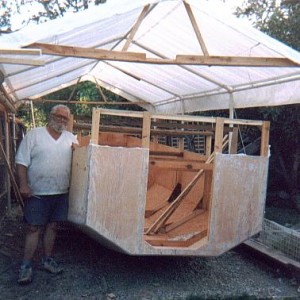
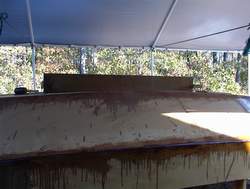
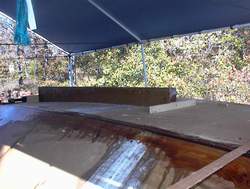
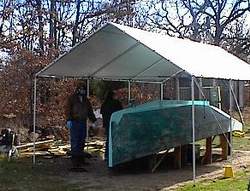
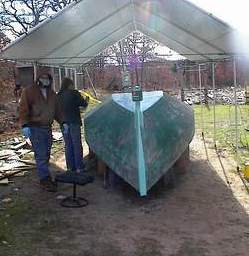
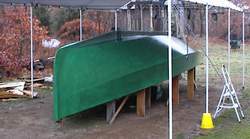
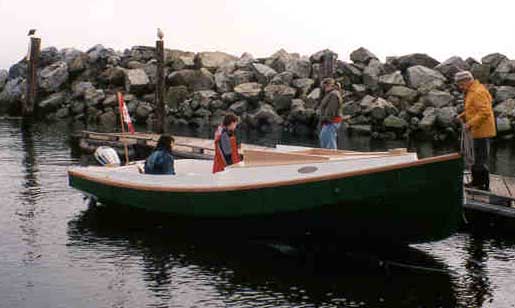
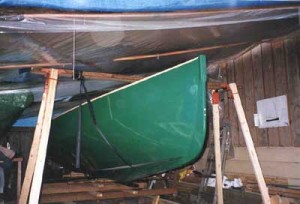
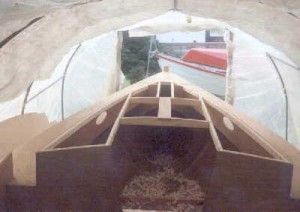
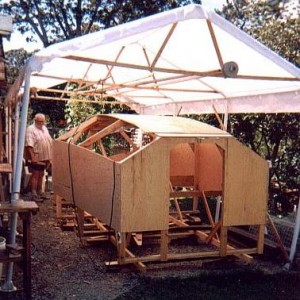
Just had these pics from Bill McKibben via Chuck Merrell of his ‘glasshouse’
Chebacco Motorsailer that’s coming along well.

Bill has raised the topsides a little more than is shown on the plans, but
(I think) kept the overall height the same.  You remember the pic of his
model on one of my last Chebacco Newses?

Anyway, Bill would be delighted if you included one or two of his pics in
your next issue.

Cheers,

Bill Samson

>Speaking of pix, the attached just came in from B&B for the NW Chebacco.
>Will put them on his web page.  They were taken in Aug and September.  I
>have a hunch he’ll have it complete by sometime next summer.  BTW, that
>green foliage, higher than the cover in Picture #1 is Beth’s corn crop from
>last summer.  I had some they brought down.  Delicious!
>Chuck
>NWCheb01 NWCheb02 NWCheb03 NWCheb04 NWCheb05
***

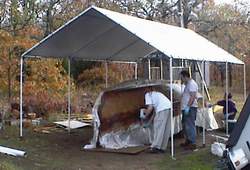
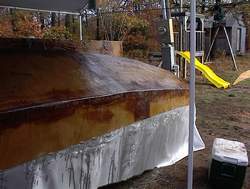
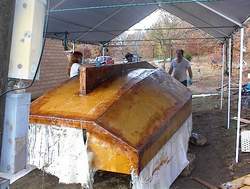
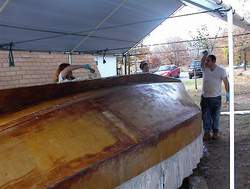
Hello Richard!  A short note with 3 photos for your next Chebacco e-zine, the main purpose being to show how I’ve tried to build a Chebacco over the summer.  As cold weather now comes over the Massachusetts hills here, I’ll soon be forced to close down boatbuilding work although I’m hopeful that an Indian Summer will come about to allow the finishing of the hull and flipping.  Even in snow I’d flip her!

Stealing Horses Keel
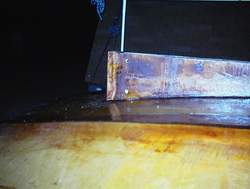
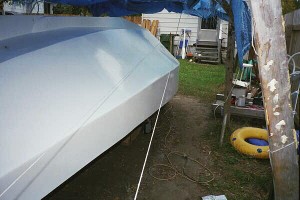
Photo 1 shows the keel on top of the bottom panel.  It was my assumption that it would be much easier for me to work at placing the keel without the bilge panels in place.  A step ladder under the bilge panel space allowed closeup work, to see into the centerboard slot, to work on finishes such as they are.

 Stealing Horses Bilge Panel

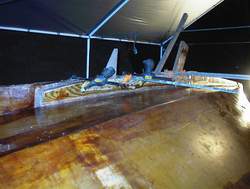
Photo 2 shows Stealing Horses with her bilge panels in place.  The front 8 feet is composed of 2 layers of 1/4″ plywood with the first brought into shape with Spanish windlass action, and the second secured with a buttering of thickened epoxy and many sheetrock screws forcing the outer to the inner panel per Jamie Orr’s earlier description of how to do this.  The aft sections of the bilgepanel are 1/2″.  A brass half-oval strip extends over the inner stem, awaiting the outer stem for attachment.  The strip along the forward keel, along both centerboard cheeks, down the aft keel but shy of where the rudder post attachment will be placed.

Stealing Horses Xynole

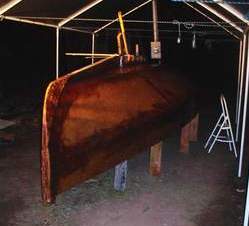
Photo 3 shows the bilge and topside panels covered with xynole cloth prior to wetting out.  The keel and most of the bottom has, as the photo shows, been cloth-clad and coated with epoxy laden with graphite.

At this time — late October — the large xynole sheets have been wetted out and received 3 coats of fairing compound which cured just before the cool weather.  Now the job of sanding the hull is sporadically underway.  The outer stem–composed of built up planks of rosewood–has been lag-screwed and epoxied to the inner stem.  The lagscrews are recessed into the inner stem and set in bedding compound.  By the way, Jim Slakov (who built an exquisite lapstrake Chebacco) suggested to me one of his embellishments: that a small wood wedge be eventually epoxied to the inner stem to hold the mast at an intermediate stage when raised.  The idea is to stand in the cockpit and raise the mast to this point (contingent on one’s height and muscle power), and then to leave it semi-raised and secured by the rachet effect of the wedge while climbing to the cuddy roof to complete the job.

I’d like in what remains of this building season to get the hull sanded and the waterline scribed to the hull–I’d like of course to do more like paint and flip–but I’d settle for this.  Soon I’ll be forced to unscrew the ladder strongback of the boat forms from the ground stakes that level it.  The coming frost will of course heave these stakes and I’m concerned that the hull not be stressed so I’ll let it float atop frozen ground.  Then an accurate waterline will be impossible.

Semi-gloss marine enamel was bought for a 2-coat job above the waterline (to be placed about 2″ higher than the design waterline) with the graphite-laden epoxy coming up from the bottom.  Kirby Paints was kind to test their various paints and primer on a sample of my plywood/my epoxy to see how to proceed (no primer was deemed necessary).

For those considering a sheet plywood version of the Chebacco the following is a list of major materials and their sources that I’ve used:
1.  Meranti marine plywood (LS 6566 grade) from Noahsmarine.
2.  Locally grown spruce, encapsulated in epoxy.  Some island-grade rosewood brought back from the South Pacific some time ago.
3.  Xynole cloth from Defender instead of fiberglass cloth because of a concern for puncture and abrasion resistance.  Xynole, however, absorbs epoxy like a blotter.
4.  Epoxy, fillers, and fiberglass tape from Raka Epoxy.
5.  Fasteners from Jamestown Distributors and Hamilton Marine.  Hamilton sells a nice through-bow silicon bronze eye bolt for pulling the boat to the trailer. I went to Jamestown for silicon bronze ring nails and screws, bedding compound.
6.  Sails, sewn over last winter, from Sailrite kits.
7.  Kirby traditional marine paint for the topsides / bilgepanels that are above the waterline.

Cheers, keep warm,

Dick Burnham

Stealing Horses stem paint

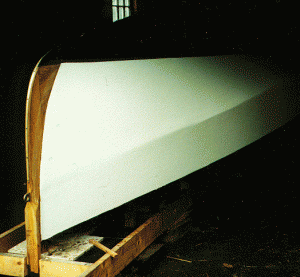
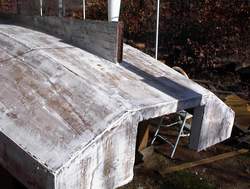
Here is our Chebacco with 2 coats of oil-based Kirby semi-gloss white on her.  The outer stem is as yet unfinished but we plan to sand it down and to varnish it.


Dick Burnham

***

Hi Richard

New email address  – ‘rwheating@telus.net’

Apologies for not thanking you sooner for your work on the Chebacco News.

I live in the same corner of the world as Jamie Orr.  He lives on Vancouver Island and me on the main land.  My Chebacco has been in the works since 1995 (!)  I was searching for just the right boat project (my first) when I read the Chebacco article in the Wooden Boat magazine.  However this would be a test of my dedication as my wife and I were just starting our family which I was to discover dramatically cuts into ones free time…
My boys are now seven and five and I am able to pick up the pace so to speak.  Just tonight I have done the final tidying up and dusting in preparation for spray painting my boat.  Mine is the standard sheet ply variety Chebacco with some modifications such as raising the cabin two inches and widening it out to the coamings.  I have also gone with a one piece ( a la Brad Story) transom with drain holes.  The forward bulkhead I doubled in thickness (to one inch) to allow me to mount the mast, using a tabernacle, directly onto the cabin roof.   I have some ideas for the tabernacle but would be very interested in other CB readers experiences with this.
Hope to launch this before January and then spend the spring on the trim  and spars.  Thanks for the sail info.  I will likely go with the Sailright kit.
I will send along some photos in the near future.
Thanks again,

Randy Wheating
Port Moody, BC
Canada

***

Sanding the CLC

Everyone has been saying that this will be a cold winter. To which I have invariably replied “NO, it will be a mild winter, so I can finish the boat!”. And you know what? With the exception of a couple of days of snow, it has hardly gotten below 50 degrees yet… spooky.

DSC00029 DSC00032 DSC00033

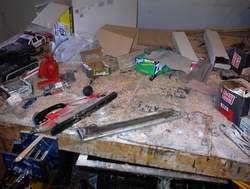
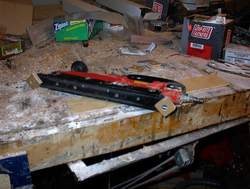
These are pictures my homemade power long board. To the left, I have just disassembled the inline air sander I bought from Harbor Freight. Center is where I have made up some small mounting blocks, and countersunk some 1/4″ flat head screws in it. To the right, I am gluing the blocks to the sanding board with some 5 minute epoxy. Note that the blocks are attached to the sander during this operation, this is the only way to make sure they are glued exactly the right distance apart, so they fit on the slide of the air sander perfectly.

DSC00034 DSC00035

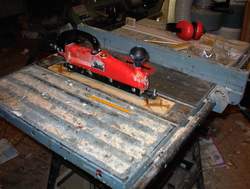
After testing my setup on the boat, I realized the slide on the sander was some kind of plastic, and bent all out of shape when the board was forced to follow the curve of the hull. What you see in this picture is a 1/4″ x 1″ length of cold rolled steel, used to keep the slide stiff and reduce the wear. Still got some wear using the sander, and had to return it to the store. I’m not sure it was all related to my setup though, as I’ve had this exact type of sander before, and had the same problems with it. I’ve since ordered a Campbell Hausfeld air sander from HF. They had it in the catalog for $16.99, about $40 less than I could find it anywhere else. The card in the mail said it was back ordered, and I can’t find it online any more… Not sure if it was a typo or what, but it appears they are going to send it to me.

To the right, you see where I have taken the sanding pad and used glass tape to strengthen the attachment of the spacer blocks to the board. The sandpaper was attached to this board with contact cement, 3M Super 77 spay adhesive. Application of the heat gun on high while pulling the paper off made changing to a new sheet a breeze. I used 36 grit paper, the kind that worked with the inline sander. At about $7 for a box of 25 at the local HF. Went through two boxes.

DSC00030

On the left here I am squaring up the rudder assembly, and on the right it is set aside for the epoxy to set up. I used three layers of the 2″ tape I got frommarsales1@aol.com I bought five 50 yard rolls of 2″, 6oz tape from him for $35, you might email him and see if he has any more. The tape is a satin weave and doesn’t wet out as easily as some of the more open weaves. You have to pre-wet your surface, then apply your tape, then wet the outside. Give capillary action a few minutes to work the epoxy in, then work any remaining bubbles out with your thumb. This tape is a bit more work than a more open weave would be, but well worth the saved money.

I make the rudder a bit thick for the post, so I trimmed it down some with a flap wheel on the angle grinder. Also, I flared the aft end on both the blade and the wing down to a finer point than on the plans, in an attempt to save a bit on drag.

DSC00001 DSC00003 DSC00004

Here you see the centerboard case going in. In the picture on the left I have just dropped it in, I had to cut a notch out of the board you see to get it to drop all the way down. Center is a side view, and right is a view of one of the cleats used to hold it. If you look in the picture, you will see that the cleat only has one screw. This is to allow the case to be levelled from underneath, before tape and epoxy is added.

On the right you can see a one of the bilge panel spices, still covered with the remnants of the wax paper used to keep the clamp board from sticking. I later went back with a wire brush on a drill and got this off.

DSC00003_2 DSC00005 DSC00006

On the left you see the crew applying glass and epoxy to the hull. This was a major operation, glassing the entire hull with 6oz cloth. Made more interesting by it being in the 60s, and by my being out of slow set epoxy. We only had one pot start to cook off on us, and I was able to dump and spread it before it had smoked too much.

Center you see a good shot of the cloth hanging off. In the future I may try to trim closer to the hull before applying the epoxy. I wasted quite a bit of glass here, as after it gets a few runs of epoxy on it, about the only thing you can do with this stuff is throw it away.

On the right, you will see where it looks like I spiced onto the back of the keel. This is caused by me splicing onto the back of the keel. Measure twice, cut once. Then cut again. Also note the brown under the glass. I used the last of my slow cure hardener to spread wood flour and epoxy over any sections that weren’t exactly smooth, so the glass would lay even. I learned on a previous boat not to use phenolic micro balloons under the glass. They aren’t very strong in tension, and I had a section de-laminate on me during sanding. This boat is being made as strong as I know how to make it, so the only putty under the glass is wood flour based.

DSC00007 DSC00008 DSC00009

The left two shots show a good view of the cutout for the motor well. Also, note that the glass is folded over twice on the transom, and right under where the rudder will be. This required a bit more work faring the hull, but the added strength may come in handy some day.

DSC00010 DSC00011 DSC00012

More shots of us desperately spreading epoxy and chasing bubbles, before the epoxy set up.

DSC00024 DSC00025 DSC00026

The two pictures on the left are of the stem after it is attached. I agonized for days over whether to finish it “bright” or not. finally, looking at the pictures I have in the Chebacco News issues showed that most people were painting over it. In addition, I REALLY wanted to cover it with a layer of glass. So, it is made up of cutouts of plywood, laminated together. Notice the radial lines on the stem? This is where I broke the belt on the hand power planer, and had to use the chain saw to finish the carving… <grin>. The stem had a liberal coat of putty applied to the bottom and then was attached top and bottom with a couple of temporary screws. After the putty set, a little sanding was done, then more putty, and a couple of layers of glass cloth went over the whole assembly. This coming Saturday a friend is coming over to help me forge a piece of 1/8″ stainless steel to the shape of the cutwater, so the keel armor will extend from the bottom up and around the cutwater! Should be very cool.

DSC00027 DSC00028 DSC00031

On the right we have applied a coat of glass bubbles and wheat flour as a faring compound. Notice the line starting halfway up the bilge panel next to the transom? This is where the bottom and the bilge layers of cloth overlap. I have two layers of glass over the bottom chine to add to the strength.On the left, I’m attaching the cheek plates over the centerboard case. I broke with tradition, and foil shaped them in the best bolger tradition, with the flare on the sides and bottom matching. Hopefully this will reduce some of the turbulence caused by this protrusion of the keel.

This notched trowel process took a LOT of epoxy. More than glassing the hull! Oh, well, it allows me to fill in the low spot, and will give a smoother hull. Helping to decrease resistance and turbulence.

DSC00001_2 DSC00003_3 DSC00004_8

This is the boat after MUCH sanding. The girls decided they would volunteer to sand the boat instead of buying me a birthday present. Their mistake! <evil grin>. I only had them sanding for a couple of weeks… They did a wonderful job, though. The odd color scheme is my attempt to vary the color of each successive layer of filler. No reason, I had the pigment and though I’d experiment.

On the left we are just starting to apply the leftover Interlux barrier coat primer from another project. I put a little of the green pigment I had left into the white primer, and it turned the yucky blue you see. We turned the boat into a swimming pool! I didn’t have quite enough for the entire hull, but that’s ok. I experimented with the paint, and it stuck to unwashed, unsanded, smooth epoxy with no qualms. Even stayed on after a couple of days in the dishwasher, and hardened up nicely after a couple of weeks.

On the right, you see the hull with paint on it. We are putting it on in many thin layers, to avoid runs. In this picture we still need a couple of layers of paint. The green is a color I got from mixing three gallons of various shades of green deck paint purchased at the local close out store. At $2.88 a gallon, I bought 12 gallons, even before testing on the epoxy!

Anyway, that’s all for now, next issue I’ll have pictures of the forged armor for the keel, and pictures of the boat turning, currently planned for some time in January. Also, I’ll show how I figured out the welding of stainless steel on a cheap wire feed welder.

Richard Spelling

From the muddy waters of Oklahoma.

Chebacco News 34

Chebacco News 34-June 2001

So long – and thanks for all the news!

Well folks, this is to be the last issue of Chebacco News under my editorship. It started in September 1994, printed on a dot-matrix printer with my old Atari ST computer, and has evolved into the current Webzine.

My heartfelt thanks are due to all of you who, over the years, have shared your Chebacco experiences via Chebacco News – but most especially to Gil and Joan Fitzhugh, not only for their insightful articles, but as the North American distributors of the printed version of this newsletter.

There are two reasons for me giving up the editorship. The first is that my interests have moved on, primarily to kayaking, and I’m not using Sylvester as she should be used. The second is that NBCI is going to start charging for the use of its webspace and I’m, frankly, not prepared to pay for a service that brings me no income.

SO – IF YOU WANT TO HAVE COPIES OF CHEBACCO NEWS TO REFER BACK TO, YOU’D BETTER START DOWNLOADING THEM BEFORE THEY DISAPPEAR ON JULY 15 2001.

If anyone is keen to take over the editorship and set up Chebacco News with their own ISP, please contact me and I’ll be pleased to help them get going.

Sylvester is for sale:

I’m offering Sylvester for sale at £4500 to include a galvanised, braked Snipe road trailer and Mariner 4hp outboard. Please contact me if you are interested, atbill.samson@tesco.net


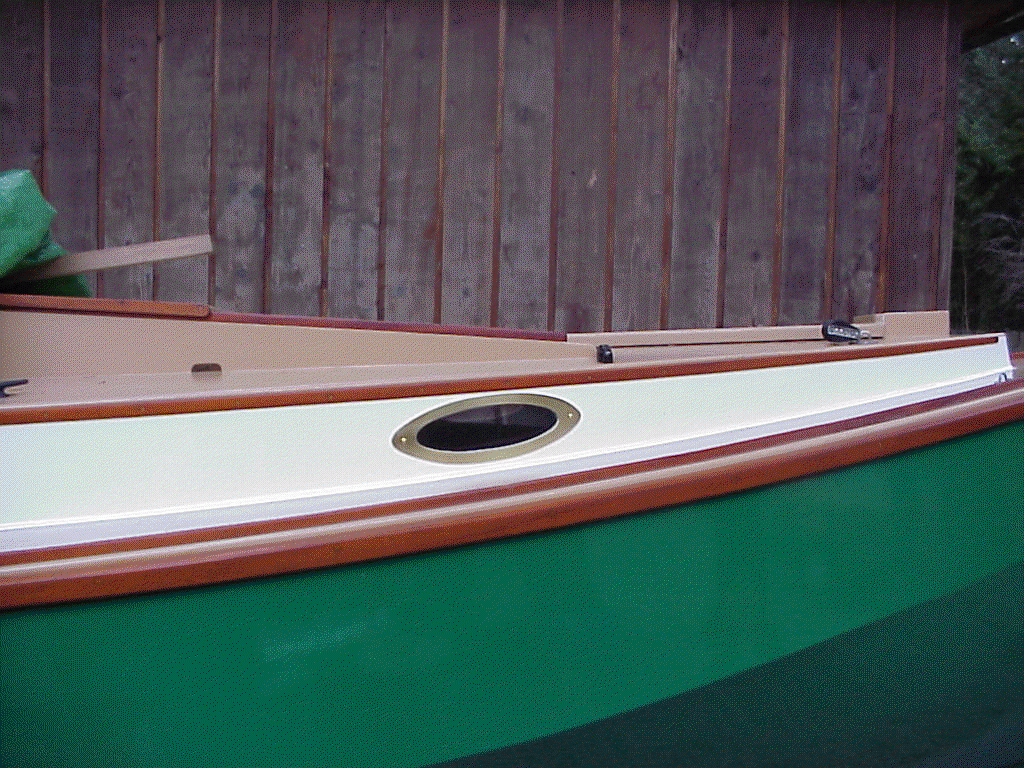
Cabin Windows – Jamie shows us how it’s done!

cabin windows

Brass-bound cabin window on Wayward Lass

Jamie Orr writes:

I just borrowed a digital camera, took some quick shots of the new windows.
They’ve turned out fairly nicely, I think, all things considered. I used
1/8 flat brass stock. The inside was the most trouble, I drilled a hole
then used a sabresaw (jigsaw) to cut to the line. The outside I cut with a
bandsaw — wonderful tool, just used the regular blade and some eye
protection for the flying filings (brassdust?). I didn’t cut as close to
the line as I should have because I was afraid to, so I had a lot of filing
to do afterward, but it was pretty straighforward stuff. They’re held in
place with one brass roundhead bolt at either end, the curve of the cabin
sides put enough pressure on the middle. Seated the whole works in Boatlife
sealer. The cabin side is routed for the lexan panes — that was done way
back before the sides went on. (That was the biggest problem — predicting
the placement and cutting the holes before anything was actually there.)

Jamie

Wayward Lass struts her stuff at Depoe Bay

Jamie Orr trailered Wayward Lass to the boat show at Depoe Bay, Oregon. Here’s what he had to say about it:

Hi

Yup, we’re back, had a great time. Went over to Port Angeles, 45 miles west of Port Townsend on Thursday afternoon, and drove to Alan’s place [ Alan Woodward, that is]. Got a little lost, but were saved by a Chebacco silhouette stuck on a pole at his driveway. Left about 9:00 next morning after breakfast (eggs from Alan’s chickens, very fresh!) and drove and drove and drove.

We followed the Hood Canal, the big fjord that almost gets back to the sound at the other end, then turned west somewhere short of Olympia. Reached the coast at Longbeach (I think) and stopped for lunch shortly after. Then we crossed the Columbia river mouth on a very long bridge and entered Oregon at Astoria. From Astoria to Pacific City the road wound around a bit, going inland a lot. This was the hardest part of the trailering, as the trailer and boat go back 25 feet from my rear bumper, and the boat’s just under 8 feet wide, as you know. I did a lot of concentrating, caught only glimpses of scenery for about two hours. The last stretch was more relaxing again, and we got in around 6:30.

Launched Wayward Lass and tucked her in, then went for dinner at the Spouting Horn with Larry Barker and John Kohnen. (Our party was myself, Dad, Alan and John Ewing). Then back to the motel, where Alan and John cunningly managed to get the suite (the motel had overbooked the cheap rooms so upgraded one of ours) that Dad and I had had our eye on, and so to bed.

Spent all Saturday, which was good weather after the first couple of hours, looking at and talking about boats. Depoe Bay is a small boat show, mostly on dry land. The harbour entrance and the bar outside make going out difficult except under good conditions. I talked to the guys at the Coast Guard station, and learned that on that day there was a “26 foot limit” which left us out. And I’m sure that they meant 26 footers with big dependable diesels! We did put up the sails and go out for a sail up and down the harbour — about 150 feet each way, with light to non-existent wind, coming from almost any direction due to the eddies. That was just to satisfy some kids that begged a ride.

Lot of interesting small boats — a Chamberlain dory skiff, same as I have the frames sawn out for, a Joel White faering, a whitehall, an immaculate Wayfarer, lots of river dories, several nice skiffs, including John Kohnen’s Pickle, and a bunch more. Also saw Dan Pence’s electric powered Ginger again, plus a Microtrawler with a big tugboat superstructure on it — looked just like a small working tug, right down to the dogs on the stem (sawtooth edge to give a grip on logs so you can push them around). I spoke to one of the owners, who said that unfortunately they couldn’t get up on plane with all that weight, even with their 50 horse Honda! They’re going to try some trim tabs at the back, I think.

Of the Port Townsend Bolgerites, we saw John and Larry, plus Jim Chamberlin. I wanted to say hello to Pat Pateson from the current list, but didn’t meet him. I see from his Friday note that I did see him, or at least a guy with a neck brace beside the red elegant punt, but never spoke to him.

Sunday we woke to sheets of fine rain blowing by. The ocean and surf looked even more exciting than on Saturday. Went down to the show after a good breakfast, and saw that a lot of folks were packing up and leaving. So after a look around and quick chat with the organizer, we hauled Wayward Lass and did the same. The micro tug was already out, and I saw Dan headed towards the ramp too, so I think Ginger was right behind us, although I could be wrong. The lousy weather on Sunday was really a blessing for us. We’d done it all the day before, and had a long drive ahead. We took the freeway route to Olympia this time, and cut an hour off our time — got in to Port Townsend about 8:00. Back in the tent about 10:30. Up on Monday, breakfast again courtesy of Alan’s “girls”, then we followed him into town while he dropped off his wife’s car, whose starter didn’t. Had a quick look in at the wooden boat school, dropped Alan at home and headed for Port Angeles again. Got back to my own house about 5:00, just in time for dinner.

I don’t know what it cost, and I’m not going to work it out. Had a good time and that’s enough. Not sure we’ll ever do it again, but I’m glad we did it this time.

I didn’t take a lot of pictures — I guess I’m a dead loss that way, but Larry, and of course John, were both snapping away, and I expect we’ll see theirs on the web pretty quickly.

Very pleased with the trailering. We covered 1,356 kilometres from start to finish, of which 1,318 were on US soil. I didn’t track the gas mileage (kilometerage?) either, but we filled up 4 times, the last time in Port Townsend coming home.

Chuck [Merrell], sorry we couldn’t fit in a visit. Didn’t realize just how big a distance we had to cover and how long it would take. See you another time!

Cheers,

Jamie

Jamie gives himself a fright!

Jamie (again – What’s happened to everybody else?) writes:

Hi Bill,

I went for a little trip on Friday night, which turned into a “learning
experience”. If I wrote it as a story, I could call it “Heavy Weather
Sailing and Stupidity, or Why You Should Listen to the Weatherman!”

I wanted to go over to the US side to drop in on a Traditional Small Craft
Association messabout at Bowman Bay, about 30 miles due east of Victoria.
To get there for Saturday, and catch the tide, I planned to leave right
after work on Friday, hopefully arriving about midnight. I figured that
with all the lights on the south side of the San Juan Islands, I should have
no trouble finding my way (true). I launched on Friday morning, and parked
Wayward Lass in Victoria’s Inner Harbour for the day, just a minute away
from my office. At lunch time I went down and did the smartest thing of the
whole trip, I tied in two reefs in preparation, then furled the sail away
again. The forecast was for winds of 15 to 25 knots from the southeast, so
I was thinking that I would probably cancel the trip.

I got away from the dock at 5 p.m. By then the weatherman said there should
have been winds of 5 to 15 knots, but it was dead calm, with no waves
outside the harbour. So I thought I would go east for a while and see how
it went, before I quit and went home. I fiddled around putting up my
battery operated nav lights, getting the anchor line ready and generally
straightening things up, then motored off, pulling Alan’s elegant punt,
Creamsicle. For a couple of hours it continued calm, with only scattered
cloud. As the light went, some waves appeared from the east, with a light
wind. Even once it was dark, there was still a lot of light from various
towns on the San Juans, and Whidbey Island, plus isolated house lights, in
addition to the lights shown on the chart.

Things started to get more lively. The waves built up very quickly, and I
had to throttle back so we wouldn’t pound. (I was still motoring because
the wind was right in my face.) Then the wind picked up quite a lot, so
that I was getting a lot of spray blowing back even when we weren’t
pounding, which we were starting to do every third wave, or so. I estimated
that I was about 1/2 way there or a little less, and since guesstimated
headway was almost nothing, I decided to turn for home — about 9 p.m. now.
I would say that was the second smartest thing I did, except there wasn’t
really any choice by now. I considered sheltering behind Lopez Island, but
I wasn’t sure I could even get that far, and I didn’t have a large scale
chart of the area if I did.

So, I put the motor out of gear, and let the mizzen hold us head to wind
while I raised the double reefed main. The dinghy nuzzled us while I did
this, to the detriment of my paint. Then I shut down the motor, and turned
downwind. The boat took a while to turn, it seemed quite happy to point
just a little upwind of broadside on, but once I got her moving, she turned
okay. Then talk about having a tiger by the tail! I had my hands full just
steering downwind. Every wave tried to push the stern around. Wind and
waves were mostly from astern, but just a little bit on the port quarter. I
let the mizzen weathercock so it wouldn’t help push us around so much. It
felt horribly out of control, but gradually I realized the boat was handling
it, at least.

I don’t know if a larger rudder would have helped, as it was mostly the
waves pushing the stern around, not the wind — although the wind was doing
its bit as well. Once or twice we broached completely, swinging 90 degrees
to our course, and taking the next wave broadside. I thought about raising
the centreboard to see if that helped, but the lanyard hadn’t been fastened,
and it had gone down the hole, so I don’t know yet if that would have made a
difference. Then I thought I’d try motoring, and see if I had more control,
so again the mizzen held us into the wind, more or less, while I furled the
main and the dinghy nuzzled us some more. The I undid the dinghy painter
and pulled it out of the motor’s bottom half. But when I went to start the
motor, the motor that never takes more than 2 pulls, it wouldn’t go! And
after half a dozen pulls, the recoil mechanism wouldn’t either. (It just
came out of the shop after having that fixed, too!) So now I was firmly in
the 19th century for my technology, whether I liked it or not. I got the
main up again, and got back to sailing. About the same time (I stopped
keeping notes some time before) I took down the mizzen, mast and all,
pushing it as far as it would go into the cabin. I also moved the dinghy
painter to the midships cleat on the lee side, as it had drifted downwind,
and I thought it as hindering me when I tried to turn downwind again. I
noticed there was some water in the dinghy, but it didn’t seem enough to
worry about, compared to the general state of the world. By this time the
wind was probably 20 knots anyway. The waves were huge, to me, and short
enough that they were very steep. Some of them were breaking at the tops.
I could hear them hissing and rushing up behind me, and was happier not
looking at them. Later, I estimated that they were probably no more than 5
feet from trough to crest, but from crest to crest was probably only 40 feet
or less — the wind was against the tide, which I should have considered.
At least it wasn’t raining.

I was able to control Wayward Lass a little better now. I was hoping my
troubles were over, but about then the dinghy painter snapped. I heard it
and felt it go, but by the time I’d picked up the spotlight and turned into
the wind, I couldn’t see it anywhere. I guess it picked up so much water
that it became too heavy for the rope. The painter broke right in the
middle, maybe it had a kink or knot from when I had to undo it to clear it.
Anyway, that simplified things even more, and the rest of the trip was
relatively uneventful, except that I succumbed thoroughly and completely to
the sea sickness that had been hovering at the edge of my consciousness —
try dealing with that at the same time as not broaching! Sometime after
midnight the wind dropped rapidly and the waves downsized to a well behaved
swell. I took both reefs out, but even then it was suddenly very slow
going. I let the sheet go and drifted around while I took off the engine
cover and wound on the “emergency” starter cord. I pumped the gas up
carefully, choked the engine, and it started first pull! So it was down
sails for the last time, and motored in — had to dodge a lot of wood in the
water, including one large log dead in my path. The storm probably washed
them off the beaches, they only seemed to be a problem near shore. I had to
motor about 5 miles along Victoria south shore, but there was enough light
reflecting off the water that the logs showed up well.

I got into Fleming Beach just after two a.m., never so glad to get ashore as
I was then. Took a while to pack up and recover the boat, I was literally
staggering with tiredness and feeling lousy. Stopped at a doughnut shop for
a snack, there were several police there on their break, and I wondered if
they would think I was drunk! (They didn’t, or at least left me alone.)

So I’m a little bit smarter now, I hope. I’ll pay attention to the weather
forecast, even if there’s nothing in sight to bear it out. I never, ever,
want another night like that one. On the plus side, I now have tremendous
confidence in the Chebacco. Even when we broached, she never threatened to
go over. When I was taking down the mizzen, we were “lying ahull” I guess,
and she moved about pretty briskly, but again she felt “safe”. Mind you,
after a while you get used to being terrified! We never took any green
water aboard, from any direction. I think that flared bilge panel deflects
most of a sideways wave under the hull, like a big wedge. And both ends
seemed to ride up and over anything. I got a fair amount of spray over the
bow when I was motoring into the wind, and a few good shots sideways, but
none to speak of when running or hove to. (I feel like a real sailor when I
use that!) The mizzen held us well up to the wind despite (or because of?)
it being quite strong.

And that was it for the night. There is a happy postscript to it all,
though. After I broke it to Alan that I’d lost his punt, I called the Coast
Guard to report it in case it should show up. After several transfers, I
spoke to a very helpful fellow in Rescue Coordination, who took all the
details. And then this morning (Sunday), in the middle of typing up a
“lost” notices to put up at marinas and boat launches, I got a call from the
same people to say that a dinghy of that description was being picked up by
the Victoria Clipper, the catamaran passenger ferry from Seattle. Ten
minutes later someone on the ferry called to say they had it, and I could
pick it up at their dock when they arrived, in about 4 more minutes! So I
went right down, and there she was, the paint a little dinged up on one
gunwale, but otherwise none the worse for it all.

So that’s my news today, guys. I feel moderately dumb for virtually
ignoring the forecast, and I’ll probably regret telling anyone about this,
but I probably learned more in the three hours between 9 and midnight than
in 10 years of normal sailing, so it wasn’t all for nothing!

Cheers,

Jamie


A purpose-designed tender for a Chebacco:

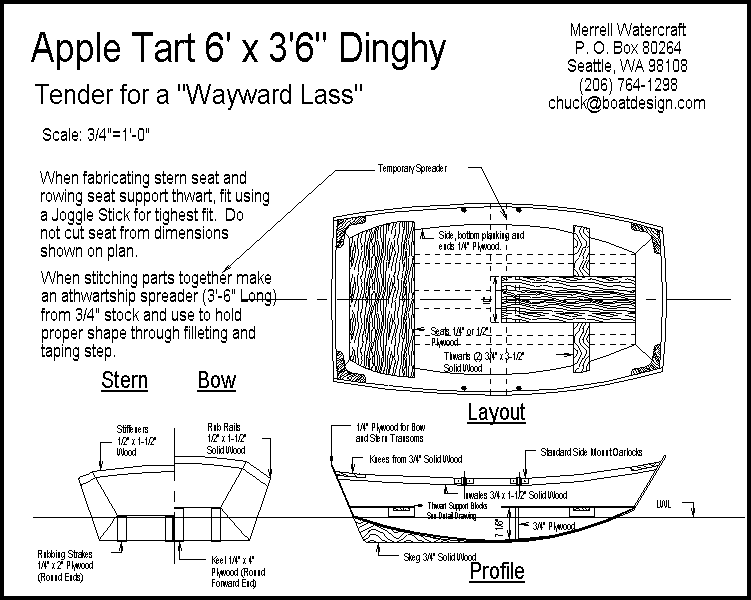
Chuck Merrell has designed a tender for Chebacco, to Jamie Orr’s specifications. Jamie will be building the prototype of Apple Tart.

Apple Tart is designed to fit inside the cockpit of a Chebacco, for trailering, and can then be towed behind the boat when sailing, allowing the sailors to get ashore when the shoreline is unsuitable for running the Chebacco up onto the beach.


Apple Tart is the smallest of a series of three prams that Chuck has designed, the others being Apple Pie (7’6″) and Peach Pie (10’). Bill McKibben has prototyped Apple Pie and Bill Samson is building the prototype of Peach Pie, which will have a spritsail rig.

Contact Chuck at chuck@boatdesign.com for further details of these pretty little boats.


atbom


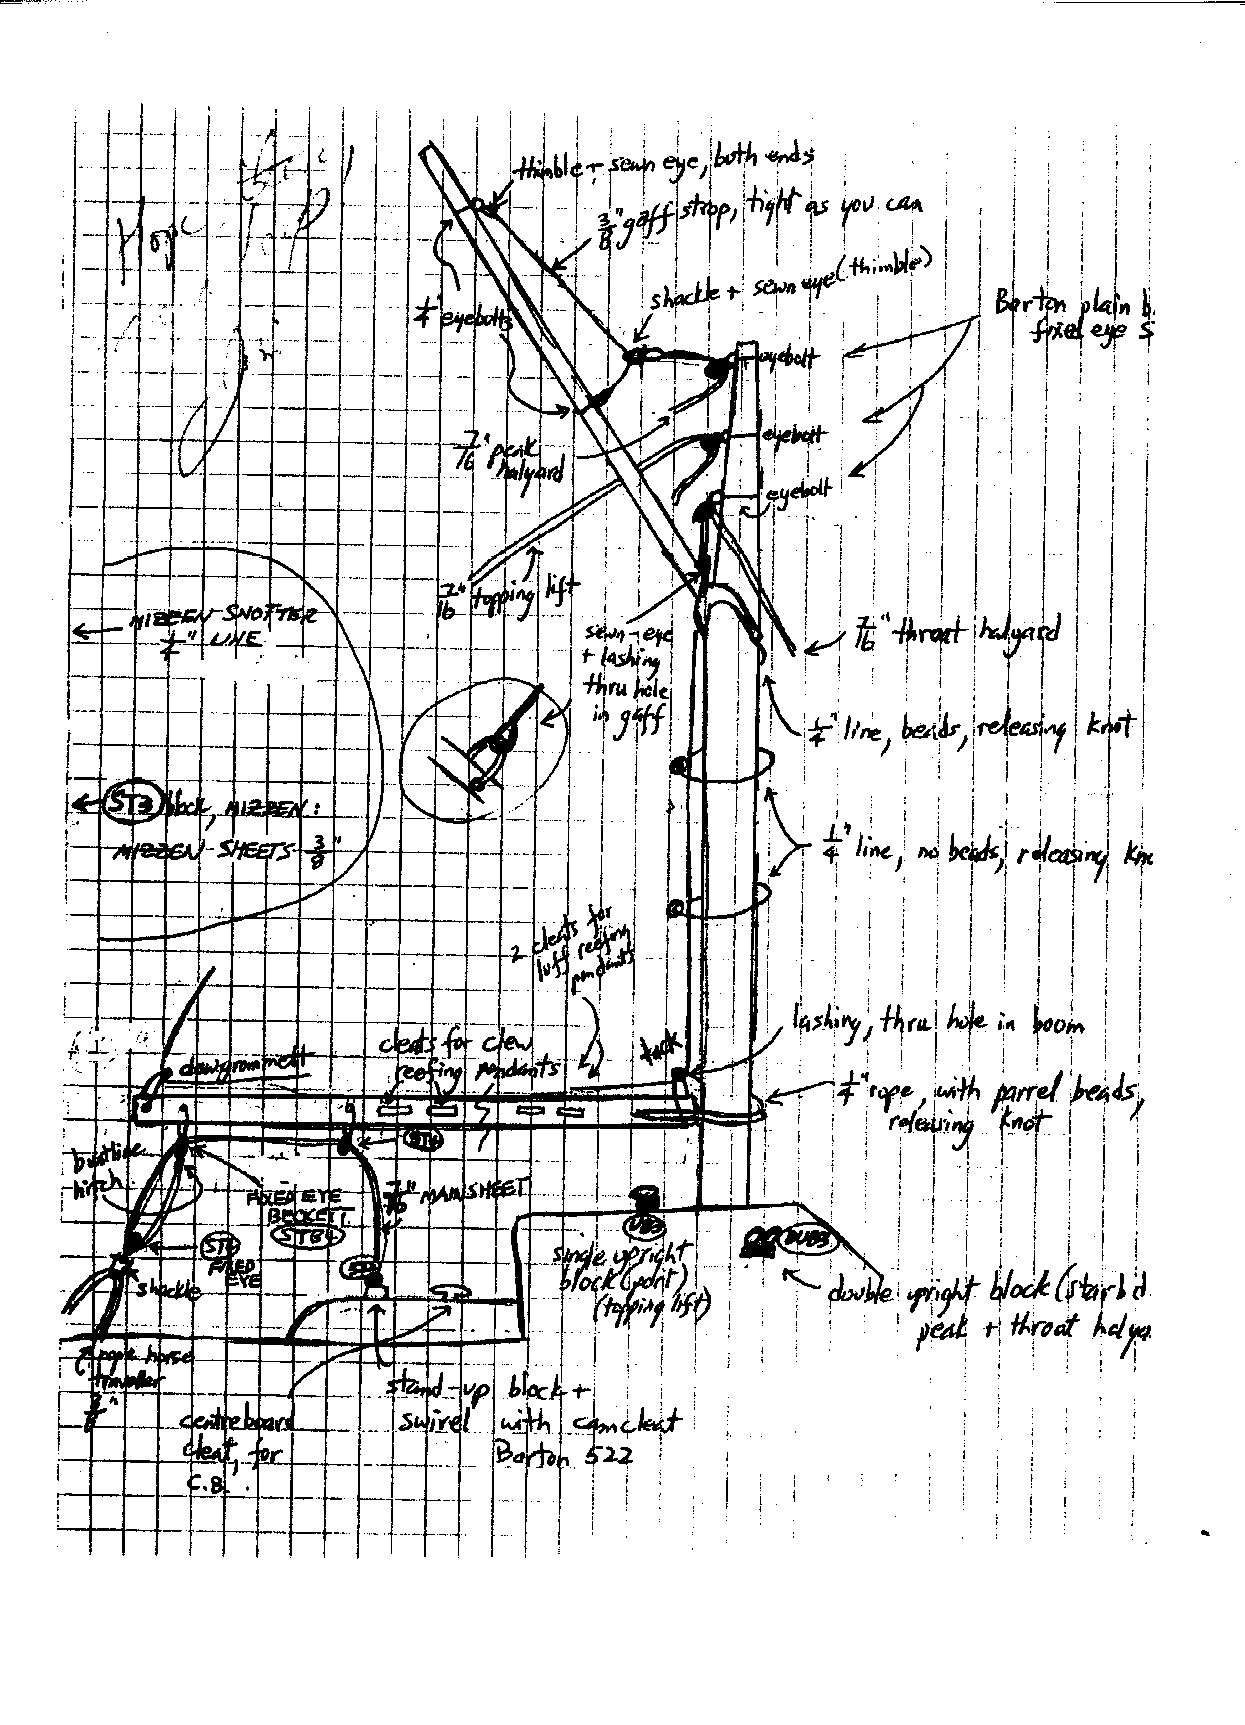
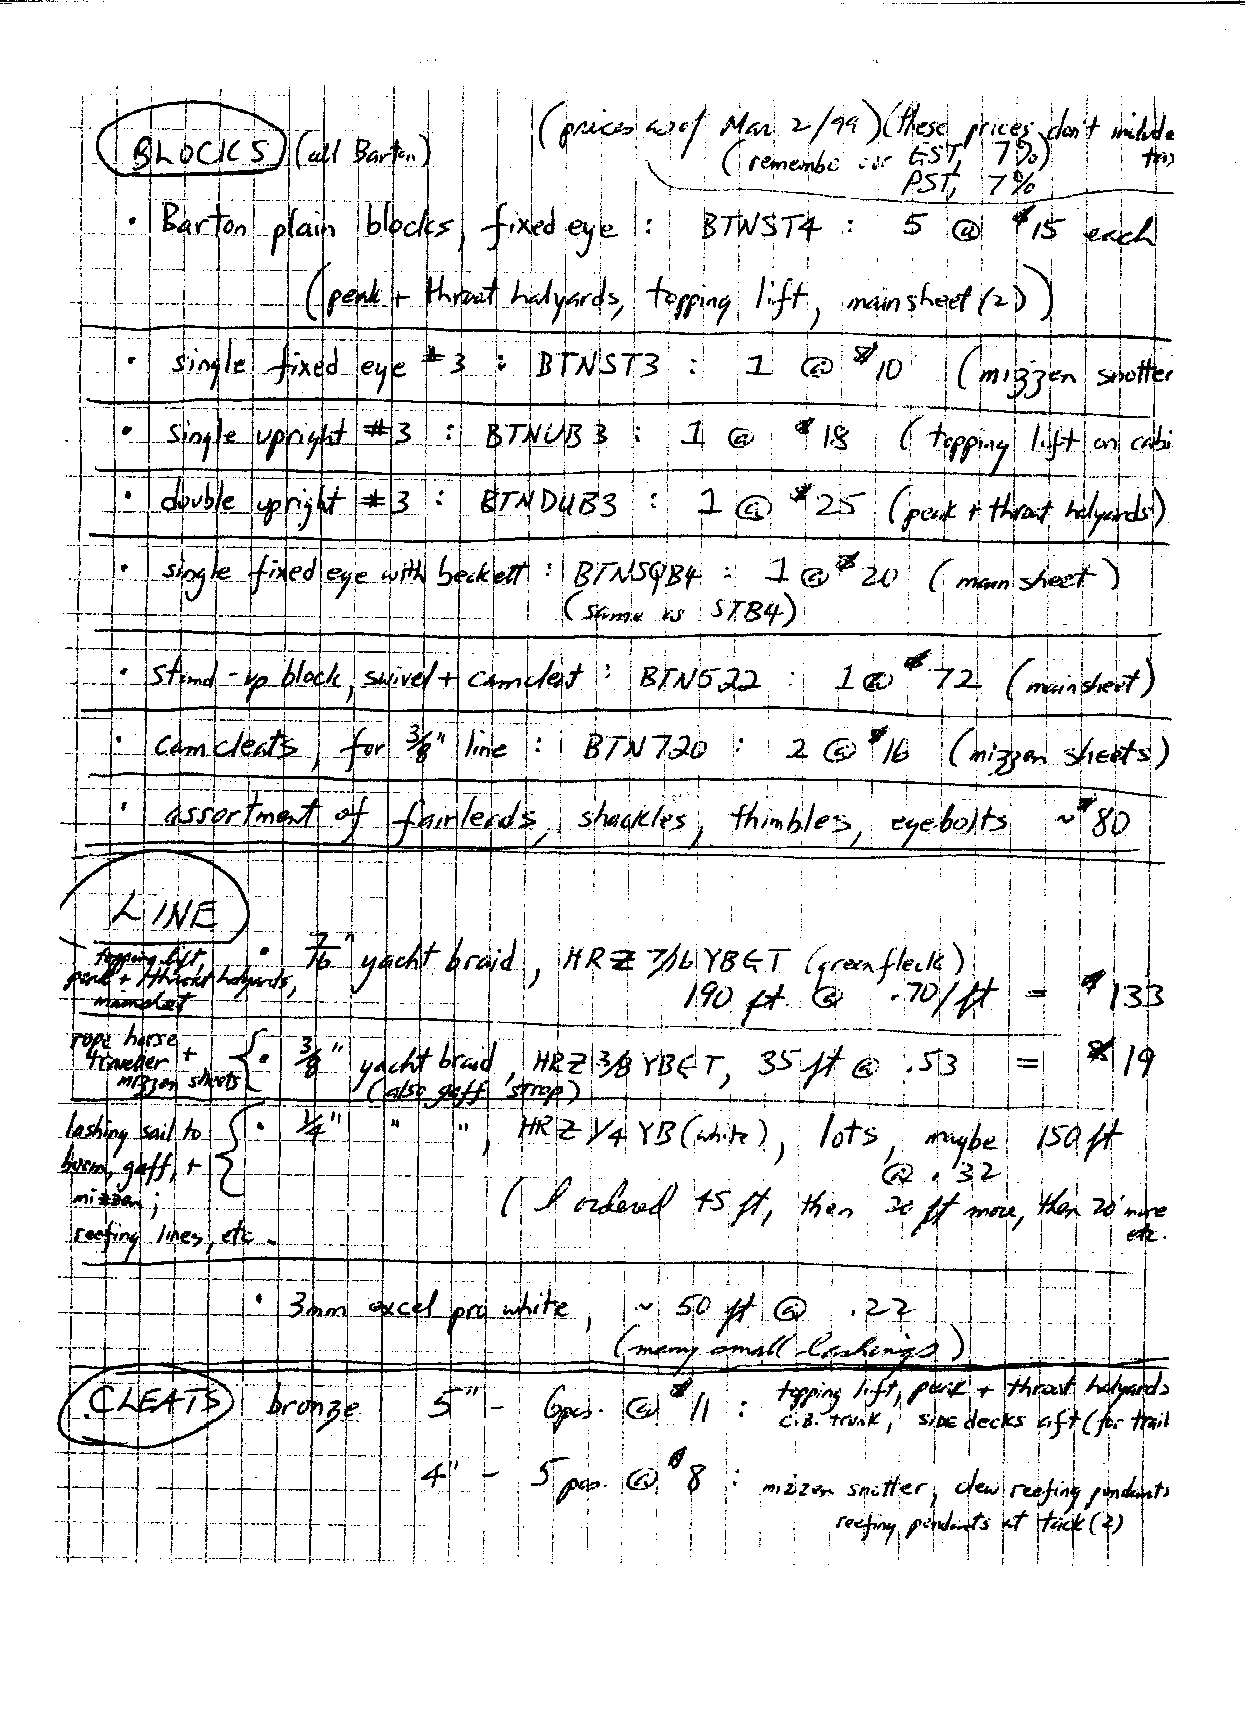
Jim Slakov’s rigging sketches:

Dick Burnham was kind enough to pass on Jim Slakov’s sketches and specifications of the rigging he uses on his immaculate lapstrake Chebacco, Kelani Rose.

sldrwg1


sldrwg2

So there you have it!

Of course I hope you’ll all keep in touch and let me know how you are getting along with your projects.

I also want to thank you all for helping to keep Chebacco News going for 7 years.

Bill Samson, 88 Grove Road, Broughty Ferry, Dundee DD5 1LB, Scotland

bill.samson@tesco.net

Chebacco News 32

Chebacco News 32 – November 2000


Roll Call!

I don’t know about you guys, but while I know there are a fair few Chebaccos out there I have only the vaguest idea where most of them are.

If you own a Chebacco – whether on the water or at any stage of construction, why not drop me an email or a line telling me what type you’ve got (sheet-ply, lapstrake, long, ‘glasshouse’, cruising . . .), when it was launched (or is due to be launched), its name (if any), name of builder, and location. I’ll publish the list once you’ve been in touch, and it can be updated as and when new Chebaccos are launched. Of course, I’ll respect anyone’s privacy if they’d rather not be included.

Completed Chebaccos I know about are:

LARK

WAYWARD LASS

KELANI ROSE

GRAY FEATHER

SYLVESTER

KATTEPUS

Apologies to folks I’ve forgotten. Anyway, complete details on all (including the above) will be most welcome!

Hollow Masts

John O’Neill writes:

Dear Bill,

Regarding ‘bird’s mouth’ masts. First, my understanding is that hollow spars should be about 10% fatter than the same spar that’s solid. Second, as I discovered, you can use more than 8 staves. If you do, you get a more even cross sectional thickness. That is, if you look at it on end, the hollow space won’t have the outline of a stop sign, but more of a true circle. I used 12 staves on the 16′ masts of my two Bolger Cartoppers, mostly as a way to more efficiently use the nearly pristine 3/4″ Dour Fir stock I had on hand, and that I didn’t want to search out and buy any more of. (Despite the added kirf waste, i.e. sawdust, I got better use of the wood). But I think the more even cross section using 12 staves provides a real strength/weight advantage, and might be worth it regardless. The width of the staves (given a perfect ‘bird’s mouth’ cut) solely determines the maximum thickness of the finished spar. To determine the width figure the circumference of the mast, and divide that by the number of staves you want. My 2 1/2″ mast worked out to 0.65″. Then divide 360 by the number of staves to get the angle for the bird’s mouth cut. For 12 staves it works out to 30 degrees. I’d recommend making a short section of test mast just to be sure of your numbers. I had my first crude one rubber-banded together in about an hour (altogether I made three!). Plus they’re fun to show off to friends of an engineering bent.I used a carbide wobble blade on a table saw for the bird’s mouth cut. It worked perfectly (with a lot of featherboards and support for the work piece, and a lot of test cuts. Make extra staves!). I used epoxy for glue-up, but instead of hose clamps I used waxed twine (epoxy won’t stick to wax) in a hand-tight spiral wrap down the length of the spar. It kept good, even pressure on the joints, with no risk of squeezing any joints dry, and as an added benefit it was easier to sight down to see if the spar was straight, without hose clamps in the way.
After a host of frustrating attempts at dry fitting my even dozen of staves (fitting the last one was always the kicker!) I finally hit on rolling them up around a core. It works like this. Arrange the staves in the order you want them, with the outside face down. Place a thick dowel a foot or more long, or a stiff cardboard roll, almost anything with the approximate diameter of the hollow interior, on top, and roll the staves up around it. It’s a ridiculously easy, one-person operation, even with a dozen slippery, slithery, epoxy coated staves. I felt like an idiot when I figured it out, that I hadn’t figured it out sooner! Just rubber band it up and pull out the roll (make sure you leave some of it protruding, I learned that too) and the base is assembled. The rest of the assembly almost falls into place. I used a plug from the base, up past the partner to where the fittings where screwed in. I drilled a fat hole clear through to avoid turning the mast’s interior into a moisture trap. Then I coated the hole walls with epoxy to minimize moisture induced dimensional changes, which I figured might sooner or later cause splits in the mast. To deal with the ‘hard spot’ at the top of the plug, I drilled down into it using two big Forstner bits. The first bit was barely smaller than the plug, and was drilled about 2 inches into the top. The second was a bit smaller than the first and drilled in as far as it would go. Not the best but I think it will do. It does add weight but it’s low where it doesn’t count.

Another plug option I’ve seen, much better for interior halyards, is to make what is essentially a tiny, hollow, second mast, to fit inside the first as a plug. The staves of this ‘second mast’–towards the top–are tapered, but not glued together, such that the plug is of constant thickness top to bottom, but ends at the top in stiff, individual, tapered fingers, almost like one side of a tall finger joint. I don’t know that I’d run interior halyards on a mast where any thickened epoxy was used during glue-up. There might be some protruding dried bits that could cause chafe.
Great newsletter by the way! You and your contributors almost have me talked into a Chebacco as my next project. Probably hard chine. But Bolger has so many great boats! I’m really torn . . .

John O’Neill, Fairfield,
CA


Meanwhile, Gil Fitzhugh has completed his hollow spars:


I’ve built the masts, boom and gaff using the birdsmouth method, with the mast modified in way of the partners as described in Chebacco News #31. I wrapped the whole mast with a layer of 6oz glass, with the weave running straight up the mast. Then I spiral wrapped the lower 4.5 feet (enough to get above the boom jaws) with another layer, with diagonal weave. The overlaps, loose strands and whatnot were as ugly as sin. I sanded everything smooth with 40 grit and then progressively sanded it down to 22o grit. And it looks damn good! It’s roundish, straightish and strongish. I’m now epoxy coating and sanding off the mizzen, boom and gaff, which won’t be glassed. Then I’ll add the fittings. Next spring I’ll varnish them.


I’ve built almost everything on this boat myself, but Joan was invaluable putting the masts together. I’d mix up about 3 squirts of epoxy at a time, stir, put in Cab-o-Sil, stir some more and then give the can to Joan. She’d paint the birdsmouths while I mixed the next batch. It must have taken half an hour, working fast, using WEST with slow hardener. Then we rolled up the spar and got about 25 automotive hose clamps around it and tightened them up. Being careful, of course, to keep shoving everything back toward straightish as it tried to sag, until we had it really tight. The guy at the auto parts store looked at me pop-eyed when I bought 20 5-inch and 20 4-inch hose clamps. I cleaned out his whole supply.


Drawing a Waterline? Try Pete’s “Poor Man’s Laser Level”

Image321

Pete Respess’s beautiful Chebacco hull

Pete Respess writes:

Dear Bill,

I have been reading your newsletter for about a year now (have been building 11 months) and finally have something that may be of use to your readers. It has to do with striking the waterline – a nebulous, scary task which all boat building books seem to brush casually by. In one place in the newsletter I read that I was “on my own” when it came to doing this. That made me ask a friend who proposed, “Hey just launch it and get down there with a magic marker and draw it in”. My pride did not let me opt for that idea though. Instead I decided upon the “poor man’s laser level”. What I did was run two parallel strings (about ten inches apart) along the boat’s length close to whre the water line should be. The strings and the boat should both be level before beginning. Then at night fall, use a flashlight to cast the “two” string’s shadows against the hull, making sure they hit the correct place on the stem and near the stern according to the plans. When the shadows of the two strings coincide, there’s your line to be drawn.
Actually, you just mark tick marks every few inches at this point and wait for daylight to fill in the actual tape line with a batten. That’s it. Of course I have not launched the boat yet to prove this theory. You will have to judge whether or not to wait for that test before you decide to include this technique. I just liked how marvelously simple and “cheap” this
method was. No laser to buy or other complicated stuff. I got the idea from building my privacy fence around the back yard. When three sticks line up “by eye” along your property, then that is your “true”fence line.

I am including the most recent picture of my boat in it’s primer coat (Epoxy Barrier-Kote). It now has a coat of Interthane Plus on it which I have just finished wet sanding with 220 and 400 grit paper (second coat this weekend). I was fortunate to have met a guy a couple of miles from me who retores wooden runabouts professionally. The things he told me about his painting and finishing techniques are priceless. I coupled his ideas with a few things from your newsletter – the results are beautiful. I am told a slight orange peel is acceptable, at least it is with me. You only see that when you get real close anyway.

Pete Respess
Hopewell, VA

For the technical thinkers out there, I have thought of the following geometric stuff. The two lines act as a horizontal plane which slices the boat in the same way the water does. When that plane lines up with the two points, fore and aft on the hull according to the plans, you have a water line. And “figures don’t lie”. Plus it kind has the ring of common sense too.

Image322

The Poor Man’s Laser Level in action


“Wayward Lass” continues her adventures . . .

Jamie Orr writes:

I had a great sail on the weekend, drove to Nanaimo and went over to Sechelt to see Jim Slakov. This was the only weekend I could do it, but we’ve had a lot of gales and stormy winds over the last week or two, and prospects didn’t look good. The forecast said things would improve, but on Saturday it still predicting up to 40 knots of wind. I was getting antsy sitting around home, so I drove up in the afternoon to have a look — yup, lots of
wind. Spent a couple of hours rigging up and fiddling with the new reefing stuff I’ve added, then launched late in the day. The Nanaimo launch site is very well sheltered, behind Newcastle Island, so I thought I’d stick my nose out and see what it was like on the open water. Even with 2 reefs it was more than I liked, so I tacked and let the sail out to reach back. I was immediately startled by a loud Whoossh! and water frothing by at high speed — we were surfing — with 2 reefs! That’s the quickest acceleration I’ve ever had sailing — really got the heart started!

Spent a not very restful night at anchor at Newcastle Island marine park, lots of slapping and noise, but at least no sailing around the anchor with the mizzen up. After breakfast on Sunday I thought I’d go for a bit of a sail around Snake Island before I packed up and went home. However, once I got out there it wasn’t bad, things were much quieter — then the radio weather report predicted good conditions (only up to 15 knots) for the nest 48 hours, so I just kept on going. Sailed for 2 hours, then the wind backed until it was right in my face (sound familiar?) so down came the sail and Honda came to the rescue. Took another 3 hours to finish the 16 or 17 odd miles across Georgia Strait (Sechelt is on the mainland).

Spent the night at Jim Slakov’s. Unfortunately, when I didn’t arrive on Saturday, they ate the dinner I would have had (Greek, one of my favourites!) but I was very well looked after anyway by Jim and his wife, Rose. Had a good look at Jim’s boat — beautiful. He put up the mast to show me the system he has worked out for raising and stowing everything, very smooth and well thought out. I stole a few ideas for later
consideration, but I’ll never touch the quality of Jim’s work.

We called at Gary Foxall’s but missed him. Had a look at his boat though, looking good and could be ready for next September, with luck — maybe a fleet of Chebacco’s in Port Townsend yet!

Got a good start Monday morning, left the dock about 3 minutes before 8:00, with the sails already hoisted. Caught the wind as I passed between the breakwaters, killed the engine right then and didn’t use it again for the whole trip home! Felt like I’d found the grail! Had a fairly steady wind 3/4 of the way, before it started to fade. After 4 hours I was within maybe 2 miles of the dock, but it took another hour to cover those 2 miles. Got a bit of breeze that took me nicely through the ferry channel, then it went back to a whisper that let me sail right up to the dock and just step off with the mooring line.

So I had a good time. My dad couldn’t make this trip, as he had an old friend visiting, and the pair of them are gallivanting off in Prince Rupert. I had a few difficulties single handing, but have some better ideas now on how to manage. Upside was that I had his Cruiser suit, and stayed warm and comfortable.

Jamie

P.S. Jim and Rose are great hosts, but take care when he offers you a hot
toddy — a generous man….

That’s all for this issue

. . . but if you have any news, questions or stories, please drop me a line:

Bill Samson,

88 Grove Road,

Broughty Ferry,

Dundee DD5 1LB,

Scotland

bill.samson@tesco.net

Chebacco News 31

Chebacco News 31 – October 2000


The Big Trip!

Image38

Bill Samson, Jamie Orr and Les Orr

Jamie Orr writes:

Hello Bill

The big adventure is over now, we’re all back home, and life is settling back into the normal routines. I thought I’d try and record our (Wayward Lass and crew’s) trip for Chebacco News, with my impressions of how the boatperformed.

This was a watershed event, the first trip in Wayward Lass. This was her fourth time in the water, and the second time the sails were up. It’s about 35 miles from the most Southeastern point of Victoria to Point Wilson, near Port Townsend. Adding another 3 miles to the Boat Haven in Port Townsend, and a bit more to Fleming Beach where we launched, and we probably covered some 85 miles in total, crossing and recrossing the Strait of Juan de Fuca between Vancouver Island and Washington State.

We got away from the launching ramp at 9 am on the 7th. When we left, the weather was overcast, with light to moderate westerly winds. There was a small craft warning at the (western) entrance to the Strait, but conditionswere okay at the eastern end. The forecast was for stronger wind from the south by late afternoon. I hoped we could sail southeast at first, then east along the Washington coast when the wind shifted. We started out on a direct course for Point Wilson, along the Victoria shore until we felt confident that everything was working properly, then changed to a more southerly course to cross the strait, and be able to take advantage of the expected wind change. However, the wind dropped fairly soon, and when it came back it was right on our nose. The sails came down and we got down to some serious motoring.

Visibility wasn’t too great, maybe 3 or 4 miles at this time, but we felt we could find our way with chart and compass – we also had a Garmin II GPS that a friend insisted on lending us, although neither Dad nor I felt comfortable relying completely on that as we hadn’t done much with it. We had 1 to 2 foot waves most of the time. With the fog and overcast sky, it felt chilly until we opened the thermos and had something to eat. (I’m a believer in keeping the furnace fuelled.)

After an hour or two we could see the land well enough to identify Dungeness Spit, which sticks out into the strait from the US side, and turned onto an easterly course for Point Wilson, or at least where the chart and compass said it ought to be. After a while more we identified Protection Island at the mouths of Sequim and Discovery Bays. It took a long time to bring it nearer, but eventually we were level with it, and had definitely identified Point Wilson ahead. About here we tried sailing again, but the wind was just too much from the east to make our course. Since the forecast was for strong southerly winds, and we wanted to get in early enough to find a berth and have a quiet night, we went back to motoring again.

At Point Wilson the wind and tide were both against us, and the GPS, which had reported some 4.5 knots most of the way, dropped until it was only 1 knot right opposite the point. The wind by this time was getting close to the predicted 20 knots, I think. Once around the corner, we hugged the shore to Point Hudson, 2 miles on. Port Townsend is built on Point Hudson, so once there, we had more or less arrived. Around that corner and another mile and we were at the Port Townsend Boat Haven, a big marina well sheltered by a long breakwater. We called US Customs, who were extremely helpful and patient with the rookie skipper, and were assigned permanent vessel identification and PIN numbers, along with a clearance number for this visit. The trip over took 8 hours from dock to dock.

We got the tarp over the boom, and mopped up the cockpit – between the spray and the rain, things were pretty wet. With the tarp up we were quite comfortable, but I was glad we had the cuddy to keep our gear dry. It also provided some shelter under weigh, keeping spray in the cockpit to a minimum.

Image39

Wayward Lass at the dock in Port Townsend


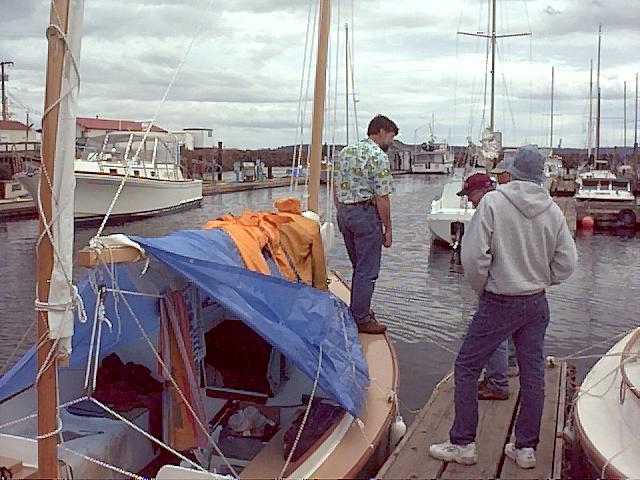
I’ve included the pictures that Chuck Merrell took in Port Townsend and e-mailed to me. I haven’t got any others at this time. The blue tarp shows up nicely, and that’s me on the boat. There are a lot of strings hanging everywhere because I haven’t entirely worked out the best way to attach all the sails and blocks. I’m trying to keep it all low-tech, but things will be evolving as we learn. I’m pleased to say the sails, also made by yours truly, seem to have the right shape.

I’d asked previously around the web about VHF radios and navigation lights. Before we went off, I bought a handheld VHF that will accept either rechargeable nicad or throwaway alkaline batteries, and a set of lights that operate off a single D cell each. I’m not sure how far the lights can be seen, but the choice in battery powered lights is limited. The VHF was almost entirely used for weather reports. So far I’m happy with my choices.
Alan Woodbury met us at the marina and gave us some local knowledge about restaurants and Port Townsend in general. After some fish and chips, Dad and I crawled into the cuddy for the night. We are both 6 feet and close to 200 lbs each, but found we could both sleep comfortably in the cuddy, using air mattresses. At the bow end, the mattresses turn up at one corner, but we put our feet at that end so it didn’t matter.
We spent the 8th walking the floats at the Festival, saw dozens of beautiful boats from big schooners to tiny canoes. We said Hi to Craig O’Donnell, on hand with the CLC folks, and took in talks by Brion Toss, rigger, and Carol Hasse, sailmaker. Both excellent. Craig dropped by for a quick chat just before we turned in. Unfortunately Jim Slakov didn’t make it down as planned with Kelani Rose – I understand he injured his back. Hope you’re better now, Jim – looking forward to seeing you another time.
On the 9th, Dad thought he’d stay at the Boat Haven while I went back to the show to meet all the Bolgerphiles at 10 am. We had a good turnout, and after talking for a while we all went to the coffee shop and talked some more. Thanks to Alan for the cinnamon buns! After that the group split up to see the exhibits. Alan and I tried to hear Carol Hasse on sailmaking, but were at the back of a large crowd, so crept out after a short time. Alan wanted to see some more boats, but I’d seen them all the day before, so I thought I’d go back to the Boat Haven for a while. I mentioned this to James McMullen, who’d said he wanted a look at Wayward Lass, and he wangled a ride down there in Ginger, a beautiful electric cruiser created by her owner, whose name I can’t quite remember – I think it was Dan, but the last name is gone.
When we arrived, we stepped into a regular Bolger seminar. Between Ginger and Wayward Lass we had our own mini boat show. More talk, then things thinned out a bit and that was the end of the Festival for us. Dinner that night was Dad and I, with Bill Samson and Alan Woodbury – more fish and chips. Bill went off with Alan to sleep at his place, and Dad and I hit the cuddy again.
Next morning we were up before dawn to get an early start. Alan brought Bill down at 5:30 (did I mention Bill was to sail back to Victoria with us?) in a fairly heavy rain. Luckily it stopped again, and we got away at 6:15, motoring between all the boats anchored off the shore. The early start was partly to take advantage of lighter winds in the morning (expected to be on our nose again) and partly to let me try out my tiny navigation lights (they worked just fine.)
We got a considerable boost from the ebb flowing past Point Wilson, the GPS reported 7 knots over the ground, or about 2 ½ knots of tide. This stayed with us for quite a distance into the strait.
After an hour or so, we put up the sails. We couldn’t hold our course to Victoria, but the wind was great and we had a good sail, enough for everyone to take the tiller for a spell. But the wind strengthened to the point where I thought we’d try a reef, and there I had a problem. The sails are only lashed on, without proper provision for tying in reefs. My lashing didn’t give the foot enough tension, and I haven’t got reef points in the sail, only the cringles at luff and leech. I was told by a professional sailmaker that points were not necessary in a sail this size, but he must have been thinking of a sail with a really efficient outhaul for the leech cringle. The sail was like a big bag with the reef – no way would it sail properly close hauled, so it came down and we went back to motoring.
We could see the southern San Juan Islands, and had a lively discussion about what was where. We also saw a buoy in mid-strait, which triggered more discussion. (It was fairly poor visibility again) Based on the buoy, we felt we were just a bit north of our course, probably due to having to point north of it to use the sails. The GPS batteries had died on us, and I couldn’t find the spares (they weren’t on board) but it revived enough to confirm our position, which was nice. Just as well we weren’t relying on it, though.
Shortly after, visibility improved and Victoria appeared. Since it had been foggy going as well, we had no idea just when to expect to see it, and couldn’t believe at first that it was there already. However, when it took another 3 hours to actually reach it, we believed. We went into Victoria Harbour to clear Customs (by phone) and announce Bill’s arrival in Canada. Canada Customs were just as easy to deal with as their US counterparts, although they only gave us one number. A last short trip back to our launch ramp, and that was that. The return took only 6 ½ hours.
Wayward Lass behaved excellently. I am pleased as anything with her performance over the Strait. She handled the wind and waves with complete aplomb – the motion was smoother under sail, but even motoring I thought she did very well. Being as light as it is, the hull leaps around a bit, but always felt stable and safe, and wasn’t stopped by the 3 foot waves on the way home. Performance at the dock was equally good, although without a tarp it might be another story with more than one aboard. The motor is a 5 horse Honda short shaft with a 3 gallon remote tank – this combination is heavy, and I thought the stern was down a bit when the engine was running. When sailing, though, it wasn’t as low, so maybe I can adjust the motor angle and improve things. We didn’t know how much fuel we’d burn, so carried an extra 6 gallons. We found that we used under 2 gallons each way (imperial gallons – it was just about 2 US gallons.) The sail set quite well, as mentioned, but I’ve got to fiddle with the attachment to the spars. I’ve also got to put in those reef points.
We carried all the prescribed equipment, plus the GPS and VHF. I think I’ll buy my own Garmin GPS next year, for the extra security it gives. Even not knowing how to use all its features, we found it helpful – the most important information, your position, comes up on its own – all you do is turn it on.
The Bolgerphiles that I met in Port Townsend were Chuck Merrell, Bill Samson, Alan Woodbury, John Kohnen, Larry Barker, Jim Chamberlain, Gary Foxall, Craig O’ Donnell, Randy Wheating, Jerome MacIlvanie and James McMullen. Apologies to any missed or misspelled. I had a great weekend and plan to do it all again next year. (If I can swing it, I may go back in November for a sailmaking/repair seminar at Carol Hasse’s loft.)
Jamie

I’d like to add my own thanks to Jamie for his kind invitation to accompany him and Les back to Victoria, and also to Alan Woodbury for his hospitality.

Image40

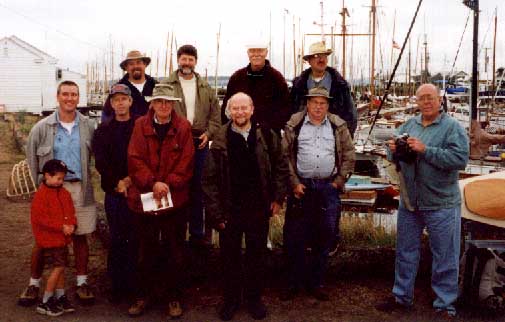
Some of the Bolgerphiles at Port Townsend – It was great to meet you all!

Hollow spars

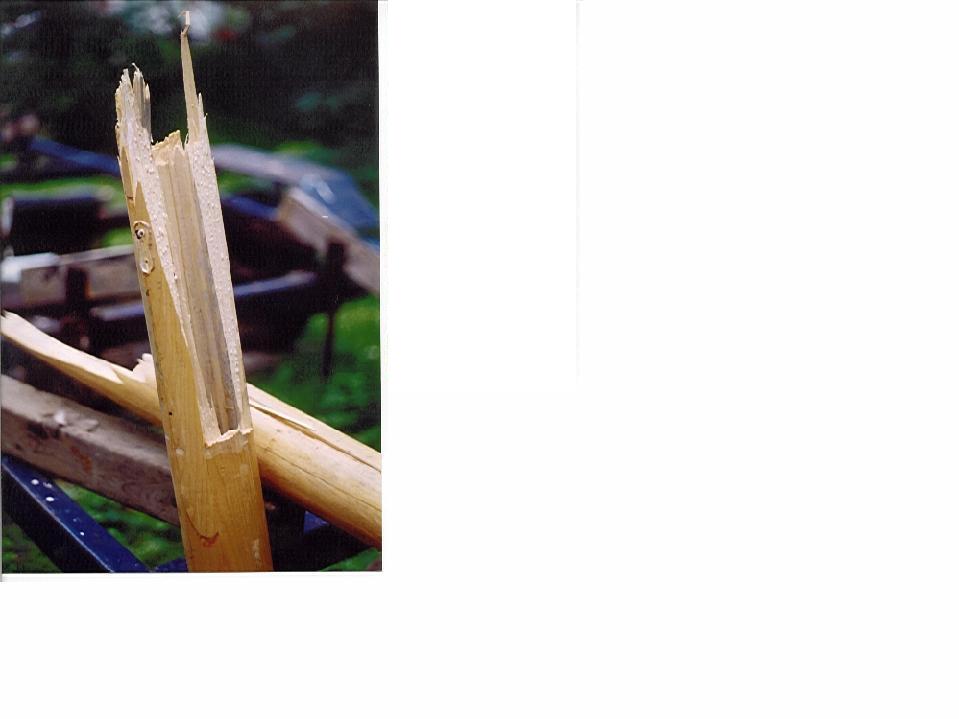
Fraser Howell recently built a hollow (birds mouth) mast for his Chebacco “Itchy and Scratchy”. One day while he was out sailing, the mast failed just above the partners! He sent me this pic of the mast:

Image41

He reports that it seemed to flatten slightly, just before it broke. He says there were no solid parts inside the mast – so that the halyards could run inside. Maybe they might have prevented it? Anybody else out there using a hollow mast of this type? We’d love to hear from you. On the subject of masts, Gil Fitzhugh is building a birds-mouth-type hollow mast for his Chebacco. When I mentioned to him that Fraser had met with this trouble, he suggests:

The objectives are 1. Strengthen the mast in way of the pressure point generated by the mast partners; 2. don’t create a hard spot somewhere else that will break; 3. salvage the birdsmouth strips I made at vast cost in time and money; 4. don’t add more weight than necessary; 5. given that building this boat has pushed me to the brink of certifiable insanity, don’t come up with a solution so complex that it pushes me over the edge. Here’s what I’ve done.


Image42If I could add a strip of shaded cross-section to each birds mouth strip before I roll the whole shebang up into an octagon, I’d have a much thicker cross section. There’d still be a hole in the middle for halyards, wires for a masthead light or whatever.

So I made 8 strips that look like this:

Image43I basically made them on the bandsaw . A table saw would have worked, but not as easily I think. Hand tools would have worked, but would have violated Objective 5 above. The width of the strip at the top isn’t critical, but depends on the thickness of the stock from which you cut the strips. If the stock is so thick that the top becomes a razor edge, you no longer have a hollow mast at that point.

Cutting order: 1. Make strips 2 feet long by a wide by however thick the wood is.

2. Make the diagonal cuts, but don’t go all the way through. The still-attached tails are good guides, clamping surfaces etc.

  1. Bevel both sides.

Glue the strips in place. Then cut away the shaded areas in the above drawing and clean up the Image44

surface with a few swipes of a hand plane. When gluing, clean up as much squeezeout as possible. these are mating surfaces, and what you neglect to clean up sooner will be a bitch to clean up later.

All this assumes that you cut your birdsmouths with rocket-science precision. I didn’t. Some of mine are a tad thicker on one side than the other. If you use this idea to create eight auxiliary thickening strips all exactly the same, your mast won’t work. (Guess how I learned this fundamental truth?) Not to worry. Label (number) your birdsmouth strips, so you predetermine which one is going to mate with which. Then determine the width of each auxiliary strip so it will fit properly. Sounds hairy. Isn’t. I did the whole thing in a couple of hours and made my auxiliary strips in a couple more. After everything’s glued up and the excess epoxy cut away, you test fit each pair of strips before the final glue-up. If it’s tight, whack it with a chisel or rabbet plane a couple of times. It really will work.

When the mast is done and rounded I’ll do two special wraps with glass cloth, in opposite directions, in way of the partners. My son, the engineer, tells me this will add strength.

We won’t know whether this works until we’re out in a howling gale and the mast doesn’t break. I prefer to avoid the howling gale.

Speaking of howling gales . . .

Phil Bolger was interested in my report in Chebacco News #30 about being caught out in a blow. He suggests:

Next time you’re caught out in a breeze (not necessarily that strong!) it’d be interesting to see what she will do under mizzen alone. I haven’t tried this in a Chebacco, but I wouldn’t be surprised if she could make good at least a beam reach, under good control.

I haven’t had a chance to try this out, yet, and Sylvester is now tucked up in my drive for the winter. Nevertheless, I’ll try it out next season, and would be interested to hear how any of the rest of you fare under similar circumstances.

And finally

Many thanks to those of you who wrote to me and sent photos. No more room this time. Maybe next . . .?

Bill Samson can be contacted on : bill.samson@tesco.net

Chebacco News is at http://members.xoom.com/billsamson

Snail mail to Bill Samson, 88 Grove Road, Broughty Ferry, Dundee DD5 1LB, Scotland.

Chebacco News 29

Chebacco News 29 – January 2000


“Masts and sails not included”

launch2

Jamie Orr’s ‘Wayward Lass’ afloat for the first time

Jamie Orr (Victoria, BC) writes:

Big news day! Boxing Day, 1999, finally saw Wayward Lass launched, albeit as a motorboat. There’s a bit of trim to be added and/or finished yet, but I wanted to get into the water before the new year. For convenience, and to avoid having to flush the engine after, I thought we’d go in at Elk Lake, just outside Victoria. We had quite a bunch of spectators, with both my family and Maureen’s on hand for Christmas. We backed the boat down to the water’s edge, and my daughter Lindsay christened her, smacking the bow with a (plastic) bottle of Sprite, then spraying it thoroughly with the contents. After that, though, complications set in — the boat couldn’t be pushed off the trailer as the lakeshore shelves very gradually and I couldn’t back far enough in. After a quick discussion, we went to Plan B, and drove another few miles north to Sidney where the boat launch can handle much bigger boats than Chebacco. This time all went smoothly, and Wayward Lass floated off easily. The motor started on the first pull, and after a short warm up, six of us went out for the maiden voyage. She goes like a dream. The engine is a 5 h.p. Honda, and I think we must have reached hull speed at half throttle – at full throttle the stern wave just got a lot bigger, made me feel like a BC Ferry. At idle, the motor gradually turns itself to one side, but at anything higher, it stays centred and I can steer with the tiller. We confirmed that the hole for the centreboard pin is indeed at or below the waterline, and had to cut a quick plug to hold the inflow to an acceptable amount. We also found that the ocean squirts up through an empty centreboard case quite easily, at any decent speed. However, both of these were more or less expected, and didn’t spoil the fun. We didn’t go far as the crew found it pretty cold and we were by now behind schedule for the celebration lunch. The recovery was as easy as the (2nd) launch. The trailer was made locally by a welding shop, and they did a great job. I’ve only adjusted the side bunk heights very slightly, and I have make one more small adjustment to raise the roller where the keel starts to rise to the bow. Boat and trailer follow the van so well that I’ve no worries about going anywhere, now. (I’d only ever used a boat trailer once before, about 30 years ago.) She’s back under her shelter now, waiting for the finish work I mentioned, and her sailing gear. I’ll be going as hard as I can on those now, except for the good weather days when we go for a power cruise! Chebacco’s rule!

Jamie also has advice on raising the Chebacco to get the trailer under it:

slings1

‘Wayward Lass’ in webbing slings

Jamie writes:

We put the boat on its trailer last Sunday, December 19. My dad (85 years old) and I (an aging accountant) managed the job ourselves, much to my surprise, without jacks or other lifting gear. I’ll describe in case it might help someone else with the same job. The boat was supported by three crosswise 4 x 4’s, resting across two lengthwise 6 x 6’s, with the bow and stern firmed up by separate supports. We started by knocking away the bow and stern supports, then I was able to lift up the ends, while Dad repositioned two of the 4 x 4’s about 3 feet apart, either side of what we guessed was the balance point. (Which is, I think, about a foot behind the midships bulkhead.) Then, as I lifted up each end (now quite light) in turn, Dad built up a criss-cross tower under the boat until it was almost 2 feet off the ground. The wide keel was enough to keep her balanced, although we had a strap under the bow end for insurance. After all, if she tipped, I’d have lost the boat, and either my canoe (stored on one side), or my dad (crawling around on the other)! More about the strap in a second. Once we had the boat up high enough, we still couldn’t roll the trailer under her because of the supporting tower of 2 x 4’s and 4 x 4’s. So we built up a pile of blocks, bits of wood and wedges under the tail of the skeg, and supported the bow with the strap, which was hung from a gigantic saw horse sort of affair across the foredeck, about a foot and a half or two feet above it. This saw horse is a 2 x 12 plank with 2 Black and Decker metal brackets, designed to accept 2 x 4 legs, and easily adjusted for height, length, width of plank etc. Very useful brackets, but I’ve no idea what they’re called or if they’re still being sold. The strap itself was seat belt webbing, wrapped 3 times around the plank and tied with a couple of half hitches. We pried the bow up an extra inch with a lever to try to allow for the stretch of the webbing, when we tightened it for the last time. We were then supported front and back, so could take the tower out, and remove the remains of the cradle. The trailer now ran in under the keel quite nicely. Once we had it positioned, I untied one end of the strap, and let the bow down. I had to take off one wrap, the remaining two provided enough friction to control the bow on the way down. Then we lowered the tongue of the trailer until the support under the skeg could be removed. The boat was then completely on the trailer.

Comfortable sleeping arrangements

Bob Branch writes:

Bill:

Hey, Merry Christmas from Michigan! I just read the comment in vol 28 about one owner buying an airmatress and pump. THERE IS A BETTER WAY!!! And it eliminates the pump (a special peeve of mine in semiwilderness camping). The solution is the self inflating air mattres. “Camprest” is the primary manufacturer and they are available in a variety of lengths and widths from backpacking and camping goods stores. And they are indeed self inflating. The “deluxe” versions are about 2 inches thick and lest anyone think that will not do the job, I’m here to tell you it doesn’t matter if you are sleeping on rocks or limbs, you will not feel the ground. They roll up into a roll that stores very easily. When they are inflated I adjust mine by adding a puff or two of air just so when I am rolled on my side my hip bones do not bottom out to ground. They have a layer of open cell foam in them as well as the air and besides being comfortable absolutely provide total temperature isolation from what is under you. In winter camping almost no heat loss occurs into the ground! We use them on the boat as sunpads. The 25 inch wide version is wonderful if you have the room for it because when you roll over you do not roll off. Owners should check the width of their floor space. A back saving addition is an overcover that forms the “Crazy Creek Chair”. This is a cover over the pad slides into with a few straps and a few battens that allow the pad to become the most comfortable rocking chair ever created. It can be adjusted to firmness, angle, and I don’t know how to explain how many more ways but it provides you with absolutely as much back support as your reclining rocker at home. It is wonderful after a day of no back rest on a wilderness canoe trip to lean back into one of these things and rock the evening away. On my canoe trips I have to be sure to have the tent up and camp totally made before sit into mine cause often I’ll doze off before dinner even gets made. These things will absolutely allow a wonderful night’s sleep on a rock hard surface…. and ply and epoxy sleeps that hard. Ain’t we all been there, done that, bought the tee shirt?

Bob Branch

Reassurance from Phil Bolger & Friends regarding Chebacco anxieties

Dick Burnham writes:

I wrote to Phil Bolger on some of my lingering concerns about the Chebacco and he swiftly put them to bed. I just received his letter today and rush to let you know about it. You must, though, if you’re inclined to publish some of the comments below, gain Bolger’s permission before doing so [Done that – No objections from Phil.]. For me they are comforting and offer me guidance on those things that have perplexed me some. For other, I have no way of knowing.

Maybe this is old hat for you guys. On my concern about flotation in the event of a capsize: “We’re not aware that any Chebacco has capsized. It would take a combination of very rash handling and bad luck to do it. The boat is unsinkable as designed. Any added buoyancy will float her higher if flooded.” (If you recall, Bill, I was wondering about sealed compartments and/or auto innertubes half blown up fore and aft….)

On my interest in possibly providing cross-planks to span the cockpit from seat to seat thus creating a nice sleeping platform outside: “Flush panel over the foot well is reasonable but its stowage needs study.” (My thought was to have 6 planks some 3′ long and a bit over 1′ wide so that the sum would cover from cuddy hatch aft to tiller. 3 would store under an openable seat on each side where the centerboard well is located — keeping weight low and in the center when sailing.)

On sailmaking and shaping of the sails: “We hear that the Sailrite Kits for homesewn sails are very satisfactory. Urge any sailmaker to build a deep draft into the mainsail. Too-flat sails are too common and degrade performance of gaff-rigged boats especially.” (Sailrite is “sailrite.com” on the internet and when I visited them some time back their graphics indicate cut, canvas weight, and price for mains’l, mizzen and an optional jib along with fixings such as thread that will be needed.)

He ends with a short note indicating that consultation on plans purchased from others (mine come from HH Payson) is “very limited.” I appreciate that as the price was most affordable. Yet it was a very nice consultation, indeed. [In his letter to me, Phil adds “Policy on consultation is to do the best we can to keep correspondence from biting too deeply into design time; that is the answers may be a bit abrupt at times.”]

Oh, found and instantly bought an 8′ long Papua New Guinean paddle. Wonderfully carved blade, and the whole length of the paddle from one piece of wood. The length will suffer a slice through it on a lengthy diagonal when we pack up to go home, but I’m thinking it will make a nice poling paddle when rejoined with epoxy, and with a boat or gaff hook on the upper end it might be a pretty useful memento.

Best, Dick Burnham


‘Itchy and Scratchy’ goes from strength to strength


iands

‘Itchy and Scratchy’ flying along on a close reach

Fraser Howell, of Nova Scotia, continues to enjoy sailing his strip-built Chebacco and has had considerable success with a large jib attched to a longish bowsprit. He tells me that he’s currently making a replacement hollow mainmast, using the ‘birdsmouth’ type of construction that was written up in WoodenBoat magazine #149, 1999.

Old-style Chebacco Boats

Craig O’Donnell draws our attention to a picture of historical Chebacco boats at http://www.photolib.noaa.gov/lb_images/historic/nmfs/figb0080.htm

Craig’s own pages are, incidentally a fantastic resource for all things boaty – http://www.friend.ly.net/~dadadata

And finally

Bill Samson can be contacted on : bill.samson@tesco.net

Chebacco News is at http://members.xoom.com/billsamson

Snail mail to Bill Samson, 88 Grove Road, Broughty Ferry, Dundee DD5 1LB, Scotland.

Chebacco News 23

Chebacco News

Number 23, October 1998

ch231

Peter Gray’s GRAY FEATHER with a bone in her teeth

Peter Gray, of Queensland Australia, sent me this wonderful photo of his sheet-ply Chebacco-20 GRAY FEATHER. Peter writes:

I have been sailing GRAY FEATHER a lot and the more I sail her the more I realise what a great design she is – so user friendly.

I entered a wooden boat regatta at Tincan Bay. There were about 25 boats in it. GRAY FEATHER won the prize for ‘Prettiest Boat of the Fleet’ (1 bottle of rum!).

Regarding your previous letter about topping lifts, this diagram shows how I did mine. The topping lift in this case also forms a lazy jack, making sail handling very easy. Floorboards – I completely sealed my cockpit, making it into a cockpit well. I use a small bilge pump to take the water out to the outboard well. This keeps the hull completely dry,

I have put a small headsail on the boat and have found that this helps her to windward very nicely – Not because of more leading edge, but because the headsail creates draft between it and the mainsail.

I am experimenting at the moment with a small bowsprit and putting a lightweight genoa on this, mainly for reaching and running. I’ll let you know how it goes.

Gil and Joan Fitzhugh visit Scotland

Gil Fitzhugh writes:

In eary July, Joan and I savored the opportunity to sail on Bill Samson’s Chebacco in Scotland. Unless Phil Bolger is a big name in Alaska, this is about as far north as his sphere of influence has yet reached. Scotland’s at the latitude of Hudson Bay; if you’re in a little unballasted sailboat in Hudson Bay, you’re not at the top of the food chain. Be reassured, however, that polar bears are not a threat in Scottish waters.

Bill Lives in Dundee, a small city pleasantly situated on the north shore of the Firth of Tay. Translated into North American, that means the estuary of the Tay River. It’s helpful to learn a few words of Scots: ‘firth’ means estuary, ‘strath’ means valley, ‘dun’ means fortress, ‘Islay single malt’ means ambrosia, ‘Damn! I missed the mooring’ means come about and start the engine before we go aground. See how easy it is?

Summer in New Jersey often means hot, sticky, sultry, stagnant air with 2 miles visibility in sunshine. Summer in Scotland seems to be cool, mostly overcast, breezy, with 20 miles visibility sometimes lowering to 4 miles in light rain. Always be prepared for rain. If you’re lucky, you won’t get it. We were lucky both days we sailed. And the sailing is grand. Both days we needed to take in a reef – a tremendous improvement over listening to limp sails slatting in almost no wind. Forget shorts and a T-shirt – you sail in jeans and a sweatshirt. And sunblock, because there’s a lot of UV coming through that cool overcast.

Our longer sail came on a Saturday. Had we been underway by 9:30, we could have beat upriver on a flowing tide to a beach about 7 miles away, had lunch, and then run home on the ebb tide. To these two American slug-a-beds, 9:30 still felt like 4:30 am, not an hour at which we’re prepared to sail (although, in July, 4:30 am local time in Scotland is full daylight). So we got a late start, and had a fun time beating up-river through the first of the two great bridges over the Tay (the road bridge). By the time we got to the second (railroad) bridge, there was no help to be had from the tide. We were still beating and the bridge was playing hob with the wind. So we turned around.

Going upwind, the Chebacco tacked through a precise 90 degrees on Bill’s compass, and made very little leeway with the board down. (Our only prior Chebacco sail had been in Sister Krista’s TOULOUMA TOO, whose board was stuck in the up position – she made considerable leeway.) Bill can tie off reefs in the middle of his boom, so reefing was a relaxed operation. On a dead downwind run, the Chebacco was very easy to steer. It could be a popular boat for hijacking by polar bears in Hudson Bay, since the cockpit will comfortably hold Papa Bear, Mama Bear and a whole passel of cubs.

There were dolphins in the Firth of Tay. This surprised Bill, who hadn’t seen them before. Since we were there, they’ve apparently taken up permanent residence. But remember, guys, we saw ’em first.

If you get to Dundee, ask Bill to take you sailing. You won’t have to ask him twice – his family aren’t sailors, and Bill likes company. You’ll have a blast!

Fraser Howell experiments with Jibs:

Fraser writes:

From:

Fraser <fraser.howell@ns.sympatico.ca>

Hello Bill,

Itchy & Scratchy has been having a busy summer. Everything is holding up well. I’ve been trying out different jibs in an attempt to reduce the weather helm when beating. I have a short bowsprit, so I have the ability to fly something bigger than the optional 30 sf jib shown on the plans.

Yesterday we rigged up a Laser M sail, which has a shorter luff than a regular Laser, and is 65 sf. The winds were < 10 km, so not a real good test. The boat balanced well on an almost neutral helm, and was faster. The laser sail sets nicely and gives good overlap. I can’t say for sure that she points higher. The best sheeting point is about 1 ft forward of the cabin bulkhead, 4″ in from the gunwhale. This is quite a bit busier rig , a handfull for the solo sailer, and draws some attention.

We will continue evaluations, but so far I am convinced that the Chebacco is a more capable sailer with a bigger jib. I’ll update you later.

I hope that this doesn’t spawn any gaff-rigged lasers.

Fraser Howell

I was concerned at Fraser’s report of weather helm, which has never been a problem with SYLVESTER, so I sent this reply:

Dear Fraser,

Readers of Chebacco News will be interested to read about your weather helm and your experiments to cure it.

Funnily enough, I’ve never had serious weather helm – nothing that’d make my tiller-arm ache anyway. I’ve helmed a Wayfarer in a good blow and that’s much worse. The worst I’ve ever encountered was an 90-year-old 50 foot yawl, where I had to take the main sheet end around the tiller to give enough purchase to hold it. It was a plank-on-edge boat which belonged to ‘Titus’ Oates of the Scott expedition and that type is seldom guilty of severe weather helm. It had been re-rigged from gaff to bermudian at one stage, so maybe that was the reason, though I can’t think why.

I find with the Chebacco that if the heel is kept to 12 degrees or less (reefing if necessary) then weather helm is slight. My mainsail has its maximum depth well for’ard – at about 30% of the way back from the luff. I’m sure that must be significant. Modern sails usually carry their max depth at about 40% back.

The trim is also significant. Weather helm is reduced by keeping the weight well back. Mine trims down by the bows a wee bit (I think my mast’s a bit heavy) but I keep the anchor amidships – nothing heavy up in the bows and the crew (if any) sits well aft.

I’m not sure about mast rake. Mine is almost exactly vertical.

The other thing is how tight you sheet the mizzen. My mizzen is cut dead flat and I harden up the snotter to keep it as flat as possible. I find that fine control of weather helm (on some points of sail) is possible by adjusting the mizzen sheets. Close hauled in a force 2-3 it’s possible to lash the helm and let her take care of herself for quite long periods. For example, I’ve done that and gone below to tidy up and she’s maintained her course for 20 minutes or more.

Bill

Fraser elaborated:

Bill,

Thanks for the detailed reply. I’ve been keeping the weight as far forward as possible. My mast weighs exactly 40 lb. and the outboard plus gas is close to 100 lb. I can’t tell without making it come true, but I keep thinking that I’m submerging the bottom of the stern, and slowing things down.

I now never hestitate to reef. I reef before whitecaps. The weather helm is terrible when you are overpowered. I’ve been caught in the “death roll” running before a freshening breeze, quite out of control until I got her around into the wind. Normally the weather helm isn’t too bad, and its easily handled by the tiller comb. Just about the time when I am thinking of putting in a reef, I have often had 8-10 deg of weather helm, and that causes cavitation off the rudder. I am hoping to be able to carry more sail longer with the bigger jib.

I also find the mizzen to be critical to the helm. I haven’t experimented much with the main shape by tinkering with the peak halyard and the outhaul. I also adjust the centerboard, from all the way down beating to almost all the way up running.

Lots of other things to try yet, but so far I am suprised that PB was not more encouraging of a larger jib.

As far as going out to sea, I have to get into open water to go anywhere but Halifax. The most interesting sailing areas are one or two days sail in either direction along the coast. I haven’t yet gone out of sight of land though.

The further one goes out the more big marine life there is. We’ve seen several kinds of whales and porpoises, sun fish, leatherbacks, and swordfish or tuna(not sure which).

Cheers

Fraser

So there we have it. Phil Bolger was the first to notice that a Chebacco could be prone to more weather helm than he would prefer, and suggested to makers that it would do no harm to move the mast forward 3 or 4 inches. If you sail a Chebacco, what’s your experience?

Ed’s hull

You’ll remember Ed’s amusing account of buying a Chebacco hull from Burton Blaise in Canada, then importing it to the USA [Chebacco News #21]. Here’s a photo of Ed strapping the hull onto his borrowed trailer at the start of the journey:

ch232

Ed makes all secure. Note the boy and the dog – both mentioned in the story!

Ed writes:

I’ve attached a couple pics of the Chebacco hull when we were loading it at Burton Blais’. I’ll hope to get some in process shots soon. Thanks for your earlier reply. I’ve decided to go with the Brad Story cockpit sole. I was thinking of doing a teak grating anyway so the pine boards will probably be a cheaper alternative. Now I’ve started on the cabin. The 1×2 lower supports for the sides are in, and I’m going to start fitting the sides tonight. The drawing is a bit sketchy here though, are the tops of the sides cut straight? or is there a concave cut in them? The drawing shows a concave, but I was assuming the natural bend might do that anyway. What did you discover on yours?

I sent Ed this reply:

RE the cabin sides – They are indeed concave along the top (and convex along the bottom, too, where they follow the sheerline).

My procedure was to cut them oversize, then fit the bottoms first, to the framing you’re putting in. Once you’ve got this line, then you can measure the height of the sides at intervals, from the plan, above this bottom line (allowing for the thickness of the deck) and then cut them to their final shape. I’d cut out the windows at this stage, too – Much easier than when the sides have been fitted.

Ed emailed later:

Just an update and some observations. First, the cabin top is on as well as the decks and in fact we’re just about to be ready to apply some exterior glass and epoxy.

As well, the centerboard is glassed and covered with a second layer of thick epoxy and will be test hung this week. Pictures of both are in the camera at this time so God knows when they’ll get processed.

Some observations,

You mentioned I think about getting a slight dip in the cabin top when you put on the ply. If this is in the fore / aft plane, I got the same even with extensive supports. I think IMHO that it is due to the flex of the ply over the designed cabin top “sheer” for lack of a better term. It appears to me to be unaviodable, but I wonder if making the rise of the cabin top a bit higher would make it better. Anyway it doesn’t look to be

an insurmountable problem.

I’ve cut in the storage under the seats and am preparing to install the shelves/ lockers whatever they are. (holes from the cabin back under the port and starboard benches.)

I’m planning on epoxying the bilge area up about 12 – 14″ from the bench front up the side rather than epoxying all of the interior wood surfaces. I have heard that if water intrusion does occur in plywood epoxy’d both sides that there is no way for it to dry. (similar to the osmosis problem in GRP. But, if the interior is left un epoxied the wood can dry from that side. Anyway that’s my theory.

Not much other news from the frozen north. I figure I’ve got about 5 weeks till the first snow flurries so I’ve got to get her watertight before then.

I replied that most makers epoxy both sides of the ply and that a good layer of epoxy is needed in the bilges, where water is likely to collect, even if you have a cover over the boat.

Jamie Orr makes progress:

From: “Orr, Jamie” <JORR@oag.bc.ca>

Bill

The pictures of the big turning over are going in today’s mail.

We’ve had a great August, the weather’s been perfect for boatbuilding. I wanted to spend the full month at it, but the rest of the family had some ideas for the holiday as well. As a result I only spent about two weeks building, more or less full time. However, for change, I’m fairly happy with the results. I fitted both the cockpit and the cabin dry, and now I’ve pulled them out for final sanding, sealing and inside

painting. Finished up the sanding last night and I’ll be putting in the seat fronts and starting to seal tonight. The motor well and after quarters are in place as well, and all decks are ready.

After reading about how difficult it was to bend your cabin roof, I laminated mine out of two layers of ¼ inch. I spread a sheet of plastic over the cabin area, and laminated the roof in place. The first layer was split down the center, and the second was done by centering the plywood on the roof, with two little pieces added at the sides. I used the same technique as I did laminating the bilge panels – holes on 8

inch centres in the top layer, with screw driven through these to squeeze out air and excess epoxy. I also tacked the edges to the cabin sides through full length ½ inch ply pads, first folding the plastic up over the work. I finished by putting small clamps on the overhanging edges. This was probably totally unnecessary by after all the rest, but the neither the clamps nor I had anything better to do. It worked fine, and now the roof is sitting all ready to drop into place.

I’ve decided against the mast slot for now, although I might put in the framing under the roof for later, if wanted. I am going to put in the hatches in the after quarters, and will borrow ideas from the sea kayakers to secure them. I expect I’ll use nylon webbing across the hatch covers with a rubber seal under – there are some effective looking cams available to snug up the straps if needed. I’ve also bought two of

the Beckson circular access hatches for the rear half of the seats, so I can use that area for storage as well.

How did you install your portlights? I’m thinking of routing out the ply by the thickness of the lexan, and using silicon sealer with an oval “ring” covering the edge. The available bronze ovals were the wrong size, so I think I’ll try cutting my own out of 1/8 sheet brass, (but that’s for another month.)

I’m also working out where to put mooring cleats, fairleads and so on, as the deck will need reinforcement underneath, and it’ll be easier to fit before the deck’s glued down -any suggestions on placing these fittings, now that you’ve had a couple of seasons sailing?

Looking forward to the next newsletter – hope you’re having a good summer and getting in lots of sailing.

P.S. A point for the newsletter about taping the seams. I started out using fibreglass tape, with finished edges. This is very convenient for handling and doesn’t fray, but doesn’t always lie down easily because of those edges. I didn’t buy enough at once for the whole job, and when I ran out I started cutting tape sized pieces out of scrap 6 oz cloth. I found these were much easier to put in place, and needed less sanding to

smooth the edges later. I never did go back for the rest of the tape, and I’ve managed to use up a lot of scrap.

A couple of points of interest. I did SYLVESTER’s portlights simply by cutting oval holes in the sides of the cabin and screwing1/8″ acrylic sheet on the inside, with some clear silicone sealant between. Jamie’s method sounds much nicer! As for cleats and fairleads – Jamie’s right in that they MUST be through-bolted. Woodscrews eventually give out (as Gil and Joan will testify – the air was blue when a mizzen fairlead on SYLVESTER let go in July!). My suggestions are:

  • cleats on the cabin top for hallyards and topping lift
  • turning blocks near the mast foot to take the halyards and topping lift back to their cleats
  • fairleads at the quarters for the mizzen sheets
  • cam cleats for the mizzen sheets, after they’ve passed through the fairleads
  • cleats on the side-decks near the rear of the boat for tying up alongside, and for hooking on a tender’s painter
  • If you have the Jonesport cleat at the stem, as shown in the plans, then that’s your for’ard mooring cleat – otherwise a hefty cleat is needed in the foredeck.
  • Apart from these, I have a block and camcleat on the aft end of the CB case for the mainsheet, and a couple of cleats on the coaming for lashing the tiller amidships when I’m on the mooring.

And finally

That’s all for this issue. Please keep your news, photos, stories, questions etc coming in.

Bill Samson,

88 Grove Road,

Broughty Ferry,

Dundee DD5 1LB,

Scotland

email – wbs@sol.co.uk

Gil Fitzhugh,

44 Primrose Trail,

Mt Kemble Lake,

Morristown,

NJ07960,

USA

Chebacco News 22

Chebacco News

Number 22, August 1998

syl2

SYLVESTER heels under an ominous sky

Photos?

You must be getting fed up of pictures of SYLVESTER under sail. How about you Chebacco sailors sending me some of yours? Of course, I appreciate that it isn’t the easiest thing to get photos of yourself underway. The above one was taken by a friendly powerboat driver, to whom I had thrown my camera and asked to shoot off the whole film. On a different occasion, I got my crew to sit at anchor in a tender with the camera while I sailed around him. It’s seldom possible to get good close photos of a boat under sail from the shore, unless a long lens is used.

Two-part Paint

Jamie Orr, whose Chebacco is nearing completion, sent the following email to the ‘Bolgerlist’ discussion group on the internet –

A few months ago I was asking for your experience with paint. I got a number of good responses, with recommendations ranging from latex to two part polyurethane. My concerns were that the finish have good resistance to abrasion, which favoured two part paint, and that the paint be reasonably user friendly, which didn’t. I viewed one part polyurethane as a possible compromise. Prices ranged from $15/litre for enamel to $29/litre for one part polyurethane to $40+/litre for two part.

I finally decided to go for two-part paint. Here’s what I learned using it, in case someone else is in the same boat (no pun intended). I found the paint to tack up quickly, but it wasn’t really that hard to use. I used a West system foam roller to apply it, followed quickly by a foam brush, brushing back into the already painted part. The hard chines of the Chebacco made for easy dividing lines — I painted the keel, then each bottom side, then each bilge side. (I’ve left the topsides for later, after

the deck joint is glassed.) This split the job into long narrow panels, making it easier to keep a wet edge on the paint.

Two things to watch for.

I found that an area about 2 ft by 2 ft was big enough to roll at once. If I did much more, the paint started to tack up before I could brush it all out — I used a three inch disposable foam brush, and didn’t brush any area more than once if I could avoid it. I estimate I had 20 seconds to get the area brushed. I also found that I did a better job if the brush stroke was backhand, not forehand. That meant I painted while moving from right to left, brushing back left to right (for a right-hander). I also changed to a new brush every so often. One roller cover did a full coat.

The other thing to avoid is to leave a roller edge mark across the end of the already painted part — its *very* hard to brush out. To cover the surface, I like to roll first one way, then go over it again at 90 degrees. To avoid leaving a mark, I rolled the paint first parallel to the wet edge, but not touching it — leaving an inch or two uncovered. Then when I rolled at 90 degrees, I rolled back into the wet edge, just as with brushing. The inch or two space only gets rolled one way, but it covered okay, and the join with the previous part was invisible after brushing.

Any flaws have to be covered within that estimated 20 seconds, or the fix will be as bad as the flaw. I put on one coat of primer, and two finish coats, so I had two “practices” before the final coat.

After the cost, the biggest drawback is the toxicity of the paint. An organic filter mask is a minimum requirement, and the paint should not be allowed to touch the skin either. I wear a beard, and so its hard to get a good seal around the mask. To help this out, I globbed vaseline into my beard and put the mask on/in this. If you try this, waterless hand cleaner will get the vaseline out again, eventually. Gloves, sleeve protectors and disposable coveralls completed the outfit. Safety glasses might be a good idea in case of splashes, but I can’t wear them with a mask as they fog up.

For cleanup, I just leave the roller cover and brushes until the paint cures, then throw them out. The solvent is about as toxic as the paint, so I haven’t used any yet. To clean up the mixing cups, I slosh the dregs of the paint in them to catalyse everything, then chuck them when cured. I also use disposable plastic liners in my paint tray, and found out that this paint will eat its way through eventually, so make sure the tray underneath is clean as well.

I used Endura paint, made in Edmonton, Alberta. For information go to:

http://fn2,freenet.edmonton.ab.ca/~bobstory/endura.htm

They have a wide range of colours, or will match any sample. The literature mostly talks about spraying, but they have a special brushing component to replace the usual catalyst if you want to brush or roll it. Make sure the pigmented component is well mixed — preferably shaken on a paint store’s mixer. I found the paint did not change or start to gel while I worked. I mixed up a full litre of primer, but used smaller batches of finish coat —

I mixed about 300 mls (9 oz) each time, adding it to the old stuff in the paint tray. This was to avoid having a lot left at the end.

I had no problem with sagging, but found that if I dripped on an unpainted spot, I had to smooth it immediately, or the drip showed through. I guess the 20 second rule applies here too. After the primer coat, I masked the bottom and bilge surfaces separately, so I could leave them covered while I did the keel, then leave the bilges covered while I did the bottom. More preparation time, but it worked.

There it is. Required care, but wasn’t that hard to use after all.

Jamie Orr

Reefing tips

Craig O’Donnell sent me the following email, pointing to reefing systems described on the Internet:

Speaking of reefing, you kight want to consider the pointer to:

http://www.friend.ly.net/user-homepages/d/dadadata/canoe/vaux.html

for the next issue. While it isn’t Chebacco-specific, it’s a good overview

of 3 reefing schemes. The originals were (are) for battened sailing canoe

sails, but of course modern lightweight battens could be used on a Chebacco

sail instead.

In any event it might spark a brainstorm among the Chebacco Riggers of the

world.

Sail-making, rigging etc.

Jim Slakov is making his own sails at the moment, and sent me a number of questions. Here’s my reply:

First of all, grommets – I used the cheap brass ones that you’ll find anywhere – 1/2″ inside diameter for everything. I agree that they’re nothing like as good as the ones used by professional sailmakers, but they don’t need special equipment either. I’ve used them on sails for the past 10 years and they’ve lasted fine, apart from a bit of greenness!

The way I fit them is to sew the ring part into the sail, with strong thread, until you can’t see the brass – Then I put in the grommet and flatten it out with the punch and anvil you get with the grommets. It seems to be plenty strong enough. An alternative is to go to an awning maker and get him to press some in – Still it’s nicer to be independent! If I ever make more sails, I may treat myself to some professional kit, but it’s hardly worth it for one set.

You also have some questions on rigging. Here goes.

1. Is there a particular point on the boom to attach the topping lift? Is it just tied onto a cleat or an eye?

– If you look at the gaff sailplan sheet that is part of Phil’s set of drawings, you’ll see that the boom has eyes at various distances from the end of the boom These are, in order:

12″ in from end – The attachment point for the mainsheet block.

8 1/2″ in from previous eye – fairleads for clew reefing pendant (first reef).

19 3/4″ in from previous eye – fairleads for clew reefing pendant (second reef)

8″ in from previous eye – attachment point for topping lift.

17″ in from previous eye – attachment point for second mainsheet block

I have my topping lift tied onto the boom, and going through a block shackled to an eyebolt near the top of the mast, then down the mast, through a block on the deck, via a fairlead, to a cleat on the cabin top (port side). If I was doing it again, I’d probably go for the simpler solution of tying it at the top of the mast and simply cleating the other end on the boom, via an eye.

My only deviation from Phil’s drawing is that I have the reefing cleats much further aft, so that they are easily reached from the cockpit. I keep the pendants in place all the time – including two at the tack. There are four cleats in all – one for each pendant. The pendants are 1/4″ braided line. The pendants cleat on the starboard side of the mast so that you can reef down on starboard tack – giving you right of way over other sailing boats. Cunning, eh?

2. How is the peak halyard attached?

The gaff has a strop (1/4″ dia rope, in my case) going from the mid-point to the top. This should be tied as tight as possible – It looks loose on the sailplan, but you’ll find it falls away like this even if you tie it bar-tight. A shackle slides back and forwards along this strop and the peak halyard is attached to this shackle. This means that when you have the full sail up the shackle will be near the foot of the strop, but when you take in reefs it will be further up, so that the pull is still at right angles to the gaff, allowing you to peak up the sail nicely. Both halyards go through blocks shackled to eyebolts near the top of the mast, then down to turning blocks at deck level, via fairleads to 6″ cleats on the cabin top (starboard side).

3. How do you attach the throat halyard to the gaff jaws?

Interesting one this. I originally shackled it to a lashing on the gaff, but soon found that the shackle was wearing a nice groove in the mast when the sail was peaked up. The best thing to do is sew an eye in the halyard and lash this directly to the gaff jaws (- I have holes drilled in the jaws to accommodate this lashing, as well as the sail lashings).

4. What about the forward end of the boom?

The weight of the boom is enough to keep the luff tight when the sail is raised. No need for any downhaul or vang, in my experience.

5. How do you tie the jaws (boom and gaff) to the mast?

There are holes in the ends of the jaws and I have 1/4 lines thread through them with wooden beads (‘parrel’ beads) to help stop them binding and stopper knots (figure eight) at the ends. The correct tension in these lines is determined my trial and error when you first raise the sail. Some builders have used a conventional gooseneck fitting for the boom.

6. How is the forward end of the sprit boom attached?

There is a line (the ‘snotter’) tied in a hole at the for’ard end of the sprit boom which goes up through a block lashed about 1/2 way up the mast, then down to a 4″ cleat. This supports the sprit boom, and flattens the sail when it is tight. There is no other attachment point for the boom, except for the lashing to the clew. It is important to keep the mizzen flat. If it draws too much you will get weather helm. If you look at Phil’s sailplan drawing the arrangement should become clear.

7. Can you hang onto the tiller while adjusting the halyards underway? Do you use a tiller extension?

No – I normally heave to. This involves centring the mizzen to make the boat point into the wind. Then you can adjust everything at your leisure! I don’t use a tiller extension, but it could be useful at times.

8. What is the sequence for setting sail?

(a) set up the mizzen so you are head-to-wind.

(b) take up the slack in the topping lift and peak halyard so the boom gallows can be removed.

(c) keeping the gaff roughly horizontal, pull alternately on the peak halyard and the throat halyard until the boom jaws rise and the luff is tight.

(d) pull up the peak halyard until the creases run from peak to tack. This is critical for windward performance. A crease from throat to clew means the top part of the sail isn’t drawing properly and performance will suffer greatly. I occasionally need to peak up the gaff during an outing when the halyards settle down.

(e) drop the centreboard if you are heading out to windward.

(f) cast off, backing the mizzen to send you off on the desired tack.

(g) sheet in, and you’re sailing!

I look forward to seeing photos of your boat when she hits the water. The thought of 3 Chebaccos [Jim Slakov’s, Garry Foxall’s and Jamie Orr’s] sailing in company in B.C. waters is wonderful!

Cheers,

Bill

Scuppered hatches?

Gil Fitzhugh has decided to put hatches in his Chebacco – in the seats, and at either side of the outboard well. He wants them flush (for comfort, and appearance sake) and doesn’t want them to be a source of leaks. His solution is to provide self-draining ‘ledges’ for the hatches to rest on. These have a gutter and drain holes at the corners which lead water away to the ouboard well, where it will drain overboard. This sketch is pretty much self-explanatory

gildrg

Wanted – a Chebacco

I had an email from Patten Williams, of Augusta, Maine: <togus@mint.net>

I’m looking to buy a used Chebacco and haven’t seen any in the usual places

I look to find boats for sale. Can you direct me to a place I might find

used Chebaccos?

If you know of any, then you could contact Patten by email, or alternatively let me know, and I’ll pass on your message.

Floorboards – to seal or not to seal?

Ed Heins was asking whether the cockpit sole should be sealed, keeping a watertight volume under the floorboards. Here’s how I replied:

As far as I know, all Chebaccos (mine included) just have loose floorboards here, and pump out the underfloor area from time to time. That way, any stray water sloshes around below the bit you are standing on, and doesn’t make it slippery. I’ve used plywood for the loose floor, in three parts – one either side of the CB case and the other covering the aft section. Brad Story has used pine boards, with narrow gaps between. He screws them down but leaves room to poke the end of a hand pump for emptying the bilgewater.

Have you read Sam Devlin’s book on stitch and glue boatbuilding? He favours your method, as it adds strength, but he fills the void with foam and still leaves a drainage channel for getting stray water out.

Incidentally, I’ve had a little trouble with water lying in that free-flooding area

aft of the cockpit. A couple of little limber-holes that drain into the cockpit wouldn’t go amiss. I plan to drill some next maintenance season.

And finally

That’s all for this issue. Please keep your news, photos, stories, questions etc coming in.

Bill Samson,

88 Grove Road,

Broughty Ferry,

Dundee DD5 1LB,

Scotland

wbs@sol.co.uk

Chebacco News 21

Chebacco News

Number 21, June 1998

syl1

SYLVESTER scoots along in a sea breeze

Why so late?

You’ve probably noticed that this issue is about a month later than usual. The explanation is that there wasn’t enough material from our readers to fill an issue until now. Anyway, there’s some good stuff now, so I hope you’ll find it’s been worth waiting for.

Reefing (again!)

I’ve made some very simple modifications to the reefing system on SYLVESTER that make reefing under-way a much more managable process. In essence, all I did was to move the horn cleats for the pendants to a point about mid-way along the boom; making them easier to reach without leaving the cockpit. The pendants at tack and clew are left in place at all times, and just hauled in (tack first) as the occasion demands, just as Brad Story described a few issues ago.

I had a chance to try it out in anger last weekend; I took in a reef when things got blustery, and shook it out again when things quietened down a little. It worked very nicely.

Building the Coach-roof

Builders tell me that one part of the plan that takes a lot of thought is the construction of the coach roof. Here’s how I did it.

First of all I put on the cabin sides – just cutting and trying until they fit, not forgetting to cut the elliptical holes for the windows before finally gluing them in.

Next job is the framing for the roof – not too difficult joinerywise, but it takes a bit of study of the drawings to figure out what’s needed, allowing for the right clearances for the mast slot and hatch hole.

This is all faired up in preparation for the top going on.

I made the top from 1/2″ ply – it takes a LOT of bending – Two layers of 1/4″ might be easier. The top is made in two halves – port and starboard. I glued and screwed it to the centeline first – LOTS of screws to make sure it stays down.

I found, when bending the curve into the top the framing started to sag, so I placed some temporary props between the framing and the bottom of the hull to try to minimise this sagging.

I then applied glue to the rest of the framing and applied my full 180+ pounds around the edge as I put in the screws. This is the hardest bit, because if you stop half way through, with not enough screws in, it’ll just pull out and spring up. I’d recommend a screw every 4 inches or so.

Finally I removed the props and there was a little sag in the roof. No big problem, but it does mean the hatch sides need to be convex along the bottom and require a bit of fitting. Once the hatch sides are on, and the framing of the mast slot, the whole thing is as stiff as you could wish for.

I hope this is helpful.

framing

Cabin sides in place and framing for the coach-roof completed

Jamie Orr Pours Lead in his Centreboard

Jamie writes:

Here are the lead pouring pictures.

First, some reminders:

  • Pick a dry day or work under cover. Molten lead will splatter if it contacts moisture.
  • Clean up your work area. It’s obvious from the photos I could have done a lot more in this regard. (Also, I think we could have had the stove in a less vulnerable position, so it couldn’t be easily knocked over. On the other hand, it didn’t get knocked over, and was at a convenient height. Take your pick.)
  • Lead stays hot for a long time, watch your fingers.
  • Wear protective clothing, and don’t breath the fumes.

Now, what we did.

We drove four big nails into the edges of the hole in the centreboard to anchor the lead. This was only just barely enough, and the lead was a bit loose after it cooled and shrank. Some epoxy around the edges fixed that.

A piece of steel plate was clamped to the underside of the board. I wire brushed the plate as it was a bit rusty, but didn’t do anything else. The books favour some blacking or soot, as well as preheating the steel, to prevent the lead from sticking, but we had no trouble with it. The board was carefully levelled on sawhorses.

The lead had been previously used to seal the removable top on a 45 gallon drum, so it came as a thick strip about an inch thick. Dad bandsawed it into chunks while I set up the board. We fired up the backpacking stove, put the pot and lead on, and put a 3 lb coffee can over the whole thing (both ends cut out of the can!) with an air space at the bottom. The can acted as a heat reflector, wind shield, and chimney for the stove, greatly increasing the heat to the lead.

It took about six minutes to melt 2/3 of a pot of lead, or about 6 lbs. Beeswax is supposed to help impurities float to the top of the lead, but they seemed to float up quite well without help, so I didn’t bother with the wax after the first lot. A tongue depressor removed the dross nicely. I found the easiest way to hold the pot was with vise grips, ignoring the bail, at least for this pot. (The pot was bought originally for bullet making, from a sporting goods store.)

I didn’t pour the lead all at once because I only had a small stove and pot. Because the first (learning) pour was on the small side, we had to do a very small fourth pour. Also, this last pour was delayed, so the lead already poured may have cooled a bit. In any case, this last, fairly thin pour didn’t bond as well to the already poured lead. When I started to level the excess, the edges tried to come up like the edges of a pancake whose middle is stuck to the pan. After I had the excess levelled, I drilled two corners and put one inch wood screws in them. Along with the epoxy already mentioned, this fixed the problem.

As an aside, I found the best tool for levelling the lead was the electric plane. I did a final finish later with the belt sander when I was fairing the edges of the board. The lead didn’t seem to hurt the plane – if in doubt, rent. Note that lead shrinks as it cools, so it should finish about 1/8 inch above the surface when poured.

Altogether, this made a nice change from epoxy, and was a whole lot easier than I thought it would be.

leadmeltleadpour

Melting, and pouring the lead.

George Cobb’s hull nears completion

George Cobb, of New Brunswick, Canada, sent me a bunch of photos of his beautifully crafted lapstrake Chebacco-20 hull. George writes:

I enclose photos going back to March ’97. I started Aug ’96 but spent most of that winter on spars, CB & trunk, rudder etc. working in the basement. As you can see from the photos, my shed doesn’t have enough room to build a boat of this size. Most of the construction went smoothly. Some trouble lining off the lap lines becuase I didn’t have room enough to stand back and look at them.

In the latest photos I am in the process of applying epoxy & the fiberglass to the deck. I have just started on the cabin. I laminated a rounded front as I did not care for the pointed look in the plans. I made very few other changes to the plans. Still have cockpit coaming, cockpit sole, toerails and rubrails and various trim pieces. All hatch covers are made except for the one for the companionway. When finishing and trailer are included I doubt if I will be launching this year.

cobb1

Starting planking – note the ‘lining off’ battens.

cobb2

The turnover ceremony.

cobb3

Starting to fit out the hull

cobb4

The cockpit nears completion

Ed Heins buys Burton Blaise’s hull

So I was pondering the next project, either a Light Scooner, a Chebacco, or one of the sets of Jim Michalak’s plans that are residing in my “projects pending” file, when lo and behold, Burton Blais posted an unbelievable deal for his Chebacco hull which made up my mind all at once and made me the newest builder on the Chebacco news list. The deal was even more attractive, as Burton, up in Ontario, is only a few hours northwest of us here in Frostbite Vermont. Burton, by the way has done a magnificent job thus far. That about covers the upside of the situation.

The downside? Well, convincing my wife Deb, was the next step. Of course it seems Deb, beautiful flower of English womanhood that she is, was somewhat less than overwhelmed at the marvelous opportunity of having yet another “bloody ship” in her back garden. Fortunately, the age old solution of providing a “quid pro quo” of greater value than the object in question, (this time in the form of a tennis bracelet) worked to perfection and the necessary political groundwork had been laid. Which then left only the logistic issues to be solved.

Downside #2, we had no trailer to transport this beast. After a caucus with Bill Samson about trailer requirements, however, I petitioned a friend to loan me the trailer from his 15′ plastic puffin which theoretically just got me enough snubber to axle length to balance the Chebacco. One small problem it seemed however was that like most Vermonters, maintenance on said trailer had been sadly neglected, so before embarking I had already rewired the lights, changed out one wheel bearing and being a Vermonter myself felt that I could get by with just repacking the other 3. Mind you I had never seen a Chebacco up close and personal, so I’m envisioning at this stage, how this is going to fit.

The morning of May 16 broke sunny and warm, a lovely day for the drive. We headed west across Vermont, caught the lake Champlain ferry just north of Burlington VT and landed safely in Plattsburg, New York. From there we headed northwest up route 190 and transitioned to US 11 at Ellenburg Depot. We left US 11 at Malone NY ( a rather niceish town with a hellatiously big Kmart, best described as a Tescoish thing for our British readers). Anyway the significance of the Kmart is that there are none in our small locale so it was planned to stop on the way back

to satisfy her majesty’s shopping fix. US 37 leaves Malone and runs west along the Canadian border to where we planned to make the border crossing. All was well here until we discovered 25 miles of roadworks with no feasible means of avoidance. Hence, 25 miles of dust and gravel later we were back on rt 37 heading towards Massena New York.

Now, Cornwall Ontario is a small city. At least on the map it looks substantial enough to warrant a signpost on the freeway. However… as with our US mapmakers who show Canada as a big beige empty block above the US border, I suppose the powers-that-be assume that just a reference to “Canada” should be sufficient for the average ignorant yank motorist. Therefore, the only signpost along the road reads “Industrial Plants Bridge to Canada”. Now it seemed absolutely logical to me to think this meant “THE Industrial Plant’s bridge to Canada”. There was an enormous factory there, and it’s not unheard of to have a factory in these parts span the border. (That’s my story and I’m sticking to it) Anyway, needless to say, 6 miles farther down the road we came to the realization that in fact this was the ONLY bridge to Canada. A clandestine U turn with a trailer across one of those “Emergency Vehicles Only”

median crossings and we were headed to Ontario.

Border crossing south to north was no big deal. The Canadian folks were friendly courteous and checked Molly the Bassett Hound’s rabies papers, and passed us right through. Burton God bless him had given excellent directions so the remaining miles were insignificant.

Until we arrived at the Blais’ estate and I got a look at the Chebacco, upside down on it’s building frame, and was appraised of the size of a completed Chebacco Hull. I would have sworn that it would never fit on the dinky trailer hitched to my minivan. Not wanting to admit defeat however, we pressed on and horsed the hull out of the temporary shed. With the help of a willing neighbor turned it was over for the first time. I have the feeling that if Burton had turned this over prior to my arrival, I probably wouldn’t have gotten a chance at the boat.

This was one pretty hull all trued up with the bulkheads and temp frames still inside. But onward….

Downside #3, Back to the Vermonters lack of trailer maintenance. It seems the trip had broken loose a couple of ancient weld patches and there was no way the trailer would have survived an overload condition in that condition. Thankfully another of Burton’s neighbors came to the rescue with a grinder and welding rig, and an hour later we were back in business.

Back to Burton’s, to load up the hull. Cripes it overhangs. Well at least the bunks fit more or less on the flat bottom although they’re somewhat short for the job. A bit of gerryrigging got her sorted and tied down & we were off back south.

Actually it trailed not too bad. There was a minor skirmish with the US customs who first after inquiring about my 2 children in back, (one boy, one dog, OK that put me off) then their obvious struggle with how they were going to get a Coast Guard safety registration certificate on an unfinished hull. (I’d love to see the exam for customs agent) Finally they acquiesced to the fact that this was really lumber at this stage so there wouldn’t be duty.

We made the obligatory stop at Kmart as promised, spent the night in Ellenburg Depot and returned uneventfully with only a few scratches in the paint to show for the ordeal.

This weekend, marks the building of a proper cradle and 8 strongbacks to horse the hull off the trailer and hopefully embarcation of further boat building exploits. Stay tuned. I’m a little overwhelmed at where to begin.

Cheers

Ed Heins

For Sale

I want you fellow Bolgerphiles to be the first to know that Catfish Lounge [a Catfish Beachcruiser] is going to be offered for sail, er, sale, to make way for a Martha Jane. Price of the Lounge is $4,500, and includes an excellent Pacific galvanized trailer and a year-old Honda 2HP motor. If you have an interest, or are interested in learning more about the boat, send me e-mail. (Both the boat and I are in the San Francisco Bay area.)

John Tuma <jtuma@sjm.infi.net>

What about an aluminium rudder?

Fraser Howell sent me this photo of his aluminium rudder. He is very pleased with the way it works. It’s very strong, too. It’s worth noticing that the rudder is in a particularly vulnerable position when a Chebacco is being launched from a trailer. Careless launching can mean the rudder hits the slip when the boat slides off the trailer. It is comforting to have a really strong rudder!

frudder

Fraser Howell’s aluminium rudder

And finally:

That just about wraps it up for this time. Please, please, please keep your news and photos coming. They are the stuff that Chebacco News is made of!

Bill Samson,

88 Grove Road,

West Ferry,

Dundee, DD5 1LB,

Scotland.

<wbs@sol.co.uk>

Chebacco News 20

Chebacco News

Number 20, March 1998


SYLVESTER makes an overnight trip

We don’t get much news about trips in Chebaccos, so here’s an account of one I did on 5th August 1997. It’s based on notes from SYLVESTER’s log (Yes! I keep a log of all my trips – Is that sad or what?). Low water was due at 11 am, so I got down to the shore at 10, rowed TWEETIE-PIE (my June Bug) out to SYLVESTER and got her ready.

lei0016

SYLVESTER at her (his?) mooring

I was underway, single-handed, in a force 3 Easterly, at slack water at 10-30 am.

The Tay is a rather shallow estuary, with loads of sandbanks and very few buoys to show you where they are, upriver of Dundee.

lei0013

Heading upriver, towards the Tay Road Bridge.

It was my intention to get upriver to the Earn – which enters the Tay from the South, just West of Newburgh – and to motor up there to Bridge-of Earn. But . . .

estuary

The route taken by SYLVESTER (The total extent of this map is about 25 miles E-W)

You’ll just be able to see, on the map above, that there are two bridges across the Tay. The Easternmost is a road bridge, and the other is a rail bridge. I had a pleasant run upriver until I passed under the rail bridge. Just beyond the bridge I ran aground on a sandbank, but the flooding tide soon lifted me off again.

taybridg

Just about to pass under the Tay Rail Bridge

From then on, I paid close attention to my charts, and avoided the sandbanks, most of which are on the North side of the river. The banks are complicated around Newburgh, but there are some pint-sized buoys to allow boats to thread their way among them. The locals amuse themselves on a nice afternoon by watching yachtsmen come to grief – often having to spend the night on a bank!

towing

TWEETY-PIE (a June Bug) towing astern – Tay Rail Bridge in the background.

The mouth of the Earn is not far beyond Newburgh, and I headed for it. Unfortuately, no-one had warned me that you need to keep well out in mid-stream before turning up the Earn, so, once again, I ran aground. By this time, the wind was gusting force 4 or 5 and things got a bit fraught. Even though the tide was flooding, I kept getting blown higher up the bank. I dropped the sails and started the outboard, hoping to motor off the bank. Unfortunately, the propellor had an argument with some rocks and the shear-pin broke.

My only option, now, was to continue sailing – The Earn is too twisty and narrow to sail up, so I decided to continue up the Tay. I eventually managed to pole myself off the bank and made my way under main alone up to Inchyra, where there are some moorings on the North side of the river, belonging to the Civil Service Sailing Club.

inchyra1

At anchor – Inchyra.

I dropped my hook (a 15 pound Danforth), replaced the broken shear-pin and rowed ashore. I had brought the June Bug with me, under tow. Two of the Civil Service guys were there and made me very welcome with a mug of coffee. They also pointed out a spare, permanent mooring that I could tie up to for the night, and save me the trouble of anchor-watching when the tide turned.

Having moved to the mooring, I rowed ashore again, tied TWEETY-PIE to the jetty and walked the mile and a half to the nearest pub, the Glencarse Hotel, for a pint and a sandwich. I got back to the jetty a couple of hours later, about 9pm, and found TWEETY-PIE dangling by her painter down the side of the jetty – It was approaching low water again! A hot drink, contemplate the sunset, then off to bed.

inchyra2

Sunset at Inchyra

Next morning, I got up at 5am, had breakfast, and set out at high water – 6am. There was no wind, so I motored back all the way, dodging the sandbanks, and got home at 9.30.

Verdict? I don’t think I could have been happier with any boat, than I was with SYLVESTER (and, of course, TWEETY-PIE).

More about Reefing systems – a two-way conversation

Following Brad Story’s account of the reefing system he uses on his Chebacco, Bob Branch got back to me with some suggestions of his own. This led to a two-way discussion of possibilities that may be of interest to Chebacco-riggers.

Bob wrote:

Thanks for issue #19. Another good job as always.

That was a nice pic of the “c” under construction under the lean too. [Jamie Orr’s hull]

A suggestion on the reefing system Brad demonstrated. Works nice but those

cleats on the boom can be a problem when reefing… trying to find them on a

flailing boom, stuck under the sail cloth, and you head having to be in such

close proximity to the boom (a bad idea in heavy weather in any boat from my

experience.) The reefing system I have used on a number of offshore boats is

just a mod of the one Brad sent. It brings the topping lift and the clew reef

lines to the mast and then turns them to the cabin top to cleats on the aft

end of the cabin. I know it adds the cost of a few blocks and sounds like a

bit of spigetti. But I have routinely used 3 reefs, topping lift, boom vang,

and in sloops all the jib and spinnaker halyards (though I reversed my

thoughts on those if much single handing is done without roller furling {never

roller reefing} on the headsail. It gets the crew out of the cockpit (where

its weight ought not to be) and puts the jib halyard at a more convenient

location for a controled sail takedown for the solo sailor). Anyway, it can

all be done very neatly. When you are reefing with this arrangement you are

not AT ALL dependent on control of the boom. In fact I get it the heck out of

the boat completely. I take up tension on the topping lift first so the boom

will not drop AT ALL during the reef. I ease the main sheet way off till the

boom is out of the cockpit completely (and away from my precious skull). Then

I lower the halyard and secure the tack (take in the tack reef line) tightly.

The main halyard is tensioned… very tight so the draft in the sail winds up

in the forward part of the sail when the sail is set. This is critical for

pointing upwind in a cat rig. The clew reef is then taken in and tensioned to

the max. You need this tight to really get a flat sail which is what you are

looking for just as much as sail area reduction. Now I haul the mainsheet and

away we go. Note, I didn’t do anything about the excess sail cloth. Right. If

the outhaul was tight to start with (which it should have been because you

were already at upper wind range prior to the reef) and the reef outhaul is

tight (which it should be) The excess cloth will be in a fold or two very

tightly against the boom. Even with a second deep reef in a high aspect main I

have NEVER found it necisary to tie the excess cloth. If the boom doesn’t have

adequate cockpit clearance or cabin top clearance to keep the sail cloth clear

you might have to but now the boat is back under control, the boom is under

control and not swinging around, and it is a simple matter of two ties at most

for the entire sail. The boat isn’t pitching anymore either! And ya never left

the cockpit. One little detail. When you make your sail or order it from the

sailmaker, be sure the reef clews are a little higer than just a perpendicular

from the mast. You want more angle upwards for the boom when you reef… so

the cloth has the room it needs, and so your precious skull is further from it

too.

I now it won’t happen in a Chebacco, but true luxury in sailing is NOT to be

found below decks. It is a boat whose boom is always above your head, during

normal sailing, tacking, jibing, and when reefed. Ahhhhhh. Peace of mind.

Keep the scratched side down, (your shallow draft Chebacco does have a scratch

I hope… otherwise you aren’t in the water it was designed for.),

BOB BRANCH

I replied:

Dear Bob,

Many thanks for your sensible suggestions re: reefing. It wouldn’t be practical in my Chebacco as it stands, because there is no gooseneck to hold the inboard end of the boom at a fixed height – something that I think’d be essential when a line comes off the inboard end of the boom to a block at the mast-foot. Otherwise the halyard tension would be working against the reefing line tension with potential mixups if one or other is slackened off. My Chebacco boom has jaws at the mast end and no tack downhaul – the weight of the boom is enough to flatten the sail. The trick is to balance the tensions in the throat and peak halyards.

Having this setup, I can raise or lower the entire sail/spars. I normally keep the boom above head-height. The only discomfort that can befall the crew is being throttled by the mainsheet in a gybe!

Yes, I do have a few honourable scratches on the bottom of SYLVESTER. Fewer than I’d expected given the horrible grinding noises when I ran aground last season. I have a galvanised steel strip around the keel which bears the brunt of such navigational misjudgements!

I’ll put your thoughts into CN#20 – some of the guys do use goosenecks and could benefit directly by adopting the system you suggest.

Bill

Rudder Issues

Burton Blaise emailed me regarding some concerns he has about the Chebacco’s rudder. My reply is printed below. His words are in italics –

Hi Bill:

Hope things are well with you. I am back at my workbench trying to do whatever I can on my Chebacco project in my small heated workshop. I am contemplating building the rudder so that it is ready to be attached to the hull in Spring. Looking at the plans, it strikes me how small the rudder appears – not much more than 1.5 square ft total area – and I wonder how such a small rudder can effectively steer such a (relatively) large boat. After all, the rudder blade for my Gypsy (which is a much smaller & lighter boat than Chebacco) is significantly larger. In your experience, how well does Chebacco respond to her helm? I worry that the rudder as shown might make for poor steering ability!! I realize that this design does have a bottom plate for extra “bite” when heeled, but I still worry that the rudder surface is much too small for a boat of this size.

I worried about the same thing when I was building, but Brad Story reassured me that it wasn’t a problem. He was right. The only anxious moments I’ve had were immediately after letting go of my mooring, before SYLVESTER had gathered much way, trying to steer the boat before being swept against the other moored boats by the tide. Mind you, the sail and CB have as much to do with steering as the rudder, and I haven’t had any problems since I got used to that aspect. I suppose that if the boat heeled a great deal, the rudder might come clear of the water – again something I’ve never experienced. I understand that some boats with much larger rudders are tricky to steer – Peter Bevan tells me that the Light Schooner won’t respond to the rudder unless the sails and CB are set just right.

You need to pay close attention to the steering when surfing downwind, but that’s the case with any boat. I’ve never felt in danger of losing control.

I also have a question concerning the pintle and support structure for the entire rudder and its post. From what I gather from the plans, the entire weight of the rudder assembly is borne on the pintle, with main support for the rudder post where it comes through the mizzen mast partner (which is strengthened with a small steel plate where the post comes through) – is this correct? If so, what stops the rudder from riding up and down, and possibly scraping against the bottom of the hull (especially in wave action?)? Should there be some kind of stop on the rudder post to prevent this action, or does this simply not happen at all?

Yes, it does ride up and down. Mine has about 1/2″ of vertical play. There’s no sign of significant wear, though it is a little looser now where it passes through the mizzen partner. I’m sure that this is as much to do with side-to-side movement as up and down, when sitting on her mooring. As a matter of interest, I’ve put a thick nylon washer around the pintle to take the wear and reduce friction.

Also, the plans appear to show a free flooding rudder, but I really wonder if this is necessary. Surely weight cannot be an issue here, since the space between the two plywood rudder cheeks has such a small volume as to be almost negligible.

Sure. But the main idea is to let water out. There’s always a danger of water getting trapped in any hollow structure, no matter how well sealed it is. I regard these as drain holes.

Also, if I use steel for the rudder post assembly, what is the best way to keep the lot from rusting? I had considered aluminum or stainless steel for the job, but I simply do not have access to the proper welding equipment, etc.. How did you handle this?

I got mine welded up from mild steel, then sent it off for hot dip galvanizing. I got a blacksmith to do the fabrication of the rudder stock and pintle and it cost me 25 pounds. The galvanising was another ten. So far, it’s held up well. When it rusts significantly I’ll take it all apart and send it off for re-galvanizing.

Bill

More on Rudders

Jamie Orr writes:

I’ve found a “retired” machinist to make up the rudder fittings in stainless steel. I wanted to use bronze where I could, but was told by at least two outfits that bronze was best cast, not welded/brazed. Also the flat stock is hard to obtain. So, since casting a single set of fittings is a bit expensive, I’ve yielded to the experts and plumped for the stainless. The lower rudder fitting is made out of 1/8th stock,

bent up around the skeg, with lower sides at the back part as well to add strength, making a 3/4 “cup” around the bearing. This fitting is already bent and welded to shape, but hasn’t got its pin or any holes drilled yet. The rudder post will be 1+ 5/16 stailess tubing, a bit thinner than called for, so I’ll have to fair in the rudder to the post. I’m having the straps welded on as if the rudder is only 1+ 5/16 as well, to get a longer weld — that is, a full 180 degrees on the post. I’ll cut down the rudder to fit in way of the straps — should be strong enough with the framing backing it up.

My machinist is also making nylon bearing/bushings for the bottom and at the tiller. The lower one will be wider at the bottom for the post to sit on, with the upper part fitting inside the rudder stock, and the pin hole drilled up through the nylon. The top one will be a bearing as well as pad out the width of the rudder stock to match the tiller width – stainless again for the rudder straps.

I’m trying to decide how high tech to go in paint, and whether to bother with bottom paint on a mostly trailered boat (probably not). I don’t want to go the length of a two part polyurethane, despite the finish, but I am considering the one part “Brightsides” mentioned in the Bolgerlist from time to time. I’m also very tempted just to go with a

good quality enamel, on the grounds that I won’t have to learn any new painting techniques or take up chemistry.

Jamie

And finally . . .

That’s all we’ve space for this time. I hope you enjoyed it. Keep your letters and emails coming!

Bill Samson,

88 Grove Road,

West Ferry,

Dundee, DD5 1LB,

Scotland.

Chebacco News 19

Chebacco News

Number 19, January 1998

Is Electric Outboard Power feasible for a Chebacco?

Gil Fitzhugh wrote to Phil Bolger and Friends –

Dear PCB&F,

. . .

I’ve been intrigued by ‘Lily’ [the electric launch] and saw her or a sister ship at St Michael’s last month. I’m not looking to build or own a power boat, but I’d welcome your views about whether the newest electric outboards with a modest number of batteries would provide reasonable auxiliary power for a Chebacco. I shouldn’t think I’d need to motor more than 3 hours between charges – usually less, since I wouldn’t go anywhere far in a Chebacco if I couldn’t anticipate reasonable sailing – and maybe a couple of solar panels on the cabin roof (or deck house) would replace, during a day’s sail, what I’d used up motoring out of harbor in the morning. Otherwise, I figure a 5-horse Honda 4-stroke would be the next-most environmentally friendly source of adequate power. Thoughts?

Best regards,

Gil Fitzhugh

PCB&F replied –

Dear Gil,

. . .

On your E-power idea, the matter is straightforward and viable for the milder duty cycle you propose if you take it seriously. Before LILY, we hung two smaller 42lbs thrust MINNKOTAs on Ted Ratcliff’s 20′ ply Chebacco ‘KATTEPUS’ and she went quite well, only hampered by the limited pitch (one size only available) on the props.

The following hardware should be good for up to 5 hours of continuously powering your boat:

  • 65/70lbs thrust 24 volt MINNKOTA (saltwater series optional for coastal use) [$430],
  • 4x6V TROJAN T-105 for 217Ah (or T-145 for added range and cost!) [4x$49 or $129] connected in series to get 24V, but interruptable by
  • single battery switch into two banks of 12V [$20], which in turn can then be charged readily in less than overnight by a
  • 40Amp STATPOWER 4-stage ‘smart’ charger with two-bank output to feed each 6V T-105 pair with 20Amps as de facto one battery [$350]
  • You could add an E-meter [$160] to gauge consumption and get instant reading on voltage and actual amp and amp/hr numbers – useful and instructive.

This will cost more than any combustion engine. But after initial installation, and very minor battery maintenance you’ll be running her for years without additional worry, never mind noise, vibration or oil-plumes – decent return for the money. E-cost will be on the order of perhaps 80c-$1 per total charging cycle . . . But always recharge immediately after you bring her back within reach of the nearest 110V outlet.

Put two batteries in about the location in each cockpit bench where [the Cruising Chebacco] plans show a single one. And locate the expensive charger inside the cuddy/house to keep it out of the rain. LILY’s rain-proof units would take twice as long to recharge these 6V pairs, and seem thus way too wimpy for the occasion. Your E-CHEBACCO would have about 2/3 the capacity of LILY. You probably won’t see more than 4Kt due to the limited pitch on that 11″x4″ prop.

. . .

Susanne Altenburger

Phil Bolger

Hanging the bilge planks on a Sheet Ply Chebacco:

Skip Pahl has been comparing notes with Jamie Orr regarding the hanging of bilge planks. He kindly copied this email to me:

Dear Jamie,

Thanks for all the good information in CN about your building methods and

experiences. Your advice is really timely for after several years of

deliberations, courage and model building, I began cutting wood this summer.

Progress is slow. My building speed is limited by the ability to buy only

three sheets of plywood (or its $ equivalent) every two weeks! Add to this

the fact that I’m very slow when it comes to new types of construction and

you’ll understand why I am straining for new wisecracks to answer the

inevitable question, “So, when’s the big launch date?”

I am writing to you because it is approaching the time to hang the bilge

planks and I am struggling to visualize the process. I too wish to avoid

building all that stress into the hull that 1/2″ ply creates when making that

“Gawdawful” twist and have decided to go with the 1/4″ ply laminations.

I made 7:1 scarf joints when I layed-up the 1/2″ sheer strakes and bottom.

They worked out really well. The curves are fair and the joints appear to be

very strong. However, with laminated bilge strakes it looks as though the

butt block is the way to go. Would you review my thinking here and see if

I’ve got the process right?

PART 1 ( (No volunteers required)

1) Trace mylar or craft paper templates on bilge openings on each side.

2) Transfer template shapes onto for bottom layer plywood. Cut out and

coat outboard surfaces with rolled layer of unthickened epoxy. Allow to cure

and sand.

3) Make 4″(?) wide butt blocks out of 1/4″ plywood and attach to aft end

of each of the forward sections of the bilge strakes. Use thickened epoxy and

bronze screws to clamp.

4) Attach forward section of each strake to the stem using bronze screws

only and begin working aft making temporary clamp blocks that are attached to

the shear strake and bottom. Use wire stitches as needed to fair.

5) Attach aft end blocks to middle sections of bilge strakes.

6) Hang middle sections of bilge strakes by beginning at the forward end

butts and working aft. Use bronze screws and epoxy at the joints with wire

stitches at the top and bottom to keep joints fair. Work aft using wire

stitches and clamp blocks (no glue).

7) Hang aft sections of bilge strakes using bronze screws on transom.

8) Go back and unscrew planks at stem and transom and reattach with

epoxy and epoxy/cabosil putty.

PART 2 (Volunteer required)

1) Transfer template shapes onto top layer of unjoined plywood and cut

out.

2) Pre-drill an 8″ grid of holes in exterior panels to allow for escape

of air pockets in laminating.

3) Masking tape interior seams closed so epoxy will not run into

interior of hull.

4) Dry fit exterior lamination panels and mark for future positioning.

5) Beginning with the center panel, roll thickened epoxy onto outboard

surface of inside lamination and unthickened expoy onto inboard surface of

exterior lamination.

6) Join the two panels with pan headed screws beginning at the center

and working forward and aft.

7) Apply forward and aft sections of exterior lamination in similar way

using bronze screws along the butted seams. No butt blocks are used on these

seams inside the hull.

8) Before epoxy has cured, apply unthickened epoxy to seams and follow

with epoxy/cabosil putty mixture to fair.

Sorry this took so long. Please let me know if I’ve got it screwed up. I

have nightmares of things getting stuck together crooked.

Thanks for your help.

Skip Pahl

These sound like sensible procedures. My only comment is that I’d probably thicken the epoxy, a little, between the laminations – but that’s just personal prejudice.

Skip also sent this photo of a gorgeous model he’s built of a sheet ply Chebacco:

transom

Skip Pahl’s model of a Chebacco-20

Uncured epoxy

Just about every boatbuilder will at some time in their career experience the horrors of uncured epoxy. This happened to Burton Blaise, who sent this nessage out to a few of us. In short, getting it off is not a lot of fun:

In case anybody is interested in my continuing epoxy saga, I am

pleased to report that, after a gruelling week-end of scraping, grinding

and sanding, I finally got all of the gummy epoxy off my Chebacco hull

and am back at where I was a couple of weeks ago (that is, ready to

complete glassing the hull – weather permitting!). As mentioned in an

earlier message, I found that the straight edge of a piece of broken glass

really works best to scrape the majority of the goo off. Any remaining

residue was removed using a belt sander fitted with a very coarse

sanding paper (30 or 40 grit). Anyone attempting the broken glass trick

should bear in mind the need to be EXTREMELY careful during the

scraping operation – I got carried away and careless, with the result that

my glass scraper broke in mid-stride, causing my hand to slip past the

glass edge and slicing a good way into my right index finger (after

bandaging my finger – which probably really should have gotten stitches

– I wisely resorted to completing the operation wearing thick canvas

gloves). This hull hasn’t even been launched yet, and already its been

baptized with my sweat, my tears (of frustration) and now my blood!

However, the way things are shaping up, I know that she’ll be worth it all

in the end. Yep, she sure is a shapely hull.

Burton

I’m certainly glad to hear it worked out OK eventually!

Chebacco too big for you? – Try a ‘Bobcat’!

Colin Hunt of Australia sent me this photo of a pair of Bolger ‘Bobcats’ (a.k.a. ‘The Instant Catboat’, ‘Tiny Cat’, ‘Little Gaffer’ . . .). Colin points out that the construction of the 12 foot hull is very like that of a sheet-ply Chebacco hull. They are excellent daysailers and family dinghies, too. So – if you’ve not quite decided that you’re ready to take on the construction of a Chebacco-20, why not hone your skills by building a ‘Bobcat’? Plans are available through PCB&F, as well as Dynamite Payson, who has also published the excellent ‘Build the Instant Catboat’, which is an almost indispensible aid to construction.

ch171

A pair of ‘Bobcats’ by Colin Hunt.

Reefing systems for a Chebacco

I was recently caught out in a force 5, under way, single handed, and had the uncomfortable job of trying to put a couple of reefs in while slithering around on the cabin top, avoiding being swept overboard by the flailing boom. It’s no secret that the Chebacco is fairly tippy, initially, (though with superb secondary stability) and so whatever side you approach from, the boat heels in that direction and the swinging boom heads your way! I eventually backed the mizzen a little so that she hove-to on port tack and thus was able to approach the boom from the starboard side, where the cleats for the reefing pendants are attached.

Although I got her well enough reefed to sail the 7 miles back to my mooring, the sail was a tad baggier than I thought ideal, and I felt there must be an easier way to do things. So I phoned Brad Story, who has built and sailed more Chebaccos than anyone else. He suggested that I would have been better to lower the boom into the cockpit, or into a boom crutch to hold it steady while I was working on the reefing. Seems obvious now; I wish I’d thought of it! Secondly, the cleats for the reefing pendants should be positioned so that they can be reached from the cockpit. Good thinking!

Brad writes:

Dear Bill,

I’ve tried to sketch some details of my own rig. The topping lift is on one side only (keeps it simple!). At the mast head is a loop spliced into the topping lift. It’s held up there with an eye-strap or two. From there it just runs to a cheek block on the boom, and then forward to s small cleat. It’s very handy – it’s right in the cockpit. It can never fall down and it’s one less line to deal with when setting up or striking the rig.

The jiffy reefing lines I’ve sketched, also. At the tack, a single line is made fast at the upper grommet. It runs down the luff, through a fairlead (hole, whatever) and aft to a cleat on the bottom of the boom, far enough aft to be reached conveniently. At the clew, a line is made fast to an eye-strap on one side of the boom (below the appropriate grommet and alittle bit aft). This line runs up to the grommet , through it and back down to a fairlead (or small cheekblock) and forward to a cleat. When it’s time to reef, just lower the sail a bit, haul both of these lines until the grommets are where they should be, and cleat them off.Now all you need to do is bundle up the foot of the sail. Again, it’s fast and convenient.

Brad Story

brad

Brad Story’s sketches of reefing arrangements

Jamie Orr’s hull nears completion:

Jamie Orr of Victoria BC, Canada, sent me this picture of his hull. He reports that he’ll be making the sails over the winter, when it’s too cold for epoxy work. He’s using 5.4 ounce cloth and plans to make a jib, as well as main and mizzen.

SORRY – THIS PHOTO HAS BEEN LOST

Jamie Orr’s sheet-ply hull

And finally . . .

That’s all for this issue. Here are some addresses that may be of interest to readers:

Phil Bolger & Friends, PO Box 1209, 29 Ferry Street, Gloucester, MA01930, USA (- Designers of the Chebacco boats and source of plans for all versions)

Harold H Payson, Pleasant Beach Road, South Thomaston, ME 04858, USA ( – Author of ‘Build the Instant Catboat’ and alternative source of some Bolger designs)

Brad Story, Boatbuilder, Box 231, Essex, MA 01929, USA (- Originally commissioned Phil Bolger to design the Chebacco boats, and has built many superb examples of them)

Bill Samson, 88 Grove Road, West Ferry, Dundee, DD5 1LB, Scotland ( – Editor of Chebacco News)