Chebacco News 23

Chebacco News

Number 23, October 1998

ch231

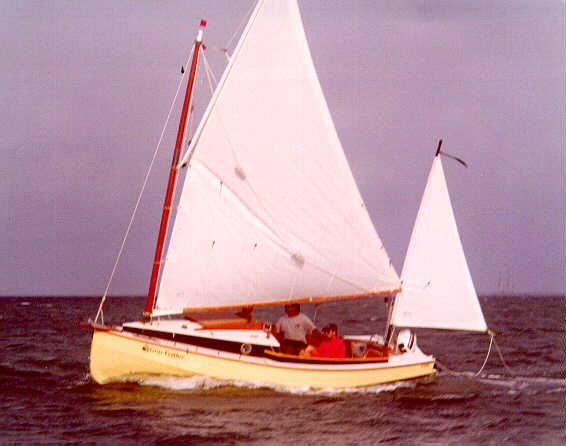
Peter Gray’s GRAY FEATHER with a bone in her teeth

Peter Gray, of Queensland Australia, sent me this wonderful photo of his sheet-ply Chebacco-20 GRAY FEATHER. Peter writes:

I have been sailing GRAY FEATHER a lot and the more I sail her the more I realise what a great design she is – so user friendly.

I entered a wooden boat regatta at Tincan Bay. There were about 25 boats in it. GRAY FEATHER won the prize for ‘Prettiest Boat of the Fleet’ (1 bottle of rum!).

Regarding your previous letter about topping lifts, this diagram shows how I did mine. The topping lift in this case also forms a lazy jack, making sail handling very easy. Floorboards – I completely sealed my cockpit, making it into a cockpit well. I use a small bilge pump to take the water out to the outboard well. This keeps the hull completely dry,

I have put a small headsail on the boat and have found that this helps her to windward very nicely – Not because of more leading edge, but because the headsail creates draft between it and the mainsail.

I am experimenting at the moment with a small bowsprit and putting a lightweight genoa on this, mainly for reaching and running. I’ll let you know how it goes.

Gil and Joan Fitzhugh visit Scotland

Gil Fitzhugh writes:

In eary July, Joan and I savored the opportunity to sail on Bill Samson’s Chebacco in Scotland. Unless Phil Bolger is a big name in Alaska, this is about as far north as his sphere of influence has yet reached. Scotland’s at the latitude of Hudson Bay; if you’re in a little unballasted sailboat in Hudson Bay, you’re not at the top of the food chain. Be reassured, however, that polar bears are not a threat in Scottish waters.

Bill Lives in Dundee, a small city pleasantly situated on the north shore of the Firth of Tay. Translated into North American, that means the estuary of the Tay River. It’s helpful to learn a few words of Scots: ‘firth’ means estuary, ‘strath’ means valley, ‘dun’ means fortress, ‘Islay single malt’ means ambrosia, ‘Damn! I missed the mooring’ means come about and start the engine before we go aground. See how easy it is?

Summer in New Jersey often means hot, sticky, sultry, stagnant air with 2 miles visibility in sunshine. Summer in Scotland seems to be cool, mostly overcast, breezy, with 20 miles visibility sometimes lowering to 4 miles in light rain. Always be prepared for rain. If you’re lucky, you won’t get it. We were lucky both days we sailed. And the sailing is grand. Both days we needed to take in a reef – a tremendous improvement over listening to limp sails slatting in almost no wind. Forget shorts and a T-shirt – you sail in jeans and a sweatshirt. And sunblock, because there’s a lot of UV coming through that cool overcast.

Our longer sail came on a Saturday. Had we been underway by 9:30, we could have beat upriver on a flowing tide to a beach about 7 miles away, had lunch, and then run home on the ebb tide. To these two American slug-a-beds, 9:30 still felt like 4:30 am, not an hour at which we’re prepared to sail (although, in July, 4:30 am local time in Scotland is full daylight). So we got a late start, and had a fun time beating up-river through the first of the two great bridges over the Tay (the road bridge). By the time we got to the second (railroad) bridge, there was no help to be had from the tide. We were still beating and the bridge was playing hob with the wind. So we turned around.

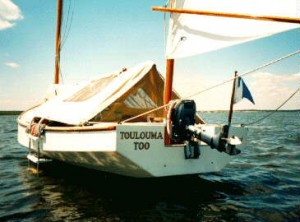
Going upwind, the Chebacco tacked through a precise 90 degrees on Bill’s compass, and made very little leeway with the board down. (Our only prior Chebacco sail had been in Sister Krista’s TOULOUMA TOO, whose board was stuck in the up position – she made considerable leeway.) Bill can tie off reefs in the middle of his boom, so reefing was a relaxed operation. On a dead downwind run, the Chebacco was very easy to steer. It could be a popular boat for hijacking by polar bears in Hudson Bay, since the cockpit will comfortably hold Papa Bear, Mama Bear and a whole passel of cubs.

There were dolphins in the Firth of Tay. This surprised Bill, who hadn’t seen them before. Since we were there, they’ve apparently taken up permanent residence. But remember, guys, we saw ’em first.

If you get to Dundee, ask Bill to take you sailing. You won’t have to ask him twice – his family aren’t sailors, and Bill likes company. You’ll have a blast!

Fraser Howell experiments with Jibs:

Fraser writes:

From:

Fraser <fraser.howell@ns.sympatico.ca>

Hello Bill,

Itchy & Scratchy has been having a busy summer. Everything is holding up well. I’ve been trying out different jibs in an attempt to reduce the weather helm when beating. I have a short bowsprit, so I have the ability to fly something bigger than the optional 30 sf jib shown on the plans.

Yesterday we rigged up a Laser M sail, which has a shorter luff than a regular Laser, and is 65 sf. The winds were < 10 km, so not a real good test. The boat balanced well on an almost neutral helm, and was faster. The laser sail sets nicely and gives good overlap. I can’t say for sure that she points higher. The best sheeting point is about 1 ft forward of the cabin bulkhead, 4″ in from the gunwhale. This is quite a bit busier rig , a handfull for the solo sailer, and draws some attention.

We will continue evaluations, but so far I am convinced that the Chebacco is a more capable sailer with a bigger jib. I’ll update you later.

I hope that this doesn’t spawn any gaff-rigged lasers.

Fraser Howell

I was concerned at Fraser’s report of weather helm, which has never been a problem with SYLVESTER, so I sent this reply:

Dear Fraser,

Readers of Chebacco News will be interested to read about your weather helm and your experiments to cure it.

Funnily enough, I’ve never had serious weather helm – nothing that’d make my tiller-arm ache anyway. I’ve helmed a Wayfarer in a good blow and that’s much worse. The worst I’ve ever encountered was an 90-year-old 50 foot yawl, where I had to take the main sheet end around the tiller to give enough purchase to hold it. It was a plank-on-edge boat which belonged to ‘Titus’ Oates of the Scott expedition and that type is seldom guilty of severe weather helm. It had been re-rigged from gaff to bermudian at one stage, so maybe that was the reason, though I can’t think why.

I find with the Chebacco that if the heel is kept to 12 degrees or less (reefing if necessary) then weather helm is slight. My mainsail has its maximum depth well for’ard – at about 30% of the way back from the luff. I’m sure that must be significant. Modern sails usually carry their max depth at about 40% back.

The trim is also significant. Weather helm is reduced by keeping the weight well back. Mine trims down by the bows a wee bit (I think my mast’s a bit heavy) but I keep the anchor amidships – nothing heavy up in the bows and the crew (if any) sits well aft.

I’m not sure about mast rake. Mine is almost exactly vertical.

The other thing is how tight you sheet the mizzen. My mizzen is cut dead flat and I harden up the snotter to keep it as flat as possible. I find that fine control of weather helm (on some points of sail) is possible by adjusting the mizzen sheets. Close hauled in a force 2-3 it’s possible to lash the helm and let her take care of herself for quite long periods. For example, I’ve done that and gone below to tidy up and she’s maintained her course for 20 minutes or more.

Bill

Fraser elaborated:

Bill,

Thanks for the detailed reply. I’ve been keeping the weight as far forward as possible. My mast weighs exactly 40 lb. and the outboard plus gas is close to 100 lb. I can’t tell without making it come true, but I keep thinking that I’m submerging the bottom of the stern, and slowing things down.

I now never hestitate to reef. I reef before whitecaps. The weather helm is terrible when you are overpowered. I’ve been caught in the “death roll” running before a freshening breeze, quite out of control until I got her around into the wind. Normally the weather helm isn’t too bad, and its easily handled by the tiller comb. Just about the time when I am thinking of putting in a reef, I have often had 8-10 deg of weather helm, and that causes cavitation off the rudder. I am hoping to be able to carry more sail longer with the bigger jib.

I also find the mizzen to be critical to the helm. I haven’t experimented much with the main shape by tinkering with the peak halyard and the outhaul. I also adjust the centerboard, from all the way down beating to almost all the way up running.

Lots of other things to try yet, but so far I am suprised that PB was not more encouraging of a larger jib.

As far as going out to sea, I have to get into open water to go anywhere but Halifax. The most interesting sailing areas are one or two days sail in either direction along the coast. I haven’t yet gone out of sight of land though.

The further one goes out the more big marine life there is. We’ve seen several kinds of whales and porpoises, sun fish, leatherbacks, and swordfish or tuna(not sure which).

Cheers

Fraser

So there we have it. Phil Bolger was the first to notice that a Chebacco could be prone to more weather helm than he would prefer, and suggested to makers that it would do no harm to move the mast forward 3 or 4 inches. If you sail a Chebacco, what’s your experience?

Ed’s hull

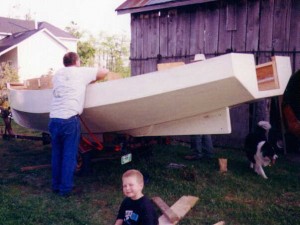
You’ll remember Ed’s amusing account of buying a Chebacco hull from Burton Blaise in Canada, then importing it to the USA [Chebacco News #21]. Here’s a photo of Ed strapping the hull onto his borrowed trailer at the start of the journey:

ch232

Ed makes all secure. Note the boy and the dog – both mentioned in the story!

Ed writes:

I’ve attached a couple pics of the Chebacco hull when we were loading it at Burton Blais’. I’ll hope to get some in process shots soon. Thanks for your earlier reply. I’ve decided to go with the Brad Story cockpit sole. I was thinking of doing a teak grating anyway so the pine boards will probably be a cheaper alternative. Now I’ve started on the cabin. The 1×2 lower supports for the sides are in, and I’m going to start fitting the sides tonight. The drawing is a bit sketchy here though, are the tops of the sides cut straight? or is there a concave cut in them? The drawing shows a concave, but I was assuming the natural bend might do that anyway. What did you discover on yours?

I sent Ed this reply:

RE the cabin sides – They are indeed concave along the top (and convex along the bottom, too, where they follow the sheerline).

My procedure was to cut them oversize, then fit the bottoms first, to the framing you’re putting in. Once you’ve got this line, then you can measure the height of the sides at intervals, from the plan, above this bottom line (allowing for the thickness of the deck) and then cut them to their final shape. I’d cut out the windows at this stage, too – Much easier than when the sides have been fitted.

Ed emailed later:

Just an update and some observations. First, the cabin top is on as well as the decks and in fact we’re just about to be ready to apply some exterior glass and epoxy.

As well, the centerboard is glassed and covered with a second layer of thick epoxy and will be test hung this week. Pictures of both are in the camera at this time so God knows when they’ll get processed.

Some observations,

You mentioned I think about getting a slight dip in the cabin top when you put on the ply. If this is in the fore / aft plane, I got the same even with extensive supports. I think IMHO that it is due to the flex of the ply over the designed cabin top “sheer” for lack of a better term. It appears to me to be unaviodable, but I wonder if making the rise of the cabin top a bit higher would make it better. Anyway it doesn’t look to be

an insurmountable problem.

I’ve cut in the storage under the seats and am preparing to install the shelves/ lockers whatever they are. (holes from the cabin back under the port and starboard benches.)

I’m planning on epoxying the bilge area up about 12 – 14″ from the bench front up the side rather than epoxying all of the interior wood surfaces. I have heard that if water intrusion does occur in plywood epoxy’d both sides that there is no way for it to dry. (similar to the osmosis problem in GRP. But, if the interior is left un epoxied the wood can dry from that side. Anyway that’s my theory.

Not much other news from the frozen north. I figure I’ve got about 5 weeks till the first snow flurries so I’ve got to get her watertight before then.

I replied that most makers epoxy both sides of the ply and that a good layer of epoxy is needed in the bilges, where water is likely to collect, even if you have a cover over the boat.

Jamie Orr makes progress:

From: “Orr, Jamie” <JORR@oag.bc.ca>

Bill

The pictures of the big turning over are going in today’s mail.

We’ve had a great August, the weather’s been perfect for boatbuilding. I wanted to spend the full month at it, but the rest of the family had some ideas for the holiday as well. As a result I only spent about two weeks building, more or less full time. However, for change, I’m fairly happy with the results. I fitted both the cockpit and the cabin dry, and now I’ve pulled them out for final sanding, sealing and inside

painting. Finished up the sanding last night and I’ll be putting in the seat fronts and starting to seal tonight. The motor well and after quarters are in place as well, and all decks are ready.

After reading about how difficult it was to bend your cabin roof, I laminated mine out of two layers of ¼ inch. I spread a sheet of plastic over the cabin area, and laminated the roof in place. The first layer was split down the center, and the second was done by centering the plywood on the roof, with two little pieces added at the sides. I used the same technique as I did laminating the bilge panels – holes on 8

inch centres in the top layer, with screw driven through these to squeeze out air and excess epoxy. I also tacked the edges to the cabin sides through full length ½ inch ply pads, first folding the plastic up over the work. I finished by putting small clamps on the overhanging edges. This was probably totally unnecessary by after all the rest, but the neither the clamps nor I had anything better to do. It worked fine, and now the roof is sitting all ready to drop into place.

I’ve decided against the mast slot for now, although I might put in the framing under the roof for later, if wanted. I am going to put in the hatches in the after quarters, and will borrow ideas from the sea kayakers to secure them. I expect I’ll use nylon webbing across the hatch covers with a rubber seal under – there are some effective looking cams available to snug up the straps if needed. I’ve also bought two of

the Beckson circular access hatches for the rear half of the seats, so I can use that area for storage as well.

How did you install your portlights? I’m thinking of routing out the ply by the thickness of the lexan, and using silicon sealer with an oval “ring” covering the edge. The available bronze ovals were the wrong size, so I think I’ll try cutting my own out of 1/8 sheet brass, (but that’s for another month.)

I’m also working out where to put mooring cleats, fairleads and so on, as the deck will need reinforcement underneath, and it’ll be easier to fit before the deck’s glued down -any suggestions on placing these fittings, now that you’ve had a couple of seasons sailing?

Looking forward to the next newsletter – hope you’re having a good summer and getting in lots of sailing.

P.S. A point for the newsletter about taping the seams. I started out using fibreglass tape, with finished edges. This is very convenient for handling and doesn’t fray, but doesn’t always lie down easily because of those edges. I didn’t buy enough at once for the whole job, and when I ran out I started cutting tape sized pieces out of scrap 6 oz cloth. I found these were much easier to put in place, and needed less sanding to

smooth the edges later. I never did go back for the rest of the tape, and I’ve managed to use up a lot of scrap.

A couple of points of interest. I did SYLVESTER’s portlights simply by cutting oval holes in the sides of the cabin and screwing1/8″ acrylic sheet on the inside, with some clear silicone sealant between. Jamie’s method sounds much nicer! As for cleats and fairleads – Jamie’s right in that they MUST be through-bolted. Woodscrews eventually give out (as Gil and Joan will testify – the air was blue when a mizzen fairlead on SYLVESTER let go in July!). My suggestions are:

  • cleats on the cabin top for hallyards and topping lift
  • turning blocks near the mast foot to take the halyards and topping lift back to their cleats
  • fairleads at the quarters for the mizzen sheets
  • cam cleats for the mizzen sheets, after they’ve passed through the fairleads
  • cleats on the side-decks near the rear of the boat for tying up alongside, and for hooking on a tender’s painter
  • If you have the Jonesport cleat at the stem, as shown in the plans, then that’s your for’ard mooring cleat – otherwise a hefty cleat is needed in the foredeck.
  • Apart from these, I have a block and camcleat on the aft end of the CB case for the mainsheet, and a couple of cleats on the coaming for lashing the tiller amidships when I’m on the mooring.

And finally

That’s all for this issue. Please keep your news, photos, stories, questions etc coming in.

Bill Samson,

88 Grove Road,

Broughty Ferry,

Dundee DD5 1LB,

Scotland

email – wbs@sol.co.uk

Gil Fitzhugh,

44 Primrose Trail,

Mt Kemble Lake,

Morristown,

NJ07960,

USA

Chebacco News 11

Chebacco News

Number 11, September 1996

[This issue of Chebacco News can be seen (in glorious colour) on the World Wide Web at: http://www.tay.ac.uk/mcsweb/staff/wbs/chebac11.html]

Another launching!

Fraser Howell, of Nova Scotia, sent me the following message on 22nd July 1996:

Hello Bill,
I launched a week ago and have been out every day but one. It is the biggest dinghy around. She sails well, dry in all conditions so far, and easy to handle. We’ve had winds up to 25 kt and I’ve had up to 3 guests on board. In anything greater than 15 kt a crew adds welcome weight. I went out today, by myself to try it out with just the mizzen and the jib. It was surprisingly fast, approaching hull speed in 15 kt with no strain anywhere. Under full canvas there is some weather helm in higher winds, but I think the jib may be reducing this a bit. So long as the heel is kept to 15 degrees or so it tracks straight. I haven’t had any success getting her to self steer, so I may add a mechanism to hold the tiller.

I have no problem keeping up with or overtaking cruiser types up to 28 or 30 feet and can tack through slightly less than 90 degrees. The racier types are faster at this stage but I’m just beginning to learn how to handle her. She really moves with the 9.9 hp Johnson. I haven’t measured the speed but it sure is trying to plane under full throttle.

The beginning of a long partnership.

Fraser Howell

[Regular readers will recall that Fraser’s hull is strip planked – the first Chebacco to have been built in this way.]

He updated this on 31st July:

Hi Bill,

Your newsletter has been an important source of information and encouragement. I may not have selected this design without it. I’ve been sailing now for three weeks, and am in every way satisfied with the design. On Friday I leave for the first real ‘voyage’, 45 nm to a place called Mahone Bay where there is a wooden boat festival. Chebacco is easy to handle, fast, stable and handsome.

I think the jib and bowsprit are worthwhile, mostly because they allow neutral helm through sail trim (- I can induce lee helm by easing the mizzen). I find a significant speed improvement at neutral helm. I sheet the mizzen at a point further forward than the plan, and am often adjusting the mizzen sheets.

I like the fact that everything is manageable, Yesterday I was talking to the owner of a 22′ Brewer-designed cat. His mast weighs 300 lb! My solid sprice mast is exactly 40 lb.

Next time I get film developed I’ll send more pictures including the trailer. The boat is very easy to launch and retrieve from this rig.

Cheers,

Fraser Howell.

Fraser sailed the 45 nautical miles to the Wooden Boat Show at Mahone Bay, Nova Scotia. When he got home he send me the following report:

Got back today. Great boat !! Stable. Easy to handle, and quite fast. I slept on board (3 nights). It was a little cramped. We would beach on an Island, explore, cook etc. and then retire to the boat. The bowsprit extends 14″ past the cutwater, following the sheer. It does nothing for the appearance of the boat, but I would not be without it. I don’t hang an anchor off it, I just use it for the jib.

We were cruising at 3 – 4 kt in winds of 10 kt or so, endlessly. On any point of sail, except wing-on-wing-on-wing the boat was tuned to self-steer fairly well (I was able to read). My procedure was to set the main and jib for the wind, and this included the out-haul , then set the mizzen for neutral helm. We wandered 10 or so degrees either side of the compass course. I kept the cb at approx 50 deg to the keel, except for downwind, when I raised it. It all worked. The boat is very sensitive to all of the adjustments, and when “in the groove” suprised some big boats. Mostly it is just satisfying to sail.

I think I could use a bigger jib, 50 sq ft.

Fraser Howell

Bill visits Bill (and ‘Sylvester’)

Bill and Mary Parkes, of Mechanicsburg, PA, were visiting relatives in Scotland during July and spent a couple of days in Dundee, with Bill and Sheila Samson. I (Bill Samson) had been in hospital for abdominal surgery a few days before they arrived, but with the assistance of my sailing buddy Donald McWhannell we were able to put ‘Sylvester’ (my sheet ply Chebacco-20) through her paces. Bill Parkes is planning to build a Chebacco and was keen to find out how it performed. We sailed the 8 miles or so up the Tay Estuary to Balmerino – the site of a mediaeval abbey on the South side of the river.

I fear I took advantage of my fragile state to do a creditable impersonation of Captain Bligh (another Bill) – “Peak up that gaff!”, “Scrub off that weed before we set off!”, “You’re pinching her!” . . . Nevertheless a good day was had by all and Bill Parkes was even more convinced that the Chebacco was the ideal boat for him.

A User-Friendly Arrangement

I had an e-mail from Jamie Orr about possible ways of arranging stowage, how to make the cuddy watertight and other matters of general interest. Jamie’s questions are preceded by ‘>’ signs, as per e-mail convention. The same message went to Fraser Howell.

>Now that you are both sailing, I have some questions about how to make
>Chebacco is as “user friendly” as I can.

>It sounds as if the mast slot is a useful item
.

I can’t imagine getting the mast up single-handed without it.

> Have either of you had any
>problem with leaks around the slot from rain or spray?

Nothing drastic. My main source of leaks is water running down the mast itself
since I haven’t fitted a boot yet. As I keep the boat on a mooring, the slot
cover is held in for the season by 10 screws. I put a little silicone sealant
around it to stop leaks. Clearly, this’d be less convenient if the mast was
taken down after every sail.

> How does the slot
>affect the boot or other seal around the mast/deck join?

It’d make life difficult IF you have a boot. The design of Chebacco means,
however, that water running down the mast collects for’ard of bulkhead #1 and
doesn’t get on your sleeping bag. I sponge that area out every few weeks.
Note that the plan doesn’t show limber holes for bulkhead #1. I’m not sure
whether this is intentional, but it helps to keep water out of the sleeping
area.

> While we’re at
>it, do either of you have a good idea of how to get a quick and easy seal on
>a mast that is put in and taken out every sail? I may be a little paranoid
>about this, but a deck leak caused a major problem in our first sailing
>holiday — being cold and wet is acceptable on deck, but not in your bunk!

See above. I noticed that the Dave Montgomery Chebacco at 29 Ferry St.
Gloucester has duct-tape around everything. It’s not very elegant, but is easy
to put on and rip off every time.

>How do you find the storage? I know it’s a daysailer, but I plan to load up
>the family and camping supplies for weekend voyages — and even for
>daysailing, its nice to keep wet and dry gear apart. Did either of you put
>in the hatches in the after deck? (Your pictures may have shown that, but I
>often can’t get pictures on screen.) I am toying with the idea of putting
>lockers in the cockpit seats — these would probably leak in heavy rain, so
>would drain into the cockpit. I would keep them shallow ( 3 – 4 inches) so
>that they do not interfere with the ventilation shown in the plans. There
>would also be dry storage in the bows if I can get a good mast/deck seal.

I didn’t put hatches in the after deck. I did buy some plastic screw-in
hatches but decided to hold off putting them in until I feel the need for
space. Sister Krista’s Chebacco DOES have hinged rectangular hatches on the
after deck. She keeps things like fenders and life jackets in them. I notice
she doesn’t batten them down when sailing! On the other hand, the volume under
the seats of her boat is completely sealed, so there’s no lack of buoyancy.

The under-seat volume on my Chebacco is accessible from inside the cuddy – I
built EXACTLY according to Phil’s drawings. There’s LOADS of space there – I
keep an anchor and a couple of fenders at one side and a pair of 8-foot oars
and sleeping mat at the other. I’ve also put net ‘hammocks’ under the side decks
in the cuddy and these hold lots of odds and ends. I keep a toolbox and water container
in the cuddy, which can be moved to the cockpit at night. The far end
of the under seat space can be got at with a boathook! I keep my main anchor alongside the
foot of the mast ahead of bulkhead #1. It’s used so seldom that it isn’t a
hassle for me.

>How is the cockpit for lounging around? Do the cockpit coamings make good
>backrests? I thought about sloping them back a few degrees, but that cuts
>down the seat and/or side deck width, as well as complicating building. (I
>won’t comment on the wisdom of departing from the plans — the Bolgerlist is
>covering that quite well at present!)

I find that the cockpit built according to plans is fine, apart from the need
for a cushion on long cruises! I went sailing with Bill Parkes when he visited last
week and I stretched out on one side for a snooze while Bill helmed!
The drawings of the lapstrake version DO show sloping coamings, so it’s
up to you. Sister Krista’s boat has vertical backrests that stop at deck level and
sloping (3/4″) mahogany coamings above that. So you really lean on the coamings,
which stand proud of the seat back.

>Finally (for now) what is your experience with the weight of the motor and
>fuel in the motor well? I asked Phil Bolger about this, and he recommended
>a light motor, and suggested an electric would be powerful enough.
> Presently I am planning on a Honda 5 hp four stroke at about 60 pounds dry,
>plus whatever fuel I can carry in the well, and still sail well. The well
>is also a possibility for the anchor, but the weight is getting up there
>then. Fraser, you have a 10 hp — does the weight affect your performance?

The weight of my 4HP Mariner is negligible in terms of trim. In fact she trims
an inch or two down by the head even when the motor is there. Trim is perfect
once I am aboard and sitting at the tiller. Thinking about it, your engine, fuel and
anchor together weigh less than a crew member.

>I’d like to see discussion of this sort of thing in the Chebacco News.
> While I reserve the right to make my own mistakes, I always like to hear
>how others have dealt with the minor problems that crop up. For example, I
>will eventually want to build a tender, so your experience with these would
>be good to hear — I plan to ask about tenders on the Bolgerlist as well as
>there appears to be a wealth of experience, not to mention opinion, among
>the list members.

I’ve almost finished my June Bug and will report on its performance in a future
Chebacco News. Mind you, the perfect tender is a function of where you are
sailing. I need to row a couple of hundred yards out into an estuary which is
frequently rough and has strong tidal flow so I need something stable which
moves fast under oar. Clearly a Shoebox would not work for me.

>Thanks for “listening” — looking forward to your comments in the News.

>Jamie Orr

Jamie sent the same message to Fraser Howell. Here’s what Fraser had to say:

Hello Jamie; That slot is not worth sealing, at least not for me as I’ll be raising and lowering regularily. I put in a sliding cover that matches the mast diameter. Rain, no spray, yet, comes in, and is held in the forward area by the bulkhead. I sponge it out as required. For storage under the cockpit seats I installed the 8″ Beckwith (sp) circular hatches, at about $20 ea. That is big enough for tent, sleeping bags, extra life jackets etc.

The difference between a 10 and 5 hp engine is not great, 20 lb or so. a full gas tank for the 10 hp is another 50 lb – but to store gas, where else but far aft. I don’t know for sure what affect the bigger engine + gas tank has, but the boat does not seem sensitive to those kinds of weights. It also is not sensitive to the jib, but I’m not sure yet. Outboard power-wise 5 hp will do well. When I go more than half-throttle I dig in – at full throttle I almost plane. (maybe I do plane, a bit,I haven’t measured the speed)

I considered angling the backrest as well. I almost did. I haven’t spent enough time in the boat to be sure one way or another.

The boat is very easy to launch, recover, and trailer. It is lighter than it looks. Despite that, I lost it off the trailer into it’s cradle. It came off the trailer as fast as the winch handle could spin, collapsed the cradle, and hit the ground. It hit rudder first, digging in several inches. I dug it out, propped it up, and found – no damage at all ! Aluminum !

The reason I hauled it out was that after a week in the water the centerboard was sticking. I found that the plywood cheeks had completely delamiated from the core. Aluminum !

I’ve glued it all back with sikaflex and through-bolted it. Ready to relaunch by Saturday. For a tender, while at the moor I use a Bolger cartopper.

Fraser Howell

News of another Sheet Ply Chebacco

Jim Stewart of Cambridge, Massachusetts, sent me an update on the sheet ply Chebacco he is building:

Hi Bill,

This is a test of getting info to you, through email. It is more for education of me, than testing new and exciting technologies.

Progress on my sheet-ply Chebacco has progressed a small amount more than shown in the pictures. I have finished construction of my support structure. Vacation time is taking me away from home, and Boat-Construction. My wife, Cathy, and our 2 children, Jimmy and Megan all went together on a sailing lesson, while we were vacationing on Martha’s Vineyard. A truly excellent place, for all things boat-related, and one-heck-of-a nice place in general. Well we all enjoyed the sailing, Cathy had the instruction, I watched the kids, the kids enjoyed the whole thing. I’m getting materials ready to start on the stem, and I’m thinking ahead to scarfing together my first large piece, the topsides.

I’ve really enjoyed all your work on the Chebacco News. I love all the pictures, they convey a great deal of information, and hopefully My boat looks half as good as Sylvester.

I hope you can decipher the images! I’m going to look at those cabin roof curves again…!!!

Jim Stewart

js1
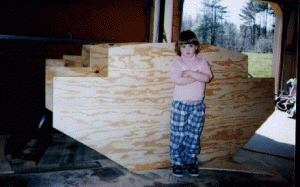
Bulkheads and Moulds for Jim Stewart’s Chebacco.

Lapstrake Chebacco – Spiling in the bulkheads

Gil Fitzhugh has started spiling in his bulkeads. Here’s what he says:

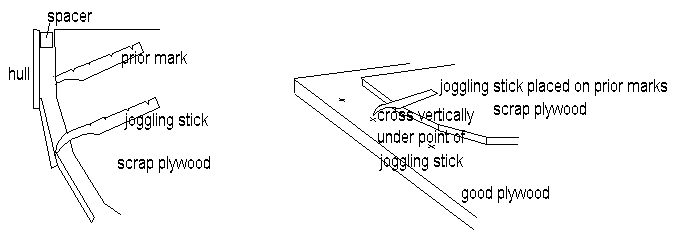
Spiling is a lot easier, though no less time-consuming, than I thought it would be. My joggling stick is about as low-tech as you can get. I cut it from a paint stirrer, and it looks like this:
ch11diag

The hook on the end helps it get into the angles between the lapped strakes. I did the forward bulkhead first. I had some scrap ply I clamped into place, used the joggling stick, transferred the points onto the good plywood (or onto mylar film first, then onto the plywood) with an ice pick (another favourite low-tech tool).

Gil tells me that the notches in the joggling stick help to locate it accurately against the marks when transferring the shape onto the good plywood. If, like Gil, you use the building molds as the ‘scrap plywood’ at this stage, they may well be full of holes and other obstructions, so you may only be able to get a partial mark with the joggling stick or may have to use the stick upside down and the notches are particularly useful for identifying the correct orientation for the stick. Gil goes on:

Put a pencil dot on the good plywood at the point of the joggling stick every time you’ve aligned the stick with marks on the board. Then connect the dots . . . you should end up with a pretty reasonable representation of the inside of the boat. Even so, the fit isn’t perefect. I find I have to trim off pieces of the bulkhead with a sharp chisel. Sometimes I end up with too much clearance, but not by a huge amount. I’ll probably just trowel in a wad of thickened epoxy, and declare victory!

Chebacco News 09

Chebacco News


Number 9, May 1996

[This issue of Chebacco News can be seen (in glorious colour) on the World Wide Web at: http://www.tay.ac.uk/mcsweb/staff/wbs/chebacc9.html]

More from One Who Waits

In the last issue Marc Lindgren told us about the hatch he built into the cabin roof of his Chebacco-20, One Who Waits. He has sent me a bunch of photos of the boat which will be of particular interest to builders of lapstrake Chebaccos.
. ch91
Marc spiles the shape of the main bulkhead

ch92
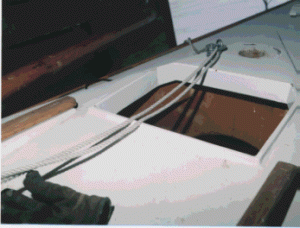
The cabin top showing the hatch

ch94
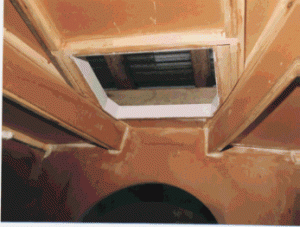
View of hatch from inside the cabin

ch95
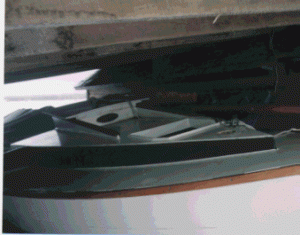
Another view of the cabin top

The hatch certainly makes an attractive feature on Marc’s Chebacco. Builders will, of course, need to make up their own minds whether a hatch is more important than the mast slot of the drawings, since you can’t have them both!

Weather helm . . .

Phil Bolger sent me the following letter:

A couple of owners have found their Chebaccos so balanced that the mizzen needs to be shaken to avoid too much weather helm. Not all have this; it may be a quirk of sail draft. But there would be no harm in opening the mainmast partner as far forward as the taper of the trunk allows, so that the rake of the mast can be reduced if it proves to be desirable. . . .

[I wonder whether sail makers realise that the Chebacco Mizzen is more of a steadying sail than a driving sail, and as such it needs to be cut dead flat – a straight luff and no broadseaming. Clearly a full mizzen would provide a lot of drive that would exaggerate weather helm. Another possibility that strikes me is that, if your mast partner is in place and you are loath to start sawing, the mast step is quite easily adjusted to bring the rake of the mast forward, though with slightly less effect than an equivalent adjustment to the partner. – B.S.]

‘Jib-booms and bobstays!’

. . . well, not exactly, but Phil explains:

We have an inquiry about a bow-sprit. If intended to be used close-hauled, it should be very short and very stiff, or else have a bobstay. We tend to think it not worth the complication. A flat-cut reaching spinnaker, single-luff type, guyed out on a pole, would add more performance but the question of added clutter remains. Rather than make a drawing for this, we’d suggest trying it out with a borrowed genoa jib of appropriate luff length, on a makehift pole to suit. Exact size and shape aren’t critical. P.C.B.

[If you are unclear about how a reaching spinnaker should be rigged, Phil’s AS29 design has this feature and you can look at the drawings in Phil’s book ‘Boats with an Open Mind’ for further details. – B.S.]

News from British Columbia

Jamie Orr writes:

Bill,
Just a quick note to let you know what’s happening (or not happening) in lotus land.
[‘In’ joke – B.S.]

I had a quick visit from Fraser Howell at the end of February. He had his photographs along, although they weren’t quite up to date – he has finished veneering, but the photos didn’t show that. I was impressed by his adaptation of building method to suit his materials on hand.

I guess it’s true about white oak beiong hard to glue. Just this weekend I noticed that the joints in my stem are letting go. The stem is made up of eight pieces of 1/4″ thick white oak. These were soaked, pre-bent together over a form, taken apart to dry, then glued over the same form using epoxy thickened with microballoons. The work was done before the low temperature arrived so I am guessing the failure is due to the white oak. I knew its reputation, but hoped that epoxy would handle it. Another possible factor was the pressure needed to hold the wood to the form, it may have squeezed too much glue out the edges. Chalk one up to experience.

Luckily, I had put in screws every six inches or so, alternating from front and back, after the glue dried. These should help to hold the shape in for now, but I think I will replace them with bolts, with as much epoxy as I can work into the cracks, before I leave it.

I’m still working on the centreboard and case, not pushing too hard as I’d like some warmer weather before epoxying the pieces of the hull together. We’re still getting frost some mornings, which makes it cold for around here.

I’m looking forward to the next edition of Chebacco News. I hope that I’ll have something to contribute by Summer. How do I print the photographs? Do you work right off ordinary prints? I’ll try to get some decent shots of my work-in-progress, although the shelter restricts what can be done.

Jamie

Good point about photos. Yes, ordinary prints are what I work from. I just scan them in and ‘paste’ them into the document. Some of you have commented that photographic quality in Chebacco News isn’t quite up to the standard of National Geographic; but then neither is my equipment!

Also- good point about white oak. I experienced this on my last boat and would never use it in a glued situation again.

Still in British Columbia, Randy Wheating in Port Moody has news of his sheet ply Chebacco:

My boat is progressing slowly and surely. I amattempting to pre-build as much as possible before getting into the assembly stage as she will be going together in our two car garage – diagonally, as the garage is 19 ft in length. The bulkheads, molds, stem, transom, centerboard and trunk are basicall completed to date.

The Chebacco News and letters from other builders have been an invaluable resourse for me. Here are my latest questions and comments:

1. Samuel Devlin’s “Devlin’s Boatbuilding – how to build any boat the stitch and glue way” is an excellent reference manual for anyone undertaking the building of a Chebacco. It is comprehensive without being wordy and is available through The Wooden Boat Store.

2. I was a little apprehensive about dealing with the molten lead for the centerboard ballast. A few issues ago there was a letter to the editor of the Wood Boat magazine which I thought dealt with this nicely. It was suggested that the 6 inch square hole be filled with a thick mixture of lead bird shot and epoxy. No melting or pouring lead and bird shot is readily available. I plan to try this out and will let you know how it goes.

3. One of Samuel Devlin’s suggestions, which I have incorporated, is to line the centerboard trunk with countertop laminate. This creates a smooth, tough, waterproof surface that allows the board to slide freely.

4. Phil’s plans show a support surrounding the pivot hole of the centerboard. Is this necessary? If so, what is used? Could a recessed epoxy/cloth patch be used? Is a similar support required on the trunk? I plan to epoxy a short piece of 1/2 inch PVC pipe into the board and trunk to act as a bushing for the 1/2 inch SS rod (from a 6 inch bolt) pivot. Does this sound workable?

5. Would it be sensible to substitute hte lower cost polyester resin in areas such as sealing the underside of panels and the inside of the hull while using the stronger and more costly epoxy for areas where great strength and durability is required such as joints, laminates, the outer hull etc.? This could reduce the costs considerably but would the quality be compromised? In my research I have found builders who use only polyester resin (i.e. Harold Payson) and others who use only epoxy.

6.After drawing out the outlines for the main bulkhead onto the plywood and finally getting a feel for the true size of the cabin I decide to expand the cabin sides outwards about four inches to align with the cockpit seat backs “catboat style”. There is some loss of deck but the additional room would be worth it. As the master of a completed Chebacco, what do you think of this plan?

7. On the topic of space below, I have been thinking cbout installing a hinged mast step on the cabin top over a beefed up bulkhead. This would require the tabernacle, two back stays (fixed) and a forestay (detachable). The advantages would be no mast boot required, access to more usable space in the forward cabin area, shorter mast to build and handle and easier mast stepping. The disadvantages are the stays (but I plan to run the optional jib anyway) building the hinge itself (I have never seen any articles or books on this). I have seen this rig on boats of similar size and would greatly appreciate any input on this matter.

I’ll try to address some of Randy’s questions here, but I must admit to being flummoxed by some of them and would be interested to hear your views:

1. I haven’t read Sam Devlin’s book yet, but I do know he produces some superb craft by the methods he describes.

2. I guess the bird shot/epoxy mixture will be a little less dense than lead. A mathematician into sphere packing theory could maybe give you an exact figure. Anyway, what I’m suggesting is that the six inch square hole may need to be slightly enlarged to give the same weight.

3. I believe that Brad Story once lined his trunks in the same way. I’m not sure if he still does. Brad?. . .

4. What I’ve done is to apply an epoxy/glass patch. It remains to be seen whether this is adequate. One consolation is that if not, the centerboard is the easiest part of the boat to replace! I like the idea of the PVC bushing, though.

5. No, no, a thousand times no! My reasoning is that epoxy forms a much more effective moisture barrier than polyester resin. To get the full benefit of this (and it’s a benefit well worth having) each part should be totally encased in epoxy – inside and out. (That’s the epoxy people’s propaganda, anyway.)

6. If you sit inside a Chebacco’s cabin, you’ll find the most comfortable position (at least for a 5’7″ guy like me) is to sit athwartships with your back leaning on the inside of the hull and head under the side deck. So, unless you do away with the side decks altogether, I guess you’ll get little benefit in terms of space gained. You might want to look at Phil’s drawings of the Chebacco-25 in ‘Boats with an Open Mind’ to see how a Chebacco might be built with no side decks.

7. I’m stumped here. I seem to remember that Peter Gray was planning to have mast shrouds on ‘Gray Feather’. Peter? . . .

You tell ’em Peter!

Colin Hunt, of Victoria Australia, kindly sent me a copy of the “Australian Amateur Boatbuilder” magazine (a great mag; I wish we had the like in the UK) which has an article about the Chebacco in it. The reviewer reports that “there are none on the water here, yet.” Readers of Chebacco News know, of course, that Gray Feather was launched in Queensland Australia last year. I’ll stick my neck out, again, and affirm that this is the first Chebacco to be launched South of the Equator. Perhaps Peter Gray should have a quiet word?

Colin is planning to build a lapstrake Chebacco-20, modifying the design to make the cabin 2 feet longer and the cockpit that much shorter. He also asks about ballast. Since he’s a new reader he won’t have seen earlier discussions on ballast. The long and short of it is – some do, some don’t. ‘Toulouma Too’ carries 300 pounds of lead ballast under the floorboards at the aft end of the cabin. Most people don’t bother, since the Chebacco has such a lot of form-stability. So far, (touch wood) none of us has heard of a Chebacco giving anyone a fright.

Financial aspects of building to order and other thoughts . . .

John Gearing of Clifton Park NY (just north of Albany) has sent me a couple of thought provoking Emails:
I stumbled onto [Chebacco News] last night during my first session of cruising the internet. I had heard of your newsletter in WoodenBoat, but I had never got around to writing you. In fact, I have been a Chebacco fan since I first read about the design in Small Boat Journal. I always thought it was sad, or perhaps a commentary on our times and economy, that Brad Story was never able to build the boat commercially for a price the market would support. The major lesson of the WB story about the three versions of the Chebacco, in my opinion, was that it takes about the same amount of time to build the boat, no matter which method one chooses. One can’t help wondering whether jigs and other production aids could cut the labor costs, but then you get into the old “chicken and egg problem” of financing the creation of an assembly line without firm orders in hand. But how do you get orders if you don’t have a production method that keeps the cost reasonable? As I recall, Brad Story had plenty of requests for information about the boat (the market was there) but very few orders (price too high). Once upon a time I suggested to Jon Wilson that a builder could build a run of boats by subscription, using the down payments made by buyers as leverage to get funding for setting up production. At the time I wasn’t sure which boat design might attract enough interest to make such a plan feasible, but now Chebacco comes to mind. I’m going to give this some more thought and will let you know if anything concrete develops. They are such great little boats . . .

and . . .

A few years ago the US boating magazines (I think it was SAIL) had an article on “trailer sailers”. Of course they were of designs not to my liking but I was impressed with a couple of things:


  • they came complete with trailer;
  • and the average cost of the lot was about $11,000.


This was at the time a new Chebacco would have run about $18,000 sans trailer. I keep reading in SAIL and its ilk how there are booming sales in these 20 – 23 foot trailerable boats because they are so convenient, and because one can avoid slip fees. It seems to me that this kind of boat could really open up the sailing world to a lot of folks who don’t live on a body of water but do live within a few hours drive of one. I’ve watched people look at wooden boats and their eyes light up at how beautiful the boats are. It used to be that there was a widely held opinion, no doubt assisted by those who build in fibreglass, that wooden boats were maintenance nightmares while fibreglass boats were maintenance free. We all know by now that no boat is maintenance free and that a properly designed and constructed wooden hull is quite competitive with ‘glass from a maintenance standpoint. In sum, there seems to be good reason to believe that there is a healthy market in the US for a Chebacco-type vessel.

Upon re-reading the above paragraph I realise that I may sound a bit preachy and that I am perhaps guilty of “preaching to the choir”. I don’t mean to go on and on over this, merely to add my small voice to that of the choir . . .

Well – John has given us some challenging thoughts there! I’d be glad to print your responses to his ideas.

Further news and thoughts:

When I started on this issue I wondered if there’d be enough material in the winter season when we Northern Hemisphere dwellers don’t do much building, but we’ve managed to fill this little newsletter with some novel, thought-provoking stuff. I guess Chebacco fans are at the intellectual end of the boating spectrum!

Meanwhile, our little community grows apace – over 40 of us now plus the many who read Chebacco News on the internet.

Keep your news, photos, thoughts, dreams . . ., no matter how outrageous, coming to me:

Bill Samson,
88 Grove Road,
West Ferry,
Dundee,
DD5 1LB,
Scotland
Phone: (+44) (0)1382 776744 Email: mctwbs@river.tay.ac.uk 1

Chebacco News 07

Chebacco News

Number 7, January 1996

We have something of a breakthrough in this newsletter, in that it is mostly concerned with sailing a Chebacco. Sister Krista Mote has been sailing her Chebacco in company with her friend Sister Donna Marie in the coastal waters of New Jersey, for the past four years. Here is her story . . .

‘TOULOUMA TOO’ (1)

I recently had the pleasure of meeting Bill Samson while he was staying with Gil and Joan Fitzhugh. The following notes are an attempt to comply with his request to write about TOULOUMA TOO.
Before I set forth the joys of sailing a Chebacco, I’d like to briefly explain how we became acquainted. My brother’s children learned to sail on a beautiful Beetle Cat – TOULOUMA. Aunt Mary (that’s me) was their frequent companion, but they were eventually lured away by more exciting companions. Just around that time, Sister Donna Marie from California, came to live at our convent. After taking her sailing once, T knew I had found a kindred spirit. We had many joyful experiences camping in the Beetle Cat. I eventually complained that we needed more space and comforts to accommodate our increasing age and desire to cruise longer distances. Harry, my brother, said, “Look around.” What a great idea.
Growing up looking at wooden boats and later, camping in the Beetle Cat, develops an acquired preference for the way boats look; an attitude which may be considered snobbish by some. Needless to say looking for a boat to replace the Beetle Cat was a frustrating experience until Harry showed me a picture and article about the Chebacco. It was love at first sight, and the rest is history.
Now I’ll tell you about my Chebacco and what you might expect with yours. I guarantee you that you and your boat will develop a lasting friendship. The personification established by referring to boats as “she” will become more real as you discover and appreciate this boat’s unique personality. You may even find yourself “talking” to her. Example: I occasionally entertain a fanciful thought (only when a weeks cruise is inconveniently interrupted by an all-day rain or two) of a bigger boat with a cabin, standing room and accompanying amenities. The dream is quickly dismissed when morning dawns buoyantly sunny again, the huge white sail is raised and we’re off on another glorious adventure. I apologize to my dear boat and assure her that she is too beautiful, too agreeable, and too much fun to ever part with’.
“How do I love thee? Let me count the ways”-

SHE’S BEAUTIFUL: The fun of sailing a Chebacco is enhanced by echoes of ooh’s and aah’s as she catches the eyes and interest of on-lookers. We’ve been docked in line with a variety of impressive yachts. Boaters will pass by these lavish modern vessels and stop in their tracks to admire and ponder our Chebacco. We often remain in the background and enjoy watching people walking around her, examining every inch. Now and then other sailors will actually pursue us to offer their praises and inquire about her origin. She’s a conversation piece, and it adds to the camaraderie on the water.
SHE’S FAST: I do not consider myself a competitive sailor. My sailing skill does not measure up to the standards required for racing. However, I will confess that I frequently find myself secretly competing with other boats of the same size or slightly larger. I can usually catch up with, stealthily overtake or keep ahead… at which times TOULOUMA TOO is the “Cat that swallowed the canary,” and I, the proverbial grinning Cheshire. Going to windward this is not always so. Then I think about adding a jib. She’ll get you to your destination (when you have one) sooner than you may wish. After all, the fun of sailing is getting there.
SHE’S EASY TO SAIL: The joy of sailing a Chebacco is found in her easy handling. A child could sail this boat. She’s so easy, she’ll make a beginner look like an “old salt” in other words, a professional. She’s responsive even in a light wind and can be sailed efficiently with a double reef in winds ranging from 20-25 knots. If the center board gets jammed “up” you can use the mizzen to assist in coming about if need to. In Dan Segal’s article, “Chebacco 20: Evolution of a Civilized Daysailer” (see Wooden Boat: July 1991) – claimed – “With some tweaking, she will steer herself.” It is true. I have had fun experimenting with this and have perched myself upon the fore deck and watched her sail. Suspecting this could be dangerous, I’m intensely alert and only practice this manoeuvre far away from other boats.
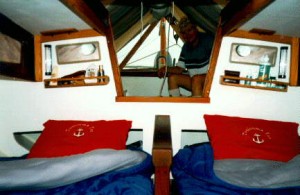
SHE’ S COMFORTABLE: Even though the cuddy is small, it’s very accommodating for a couple of sleeping bags. You’ll be as content as two peas in a pod. We previously used air mattresses and are now replacing them with custom fitted 4″ foam sleeping cushions. The latter will take less space in the cuddy and eliminate our exertion in blowing up each night as air is-lost. Some time after the sun sets, we rig our cockpit tent and presto, instant additional shelter
seven1
Toulouma Too – showing boom-tent.
We sit on the floor, allowing plenty of head room as we rest our backs against a cushion .
seven2

seven3
We play cards, listen to a book tape, have a snack, and eventually say our prayers of gratitude. Sometimes we just talk as we’re rather silent during the day, not wanting to disturb the serenity of each tranquil moment. When we awake in the morning, everything that is stowed in the cockpit from the cuddy is nice and dry being protected from the cool night’s dew by our tent. When you have discovered that perfect anchorage” for the night, you’ll bless the mizzen for keeping you up into the wind, especially while rendezvousing with friends while moving in a curving motion is undesirable.
SHE HAS A SHALLOW DRAFT: Due to the shallow draft, we have the advantage of being able to explore alluring shorelines, shoal creeks, and coves. We can even beach her for a picnic if we choose. This wonderful feature provides us with the opportunity to witness nature “up close and personal.” For instance, one night during our last cruise, we chose an anchorage in two feet of water, about ten feet from the lovely picturesque shoreline of Island Beach State Park. As we lazily watched the sun set, we were suddenly joined by a beautiful red fox. He boldly trotted along the water’s edge pausing intermittently and indifferently looked us over. I guess we were more impressed with him than he was with us. This is the sort of delightful experience sailors with deep keels are denied. The next morning, we stepped off our boat and ventured along the same charming shore, observing nature’s opulence. Stepping off in four or five feet of water would not be nearly as convenient. In addition to the convenience of a shallow draft, is the fact of a relatively short mast. Due to the gaff rig, the mast is short compared to other boats of similar length (about 20′ minus the gaff spar). You will be very happy to discover that you can motor or sail under many bridges that others cannot.
SHE HAS STORAGE: There’s sufficient storage to certainly satisfy most sailors needs. On the other hand, storage may become just adequate depending on individual needs and the duration of the cruise. You may be forced to set priorities. Sister Donna Marie and I are gradually improving. However, we find that when we sacrifice one object, it quickly gets replaced with something else. For instance, we eliminated one or our two ice coolers and replaced it by an Origo alcohol stove which proved to be a great decision! We have learned to simplify our menu and get along with less clothing. Fortunately for we who sail in the back bays of New Jersey, there are many marinas equipped with showers. Yacht clubs are especially hospitable in sharing facilities.

Here’s where we stow it:
1. 1 can’t imagine stowing an anchor anywhere on this boat except on a bow sprit. I am forever grateful to Harry for identifying the need to do so, before she was built.
2. What do you do with wet wash cloths? Harry made me a beautiful little wood towel rack, fastened forward in the cuddy.
3. Wet bathing suits are stowed in the motorwell, so are gas and water.
4. PFD’s fowl weather gear, plus a variety of nautical non-necessities are readily available from the spacious lazerettes. [- there are hatches opening onto the chambers either side of the motor well (Ed.)]
5. Toiletries in an adapted spice shelf
seven4
6. Sleeping bags are stowed in the bow.
7. Pillows and sleeping gear in the hammocks. [- slung under the side decks in the cuddy. These are little hammocks – not for sleeping in! – BS]
8. Food and drink under the bridge, inside cuddy. [Toulouma Too has a bridge deck, providing storage at the aft end of the cuddy. Builders who have not included a bridge deck but have followed Phil’s plans to the letter will find adequate storage under the side benches, accessible from the cuddy – BS]
9. Docking lines, plus all kinds of little gadgets, weather radio, sun tan lotion, bug spray etc. are tucked away under the motor well in the cockpit. Oh yes, the first aid kit is under there too.
In conclusion, as a credit to the above praise, I need to point out the following: As a result of our (Harry and I) trial sail with Mickey (owner of a Chebacco in Massachusetts – 1990), Harry identified several alterations to be made before Brad Story built my particular boat. Brad was sent a list of requests pertaining to planking, framing, aft end of cockpit, centerboard, mast partner, stem, anchor sprit, rig, mainsail and mizzen. These mutations have made this “Cat” exceptional. All this added to the fact that it was built to purrfection by Brad Story. I might boast of having the most desirable “Cat” of the litter.
Observation: The “yachty” Chebacco pictured in news letter *3 April 1995 is TOULOUMA TOO. Actually, I think she is referred to as The Story 20.
For anyone who is curious about the origin of the name, TOULOUMA. My dear Uncle Gus suggested the name for the Beetle Cat after reading Alone in the Caribbean, by Frederick Fenger. The word TOULOUMA is from the Carib Indian language which means “pretty girl”. The Carib Indians are the people who live on the windward side of the Leeward Islands. Harry thought it was very appropriate for such a pretty boat.
PS Harry has a great respect for Phil Bolger’s work and owns a Shearwater. We had the pleasure of talking with Phil over tea after our sail in 1990. It was a charming and memorable experience.
seven5
Phil Bolger with Sister Krista on board ‘Resolution’.

‘TOULOUMA TOO’ (2)

Joan and Gil Fitzhugh went sailing with Sister Krista and Sister Donna Marie in mid-October. Here’s what they have to say:
Joan and I had a delightful sail with Sister Krista and Sister Donna Marie last Sunday. I’ll pass on my impressions, but remember that they’re from the standpoint of a very inexperienced sailor. . .
Sunday was overcast, cold and blustery. Wind was 10-12 kts near shore, 15-20 out in the bay, with higher gusts. Waves weren’t very high, maybe a foot, but the water was heavily wind-streaked and about a third of the waves had small whitecaps. As you know, Sister Krista’s boat was modified by adding 300+ lbs of inside ballast, and by raising the mast a few inches. As you probably didn’t know, her centerboard was jammed in the up position. She doesn’t know the source of the problem, but expects to have it corrected at the end of the month when the boat is hauled out of the water.
We motored out into the bay and raised the mizzen. The boat pointed itself into the wind and behaved docilely, while Sister Krista raised the mainsail, into which she had already tied a single reef. We whizzed off on a beam reach, with Sister Krista concerned that a second reef might be in order. After a while I took the tiller. The boat held course fine in a steady wind, with just a bit of weather helm, but I found the gusts a bit off-putting. (I hadn’t sailed anything in a year and a half, and had never sailed a yawl, so recognise that all my comments are filtered through my inexperience.) A puff would make her round up sharply into the wind. Considerable pull on the tiller would point her back on course, but with a lot more heel. Sister Krista decided a second reef was a wonderful idea! She sheeted in the mizzen and Sister Donna dropped the anchor (Barnegat Bay is shallow enough to anchor in most places). Tying in the reef was a non-event, since the boat is a pretty steady platform. With the anchor raised the boat was transformed. Very pleasant and non-scary, even in gusts.
I wanted to see how it would behave close-hauled. Answer: fine, though with the board stuck up we seemed from the angle of the wake to be making about 15 degrees of leeway. Even so, true upwind progress was possible, though slow. With the board unjammed I’m sure it would have been great. Coming about was easy if the mizzen was used for some steering help.
An easy intentional gybe soon had us surfing downwind at a rollicking clip. Then Joan sailed it and she, too, enjoyed it.
Since home was directly upwind, and since Sister Krista had plans for the afternoon, it was time to head back. After three or four long beats, it was apparent that a) home was getting noticeably larger, and b) it was nonetheless not doing so fast enough. Sister Krista got the sails down , again with no apparent heroics, and we motored in. The 4-horse was more than adequate to punch through the wind. The access to the dock was directly crosswind, and the drift was considerable, but the engine and Sister K’s tillerwork were able to get us in. By the way, Phil Bolger says that you can steer with the tiller and the motor will pivot appropriately, but I noticed that Sister K climbed to the stern and steered directly with the motor whenever we were under power.
All in all, Joan and I came away from this sail much relieved – a lot of our money and my time has been going into this boat with nothing but a belief that everything would be copacetic [I like that word; ‘US colloq.’ it says in my dictionary – BS]. Until recently we’d never even seen a Chebacco, let alone had a sail in one. We’re now persuaded that we’ve chosen a suitable design. We’ll gain experience slowly – I doubt our first few sails will be in as much wind as we had with Sister K – and, since our boat will live on a trailer, we don’t have to wait ’til end-of-season haulout to unjam the centerboard.
‘NENCIA’ News, too from Alessandro Barozzi, of Italy. In Chebacco News #6 there was a photo of NENCIA, his Chebacco without a cabin and with self-draining cockpit. I asked Alessandro how this worked and he wrote to me. [Inaccuracies are my responsibility, due to the shakiness of my Italian.]
Casavecchia has incorporated a self draining cockpit simply by leaving out the footwell and making a single bridge from the third station to the stern, resulting in what he calls ‘a party boat’; in fact I believe that half a dozen Japanese Sumo wrestlers could dance a minuet on it!
He also comments on the relative merits of lapstrake vs sheet ply he says –
I agree with you about the elegance of her lines, but I am convinced, having spent a summer with NENCIA, that in all probability the more practical version is the one you have made [sheet ply]. The clinker hull is too inclined to splinter at the least bump and I suspect that it is also considerably heavier.
I’m not sure I agree about the heaviness, since the sheet ply version is sheathed in glass and epoxy. He goes on to say that he is tempted to raise the freeboard of NENCIA and improve the accommodations and is thinking of how this might be achieved without sacrificing the aesthetic properties of his boat.

News from builders

Fraser Howell of Nova Scotia has e-mailed me to say that his hull is now painted with dark blue two-part gloss paint.
Bill Meier of Connecticut has started building his lapstrake Chebacco-20, upright. It will be interesting to hear how well this works out when compared with Gil Fitzhugh’s inverted technique. Bill writes –
As the leaves begin to fall I’m finally beginning to see some progress on the boat. I spent the better part of the summer on assorted parts but didn’t start putting anything together until September. As things stand now, the backbone and bottom assembly are set up, the molds are positioned and I have the plank lands marked. Since I’m building upright, marking off and fitting the first plank forced me to spend the last two weekends lying in sawdust and shavings on the concrete garage floor. This coming weekend I’ll do a final dry fitting and then permanently fasten down my first plank.
When I joined the bottom pieces I tried the technique of scarphing plywood by hollowing out a six inch groove along the joint and filling it with fiberglass matting and epoxy. My poor disk sander complained, the dust was everywhere and it took me three batches of thickened epoxy before I got a fair surface. I decided that it was more pleasant (as well as cheaper and faster) to cut the scarphs with a sharp hand plane so that’s my current strategy. Four down and twenty to go!
The only significant change to the construction drawings I’ve mad to this point is to build a solid keel. I was concerned about the durability and longevity of a hollow keel, so I agonized more than a few nights about alternative constructions. I wasn’t thrilled about working (or paying for) large pieces of white oak so I finally settled on the technique of building the keel from lifts sawn from construction grade 2×6 Douglas fir, which also eliminated the need for separate cheek pieces. The lifts were cut with a skil saw, fastened with 3M 5200 adhesive and 20d bronze ring nails, planed to final shape and soaked in Cuprinol wood preservative. I nailed from the bottom up so that I could plane the curved top surface. A hickory shoe was added to the bottom of the keel for those unexpected rocks lurking just under the surface. Three-eighths inch bronze rod will be used to fasten the keel to the hull at strategic points. I’m not completely happy with my choice of Douglas fir, but the boat will be kept on a trailer most of the time and I’m hoping the Cuprinol will keep it healthy for more than a few years.
Keep up the good work. I’ve been thoroughly enjoying the newsletter.
Regards,
Bill Meier

Gill Fitzhugh tells me that since he flipped his hull he is battling against rainwater getting under the tarp. He also writes –
I’ve been cleaning up the inside, especially forward of station 5 where the inside is visible. There’s a fairly simple way to clean up the joints between strakes, although old spilled epoxy is hard on cutting tools. It involves a rabbet plane . . .
He goes on to explain how the plane can clean up the epoxy runs at the plank lands. Gil also commends the plank bevelling technique shown in the November/December issue of WoodenBoat: –
Gee, I wish I’d known about that, or thought of it myself! Instead of temporary molds, I could have built in the permanent ones. With molds in place the rollover could have been done with three or four people. The result would have been more accurate and cheaper. And round battens with no twist? Brilliant! I’m impressed all over again by the potential for the human race when someone can create a quantum leap in simplicity and accuracy for what’s essentially a backyard process that’s been going on for centuries.

Gil also pointed out a transcription error (mea culpa) in his table of offsets –
The height of plank line EF at station 8 is 2.1.3, not 3.1.3. The other numbers are the ones I sent you.
I’ve now corrected my master copy, so if you’d like a fresh copy with the correction, please get in touch.

Roots . . .

Lofting takes Gil back to his days as an actuary –
I kind of enjoy lofting. It’s a bit like graduating a mortality table from raw data, but the result is so much prettier.
Hmmm . . . This takes me back to the origins of my own interest in woodworking; my father was an undertaker. . .

Keep in touch

I’ve had particular fun putting together this issue of Chebacco News and would like to express my thanks to all our contributors. Please send me your stories, views, opinions, challenges, insults, . . .

Bill Samson,
88 Grove Road,
West Ferry,
Dundee DD1 1HG,
Scotland.

e-mail – mctwbs@river.tay.ac.uk

Chebacco News 05

Chebacco News


Number 5, September 1995

It’s time, once more, to report on Chebacco-related news around the world. The weather here, in the UK, has been superb – four weeks of continuous sunshine and counting! No excuses, then for lack of progress in outdoor boatbuilding.

We’re on the Internet!

As I mentioned last time, I was trying to get a World-Wide-Web page set up with Chebacco News in it. It’s there now. The address to connect to is:
http://www.tay.ac.uk/mcsweb/staff/wbs/chebacc4.html
for newsletter number 4, and

http://www.tay.ac.uk/mcsweb/staff/wbs/chebacc5.html
is this one.

Another internet ‘club’ that should be of interest is ‘Bolgerphiles’. If you’d like to participate, drop an email to
cnoto@freenet.scri.fsu.edu
who, in real life, is Chris Noto, of Sweetwater, Tennessee.
Some of you have already found Chebacco News on the net and have told me they don’t need me to send out the newsletter to them any more. This is fine, and saves on printing costs and stamps BUT all readers of the News should feel part of the ‘club’, whether they read the electronic version or get the paper copy in the mail. I’m interested to hear from you however you come to be reading this.

Anchors, toilets, mast jackets, . . .

Phil Bolger mentioned in a recent letter that he would favour a plough anchor – Bruce or Delta for example weighing 25 pounds or more with 200 feet of rode, for a Chebacco. I’ve had letters from a couple of you wondering if I had come across a good way to stow an anchor on board a Chebacco. To my mind the foredeck is rather small to accommodate a hatch, so although the anchor could be stowed up in the forepeak the dirty weedy thing would have to be brought through the cuddy, dripping on your nice floor or sleeping bag!
Personally, I don’t think the forepeak of a light displacement boat is the best place to hold anything heavy. The nearer the anchor and other heavy gear is to the centre of the boat, the happier I am. My plan is to keep the anchor(s) under one of the side benches, getting it in and out through the access hole from the cuddy through bulkhead 4, and the rode on the other side to balance things out. Admittedly, it will drip momentarily in the cuddy but this should be a minimal problem considering the short distance from the access door to the cuddy entrance.
Another possibility you may like to consider is to replace the ‘Jonesport’ cleat at the stemhead by a short bowsprit/cathead to support a plough anchor ready to drop at all times.
If you have any other ideas, we’d like to hear them!
Jim Slakov asked about the anchor, and also about where to keep a portable toilet. He also wonders if anyone has thought about how to arrange a mast jacket. Do you favour mast hoops or lacing for the luff of the mainsail? Again, let us hear your ideas on these or other matters of interest.

How much does it cost?

People embarking on the building of a Chebacco wonder how much it’s all going to cost. I’ve had a couple of letters about this and thought the answer might be of general interest.
The cheapest way to go is to use exterior-grade ply. In the UK this will set you back about £500 ($800) for the 22 sheets needed if you follow Phil’s drawings to the letter, including hollow keel and ply floorboards. The 10 gallons of epoxy needed cost £750 ($1100) in the UK, and the glass cloth £200 ($350). If spars are made from reclaimed wood the cost is negligible. Fittings vary a lot, but making as much as possible yourself (wooden cleats etc) you can probably get away with £200 ($350). The sails would cost about £600 ($1000) ready made, but you can buy the cloth to make them for £130 ($200). Paints and varnish (house paints) will cost about £100 ($160), giving a grand total (assuming home-made sails) of £1880 ($2960) very approximately.
Going the Rolls Royce route with Bruynzeel ply and pricey paints, top class sails and so on could easily set you back four times that much. A lot depends on whether you are building her to sail yourself for the foreseeable future, or are more interested in her resale value when you move on to your next boat.
My own approach was to try to spread the cost as much as possible, so as not to have to shell out too much cash at once. As a result, the ply I’ve used is of a very modest marine grade, but I’ve gone to town on the best paints and varnish (2-part linear polyurethanes) which, unlike the ply, can be bought as and when required. Hopefully, too, they’ll provide good protection for the ply, such as it is.
Depending on how you intend to sail her, you may want to buy a trailer ($1500 or more) and an outboard motor ($800, but second hand motors are often available much more cheaply).

We have a sailor!

At last, a Chebacco sailor (as opposed to builder/dreamer/. . .) has joined our ranks. Alessandro Barozzi of Valfenera, Italy owns a Chebacco built by a builder named Casavecellia. My Italian is very rusty (- it never was shiny -) but I gather from Alessandro’s letter that his Chebacco is the lapstrake version, rigged as per the plans, but built as an open boat, without the cuddy [Alessandro – please correct me if I’m wrong!].
He writes that members of his club describe her as ‘a poem – the most elegant boat on Viverone’s pond’. ‘Nencia’ (for that is her name) nearly came to grief in a ‘Valdostano’ – a powerful wind sxweeping down from Mont Blanc – when she broke away from her mooring and blew away towards the rocky lee shore. Fortunately, she ended up in a quiet corner, bobbing around with some black ducks and only a little scratch on the paintwork to show for her adventure.
Alessandro mentions that she has some weather helm, and is thinking about adding a jib to help her balance better. He also finds her slow to tack, but I suppose this is understandable given that she has a long shallow keel, unlike a conventional centreboard dinghy. Finally, he says that she sails well, with satisfying speed, even in the lightest wind. ‘
Nencia’ is Casavecellia’s second Chebacco. The first one he built was strip planked, Bermudian rigged, had an iron centreplate and an inboard diesel engine (if I understand the Italian technical terms correctly). Alessandro believes that it was a mistake to stray so far from Phil Bolger’s drawings, and made sure that his own craft was much closer to the designer’s intentions.

A Tender for a Chebacco.

As my sheet ply Chebacco nears completion I’ve started to ponder the practical aspects of sailing her. I’ll be keeping her on a deep-water mooring in the Tay estuary and may be a couple of hundred yards from the nearest launching slip for a tender. This can be a fair old distance to row when wind and tide are unfavourable. I wrote to Phil Bolger asking if a stretched ‘Nymph’ might be suitable. He replied suggesting that
[The June Bug] is the best tender design that I know of if you can live with its looks: fast rowing, quick to build, a good carrier and stiff to get into and out of (a weakness of Nymph). Weight about 100 lbs. They’re good sailors, but the rig is too much clutter in a tender.
I also asked him about how a Chebacco would row, if caught out in a calm with a busted outboard (or no outboard at all). He replied:
I imagine a Chebacco would row quite well with, say, nine-foot oars. They have little if any more surface than a Dovekie, which I’ve rowed many miles at three knots. Chebacco’s geometry would not be as good, and think out carefully where you will stow the oars! I would have a long paddle, actually probably a six-foot oar. . . . If you tow the 14-foot tender, you can row that . . .

Windward Performance

You’ll recall that Mark Raymer was considering building a Chebacco-25, but was worried about how well she’d sail to windward. Phil writes:
On the windward performance of the Chebacco-20, it is as good as the sails, which need to be cut with a good flow. Given that, they are close-winded and spirited. The 25-footer is no doubt undersparred for light weather, when she is supposed to use the engine without inhibitions. I’m most confident that she will give a good account of herself in any fair sailing breeze, and that the speed with which she can be rigged and unrigged will add more to her mileage than would a better drifting ability.

My own view is that close-windedness is a matter of what you’re used to, and whether you intend to sail in company with more close-winded boats. For example, I don’t think that Chebacco was ever intended to sail close-hauled with a heavily ballasted fin-keeled bermudian sloop with a bendy mast. I currently sail a 15 foot lug-rigged flattie. I’m always contented with her performance when I sail alone. I sometimes sail in company with racing dinghies like Wayfarers and Enterprises and while the flattie gives a good account of herself on a run or a reach, she’s soon left behind on windward legs. Having said that, I wholeheartedly agree with Phil about rigging time – I can be on the water and away 20 minutes before the racers, which makes up for a lot!
Thanks to those of you who wrote to me about this. I have passed your letters on to Mark.

Fraser’s Stripper

Fraser Howell of Nova Scotia is making excellent progress with his strip-planked Chebacco hull. He writes:
As of today the strip bottom is complete except for the veneer, which is next. I lost some time due to moisture. I was building upright, outdoors. We had some exceptional rains, and the pine strips had warped, mostly I think because of moisture from the ground, as it was under a waterproof cover, with no floor. I moved it to my shed a week ago , and happily the original dimensions returned (whew). Everyone who the bottom out of plywood was right. My method is not cheaper, and requires probably ten times more work. If there is an advantage it is that the final bottom thickness will be one inch. said to make
Given the bottom, here is the sequence I plan to follow;
1. loft and cut molds out of inexpensive plywood sheathing for every station, except transom and #5 which are made from good marine ply
2. make c.b. case, again from good marine ply
3. align the molds and stem on the bottom with the c.b. case inserted in #5, #6
4. brace the molds and epoxy the c.b. case and #5 together, permanently attach stem, #5 and transom to the bottom
5. strip plank the hull
6. turn it over, smooth the hull and apply 1/8″ veneer in epoxy
7. smooth the veneer layer, coat with epoxy
8. turn it back over . . .
I have laminated and roughly bevelled the stem, framed the centerboard case, and completed half of the molds. Having a great time. I got Bolger’s latest book, enjoyed ot a lot.
Looking forward to an exuberant description of the sailing performance.

Fraser also enclosed some detailed sketches of how things are to go together. I’m afraid they are a bit beyond my Microsoft Paintbrush ability, so I’ll summarise what they are about:
The c.b. case has a really neat frame – the for’ard part is made from a straight piece of wood, slit lengthwise several times by bandsaw, glue put in the slits and the whole lot bent to shape forming a strong, laminated member.
The strip planking is to start from the chine, with the first plank being glued to the edge of the bottom. Fraser has cut a set of little bevel guides from the lofting so that the edge is accurately bevelled to accept the first plank.
The strips will be scarfed on the boat with Titebond glue and galvanised finishing nails.
The c.b. case will be finished flush with the pine strips on the outside of the bottom and the edge grain of the ply covered by the 1/4″ ash veneer. The cheek pieces of the keel are made of solid ash and are through-bolted to the logs either side of the c.b. case inside the hull.
There is a mold at each lofting station – not just at bulkhead positions.
There are some photos later . . .

Gil’s Boat

Gil Fitzhugh is making good progress with his lapstrake Chebacco-20.
All the planks are permanently in place, and I’m sanding, filling, sanding, epoxying, sanding, . . . Maybe another couple of weeks and I can paint the hull. The I’ll dragoon some neighbors, ply them with beer and flip the boat. Working outside in the spring and summer gives new meaning to WoodenBoat’s euphemism about building from ‘organic materials’. There’s the bark, twigs, dead leaves and seed pods that land on the work. There’s the flies, spiders, inchworms (2.54 cm worms) [Gil’s practicing, in case ‘The Boatman’ asks him to write an article] that crawl on it. There’s gypsy moth larvae, that feast on leaves and excrete little pellets on everything. All this organic material gets caught in the crevices, or lands in wet epoxy, and leaves residue in the boat. Some of it is, at best, wood by-products. And some is two or three incarnations away from having recognisable vegetable origins.
How much of my $70/gallon epoxy ends up as sanding dust?

[Gil should count his blessings – epoxy costs £75/gallon on this side of the pond!]

And finally

Keep your letters and emails coming. These form the substance of this newsletter. Remember that what may seem obvious or mundane to you could light the way for someone else. Jim Slakov writes:
Keep up the great work: newsletter #3 was the best yet. Of special interest to me was Gil’s method of planking, and the pictures of the two Chebaccos. You wouldn’t believe how I obsess over every detail, especially Story’s version: I like a bit of wood showing, and his lower hatch slide-logs, although that extra height looks good in Bolger’s drawings . . .

Write to me, Bill Samson, with your thoughts, experiences, ideas, dreams, . . .
Bill Samson,
88 Grove Road,
West Ferry,
Dundee, DD5 1LB,
Scotland.
email: w.samson@tay.ac.uk

Photos

fh1
The bottom of Fraser Howell’s strip-planked Chebacco – note the screw caddy!

fh2
For’ard end of Fraser’s keel cheekpieces

fh3
Aft end of keel

fh4
Planking in way of centerboard case

bs1
Bill Samson’s Chebacco – screw hole plugs to be trimmed.

bs2
Bill’s boat, cockpit looking for’ard.

bs3
Bill’s boat, cockpit looking aft.

rudder1
Rudder; post made from galvanised 1″ mild steel.

Chebacco News 02

Chebacco News

Number 2, February 1995

Since Peter Spectre published details of the newsletter in WoodenBoat, the readership of this newsletter has almost doubled. Interestingly, practically all of the readers are builders of Chebacco – the only account I’ve had of her sailing performance was from Phil Bolger himself, of which more later.

So far, none of the readers (except for Brad Story) has completed construction of a Chebacco, and about half are still at the planning stage and haven’t applied saw to wood yet. This is a pity, because lots of us would like to hear about cruises that Chebacco owners have undertaken – these would be wonderful inspirational fodder to keep us going through the construction process.

A number of readers were disappointed in the quality of the photos in the last issue, so I’ve had them scanned into a computer and printed out in dot style, which photocopies much better.

I’d like to thank those readers who have sent me a donation to help cover printing and postage costs. For information; the (low volume) photocopying and postage involved in producing this newsletter costs me about $2 each.

Please keep your letters coming – even if they are only questions. Discussions of questions are likely to be of interest to more than one reader.

Bill Samson,
88 Grove Road,
West Ferry,
Dundee,
DD5 1LB,
Scotland.

The Question of Ballast

I’ve had a couple of queries from readers about whether Chebacco should be ballasted. Phil Bolger says:

“The Chebacco was meant to sail without any ballast. We have, and you can, experiment with the effects of ballast simply by noting the effect of various crew weight and placement. They are very good in rough water and forgiving in squalls and with prudent and skilled handling and not exceptionally bad luck would get over the North Sea, or the ocean for that matter; but by present day standards they are inshore and fair-weather boats.”

Brad Story told me, last year, that he didn’t see any need for ballast on the Chebacco, although he knew of one owner who had put in a couple of hundred pounds of it.

My own experiments with an eighth scale model of Chebacco (sheet ply version) indicate that she’ll self right from a ninety degree knock-down, but if she goes much further than that she’ll go all the way over. On the other hand, a capsized Chebacco floats very high and certainly won’t sink as many ballasted boats would. This is all academic, though, because there have been no reports of a Chebacco ever having capsized.

Sailing Chebacco

Phil Bolger writes:
“We had a good sail last week in a borrowed Chebacco 20; the last of the season as we’re starting to see ice. This one carries a stronger weather helm than I would prefer. It may be a quirk of her sail cut, or something, as there have not been any complaints about it, but if you have not yet completed the mast step and partners there would be no harm in allowing each of them to go three or four inches further forward. Another possibility is that we had her centerboard too far down, as there was no marking on the C.B. pendant to show where the board was.”

Building Sequence for a Sheet Ply Chebacco

Unlike many other of Phil Bolger’s tack and tape designs, there is no published building sequence for a Chebacco. One reader wrote that he’d be wary of starting on a Chebacco without something akin to Dynamite Payson’s “Build the Instant Catboat” book to guide him through the process. I hope this numbered sequence of steps, which are based on my own journal of construction, will help in some measure to fill that gap.

1. Buy plans – these are available from Dynamite Payson.
2. Get hold of Dynamite’s book “Build the New Instant Boats” which describes lots of useful techniques which are applicable to Chebacco.
3. I’d strongly recommend building an eighth scale model, using 1/16 inch ply. This will help to sort out any uncertainties you may have when reading the plans, without costing an arm and a leg if you make a mistake.
4. Get your plywood. I used 22 sheets of half inch ply. If you intend to laminate the for’ard end of the bilge panels, rather than twist the half inch ply, then make that 20 sheets of half inch and four of quarter inch. There’s something to be said, too, for laminating the cabin roof. If you do that you’ll need 18 sheets of half inch and 8 of quarter inch.
5. Choose your building site. It is undoubtedly best to build in a shed if one is available. I, and a couple of other guys have used a temporary polyethylene tunnel like the one whose plans can be had from Stimson Marine – although it might get a bit hot in warm climates. If the climate is warm, then you can build out of doors and throw a tarp over the boat when you aren’t working on it. You’ll need at least 3 or 4 feet all around the hull for comfort when you are working on it.
6. Set up your backbone. The style of backbone is up to you. I used a “ladder” made of two by sixes, with the “rungs” spaced to match the bulkheads/molds. I set this up on legs about a foot off the ground with packing under the feet to keep everything level – this is crucially important if you want to avoid building a twisted hull. Gil Fitzhugh of New Jersey is using a plywood box section backbone which is working very well.
7. Mark out the bulkheads and transom on the sheets of ply, following the dimensions given in the plans. It isn’t necessary to loft the lines as the dimensions on the plans are accurate enough. Marking out actually takes longer than cutting them out! I found that this was very hard on the knees and would recommend getting knee pads before you start. Incidentally, it’s a good idea to plan the layout of components on the ply sheets before you start, in order to minimise wastage.
8. Cut out the bulkheads and transom. The molds (2 and 3) can be made from what we in the UK call “chipboard” – could this be the same as US particle board? Most of the cutting out can be done with a hand held circular saw – the curves are pretty gentle. A sabre saw (UK “jigsaw”) can also be used but gives wobbly edges that need planing up. I used (masochist that I am) a hand saw – crosscut with hardened teeth – which got through the wood surprisingly quickly and without the nervous tension that always seems to go with handling power tools. Try it!
9. (Optional) You can pre-coat all your plywood components with epoxy after cutting them out. It’s much easier to get a drip-free coat on a horizontal surface than a vertical one. The downside is that all the gluing surfaces need to be roughened up and you’ll need to protect the epoxy from UV degradation until you paint it. It’s also a pain having to wait for this to dry before you get to the next stage.
10. Make the stem. I laminated mine from offcuts of half-inch ply (seven layers) glued side by side and liberally coated with epoxy. I cut the bevels on a bandsaw, making sure not to cut too deep. The final bevels will be determined once the stem is set up with the bulkheads and molds.
11. Before you set up the bulkheads it’s a good idea to glue on the one and a half by four “floors” on bulkheads 4 and 5 and the framing around the transom. I used a mixture of yellow (“pitch”) pine and construction grade fir for these. The plans give accurate instructions for bevelling the transom and its framing – do this now.
12. Following the measurements given in the lines plan, fix the bulkheads, molds , transom and stem to the backbone using simple battens and nails which will be removed later. Be very careful to line everything up accurately using a spirit level and double check the heights of the gluing surfaces for the bottom. I found a lot of fiddling was necessary at this stage. Once you’ve fixed on the topsides you are committed and there’s no going back!
13. Mark out the topsides and bottom on the ply, using a bendy batten to mark fair curves for their edges. This is vitally important for the finished look of the craft. Cut them out and join up the parts with butt straps as shown in the plans. Precoat with epoxy if desired, then roughen up the gluing surfaces.
14. Mark the positions of stem, molds, bulkheads and transom on the topsides and bottom.
15. Temporarily fit topsides to bulkheads using screws and cleats as necessary. An extra pair of hands helps here though it can be done singlehanded by suspending the topsides with string from the shed roof. Some fine adjustments to the bulkheads will probably be needed at this stage.
16. Once you are satisfied with the positioning of the topsides, glue them on and apply epoxy fillets. Notice that there is no need to bevel the bulkhead edges. The epoxy fills the gaps and, indeed, a stronger joint results.
17. Fit the bottom and glue it in much the same way as the topsides.
18. The next thing to do is make the bilge panels. No dimensions are given for these on the plans because the fine adjustments of the previous stages could result in significant variation in the bilge panel shapes. The panels are made a section at a time and then fitted, with butt straps being applied on the boat.
19. The shape of the bilge panel can be determined by laying a long sheet of wrapping paper (as stiff as possible) along the gap between topsides and bottom that the bilge panel will fill. The shape of this gap is transferred to the paper by rubbing coloured chalk along the edges. It is best to do this on each side of the boat separately, as there could be small differences. Notice that because the bottom and topsides are not bevelled, the shape traced will be too large by about a half inch. This can be trimmed away later as fitting of each panel progresses.
20. Mark out the shape of the front section of the bilge panel on a sheet of ply and cut it out. Fit this section starting at the stem and screwing on cleats inside to make it lay against the topsides and bottom, working aft, trimming it to size as you go. There is tremendous twist in this panel and I used a Spanish windlass (twisted rope) attached to a clamp at the aft end of the panel to pull it into position. There is a colossal amount of potential energy in this twisted panel so take care that it doesn’t accidentally come loose and decapitate you! I found that, with the plywood I was using, if I left it clamped in position for a day or so, the plywood took up its shape and had less tendency to spring back when further work was done. [Alternatively, laminate this section in situ using two layers of quarter inch ply.]
21. Glue front section of bilge panel into position, both sides, and apply epoxy fillets as necessary.
22. Fix butt straps to front sections of bilge panels. (This may involve trimming one of the molds.)
23. Fit and glue the other two sections of the bilge panels. They are easy peasy compared to the front section.
24. Tape all the joints, inside and out, with 4 inch glass tape. (I won’t go into details here – Dynamite explains it beautifully in “Build the New Instant Boats”.)
25. Fair the outside of the hull using a power sander ( – I like the dual action type – ) and a long sanding board with 60-grade paper on it. Fill all hollows and sand out all humps at this stage. It sounds straightforward but takes ages to do right. Any unfairness at this stage will stick out like a sore thumb on a glossy hull. BE SURE TO USE A BREATHING MASK AND GOGGLES WHEN YOU DO THIS – EPOXY DUST CAN BE VERY BAD FOR YOU!
26. You can now glass the outside of the hull, or wait until the centerboard case and keel are fitted before you do so. I did it at this stage because it is less fiddly.
27. Apply a layer of six ounce glass cloth (I used plain weave) to the outside of the hull, using about three coats of epoxy to fill the weave. Beware of drips, sags and runs! Dynamite’s book again explains the process very well.
28. This is a good time to make the centerboard case (and the centerboard). This is a straightforward bit of joinery and needs no special explanation. NOTE, however, that the case protrudes through the bottom of the boat to the level of the outside of the keel.
29. Fit the centerboard case to the hull. This is an awful job as it involves cutting the slot in the bottom and making sure it lines up accurately with the slot in bulkhead 4 and its associated floor. I used a combination of sabre saw, handsaw, abrasive disk and files along with a liberal sprinkling of four letter words as I was working inside the hull and sawdust, epoxy dust and glass dust rained down on me. Goggles are a good idea – I didn’t wear any and had to go to hospital to get a sliver of epoxy removed from my cornea at this stage!
29. The keel pieces, cheeks and outer stem can now be made and fitted. I stuck to the plans with built-up hollow keel (remembering the drainage holes). Brad Story and other builders have gone for solid wooden keel pieces – fir or oak. With my small scale woodworking equipment the built-up option was easier. I made the stem from two thicknesses of one and a quarter inch thick fir.
30. Glass the stem and keel.
31. Back to sanding and fairing. This shouldn’t be too bad if the last lot was done well. Again take precautions against inhaling the dust.
32. Once the hull has been sanded and faired it is a good idea to paint it so that there will be no worries about UV degradation of the epoxy. I used a white epoxy paint undercoat (Veneziani “Plastolite”) which was sanded, and fairing done where the paint (inevitably) showed up irregularities which had been hiding until now. I used a Veneziani polyester filler (rather like car body filler) which applied easily and sanded well. This was topped with a 2-part linear polyurethane gloss (Veneziani “Gel Gloss”) applied using a paint pad. The finish is unbelievably hard. I used the same stuff on a skiff five years ago and it hasn’t needed repainting, so I claim the extra expense of these fancy paints is worthwhile. Having said that, most builders use conventional marine enamel on top of the epoxy. So it’s up to you. The waterline needs to be struck at this stage. (You figure out a good way; I can’t.) The area under the waterline should be painted with antifouling. I put this straight on the epoxy. It could be better to paint the epoxy first with conventional paint and then antifouling paint – I don’t really know what is best. I used a long handled roller to apply the paint to the inside to the centreboard case.
33. Turn the hull over.
34. Fillet inside joints and glass tape them.
[Lapstrake builders are on their own up to this point – from here on in it’s the same process]
35. Add remaining floors.
36. Fit and glue inwhales.
37. Fit and glue framing for seats, carlines for decks.
38. Finish inside of hull with 3 coats of epoxy. Foam roller application is easiest. Watch out for runs!
39. Make decks, seats, outboard well panels etc. to fit framing – precoat with epoxy and then glue/nail in place.
40 . Make cabin sides and glue into position.
41. Add framing to tops of cabin sides and fair in preparation for cabin roof.
42. Cut out cabin roof and glue/screw in position.
43. Make hatch slides (I used fir) and glue/screw in position.
44. Add trim pieces to hatch opening and mast opening.
45. Make slides for washboard and fix.
46. Make hatch and washboard.
47. Cut ventilator holes in rear compartments and fix on clamshell covers.
48. Fix on “shelves” to support floorboards in cockpit.
49. Make and fix mast step.
50. Make floorboards – loose fit.
51. Glass decks and fair surface.
52. Paint.
53. Make spars; get (or make) sails.
54. Add fittings, cleats etc.
55. Rig her up and go sailing!