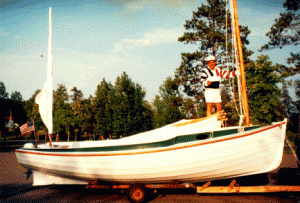
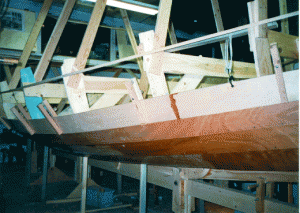
Chebacco News 19

Chebacco News

Number 19, January 1998

Is Electric Outboard Power feasible for a Chebacco?

Gil Fitzhugh wrote to Phil Bolger and Friends –

Dear PCB&F,

. . .

I’ve been intrigued by ‘Lily’ [the electric launch] and saw her or a sister ship at St Michael’s last month. I’m not looking to build or own a power boat, but I’d welcome your views about whether the newest electric outboards with a modest number of batteries would provide reasonable auxiliary power for a Chebacco. I shouldn’t think I’d need to motor more than 3 hours between charges – usually less, since I wouldn’t go anywhere far in a Chebacco if I couldn’t anticipate reasonable sailing – and maybe a couple of solar panels on the cabin roof (or deck house) would replace, during a day’s sail, what I’d used up motoring out of harbor in the morning. Otherwise, I figure a 5-horse Honda 4-stroke would be the next-most environmentally friendly source of adequate power. Thoughts?

Best regards,

Gil Fitzhugh

PCB&F replied –

Dear Gil,

. . .

On your E-power idea, the matter is straightforward and viable for the milder duty cycle you propose if you take it seriously. Before LILY, we hung two smaller 42lbs thrust MINNKOTAs on Ted Ratcliff’s 20′ ply Chebacco ‘KATTEPUS’ and she went quite well, only hampered by the limited pitch (one size only available) on the props.

The following hardware should be good for up to 5 hours of continuously powering your boat:

  • 65/70lbs thrust 24 volt MINNKOTA (saltwater series optional for coastal use) [$430],
  • 4x6V TROJAN T-105 for 217Ah (or T-145 for added range and cost!) [4x$49 or $129] connected in series to get 24V, but interruptable by
  • single battery switch into two banks of 12V [$20], which in turn can then be charged readily in less than overnight by a
  • 40Amp STATPOWER 4-stage ‘smart’ charger with two-bank output to feed each 6V T-105 pair with 20Amps as de facto one battery [$350]
  • You could add an E-meter [$160] to gauge consumption and get instant reading on voltage and actual amp and amp/hr numbers – useful and instructive.

This will cost more than any combustion engine. But after initial installation, and very minor battery maintenance you’ll be running her for years without additional worry, never mind noise, vibration or oil-plumes – decent return for the money. E-cost will be on the order of perhaps 80c-$1 per total charging cycle . . . But always recharge immediately after you bring her back within reach of the nearest 110V outlet.

Put two batteries in about the location in each cockpit bench where [the Cruising Chebacco] plans show a single one. And locate the expensive charger inside the cuddy/house to keep it out of the rain. LILY’s rain-proof units would take twice as long to recharge these 6V pairs, and seem thus way too wimpy for the occasion. Your E-CHEBACCO would have about 2/3 the capacity of LILY. You probably won’t see more than 4Kt due to the limited pitch on that 11″x4″ prop.

. . .

Susanne Altenburger

Phil Bolger

Hanging the bilge planks on a Sheet Ply Chebacco:

Skip Pahl has been comparing notes with Jamie Orr regarding the hanging of bilge planks. He kindly copied this email to me:

Dear Jamie,

Thanks for all the good information in CN about your building methods and

experiences. Your advice is really timely for after several years of

deliberations, courage and model building, I began cutting wood this summer.

Progress is slow. My building speed is limited by the ability to buy only

three sheets of plywood (or its $ equivalent) every two weeks! Add to this

the fact that I’m very slow when it comes to new types of construction and

you’ll understand why I am straining for new wisecracks to answer the

inevitable question, “So, when’s the big launch date?”

I am writing to you because it is approaching the time to hang the bilge

planks and I am struggling to visualize the process. I too wish to avoid

building all that stress into the hull that 1/2″ ply creates when making that

“Gawdawful” twist and have decided to go with the 1/4″ ply laminations.

I made 7:1 scarf joints when I layed-up the 1/2″ sheer strakes and bottom.

They worked out really well. The curves are fair and the joints appear to be

very strong. However, with laminated bilge strakes it looks as though the

butt block is the way to go. Would you review my thinking here and see if

I’ve got the process right?

PART 1 ( (No volunteers required)

1) Trace mylar or craft paper templates on bilge openings on each side.

2) Transfer template shapes onto for bottom layer plywood. Cut out and

coat outboard surfaces with rolled layer of unthickened epoxy. Allow to cure

and sand.

3) Make 4″(?) wide butt blocks out of 1/4″ plywood and attach to aft end

of each of the forward sections of the bilge strakes. Use thickened epoxy and

bronze screws to clamp.

4) Attach forward section of each strake to the stem using bronze screws

only and begin working aft making temporary clamp blocks that are attached to

the shear strake and bottom. Use wire stitches as needed to fair.

5) Attach aft end blocks to middle sections of bilge strakes.

6) Hang middle sections of bilge strakes by beginning at the forward end

butts and working aft. Use bronze screws and epoxy at the joints with wire

stitches at the top and bottom to keep joints fair. Work aft using wire

stitches and clamp blocks (no glue).

7) Hang aft sections of bilge strakes using bronze screws on transom.

8) Go back and unscrew planks at stem and transom and reattach with

epoxy and epoxy/cabosil putty.

PART 2 (Volunteer required)

1) Transfer template shapes onto top layer of unjoined plywood and cut

out.

2) Pre-drill an 8″ grid of holes in exterior panels to allow for escape

of air pockets in laminating.

3) Masking tape interior seams closed so epoxy will not run into

interior of hull.

4) Dry fit exterior lamination panels and mark for future positioning.

5) Beginning with the center panel, roll thickened epoxy onto outboard

surface of inside lamination and unthickened expoy onto inboard surface of

exterior lamination.

6) Join the two panels with pan headed screws beginning at the center

and working forward and aft.

7) Apply forward and aft sections of exterior lamination in similar way

using bronze screws along the butted seams. No butt blocks are used on these

seams inside the hull.

8) Before epoxy has cured, apply unthickened epoxy to seams and follow

with epoxy/cabosil putty mixture to fair.

Sorry this took so long. Please let me know if I’ve got it screwed up. I

have nightmares of things getting stuck together crooked.

Thanks for your help.

Skip Pahl

These sound like sensible procedures. My only comment is that I’d probably thicken the epoxy, a little, between the laminations – but that’s just personal prejudice.

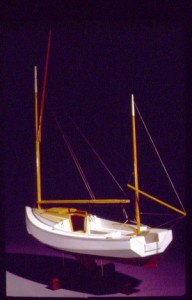
Skip also sent this photo of a gorgeous model he’s built of a sheet ply Chebacco:

transom

Skip Pahl’s model of a Chebacco-20

Uncured epoxy

Just about every boatbuilder will at some time in their career experience the horrors of uncured epoxy. This happened to Burton Blaise, who sent this nessage out to a few of us. In short, getting it off is not a lot of fun:

In case anybody is interested in my continuing epoxy saga, I am

pleased to report that, after a gruelling week-end of scraping, grinding

and sanding, I finally got all of the gummy epoxy off my Chebacco hull

and am back at where I was a couple of weeks ago (that is, ready to

complete glassing the hull – weather permitting!). As mentioned in an

earlier message, I found that the straight edge of a piece of broken glass

really works best to scrape the majority of the goo off. Any remaining

residue was removed using a belt sander fitted with a very coarse

sanding paper (30 or 40 grit). Anyone attempting the broken glass trick

should bear in mind the need to be EXTREMELY careful during the

scraping operation – I got carried away and careless, with the result that

my glass scraper broke in mid-stride, causing my hand to slip past the

glass edge and slicing a good way into my right index finger (after

bandaging my finger – which probably really should have gotten stitches

– I wisely resorted to completing the operation wearing thick canvas

gloves). This hull hasn’t even been launched yet, and already its been

baptized with my sweat, my tears (of frustration) and now my blood!

However, the way things are shaping up, I know that she’ll be worth it all

in the end. Yep, she sure is a shapely hull.

Burton

I’m certainly glad to hear it worked out OK eventually!

Chebacco too big for you? – Try a ‘Bobcat’!

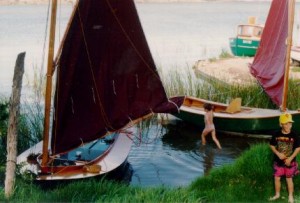
Colin Hunt of Australia sent me this photo of a pair of Bolger ‘Bobcats’ (a.k.a. ‘The Instant Catboat’, ‘Tiny Cat’, ‘Little Gaffer’ . . .). Colin points out that the construction of the 12 foot hull is very like that of a sheet-ply Chebacco hull. They are excellent daysailers and family dinghies, too. So – if you’ve not quite decided that you’re ready to take on the construction of a Chebacco-20, why not hone your skills by building a ‘Bobcat’? Plans are available through PCB&F, as well as Dynamite Payson, who has also published the excellent ‘Build the Instant Catboat’, which is an almost indispensible aid to construction.

ch171

A pair of ‘Bobcats’ by Colin Hunt.

Reefing systems for a Chebacco

I was recently caught out in a force 5, under way, single handed, and had the uncomfortable job of trying to put a couple of reefs in while slithering around on the cabin top, avoiding being swept overboard by the flailing boom. It’s no secret that the Chebacco is fairly tippy, initially, (though with superb secondary stability) and so whatever side you approach from, the boat heels in that direction and the swinging boom heads your way! I eventually backed the mizzen a little so that she hove-to on port tack and thus was able to approach the boom from the starboard side, where the cleats for the reefing pendants are attached.

Although I got her well enough reefed to sail the 7 miles back to my mooring, the sail was a tad baggier than I thought ideal, and I felt there must be an easier way to do things. So I phoned Brad Story, who has built and sailed more Chebaccos than anyone else. He suggested that I would have been better to lower the boom into the cockpit, or into a boom crutch to hold it steady while I was working on the reefing. Seems obvious now; I wish I’d thought of it! Secondly, the cleats for the reefing pendants should be positioned so that they can be reached from the cockpit. Good thinking!

Brad writes:

Dear Bill,

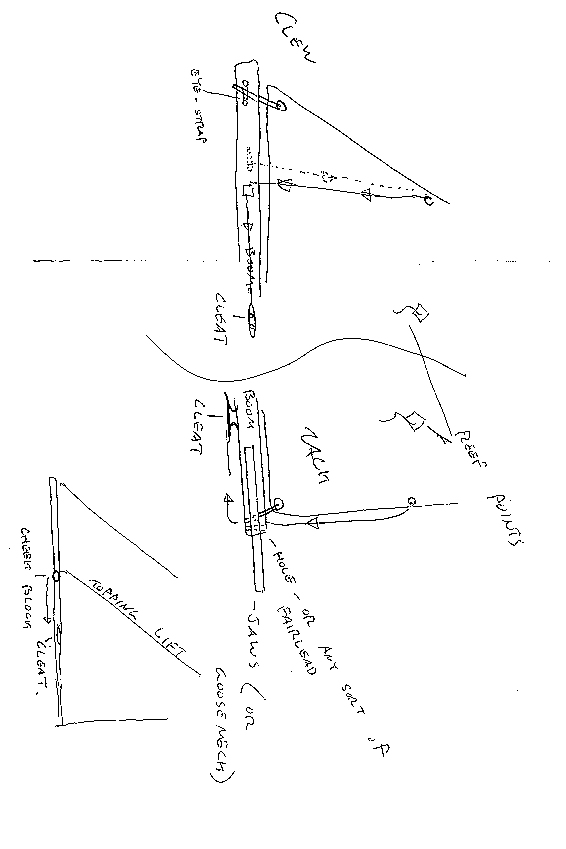
I’ve tried to sketch some details of my own rig. The topping lift is on one side only (keeps it simple!). At the mast head is a loop spliced into the topping lift. It’s held up there with an eye-strap or two. From there it just runs to a cheek block on the boom, and then forward to s small cleat. It’s very handy – it’s right in the cockpit. It can never fall down and it’s one less line to deal with when setting up or striking the rig.

The jiffy reefing lines I’ve sketched, also. At the tack, a single line is made fast at the upper grommet. It runs down the luff, through a fairlead (hole, whatever) and aft to a cleat on the bottom of the boom, far enough aft to be reached conveniently. At the clew, a line is made fast to an eye-strap on one side of the boom (below the appropriate grommet and alittle bit aft). This line runs up to the grommet , through it and back down to a fairlead (or small cheekblock) and forward to a cleat. When it’s time to reef, just lower the sail a bit, haul both of these lines until the grommets are where they should be, and cleat them off.Now all you need to do is bundle up the foot of the sail. Again, it’s fast and convenient.

Brad Story

brad

Brad Story’s sketches of reefing arrangements

Jamie Orr’s hull nears completion:

Jamie Orr of Victoria BC, Canada, sent me this picture of his hull. He reports that he’ll be making the sails over the winter, when it’s too cold for epoxy work. He’s using 5.4 ounce cloth and plans to make a jib, as well as main and mizzen.

SORRY – THIS PHOTO HAS BEEN LOST

Jamie Orr’s sheet-ply hull

And finally . . .

That’s all for this issue. Here are some addresses that may be of interest to readers:

Phil Bolger & Friends, PO Box 1209, 29 Ferry Street, Gloucester, MA01930, USA (- Designers of the Chebacco boats and source of plans for all versions)

Harold H Payson, Pleasant Beach Road, South Thomaston, ME 04858, USA ( – Author of ‘Build the Instant Catboat’ and alternative source of some Bolger designs)

Brad Story, Boatbuilder, Box 231, Essex, MA 01929, USA (- Originally commissioned Phil Bolger to design the Chebacco boats, and has built many superb examples of them)

Bill Samson, 88 Grove Road, West Ferry, Dundee, DD5 1LB, Scotland ( – Editor of Chebacco News)

Chebacco News 17

Chebacco News

Number 17, September 1997

Bob Cushing launches the first Chebacco Motorsailer

chglhs1c

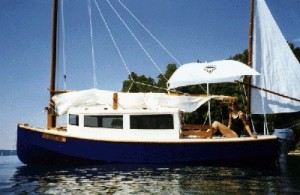
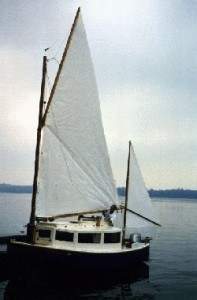
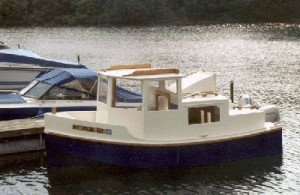
Bob Cushing’s Chebacco Motorsailer Congratulations to Bob Cushing for building and launching the first example of the Chebacco Motorsailer – the ‘Glasshouse’ version referred to in Phil Bolger’s book ‘Boats with an Open Mind’. This version has a fixed ballast keel and no centreboard. The tiller is positioned to allow the boat to be helmed from within the spacious cabin. Bob writes:

We have sailed the Chebacco Motorsailer 3 times now and finally had some good wind on our last sail. With winds of about 20-25 kts and 2-4 ft waves on Seneca Lake in upstate New York we sailed downwind for about 15 miles. We had both reefs in as we were not sure of how wild it would get but as it turned out it was quite docile running downwind in these conditions – one reef would probably have been adequate. Speeds were in the 5-6 kt range as measured by the GPS. Speed under power with the 9.9 Honda have been measured by the GPS to be 7.0-7.5 kts max and 5.5 kts a more reasonable (i.e. quiet and comfortable) speed under power.

The boat is very comfortable with 7 foot berths, a dinette table to port, which can pivot to center, a kitchen area up front with sink, stove, cooler, food storage and 6 gallon water tank. There is a lot of storage space under the bunks and throughout the rear of the boat under the decks. A porta-john with pump-out capability is kept under the step, along with the toolbox. A small built-in fuel tank is behind this. Tinted Lexan windows were used throughout. The front-center opens and four Beckson round ventilation ports w/screens elsewhere. Trailing and launching is quite easy from a standard bunk-type boat trailer. Setup time is about 20 minutes – Take down and pack up about 30. This will be shortened by some 5 – 10 minutes with some simplification of procedures and fasteners. The mast is laminated from fir and weighs 60 pounds – not too hard to step – walk it up on the roof as one end rests in the tabernacle. The actual lifting/pivoting weight once it is in the tabernacle is probably only 30 – 40 pounds. The sails were made from a Sailrite kit. They are made from 5 ounce dacron and went together pretty easily using a home sewing machine and two people working together on large sections.

All in all a really nice little trailerable motorsailer.

Bob Cushing

b.cushing@csss-a.cvsi.com

chglhs2c

Another view of Bob’s Chebacco Motorsailer

Phil Bolger writes:

Bob Cushing lights up our lives. Amazing, and wonderful, how fast he does good work. The boat looks nice and I am inclined to think it’s a better bet than the more-or-less conventional ‘cruising Chebacco’ we’ve been discussing. . . . the idea of sitting in shelter, right on the pitch axis and center of buoyancy, has a lot to be said for it.

Phil

Bob Cushing has built a number of Bolger boats, including the Fast Motorsailer and the Microtrawler. I understand that Bob’s Microtrawler is currently up for sale –

microtrc

Bob Cushing’s Microtrawler – FOR SALE!

If you are interested in buying it, Bob can be contacted at 5998 E. Lake Road, Cazenovia, NY 13035-9323, USA, or at the email address above.

A Tool for fairing Epoxy Fillets:

Burton Blaise writes:

One of the great advantages of building hard chined hulls by the “tack and tape” method is that even amateurs such as myself can put a hull together with minimal time and effort. However, working on my Chebacco 20 hull, I found it difficult to cut the bilge panels with sufficient accuracy to give me beautiful, fair outer seams at the chines (where the bilge panel meets the topside and bottom panels). In fact, this type of building technique cannot do otherwise than produce ugly seams where

hull panels meet since the plywood edges are not bevelled to ensure perfect mating of the pieces. Therefore, such seams (especially outer seams) must generally be made fair before applying glass tape by globbing on putty (thickened epoxy) and then smoothing on with a putty knife or other straight edge to produce a nice, fair and eye-pleasing chine. (This also adds to the strength of the joint).

Working on my Chebacco 20, I was finding this to be a pretty demanding task, with a great deal of fussing and several successive coats of thickened epoxy necessary to produce a half-way decent looking outer corner. Thinking that there had to be an easier way, I eventully came up with an idea for a simple tool which enables me to create perfectly fair outer corners in just one pass. Perhaps such a

gizzmo is already known to the more initiated boatbuilders, but for the rest, here is my idea:

Take two tongue depressors or other flat, straight edged pieces of wood (e.g., paint mixing sticks), place (stack) one on top of the other, and drill a small hole through the two stacked pieces at one end. Then pass a short screw through the hole and tighten with a wing nut to create a pivoting point. You now hold a very simple device which greatly facilitates the task of fairing an outer corner or chine along a

compound curve on a hull. To use, simply glob thickened epoxy on the seam to be faired, then open the fairing gizzmo (spread the sticks apart) and rest the straight edge of one blade (or stick) on one of the hull panels and the other blade on the adjoining panel, and slowly, steadily draw along the seam making sure that both straight edges rest firmly on the panels at all times. The gizzmo automatically and smoothly adjusts to the changing curves and angles between adjoining panels as you go along the hull. The result is a perfectly smooth and fair outer corner or

chine in a single pass, with only minor touch ups to be done later. I’ve used this on the Chebacco hull and have found it to work like a charm! Once the resin sets, I then apply the glass tape and fill the weave with unthickened epoxy, according to standard practice. Hope this is helpful to someone out there!

Burton

Rigging a Chebacco:

Burton wrote to me again:

While I am nowhere near the stage of having to rig a Chebacco yet (as is quite obvious from my recent correspondence with the Bolgerphiles group!), I am starting to think about the details of the rigging. Now, I really have very little experience with sailboat rigs in general (my Gypsy’s rig is so simple that it does not prepare me for the more complicated cat-yawl rig of the Chebacco), and the details shown

on the Chebacco building plans leave me with more questions than answers. For instance, I’m not relly clear on what exactly lazyjacks are, or how to set up the toppinglift, nor do I know much about reefing and pendants & such. I wonder if, for the benefit of the uninitiated, you might consider devoting part of an upcoming “Chebacco News” issue to the art of rigging a Chebacco, perhaps even including some detailed drawings of how to set up her rig and some explanations of the different elements (sheets, halyards, cleats, pulleys – er, blocks, that is, etc.). I

suspect that we novices could stand to learn a lot from your own and other builders’ experiences – some food for thought at any rate.

Chat with you soon!

V. best,

Burton

My reply was:

Briefly, the halyards and the topping lift (which I have on the port side of the sail) go through blocks at the top of the mast, down to blocks at the mast foot, then back to cleats on the cabin roof at the front end of the cockpit.

The topping lift, if it was paired with another on the starboard side, would constitute a pair of Lazyjacks, which simply guide the gaff and sail down onto the boom when they are lowered, rather than falling off to one side. Lazyjacks often fork into 3 parts on the boom, to help gather the sail better. I’m not comfortable with lazyjacks because they need more line and complicate things. I like to get everything out of the way when I snug the boat away under its cover. The more lines, the more

complicated this would be.

A reefing pendant is a line which is attached to one side of the boom, just aft of the corresponding leech cringle which becomes the clew when the sail is reefed, is led through the cringle, then down to a block or fairlead on the other side of the boom, then led forward to a cleat where it can be cleated off when the sail is reefed. A similar pendant can be installed at the luff. When both of these are hauled tight, the sail is reefed all but the tying of the reefing points – which isn’t that important. With two lines of reefing points (as in the Chebacco’s sail) two pendants are needed at the leech, and two at the luff, with cleats for each.

That’s all I’ve got on my sail, apart from the mainsheet, which is straightforward.

Cheers,

Bill

Inexpensive epoxy

Dick Burnham writes:

After reading Reuel Parker’s “The Sharpie Book” I was newly informed that

only about 4 or 5 firms manufacture epoxy. Parker buys direct, it seems,

from Shell Oil. A place in West Palm Beach, Florida (admittedly distant

from Scotland) sells an epoxy (RICO?) in a 15 gallon kit that includes

hardener and resin for about $377? I called them on their 800 number and

seem to recall that it was about $30 – / gal. Which, if its the same, is

soooo very different from West epoxy at $80/. The name of the WPB place is

in the appendix of Parker’s book.

Epoxy Woes!

Burton Blaise has been having problems with epoxy. He sent an email to the Internet Bolgerlist – read on:

I desperately need help from all ye bolgercolleagues experienced with epoxy . All summer long I’ve been using epoxy (a 4:1 mix from Gelcote International) quite successefully in assembling my Chebacco 20 hull. In typical warm summer weather, the epoxy would cure within about 24 h, to the point where it could be sanded. Occasionally, the epoxy would remain sticky even after curing for 2 days, but this sticky stuff (which I assume is amine blush) would come off readily by wiping with a wet cloth, and the epoxy could then be sanded.

Recently, however, I’ve been experiencing some difficulties with the same epoxy, and frankly, I’m at wits end to know what to do. About a week ago I did a few last touch ups (fairing and filling) with the epoxy and taped the last few seams around the keel. After 3-4 days of curing, I washed the sticky surface thoroughly with water as usual. I should point out that, other than being sticky on the surface, the epoxy seems to have hardened. When I started to sand, I noticed that the sand paper was clogging very quickly, and that the epoxy was not sanding into a fine dust (as it has been during all previous sanding sessions), but rather was either not sanding at all or just coming off in little waxy bits. In fact, in many spots the recently epoxied surfaces remain hard but tacky. I’ve tried washing several times with water, and even with acetone , but the surface remains tacky (even at the present time, fully one week since

the epoxy was applied, it remains tacky and cannot be sanded). When I tried scraping the epoxied surface using a cabinet scraper, I get a very thin gummy film coming off but nothing else. Washing with acetone followed by scraping does not improve things. Now, I’m pretty certain that I’ve measured the resin and hardener correctly, and in fact am using the same approach (and materials) that have worked well all summer.

The only thing different is that we have been getting some cooler, damp weather lately (particularly at nights, when its been going down to about 10 C), with a few rainy days. However, we’ve also had some warm days where the temperature in my tarp boatbuilding shed should have been more than sufficient for curing epoxy.

Well, now that you’ve read my sad story, could some kind soul please offer me some suggestions on how I can deal with this problem? Right now I’m stuck at this stage, since I need to be able to do some sanding before I can apply the final glassing over the entire hull. I’m especially anxious to complete glassing and painting of my hull by the end of September, so that I can turn her over and make some progress on the deck structure before having to call it quits for the winter. Is there anything that can be done, or has something gone horribly wrong with my epoxy, or my technique, or whatever?

Sure looking forward to some suggestions from y’all. Many thanks in

advance.

Burton

The Internet Bolgerphiles duly replied and the conclusion was that the problem was probably caused by a slight excess of hardener in the epoxy mix (a lesson for us all!). The solution that was adopted by Burton was to scrape off the bad epoxy. He tried a cabinet scraper, but the best solution was to use fragments of broken glass as scrapers.

Meanwhile, if anyone has any other theories/solutions, please send them to me and I’ll include them in a future issue.

Butt Block Woes:

You’ll recall that in the last issue, problems were reported with butt-strap joints giving out when the panels were bent into position. Jamie Orr comments:

I used the same plywood butts on my Chebacco that Burton did, but reinforced them with 1″ #10 bronze screws. This also solved the clamping issue. The soft bronze is nice because the screw can be countersunk without worrying about breaking through the other side, the point is easily ground off when it does break through. Although Burton has fixed his problem, adding screws might provide more peace of mind.

After looking at the sailing pictures, I feel inspired all over again. I’m having problems staying on my time line, but still plan to flip this Summer.

Jamie Orr

A later email said:

I thought I’d add another comment.

When I joined the pieces of bilge panel (first layer of 1/4 inch), I did the first joint on the boat. This was OK, but for reasons since forgotten, I took the panel off (only tacked on) and did the second one on the flat. I think that if I build another boat in this style, I will do all the butt joins flat, as it’s easier to clamp. Also, the edges beyond the buttstrap can be easily edge glued and will then stay in line rather than twisting apart and having to be held in place when fastening to the hull.

Of course, if you are fastening to the hull at the same time, the last point doesn’t apply, but I try to tackle only one thing at a time.

Jamie

Progress report

Jamie Orr also reports progress:

Hi, Bill

I’m at the stage of “designing” my sails, and thought I’d touch base with you. So far you’re the only builder I’ve heard of who also made the sails as well.

I think you said somewhere that you cut the mizzen very flat. Was that dead flat or only relatively flat? Can some shape be induced by slacking off the snotter?

On the main, I started out thinking that I would use a vertical cut, very plain. However, now I’m thinking that it might be more useful as a learning exercise to go the whole nine yards, with horizontal cut, roach, battens and all. I’ll probably change my mind a time or two yet, as I’ll be doing the mizzen first. This is all winter work — I’ll start as soon as the weather becomes a problem for boatbuilding.

On the boat, I now have the hull glassed (six ounce), except for some work on the keel. One of the high points of the hull was carving the stem — it always feels so good to work with real wood after a long spell of plywood and fibreglass. I used the band saw to cut the profile and rough out the taper, then block plane, spokeshave and chisel to finish it off.

I laminated the bilge panels out of 1/4 inch plywood. I glued and fastened the first layer on, and let the epoxy set up before I started the second layer. To guard against voids between the layers I pre-drilled holes on eight inch squares, in the outer layer only, after the pieces were cut to shape. I rolled some unthickened epoxy on to both layers, then spread a generous amount, slightly thickened, on the outer piece (outer, because it was lying flat and so the epoxy couldn’t drip or drool). I started with the

middle piece, and started fastening from the centre of that, using self tapping, pan head screws to draw the layers together. Working outward both ways from centre helped make sure that air and excess epoxy got pushed out.

When I put the end pieces on, I started fastening from the butt joints and worked to the ends of the hull.

The screws were number 8’s, and almost none of them stripped the threads in the hole. Where this did happen, I just rammed another one through both layers, right beside it. At the butt joints, I put them in four inches apart and got a nice tight joint each time. Butts were about a foot away from those in the first layer. I used a cordless drill to drive the screws. Power is almost a necessity here due to the working time of the epoxy, especially in mid-summer. I used 287 screws altogether, and it took a solid four hours, with no breaks, to do both sides, from the time the first batch

of epoxy was mixed. My dad helped position the panels, but we only had one drill for fastening — I had a back-up drill on hand, but it was too new to use near epoxy unless the first one failed!

I filled the joints at the edges right away, so that if any blush formed, it wouldn’t be deep down in the joints where my sandpaper couldn’t reach. The joints were already sealed with masking tape on the inside.

I have a big clean up planned, so I’ll try to remember to take some pictures when I’ve done that — the site is not suited to well laid-out photos, but we’ll see what happens.

Jamie

On the subject of sailmaking, I replied:

Yes the mizzen is cut DEAD flat. It assumes some shape anyway, especially if the snotter isn’t twanging tight, and more if the snotter is slackened.

I cut my main with horizontal cloths, broadseaming the seam that goes through the tack and one either side, down to no broadseaming at the peak. You need the double-reefed main to set as flat as possible, therefore broadseaming at the peak is a bad idea. I carried the broadseaming back about 30% of the way from the luff, to keep the maximum draft well forward, to avoid weather helm. It worked! Likewise, the

curves on luff and foot should have maximum depth about 30% up/back from the tack. These curves were about 6″ deep, but that was just guesswork on my part. I’m not sure whether more, or less would be better.

Bolger Plans

Plans for all versions of the Chebacco and all other Bolger designs are available from Phil Bolger and Friends Inc., Boat Designers, P.O.Box 1209, 29 Ferry Street, Gloucester, MA 01930, USA. Phil enthusiastically recommends Dynamite Payson’s books. They are ‘almost a necessity’ for building many of his designs.

And Finally

That’s all we have room for this time. Please send me your news:

Bill Samson, 88 Grove Road, West Ferry, Dundee DD5 1LB, Scotland

Chebacco News 12

Chebacco News


Number 12, November 1996

[All issues of Chebacco News can be seen (in glorious colour) on the World Wide Web at: http://www.tay.ac.uk/mcsweb/staff/wbs/chebacco.html]

image2
Bill Samson’s ‘Sylvester’ impersonates the Chebacco News logo

The first ‘Glass-house’ Chebacco?

Bob Cushing (b.cushing@csss-a.cv.com) emailed to tell me that he is building the high- sided Chebacco motorsailer, dubbed the ‘glass-house version’ by Phil Bolger (Boats with an Open Mind – pages 225-227). As far as I can tell, this will be the first to be built to this design. Bob writes:

I have started building the highsided Chebacco motorsailer – have the bottom, ballast keel and rudder built and some of the bulkheads. I will be turning it rightside up shortly and starting to install the bulkheads, stem and sides.

Bob also mentions that he has built the Microtrawler (currently for sale!) and the Fast Motorsailer (both described in BWAOM). He hasn’t added the sailing rig to the Fast Motorsailer, yet, but is so pleased with its performance under power, he may not add it.

Lapstrake Chebaccos

Gil Fitzhugh reports steady progress on his lapstrake Chebacco. He is currently fitting out the hull:

The forward bulkhead is in, the aft one is cut out and the hidden one at the backend of the centerboard trunk is spiled. The aft bulkhead has a pretty top that I wanted to cover with a curved strip of laminated mahogany – two tight bends one way and two the other. It worked, but what a job! Bulding boats is duck soup. Building yachts, on the other hand . . .

I just hope, that with all that loving care and attention Gil is lavishing on his Chebacco, he can screw up the courage to dump it in the water when the time comes!

Gil also tells me that he is seriously thinking about putting on a bowsprit and jib, following the glowing report from Fraser Howell in the last issue. He has put a substantial breasthook into the hull so that a short bowsprit can be bolted through the deck and breasthook.

Another lapstrake Chebacco builder, Jerome McIlvanie, of Yakima, Washington reports that he built his hull right side up, turned it over using the pulley and ropes method (see Chebacco News #1) for painting. He then plans to turn it back over to finish it off.

Yet another builder who has decided to build the lapstrake version is George Cobb, of New Brunswick, Canada. He writes:

I won’t have building space for another 2-3 months. In the meantime I have completed the lofting and am well along on the spars. I would like to hear whether anybody has used a gooseneck on the boom and its merits and drawbacks as compared to gaff jaws.

I went for a sail in Fraser Howell’s boat three weeks ago. The winds were light but it was still a very enjoyable sail. I especially enjoyed nosing up to a beach and going ashore.

George Cobb

If you use a gooseneck on the boom you’ll be in good company, George. Sister Krista’s ‘Toulooma Too’, built by Brad Story (see Chebacco News #7) has a gooseneck. It certainly looks very neat and works well. I used jaws on my boom because I like low-tech things that are easily fixed, wherever I am. The only slight advantage of jaws is that the height of the boom above the deck can be adjusted using the throat halyard – but this is no big deal.

Another sheet ply Chebacco?

I am sometimes accused to being rather biassed towards the sheet ply version of the Chebacco. OK – I fess up! (- you’d think I was an American or something -) I am biassed. So it gladdens my heart to hear that another one is about to start taking shape. Garry Foxall, of British Columbia, writes: I am going to build the sheet ply version, although Jim Slakov’s [a lapstrake version] is so pretty it makes me want to do that instead. However, I have a number of other projects that must be done, and I think that the sheet ply one will be faster.

I hope to begin cutting out bulkheads and temporary frames this month. December is when I hope to begin the actual construction.

Jim Slakov lives a few miles away. He turned his hull over in the early summer and is now working on the centerboard trunk. He is a cabinetmaker by trade and his workmanship is beautiful. It makes one feel envious.

Garry.

Chebacco a tad big for you? How about a Catfish Beachcruiser!

John Tuma, of Fremont California has launched his Catfish Beachcruiser (a recent Bolger design). He has called it ‘Catfish Lounge’, in view of the astonishingly spacious cockpit/cabin. John writes:

The hull form is similar to the sheet ply Chebacco . . .

The particulars:
LOA 15’1”
Beam 6’6”
Draft 15”
Trailer weight ~800 lbs
Displ (sailing) ~1000-1200 lbs
Sail area 139 square feet

She has a long, shallow keel and no centreboard, giving an uncluttered interior. The deck is raised to the height of the top of the coaming and there is a narrowish walkway down the centre which forms the cockpit when sailing, and can be easily covered over at night to give sleeping accommodation (rather like the Birdwatcher, but less extreme). So you get a huge cockpit and huge sleeping accommodation, too.

image1
John Tuma’s ‘Catfish Lounge’

John emailed me to say:

The Lounge offers commodious seating, occasionally excellent dining, and often an excellent view. Performance to windward is not as slow as I first thought. I had my sailmaker join me for an afternoon on the Oakland Estuary, and we played with the various controls. Throat halyard tension was improved with the addition of a 2-to-1 purchase, and greater luff tension improved windward performance in light airs. In heavier conditions or with a lightly loaded boat the increased luff tension tends to induce weather helm. I did not expect the rig to be so sensitive to tuning, so now I feel I’m learning about sail controls all over again.

I’ve also found the lounge to be sensitive to loading. Four adults and two children can fit without trouble, but the boat doesn’t sail well with that much weight (at least not when chips and dip are more important than weight placement). Very slow to get going, and slow downwind. The increased momentum made tacking in light airs easier, the deeper profile reduced leeway. However, I’ve been having fun with the sideways motion, and a downwind dock can be taken by stalling the boat and sliding in sideways. I do have to be careful though, as the same thing would happen on a lee shore. I have also found that the Lounge likes to be sailed on the bilge panel, and flies on a reach when that far over. Is the same true of the Chebacco?

John

It certainly is! The downside is, though, that the greater the heel, the greater the weather helm. On balance, I like to sail my sheet ply Chebacco with a little heel, but not with the gun’l under! Sailing singlehanded, as I often do, this can mean taking in a reef earlier than when I have a crew to sit on the weather bench.

First, the model . . .

James (Skip) Pahl, of Carlsbad, California, writes:

I’ve just started my 3/4” to 1’ model. The hull is done and today I’m beginning the post-turn-over interior work. I am hoping the model comes out looking as sweet as the one you built. [Aw! Shucks! – B.S.] It might give courage at the office during a week that seems an unnecessarily long interruption to one’s time on the water.

I was fascinated by Fraser Howell’s recent comments about his bowsprit and jib, and wondered if his Chebacco points higher than those with cat rigs or might require reefing later since the jib tends to relieve the weather helm when the main is overpowered. Also, I’d like to learn how he installed the bowsprit. It seem to me that, with a careful job of tapering the spar, it could look great with the 19th century lines of the boat.

I’d also be grateful for your thoughts about using plastic laminate on the interior or the centerboard trunk and of using an aluminium plate for the centerboard.

Skip

Well, Fraser, some of this is for you to look into. Formica-lined centreboard trunks have been used successfully by boatbuilders for a long time now. I only wish I’d heard about it before spending days glassing the inside of my trunk! I’d be very wary of an aluminium centreboard. Made to the same thickness as shown on the plans, it’d be very heavy and would probably need a winch to raise it. A thinner one would need a narrower trunk and might get bent and jam up. You’ll recall that Fraser laminated a central core of aluminium in plywood, giving the same weight/density as the lead- weighted plywood centreboard of the plans (see Chebacco News #11).

Skip also emailed Gil Fitzhugh and myself asking how to fit the carlins and cuddy sides. Gil replied:

. . . there are floors at roughly stations 2 3/4 and 3 3/4. After they and the inwale are in place, you can tie the carlin to those floors and inwale with string, or wires and turnbuckles, like this –

carlin

By adjusting the tension on the strings you can pull the carlins into a fair curve relative to the sheer in both profile and plan view. Note that the top and inside faces of the carlin, to which the deck and cuddy sides will be fastened, are unobstructed. After you’ve fastened the deck and cuddy sides to the unobstructed faces of the carlin with screws and epoxy, the carlin ain’t goin’ noplace, never again . . .

My own approach is rather cruder. I left in the temporary molds 2 and 3, and used these to determine the shape of the carlins. Once the cuddy sides and side decks were fitted, I crawled into the cuddy with a handsaw and chopped the molds up so they could be removed. Untidy, but it works!

Professional advice available

Bill Buchholz has recently returned to the USA from Finland, where he supervised the building of a modified Chebacco at the boatbuilding school in Hamina. Bill has kindly offered to provide advice to amateur builders of Chebacco. He can be contacted at Apache Boatworks, RFD 4517, Camden, ME 04843, USA, phone 207-236-8048.

Weight aft, Mizzen Sails and Mast Boots

Peter Gray of Queensland, Australia refers to Jamie Orr’s query about weight at the back end of the Chebacco. He writes:

I was concerned about this with Grey Feather. The rudder was built of steel-

pgray1

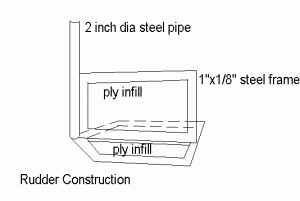
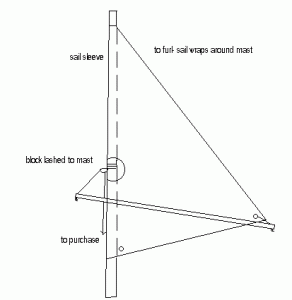
so instead of the Oregon mizzen mast weighing 12 kgs I used a second hand windsurfer mast costing $50 and weighing 2 kgs. I got the sailmaker to sew a sleeve in the mizzen sail to go over this. It works really well. I also have an 8 hp Johnson outboard weighing 27 kgs. I have found this combination of items works well (weight and function).

pgray2

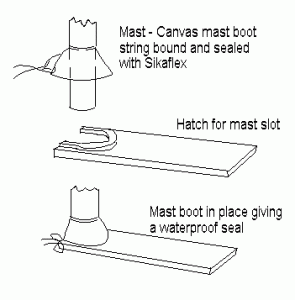
About the mast slot and sealing it – this was also of major concern to me as I don’t like water in the hull. I made a hatch cover for the slot and a boot for the mast.

pgray3

Grey Feather went to the Brisbane (Down by the River) Festival on August 23-24. This was a celebration of the 150th year of Newstead House, house of the Governor of Queensland, Australia. The house is on the banks of the Brisbane river. Incorporated with these celebrationswas a heritage and vintage boat show. Gray Feather was part of this and was met with great enthusiasm

Peter Gray


And Finally . . .

Please keep your news coming; whether about sailing or building or even just dreaming. This is your newsletter and we can all benefit from each others’ experience. For the first time, in this issue, I have devoted some space to a Bolger boat which isn’t a Chebacco – John Tuma’s Catfish. Please let me know whether I should occasionally discuss Bolger designs which might be alternatives to Chebacco, or whether I should stick strictly to Chebaccos.

Happy building, sailing, modelling, dreaming, . . .

Bill Samson,
88 Grove Road,
West Ferry,
Dundee,
DD5 1LB,
Scotland.

w.samson@tay.ac.uk

Chebacco News 09

Chebacco News


Number 9, May 1996

[This issue of Chebacco News can be seen (in glorious colour) on the World Wide Web at: http://www.tay.ac.uk/mcsweb/staff/wbs/chebacc9.html]

More from One Who Waits

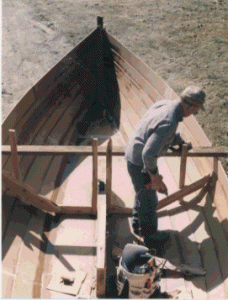
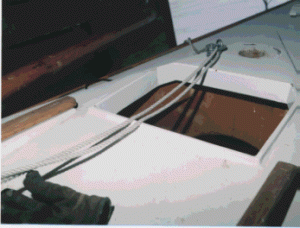
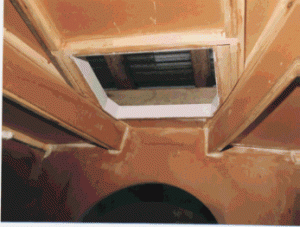
In the last issue Marc Lindgren told us about the hatch he built into the cabin roof of his Chebacco-20, One Who Waits. He has sent me a bunch of photos of the boat which will be of particular interest to builders of lapstrake Chebaccos.
. ch91
Marc spiles the shape of the main bulkhead

ch92
The cabin top showing the hatch

ch94
View of hatch from inside the cabin

ch95
Another view of the cabin top

The hatch certainly makes an attractive feature on Marc’s Chebacco. Builders will, of course, need to make up their own minds whether a hatch is more important than the mast slot of the drawings, since you can’t have them both!

Weather helm . . .

Phil Bolger sent me the following letter:

A couple of owners have found their Chebaccos so balanced that the mizzen needs to be shaken to avoid too much weather helm. Not all have this; it may be a quirk of sail draft. But there would be no harm in opening the mainmast partner as far forward as the taper of the trunk allows, so that the rake of the mast can be reduced if it proves to be desirable. . . .

[I wonder whether sail makers realise that the Chebacco Mizzen is more of a steadying sail than a driving sail, and as such it needs to be cut dead flat – a straight luff and no broadseaming. Clearly a full mizzen would provide a lot of drive that would exaggerate weather helm. Another possibility that strikes me is that, if your mast partner is in place and you are loath to start sawing, the mast step is quite easily adjusted to bring the rake of the mast forward, though with slightly less effect than an equivalent adjustment to the partner. – B.S.]

‘Jib-booms and bobstays!’

. . . well, not exactly, but Phil explains:

We have an inquiry about a bow-sprit. If intended to be used close-hauled, it should be very short and very stiff, or else have a bobstay. We tend to think it not worth the complication. A flat-cut reaching spinnaker, single-luff type, guyed out on a pole, would add more performance but the question of added clutter remains. Rather than make a drawing for this, we’d suggest trying it out with a borrowed genoa jib of appropriate luff length, on a makehift pole to suit. Exact size and shape aren’t critical. P.C.B.

[If you are unclear about how a reaching spinnaker should be rigged, Phil’s AS29 design has this feature and you can look at the drawings in Phil’s book ‘Boats with an Open Mind’ for further details. – B.S.]

News from British Columbia

Jamie Orr writes:

Bill,
Just a quick note to let you know what’s happening (or not happening) in lotus land.
[‘In’ joke – B.S.]

I had a quick visit from Fraser Howell at the end of February. He had his photographs along, although they weren’t quite up to date – he has finished veneering, but the photos didn’t show that. I was impressed by his adaptation of building method to suit his materials on hand.

I guess it’s true about white oak beiong hard to glue. Just this weekend I noticed that the joints in my stem are letting go. The stem is made up of eight pieces of 1/4″ thick white oak. These were soaked, pre-bent together over a form, taken apart to dry, then glued over the same form using epoxy thickened with microballoons. The work was done before the low temperature arrived so I am guessing the failure is due to the white oak. I knew its reputation, but hoped that epoxy would handle it. Another possible factor was the pressure needed to hold the wood to the form, it may have squeezed too much glue out the edges. Chalk one up to experience.

Luckily, I had put in screws every six inches or so, alternating from front and back, after the glue dried. These should help to hold the shape in for now, but I think I will replace them with bolts, with as much epoxy as I can work into the cracks, before I leave it.

I’m still working on the centreboard and case, not pushing too hard as I’d like some warmer weather before epoxying the pieces of the hull together. We’re still getting frost some mornings, which makes it cold for around here.

I’m looking forward to the next edition of Chebacco News. I hope that I’ll have something to contribute by Summer. How do I print the photographs? Do you work right off ordinary prints? I’ll try to get some decent shots of my work-in-progress, although the shelter restricts what can be done.

Jamie

Good point about photos. Yes, ordinary prints are what I work from. I just scan them in and ‘paste’ them into the document. Some of you have commented that photographic quality in Chebacco News isn’t quite up to the standard of National Geographic; but then neither is my equipment!

Also- good point about white oak. I experienced this on my last boat and would never use it in a glued situation again.

Still in British Columbia, Randy Wheating in Port Moody has news of his sheet ply Chebacco:

My boat is progressing slowly and surely. I amattempting to pre-build as much as possible before getting into the assembly stage as she will be going together in our two car garage – diagonally, as the garage is 19 ft in length. The bulkheads, molds, stem, transom, centerboard and trunk are basicall completed to date.

The Chebacco News and letters from other builders have been an invaluable resourse for me. Here are my latest questions and comments:

1. Samuel Devlin’s “Devlin’s Boatbuilding – how to build any boat the stitch and glue way” is an excellent reference manual for anyone undertaking the building of a Chebacco. It is comprehensive without being wordy and is available through The Wooden Boat Store.

2. I was a little apprehensive about dealing with the molten lead for the centerboard ballast. A few issues ago there was a letter to the editor of the Wood Boat magazine which I thought dealt with this nicely. It was suggested that the 6 inch square hole be filled with a thick mixture of lead bird shot and epoxy. No melting or pouring lead and bird shot is readily available. I plan to try this out and will let you know how it goes.

3. One of Samuel Devlin’s suggestions, which I have incorporated, is to line the centerboard trunk with countertop laminate. This creates a smooth, tough, waterproof surface that allows the board to slide freely.

4. Phil’s plans show a support surrounding the pivot hole of the centerboard. Is this necessary? If so, what is used? Could a recessed epoxy/cloth patch be used? Is a similar support required on the trunk? I plan to epoxy a short piece of 1/2 inch PVC pipe into the board and trunk to act as a bushing for the 1/2 inch SS rod (from a 6 inch bolt) pivot. Does this sound workable?

5. Would it be sensible to substitute hte lower cost polyester resin in areas such as sealing the underside of panels and the inside of the hull while using the stronger and more costly epoxy for areas where great strength and durability is required such as joints, laminates, the outer hull etc.? This could reduce the costs considerably but would the quality be compromised? In my research I have found builders who use only polyester resin (i.e. Harold Payson) and others who use only epoxy.

6.After drawing out the outlines for the main bulkhead onto the plywood and finally getting a feel for the true size of the cabin I decide to expand the cabin sides outwards about four inches to align with the cockpit seat backs “catboat style”. There is some loss of deck but the additional room would be worth it. As the master of a completed Chebacco, what do you think of this plan?

7. On the topic of space below, I have been thinking cbout installing a hinged mast step on the cabin top over a beefed up bulkhead. This would require the tabernacle, two back stays (fixed) and a forestay (detachable). The advantages would be no mast boot required, access to more usable space in the forward cabin area, shorter mast to build and handle and easier mast stepping. The disadvantages are the stays (but I plan to run the optional jib anyway) building the hinge itself (I have never seen any articles or books on this). I have seen this rig on boats of similar size and would greatly appreciate any input on this matter.

I’ll try to address some of Randy’s questions here, but I must admit to being flummoxed by some of them and would be interested to hear your views:

1. I haven’t read Sam Devlin’s book yet, but I do know he produces some superb craft by the methods he describes.

2. I guess the bird shot/epoxy mixture will be a little less dense than lead. A mathematician into sphere packing theory could maybe give you an exact figure. Anyway, what I’m suggesting is that the six inch square hole may need to be slightly enlarged to give the same weight.

3. I believe that Brad Story once lined his trunks in the same way. I’m not sure if he still does. Brad?. . .

4. What I’ve done is to apply an epoxy/glass patch. It remains to be seen whether this is adequate. One consolation is that if not, the centerboard is the easiest part of the boat to replace! I like the idea of the PVC bushing, though.

5. No, no, a thousand times no! My reasoning is that epoxy forms a much more effective moisture barrier than polyester resin. To get the full benefit of this (and it’s a benefit well worth having) each part should be totally encased in epoxy – inside and out. (That’s the epoxy people’s propaganda, anyway.)

6. If you sit inside a Chebacco’s cabin, you’ll find the most comfortable position (at least for a 5’7″ guy like me) is to sit athwartships with your back leaning on the inside of the hull and head under the side deck. So, unless you do away with the side decks altogether, I guess you’ll get little benefit in terms of space gained. You might want to look at Phil’s drawings of the Chebacco-25 in ‘Boats with an Open Mind’ to see how a Chebacco might be built with no side decks.

7. I’m stumped here. I seem to remember that Peter Gray was planning to have mast shrouds on ‘Gray Feather’. Peter? . . .

You tell ’em Peter!

Colin Hunt, of Victoria Australia, kindly sent me a copy of the “Australian Amateur Boatbuilder” magazine (a great mag; I wish we had the like in the UK) which has an article about the Chebacco in it. The reviewer reports that “there are none on the water here, yet.” Readers of Chebacco News know, of course, that Gray Feather was launched in Queensland Australia last year. I’ll stick my neck out, again, and affirm that this is the first Chebacco to be launched South of the Equator. Perhaps Peter Gray should have a quiet word?

Colin is planning to build a lapstrake Chebacco-20, modifying the design to make the cabin 2 feet longer and the cockpit that much shorter. He also asks about ballast. Since he’s a new reader he won’t have seen earlier discussions on ballast. The long and short of it is – some do, some don’t. ‘Toulouma Too’ carries 300 pounds of lead ballast under the floorboards at the aft end of the cabin. Most people don’t bother, since the Chebacco has such a lot of form-stability. So far, (touch wood) none of us has heard of a Chebacco giving anyone a fright.

Financial aspects of building to order and other thoughts . . .

John Gearing of Clifton Park NY (just north of Albany) has sent me a couple of thought provoking Emails:
I stumbled onto [Chebacco News] last night during my first session of cruising the internet. I had heard of your newsletter in WoodenBoat, but I had never got around to writing you. In fact, I have been a Chebacco fan since I first read about the design in Small Boat Journal. I always thought it was sad, or perhaps a commentary on our times and economy, that Brad Story was never able to build the boat commercially for a price the market would support. The major lesson of the WB story about the three versions of the Chebacco, in my opinion, was that it takes about the same amount of time to build the boat, no matter which method one chooses. One can’t help wondering whether jigs and other production aids could cut the labor costs, but then you get into the old “chicken and egg problem” of financing the creation of an assembly line without firm orders in hand. But how do you get orders if you don’t have a production method that keeps the cost reasonable? As I recall, Brad Story had plenty of requests for information about the boat (the market was there) but very few orders (price too high). Once upon a time I suggested to Jon Wilson that a builder could build a run of boats by subscription, using the down payments made by buyers as leverage to get funding for setting up production. At the time I wasn’t sure which boat design might attract enough interest to make such a plan feasible, but now Chebacco comes to mind. I’m going to give this some more thought and will let you know if anything concrete develops. They are such great little boats . . .

and . . .

A few years ago the US boating magazines (I think it was SAIL) had an article on “trailer sailers”. Of course they were of designs not to my liking but I was impressed with a couple of things:


  • they came complete with trailer;
  • and the average cost of the lot was about $11,000.


This was at the time a new Chebacco would have run about $18,000 sans trailer. I keep reading in SAIL and its ilk how there are booming sales in these 20 – 23 foot trailerable boats because they are so convenient, and because one can avoid slip fees. It seems to me that this kind of boat could really open up the sailing world to a lot of folks who don’t live on a body of water but do live within a few hours drive of one. I’ve watched people look at wooden boats and their eyes light up at how beautiful the boats are. It used to be that there was a widely held opinion, no doubt assisted by those who build in fibreglass, that wooden boats were maintenance nightmares while fibreglass boats were maintenance free. We all know by now that no boat is maintenance free and that a properly designed and constructed wooden hull is quite competitive with ‘glass from a maintenance standpoint. In sum, there seems to be good reason to believe that there is a healthy market in the US for a Chebacco-type vessel.

Upon re-reading the above paragraph I realise that I may sound a bit preachy and that I am perhaps guilty of “preaching to the choir”. I don’t mean to go on and on over this, merely to add my small voice to that of the choir . . .

Well – John has given us some challenging thoughts there! I’d be glad to print your responses to his ideas.

Further news and thoughts:

When I started on this issue I wondered if there’d be enough material in the winter season when we Northern Hemisphere dwellers don’t do much building, but we’ve managed to fill this little newsletter with some novel, thought-provoking stuff. I guess Chebacco fans are at the intellectual end of the boating spectrum!

Meanwhile, our little community grows apace – over 40 of us now plus the many who read Chebacco News on the internet.

Keep your news, photos, thoughts, dreams . . ., no matter how outrageous, coming to me:

Bill Samson,
88 Grove Road,
West Ferry,
Dundee,
DD5 1LB,
Scotland
Phone: (+44) (0)1382 776744 Email: mctwbs@river.tay.ac.uk 1

Chebacco News 08

Chebacco News


Number 8, March 1996

ch82 ‘One Who Waits’

Was Marc First?

In Chebacco News #6 I opined that Peter Gray’s Gray Feather was the first amateur-built Chebacco to be launched. Mea culpa; Marc Lindgren of Minnesota has put pen to paper, pointing out that One Who Waits, his home-built lapstrake Chebacco hit the water in August 1994! This time, though, I’ll be more cautious and simply ask if anyone knows of an earlier one. Marc writes:

Dear Bill,
I’ll bet you are getting lots of letters in regard to the launching of the ‘first’ amateur Chebacco. Here’s some news for you. I launched One Who Waits, a lapstrake Chebacco, about a year and a half ago. On August 22, 1994 not only did I turn 40, but used the occasion to launch the new boat for the first time. We had a great party, with lots of well wishers present.
Construction began December of ’93. I know it was December because instead of doing the Christmas gifts in my shop I told my dear wife I’d do, molds were being cut and assembled. Setup and lining the ribbands progressed rapidly and before long strakes were being cut and glued. 1/2″ fir AC MDO (medium density overlay) ply turned out to be an okay substitute for the (much) more expensive material Phil suggested. Easy to scarf together with a hand power-planer. It seems very durable and doesn’t need fiberglass sheathing to avoid checking. All end-grain was coated several times. He recommended Tom Hill’s book on lapstrake canoes as an excellent reference to building this type hull. Laps were well primed with unfilled epoxy, glued with a cabosil/epoxy mixture. All fillets were epoxy/cabosil/microballoon. Smoothing the soft epoxy with a brush dipped in lacquer-thinner speeded the process. Much less sanding. Some galvanized sheet rock screws were used during planking as temporary ‘clamps’. I used a template cutter on the router to get the strakes out.
Hoisting the 4’X23′ planking stock definitely took two guys. An alternative to the router/ribband technique would be to utilize some cheap, thin ply to take the strake-shapes from the jig, tracing directly onto the planking stock. When I do another hull of this type this is the manner in which planks will be finished. Less lifting.
Turned the hull in April and began the interior work. Summer slowed the work somewhat. The long hours of winter-darkness lend themselves to concentrated building.
Spars are natural growth white spruce. My photos don’t show the forward hatch my son suggested we include. I’ll try to photograph the details and include them soon. Do the hatch! It doesn’t weaken the structure (if done properly) and makes the cuddy more inhabitable and interesting.
Took the boat to Lake Superior last summer for some big-water sailing. Didn’t go too far out but felt secure all the time. Prudently left harbor with a reef, ended the trip full sail and ripping along.
Part of the fun with this type boat are the engaging conversations that often occur. Comments heard include “how old is that boat”, “did you restore that” and “gee that’s a beautiful boat”.
I’d like to build another one this winter. Interested types call me for details.
Marc

Thanks for the news, Marc. I’m most impressed (and a little ashamed) that you started building about a year after me and launched less than a year later. Eighteen months on mine has still never had her bottom wet. Lots of useful tips there, too. It would be nice to hear more about the hatch arrangements. Here are some photos of Marc’s Chebacco:

ch83ch84

ch85ch86


Another Lapstrake Chebacco

Jerome McIvanie of Washington State sent me a photo of the lapstrake Chebacco-20 which he is building.ch81

He writes:

A year ago I started building the Chebacco 20′, lapstrake hull. 1/2″ okume plywood and WEST System epoxy.
I’ve never built a boat before but with three years of reading and a couple of weekend classes at the Wooden Boat School in Port Townsend, WA, I decided I was ready. As you can see from the picture, I did it upright.
I am a machinist by trade, and have built most everything that is straight, flat and square. This has been a real challenge. The kind of thing I need help with is what kind of fastenings (size) and where to put them.
Again, I would like to thank Gil [Fitzhugh] for helping me to get started.
Jerome McIlvanie

If anyone has any opinions about fastenings, please let me know and I’ll include them in the next newsletter.

Booms and Downhauls

I wrote to Phil Bolger asking for advice that will be of general interest to Chebacco builders who are unused to gaff rigs with jawed booms. All rigs I’ve used until now (gunter, bermudan, standing lug) have required some kind of downhaul at the mast end of the boom, possibly in the form of a kicking strap or vang. It seems that such complications are not needed with the Chebacco’s rig. Phil writes:

Dear Bill,

I would not bother with a downhaul myself. A tight luff is not very important to a sail like this. No harm in it.
. . .
Phil Bolger

Some builders (Brad Story, for example) replace the boom jaws with a conventional gooseneck. Sister Krista’s Toulouma Too is like this (see Chebacco News #7).

Other Building News

Jim Slakov, of Sechelt, BC, Canada reports progress:

Thanks for the last issue; great as usual, and encouraging to see some finished products! I hope to be sending you some pics in the not too distant future. The molds are ready to assemble on the strongback, but work is keeping me from play lately, so progress is a bit slow for now. Congratulations on your nearly completed boat. When do we get to see some shots of her under full sail? I’m wondering if anyone will make their own sails? [See below!] I bought ‘The Sailmaker’s Apprentice’ but don’t know how I’ll feel about it when I get to that stage.
Thanks,
Jim

Jamie Orr (jorr@oag.aud.gov.bc.can), also of BC, Canada sent me an e-mail the other day that shows he has been thinking hard about arrangements for the sheet ply Chebacco-20 he is building:

My name is Jamie Orr, and I live in Victoria, B.C., Canada . . .
I recently started my own sheet ply Chebacco 20 and recognise some of the concerns and problems mentioned in your newsletter [#5]. I am also building outside, but at this time of year I am contending with heavy rain and (just lately) freezing temperatures. The plywood shows some tendency to warp after the pieces are cut out with the heavy moisture content of the air. However, brute force and ignorance will probably continue to save the day. Luckily I am using ‘cold-cure’ epoxywhich will cure down to 2 degrees Celsius (36F) and ignores the damp. I used this on a strip canoe recently and was very pleased with the result.
One of the questions raised in your newsletter was where to put the portable toilet. I haven’t any brilliant ideas, but wonder if it might sit at the back of the cockpit, under an athwartship addition to the seats, right up against bulkhead #6. It would have to be moved to use it in any sort of privacy, but there’ll be little of that anyway.
As for the anchor, I plan to use a Danforth for its ease of storage, and keep it in chocks under the floorboards. My boat will live on a trailer, so I don’t want to leave any equipment visible or too accessible to passers-by.
Speaking of floorboards, I also plan to fasten a 3/4″ by 3/4″ rail along the fronts of the cockpit seats , so that the floorboards can be lifted up and placed on these rails, level with the seats. The whole cockpit area will then be available for sleeping in or on undeer a boom tent. In any case, I look forward to reading your newsletter again. I would be interested to know how the cat-yawl rig handles – for example, how does it heave to, if at all, without lowering the main? [Any answers sailors?] I have found heaving to of great help, as my family is too young to help much, and I was virtually single-handed when we chartered last summer.
I think that’s enough for now . . .
So long and good sailing,
Jamie Orr

I drew Jamie’s attention to the other issues of Chebacco News, on the Internet, and he wrote back:

. . . Yes, I have a shelter. I have a large (20X30) plastic tarp over supports attached to the house. They are 16 feet long, attahced about 10 feet up, sloping down to 6 foot posts at the lower end. The tarp is held in place by 16 foot 1″X2″ battens screwed down to the 2″X4″ beams and posts. The working area covered is roughly 25 by 15 feet, but hte ends are open so the rain sometimes blows in. I have not attempted to add end walls because of the added resistance to the wind. When necessary, I cover the work with more plastic tarps.
Just lately we’ve had some freezing weather, so the work has gone from slow to dead slow. However, Victoria has Canada’s mildest weather so I hope to get the side panels and bottom set up over the Christams holidays. I’m looking forward to this as it will set the shape of the boat and I’ll be able to see what I’m building.
While the weather’s been bad i’ve been building (indoors) Bolger’s ‘Elegant Punt’ with my seven year old son Alan. I chose this design for its simplicity and because it doesn’t need any toxic resins. He’s enjoying it, although we’ve had to pause for lessons in basics, such as how to hammer nails.
I’ll keep in touch on the building. I expect it’ll be pretty slow here until March or April. I hope you and yours have a merry Christmas and a happy Hogmanay.
Jamie

Making your own sails?

Being a thrifty Scotsman, I decided to save myself a few hundred quid and make my own sails. There are a number of good books on the subject, but the one I’ve used most is a booklet written by Paul Fisher. This is called “Sail Making for the Home Builder” and can be bought for £7.50 plus postage/packing from Selway Fisher Design, 15 King Street, Melksham, Wiltshire, SN12 6HB, England, phone/fax +44 1225 705074, or 01225 705074 in the UK.
I bought 7 ounce sailcloth – a 30 metre roll which is about twice as much as I need but it is very much cheaper to buy a whole roll. US readers should note that British 7 ounce is about the same as US 5 1/2 ounce. The Brits measure weight for 36″ wide cloth; Americans for 28 1/2″ wide (an old standard width for broadcloth).
My wife, Sheila, sewed the cloths together on her ordinary domestic sewing machine. The only problem she encountered was that the mchine had trouble gripping the very stiff hard cloth; still, with care, it went together okay. We ‘broadseamed’ the leading edge of the sail back to 1/3 of its width, on the seam that passes through the tack and a couple of seams either side. This has the effect of giving the sail some shape, when combined with convexity of the luff and leach. Incidentally, we’re making cross cut sails with the cloths perpendicular to the leach. It is equally valid to make vertical cut sails with the cloths parallel to the leach. It’s important to find out whether your cloth is strongest along the warp, or the weft, and to keep the strong threads parallel to the leach.
Many sailmakers carry broadseaming back to 40% or more of the width, but we decided to make the curve shorter in order to keep the ‘powerpoint’ well forward and help counteract the weather-helm which is a tendency of most Chebaccos.
We’re currently ‘roping’ the edges of the sails and applying reinforcing patches at the corners. This is being hand stitched because of the large number of thicknesses the needle has to pass through. It’s easy enough work, though and quite therapeutic.
We’ll keep you posted on how the sails turn out. Even if they aren’t very good, we’ll be confident enough to unpick a seam and re-stitch it for better setting.
I should mention that we sewed the sails for our last two boats and both worked perfectly well, with no obvious problems.

Keep in touch!
Keep your letters coming. Send them to:

Bill Samson,
88 Grove Road,
West Ferry,
Dundee,
DD5 1LB,
Scotland

mctwbs@river.tay.ac.uk