Chebacco News 44

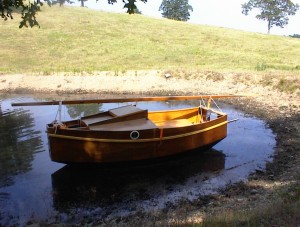
Icebreaking – Richard Spelling

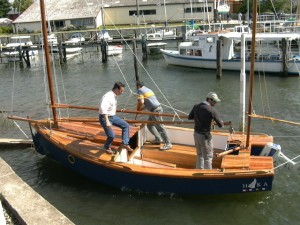
tn_P2230001

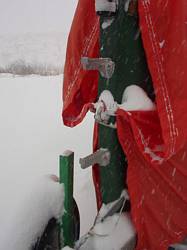
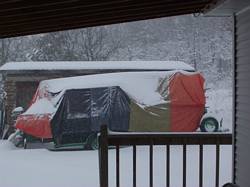
Well, woke up this morning, and there is six inches of snow on the ground. Guess that’s a sign I need to publish this issue!

Been kind of quite around here. Send pictures! Send stories! In particular, I know of one long cruise in the Chebacco “Samantha”… Send write up!Well, woke up this morning, and there is six inches of snow on the ground. Guess that’s a sign I need to publish this issue!

In this issue we have an update to “Chebacco Sailing 101, from the previous authors, some miscellaneous conversations, and some pictures of a Chebacco from Down South. Not “Down Under”, but South America! He even wrote me in spanish.

Coincidentally, I’m learning spanish, so I wrote him back in the same language. I’ll spare the regular readers the trails of automatic translation websites… (which translate “sailboat” to “boat of candles”…) I had originally planned on doing the whole issue in his native language, but I’ll do it in
english instead.

Ed Heins reports progress:

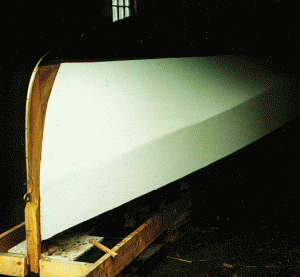
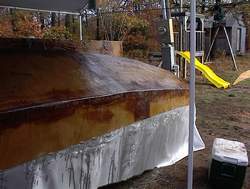
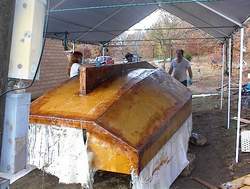
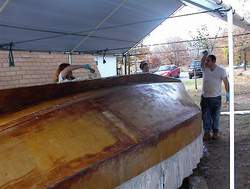
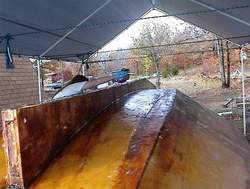
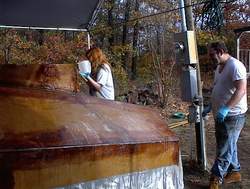
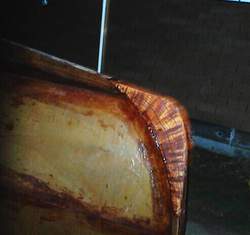
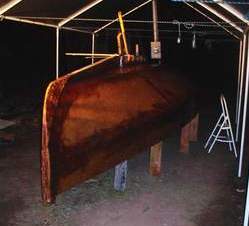
At long last it appears I’m able to report some progress on the chebacco garage ornament that’s been living about 25 ft away from this computer for the past 4 years.   Light at the end of the tunnel is looming larger as I should finish sheathing the topsides tomorrow and be done with the final fairing of the epoxy making ready for painting by the end of the month.  Boat name “Bodacea” has been selected and routed into an oak nameboard for transom mounting, and brightwork already started.  Electrics are in to the stern light and battery box, and should the mood strike tomorrow, I’ll get the flush mount running light mounts cut in.  Current plans are to paint it interlux dark blue on the bottom and hatteras off white on the deck to just below the rub rail.  Then a gold and red bootstripe should finish it off.  Opting for no waterline markings since the boat will live on a trailer for most of it’s life and the bottom will not be antifouled.
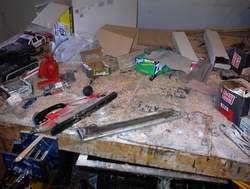
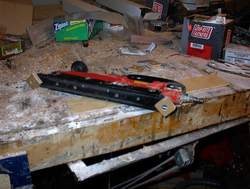
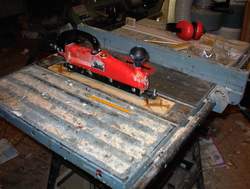
Just bought the power planer today, and plan on attempting a birdsmouth mast later this winter.

As does Mike Haskel:

Good morning Richard,

How are things going down in Oklahoma? I have attached a URL that describes
the building of “Two Grumpy Old Men”

http://www.adventurequest-usa.com/New_Folder/chebacco.htm

All the best,

Mike Haskell, Founder/CEO
Adventure Quest-USA
8 River Road
Bowdoinham, ME  04008
207-666-8976

Also had an interesting conversation on the origins of the name “Chebacco” with Edson White:

—– Original Message —–

Sent: Tuesday, January 14, 2003 8:39 AM
Subject: Re: Where did the name “Chebacco” originate?
Actually, I think it is a type of boat from England:
—– Original Message —–
Sent: Tuesday, January 14, 2003 8:30 AM
Subject: Where did the name “Chebacco” originate?
Richard:  I am a little curious.  I have password “chebacco”, and my son has “Chebacco-2”  Our “clam shack” on the ocean was named “Chebacco” back in the 1800’s!
Thus, (1) “Chebacco” is an Indian name, given to a river before the advent of the white man – at least up here in the northeast.
Is this also an Indian name prevalent in Oklahoma, and if so, do you know the meaning of the name?
                                                   
                                                                                                         Best regards,    Edson F. White

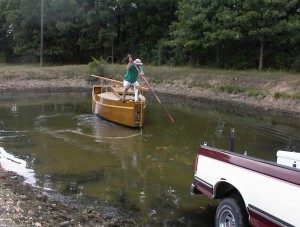
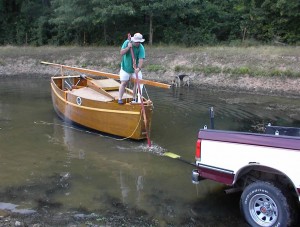
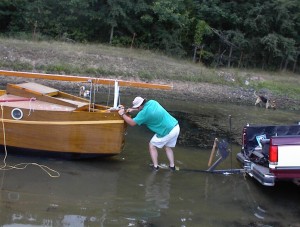
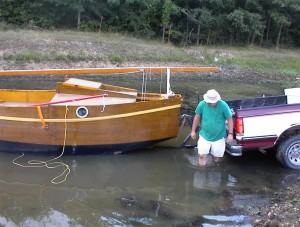
I’ve been able to sneak out a couple of times, weather permitting, and using nice tall rubber boots to retrieve the boat from the frigid water. Nothing really notable, except for the icebreaker session!

A friend of mine had come up to deliver half a boat, which is a whole other story. Part of the price was a sailing trip in Schroedinger. Luckily, the weather cooperated, and we had wind and temps in the 45 degree range.

We see some nice waves when we drive over the dam to launch the boat at the local state park, so I’m anticipating a nice brisk sail.

I setup the boat and we launch at the ramp, with only one other vehicle in the state park on this nippy January morning.

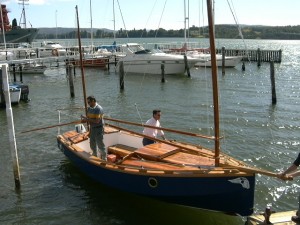
tn_P2230002

The new steps I cast for the boat work great! They make it very easy to get in when the bow is on the beach. (I’ve been doing machine work lately, when it’s to cold to sail.http://www.richardspelling.com/richardsfoundry/  )

I notice the water is calm in the bay where we are launching, I attribute this to the surrounding hills.

As I’m reversing away from the ramp, I idly wonder aloud what that filthy layer of scum is on top of the still water. “Oh, that’s ice” says my sailing
guest.

And I’m about five feet away, backing the transom and the expensive motor right towards it!

Can you say “quick turn”?

I take a good look, and guess what, there is NO WAY out from the launch ramp facility! There’s open, ice free water about 1/4 mile away, but there is no path to get to it!

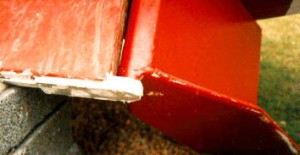
Nothing for it but to put the 1/8″ stainless steel keel armor to the test. RAMMING SPEED! All hands brace for impact! Crunch!

About this time I’m wishing I had brought the camera!

At about half throttle, the keel rides up on top of the ice, and the weight of the boat breaks the ice, in true icebreaker fashion.

My greatest worry at this point is that I’m going to have to repaint the bottom!

We crunch through the 1/4″ mile of 1/2″ thick ice to open water, and have a nice sail. The only other homemade boat on the lake was out, so we sailed over to him and had a nice chat.

And guess what, when we retrieved the boat, we had to do the whole icebreaker thing again! Oh, my poor paint!

When I got off the boat at the ramp and looked at the hull, there was not a single scratch in the “deck paint” on the hull! Amazing, I was expecting at least bare fiberglass.

And interestingly enough, when I posted my tale on the Bolger egroup, two other people had ice stories, for the same day! We decided to officially dub that saturday “National Bolger Icebreaker and Porch Paint appreciation day”!

More when the weather warms up!

– Chebacco Richard

***
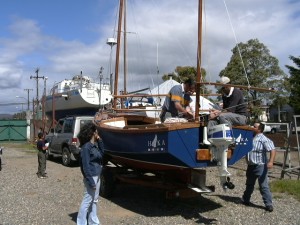
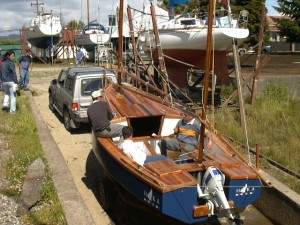
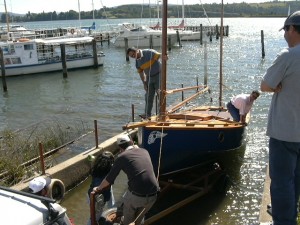
Sudamericano Chebacco – Gustavo Estévez F

Mr. Richard

Chebacco Sudamericano

A finales de Diciembre lancé mi bote (Chebacco con un toque de Goland
Gaffer) llamado Haka a las aguas en Valdivia, Chile (no es el fin del
mundo pero de aquí se puede ver). Hasta ahora no he tenido problemas.
Espero enviar pronto fotos navegando a toda Vela.

Saludos

Gustavo Estévez F. (gef@telsur.cl)

Sudamerican Chebacco

At the end of December I launched my boat (a Chebacco with a touch of Goland
Gaffer), called Haka, in the waters of Valdivia, Chile (it is not the end
of the world, but you can see it from here). So far I have not had
any problems. I hope that soon I can send you photos of the boat sailing under full sail.

Greetings

Gustavo Estévez F. ( gef@telsur.cl)

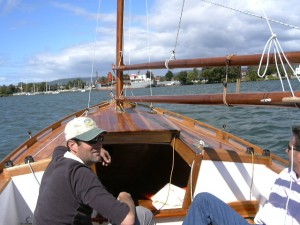
P1000045 P1000047 P1000048 P1000053 P1000054 P1000056

***

Pre-Christmas Sail – Jamie Orr

‘twas the weekend before Christmas…

And after thinking about sailing all week, I decided to go and do it, so on Sunday morning I threw all the warm clothes I own into the boat and headed for the launch ramp.

I drove to Cattle Point, on Victoria’s east shore – Victoria is right on the southeast corner of Vancouver Island – where there are two ramps.  The older one is narrow, with rocky sides, and faces northeast, while the newer one faces southeast.  Neither has very good provision for mooring the boat while you park or retrieve your trailer, but the new ramp has more room.  Because I’d packed up in a hurry last time, I spent a leisurely 40 minutes untangling lines and rigging up.  Cattle Point gets a lot of walkers, so I had several conversations as people stopped to ask about the boat.

The launch went smoothly, and Honda fired on the second pull – not bad since he hadn’t been running for a month or so.  I motored out until I was clear of the rocks, and had some room to drift, then put up the sails.  There was a nice little breeze from the northeast, and Wayward Lass moved along well. I wanted to explore the Chatham and Discovery Islands group, so I tacked upwind, thinking to have the wind behind me to avoid having to tack in the narrow channels between the islands.  It took a while to reach the north end of the passage I had chosen, and I was getting hungry, so I picked an inviting bay off the chart, and headed for that.  As I worked my way to the head of the bay, a group of kayakers came by, adding some colour to an otherwise wintry scene.

I anchored in about five feet.  There was a smooth beach only a few yards away, but most of these islands are Indian Reserve land, and landing is only permitted on the south shore of the most southern, Discovery Island, where a marine park fills that side.  Just as well, really, or these islands would be fully developed as well as private, being so close to Victoria.  As it was, it was like being miles from civilization, as I watched an otter catching and eating his lunch while mine heated on the stove!

After I’d finished and tidied up, I pulled up the anchor and set the main again.  I made sure the anchor was ready if wanted, since I expected some current and the wind was very light by now.  I set off south through the passage between the two larger Chatham Islands, with the wind behind me and against the current.  The deep channel is close beside the eastern island, which may be why the wind became very light and fluky – the island sheltered the channel too well!  I found myself still sailing gently about half way through, but no longer moving in relation to the land.  I used the canoe paddle for an extra boost until a gust came along to help, but it was all undone in the end.  After another spell of motionless activity, what little wind I had reversed itself, and I had to follow suit.

The current carried me back almost to the north end, where the “real” wind was still coming from the northeast.  It seemed to be a little stronger than before, so I turned to try again.  This time I stayed further from the shore, despite the shallow areas, and did a little better.  I managed to sail past my previous turning point before I had to resort to the paddle.  After another 40 or 50 yards, the wind took pity on me and came back.

I thought I was clear then, but found I couldn’t quite sail the course I needed to stay out of the shoals.  The current was still running, and the wind was still too light to allow much manoeuvring, so I decided to trust to our shallow draft, and turned inside a pair of rocks that were just ahead.  I wondered if this was really a good idea, standing with the tiller in one hand and the centreboard line in the other, watching the bottom go by only a couple of feet below.  If I hit some really shallow water and went aground, it was quite possible that the current would hold us there until the tide dropped, leaving Wayward Lass and I on the mud for the night.

However, just before reaching the keel, the bottom receded again, and we reached deeper water, moving out of the shelter of the islands as we went.  Once out in the open, we had a straightforward, two mile run to the ramp.  The wind was still light, but steady, and the gentle run made a nice finish to the day.  I was able to tie off the tiller and let Wayward Lass steer herself long enough to take in the mizzen, then about a quarter mile from the ramp, we stopped and I furled the main.  When I started the motor, the starting mechanism made some funny noises, but the engine ran alright, so I just made a mental note to look at it later.

We made a soft landing at the ramp, despite the following wind, and the recovery went as smoothly as the launch.  I tidied up a little more carefully this time, so that my next outing wouldn’t require untangling all the lines.

After a sail, I always run the outboard in fresh water to flush the salt out.  When I pulled the starter cord this time, I got nothing but funny noises, and the motor didn’t turn over. When I took off the cover, I discovered that a big plastic gearwheel had broken into four pieces.  Two were still more or less in place, until I pulled on the cord again to see what would happen.  (They popped right out.)   I was able to start the motor by winding another cord on the thing on top of the flywheel, but I’ll have to go to the shop for a new recoil gear.  I suppose the plastic gets brittle with age, the engine is about 17 now.

No matter, it was still a good day!

A few days later…

Dad, Catherine and I drove to the launch ramp in Esquimalt Harbour.  A fairly decent ramp and dock, and sheltered from the prevailing southeast wind.  We rigged Wayward Lass, then I backed down the ramp.  Hadn’t paid enough attention to a tree growing beside and over the ramp, and we brushed through it, getting a cockpit full of twigs, needles and cones!  However, we launched without problem, and got underway.

We motored out carefully, as there are rocks near the ramp, then got the sails up and headed for the open sea.  We caught a nice breeze and made good time to the south with a southeast wind (maybe a touch more easterly) pushing us along.  For a while we were gaining on a big ketch on the same course, but he eventually found his groove and started to open up the distance between us.  We’d been out for an hour or so by then, so made our turn for home.  Had a nice reach going back to the harbour – saw a smallish (thirty-something feet?) schooner come out and turn west, making a picture postcard scene.

Once back inside the harbour, we turned into the wind to furl the sails.  Esquimalt is a naval harbour, and boats are required to stay at least 100 metres from all naval property, including the ships.  We were over the minimum distance from the ships, but pointing right at them.  It may have been a coincidence, but the patrol boat came out from behind them in a minute or so, coming our way.  However, by then we had the main down and were busy with the sail ties, so our peaceful intentions were evident.

The motor started on the first pull – still using the “emergency” rope – and we motored in to the ramp.  Everything went very well, until I pulled the boat and trailer up the slope. At this point we ran into the same tree, but the branches must angle down-ramp, because although the main mast still got through all right, the mizzen hung up and broke off just above the partners.  This put a bit of a damper on the day, but it looked like it might be repairable, so I was mostly only ticked off at making such a dumb mistake.  D’oh!!

The aftermath.

Although I’m no mechanic, the starting gear didn’t look like a tough job, so I went down to the Honda dealer and paid the outrageous amount of $38 for a four inch diameter plastic gear!  The remains of the old one came out after undoing the top bolt, so that was pretty simple, but the new gear wouldn’t go on without removing the assembly completely, because of the need to mesh with the teeth on the flywheel.  To take off the assembly only meant undoing three bolts, but it took a while to find a socket that could reach them – I finally bought a nutdriver to make it easier.  Once I had the right tool it was all done in minutes.

The mast was a longer job, but not much harder.  The mast is made of two halves, glued up the middle.  One side had split when it broke, and resembled a two foot scarf.  The other side was broken pretty well straight across the grain, but there were a lot of spikes sticking out from either piece.  I decided the spikes would serve as finger joints and provide some strength when glued up in conjunction with the “scarf” on the other side.  I cleaned up the loose chips and straightened up some bent spikes, then carefully matched up the ends.  I pushed them together as much as I could, then used a mallet on the butt of the mast, ramming the joint as tight as I could.  I had to do this a couple of times, taking it apart and removing more broken chips each time until the thing fit properly.

Then I smeared thickened epoxy over all the broken area, matched up the ends and got busy with the mallet again.  Once everything was as tight as it was going to get, I put in a temporary nail so the ends couldn’t slip apart, and clamped the scarf firmly.  I gave it three days to cure, after that it was just a matter of cleaning up the epoxy that squeezed out, and putting a couple of “dutchmen” in where some small pieces of wood were missing.  I considered putting a fibreglass band around the “finger-joint” area, but decided it was strong enough without it.  We’ll see next time out.

Chebacco News 42

On the Road Again – Jamie Orr

Being the further adventures of the good ship

Wayward Lass

in Clayoquot Sound (for chart, turn to the last page)

image002

Yes, Wayward Lass has been on the road again, this time to Tofino on the west coast of Vancouver Island, to explore Clayoquot Sound. Clayoquot is made up of a number of inlets, with three major islands, Meares, Flores and Vargas. Meares Island was the centre of considerable attention a few years ago, when logging and anti-logging interests clashed over clear-cutting on the island. Meares is also the most interesting island from another point of view, as it lies completely within the sound, and can be sailed around without venturing onto the open sea. Flores and Vargas islands guard the outer edge of the Sound, providing sheltered waters on their eastern sides.

Saturday

I was supposed to get away with my dad, Les, in June, but work kept me in Victoria for another month. We didn’t know it at the time, but this turned out to be a blessing – in the whole week, we were going to have lots of sunshine, almost no rain, and a good sailing breeze for part of every day. We arrived in Tofino about 3 o’clock on Saturday afternoon, after a five hour drive from Victoria, and launched soon after at the 4th Street Public Docks (shown in the “cover” picture) . We found parking for the van and trailer only three short blocks away.

We left the docks at 4:40 pm, and motored north for a short distance through Deadman Passage, with sand banks to port and rocks and mudbanks to starboard. I should note here that as we travelled, we frequently left one channel for another, with the tide changing between fair and foul almost as often. The tide was ebbing on Saturday evening – in Deadman it was on our starboard side, as we turned west in Heynen Passage it was in our favour, then when we turned north again to Maurus Channel it was dead against us.

About 8:30 we anchored in a small cove on the northeast side of Vargas Island. This was still close to Tofino, and turned out to be on a busy corner. While well sheltered from weather, it was wide open to the wakes from the numerous water-taxis and whale watching boats that passed the entrance every few minutes. These carried on until late – not a good recipe for a peaceful night!

image004 Wayward Lass at anchor in the morning, with Lone Cone (on Meares Island) in background

Sunday

Next morning was a bit quieter, and we cooked up bacon, eggs and toast for breakfast before the traffic got going. Then we got moving, under power since the wind wasn’t up yet – this was the general pattern for the week, no wind in the early morning, a bit in the late morning, a quietish spell then a good breeze in the mid afternoon, lasting until evening. Once out of our cove, we headed northwest to Millar Channel, where we turned north. Near the top of Millar, around noon, a light wind came up, so we put up the sails and stopped the motor. (About the same time, we saw the only porpoise we were to see on the trip.)

At the north end of Millar Channel, Obstruction Island splits the channel into two – the passage to the west is fairly straight, but Sulphur Passage to the east is a more interesting, winding around corners and islands. We thought we’d make use of the favourable wind and the last of the flood tide, not to mention our shallow draft (a great comfort at times!) and sail through this route. The wind became fluky and unreliable behind the island, but never totally deserted us. At the most eastern part of the passage, we were drifting more than sailing, but once around that corner, we could feel some air again, so were able to beat down the next leg and see our way between Obstruction itself and the last islet of the chain next to it. Once through, we were quite pleased with ourselves.

We now faced a long beat westward to Sydney Inlet. The tide was starting to ebb (having changed channels, we now had the ebb in our favour), but the wind was against us. I lost count, but I believe we crossed and re-crossed that inlet a dozen times, with the wind strength going up and down, and often changing direction due to the hills and valleys either side of the channel. We finally rounded the point and started south down Sydney Inlet. Unfortunately, by this time the ebb was almost done, and the wind had gone around to the south, following the line of the channel, leaving us still fighting for every inch. Our goal was Hot Springs Cove, just around the corner at the mouth of the inlet. After all our work we were determined to reach Hot Springs, and we passed up one or two inviting bays on the east shore of the channel. One of these had several kayaks pulled up on shore, and tents on the beach. Smart kayakers — it took us another hour to reach the final point, and then we just could not get around it. The wind was almost completely gone, while a strong current was coming around the point against us. We tried for a good hour, but were either pushed back into Sydney Inlet, or towards the rocks where the gentle ocean swell was breaking in a most ungentle way. In the end, it was Honda to the rescue, and we motored into Hot Springs Cove, arriving at the Parks’ dock 10 minutes later. During this short stretch, we had the only rain of the trip, a shower that lasted until we had the shelter up. Since Hot Springs Cove was our only pre-determined destination, we celebrated with wine and a spaghetti dinner, with an excellent meat sauce brought from home.

Our galley arrangements might be of interest. To start with, we don’t carry a cooler on board. It would be too bulky, and we couldn’t keep the ice long enough anyway. Our solution was to put the perishables under the floorboards in the cabin. We kept bacon and eggs for three days this way, and they were still good – we finished them by then so I don’t know how long they might have lasted. Hard sausage, butter and cheese were still good at the end of the week. There was a bit of mould on the cheddar, but we scraped it off and the rest tasted fine. Beer and soft drinks went under the floorboards in the cockpit, since a bit of salty water won’t hurt them. The rest of the “galley” went in two plastic storage boxes. These are convenient, and the soft plastic doesn’t mark the paint when they’re moved around. Our stove is a two burner camp stove that runs off one pound propane bottles. The stove goes under a cockpit seat and the bottle, once started, is stored in the cockpit, in the open space under the motor well.

Monday

The next morning, we were up bright and early (well, early anyway) and by 7:00 were on the trail to the hotspring itself. This trail is about 2 km long, and is boardwalk all the way, with lots of stairs up and down. The spring starts a few metres above the high tide line, the water first appearing as it falls over a small rocky cliff – I found this natural shower a little too warm to stand under. The hot water then runs through a series of rocky pools, cooling as it goes. These pools are more or less natural – some rocks have been re-arranged to better hold the water, or for comfort – but they’re still small, rocky pools in the end. The best has a gravel bottom, and is big enough for 4-6 people (depending how well they know each other) to sit comfortably. We were lucky in that only two other people were there when we arrived – what it’s like when the tour boats come in I don’t know! However, I’d hate to see it developed – for me, the appeal is in the unspoiled surrounding. Happily, since the point is a Provincial park, it’s likely to stay as it is for a while at least.

After our soak, we hiked back for some breakfast, then at 11:00 we left Hot Springs Cove to go down the outside of Flores Island. This route is open to the Pacific swells – nothing between us and Japan – so we were careful to get an up to date weather report from the VHF. Favourable winds were predicted later in the day, but as there was no wind when we set out, we started off motoring. Once we were clear of Hot Springs Cove, a light south-west wind did appear, but it wasn’t enough to make us put up the sails just yet.

image006 Next stop, Japan!

We thought we might be able to start sailing at Rafael Point, an hour away, where the coast falls away to the southeast, and we could hold a course without tacking. As we approached Rafael Point, I saw a puff of spray shoot up from the surface. After a second, I realized it was a whale spouting! Soon we were able to make out three or four grey whales. First the spout would appear, then the whale’s back would appear as it started to dive. Once or twice we saw a tail come briefly out of the water – just like on the postcards!

image007 Here’s the only picture we have of a whale – see the grey hump in the middle of the grey sea? The mist is the spout, several seconds old.

We were pretty thrilled, but didn’t hang about too long – we were still very conscious of being on an exposed shore in a not very big boat.

Instead, we got the sails up as planned, and managed to sail slowly down the coast, but the wind wasn’t really strong enough. – the rocking and pitching from the swell was making the gaff and boom thrash around, so eventually we dropped the sails in favour of motoring again. Passing an unnamed point two or three miles southwest, we saw another group of three whales, so we were well pleased with our morning.

South of Flores Island, we motored back into sheltered waters, eventually turning north again into Millar Channel, this time turning into smaller Matilda Inlet to dock at Ahousat, where we topped up the gas tank, and re-filled our 5 gallon water jug. We decided to stay the night there, and take advantage of the special at the cafe (sweet and sour meatballs.) There’s a sizable marine railway at Ahousat, and at high tide that night they were going to put a fishing boat back in and haul a 53 foot cruiser – a huge fibreglass beast. The cruiser had lost one of its propellers, but the owner had spare props and shafts aboard. I went along at 10 pm and watched the show. The operator of the ways, who also runs the store and everything else there, gave instructions to the cruiser’s owner and several other men on the cruiser as to where he wanted it placed in relation to the supports, then disappeared up to the winch end of things to fire up the engine and start hauling. It was a very smooth operation, finishing with the boat out of the water, but still overhanging it, so actual repairs were to start once the tide allowed. (I took a look in the morning, at low tide, and the two inch stainless steel shaft had snapped off cleanly, just outside the “A” bracket. I’m told this is not an uncommon happening with stainless shafts on big boats – just one of those things rich people have to cope with.)

image010 Wayward Lass at Ahousat, looking across Matilda Inlet to the Indian village of Marktosis

Tuesday

We ate breakfast at the café (moral decay setting in!) then took a look at the chart. Our decision was to go around Meares Island, particularly as both wind and tide should be in our favour for several hours. We fired up Honda and set off back down Millar Channel, but we fairly soon felt some wind and put up the sails. About then, one of Tofino Air’s floatplanes came along, not wasting much fuel on altitude – it was so low that it swerved around us rather than flying over! Soon after that, we left Millar behind, cutting inside both beacon and rocks at the point in order to avoid any extra distance in the light wind. (By watching the local traffic, fishing boats and water taxis, we got a good idea of where it was safe to cut corners.)

image012 Sailing close inshore in light wind.

On leaving Millar, we turned northeast, sailing between some small islands on the way to Cypress Bay. On the way, we passed Hecate Bay, which used to be a big centre for logging activity. There was a big chip barge and a tug moored in the bay, but it didn’t look like a lot was going on.

image014 Here’s Dad toughing it out in Cypress Bay

At the north end of Cypress we lost the wind, so were motoring as we passed through the narrow entrance to Quait Bay, which opened out into a sizable sheltered anchorage, with enough room for a hundred boats. There was a big floating resort moored on the northwest side, catering for sports fishermen, but we didn’t attempt to land there, instead continuing on around the bay then ducking out an even smaller passage to the east of the main entrance.

The wind returned nicely about this time, and we were able to sail eastward towards the narrows at the north end of Meares Island, getting through them just before losing the flood as well as 95% of the wind. We had thought, in our innocence, that on reaching the east side of Meares Island we would pick up the ebb going south, but found that the current was flowing the wrong way! Some study of the chart and the guidebook showed that the flood goes all the way up the west side of Meares Island, across the north end, then down the east side (where we now were) before turning up Tofino Inlet in a northeast direction. And of course the ebb goes back the other way. The tide also flows east and west through Browning Channel south of Meares, but Browning is narrow, so a lot of water takes the long way north around Meares. All of which is to say we blew it and didn’t get any help from the ebb tide.

We started the motor again, heading south and looking into Mosquito Harbour, which is much nicer than its name. Coming out we were able to use the local wind and sail a mile or two, but once clear of Mosquito Harbour, we lost the wind – all the bays we looked into had their own winds blowing out, but I’m not clear on just what causes these.

We by-passed the next bay, since we could see down to the end, and the wind was blowing strongly out of it anyway. At the southern end of our channel, we turned east towards Tofino Inlet, not noticing right away that the wind had come up behind us.

When we did notice, it was hardly worth putting up the sails, so we kept on motoring around into Island Cove, then into another, tiny cove on the south shore of that – absolutely no wind here. As we putted slowly in, getting ready to drop the hook, we saw a young black bear foraging his way along the shore. He stopped and sniffed the air when he heard us, but didn’t pay us much attention beyond that. We passed by about 20 feet out, then circled for some more pictures. He just kept working his way along, and by the time we had the anchor set, he was out of sight. Made a great end to the day.

This also made me realize that I have to invest in either contact lenses or a new camera. I have an old Olympus SLR, but when I focus the camera now, I’m also compensating for my eyesight, so the resulting pictures aren’t as sharp as they used to be!

image015 A young black bear on the shore of Island Cove

We also saw (and heard) an eagle spiral almost vertically down to the beach, but before he could do more than peck at something he found there, five crows arrived and started to verbally abuse him with great enthusiasm. The eagle took himself off, pursued by one particularly aggressive crow.

Wednesday

As was usual by now, there was no wind as we started off at 8 o’clock, so we were motoring as we got properly into Tofino Inlet, heading towards the Kennedy River. The chart indicates this should be navigable, at least at high tide, all the way to Kennedy Lake, but there are drying areas, as well as at least one bridge with no clearance indicated. As the tide was low, we settled for going up only a few hundred yards before turning downstream again. We also looked into Kennedy Cove next door, where some old pilings were all we could see left of a cannery that thrived (throve?) there years ago.

Continuing up the inlet, we looked into another cove, slipping behind some small rocky islands to come out the back door. Dad was steering while I watched for rocks from the bows – I could see a rocky ridge below us as we passed out of the bay, but it was safely under our keel.

image017 Here we are up the Kennedy River, looking downstream towards the river mouth

Travelling the rest of the way up Tofino Inlet was an enjoyable if uneventful trip, getting a little sailing when the wind appeared for a short time, but motoring most of the way. We’ve found that a lower setting on the throttle gives almost as much speed as a higher, but it’s a lot quieter, so it felt like we were loafing along. We passed several small islands, including two that together almost cut off the head of the inlet from the outside world.

My goal was to have a swim once we reached the far end of Tofino Inlet, as the guidebook said this was the warmest water in the area. Okay, that may be so, but the rest of Clayoquot Sound must be damn cold! Up here it wasn’t quite gasping cold, but I didn’t stay in long. Getting back in Wayward Lass, I used as a step a line strung between cleats at either end of the cockpit – something I’ve thought about for recovering a man overboard. When I stepped on it, the line swung under the overhang of course, but it still helped me get aboard by on my own.

image019 Here’s a view of the head of Tofino Inlet

Just about then, about 12:20, the wind came up, a healthy one at last – maybe 10 knots. We motored clear of the islands and got the sails up about 1:00, then started tacking back down the inlet – do I need to mention it was against us? No? Okay then, I won’t.

We crossed the inlet at least five times, working our way southwest. As we left the last of the bigger islands behind, it started to blow harder, and we started to take some spray

aboard – lots of whitecaps by now. By the time we were back down near the south end, it was well over 15 knots, so we ducked in behind a handy island at about 2:30, and put in a reef. Then it was across the inlet again to Grice Bay on one long, wet thrash!

At its western end, the inlet narrows considerably, feeding into the even narrower Browning Channel. and the wind was funnelling through these at an estimated 20 knots by now, so sailing through seemed unlikely to succeed. In which case, we thought we would motor through Grice Bay. This large bay is mostly mud flats, with a narrow channel winding south of a biggish island to join Browning Channel further west. We thought it might be a challenge keeping off the mud, but it turned out to be dead easy, since the tide was well up. We navigated down what we thought ought to be the channel anyway, to be on the safe side. It was a trouble free journey until some floating weed choked the cooling water intake on Honda. Luckily, it also caught around the prop, and the change in engine sound caught our attention. I stopped the motor and cleared away all the crud, after which it started again on the first pull.

Once out into Browning Channel, it was just one long plug into the wind. Since the tide was going with us, it was a wet plug as well, with a sizable chop thrown up by the battle between wind and tide. We pounded a bit, but didn’t have to slow down. With the favourable tide we managed over 6 knots a lot of the way. The eastern entrance to Tofino has a big submerged rock blocking the channel, and our (old) chart didn’t show any aids to navigation, but we thought we would give it a shot, rather than add a couple extra miles to go around. A good decision, since we found a pair of lateral buoys marking the channel in – these were very close together, no more than 25 feet between them, so I was glad we didn’t have to judge it by the kelp alone! These markers must be fairly new, since the guidebooks don’t mention them – our Waggoner guide is only 2 years old. We arrived at the 4th Street docks at 4:45, and downed a couple of pale ales to celebrate.

image022 Les Orr in Wayward Lass, at the 4th Street docks, in Tofino

These docks are mostly reserved for commercial fishermen, so are busy all day and a good part of the night, but about 20% of the space is available for pleasure boaters. We shared “D” finger with a couple of big sailboats headed (separately) around Vancouver Island.

Waggoner passes on a glowing recommendation for the Rain Coast Café. We went there and found that he’s absolutely right, but he forgot to mention that quality costs. Our visit left a large hole in my wallet, although it was unquestionably the best halibut I’ve ever tasted, and the peanut butter pie was right up there with it!

Thursday

The forecast for Thursday morning accurately predicted fog, but it cleared early at Tofino, so after a quick bite at the Coffee Pod Café, (which I recommend highly for good foodand for its prices) we cast off for Lemmens Inlet. Right off the bat the engine sucked in some green, hairy weed floating at the dock and had to be cleared. Once we’d done that, we paddled clear of the crud and re-started. Once you get past a couple of islands to the north of Tofino, Lemmens Inlet carries on straight north, trying hard to cut Meares Island in half. It doesn’t quite make it, but it does provide a great day of sheltered, fog-free travel. Motoring up it, we took the narrower western route when the passage divided, successfully getting around the north end of the island by scraping past what we think was an oyster farm moored just off the shore. We wanted to look into a small unnamed bay to see if it would do as a shallow water anchorage, but ran into some eelgrass (a new Kevlar variety, I think) that wound itself firmly around the prop. I pulled up the motor and worked at clearing the grass while Dad started paddling our way out of the weed patch. It’s funny, in 2 ½ years, I haven’t had a problem with weed, but in these last two days we were stopped three times by it. Once out and clear, we abandoned the bay, since it was on the wrong side of the eelgrass, and headed on up the inlet. The next bay along is known as God’s Pocket, and it’s a good sheltered anchorage. We poked into another tiny bay inside, (God’s Watch Pocket, perhaps?) that was just Wayward Lass sized for anchoring. There was one nasty rock to avoid near the entrance, but once we were in, it was almost as nice as our nook in Island Cove.

As we came out into the main part of God’s Pocket, the wind came up, so we upped sails and motor and sailed out of the bay, then right up to the end of Lemmen’s Inlet. We had a good run going north, where we turned and started beating back south. Since the flood was running later every day, and we were up to Thursday now, it was still running and we had that against us. However, the wind was reasonably steady, and we made good progress back past God’s Pocket, (showing off to the two big sailboats still anchored there) down to where the inlet narrows between the mud banks. The wind was lighter now, but steady, so we kept sailing. I got out the lead line, but found I wasn’t able to get good results – maybe I need more practice, or maybe we were still moving too fast. Anyway, we found we could see the bottom in time to tack, so we were able to avoid any embarrassment. Eventually we sailed right out of the bottom of the inlet, feeling very smug (again!)

We were now at the east end of Heynen Passage, and had to work to windward again to take Deadman Passage back to Tofino. (No matter which way we turned, we had the wind against us because it was being funnelled by the land, and we were travelling generally west.) The current was stronger now, and we were making slow progress. On the plus side, though, the water had covered the mud, so we crossed our fingers and took a short cut over the banks east of Deadman, on the wrong side of several rocks and islets – we could just nicely make our course on a close reach. We could see the bottom, about four or five feet down, but as our maximum draft with the centreboard down is only four feet, all was well.

Once through, it was still too early to quit, and as we were pointed at the channel leading to the open sea, (well, not quite open, one more biggish island south of Vargas still offers some shelter) we carried on past the town. Off the point on the northwest tip of the peninsula where Tofino is located, is another small island. This effectively blanketed our wind, and we bobbed around near the rocks for a while, but the ebb finally pushed us out to where the wind could reach us again. We sailed around to a nearby cove where we had been told there were mooring buoys and safe anchoring. Didn’t see any mooring buoys, (found out later they’d been removed) and the wind blew right into the bay, where some healthy (for surfing) rollers were beating up the beach. Nowhere I’d want to anchor, for sure. We worked up to windward a bit, then turned back towards town. We got stuck in the same wind shadow, but this time the tide couldn’t help. We finally got through when the wind picked up, and we had a royal run down the length of Tofino’s waterfront – got a big thumbs up from the guy on the seaplane float, I wish we could have had a photo from there too.

Since no one was at the loading/unloading dock at the end of “D”finger, and it was parallel to wind and channel, a landing under sail looked like a good idea. We don’t get to practice these much, (I think this was our first) I wasn’t sure of our turning circle, and we had a good stiff breeze behind us now, so I was somewhat shy of hitting the dock. As a result, the first attempt positioned us nicely parallel to the dock, but 10 feet away. We were able to keep turning, though, and circled, making the second half of the circle into two 90 degree turns and finishing stopped against the dock, just like we knew what we were doing. After we moved to an overnight spot, it was back to the Coffee Pod for dinner. (I hate to admit it, but every time we were at a dock at mealtime, we caved in and went to a restaurant – brought half our food home with us. Ate well, though!)

Friday

On Friday the fog finally caught us. It was thick and grey, and only a few water taxis were going out. I guess with radar, GPS and digital charts they can handle fog without much trouble. We had a leisurely breakfast (at the Coffee Pod again!) and did what chores we could find on the boat – not many left after five full days on board. Then we remembered that we had the van nearby, so we topped up Honda’s remote tank from the spare can, and took the can for refilling. To Uclulet, 30 miles away.

Rather than unhook the trailer, and wonder where to leave it, we pulled it along. The spare gas can fitted nicely in the “U” channel for the keel, and a bungy cord kept it there, so we didn’t have the smell of gas in the van – very convenient.

We actually filled up before Uclulet, but we carried on, right through the town out to the southernmost point – both Tofino and Uclulet are on peninsulas, one north and one south. Then we located a boat ramp for future reference – not very fancy, and expensive, but quite usable for Wayward Lass. We could see fog around parts of the inlet there too, showing that we weren’t missing any sailing, so we took time out for a coffee.. However, it doesn’t do to take chances, so we were soon back on the road to Tofino.

image024 Fog on D dock, at Tofino’s 4th Street docks.

As it happened, when we reached Wayward Lass the fog was definitely clearing, so we cast off right away. The tide was low, so we were careful to keep between the markers in Deadman Passage. There’s a dirty big sandbank on one side, and a dirtier big rock on the other to keep you honest, here. Once we had a clear course through, we got the sails up and worked our way through both Deadman and Heynen passages, and into Maurus Channel. At the point where we turned up Maurus Channel we ran into the fog again, however, we had the radar reflector to keep the water taxis off, and the GPS to back up our dead reckoning. Before the trip, I had entered waypoints from Tofino to Hot Springs Cove, in case of fog, and we were back on part of that route so these waypoints were ready if needed. We were in thickish fog for a mile or so, then we sailed out of it and left it behind. We sailed to the point beside our first night’s anchorage, where the tide and wind coming around the north end of Vargas Island met us head on, then started the motor, thinking of an “outside” trip around Vargas. However, a weather check told us that fog was still thick outside, and 25 knot winds were predicted for the afternoon, so we abandoned that idea. We’d been tossing it around for a couple of days, but between fog and higher winds forecast out there, we hadn’t tried it. I guess we were lucky to have had one great day outside the islands, never mind asking for more. Instead, we turned north for Cypress Bay and raised the sails again, planning to anchor for the night in Quait Bay. We now had the wind behind us, as well as the flood tide, so we were soon making good time, hitting 6 knots at times.

About mid-afternoon, I thought I’d try out the jib. This is shown as an option on the Chebacco sail plan, and I made one last winter. I haven’t had much luck with it, but haven’t used it much either. I decided that if I got all the strings just right, I could set such a small jib without leaving the cockpit. It took a couple of trips to the bows to get the strings set up, of course. At the beginning of the week I had put a line up to a block to use for this and/or the radar reflector, so at least I didn’t have to climb the mast! Finally, everything was ready. I put the sail on the cabin roof and started pulling the halyard and downhaul (there’s no stay, the jib is set flying.) It went forward and up as planned, but the sheets took the opportunity to wrap themselves firmly around the downhaul, and it took two more trips forward to sort this out. I should have kept a firm tension on the sheets as the sail went forward, I think.

While I was doing this, Dad sensibly kept us on a bit of a reach, rather than running straight downwind, so I wouldn’t get whacked by the boom if we gybed. However, it was getting to be time to gybe before we ran out of water. We noticed the lee-side mizzen sheet had caught in the pulled-up motor, so I loosened that and cleared it, then Dad started to put the helm over. However, I hadn’t pulled the mizzen sheet back in enough, because the mizzen sail suddenly swung forward in the cockpit with us! Dad put the helm back where it was, to stop the gybe. But the wind got behind the main anyway as we worked to clear the mizzen, and we had a lulu of an uncontrolled gybe. We saw it coming, so no one was hit by the boom or caught by the sheet, but the gaff finished up vertical, ahead of the mast on the windward side, with the mainsail wrapped around the mast to leeward and the boom cocked up at a jaunty angle! Luckily, we were able to gybe back and clear it all, and then gybe a third time onto our new course before we hit any rocks (remember why we started all this?) A fair bit of a schemozzle, but personally, I blame it all on the jib.

We sailed a while longer with the jib set, but it really is too close to the mainsail to work properly. So far it’s been a failure – other Chebacco sailors, Fraser Howell for one, have successfully used a jib, but only with a bowsprit, and I have no plans to add one of these at present. I’ll keep the sail anyway – maybe I’ll want it for a downwind run sometime when it’s blowing too hard for the main.

By now we were nearing Quait Bay. We took in the jib, with my patent “from-the-cockpit” method working smoothly this time, and chose our course to allow for the brisk wind, which of course promptly died. Dad still had the helm and he persevered, slowly working us into the entrance. At this point, we felt a slight breeze follow us in, and we kept that all the way to a nook at the far end of the bay, where we rounded up to anchor at 4:45. I didn’t drop the anchor immediately when we turned, as I wanted to back down a few feet.Wayward Lass, though, didn’t want to stop sailing, and forged ahead in the light air, even with the mainsheet slack – I guess the wind was light enough that the weight of the boom held the sail in position. So we anchored first, then furled the mainsail, then lifted the anchor off the bottom and backed down as first planned.

Ham with rice was on the menu, and I tried to follow my wife’s instructions for cooking the rice, but couldn’t make the stove simmer. Instead, I turned the heat right off after bringing the water to a boil, but this way the rice was taking forever to cook. To while away the time, I took in the mizzen, which had been left up, sheeted amidships. Right away, we started to sail around the anchor, even with the rode in the Jonesport cleat, leading directly over the bow. I put the mizzen out again, sheeted it amidships, and bingo! – we were head to wind again, dead steady. Then I added more water to the rice and boiled it into submission. We had the last of the wine to celebrate a successful cruise, and to distract us from the now soggy rice.

While we were anchored here, we saw a burst of bird life. An eagle snatched something out of the water and landed on a rock on shore to eat it, and a kingfisher also dove in for his dinner – didn’t see if he got anything, but he flew away and didn’t come back. We saw some divers (later identified as red-breasted mergansers) patrolling the water’s edge. They would put their beaks and eyes under water, then swim quickly along. One suddenly put on an extra burst of speed, and dove under. A second later it was on the surface again, flipping a fish around in it’s beak, then bang, the fish was gone. Evidently this was a prime spot for fish dinners!

Saturday

After a peaceful night, we were up early to take advantage of the ebb to get to Tofino. I’m not sure why, as we were motoring again and could have easily beaten the tide. Still, it’s the nautical thing to do, right? The forecast didn’t mention fog at all, but still called for winds of 20 knots on the outside, so the round-Vargas idea stayed dead. It was time anyway to get back to town, and get on the road home. To speed things along, we didn’t have breakfast, just grabbed a snack on the way.

As we travelled south, we passed a tug pulling a barge, loaded with a grapple and a grader, towards Hecate Bay, so maybe things aren’t as dead there as they looked. We also had a second sunrise as we motored along, as the sun climbed above a narrow but heavy layer of cloud in the east.

I was thinking that despite our early arrival at Tofino, we’d have to wait for the tide to bottom out, then rise a bit before we could recover the boat, since on such a low tide the water would be down to the end of the ramp. However, the tide behind us did it’s work well, we made 6 knots over the ground most of the way, on an estimated 5 knot throttle setting, and with this on top of our early start we arrived two hours before low tide. I hustled off for the trailer, and after several attempts managed to get it in far enough, without putting one wheel or the other in a hole. Then I went over to “D” dock where Dad was waiting with Wayward Lass. Usually I like to be ashore to guide the boat on by hand, particularly since I learned that the keel can hit the ends of the steel frame if it misses the centre bunk, but in this case I was too lazy to walk all the way back to the ramp. We both stayed aboard, and made a “hot” landing, luckily putting the keel right in its U-shaped bunk. Definitely more luck than skill, since the current was pushing us sideways at an unknown rate!

And that was the happy ending to an entirely satisfactory cruise of Clayoquot Sound. We hauled Wayward Lass out, unloaded and unrigged her, then before starting for home, stopped for a last breakfast at (where else?) the Coffee Pod Cafe.

image026

Life is good!

The Chart

When I read accounts of coastal cruising, I always want to see where they went, so I’ve attached a copy of the large scale chart for Clayoquot Sound. Brown indicates land, blue is water, and green is where it dries at low tide. I’ve roughly indicated our track in red. The numbers refer to places mentioned in the text. I’ve emphasized the shoreline, but haven’t attempted to show all the rocks and small islands. My hand may have slipped here and there, so if you know the area and something doesn’t look right, it probably isn’t. If you’re reading this on-line, it’s going to be small, but hopefully you can enlarge it enough to read the numbers and see some detail. If on hard copy, a magnifying glass helps.

image027

The chart is plagiarized from the Canadian Hydrographic Service chart number 3640. This is an old chart, (my copy of the chart is about 25 years old,) which was superseded when the hydrographic service changed over to metric charts. My apologies to the Service, along with my thanks for this and all the other excellent charts they produce.

***

Launch of Buster – Randy Wheating
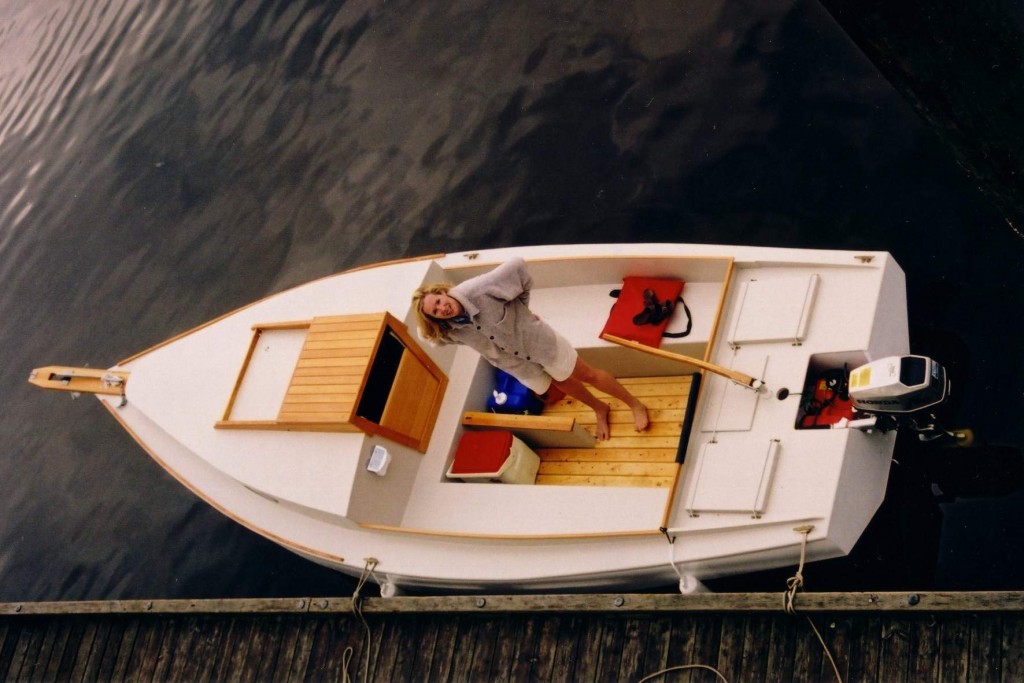
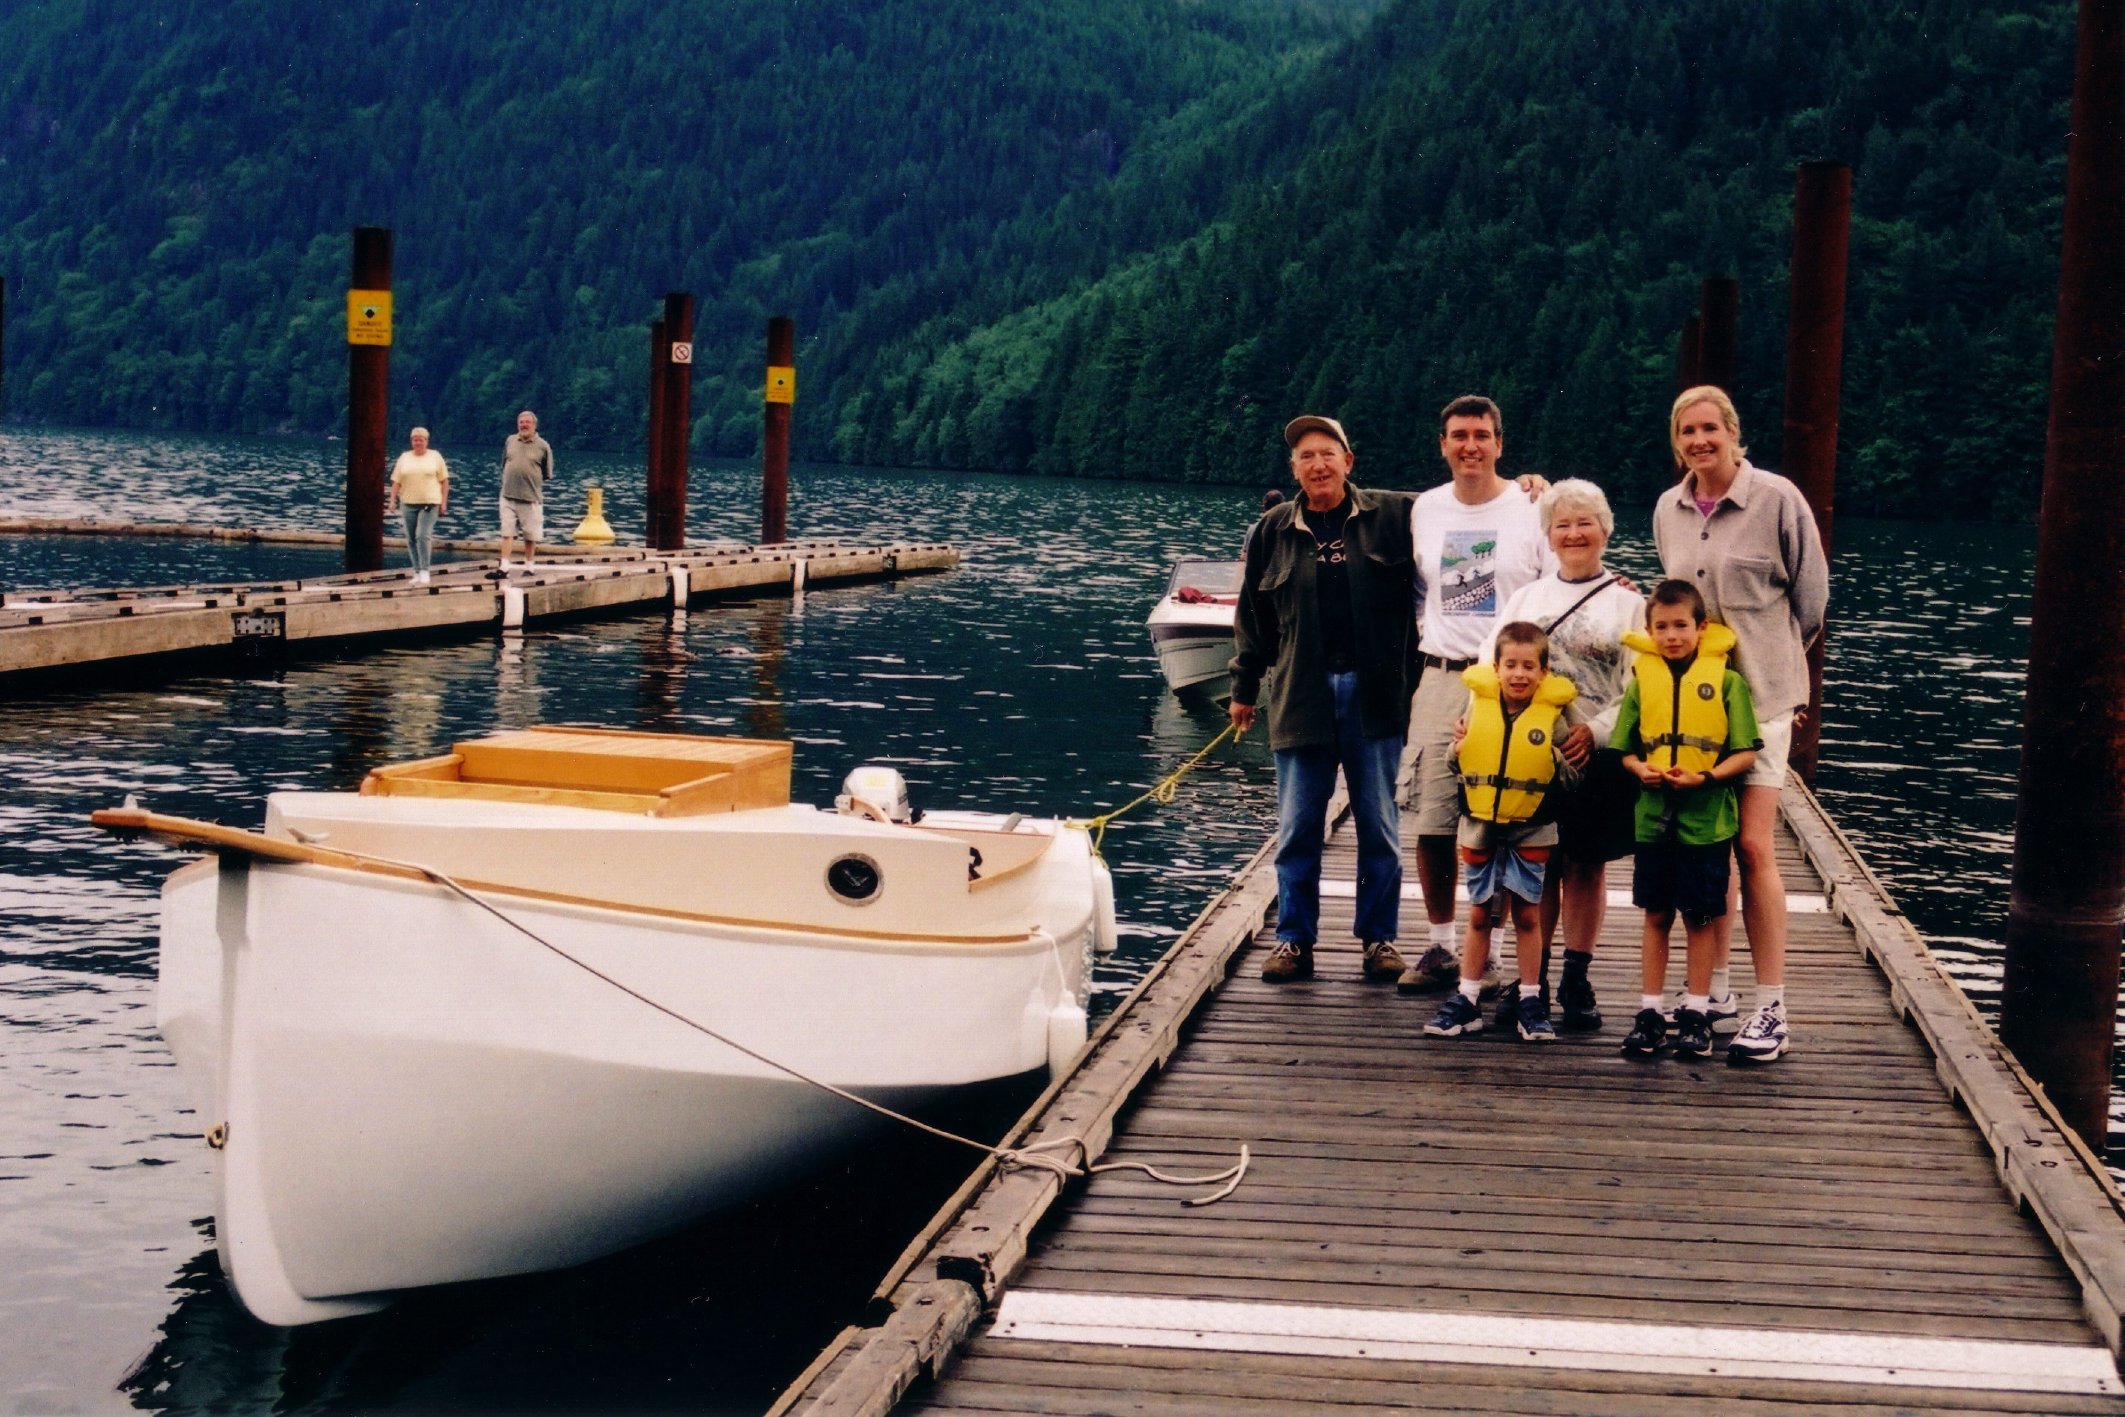
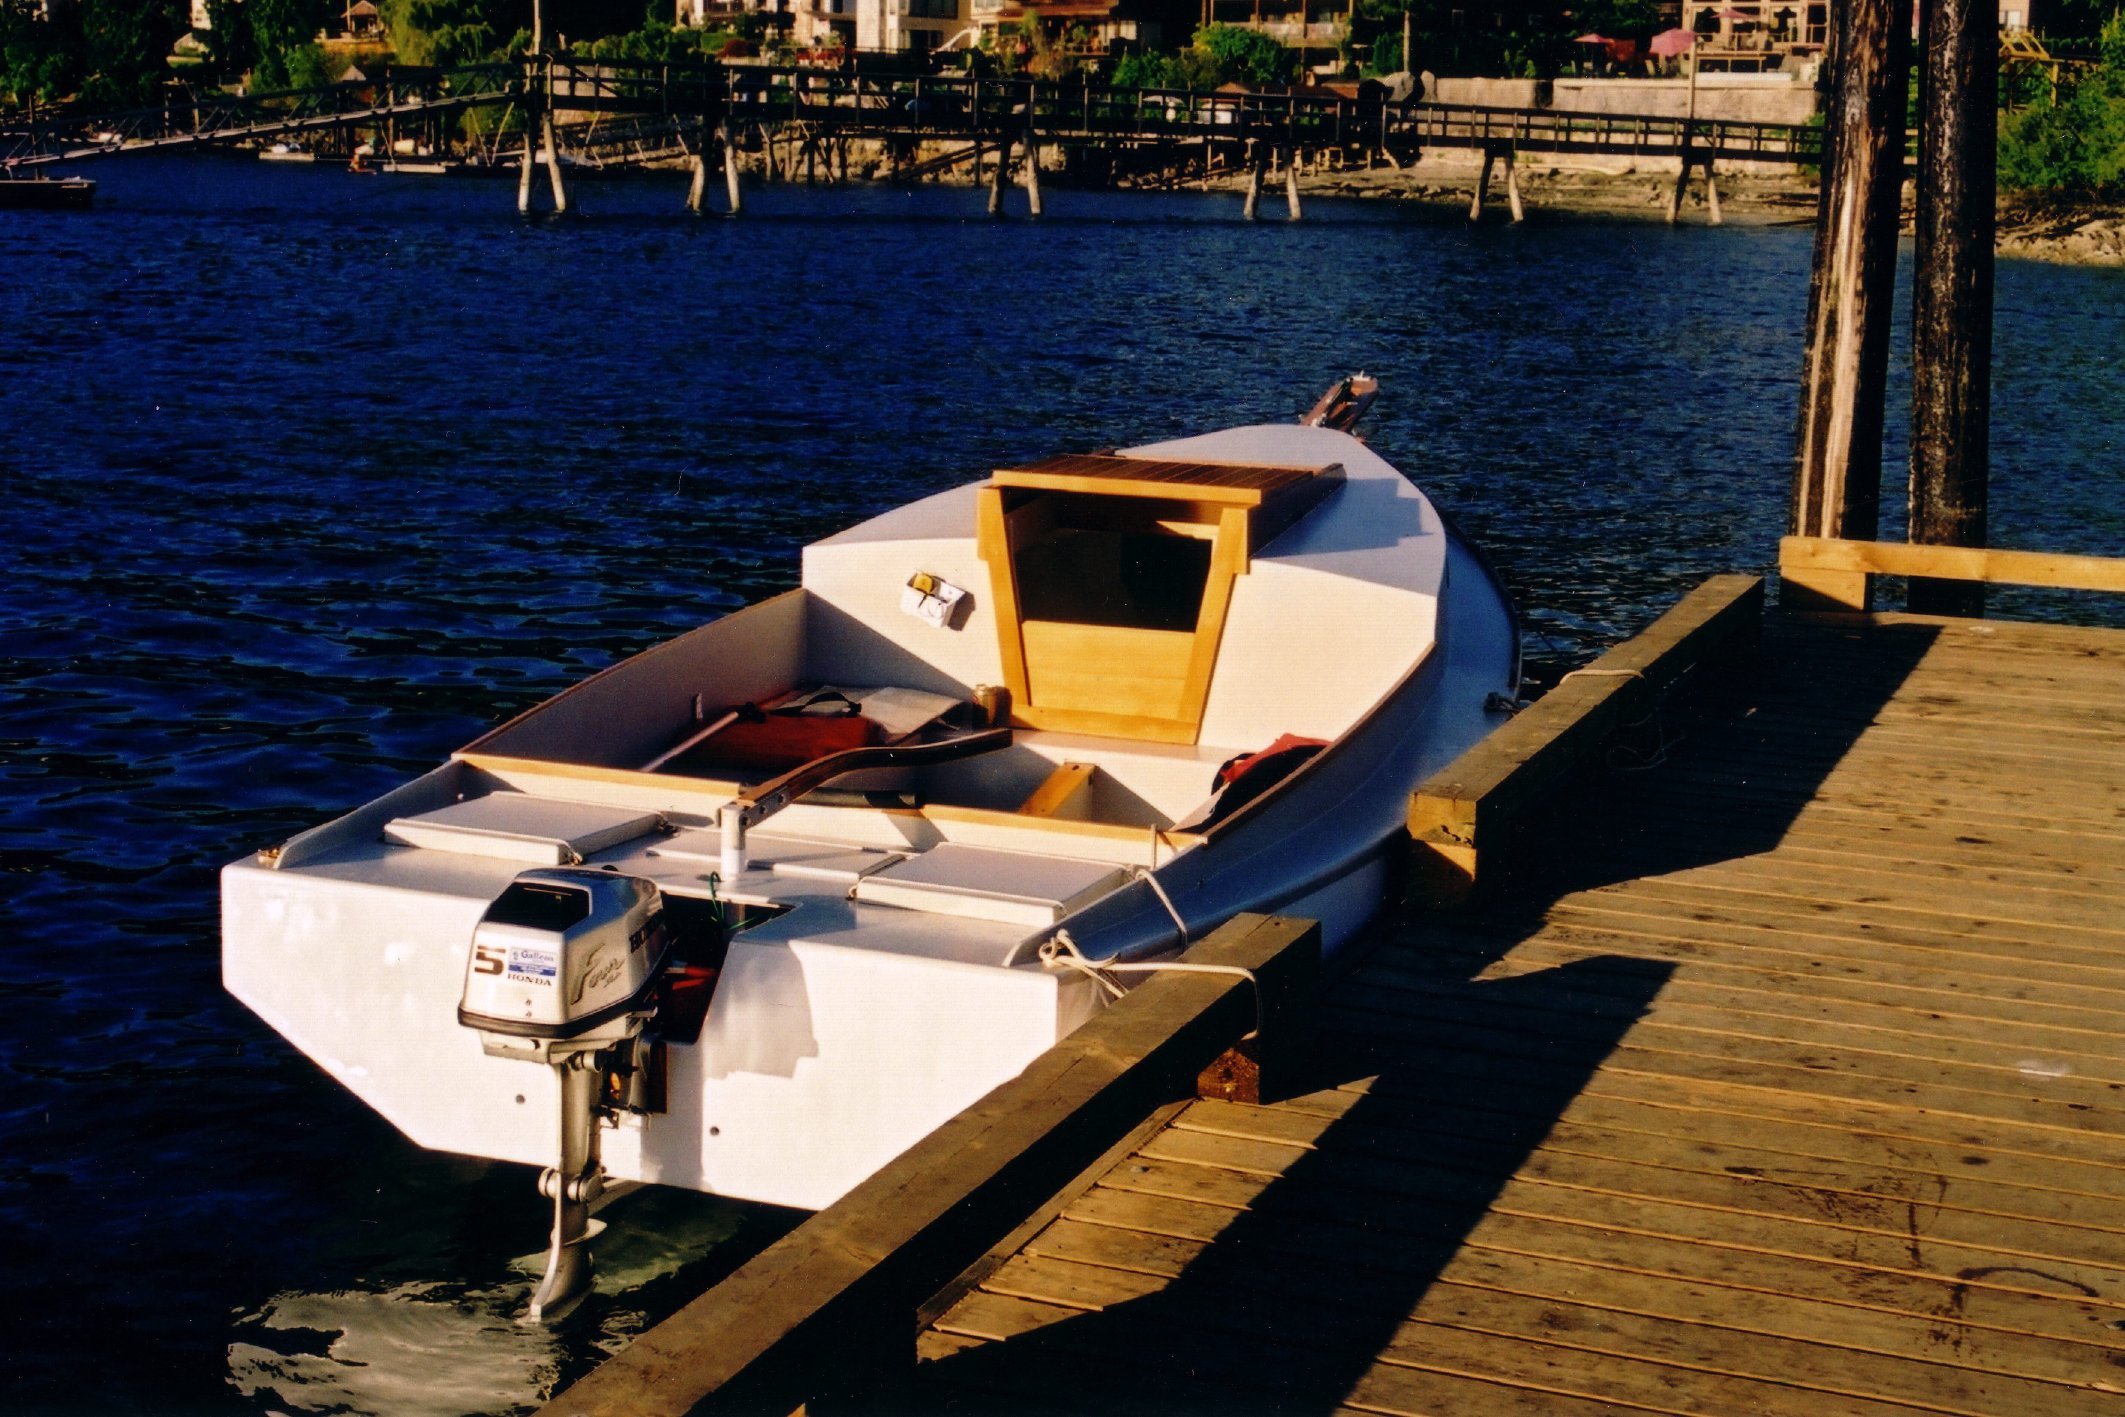
Scan1 Scan10001 Scan10003

Hi Richard

Congratulations on the launch of your Chebacco.  Built and launched in
one year, that is light speed from my perspective.

I finally launch my Chebacco, Bluster, at the Stave Lake (one hour east
of Vancouver) public ramp on July 7th.  I have been puttering away on
this boat for over five years.  I still need to build the masts and
booms and I have purchased the Sailrite kit all of which will be next
winter’s project.  I am thrilled with the final results.  She handled
the five adults and two children easily for the inaugural one hour
cruise on a typically warm and rainy west coast day.

Bluster is a sheet ply Chebacco with a few minor changes:
The keel is laminated solid fir
Cabin top is raised two inches and the cabin sides pushed out to
line up with the coamings.
Transom is one continuous with a cut out for the motor
Motor well is slightly smaller (fits two 3 gal gas tanks)
Coaming is continuous along the aft section (no cut out)
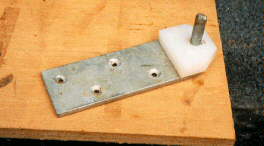
Rudder and rudder post are welded aluminum
Mast to be deck mounted on a welded aluminum tabernacle; shrouds and
fore stay required
Plank style bowsprit with anchor roller and fore stay for jib

I splurged out and purchased a 5 hp Honda four cycle outboard motor
which I am very pleased with.  I purchased the optional ‘power prop’
designed for displacement hulls.  This prop gives me about 1/2 knot more
speed over the standard prop at all throttle settings.

On the weekend of July 13th  Lisa and I took Bluster out for her first
salt water and overnight trip.  We live close to the end of the Port
Moody arm of Burrard Inlet (the mouth of which is the city of
Vancouver)  We planned to travel the end of Indian Arm which is the
longest arm of Burrard Inlet, the end is about 30 km from Vancouver. We
launched at Rocky Point at 6:30 pm on Friday night and we were dropping
the hook around 8:30 pm in Bedwell Bay off Indian Arm.  I am new to
anchoring so I reset the anchor once and tested it before we tucked into
our cockpit candle light dinner.  We spent a fairly comfortable night
but awoke several time to check on things.  I noticed that Bluster would
dance around in the slightest of breezes (up to 180
degrees) not  on the anchor but just on the weight of the anchor line.
The large, heavy,  motor yachts  in the anchorage did not budge.   Maybe
the mizzen and centreboard would buffer this movement.  The night was
warm and the mosquitos  had a go at us.  Note to me – need a screen for
companionway opening.

Up at 7:00 and motoring away from anchorage by 7:45.  We cruised over to
the village of Deep Cove and tied up at the public wharf. Walked  into
town a found a cafe for a big breakfast.  After this in a warm but light
rain we motored north 18 km to the end of Indian Arm.  Stopped once to
brew up a coffee on my single burner hiking stove.

We motored steadily all day and the Honda (with standard prop at this
time) just purred along.  GSP gave us 5.5 knots at half throttle and 6.1
at full.  Even at a fast idle we moved along at 2.9 knots. Used
approximately 3/4 of the 3 gal gas tank for the entire cruise.  Lisa
thinks we should skip the sails as it will just complicate the fun and
she would lose her seat on the front of the cabin top.

Arrived back at the ramp around 3:30 pm on Saturday at an extremely low
tide.  No retrieval problems.

Since this trip we have been out for several day cruises with the
children (Jacob 7, Sam 5) for family fun.

I have attached some photos.

Thank you Richard for all the work in maintaining the Chebacco site.

Randy Wheating
Port Moody, BC
Richard Spelling wrote:

> Wonderfull looking boat. Looks like you spent the 5 years well.
>
> Why solid wood keel?
>

Years ago, when I was getting around to the keel, I had never heard of a hollow
keel and it seemed vulnerable in the case of groundings or trailering.  I also
had a supply of really old rough cut 2″ boards in my father’s barn that need a
purpose in life.  Through work (industrial fiberglass manufacturing) I had
access to some kevlar scraps that I used to encase the keel.

>
> Transom and aft deck looks good, why did you do it that way?

I though the original drawings were odd in that it cut away all but 2″ of  the
transom and then bolted a motor mount plank across the hole.  Therefore, after
much pondering, I went with the solid transom.  I needed to attach a little
wedge to the transom to get the motor angle right.  I recall Brad Story’s
version have a solid transom.

I also did not care for nor understand the purpose of the big cut away into the
motor well from the cockpit and then adding a plank for the mast/tiller so I
made this solid and added a little access hatch under the tiller to get at the
forward part of the motor well (through which I can slip a 3 gal Honda gas tank)

>
>
> BTW, love your floor boards. Look much better than mine. Pine?

These boards are the cheapest wood on the boat – scrounged from a lift on
utility grade 1×4 spruce we use for pallet building at work. I just cut to fit,
rounded the edges and varnished.  My plan was to replace with some nice fir
boards in the future but the pallet wood seems to look fine.

>
> Welded aluminum rudder post? 2″ I thought of doing that, but didn’t think it
> would be strong enough.
>

So far, so good.  I copied  Fraser Howell’s idea and I have access to an
excellent welder at work who could whip it up for me.  I fabricated all the
metal work (tiller bracket, chain plates, anchor roller mounts, fore stay
brackets) and had these professionally galvanized.

>
> Interesting, you are trading standing rigging for a simpler tabernacle, and
> a usefull jib. Let me know how it turns out. Don’t forget the compression
> load on your mast now.
>

I do not expect the standing rigging to be a big deal and I wanted a nice tight
fore stay for the jib.  The mast is actually to be cabin top mounted on an 1/2″
thick by 9″ tall hinge.  I laminated the forward bulkhead to 1″ thick to act as
a compression post.  Cut a square hole in it rather than a round one as per the
drawings.

>
> Don’t let Lisa convince you to loose the sails. There is something about
> flying along in silence with nothing but the wind pushing you that can’t be
> matched by motoring.
>

You certainly do not need to convince me.  I am busting to get sailing.  Lisa
has not really had any sailing experience to speak of so I am eager to share
this with her.  I have learned to go slow.  As they say:  “When the momma is
happy, everyone is happy.”

Cheers,
Randy

***

Miscellaneous boat ramblings – Richard Spelling

“It’s a Chebacco. No, it’s a yawl, not a ketch. Yes, I built it. Thank you.” Well, if nothing else I meet lots of people.

At least they don’t think it’s a fake boat!

You know, life is funny sometimes. I built this boat to take the family, and in particular the wife, out camping and sailing. The wife likes the boat, but she still left and took all the kids. Life is change, I guess. At least I got a boat out of the deal. Know any girls who like to build boats? More to the point, know any girls who like boat builders ?
Img22 Img20 Img16

Img10 Img04

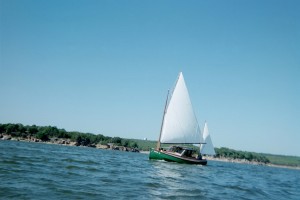
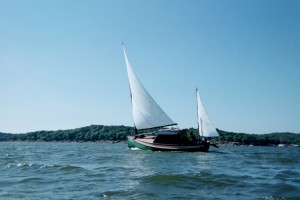
Out sailing, some of the hard to get pictures of your boat sailing. Quite windy, put in a reef and went splashing through the big waves where the wind had a couple of miles to build up waves just after this. Beat to windward, run back and beat to windward again. Much fun, got water on the inside of the windows! (hatches were open). Ex 6 year old stepdaughter had a blast.
tn_DSC00001 tn_DSC00007

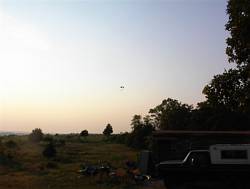
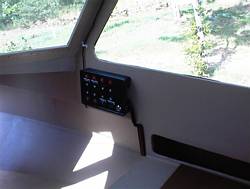
Hey! I want one of those. Picture of a powered parachute buzzing around. Right is a picture of the recycled electrical panel I made for the boat. Was a panel for some computer equipment I salvaged from the trash. Some 50 cent switches and fuses, and some holes bored on my homemade milling machine, and presto, switch panel.
DSC00004 DSC00005 DSC00006

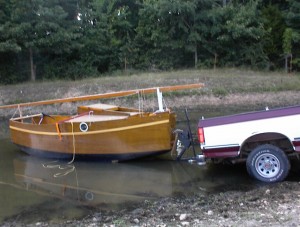
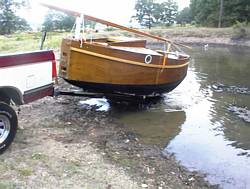
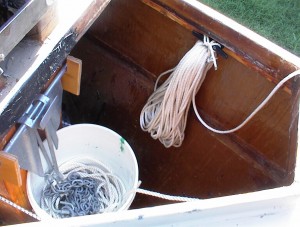
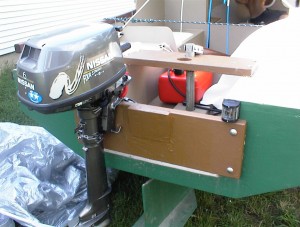
Anchor well, anchor rode, and launching rope. Wedge under motor to give proper trim angle. I put this on because the back would dig in at full throttle, and I thought the trim was off on the motor. Back still digs in, I guess I’m climbing over the bow wave. No matter, when the motor is tilted up it rides lower with the wedge, less chance of water going up the exhaust and into the cylinders now. Also, you can’t pull the motor off strait up, you have to slide it off sideways now. And, there is a plate screwed on with with epoxy blocking the screwdriver slots on the soft brass screws to prevent sideways sliding. Theft prevention. Right is battery charger.
tn_P9020001 tn_P9020002

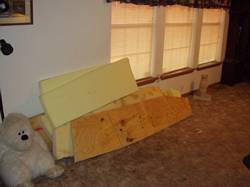
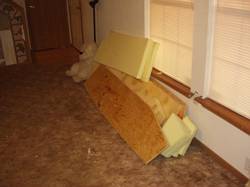
Foam and boards to go on the seats and the berths. Going to try my hand at upholstery. Note clean empty living room. One advantage of being single again, I can work on boat stuff in the house!
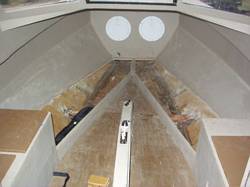
tn_P9020005 tn_P9020006

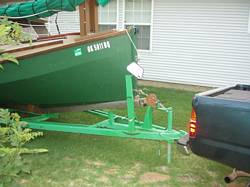
Prototype of hitch mirror. Doesn’t work, moves and gets out of alignment due to the wonderful roads here in Oklahoma. Thought was to let me see the hitch in the rear view mirror for hooking the boat up singlehanded. Designing Mark II now. Right is a picture of the storage areas under the berths.
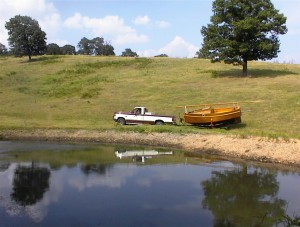
DSC00008 DSC00009 DSC00010

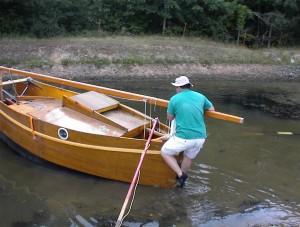
Here we are launching a friends Micro in Grand Lake so we can work on the trailer without jacking the boat up. This is so we can take both boats out sailing.
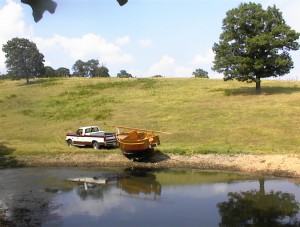
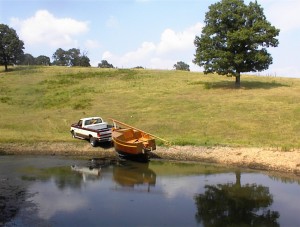
DSC00011 DSC00012 DSC00013

DSC00015 DSC00016 DSC00017

DSC00018 DSC00019 DSC00021

DSC00022 DSC00023 DSC00024

OK, I lied. It wasn’t Grand Lake.
DSC00025 DSC00026 DSC00027

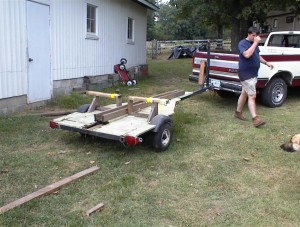
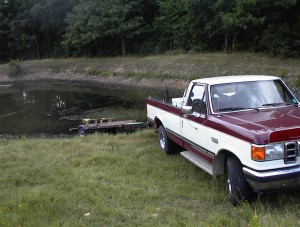
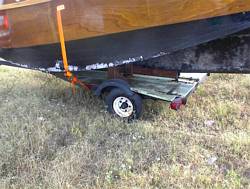
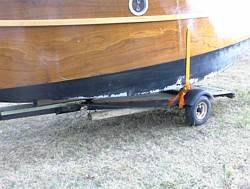
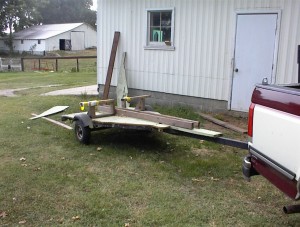
Modifications to the trailer to fix the lights, and to encourage it to sink…
DSC00028 DSC00029 DSC00030

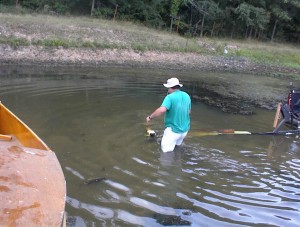
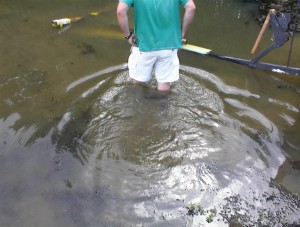
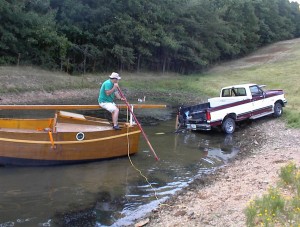
David: “I’m not going in there!” Me: “It’s not like it’s a sewer or something!”
DSC00031 DSC00032 DSC00033

DSC00034 DSC00035 DSC00036

Me: “Yuk!”

tn_DSC00037 tn_DSC00038 tn_DSC00039

Hint: Do not drive an old trailer with 8 inch wheels in a rocky field with holes deeper than 8 inches, you will break leaf springs. Right is emergency repairs.
tn_DSC00040

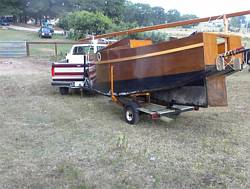
Micro goes back in it’s barn. I guess we are only taking one boat out.


***

—-Original Message—–
From: Richard Spelling [mailto:richard@spellingbusiness.com]
Sent: Monday, March 25, 2002 10:52 AM
To: Mike Haskell
Subject: Re: Request in next newsletter

Sure, no problem. Maybe we should ask them to register so
everyone has thier email addr?
Put the side decks on, and started the mast this weekend.

—– Original Message —–
From: “Mike Haskell” <mike@AdventureQuest-USA.com>
To: <richard@spellingbusiness.com>
Sent: Monday, March 25, 2002 9:45 AM
Subject: Request in next newsletter

Good morning Richard,

When you complete the next newsletter, would you put in this request:

To all Chebacco lapstrake builders. My name is Mike Haskell and
I plan to start building a lapstrake Chebacco in the summer of 2002. By scouring past articles in the Chebacco News, I have deduced that the following may have, or have built or are building lapstrake Chebaccos:
Marc Lindgren
Allan Bell
Bill Parkes
Bill Meier
Jerome McIvanie
George Cobb
Gil Fitzhugh

Would each of you be willing to respond to me off list. I’d like to have your e-mail addresses, so that I can contact you to see whether or not I can pick your brains as I get into this project. Gil, since you and I have already correspnded, you need not contact me again–I have your address and you are currently at the top of my “When I Need Help Call______” list.

Thank you to all who respond–and there is a prize. If you ever get to Maine, stop by Bowdoinham, we’ll go sailing or kayaking, and I’ll treat you to a bowl of the best lobster stew you’ve ever eaten.

Sincerely,

Mike Haskell

Mike Haskell, President/CEO
Adventure Quest-USA
Leadership That Gets Measurable Business Results, Guaranteed!

Forging Business Leaders Who
-Create Effective Work Teams
-Increase Productivity
-Deliver Measurable Business Results
mailto:mike@AdventureQuest-USA.com
http://www.AdventureQuest-USA.com

Chebacco News 38

Hello Richard:


I want first to thank you for continuing Bill Samson’s work in editing the Chebacco News. I have learned a great deal from this newsletter and appreciate very much Bill’s work on behalf of Chebacco builders.


In his very helpful description of the building sequence for the sheet-ply Chebacco 20, Bill describes how he installed the two hull side panels by suspending them from the ceiling while he fitted them. Since I am building outdoors and do not have a ceiling, I had to find another solution.


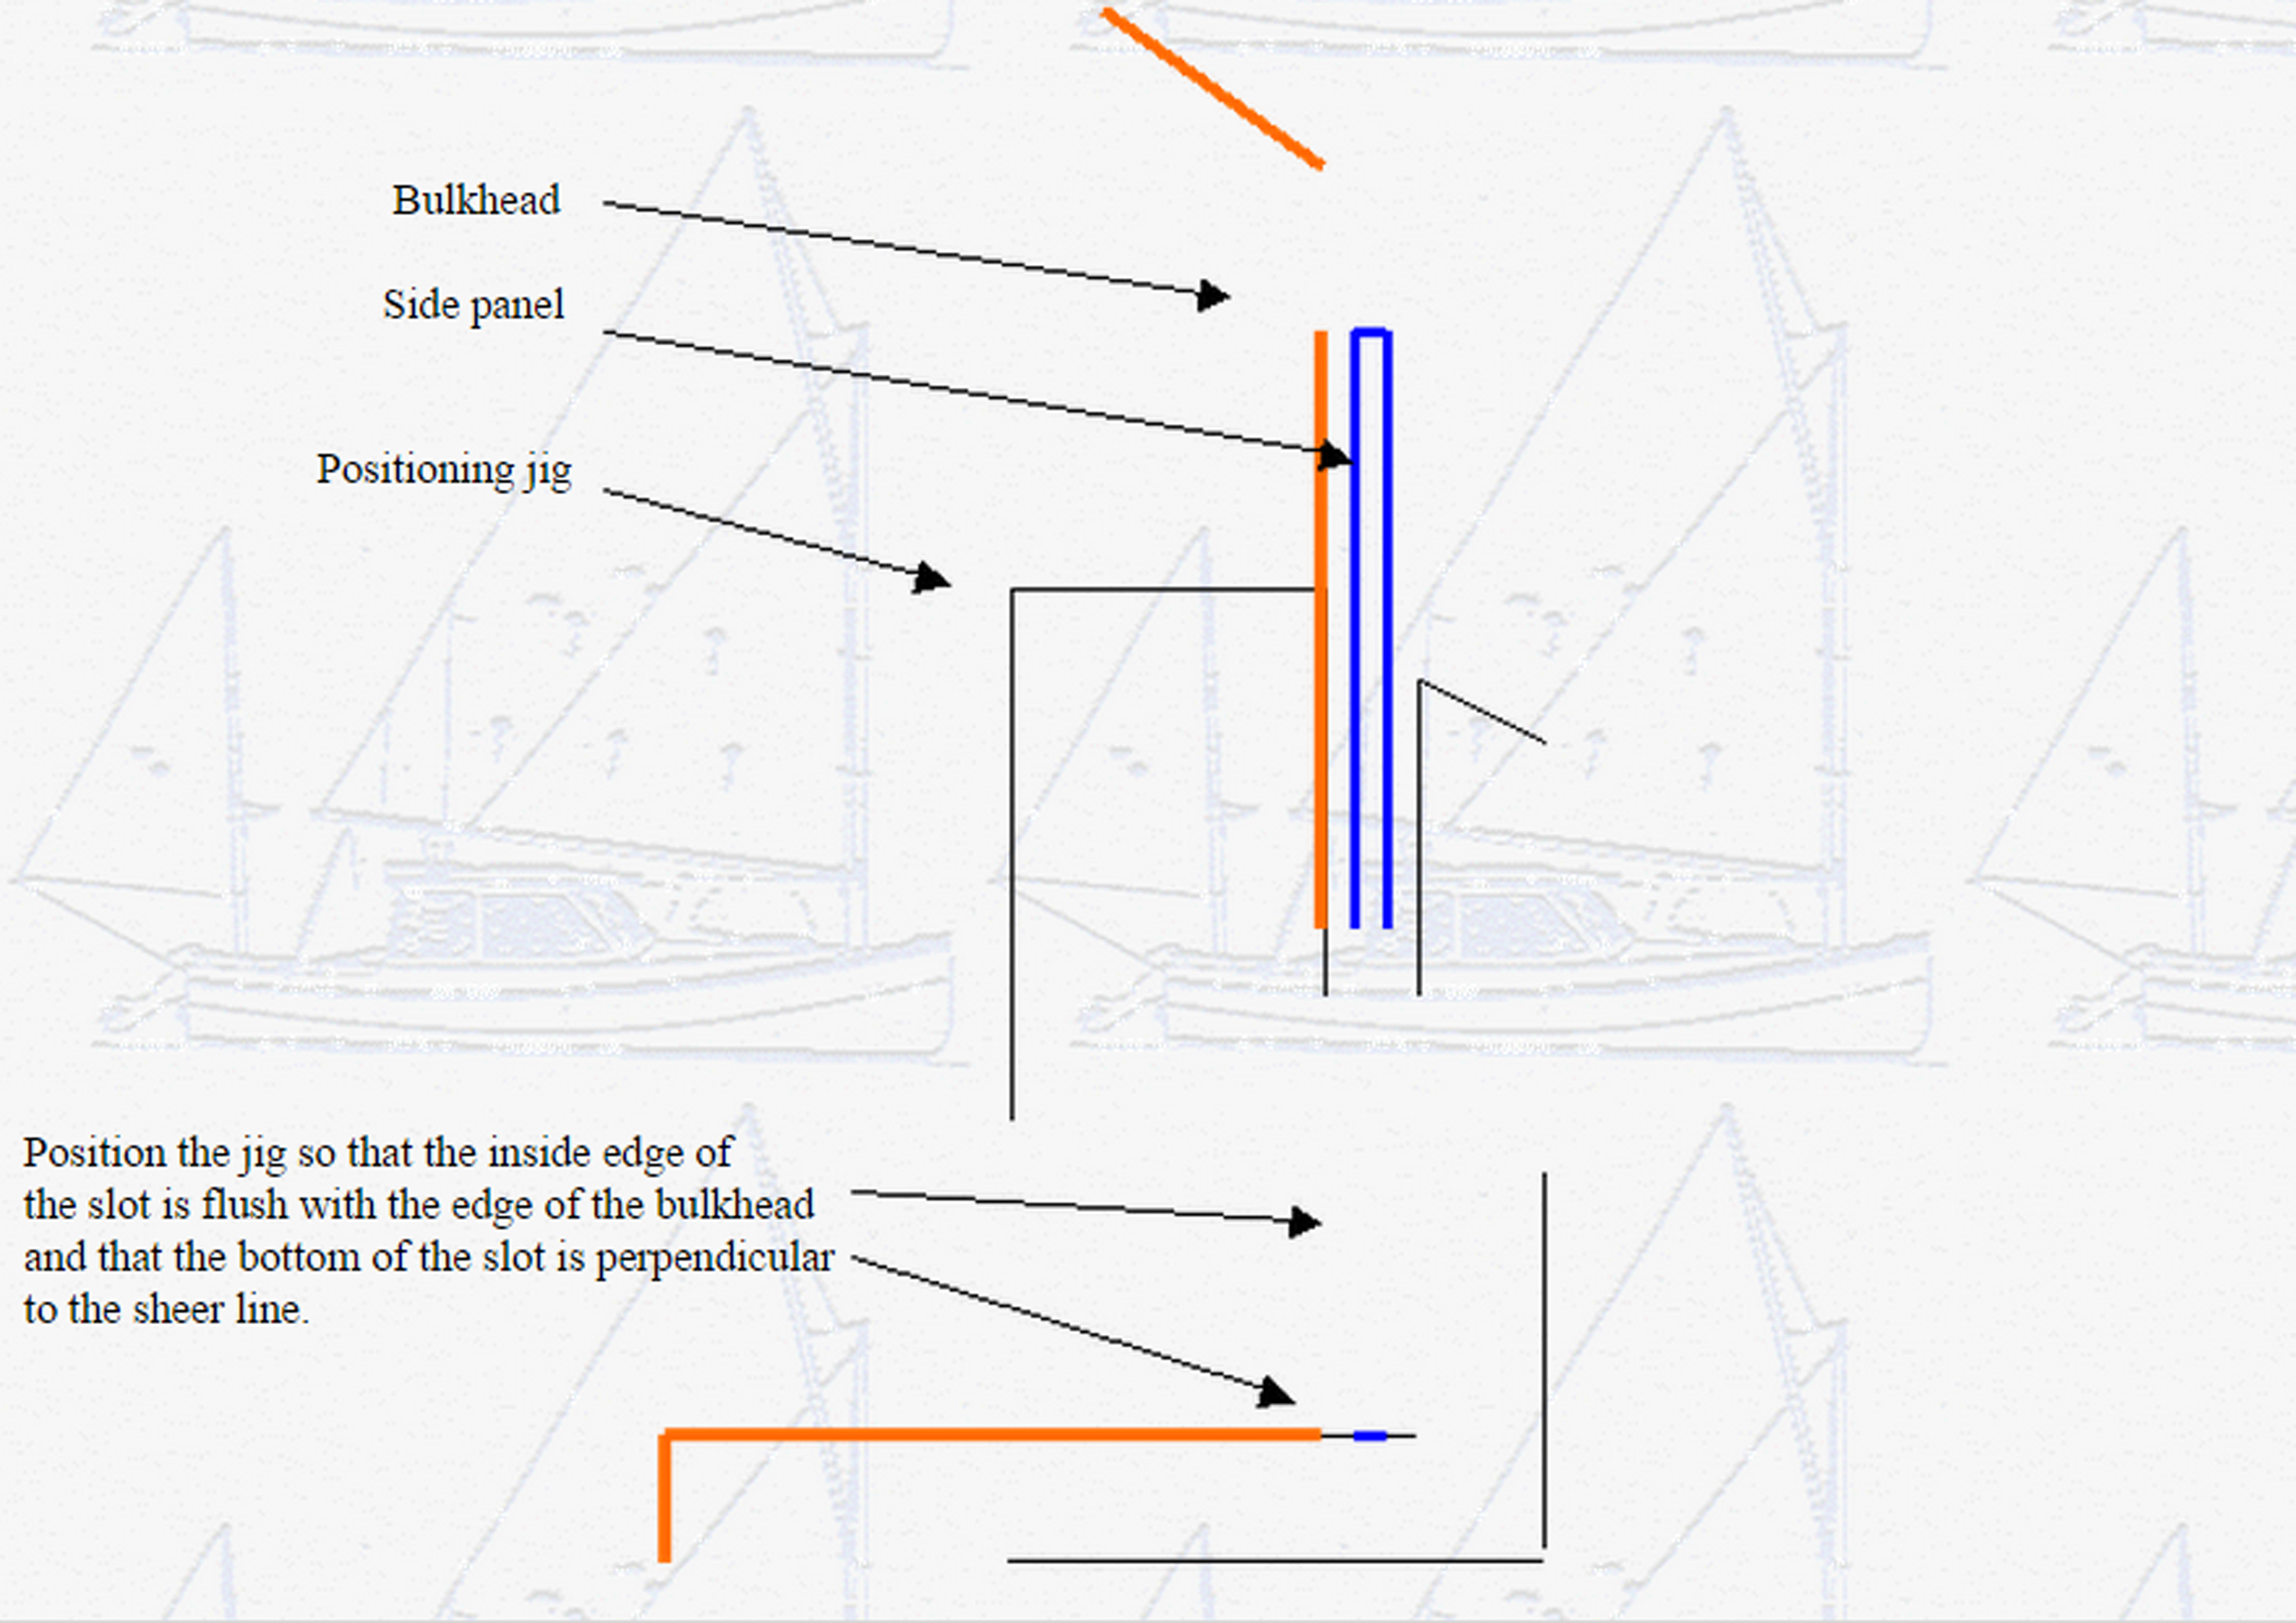
My approach, therefore, was to cut out six small jigs out of scrap plywood (I actually used the cutouts from the bulkheads.). These were screwed temporarily to bulkheads # 1, # 4, and # 6 as shown in the diagram below. The side panels were then dropped into the slots, three on each side, and I was able to take my time in positioning the panels. When the epoxy fillets were complete on one side of the bulkhead and the panels were permanently fastened at bow and stern ends, I removed the jigs and made the fillets on the other side of each bulkhead.


Side Jig 2

I found this to have been very easy and I hope that it might be of use to others as well.


Regards, Tom McIllwraith

Halifax, Nova Scotia

***

Hi Richard,

Thanks for the nice job on the last issue of chebacco.
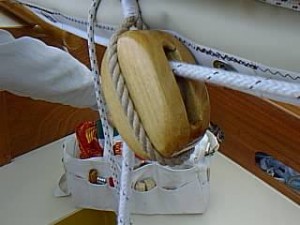
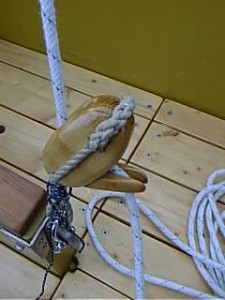
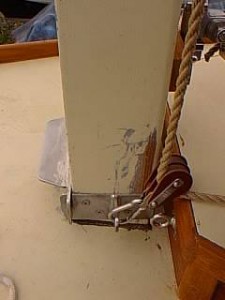
Here are the pictures of blocks and tabernacle fitting
that you requested.

block1.jpg 1 block2.jpg 1
Blocks are made out of locust with a brass sheave spinning
on a 5 mm brass pin (Fig. Block1.jpg).  They run nice and smooth
as long as the hole in the sheave is a bit larger (e.g. 5.25 mm)
than the pin. As I mentioned before, I made patterns
by magnifying the drawings in the “Riggers apprentice”
by Brion Toss. I also fitted the block on the centerboard
case with some kind of slotted tongue (Fig. Block2.jpg)
to jam the sheet, a home-made simple substitute for a camcleat.
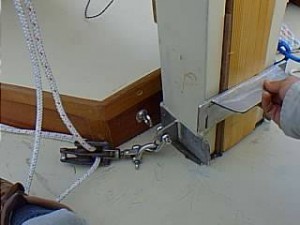
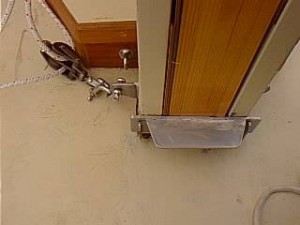
taber1.jpg 1 taber2.jpg 1 taber3.jpg 1

The stainless steel fitting for the tabernacle was “invented” and made by
my friend Roberto Ginetto. There is a U-shaped part that goes around
the back and sides of the tabernacle. This part is screwed onto the tabernacle.
The front part is removable (Fig. taber1.jpg) and goes on the u-shaped part
like a “fence”. The U-shaped part also has “ears” (Fig. taber2.jpg) to attach
the double turning blocks for the throat and peak haliards (starboard side,
Fig. taber1.jpg) and topping lift + jib haliard (port side, Fig. taber3.jpg).
As you can see, things are still a bit scratched and unfinished around there
but the whole thing works well and is very easy get on and off single-handed.

Let me know if you need more explanation or other info.

Cheers,
Vincenzo

Do you have any close up pictures of the hinge on your tabernacle?

Also, I notice you have the forward section closed off. What is the distance from the hing to you locking mechanism?

How do you raise the mast? You use the jib line as a forstay, do you use it to hoist the mast?

It appears your mast is rounded up top, but square on the bottom. It is square up to the double reef position of the gaff?

Have any closeups of your gaff saddle?

Hi Richard,

It is very easy to raise the mast, I just stand on the cabin roof and walk it up, it takes only a second then to block it with the metal fence. I do not use the jib haliard as a forestay or to raise the mast, although I guess that could be done.

The mast must be rounded all the way above the hinge point, otherwise the gaff jaws will not be free to swing around when hoisting or lowering sail (acting as a wrench around a bolt) and might bust at the first gust of wind! So, the mast is left square only in the part that goes into the tabernacle.

I will take close-ups and measures over the weekend.

Buon vento,
Vincenzo.

Richard,

the distance from the pin of the hinge to the bottom of the locking mechanism is 67 cm.
The width of the steel plate of the locking mechanism is 6 cm.

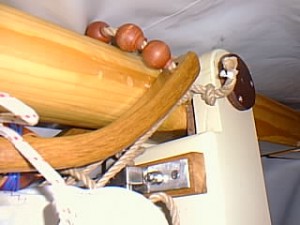
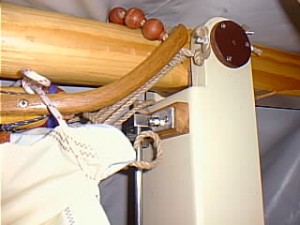
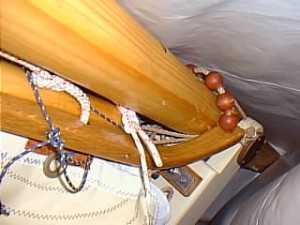
I made the curved gaff jaws epoxying 2mm oak lamination to a final thickness of 24 mm
(see attached pictures)

gaff1 gaff2 gaff3

Cheers,
Vincenzo

Did you use the 1 inch stainless steel rod described in Chebacco News 18 for the pivot pin?
I’m thinking of going a little thinner, to have less of a hole in the mast.
Did you do any kind of reinforcement for the hole in the mast?

The round plate with the three screws, this is the bearing plate for the pivot pin? Are all the mast forces taken by this plate, or is it a loose enough fit that the mast forces are taken by the box section of the tabernacle?

PCB&F says: “Since we know of no widely available source for them any more, we are proposing a ‘home-made’ gooseneck. It uses two stock ‘heavy duty’ SS gudgeons to accept a 1/2″ SS eyebolt which then connects via another ‘undersized’ bolt loosely to two SS tangs that are screwed to the forward sides of the boom; there should be enough freedom for the boom to move any which way, including twist from the sheet-pull. ”

I was never sure what exactly they were saying. It looks like you have a 10 inch or so long, 1/2″ thick  rod between the upper and lower brackets (gudgeons?) on the tabernacle face. I can’t see, but I’m assuming you then have an oversized eyebolt that slides up and down over this rod, is attached to the front of the boom, and acts as your gooseneck?

I used 1 inch bronze rod for the pivot pin.

To avoid having the pin bearing directly on wood, I screwed steel plates
(with a 1 inch hole for the pin), one screwed to the side of the mast, the
other to the side of the tabernacle, so the forces on the pin should mostly bear on the steel plates. The plates you see in the pics are just plywood plates that prevent the bronze pin from working its way out of the hole.

You are exactly right about my gooseneck. The pin is 12 X 30 mm stainless steel. I made it so long with the idea of rigging a downhaul to tension the luff. However the throat halyard is enough to give plenty of tension, and the sliding up and down of the boom is just a useless complication when hoisting or lowering the sail. I am going to cut that rod!
Pics of gooseneck details next weekend.

Vincenzo.

***

From: “Bill Samson” <bill.samson@tesco.net>
To: <richard@spellingbusiness.com>
Subject: New Chebacco growing on Vancouver Island . . .
Date: Sunday, November 11, 2001 2:41 AM

Hi Richard,

Just had these pics from Bill McKibben via Chuck Merrell of his ‘glasshouse’
Chebacco Motorsailer that’s coming along well.

Bill has raised the topsides a little more than is shown on the plans, but
(I think) kept the overall height the same.  You remember the pic of his
model on one of my last Chebacco Newses?

Anyway, Bill would be delighted if you included one or two of his pics in
your next issue.

Cheers,

Bill Samson

>Speaking of pix, the attached just came in from B&B for the NW Chebacco.
>Will put them on his web page.  They were taken in Aug and September.  I
>have a hunch he’ll have it complete by sometime next summer.  BTW, that
>green foliage, higher than the cover in Picture #1 is Beth’s corn crop from
>last summer.  I had some they brought down.  Delicious!
>Chuck
>NWCheb01 NWCheb02 NWCheb03 NWCheb04 NWCheb05

***

Hello Richard!  A short note with 3 photos for your next Chebacco e-zine, the main purpose being to show how I’ve tried to build a Chebacco over the summer.  As cold weather now comes over the Massachusetts hills here, I’ll soon be forced to close down boatbuilding work although I’m hopeful that an Indian Summer will come about to allow the finishing of the hull and flipping.  Even in snow I’d flip her!

Stealing Horses Keel
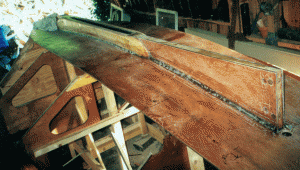
Photo 1 shows the keel on top of the bottom panel.  It was my assumption that it would be much easier for me to work at placing the keel without the bilge panels in place.  A step ladder under the bilge panel space allowed closeup work, to see into the centerboard slot, to work on finishes such as they are.

 Stealing Horses Bilge Panel

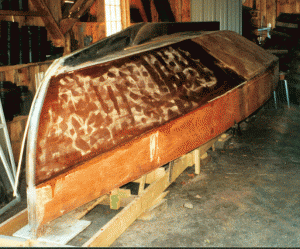
Photo 2 shows Stealing Horses with her bilge panels in place.  The front 8 feet is composed of 2 layers of 1/4″ plywood with the first brought into shape with Spanish windlass action, and the second secured with a buttering of thickened epoxy and many sheetrock screws forcing the outer to the inner panel per Jamie Orr’s earlier description of how to do this.  The aft sections of the bilgepanel are 1/2″.  A brass half-oval strip extends over the inner stem, awaiting the outer stem for attachment.  The strip along the forward keel, along both centerboard cheeks, down the aft keel but shy of where the rudder post attachment will be placed.

Stealing Horses Xynole

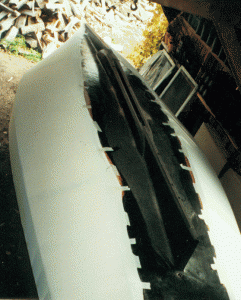
Photo 3 shows the bilge and topside panels covered with xynole cloth prior to wetting out.  The keel and most of the bottom has, as the photo shows, been cloth-clad and coated with epoxy laden with graphite.

At this time — late October — the large xynole sheets have been wetted out and received 3 coats of fairing compound which cured just before the cool weather.  Now the job of sanding the hull is sporadically underway.  The outer stem–composed of built up planks of rosewood–has been lag-screwed and epoxied to the inner stem.  The lagscrews are recessed into the inner stem and set in bedding compound.  By the way, Jim Slakov (who built an exquisite lapstrake Chebacco) suggested to me one of his embellishments: that a small wood wedge be eventually epoxied to the inner stem to hold the mast at an intermediate stage when raised.  The idea is to stand in the cockpit and raise the mast to this point (contingent on one’s height and muscle power), and then to leave it semi-raised and secured by the rachet effect of the wedge while climbing to the cuddy roof to complete the job.

I’d like in what remains of this building season to get the hull sanded and the waterline scribed to the hull–I’d like of course to do more like paint and flip–but I’d settle for this.  Soon I’ll be forced to unscrew the ladder strongback of the boat forms from the ground stakes that level it.  The coming frost will of course heave these stakes and I’m concerned that the hull not be stressed so I’ll let it float atop frozen ground.  Then an accurate waterline will be impossible.

Semi-gloss marine enamel was bought for a 2-coat job above the waterline (to be placed about 2″ higher than the design waterline) with the graphite-laden epoxy coming up from the bottom.  Kirby Paints was kind to test their various paints and primer on a sample of my plywood/my epoxy to see how to proceed (no primer was deemed necessary).

For those considering a sheet plywood version of the Chebacco the following is a list of major materials and their sources that I’ve used:
1.  Meranti marine plywood (LS 6566 grade) from Noahsmarine.
2.  Locally grown spruce, encapsulated in epoxy.  Some island-grade rosewood brought back from the South Pacific some time ago.
3.  Xynole cloth from Defender instead of fiberglass cloth because of a concern for puncture and abrasion resistance.  Xynole, however, absorbs epoxy like a blotter.
4.  Epoxy, fillers, and fiberglass tape from Raka Epoxy.
5.  Fasteners from Jamestown Distributors and Hamilton Marine.  Hamilton sells a nice through-bow silicon bronze eye bolt for pulling the boat to the trailer. I went to Jamestown for silicon bronze ring nails and screws, bedding compound.
6.  Sails, sewn over last winter, from Sailrite kits.
7.  Kirby traditional marine paint for the topsides / bilgepanels that are above the waterline.

Cheers, keep warm,

Dick Burnham

Stealing Horses stem paint

Here is our Chebacco with 2 coats of oil-based Kirby semi-gloss white on her.  The outer stem is as yet unfinished but we plan to sand it down and to varnish it.


Dick Burnham

***

Hi Richard

New email address  – ‘rwheating@telus.net’

Apologies for not thanking you sooner for your work on the Chebacco News.

I live in the same corner of the world as Jamie Orr.  He lives on Vancouver Island and me on the main land.  My Chebacco has been in the works since 1995 (!)  I was searching for just the right boat project (my first) when I read the Chebacco article in the Wooden Boat magazine.  However this would be a test of my dedication as my wife and I were just starting our family which I was to discover dramatically cuts into ones free time…
My boys are now seven and five and I am able to pick up the pace so to speak.  Just tonight I have done the final tidying up and dusting in preparation for spray painting my boat.  Mine is the standard sheet ply variety Chebacco with some modifications such as raising the cabin two inches and widening it out to the coamings.  I have also gone with a one piece ( a la Brad Story) transom with drain holes.  The forward bulkhead I doubled in thickness (to one inch) to allow me to mount the mast, using a tabernacle, directly onto the cabin roof.   I have some ideas for the tabernacle but would be very interested in other CB readers experiences with this.
Hope to launch this before January and then spend the spring on the trim  and spars.  Thanks for the sail info.  I will likely go with the Sailright kit.
I will send along some photos in the near future.
Thanks again,

Randy Wheating
Port Moody, BC
Canada

***

Sanding the CLC

Everyone has been saying that this will be a cold winter. To which I have invariably replied “NO, it will be a mild winter, so I can finish the boat!”. And you know what? With the exception of a couple of days of snow, it has hardly gotten below 50 degrees yet… spooky.

DSC00029 DSC00032 DSC00033

These are pictures my homemade power long board. To the left, I have just disassembled the inline air sander I bought from Harbor Freight. Center is where I have made up some small mounting blocks, and countersunk some 1/4″ flat head screws in it. To the right, I am gluing the blocks to the sanding board with some 5 minute epoxy. Note that the blocks are attached to the sander during this operation, this is the only way to make sure they are glued exactly the right distance apart, so they fit on the slide of the air sander perfectly.

DSC00034 DSC00035

After testing my setup on the boat, I realized the slide on the sander was some kind of plastic, and bent all out of shape when the board was forced to follow the curve of the hull. What you see in this picture is a 1/4″ x 1″ length of cold rolled steel, used to keep the slide stiff and reduce the wear. Still got some wear using the sander, and had to return it to the store. I’m not sure it was all related to my setup though, as I’ve had this exact type of sander before, and had the same problems with it. I’ve since ordered a Campbell Hausfeld air sander from HF. They had it in the catalog for $16.99, about $40 less than I could find it anywhere else. The card in the mail said it was back ordered, and I can’t find it online any more… Not sure if it was a typo or what, but it appears they are going to send it to me.

To the right, you see where I have taken the sanding pad and used glass tape to strengthen the attachment of the spacer blocks to the board. The sandpaper was attached to this board with contact cement, 3M Super 77 spay adhesive. Application of the heat gun on high while pulling the paper off made changing to a new sheet a breeze. I used 36 grit paper, the kind that worked with the inline sander. At about $7 for a box of 25 at the local HF. Went through two boxes.

DSC00030

On the left here I am squaring up the rudder assembly, and on the right it is set aside for the epoxy to set up. I used three layers of the 2″ tape I got frommarsales1@aol.com I bought five 50 yard rolls of 2″, 6oz tape from him for $35, you might email him and see if he has any more. The tape is a satin weave and doesn’t wet out as easily as some of the more open weaves. You have to pre-wet your surface, then apply your tape, then wet the outside. Give capillary action a few minutes to work the epoxy in, then work any remaining bubbles out with your thumb. This tape is a bit more work than a more open weave would be, but well worth the saved money.
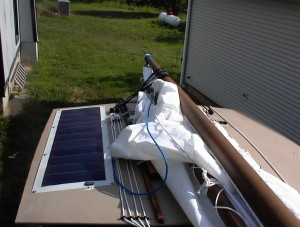
I make the rudder a bit thick for the post, so I trimmed it down some with a flap wheel on the angle grinder. Also, I flared the aft end on both the blade and the wing down to a finer point than on the plans, in an attempt to save a bit on drag.

DSC00001 DSC00003 DSC00004

Here you see the centerboard case going in. In the picture on the left I have just dropped it in, I had to cut a notch out of the board you see to get it to drop all the way down. Center is a side view, and right is a view of one of the cleats used to hold it. If you look in the picture, you will see that the cleat only has one screw. This is to allow the case to be levelled from underneath, before tape and epoxy is added.

On the right you can see a one of the bilge panel spices, still covered with the remnants of the wax paper used to keep the clamp board from sticking. I later went back with a wire brush on a drill and got this off.

DSC00003_2 DSC00005 DSC00006

On the left you see the crew applying glass and epoxy to the hull. This was a major operation, glassing the entire hull with 6oz cloth. Made more interesting by it being in the 60s, and by my being out of slow set epoxy. We only had one pot start to cook off on us, and I was able to dump and spread it before it had smoked too much.

Center you see a good shot of the cloth hanging off. In the future I may try to trim closer to the hull before applying the epoxy. I wasted quite a bit of glass here, as after it gets a few runs of epoxy on it, about the only thing you can do with this stuff is throw it away.

On the right, you will see where it looks like I spiced onto the back of the keel. This is caused by me splicing onto the back of the keel. Measure twice, cut once. Then cut again. Also note the brown under the glass. I used the last of my slow cure hardener to spread wood flour and epoxy over any sections that weren’t exactly smooth, so the glass would lay even. I learned on a previous boat not to use phenolic micro balloons under the glass. They aren’t very strong in tension, and I had a section de-laminate on me during sanding. This boat is being made as strong as I know how to make it, so the only putty under the glass is wood flour based.

DSC00007 DSC00008 DSC00009

The left two shots show a good view of the cutout for the motor well. Also, note that the glass is folded over twice on the transom, and right under where the rudder will be. This required a bit more work faring the hull, but the added strength may come in handy some day.

DSC00010 DSC00011 DSC00012

More shots of us desperately spreading epoxy and chasing bubbles, before the epoxy set up.

DSC00024 DSC00025 DSC00026

The two pictures on the left are of the stem after it is attached. I agonized for days over whether to finish it “bright” or not. finally, looking at the pictures I have in the Chebacco News issues showed that most people were painting over it. In addition, I REALLY wanted to cover it with a layer of glass. So, it is made up of cutouts of plywood, laminated together. Notice the radial lines on the stem? This is where I broke the belt on the hand power planer, and had to use the chain saw to finish the carving… <grin>. The stem had a liberal coat of putty applied to the bottom and then was attached top and bottom with a couple of temporary screws. After the putty set, a little sanding was done, then more putty, and a couple of layers of glass cloth went over the whole assembly. This coming Saturday a friend is coming over to help me forge a piece of 1/8″ stainless steel to the shape of the cutwater, so the keel armor will extend from the bottom up and around the cutwater! Should be very cool.

DSC00027 DSC00028 DSC00031

On the right we have applied a coat of glass bubbles and wheat flour as a faring compound. Notice the line starting halfway up the bilge panel next to the transom? This is where the bottom and the bilge layers of cloth overlap. I have two layers of glass over the bottom chine to add to the strength.On the left, I’m attaching the cheek plates over the centerboard case. I broke with tradition, and foil shaped them in the best bolger tradition, with the flare on the sides and bottom matching. Hopefully this will reduce some of the turbulence caused by this protrusion of the keel.

This notched trowel process took a LOT of epoxy. More than glassing the hull! Oh, well, it allows me to fill in the low spot, and will give a smoother hull. Helping to decrease resistance and turbulence.

DSC00001_2 DSC00003_3 DSC00004_8

This is the boat after MUCH sanding. The girls decided they would volunteer to sand the boat instead of buying me a birthday present. Their mistake! <evil grin>. I only had them sanding for a couple of weeks… They did a wonderful job, though. The odd color scheme is my attempt to vary the color of each successive layer of filler. No reason, I had the pigment and though I’d experiment.

On the left we are just starting to apply the leftover Interlux barrier coat primer from another project. I put a little of the green pigment I had left into the white primer, and it turned the yucky blue you see. We turned the boat into a swimming pool! I didn’t have quite enough for the entire hull, but that’s ok. I experimented with the paint, and it stuck to unwashed, unsanded, smooth epoxy with no qualms. Even stayed on after a couple of days in the dishwasher, and hardened up nicely after a couple of weeks.

On the right, you see the hull with paint on it. We are putting it on in many thin layers, to avoid runs. In this picture we still need a couple of layers of paint. The green is a color I got from mixing three gallons of various shades of green deck paint purchased at the local close out store. At $2.88 a gallon, I bought 12 gallons, even before testing on the epoxy!

Anyway, that’s all for now, next issue I’ll have pictures of the forged armor for the keel, and pictures of the boat turning, currently planned for some time in January. Also, I’ll show how I figured out the welding of stainless steel on a cheap wire feed welder.

Richard Spelling

From the muddy waters of Oklahoma.

Chebacco News 33

Chebacco News 33 – February 2001


A New Chebacco Motorsailer

ChebMS1

Bill and Beth McKibben of Sidney BC, Canada – the prolific builders of many Bolger boats, including the Breakdown Schooner and the Fast Motorsailer, are turning their thoughts to a Chebacco Motorsailer, and have built this model as their starting point. The keen-eyed among you will notice that they’ve raised the topsides a smidgen, and have used the Solent Lug rig in preference to the more usual gaff rig. It looks wonderful, and will make a great addition to the growing fleet of British Columbian Chebaccos.


A Swedish Chebacco

edstrom

Björn Edström writes:

I have built a Chebacco 20 in sheet ply coated with epoxy and fabric
both in and outside because I used only 9 mm plywood on the whole
construction. The boat was launched in September this year, so far it
has only been one weekend sailing this year, the interior is not
completed.

Built: 1999 – 2000
Launched: September 2000
Name: WOODY
Owner/builder: Björn Edström, email: bjorn.edstrom@posten.se
Location: Stockholm/Sweden

I will send more pictures from the launching when the film is developed


Mary-Beth, Too

Mvc-004f

Dave Neder has made a great ‘gold plater’ job of his sheet ply Chebacco, “Mary-Beth, Too”. He writes:

. . . The mast is hollow. It consists
of a marine ply box section sheathed with Sitka Spruce and Red Oak at the
gaff throat position.


The tiller is from a 26′ “Lancer” sail boat. It was contributed by a
friend of mine. The coaming is made of ribbon stripe mahogany ply and
mahogany lumber. I cap all exposed ply edges and I built narrow hand rails
all around into the coaming. The drawings show flush sides, but since I
need a better grip, I added the rail.

The hatches are water tight. The out board motor’s gas tank is under the
port hatch. The motor will be old 9.9 Johnson from the “Lancer”. The 12
Volt battery is under the starboard hatch. Their centers of gravity are
equidistant about the centerline.

The cabin hatch cover is shown closed portions of the cover, trim and pen
boards are made of red oak. It is common here and I like to work with it.
The two cleats are for the peak and throat halyard.

I am going to trailer the boat. I have a wide choice of sailing lakes
including Lake Michigan. Lake Michigan is about twenty miles from my front
door. One comment about sailing on Lake Michigan; it is about 90% Ho Hum
and 10% sheer terror. Moorings in my area are filled up and expensive even
if you can find one for sale or rent.


I am presently building boom crutches to hold the masts and booms while
trailering the boat. I will send photos as things progress
Our goal is to sail this spring.
Regards Dave

Yet another Chebacco growing in BC!

Randybow

Randy Wheating writes:

Hi Bill

It was my pleasure to have finally met you in person at the Port
Townsend Wooden Boat Festival last fall. I turned my hull over this
past June. I went the brute force method with the help of six friends.
Before the ‘flip’ I cut out a notch in the cross pieces of the strong
back. I added a little padding to the notches and when we turned the
hull we set the keel into these notches and there she stood – upright
for the first time! A little shoring up and leveling and the hull was
for me to climb aboard.

As you may be able to see from the attached photos, I have made some
minor alterations. I have increased the width of the cabin about six
inches per side – flush with the cockpit coamings. The cabin top was
raised two inches.

The forward bulkhead I made one inch thick (laminated two half inch
pieces of plywood) as this will be the main support for my mast
tabernacle. I cut a square hole, for no particular reason, rather than
the round one as shown in the drawings.

The space under the cockpit seats will be sealed with air tight
inspection hatches for dry storage and floatation.

I added an eight inch bridge deck and made some cut outs in the main
bulkhead, from the cabin, for extra storage.

Like Brad Story’s boats (I believe) the aft cockpit is not cut through
to the motor well. A one piece stern deck with port and starboard
hatches with cover this area. There will be a small access hatch in
this deck just forward of the rudder post that will just allow me to
drop a 3 gal fuel tank into this space. A second tank will sit just aft
of the mizzen.

The rudder and post are aluminum. I fabricated an epoxy/cloth/mat tube
just larger than the rudder post OD which was then bonded between the
hull and motor well floor. This should create a nice water tight
passage for the rudder post.

Since taking the photos I have temporarily reinstalled the original
forms into the cabin and have started on the cabin sides.

With luck I will get her into the water later this year.

As always I enjoy the CN and appreciate your fine work. You must come
back to the West Coast in a couple of years for a cruise when all four
BC Chebaccos are in the water!

Take care,
Randy Wheating
Port Moody, BC, Canada

Pete has flipped

Upright

You’ll remember Pete Respess’s ‘poor man’s laser level’ from the Chebacco News #32. Pete has now flipped his hull, and I must say that waterline looks fantastic!

Skip flips, too

skipflip


Skip Pahl, in Southern CA, has flipped his handsome sheet-ply hull. In case you’re wondering, about half of his helpers are on the other side of the hull!

Skip writes:

So. Cal.’s apparent “one-and-only” Chebacco is not dead, however, progress
has been mighty slow.

A few weeks ago we had our annual neighborhood block party, an event that
provided me with lots of horsepower for turning the boat. We kicked-off the
party with the boat turning and everyone was delighted to be a part of the
effort. They have been watching the building for nearly three years now! By
scheduling the turning early in the picnic (before the beer), we accomplished
our task without a nick or scratch.

A note about striking the waterline: Last year I found the world’s cheapest
laser level for $39.95 in the Radio Shack Christmas catalog. It produces a
fine laser line as well as the standard spot! I mounted the level on a piece
of plywood attached to the top of a camera tripod and then leveled the
platform north, south, east and west) with a mark on the cutwater were I
wanted the waterline to start. After the first arc gave me a series of dots
from the cutwater to midships, I rotated the level on its leveled platform
and marked dots from miships to stern. I the stretched 3M fine line (1/4″)
tape along the pencil marks and arrived at a clean and satisfactory
waterline. This is a good system if you don’t have a great deal of work space
around the boat.

Best wishes to all!

Skip Pahl
Carlsbad, CA

pahltejeda@aol.com

That’s all for this issue

Not a terribly technical one this time – just a showcase of the fantastic efforts that are going on around the world. It seems to me that the number of Chebaccos is growing at an ever-increasing rate, as of course, a beautiful design like this deserves.


Keep in touch, everyone!

Bill Samson,

88 Grove Road,

Broughty Ferry,

Dundee DD5 1LB,

Scotland

bill.samson@tesco.net

Chebacco News 15

Chebacco News

Number 15, May 1997

[This issue of Chebacco News can be seen (in glorious colour) on the World Wide Web at: http://www.scotland.net/users/wbs/chebacco]

Our Website

Those of you who surf the World Wide Web will have noticed that Chebacco News is now at a different URL from previously. Formerly, I put CN on my web pages at work, in the University of Abertay Dundee. I now have a private web page, funded by yours truly.

There are two reasons for this – firstly, my employers could see that I had interests outside of work – a grave mistake in this age when workaholism is assumed to be the norm – secondly, I plan to retire later this year and my work pages will disappear anyway!

The downside of the new site is that I’m rationed to 1/2 megabyte of web space, so I’ll only be able to show one issue at a time, so the happy state of having the entire collection of Chebacco News’s on the web is to be no more.

To keep new readers happy, I can now offer earlier issues of Chebacco News as ‘bound’ (i.e. stapled) volumes. The two volumes are issues 1 though 6, and issues 7 through 12. If you’d like either (or both!) of these, the cost is $10 for each volume, including surface-mail postage, or £7 in British funds. Add two more dollars (£1.30) for air-mail. Please send cash only – it costs me a fortune to cash an overseas cheque. Commission for converting cash is much less.

News, enquiries etc should be sent to me:

Bill Samson,

88 Grove Road,

West Ferry,

Dundee,

DD5 1LB,

Scotland

Email:- wbs@sol.co.uk

Gil Fitzhugh ‘fesses up . . .

Gil Fitzhugh has been reflecting on his experiences of building a lapstrake Chebacco hull:

It’s true confessions time. Many of your newsletters have passed on information on how I was building my Chebacco, with the goal of helping those who hadn’t started yet to get off their duffs and get cracking. It has increasingly been occurring to me of late, that many of the techniques I used were suboptimal. Not wrong; I do have a nice hull. But I could have built it much more efficiently. But, if I’m ever misguided enough to build another glued-lap plywood boat, here are some of the things I would do differently.

1. The Tom Hill approach is one I wouldn’t do again. It uses a series of battens to define plank lines. Tom’s boats aren’t particularly curvy; it makes sense to use battens to help shape the planks. But a lapstrake Chebacco is a pretty curvy boat. Since I disagreed with Phil Bolger’s plank shapes, I lofted my own. Then I cut molds to duplicate my lofted planks. Having done so, I didn’t need Tom’s technique to define my planks. I could have taken them direct from the molds. This is what I did when lofting the cradle boat, and as you can see it worked fine:

ch144

Gil Fitzhugh’s cradle boat – based on Iain Oughtred’s ‘Whilly Boat’ design

I used Iain Oughtred’s plank lines in defining my molds. There are no plank lines specified in the lapstrake Chebacco. You can use Tom Hill’s battens to come up with nice lines, or you can loft them. You don’t need both.

2. Having abandoned Tom’s battens, you can set up all the permanent bulkheads as molds (either substitute molds or extras, depending on where they fall). When you lift the hull off the building frame, the temporary molds are left behind and the bulkheads stay with the hull. This saves many months of fitting out. I suspect that’s the way sheet-ply Chebaccos are built [that’s right – Bill] ; no reason not to do likewise for lapstrake.

3. Using drywall screws to hold the planks togetherwhile the epoxy sets up is easy and effective while you’re doing it, and a monumental pain later. Some of the screws break off and have to be removed by brute force. All those zillions of holes have to be plugged and smoothed on the outside, and the ones in the cuddy have to be smoothed on the inside, too. All this takes forever and yields no job satisfaction. A better way is to make up a batch of plywood plank clamps, like this:

clamp

They can be made tight with a wooden wedge or two at the open end. I starte out to use them on the Chebacco, but the presence of all those Tom Hill battens meant the opening had to be quite wide and the closed end rather thin. When I tried to tighten the clamps with wedges, they bent at the closed end instead of pulling the clams together at the open end. So I gave up and went to drywall screws. I gave up too soon. I should have used heavier clamps. In the cradle boat, with planks of 1/8 inch luan ply, my clamps were scraps of 12mm occume ply from the Chebacco. They worked fine, and left no holes. If I’d taken the time to glue together two or three thicknesses of lumberyard ply for the Chebacco clamps, they’d have been plenty strong enough.

I’m grateful to Gil for sharing his learning experience with us. After all, it’s better to stand on the shoulders of our predecessors, than to start from ground level.

Story Chebacco-20 spotted at Maine boatshow

:

John Harris, of Chesapeake Light Craft, MD sent some email:

Neat show; I’d swear there was as much interesting stuff as at the WoodenBoat Show. Just crammed with wooden boats of all shades and an acre of boat-stuff vendors.

Brad Story was there with a lapstrake Chebacco 20. Marvelous finish and detail. (Were those NUTS and BOLTS holding the laps together?) I talked with his wife a little; she said they were going to try to ease out of big boat one-offs and concentrate on marketing the Chebacco as a production boat. I’ll be very interested in how that works out; they’ve already sold nine and are doing some nice advertising.

We left on Sunday after a mandatory stop at the LL Bean and Patagonia outlets.

Cheers,

John C. Harris

A new Sailing Pirogue from PCB & F –

John Harris also reports that he has built the prototype Sailing Pirogue – a new design from Phil Bolger & Friends. This pirogue is 11’6″long by 2′ beam. Drawings of this fun boat are available from Phil Bolger & Friends, 29 Ferry Street, Gloucester, MA 01930. Phil writes:

The plans of this design are on two sheets of 8 1/2″ x 11″ typewriter paper, rough but demostrably adequate. If somebody wants a set, we’ll charge US$25.00 for them, mostly “handling”, i.e. nuisance.

peero

John Harris’s prototype Bolger Sailing Pirogue

Progress with Sheet Ply Chebacco:

Hi to All,

I’ve been making some, but somewhat slow progress. I’m building a sheet-ply Chebacco, and I’m building it in my garage. my progress to date…

cut-out my bulkheads and molds (I guess I’m very luckyto be living so close to ‘Boulter’ (plywood and specialty woods and materials, an excellent company and resource – Boulter Plywood Somerville Ma 617-666-1340)

I built my support structure (less than 2 feet to spare) in an effort to keep things straight, I stretched a wire from front to back and permanently mounted it near the

cieling over the boat centerline. On the wire I have a weighted string that I can slide along over the construction and verify the centerline alignment of individual

elements or the underlying structure, which gets hammered on occasionally. I also shot several areas of the floor/structure with spray-paint, to make it more noticeable

if my structure gets shifted.

I’ve cut-out, but not yet laminated the inner-stem

The transom is not yet reinforced or on the structure.

I have plenty of work ahead of me, and the expenditure of funds is at the rate that is hardly noticed (but the progress is certainly noticeable…if slow) which is

my general plan, small expenditures of money, over long period of time. (besides, I have only a little bit of either of those resources).

I do have some questions for the general Chebacco-building

population…

I’m trying to decide, whether to build the centerboard/case and install/mate with the bottom panel, at bottom panel phase of hull construction (soon in my case) ???

And I’m not clear on the intent, on the plans for the thru-hull-section for the rudder post…

is it lined with an appropriate sleeve for the post to wear/rub against, or is it epoxy-coated (specialty additives) for the stressful life of supporting the twisting and turning of the rudder?

Does any preparation for this area happen while upside-down in the hull stages?

By The Way, My garage is now adorned with a large framed color print of ‘Sylvester Ghosting In’, which was featured on a previous ‘Chebacco News’, (Bill, I hope that’s

OK) it’s beautiful and right smack-dab in front of my wife’s parking space in the garage…she still has use of her side of the garage…and we’re both enthused

by the artwork.

Jim Stewart mailto:stewarj1@polaroid.com

#2 Stewart Farm Rd.

Atkinson NH 03811

Regarding the hole for the rudder stock, the way I built my Chebacco all the wear is taken by a pintle (gudgeon?) at the bottom end and a steel plate with a hole in it on the oak ‘slab’ at the top. The hole itself is epoxied and painted, but doesn’t seem to get any wear. Some builders fit the CB case at the same time as they fit the bottom to the hull. I cut the slot later, and inserted the CB case before making the keel. If I was doing it again, I’d fit it at the same time as the bottom – much less hassle!

More questions on construction:

Here’s another email question and answer session between Burton Blaisbblais@EM.AGR.CA – and myself

Hello Bill:

Is it sailing season yet in Scotland? We’re nowhere near it here – it’s still snowing out there!

Three weeks until the moorings are laid. I was out in my Payson Pirogue at the weekend. First time on the water this year!

Anyway, I wonder if I might pester you with yet another request for tips on building my Chebacco. I’ve pretty well finished cutting and sorting out all of the parts & components for the centreboard and its case (all I need to do now is to fiberglass the inside surfaces of the case before putting the whole together – I’m waiting on this for warmer weather and for my shipment of RAKA marine epoxy – yes, despite my recent controversial query to the Bolgerlist folks about the possibility of using vinyl ester, I still intend to use epoxy for my Chebacco). In anticipation of the hull asssembly process, I wonder if you could give me your opinion on the following details:

1) For the inside surfaces of the centreboard case, will fiberglassing with epoxy provide sufficient protection?

That’s what I did and it seems OK. I understand that Brad Story epoxies a layer of Formica on the inside of the CB case – should save a lot of bother!

2) After cutting out the hole in the centreboard for the lead ballast, did you first epoxy the inner edges of the plywood to protect it from the water, or will this interfere with the “adhesion” of the lead? Perhaps it would be better to pour the molten lead in first, let it solidify, and then seal the surface thoroughly with epoxy?

Yes – I epoxied AFTER pouring the lead. It seems fine so far.

3) For the framing, floors, deck beams and carlins, what type of lumber should I use? Can I get away with using carefully selected spruce or white pine, or do I absolutely need stronger wood ( such as oak)? I’m assuming that the main function of the deck beams and carlins is to support the deck, and not to play a major role in the structural strength of the entire hull itself.

I used reclaimed white pine – liberally coated with epoxy and well painted – seems fine. If I’d had unlimited resources, I’d probably have gone for mahogany or Douglas Fir. The carlines themselves add little to the strength of the boat – they effectively extend the glueing area for joins between panels.

4) Again, what are the options for lumber for the keel cheeks?

If you can get oak, that’s probably best – but be careful, It doesn’t glue well, so back up your joints with S/S bolts. I used construction-grade fir (‘red deal’) which epoxies well but is more easily damaged than oak.

5) I seem to recall reading in your published building sequence that fort the bilge panels you are recommending two plys of 1/4″ plywood, rather than 1/2″, due to the twist in the panel near the bows. Unfortunately, most lumber in Canada is sold in metric sizes, and while we can find 1/2″ plywood readiliy enough, the closest to 1/4″ that I can find is actually thicker at about 8-9 mm. Therefore, if I go the route of using two plys of the thinner stuff I will actually end up with a bilge panel that is considerably thicker than 1/2″ , and which will not be flush with the other 1/2″ panels. Therefore, I may have no choice but to use the 1/2″ plywood for this job. Do you have any experience with this, or any tips on how I might be able to use this thickness and still get the correct twist in the panel ?

I can get 6mm ply here, which is pretty close to 1/4″. I should point out, though, that in fact I made the bilge panels out of 1/2″ (12mm) ply but you need a bit of brute-force to get the panels bent into position. I used strategically placed clamps and twisted ropes (‘Spanish windlass’) to coax them into position.

Sorry to bother you with so many questions, but you are simply too valuable a resource not to use! Many thanks in advance for all your help.

Regards,

Burton

Delighted!

Bill

Photo from Nova Scotia:

I found this image of Fraser Howell’s strip-planked Chebacco-20, ‘ITCHY’, on the World Wide Web. Unfortunately, the image has suffered somewhat in the transfer! If you can get onto the web, the URL is http://Fox.nstn.ca:80/~swbans/photo.html where the image is much clearer. Fraser tells me he’ll soon be sending some other images. Watch this space!

fraser

Fraser Howell’s strip-plank ‘Itchy’ scoots along.

That Tasmanian Chebacco:

A number of you have written or emailed me asking for more details of the Chebacco that appeared on the fromt page of Chebacco News #14. Colin Hunt, who took the photos, takes up the story:

. . . as I wandered around the docks there it was – ‘GREBE’ – a chine built Chebacco launched last summer by Bruce Tyson of Port Sorrell in Tasmania. This craft is magnificently built and finished, and when I finally caught up with Bruce he described her as a very user-friendly boat. She was built according to the plans with no ballast and a 5hp motor.

ch143

GREBE

Colin also tells me that he has built a ‘Bobcat’/ ‘Tiny Cat’/ ‘Instant Catboat’ (surely a 12 foot boat doesn’t need all these names). He mentions that construction is very like that of the sheet ply Chebacco. I hope Colin sends some photos for a future issue.

And Finally . . .

When we first started this newsletter I wondered if it would survive as far as a second issue. I’m frankly flabbergasted at the amount of information we’ve disseminated. We seemed to have hit the market at just the right time when the first home-built Chebaccos were starting to appear. The World-Wide-Web has also been a tremendous help in reaching new Chebacchisti (- Gil Fitzhugh coined this word -), particularly through Chris Noto’s Bolgerlist, and Tim Fatchen’s Light Schooner home page.

Thank you all for your news items, past, present and future – Keep ’em coming!

Bill Samson

Chebacco News 14

Chebacco News

Number 14, March 1997

ch142
Colin Hunt spotted this beautifully finished Chebacco at the Wooden Boat Festival in Tasmania. It was built by Bruce Tyson of Port Sorell in Tasmania. This must be the most Southerly Chebacco!

We hit the posh mags:

Some of you may have come across the excellent new magazine devoted to boats and boatbuilding – ‘Water Craft’ – which is published by the legendary Pete Greenfield. You’ll recall that Pete started ‘Classic Boat’ and ‘The Boatman’, which recently amalgamated. ‘Water Craft’ is his latest venture – a bi-monthly mag with a very strong bias towards boatbuilding (unlike some other mags which seem to be committed to reviewing the latest millionaire gin-palaces).

I phoned Pete a couple of months ago, asking if he’d like to publish an article on the Chebacco boats. He looked at a draft article and agreed to commit himself to publishing a major article on the Chebacco and its construction. Phil Bolger and Gil Fitzhugh have both contributed to the article, which will be illustrated with lots of photos of ‘Sylvester’ at various stages of construction. The article is due to appear in Water Craft number 3, to be published on 17 April 1997.

Subscriptions to ‘Water Craft’ (six issues) can be had for £16.50 (UK) or £20.00 (rest of the World) from:

WATER CRAFT,
Pete Greenfield Publishing,
Gweek,
Helston,
Cornwall,
TR12 6UE,
UK

Some Questions about Chebacco Building:

Dr Burton Blais of Ontario, Canada, has recently started building a sheet-ply Chebacco-20. He wrote to me with a list of questions which, I believe, are of general interest, so here they are, along with my initial responses to them.

1. What is the best way to set up a construction platform for assembling the hull? I am thinking of two parallel 20’ long 2×4 or 2×6 rails (straight and carefully levelled), with the frames and molds set at proper distances along the rails. I’m not sure about the best way to adjust the heights of the frames and moldsto produce the correct arrangement for assembling the sides, etc. . .

I used 2x6s, as you suggest. I reckon 2x4s wouldn’t be stiff enough, at 20’long. These were set up about 30” apart like a ladder with ‘rungs’ corresponding to the positions of frames and molds. The frames and molds were lightly attached to these to allow some adjustment to fit the topsides panels when these were attached. Gil Fitzhugh used a plywood ‘box girder’ for his strongback and this worked very well, too.

2. Exactly how does one go about affixing the stem cap solidly to the hull – is it bolted to the stem? If so, how is it bolted? (I presume this goes on after the sides and bilge panels have been attached to the stem).

Yes, it does go on after the sides and bilge panels are attached. I fixed mine with longish woodscrews in deeply countersunk holes. Really, the glass sheathing should make it strong enough without through bolting.

3. For the hollow keel, the plan mentions something about drainage holes, but I’m not sure that I understand what is meant here . . .

The hollow keel sections are free-flooding, and so need to be carefully coated with epoxy inside and out. Each hollow section is roughly triangular in shape, so I drilled a 3/4” hole through the plywood (on one side only) at each corner of the triangle. I did this, too, on the hollow rudder. Some builders have made the keel solid and I don’t think there’s any harm in that. For amateurs with limited woodworking facilities, however, the hollow built-up keel is easier to build.

4. For the plywood rudder, exactly how did you affix yours to the rudder post so that it holds strongly (e.g. even when there is pressure against the rudder)? Also, how did you affix the tiller to the post?

I strayed a little from the plans, in this case, because I happened to have some 1” dia steel rod for the rudder post, rather than the 2” dia pipe specified on the plan. I welded two, three inch long ‘prongs’ onto the post, which locate in holes in the frame at the for’ard end of the rudder. The whole lot was then sheathed in glass and epoxy and is very strong. The tiller is made with steel ‘cheeks’ in way of the post. A tightly fitting stainless bolt goes through both cheeks and the post. This would certainly be easier to get right with a 2” post. Play in this joint can be most irritating when you are sailing, as I found to my cost. I fixed the problem by drilling out the holes and using a larger size bolt.

5. Exactly how does one remove the two molds once the hull and cuddy have been assembled (do the molds not become entrapped within the structure?)? Does one simply ‘hack’ them out?

Yes.

6. Do you recommend installing styrofoam for positive floatation and if so, where should it be placed?

I haven’t installed any in ‘Sylvester’, on the grounds that she’s a wooden boat and would be quite buoyant, even when swamped. Some owners put in 2 or 3 hundred pounds of internal ballast, and the case for buoyancy would be considerably greater in these boats. If I were to install some, I’d put it under the side decks and under the benches.

Burton later emailed me with an account of how he is going about the construction of his boat:

As you know, I am still very early in the building process, and am very much a novice, and so I fear I won’t have much interesting material to relate. However, I’ll tell you a little about what’s happened so far in my Chebacco building enterprise:

First, I should indicate the type of workshop facilities and tools I have to work with. I built my small workshop several years ago to suit my modest woodworking needs and the Canadian climate – the entire building (which is insulated against the cold -it can get to -30 C here in Jan. and Feb.) is only 12′ X 20′ , and much of the space is taken up by benching and work stations set up along the walls. Despite this, I did manage to build a 15′-long Bolger Gypsy in this space last winter. However, the experience taught me that I would need a larger, less encumbered space to build the 20′-long by 7.5′-wide sheet ply Chebacco. Thus, last Fall, I completed construction of a temporary 12′ X 30′ shelter behind my shop. This is built of a 2 X 3 spruce lumber frame covered with a blue polyethylene tarp (this is an inexpensive woven tarp commonly available in North American hardware stores). In spite of the sunshine and strong winds in our area, I hope that this tarp will last through to the end of next winter (1997-98), when I expect to have my Chebacco completed (or nearly completed – a lot will depend on the availability of funds, and other circumstances). Thus far the tarp seems to be holding up well through the worst of our winter, although its getting a little slack in places (I must remember to see about tightening it so it doesn’t flap too badly in the wind).

As for my workshop tools, I have what I consider to be most of the basic woodworking tools (at least, the necessary equipment for my other woodworking passion, furniture building): e.g., 10″ Delta table saw (this is the inexpensive table top model, with a carbide-tipped blade – this saw doesn’t owe me anything, having given me much service over the past 8 years), a small Delta bandsaw, a scroll saw, a compound miter saw, a router, a lathe, and of course, a skilsaw, a jigsaw and a a belt sander. But my real gems are couple of really nice Stanley handplanes and an old cross-cut saw I found in an antique shop! So armed, I proceeded to tackle the problem of building a sheet ply Chebacco…

At this juncture, I should point out that I am trying to build my Chebacco as economically as possible, yet aiming for a good quality boat in the end. I should state that, as I live at least 10 miles from my intended cruising grounds (the St. Lawrence river, near Morrisburg, Ontario), my Chebacco will spend most of her life on a trailer under a tarp (as does my Gypsy right now). This fact does influence my choice of materials. For plywood, I am using construction grade 1/2″ fir 5-ply (good one side). Now, I know that there are many critics of construction grade plywood in the boatbuilding world. However, marine grade is simply not an option for me because of its very high cost in my area ($90.00 CDN a sheet for marine fir plywood!!). I have contacted the Canadian plywood association, who inform me that all plywoods maniufactured in Canada these days, whether marine or construction grade, uses the same types of waterproof adhesive. The main difference appears to be in the quality of the plies, finishing and the number of voids (the latter factor being of crucial importance to the boatbuilder). I have searched far and wide in the lumber yards of eastern Ontario, and have found that there is considerable variation in terms of quality from one dealer to another. I have learned that there is some pretty terrible plywood on the market these days (both marine and construction grade), and that one has to have a very discerning eye in chosing either type. After searching, I have found a supplier who stocks what I deem to be fairly good quality construction plywood. After much cutting and handling so far, I have found this plywood to have few voids, and these are very small at that! I think that this material will suit my purpose very well. I do plan to use epoxy resin for the fiberglassing, and indeed, intend to fully encapsulate all plywood parts as other Chebacco builders have done. I believe that this (and proper regular maintenance of the boat once in use) will be the main factor in ensuring the longevity of my boat. Now, for epoxy, I did consider going the popular route of WEST System or EAST System products. In my area, the cost of these is roughly $120 (CDN) per gallon. However, recently while surfing the net I came across a company in Florida, Raka Marine, which sells a 2:1 marine epoxy at discount prices. I figure that even after taking into consideration the currency exchange rate and shipping charges, this product will still cost about half of what I would pay for the more popular brands. Anyway, I am going to try it out, and perhaps later next summer will be able to report on how the stuff works. As for the actual construction process, right now I am limited by cold weather. I have been doing whatever I can in my small heated workshop: thus far I have cut all of my frames and molds, assembled the transom and its framing, and put together the stem and stem cap. By the way, knee pads are an absolute necessity for laying out frames, etc., on the plywood – I wish I had thought to get a pair when I built my Gypsy! For cutting the frames and molds I used both a skilsaw and a jigsaw, as necessary. It is very difficult to cut a nice smooth curve with a jigsaw, and I may have to do some planing and epoxy puttying later (note that, since most of the side and bottom edges of the frames will be set in epoxy putty and taped to the inside of the hull at the assembly stage, a slightly “wobbly” edge should not be too critical).

I laminated my stem and stemcap using the 1/2″ ply and epoxy (not the Raka marine stuff, which I haven’t ordered yet). The result was the ugliest looking two pieces of wood I had ever laid eyes on! The stem is laminated from seven pieces of plywood cut with the jigsaw, and boy, talk about multiple wobbly edges! However, I persevered, and began be cutting a bevel on the stem to start giving it its proper final shape. At first this posed a problem: my jigsaw blades were too short for the job, and I broke two bandsaw blades trying to feed the stem through. At last, I was able to do a decent and quick job of it using my trusty cross-cut saw. The final surface and proper bevel were achieved with a blockplane and the beltsander. The aft curvature was worked with a combination of a drawknife and the belt sander. For the stemcap, which is laminated from 5 pieces of ply, tapering was achieved by laying the piece on its side and going at it with a blockplane, followed by smoothing with the belt sander. The result are a rather handsome stem and stemcap, if I do say so myself!

With all of this done, now I am beginning to attack the centerboard and its case…

Well, that’s pretty much all I have to report for now. As you can see, its not much in the way of accomplishment yet. Hopefully when Spring arrives in two months I can get some serious work done. Incidentally, I do intend to try making my own sails, when the time comes, as you have done. This will save me a considerable amount of money, but more importantly, I will learn something new.
Best regards,
Burton


News from Germany/Connecticut:

Bill Meier emailed me with an update on progress:

Dear Bill and other Chebacco newsletter readers, In spite of the fact that I haven’t written in probably more than a year (or has it been two years), I have been faithfully reading the newsletters and dreaming. My building plans were put on hold last Spring when my company offered me a one year assignment in Cologne, Germany. The opportunity to live and travel in Europe outweighed the boatbuilding schedule so the family and I packed up and moved. Recently, however, the rather damp and drizzly Rhein valley weather has driven me to spend my weekends reading boating books, magazines and newsletters to the point that I can think of little else but my lapstrake Chebacco, sitting patiently in my garage, waiting. The glowing reports by Frasier Howell of the Chebacco’s sailing performance have made the wait agonizing. The hull of my boat is completely planked, the CB trunk and bulkheads are installed and the cockpit is about half done. I didn’t know that there was/is a Bolgerlist newsgroup so I decided to vary from the construction drawings on a few points. I won’t know if the decisions were right for me until the boat is in the water for a while, but I thought I’d share them with you.

I decided to build a solid keel rather than the plywood sheathed one in the plans. I was concerned about the longevity of plywood, especially when moisture got into the structure and stayed there. I wanted a unit that could be easily replaced (i.e. not epoxied to the hull) in a few years. What I came up with after determining the price and availability of wood was to use douglas fir 2x6s laminated horizontally with plenty of 3M 5200 and bolted to the CB trunk and floors with bronze rods. The whole assembly including the bolt holes were given a good soaking in some Cuprinol I had left over from a previous project. For abrasion resisistance I used a 1x6x18ft hickory shoe that the local lumber mill gave me for free.

Was it worth it? I do know that it took quite a bit of work to get the shape right (with skil saw and hand planes). My work log is back in the States but I remember it being at least two and probably three solid weekends of work. It appears to be stable (not twisted or otherwise deformed) so far. I’m not terribly confident about the longevity of fir even with a Cuprinol bath but at least it won’t delaminate and I can replace it without too much difficulty.

All of the other timbers that will be in contact with the water, except the stem, are of white oak and are glued to the plywood with 3M 5200. I did some epoxy joint tests with my batch of white oak and was not pleased with the results. The 5200 seems to be fine, however, as long as it isn’t overclamped. The inside of the CB trunk has a layer of 6oz fiberglas cloth saturated with West epoxy. After the cloth was bonded to the wood, I filled the weave with two coats of epoxy thickened with West copper-based thickener to inhibit marine growth. The stem and all of the other dimensional lumber above the water line is ash, also glued with West epoxy.

The other point on which I deviated from the plans was to widen the cabin (slightly?) so that, in plan view, the cockpit coaming is a continuous, smooth extension of the deckhouse line. That leaves a side deck of about 1ft, which is on the narrow side but, as I remember, no worse than some other similarly sized boats I’ve sailed.

I’m essentially a novice with planking so I worked slowly and carefully to get the lines right and the scarphs well distributed and smooth. I worked the scarphs with a sharp hand plane (my trusty Record jack plane) and found it to be fast and easy to get a straight 8:1 bevel. I found no need for jigs or other special setups. I cut the plywood plank stock with a skil saw, leaving about 1″ extra on both the top and bottom for final fitting on the boat. The curves were gentle enough that a thin kerf carbide blade worked very well. A few passes with a hand pane were all that were needed to produce a fair curve on the completed plank.

Well, that’s where I am at this point. This week I was mulling over some of the rigging details when I found Chebacco News #13 on the Internet and decided it was time to report my progress?? and ask a few more questions:

I am concerned that, as drawn, the mainsheet will be right in the middle of things and will make it awkward for guests to move from side to side. How has it worked out for you? I’ve seen similar sized (18ft.) catboats and some classic gaffers with the sheet attached only to the aft end of the boom and cleated to the aft of the cockpit but I’m not sure that the Chebacco boom is rigid enough for that to work. If people have found the layout to be a problem, does anybody have an alternative that has been successful?

As far as the topping lift(s) is concerned, I was thinking about running two so they would help to control the gaff when lowering the main and so I could use the windward one to keep the boom up when running free. What is the experience of the group?

I, too, will be going for the low-tech boom jaw approach and I’d like to know what you’ve done to keep the boom jaws down? Is the boom heavy enough to stay put or do you need a line to keep it down and control luff tension?

Thanks for all your work coordinating and putting together the newsletter. I am enjoying it immensely both as a sounding board for design / construction ideas and for reports of on-the-water experiences. If anyone would like to contact me directly, I can be reached via e-mail at 71742.107@compuserve.com and usually by the Deutsche Post at:
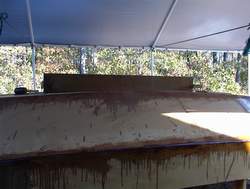
Achenbachstr 135
40237 Duesseldorf
Germany

Regards,
Bill Meier

I’d like to reply that I’ve never found the central mainsheet to be in the way, though the end does tend to get ‘in your feet’, but this is the case with any mainsheet arrangement.
I like the idea of a topping lift either side of the mainsail. I must try to figure out how to add one without too much extra hardware.

The weight of the boom is certainly enough to hold the sail flat in any conditions I’ve encountered. I suspect a downhaul wouldn’t be worth the extra trouble.
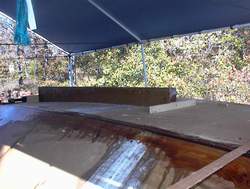
Wanted – A Chebacco boat:

Douglas MacCoy emailed me to ask if I knew of any Chebaccos for sale –

Family interested in acquiring a used Chebacco boat, basic version. Please contact Doug MacCoy, 1089 NW 83rd Drive, Coral Springs, FL 33071, USA, or by e-mail at 70253.113@compuserve.com. Phone 954-345-6483.

And Finally:

Sorry about the shortage of photos in this issue. I do have some that have been sent in, but haven’t got around to scanning them yet. I’ll save them for next time when I may not have so much text!
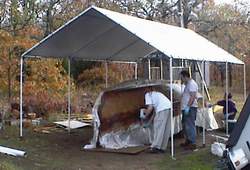
We’ve had an issue dominated by Chebacco coustruction. This is pretty interesting to most of our readers, but most also like to hear sailing yarns, too. I know that it isn’t sailing season in the Northern Hemisphere, so how about some of our Southern Hemisphere readers giving us some stories? OK – I know you’re too busy sailing . . .

News, views, photos etc to me

Bill Samson,
88 Grove Road,
West Ferry,
Dundee,
DD5 1LB,
Scotland.

wbs@sol.co.uk

Chebacco News 12

Chebacco News


Number 12, November 1996

[All issues of Chebacco News can be seen (in glorious colour) on the World Wide Web at: http://www.tay.ac.uk/mcsweb/staff/wbs/chebacco.html]

image2
Bill Samson’s ‘Sylvester’ impersonates the Chebacco News logo

The first ‘Glass-house’ Chebacco?

Bob Cushing (b.cushing@csss-a.cv.com) emailed to tell me that he is building the high- sided Chebacco motorsailer, dubbed the ‘glass-house version’ by Phil Bolger (Boats with an Open Mind – pages 225-227). As far as I can tell, this will be the first to be built to this design. Bob writes:

I have started building the highsided Chebacco motorsailer – have the bottom, ballast keel and rudder built and some of the bulkheads. I will be turning it rightside up shortly and starting to install the bulkheads, stem and sides.

Bob also mentions that he has built the Microtrawler (currently for sale!) and the Fast Motorsailer (both described in BWAOM). He hasn’t added the sailing rig to the Fast Motorsailer, yet, but is so pleased with its performance under power, he may not add it.

Lapstrake Chebaccos

Gil Fitzhugh reports steady progress on his lapstrake Chebacco. He is currently fitting out the hull:

The forward bulkhead is in, the aft one is cut out and the hidden one at the backend of the centerboard trunk is spiled. The aft bulkhead has a pretty top that I wanted to cover with a curved strip of laminated mahogany – two tight bends one way and two the other. It worked, but what a job! Bulding boats is duck soup. Building yachts, on the other hand . . .

I just hope, that with all that loving care and attention Gil is lavishing on his Chebacco, he can screw up the courage to dump it in the water when the time comes!

Gil also tells me that he is seriously thinking about putting on a bowsprit and jib, following the glowing report from Fraser Howell in the last issue. He has put a substantial breasthook into the hull so that a short bowsprit can be bolted through the deck and breasthook.

Another lapstrake Chebacco builder, Jerome McIlvanie, of Yakima, Washington reports that he built his hull right side up, turned it over using the pulley and ropes method (see Chebacco News #1) for painting. He then plans to turn it back over to finish it off.

Yet another builder who has decided to build the lapstrake version is George Cobb, of New Brunswick, Canada. He writes:

I won’t have building space for another 2-3 months. In the meantime I have completed the lofting and am well along on the spars. I would like to hear whether anybody has used a gooseneck on the boom and its merits and drawbacks as compared to gaff jaws.

I went for a sail in Fraser Howell’s boat three weeks ago. The winds were light but it was still a very enjoyable sail. I especially enjoyed nosing up to a beach and going ashore.

George Cobb

If you use a gooseneck on the boom you’ll be in good company, George. Sister Krista’s ‘Toulooma Too’, built by Brad Story (see Chebacco News #7) has a gooseneck. It certainly looks very neat and works well. I used jaws on my boom because I like low-tech things that are easily fixed, wherever I am. The only slight advantage of jaws is that the height of the boom above the deck can be adjusted using the throat halyard – but this is no big deal.

Another sheet ply Chebacco?

I am sometimes accused to being rather biassed towards the sheet ply version of the Chebacco. OK – I fess up! (- you’d think I was an American or something -) I am biassed. So it gladdens my heart to hear that another one is about to start taking shape. Garry Foxall, of British Columbia, writes: I am going to build the sheet ply version, although Jim Slakov’s [a lapstrake version] is so pretty it makes me want to do that instead. However, I have a number of other projects that must be done, and I think that the sheet ply one will be faster.

I hope to begin cutting out bulkheads and temporary frames this month. December is when I hope to begin the actual construction.

Jim Slakov lives a few miles away. He turned his hull over in the early summer and is now working on the centerboard trunk. He is a cabinetmaker by trade and his workmanship is beautiful. It makes one feel envious.

Garry.

Chebacco a tad big for you? How about a Catfish Beachcruiser!

John Tuma, of Fremont California has launched his Catfish Beachcruiser (a recent Bolger design). He has called it ‘Catfish Lounge’, in view of the astonishingly spacious cockpit/cabin. John writes:

The hull form is similar to the sheet ply Chebacco . . .

The particulars:
LOA 15’1”
Beam 6’6”
Draft 15”
Trailer weight ~800 lbs
Displ (sailing) ~1000-1200 lbs
Sail area 139 square feet

She has a long, shallow keel and no centreboard, giving an uncluttered interior. The deck is raised to the height of the top of the coaming and there is a narrowish walkway down the centre which forms the cockpit when sailing, and can be easily covered over at night to give sleeping accommodation (rather like the Birdwatcher, but less extreme). So you get a huge cockpit and huge sleeping accommodation, too.

image1
John Tuma’s ‘Catfish Lounge’

John emailed me to say:

The Lounge offers commodious seating, occasionally excellent dining, and often an excellent view. Performance to windward is not as slow as I first thought. I had my sailmaker join me for an afternoon on the Oakland Estuary, and we played with the various controls. Throat halyard tension was improved with the addition of a 2-to-1 purchase, and greater luff tension improved windward performance in light airs. In heavier conditions or with a lightly loaded boat the increased luff tension tends to induce weather helm. I did not expect the rig to be so sensitive to tuning, so now I feel I’m learning about sail controls all over again.

I’ve also found the lounge to be sensitive to loading. Four adults and two children can fit without trouble, but the boat doesn’t sail well with that much weight (at least not when chips and dip are more important than weight placement). Very slow to get going, and slow downwind. The increased momentum made tacking in light airs easier, the deeper profile reduced leeway. However, I’ve been having fun with the sideways motion, and a downwind dock can be taken by stalling the boat and sliding in sideways. I do have to be careful though, as the same thing would happen on a lee shore. I have also found that the Lounge likes to be sailed on the bilge panel, and flies on a reach when that far over. Is the same true of the Chebacco?

John

It certainly is! The downside is, though, that the greater the heel, the greater the weather helm. On balance, I like to sail my sheet ply Chebacco with a little heel, but not with the gun’l under! Sailing singlehanded, as I often do, this can mean taking in a reef earlier than when I have a crew to sit on the weather bench.

First, the model . . .

James (Skip) Pahl, of Carlsbad, California, writes:

I’ve just started my 3/4” to 1’ model. The hull is done and today I’m beginning the post-turn-over interior work. I am hoping the model comes out looking as sweet as the one you built. [Aw! Shucks! – B.S.] It might give courage at the office during a week that seems an unnecessarily long interruption to one’s time on the water.

I was fascinated by Fraser Howell’s recent comments about his bowsprit and jib, and wondered if his Chebacco points higher than those with cat rigs or might require reefing later since the jib tends to relieve the weather helm when the main is overpowered. Also, I’d like to learn how he installed the bowsprit. It seem to me that, with a careful job of tapering the spar, it could look great with the 19th century lines of the boat.

I’d also be grateful for your thoughts about using plastic laminate on the interior or the centerboard trunk and of using an aluminium plate for the centerboard.

Skip

Well, Fraser, some of this is for you to look into. Formica-lined centreboard trunks have been used successfully by boatbuilders for a long time now. I only wish I’d heard about it before spending days glassing the inside of my trunk! I’d be very wary of an aluminium centreboard. Made to the same thickness as shown on the plans, it’d be very heavy and would probably need a winch to raise it. A thinner one would need a narrower trunk and might get bent and jam up. You’ll recall that Fraser laminated a central core of aluminium in plywood, giving the same weight/density as the lead- weighted plywood centreboard of the plans (see Chebacco News #11).

Skip also emailed Gil Fitzhugh and myself asking how to fit the carlins and cuddy sides. Gil replied:

. . . there are floors at roughly stations 2 3/4 and 3 3/4. After they and the inwale are in place, you can tie the carlin to those floors and inwale with string, or wires and turnbuckles, like this –

carlin

By adjusting the tension on the strings you can pull the carlins into a fair curve relative to the sheer in both profile and plan view. Note that the top and inside faces of the carlin, to which the deck and cuddy sides will be fastened, are unobstructed. After you’ve fastened the deck and cuddy sides to the unobstructed faces of the carlin with screws and epoxy, the carlin ain’t goin’ noplace, never again . . .

My own approach is rather cruder. I left in the temporary molds 2 and 3, and used these to determine the shape of the carlins. Once the cuddy sides and side decks were fitted, I crawled into the cuddy with a handsaw and chopped the molds up so they could be removed. Untidy, but it works!

Professional advice available

Bill Buchholz has recently returned to the USA from Finland, where he supervised the building of a modified Chebacco at the boatbuilding school in Hamina. Bill has kindly offered to provide advice to amateur builders of Chebacco. He can be contacted at Apache Boatworks, RFD 4517, Camden, ME 04843, USA, phone 207-236-8048.

Weight aft, Mizzen Sails and Mast Boots

Peter Gray of Queensland, Australia refers to Jamie Orr’s query about weight at the back end of the Chebacco. He writes:

I was concerned about this with Grey Feather. The rudder was built of steel-

pgray1

so instead of the Oregon mizzen mast weighing 12 kgs I used a second hand windsurfer mast costing $50 and weighing 2 kgs. I got the sailmaker to sew a sleeve in the mizzen sail to go over this. It works really well. I also have an 8 hp Johnson outboard weighing 27 kgs. I have found this combination of items works well (weight and function).

pgray2

About the mast slot and sealing it – this was also of major concern to me as I don’t like water in the hull. I made a hatch cover for the slot and a boot for the mast.

pgray3

Grey Feather went to the Brisbane (Down by the River) Festival on August 23-24. This was a celebration of the 150th year of Newstead House, house of the Governor of Queensland, Australia. The house is on the banks of the Brisbane river. Incorporated with these celebrationswas a heritage and vintage boat show. Gray Feather was part of this and was met with great enthusiasm

Peter Gray


And Finally . . .

Please keep your news coming; whether about sailing or building or even just dreaming. This is your newsletter and we can all benefit from each others’ experience. For the first time, in this issue, I have devoted some space to a Bolger boat which isn’t a Chebacco – John Tuma’s Catfish. Please let me know whether I should occasionally discuss Bolger designs which might be alternatives to Chebacco, or whether I should stick strictly to Chebaccos.

Happy building, sailing, modelling, dreaming, . . .

Bill Samson,
88 Grove Road,
West Ferry,
Dundee,
DD5 1LB,
Scotland.

w.samson@tay.ac.uk

Chebacco News 11

Chebacco News

Number 11, September 1996

[This issue of Chebacco News can be seen (in glorious colour) on the World Wide Web at: http://www.tay.ac.uk/mcsweb/staff/wbs/chebac11.html]

Another launching!

Fraser Howell, of Nova Scotia, sent me the following message on 22nd July 1996:

Hello Bill,
I launched a week ago and have been out every day but one. It is the biggest dinghy around. She sails well, dry in all conditions so far, and easy to handle. We’ve had winds up to 25 kt and I’ve had up to 3 guests on board. In anything greater than 15 kt a crew adds welcome weight. I went out today, by myself to try it out with just the mizzen and the jib. It was surprisingly fast, approaching hull speed in 15 kt with no strain anywhere. Under full canvas there is some weather helm in higher winds, but I think the jib may be reducing this a bit. So long as the heel is kept to 15 degrees or so it tracks straight. I haven’t had any success getting her to self steer, so I may add a mechanism to hold the tiller.

I have no problem keeping up with or overtaking cruiser types up to 28 or 30 feet and can tack through slightly less than 90 degrees. The racier types are faster at this stage but I’m just beginning to learn how to handle her. She really moves with the 9.9 hp Johnson. I haven’t measured the speed but it sure is trying to plane under full throttle.

The beginning of a long partnership.

Fraser Howell

[Regular readers will recall that Fraser’s hull is strip planked – the first Chebacco to have been built in this way.]

He updated this on 31st July:

Hi Bill,

Your newsletter has been an important source of information and encouragement. I may not have selected this design without it. I’ve been sailing now for three weeks, and am in every way satisfied with the design. On Friday I leave for the first real ‘voyage’, 45 nm to a place called Mahone Bay where there is a wooden boat festival. Chebacco is easy to handle, fast, stable and handsome.

I think the jib and bowsprit are worthwhile, mostly because they allow neutral helm through sail trim (- I can induce lee helm by easing the mizzen). I find a significant speed improvement at neutral helm. I sheet the mizzen at a point further forward than the plan, and am often adjusting the mizzen sheets.

I like the fact that everything is manageable, Yesterday I was talking to the owner of a 22′ Brewer-designed cat. His mast weighs 300 lb! My solid sprice mast is exactly 40 lb.

Next time I get film developed I’ll send more pictures including the trailer. The boat is very easy to launch and retrieve from this rig.

Cheers,

Fraser Howell.

Fraser sailed the 45 nautical miles to the Wooden Boat Show at Mahone Bay, Nova Scotia. When he got home he send me the following report:

Got back today. Great boat !! Stable. Easy to handle, and quite fast. I slept on board (3 nights). It was a little cramped. We would beach on an Island, explore, cook etc. and then retire to the boat. The bowsprit extends 14″ past the cutwater, following the sheer. It does nothing for the appearance of the boat, but I would not be without it. I don’t hang an anchor off it, I just use it for the jib.

We were cruising at 3 – 4 kt in winds of 10 kt or so, endlessly. On any point of sail, except wing-on-wing-on-wing the boat was tuned to self-steer fairly well (I was able to read). My procedure was to set the main and jib for the wind, and this included the out-haul , then set the mizzen for neutral helm. We wandered 10 or so degrees either side of the compass course. I kept the cb at approx 50 deg to the keel, except for downwind, when I raised it. It all worked. The boat is very sensitive to all of the adjustments, and when “in the groove” suprised some big boats. Mostly it is just satisfying to sail.

I think I could use a bigger jib, 50 sq ft.

Fraser Howell

Bill visits Bill (and ‘Sylvester’)

Bill and Mary Parkes, of Mechanicsburg, PA, were visiting relatives in Scotland during July and spent a couple of days in Dundee, with Bill and Sheila Samson. I (Bill Samson) had been in hospital for abdominal surgery a few days before they arrived, but with the assistance of my sailing buddy Donald McWhannell we were able to put ‘Sylvester’ (my sheet ply Chebacco-20) through her paces. Bill Parkes is planning to build a Chebacco and was keen to find out how it performed. We sailed the 8 miles or so up the Tay Estuary to Balmerino – the site of a mediaeval abbey on the South side of the river.

I fear I took advantage of my fragile state to do a creditable impersonation of Captain Bligh (another Bill) – “Peak up that gaff!”, “Scrub off that weed before we set off!”, “You’re pinching her!” . . . Nevertheless a good day was had by all and Bill Parkes was even more convinced that the Chebacco was the ideal boat for him.

A User-Friendly Arrangement

I had an e-mail from Jamie Orr about possible ways of arranging stowage, how to make the cuddy watertight and other matters of general interest. Jamie’s questions are preceded by ‘>’ signs, as per e-mail convention. The same message went to Fraser Howell.

>Now that you are both sailing, I have some questions about how to make
>Chebacco is as “user friendly” as I can.

>It sounds as if the mast slot is a useful item
.

I can’t imagine getting the mast up single-handed without it.

> Have either of you had any
>problem with leaks around the slot from rain or spray?

Nothing drastic. My main source of leaks is water running down the mast itself
since I haven’t fitted a boot yet. As I keep the boat on a mooring, the slot
cover is held in for the season by 10 screws. I put a little silicone sealant
around it to stop leaks. Clearly, this’d be less convenient if the mast was
taken down after every sail.

> How does the slot
>affect the boot or other seal around the mast/deck join?

It’d make life difficult IF you have a boot. The design of Chebacco means,
however, that water running down the mast collects for’ard of bulkhead #1 and
doesn’t get on your sleeping bag. I sponge that area out every few weeks.
Note that the plan doesn’t show limber holes for bulkhead #1. I’m not sure
whether this is intentional, but it helps to keep water out of the sleeping
area.

> While we’re at
>it, do either of you have a good idea of how to get a quick and easy seal on
>a mast that is put in and taken out every sail? I may be a little paranoid
>about this, but a deck leak caused a major problem in our first sailing
>holiday — being cold and wet is acceptable on deck, but not in your bunk!

See above. I noticed that the Dave Montgomery Chebacco at 29 Ferry St.
Gloucester has duct-tape around everything. It’s not very elegant, but is easy
to put on and rip off every time.

>How do you find the storage? I know it’s a daysailer, but I plan to load up
>the family and camping supplies for weekend voyages — and even for
>daysailing, its nice to keep wet and dry gear apart. Did either of you put
>in the hatches in the after deck? (Your pictures may have shown that, but I
>often can’t get pictures on screen.) I am toying with the idea of putting
>lockers in the cockpit seats — these would probably leak in heavy rain, so
>would drain into the cockpit. I would keep them shallow ( 3 – 4 inches) so
>that they do not interfere with the ventilation shown in the plans. There
>would also be dry storage in the bows if I can get a good mast/deck seal.

I didn’t put hatches in the after deck. I did buy some plastic screw-in
hatches but decided to hold off putting them in until I feel the need for
space. Sister Krista’s Chebacco DOES have hinged rectangular hatches on the
after deck. She keeps things like fenders and life jackets in them. I notice
she doesn’t batten them down when sailing! On the other hand, the volume under
the seats of her boat is completely sealed, so there’s no lack of buoyancy.

The under-seat volume on my Chebacco is accessible from inside the cuddy – I
built EXACTLY according to Phil’s drawings. There’s LOADS of space there – I
keep an anchor and a couple of fenders at one side and a pair of 8-foot oars
and sleeping mat at the other. I’ve also put net ‘hammocks’ under the side decks
in the cuddy and these hold lots of odds and ends. I keep a toolbox and water container
in the cuddy, which can be moved to the cockpit at night. The far end
of the under seat space can be got at with a boathook! I keep my main anchor alongside the
foot of the mast ahead of bulkhead #1. It’s used so seldom that it isn’t a
hassle for me.

>How is the cockpit for lounging around? Do the cockpit coamings make good
>backrests? I thought about sloping them back a few degrees, but that cuts
>down the seat and/or side deck width, as well as complicating building. (I
>won’t comment on the wisdom of departing from the plans — the Bolgerlist is
>covering that quite well at present!)

I find that the cockpit built according to plans is fine, apart from the need
for a cushion on long cruises! I went sailing with Bill Parkes when he visited last
week and I stretched out on one side for a snooze while Bill helmed!
The drawings of the lapstrake version DO show sloping coamings, so it’s
up to you. Sister Krista’s boat has vertical backrests that stop at deck level and
sloping (3/4″) mahogany coamings above that. So you really lean on the coamings,
which stand proud of the seat back.

>Finally (for now) what is your experience with the weight of the motor and
>fuel in the motor well? I asked Phil Bolger about this, and he recommended
>a light motor, and suggested an electric would be powerful enough.
> Presently I am planning on a Honda 5 hp four stroke at about 60 pounds dry,
>plus whatever fuel I can carry in the well, and still sail well. The well
>is also a possibility for the anchor, but the weight is getting up there
>then. Fraser, you have a 10 hp — does the weight affect your performance?

The weight of my 4HP Mariner is negligible in terms of trim. In fact she trims
an inch or two down by the head even when the motor is there. Trim is perfect
once I am aboard and sitting at the tiller. Thinking about it, your engine, fuel and
anchor together weigh less than a crew member.

>I’d like to see discussion of this sort of thing in the Chebacco News.
> While I reserve the right to make my own mistakes, I always like to hear
>how others have dealt with the minor problems that crop up. For example, I
>will eventually want to build a tender, so your experience with these would
>be good to hear — I plan to ask about tenders on the Bolgerlist as well as
>there appears to be a wealth of experience, not to mention opinion, among
>the list members.

I’ve almost finished my June Bug and will report on its performance in a future
Chebacco News. Mind you, the perfect tender is a function of where you are
sailing. I need to row a couple of hundred yards out into an estuary which is
frequently rough and has strong tidal flow so I need something stable which
moves fast under oar. Clearly a Shoebox would not work for me.

>Thanks for “listening” — looking forward to your comments in the News.

>Jamie Orr

Jamie sent the same message to Fraser Howell. Here’s what Fraser had to say:

Hello Jamie; That slot is not worth sealing, at least not for me as I’ll be raising and lowering regularily. I put in a sliding cover that matches the mast diameter. Rain, no spray, yet, comes in, and is held in the forward area by the bulkhead. I sponge it out as required. For storage under the cockpit seats I installed the 8″ Beckwith (sp) circular hatches, at about $20 ea. That is big enough for tent, sleeping bags, extra life jackets etc.

The difference between a 10 and 5 hp engine is not great, 20 lb or so. a full gas tank for the 10 hp is another 50 lb – but to store gas, where else but far aft. I don’t know for sure what affect the bigger engine + gas tank has, but the boat does not seem sensitive to those kinds of weights. It also is not sensitive to the jib, but I’m not sure yet. Outboard power-wise 5 hp will do well. When I go more than half-throttle I dig in – at full throttle I almost plane. (maybe I do plane, a bit,I haven’t measured the speed)

I considered angling the backrest as well. I almost did. I haven’t spent enough time in the boat to be sure one way or another.

The boat is very easy to launch, recover, and trailer. It is lighter than it looks. Despite that, I lost it off the trailer into it’s cradle. It came off the trailer as fast as the winch handle could spin, collapsed the cradle, and hit the ground. It hit rudder first, digging in several inches. I dug it out, propped it up, and found – no damage at all ! Aluminum !

The reason I hauled it out was that after a week in the water the centerboard was sticking. I found that the plywood cheeks had completely delamiated from the core. Aluminum !

I’ve glued it all back with sikaflex and through-bolted it. Ready to relaunch by Saturday. For a tender, while at the moor I use a Bolger cartopper.

Fraser Howell

News of another Sheet Ply Chebacco

Jim Stewart of Cambridge, Massachusetts, sent me an update on the sheet ply Chebacco he is building:

Hi Bill,

This is a test of getting info to you, through email. It is more for education of me, than testing new and exciting technologies.

Progress on my sheet-ply Chebacco has progressed a small amount more than shown in the pictures. I have finished construction of my support structure. Vacation time is taking me away from home, and Boat-Construction. My wife, Cathy, and our 2 children, Jimmy and Megan all went together on a sailing lesson, while we were vacationing on Martha’s Vineyard. A truly excellent place, for all things boat-related, and one-heck-of-a nice place in general. Well we all enjoyed the sailing, Cathy had the instruction, I watched the kids, the kids enjoyed the whole thing. I’m getting materials ready to start on the stem, and I’m thinking ahead to scarfing together my first large piece, the topsides.

I’ve really enjoyed all your work on the Chebacco News. I love all the pictures, they convey a great deal of information, and hopefully My boat looks half as good as Sylvester.

I hope you can decipher the images! I’m going to look at those cabin roof curves again…!!!

Jim Stewart

js1
Bulkheads and Moulds for Jim Stewart’s Chebacco.

Lapstrake Chebacco – Spiling in the bulkheads

Gil Fitzhugh has started spiling in his bulkeads. Here’s what he says:

Spiling is a lot easier, though no less time-consuming, than I thought it would be. My joggling stick is about as low-tech as you can get. I cut it from a paint stirrer, and it looks like this:
ch11diag

The hook on the end helps it get into the angles between the lapped strakes. I did the forward bulkhead first. I had some scrap ply I clamped into place, used the joggling stick, transferred the points onto the good plywood (or onto mylar film first, then onto the plywood) with an ice pick (another favourite low-tech tool).

Gil tells me that the notches in the joggling stick help to locate it accurately against the marks when transferring the shape onto the good plywood. If, like Gil, you use the building molds as the ‘scrap plywood’ at this stage, they may well be full of holes and other obstructions, so you may only be able to get a partial mark with the joggling stick or may have to use the stick upside down and the notches are particularly useful for identifying the correct orientation for the stick. Gil goes on:

Put a pencil dot on the good plywood at the point of the joggling stick every time you’ve aligned the stick with marks on the board. Then connect the dots . . . you should end up with a pretty reasonable representation of the inside of the boat. Even so, the fit isn’t perefect. I find I have to trim off pieces of the bulkhead with a sharp chisel. Sometimes I end up with too much clearance, but not by a huge amount. I’ll probably just trowel in a wad of thickened epoxy, and declare victory!

Chebacco News 06

Chebacco News

Number 6, November 1995

Peter Launches!

Peter and Sandy Gray, of Queensland, Australia, have launched their Chebacco. As far as I can tell, this is the first amateur-built Chebacco to be launched. (If anyone knows this to be wrong, please let me know!) Congratulations to Peter for a great achievement.
six6
Gray Feather afloat in the Noosa river.

Peter writes:
Dear Bill,
Well, it has finally happened. Our boat was launched on 31 August 1995.
It was a beautiful morning on the Noosa river as our boat slid off its trailer and into the water. She sat exactly on the waterline and looked a picture. I stood back to take a photo of her but our camera wouldn’t work. At that moment a person walked down to admire her and after seeing that our camera didn’t work, he offered to take some photographs for me (- he was a professional photographer). After the photos were taken, Sandy and I boarded the boat and motored off down the river.
. . . the sails will come later. She has an 8 hp long shaft Johnson outboard. I estimate that she cruises at about 6 kts comfortably.

Bill travels and Gil flips . . .

I was fortunate to be in the USA on business at the start of October and took some time off to visit Gil and Joan Fitzhugh in New Jersey, and Bill and Mary Parkes in Pennsylvania.
Gil kindly timed the ‘flip’ (ie lifting his hull from the molds and turning it right way up) to coincide with my visit. A host of neighbours and relatives turned out for the flip and they were fuelled by generous quantities of grog and grub supplied by Gil and Joan. The flip went without a hitch – apart from participants having to dodge acorns falling from 100 foot high oaks around the boat. I was particularly impressed that the hull lifted off the mold without a murmur – no screws had been left in; no glue had stuck the hull to the molds.
Gil’s hull is beautifully fair – the product of more hours of sanding and filling than I care to imagine – and the plank lands are sweet and fair to the eye. Now for the fitting out . . .
six9
Gil Fitzhugh’s hull safely flipped and on its trailer.
Bill Parkes travelled from Mechanicsburg to assist in the flip. I went on to spend a couple of days with Bill and Mary. Bill is planning to build a sheet ply Chebacco. He has already built two Bolger boats – a Nymph and a Gloucester Light Dory. He took me rowing in the Light Dory on the Susquehanna river. Having rowed and admired it, I can understand why it is called Phil’s ‘ticket to Heaven’.
Sincere thanks to Joan, Mary, Gil and Bill for their kindness and hospitality to me during my visit, and particularly for allowing me to OD on boat talk with them!

Want molds for a lapstrake Chebacco?

Now that Gil Fitzhugh has completed his beautiful hull, he has a set of molds that are now surplus to his requirements. If you are planning to build a boat like Gil’s, you are welcome to take away his molds, free of charge, also saving yourself the hassle of lofting the lines full size. Gil would rather they went to a good home than put them to the torch. You can contact Gil at his home in New Jersey:
Mr Gil Fitzhugh,
Primrose Trail,
Mt. Kemble Lake,
Morristown,
NJ 07960

e-mail: joancarol@aol.com

phone: 201 425 9010

Chuck Merrell on Anchors

six10
‘Tomboy’

Chuck Merrell of Seattle lives aboard ‘Tomboy’, a ‘Jessie Cooper’ designed by Phil Bolger, and is currently finishing ‘Wonky’ a steel ‘Tahitiana’ ketch which he bought half-built. Chuck is a self-confessed anchor-obsessive and emailed me with the following observations in response to the chat about anchors and how to stow them in Chebacco News #5:
Hi Bill, I usually singlehand, and even if there is someone with me, I generally wind up doing most everything by myself anyway. Singlehanded anchoring is always a problem if you have to leave the tiller to drop the hook, especially on a boat like Tomboy. Wonky wouldn’t be such a bad problem, but anchoring from the bow still takes a thirty foot run from the cockpit to the front end and back.
On Tomboy, I keep the anchor permanently mounted on the stern, and keep the anchor chain in a bucket in the cockpit. (I use 30′ feet of chain). I have the chain shackled to the nylon anchor rode which is led back to the bow, through the chocks and cleated off. When I’m ready to anchor, I have made up a little quick release device that allows me to drop the anchor out of its mounts as the boat is moving forward. I hold the chain bucket overboard so the chain doesn’t flail against the boat as it runs out. The rode follows the chain and the forward motion of the boat digs the anchor in and turns the boat in line with the anchor, then it can be backed down and set and adjusted at my leisure. The system works great, and you don’t have to leave the tiller during any part of the operation. I’ve done it dozens of times, and never have had a mishap under power or sail, regardless of how hard the wind is blowing or what the conditions. The way I have the anchor mounted makes it very easy to deploy, and the anchor always stays put even in heavy weather till it’s time to let it go.
That brings up the subject of what kind of anchor to use. According to what you say, Phil has recommended a 25 pound Plow, or an equivalent Bruce. Phil as you know is a “belt and braces” man, particularly when it comes to anchors. In my opinion, a 25 pound plow is almost 3 X overkill unless your local conditions absolutely dictate the choice. This anchor is better suited to a boat weighing about 6,000 lbs, not a daysailer less than a ton. A 25 pound plow is about the smallest you can buy, and Phil probably recommended it because he figured any Scotsman worth his Haggis would want to spend the money at home with Simpson Lawrence. I don’t like to use a plow unless I have a bowsprit and winch. They are heavy, and it’s easy to bang the topsides and pinch your fingers. A 25 pound isn’t too bad, but on a pitching foredeck, my 45 pound can really smash a pinkie and make dents in the topsides or deck. (I’ve designed Wonky’s bowsprit and rollers to work in such a way that there is no way raising an anchor will bang into the hull regardless of the conditions. You’ll see when I get the pix developed and scan them to you.)
Bruce anchors are nice in certain types of bottoms, and they don’t foul easily, and will reset in their own length if they drag. But they’re pretty expensive, and in general don’t perform much better than a Danforth type, especially to anchor a light boat like the Chebacco. Danforths and Bruce anchors are roughly for the same type of bottoms, but the Bruce is harder to stow.
I think that I would use an 18 pound standard Hi Tensile Danforth (assuming that a Danforth type will work in your ground conditions) with 30 ft. of 5/16″ BBB chain as my working system on a Chebacco. One thing is, with that setup, you could sit around and wonder if the anchor was holding the boat, or could you just get by with chain only (just kidding). A 1/2″ nylon rode would be nicer to hand, but 3/8 nylon would be plenty strong enough. A Danforth can be made to hang on a flat vertical transom like the Chebacco has. If you use the natural design of the Danforth, the flukes will fall away from the boat when stowed, as well as deployed, and never cause marring. You can use a second 18 Lb Danforth on a Bahamian mooring arrangement if you anchor in the river. You can leave the anchor rigged and hanging in its bracket when you are tied to your mooring, or when trailering down the road. This is a good system if you ever really need to anchor fast.
For comparison, on Wonky which weighs 20,000 lbs, I have the following ground tackle: 50 Lb Herreschoff, 45 Lb Plow, I built the following anchors: 40 Lb Danforth type, Two 40 Lb large fluked folding Yachtsman anchors, 18 Lb. Kedge, 5 Lb Kedge. 200 ft of 5/16 Hi-tensile chain, 200 feet of 5/16 BBB chain (given to me as a gift), and a couple dinghy anchors. For storm conditions I would becue the 50 Lb Herreshoff and the 45 Lb Plow. For Hurricane I’d also put out everything else, and all the chain. For nylon, I have 600 feet of 3/4″ Guess you get the idea that I like anchors and feel that you can never have too many, huh?
. . .
Have a good weekend.
Chuck

Fraser’s stripper . . .

Fraser Howell continues to make astonishing progress on his strip planked version of Chebacco. He sent me a whole bunch of photos of which a small selection are included in this newsletter. The captions are supplied by Fraser.
six4
Here is the bottom, while fitting the CB case. The roughed out laminated stem is just beside the case. You can see that I built up the base of the stem where it will bear on the bottom. This stem enlargement made it easier to fit in a free-standing fashion. I fit it with a 1/2″ stainless steel post that passes through the stem enlargement and the keel ( – I had just broken a molar repaired in a similar fashion). You can also see some distortion of the bottom due to moisture. At this point the ‘boat’ went back into the shed, dried out and came back into shape. I then turned it over and applied the 1/4″ ash veneer in epoxy.

six5
Some time later, transom, main bulkhead, stem and molds ready to be aligned. You can just see the untrimmed edge of the bottom veneer.
six7
A successful rolling crew. I don’t know why the rest of them are smiling, I’m the only one with a beer.
Fraser’s other photos show details of the stripping process, scarfing of strips, breasthook and knee and various views of the hull. He writes:
I made the seat supports, after cockpit bulkhead etc. out of 5/8″ exterior ply. There are two partial bulkheads on each side to support the seat. I placed them at mold stations. This allowed me to use the mold profile rather than scribe them. The forward and after bulkheads were scribed to fit. All bulkheads were epoxy filleted and taped with 4″ wide 10 ounce cloth. I put in all that internal structure to stiffen the hull for the roll-over and hold the shape. Molds 3 and 4 were left in for the same reason.
Presentlly, I’m planing the 1/8″ ash veneers. I will lay them at right angles to the strips, stapled in thickened epoxy. I’ll then fair and seal the hull exterior to leave it through the winter . . .

‘Nencia’

Alessandro Barozzi sent me this photo of Nencia, his lapstrake Chebacco which has no cabin.
six8
‘Nencia’
I fear I must apologise for getting the builder’s name wrong. He is Casavecchia (not Casavecellia). I was also wrong when I described her as an ‘open’ boat. She is mostly decked, with a self-draining cockpit. She is certainly a most attractive boat and may give some of us pause for thought as to whether we really need a cabin, when she looks so good without one.
Alessandro has been out of action recently, with surgery to his right arm. I hope he makes a full and swift recovery so that he can continue to enjoy his sailing.

Bill Samson’s Sheet Ply Chebacco

My own Chebacco is now complete except for spars, sails, outboard and trailer.
six1
Bill’s Chebacco tilted to receive its centreboard and rudder.
The next two photos show the lower gudgeon (pintle??) for the rudder. This is made from galvanised iron. Note the nylon bush to take the downward thrust of the rudder.
six2
Galvanized gudgeon before fitting (Yes- I know it’s countersunk on the wrong side! In fact it is countersunk on both sides.)
six3
Gudgeon and rudder in place; bedded in liberal quantities of Sikaflex.

And Finally

This has been a great year for amateur Chebacco builders with Peter Gray getting into the water and Bill Samson hoping to follow soon. Please do keep in touch and let me have your news. Thanks to those of you who have sent me letters and photos as well as those who have sent financial donations to help keep this little newsletter afloat.

Bill Samson,
88 Grove Road,
West Ferry,
Dundee,
DD5 1LB,
Scotland

w.samson@tay.ac.uk

Have a Merry Christmas and a Happy New Year!


Chebacco News 01

Chebacco News

Number 1, September 1994

This is the first ( and possibly the only) CHEBACCO newsletter. The response to my intial mailshot was wonderful in quality, but rather underwhelming in quantity! My mailing list currently stands at eight and covers the globe very satifactorily – including Australia and New Caledonia as well as the US (NY and NJ). I fear I am Europe’s only representative in the Chebacco community.

The future of this newsletter depends on you, the readers. As you can see, it is made up of contributions I received in response to my mailshot, as well as my personal news. The possibility of more issues depends on whether you write to me telling me what you are up to; what may seem trivial to you could be of great interest to the rest of us, so don’t be shy! For example, let us know if you are currently building , or just dreaming over the plans. What version of Chebacco are you working on – hard chine, lapstrake or Chebacco-25? As you know , the drawings don’t come with a building key, so tell us how you are to build her. What materials are you using? Have you strayed from the plans in any way?

Send future contributions to me:

Bill Samson,
88 Grove Road,
West Ferry,
Dundee,
DD5 1LB,
Scotland,
U.K.

As you know, this newsletter is not a money-making scheme, so please feel free to copy it to anyone who might be interested – it’ll save my postage costs!

The next newsletter will appear as soon as I have enough material to make it worthwhile.

Turning Over a Chebacco Hull (almost) Single Handed

A couple of months ago I arrived at the stage where my hard-chined Chebacco hull was complete and ready for turning over for fitting out. She had been built in my bcak yard with a tree to one side and a hedge to the other. The hull had been built on stocks of reclaimed timber, about a foot off the ground.

One approach to this problem is to get half a dozen gorillas (or their nearest human equivalent) to support the hull while you crawl underneath, knocking away the stocks and dragging them out from under – hoping that the gorillas don’t get tired or bored meantime and drop everything on top of you. Once the stocks are away the team might be persuaded to flip the hull over without dropping it on its thin sheerstrake – although this can be tricky as handholds are not plentiful on the outside of the hull. The main expense of such a technique is a keg of beer to reward your patient strongmen.

This method sounded a bit nerve-racking to me, besides which it isn’t always possible to get all the gorillas you need at a mutually convenient time. I decided to try to do the job myself by rigging up a scaffold (gallows?) from which to suspend the boat while the stocks are removed ad ropes to pull which will turn the boat over.
The scaffold consists of two arches, or portals, which are placed over the hull, about 5 feet from each end. Each portal has two pulley sheaves let into its cross member (top) through which a long rope loop is threaded, going around the hull.

Because Chebacco’s hull is very beamy, I had to raise it , stocks and all, by about a foot, so that the sheerstrake would clear the ground when the hull had rotated through 90 degrees. I did this by levering one side of the stocks off the ground using a 12-foot length of 2 by 4 as a lever, and while it was raised, my long-suffering next-door neighbour inserted concrete blocks under the legs. I repeated this operation on both sides until the hull was sufficiently high.

The next step was to complete the rope loops around the hull and through the sheaves on the scaffolds. I used three eighths inch diameter polypropylene rope for the loops and knotted them using a carrick bend, which is less likely to slip or come apart than a reef knot or bowline. The knots have to be placed so that they will not pass through the sheaves as the hull turns over.

Trestles were placed under the stem and transom in order to prevent the hull crashing down if the rope loops gave out when the stocks were knocked away. The stocks were knocked away and dragged out from under the hull without mishap, leaving the hull hanging upside down under the scaffold.

I pulled gently down on the rope loops, which obediently ran through the sheaves. After about 80 degrees of rotation, gravity took over and the hull swing (too) quickly over into its right-way-up position; about a ccouple of feet off the ground. The 2 by 4 lever and heaps of old car tyres were brought into play to allow the knots to be undone and the hull lowered, one end at a time, to its final resting place on wooden blocks.

News from Builders

Gil Fitzhugh, of Morristown NJ, is building a lapstrake Chebacco-20. His chosen method is to build a mould from temporary bulkheads and ribbands placed where the strakes will overlap. In this way he is able to ensure that the lands will form fair and even curves before starting to cut out the strakes. The method is described in Tom Hill’s book, “Ultralight Boatbuilding”. The main snag with this method is that the permanent bulkheads need to be fitted after the hull is lifted from the mould and turned over.

Another good idea from Gil is the way he built his (inner) stem. It is laminated from mahogany and includes the mast step. In other words, it extends all the way back to bulkhead #1. Gil’s keel, too, is laminated; the front and rear sections from (I think) 3/4 inch thick fir, and the cheeks either side of the centreboard from 3/4 inch oak. The laminations are horizontal.

Gil writes:
The wood’s expensive, but it’s available locally . . . Epoxy has made it possible for Klutzes like me, who aren’t in a hurry, and who aren’t building in quantity, to make a good boat out of wood that Nat Herreshoff or Colin Archer wouldn’t have bothered cutting up for the fireplace.”

I must add though, that Gil’s photos of the keel and mould show that his workmanship is anything but “klutz”-like.

I understand that Gil is to use sapele marine ply for the hull. I guess the result will be a real gold-plater when it hits the water.

Peter Gray of Queensland, Australia is well advanced on the construction of a hard-chine Chebacco. When he wrote to me in June, the Hull had just been finished and he hopes to finish the boat around Christmas this year – a good time to launch in Australia, I should think.

Peter is using exterior grade ply, WEST system epoxy and stainless steel screws and bolts. He’s also scouring second hand boatyards for authentic fittings.

Allan Bell of Fairport NY is currently dreaming over plans for a lapstrake Chebacco which he plans to start constructing in a year or so. I hope he will find Gil Fitzhugh’s experiences (see above) helpful when the sawdust starts flying.

My own Chebacco is a hard-chine one. She’s built from Far Eastern marine ply. This is pretty inexpensive (about $30 a sheet if you buy it in quantity) and has alarmingly thin outer veneers. I used the same stuff for a skiff I built 6 years ago and, coated with WEST epoxy and 2-part paint, it has been entirely satisfactory and hasn’t needed repainting in all that time (apart from the odd ding). For tree wood I’m using reclaimed red deal (a fairly resinous pine/fir) which is reasonably durable when it is coated with epoxy – and pitch pine (longleaf yellow pine) for floors. I’m using copper boat nails for almost all my fastenings. I have built the hull strictly according to Phil Bolger’s plans, right down to the hollow keel. I finished the outside of the hull with one layer of 6 ounce glass cloth in three coats of epoxy and 2-part paint on top. Under the waterline I used standard antifouling paint applied directly on top of the epoxy.

The fitting out of the hull is almost complete now. One snag I came across was that the half inch ply for the cabin top was tough to bend and resulted in some sagging of the framing. If I was to do it again I’d probably laminate the roof from two layers of quarter inch ply.

One final point – I used 22 sheets of ply for the entire boat. Brad Story does it with 15 but he makes the keel and floorboards out of tree wood and, on his gold platers, the coamings and cabin sides are made of solid mahogany (about 3/4 inch thick, I think).