Chebacco News
Number 20, March 1998
SYLVESTER makes an overnight trip
We don’t get much news about trips in Chebaccos, so here’s an account of one I did on 5th August 1997. It’s based on notes from SYLVESTER’s log (Yes! I keep a log of all my trips – Is that sad or what?). Low water was due at 11 am, so I got down to the shore at 10, rowed TWEETIE-PIE (my June Bug) out to SYLVESTER and got her ready.
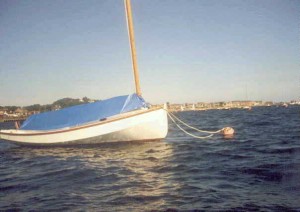
SYLVESTER at her (his?) mooring
I was underway, single-handed, in a force 3 Easterly, at slack water at 10-30 am.
The Tay is a rather shallow estuary, with loads of sandbanks and very few buoys to show you where they are, upriver of Dundee.
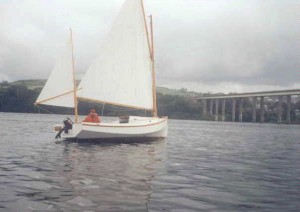
Heading upriver, towards the Tay Road Bridge.
It was my intention to get upriver to the Earn – which enters the Tay from the South, just West of Newburgh – and to motor up there to Bridge-of Earn. But . . .
The route taken by SYLVESTER (The total extent of this map is about 25 miles E-W)
You’ll just be able to see, on the map above, that there are two bridges across the Tay. The Easternmost is a road bridge, and the other is a rail bridge. I had a pleasant run upriver until I passed under the rail bridge. Just beyond the bridge I ran aground on a sandbank, but the flooding tide soon lifted me off again.
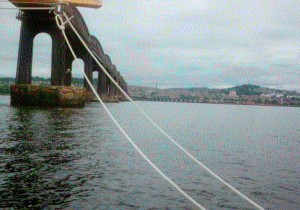
Just about to pass under the Tay Rail Bridge
From then on, I paid close attention to my charts, and avoided the sandbanks, most of which are on the North side of the river. The banks are complicated around Newburgh, but there are some pint-sized buoys to allow boats to thread their way among them. The locals amuse themselves on a nice afternoon by watching yachtsmen come to grief – often having to spend the night on a bank!
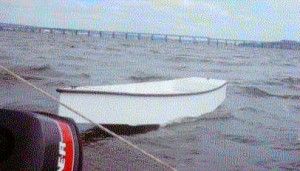
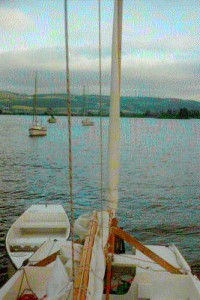
TWEETY-PIE (a June Bug) towing astern – Tay Rail Bridge in the background.
The mouth of the Earn is not far beyond Newburgh, and I headed for it. Unfortuately, no-one had warned me that you need to keep well out in mid-stream before turning up the Earn, so, once again, I ran aground. By this time, the wind was gusting force 4 or 5 and things got a bit fraught. Even though the tide was flooding, I kept getting blown higher up the bank. I dropped the sails and started the outboard, hoping to motor off the bank. Unfortunately, the propellor had an argument with some rocks and the shear-pin broke.
My only option, now, was to continue sailing – The Earn is too twisty and narrow to sail up, so I decided to continue up the Tay. I eventually managed to pole myself off the bank and made my way under main alone up to Inchyra, where there are some moorings on the North side of the river, belonging to the Civil Service Sailing Club.
At anchor – Inchyra.
I dropped my hook (a 15 pound Danforth), replaced the broken shear-pin and rowed ashore. I had brought the June Bug with me, under tow. Two of the Civil Service guys were there and made me very welcome with a mug of coffee. They also pointed out a spare, permanent mooring that I could tie up to for the night, and save me the trouble of anchor-watching when the tide turned.
Having moved to the mooring, I rowed ashore again, tied TWEETY-PIE to the jetty and walked the mile and a half to the nearest pub, the Glencarse Hotel, for a pint and a sandwich. I got back to the jetty a couple of hours later, about 9pm, and found TWEETY-PIE dangling by her painter down the side of the jetty – It was approaching low water again! A hot drink, contemplate the sunset, then off to bed.
Sunset at Inchyra
Next morning, I got up at 5am, had breakfast, and set out at high water – 6am. There was no wind, so I motored back all the way, dodging the sandbanks, and got home at 9.30.
Verdict? I don’t think I could have been happier with any boat, than I was with SYLVESTER (and, of course, TWEETY-PIE).
More about Reefing systems – a two-way conversation
Following Brad Story’s account of the reefing system he uses on his Chebacco, Bob Branch got back to me with some suggestions of his own. This led to a two-way discussion of possibilities that may be of interest to Chebacco-riggers.
Bob wrote:
Thanks for issue #19. Another good job as always.
That was a nice pic of the “c” under construction under the lean too. [Jamie Orr’s hull]
A suggestion on the reefing system Brad demonstrated. Works nice but those
cleats on the boom can be a problem when reefing… trying to find them on a
flailing boom, stuck under the sail cloth, and you head having to be in such
close proximity to the boom (a bad idea in heavy weather in any boat from my
experience.) The reefing system I have used on a number of offshore boats is
just a mod of the one Brad sent. It brings the topping lift and the clew reef
lines to the mast and then turns them to the cabin top to cleats on the aft
end of the cabin. I know it adds the cost of a few blocks and sounds like a
bit of spigetti. But I have routinely used 3 reefs, topping lift, boom vang,
and in sloops all the jib and spinnaker halyards (though I reversed my
thoughts on those if much single handing is done without roller furling {never
roller reefing} on the headsail. It gets the crew out of the cockpit (where
its weight ought not to be) and puts the jib halyard at a more convenient
location for a controled sail takedown for the solo sailor). Anyway, it can
all be done very neatly. When you are reefing with this arrangement you are
not AT ALL dependent on control of the boom. In fact I get it the heck out of
the boat completely. I take up tension on the topping lift first so the boom
will not drop AT ALL during the reef. I ease the main sheet way off till the
boom is out of the cockpit completely (and away from my precious skull). Then
I lower the halyard and secure the tack (take in the tack reef line) tightly.
The main halyard is tensioned… very tight so the draft in the sail winds up
in the forward part of the sail when the sail is set. This is critical for
pointing upwind in a cat rig. The clew reef is then taken in and tensioned to
the max. You need this tight to really get a flat sail which is what you are
looking for just as much as sail area reduction. Now I haul the mainsheet and
away we go. Note, I didn’t do anything about the excess sail cloth. Right. If
the outhaul was tight to start with (which it should have been because you
were already at upper wind range prior to the reef) and the reef outhaul is
tight (which it should be) The excess cloth will be in a fold or two very
tightly against the boom. Even with a second deep reef in a high aspect main I
have NEVER found it necisary to tie the excess cloth. If the boom doesn’t have
adequate cockpit clearance or cabin top clearance to keep the sail cloth clear
you might have to but now the boat is back under control, the boom is under
control and not swinging around, and it is a simple matter of two ties at most
for the entire sail. The boat isn’t pitching anymore either! And ya never left
the cockpit. One little detail. When you make your sail or order it from the
sailmaker, be sure the reef clews are a little higer than just a perpendicular
from the mast. You want more angle upwards for the boom when you reef… so
the cloth has the room it needs, and so your precious skull is further from it
too.
I now it won’t happen in a Chebacco, but true luxury in sailing is NOT to be
found below decks. It is a boat whose boom is always above your head, during
normal sailing, tacking, jibing, and when reefed. Ahhhhhh. Peace of mind.
Keep the scratched side down, (your shallow draft Chebacco does have a scratch
I hope… otherwise you aren’t in the water it was designed for.),
BOB BRANCH
I replied:
Dear Bob,
Many thanks for your sensible suggestions re: reefing. It wouldn’t be practical in my Chebacco as it stands, because there is no gooseneck to hold the inboard end of the boom at a fixed height – something that I think’d be essential when a line comes off the inboard end of the boom to a block at the mast-foot. Otherwise the halyard tension would be working against the reefing line tension with potential mixups if one or other is slackened off. My Chebacco boom has jaws at the mast end and no tack downhaul – the weight of the boom is enough to flatten the sail. The trick is to balance the tensions in the throat and peak halyards.
Having this setup, I can raise or lower the entire sail/spars. I normally keep the boom above head-height. The only discomfort that can befall the crew is being throttled by the mainsheet in a gybe!
Yes, I do have a few honourable scratches on the bottom of SYLVESTER. Fewer than I’d expected given the horrible grinding noises when I ran aground last season. I have a galvanised steel strip around the keel which bears the brunt of such navigational misjudgements!
I’ll put your thoughts into CN#20 – some of the guys do use goosenecks and could benefit directly by adopting the system you suggest.
Bill
Rudder Issues
Burton Blaise emailed me regarding some concerns he has about the Chebacco’s rudder. My reply is printed below. His words are in italics –
Hi Bill:
Hope things are well with you. I am back at my workbench trying to do whatever I can on my Chebacco project in my small heated workshop. I am contemplating building the rudder so that it is ready to be attached to the hull in Spring. Looking at the plans, it strikes me how small the rudder appears – not much more than 1.5 square ft total area – and I wonder how such a small rudder can effectively steer such a (relatively) large boat. After all, the rudder blade for my Gypsy (which is a much smaller & lighter boat than Chebacco) is significantly larger. In your experience, how well does Chebacco respond to her helm? I worry that the rudder as shown might make for poor steering ability!! I realize that this design does have a bottom plate for extra “bite” when heeled, but I still worry that the rudder surface is much too small for a boat of this size.
I worried about the same thing when I was building, but Brad Story reassured me that it wasn’t a problem. He was right. The only anxious moments I’ve had were immediately after letting go of my mooring, before SYLVESTER had gathered much way, trying to steer the boat before being swept against the other moored boats by the tide. Mind you, the sail and CB have as much to do with steering as the rudder, and I haven’t had any problems since I got used to that aspect. I suppose that if the boat heeled a great deal, the rudder might come clear of the water – again something I’ve never experienced. I understand that some boats with much larger rudders are tricky to steer – Peter Bevan tells me that the Light Schooner won’t respond to the rudder unless the sails and CB are set just right.
You need to pay close attention to the steering when surfing downwind, but that’s the case with any boat. I’ve never felt in danger of losing control.
I also have a question concerning the pintle and support structure for the entire rudder and its post. From what I gather from the plans, the entire weight of the rudder assembly is borne on the pintle, with main support for the rudder post where it comes through the mizzen mast partner (which is strengthened with a small steel plate where the post comes through) – is this correct? If so, what stops the rudder from riding up and down, and possibly scraping against the bottom of the hull (especially in wave action?)? Should there be some kind of stop on the rudder post to prevent this action, or does this simply not happen at all?
Yes, it does ride up and down. Mine has about 1/2″ of vertical play. There’s no sign of significant wear, though it is a little looser now where it passes through the mizzen partner. I’m sure that this is as much to do with side-to-side movement as up and down, when sitting on her mooring. As a matter of interest, I’ve put a thick nylon washer around the pintle to take the wear and reduce friction.
Also, the plans appear to show a free flooding rudder, but I really wonder if this is necessary. Surely weight cannot be an issue here, since the space between the two plywood rudder cheeks has such a small volume as to be almost negligible.
Sure. But the main idea is to let water out. There’s always a danger of water getting trapped in any hollow structure, no matter how well sealed it is. I regard these as drain holes.
Also, if I use steel for the rudder post assembly, what is the best way to keep the lot from rusting? I had considered aluminum or stainless steel for the job, but I simply do not have access to the proper welding equipment, etc.. How did you handle this?
I got mine welded up from mild steel, then sent it off for hot dip galvanizing. I got a blacksmith to do the fabrication of the rudder stock and pintle and it cost me 25 pounds. The galvanising was another ten. So far, it’s held up well. When it rusts significantly I’ll take it all apart and send it off for re-galvanizing.
Bill
More on Rudders
Jamie Orr writes:
I’ve found a “retired” machinist to make up the rudder fittings in stainless steel. I wanted to use bronze where I could, but was told by at least two outfits that bronze was best cast, not welded/brazed. Also the flat stock is hard to obtain. So, since casting a single set of fittings is a bit expensive, I’ve yielded to the experts and plumped for the stainless. The lower rudder fitting is made out of 1/8th stock,
bent up around the skeg, with lower sides at the back part as well to add strength, making a 3/4 “cup” around the bearing. This fitting is already bent and welded to shape, but hasn’t got its pin or any holes drilled yet. The rudder post will be 1+ 5/16 stailess tubing, a bit thinner than called for, so I’ll have to fair in the rudder to the post. I’m having the straps welded on as if the rudder is only 1+ 5/16 as well, to get a longer weld — that is, a full 180 degrees on the post. I’ll cut down the rudder to fit in way of the straps — should be strong enough with the framing backing it up.
My machinist is also making nylon bearing/bushings for the bottom and at the tiller. The lower one will be wider at the bottom for the post to sit on, with the upper part fitting inside the rudder stock, and the pin hole drilled up through the nylon. The top one will be a bearing as well as pad out the width of the rudder stock to match the tiller width – stainless again for the rudder straps.
I’m trying to decide how high tech to go in paint, and whether to bother with bottom paint on a mostly trailered boat (probably not). I don’t want to go the length of a two part polyurethane, despite the finish, but I am considering the one part “Brightsides” mentioned in the Bolgerlist from time to time. I’m also very tempted just to go with a
good quality enamel, on the grounds that I won’t have to learn any new painting techniques or take up chemistry.
Jamie
And finally . . .
That’s all we’ve space for this time. I hope you enjoyed it. Keep your letters and emails coming!
Bill Samson,
88 Grove Road,
West Ferry,
Dundee, DD5 1LB,
Scotland.

