News, questions, and boats for sale.
News:
| Last issue started out with “There will be a calendar!” This was perhaps overly optimistic… 🙂 Life, as life so often does, has interferred. With any luck I’ll have one ready for 2005. |
Questions:
|
Hello Richard,
After watching the Chebacco web site for almost 2 years, and having read the Archive files several times over, I’ve decided to build the 20 ft Lapstrake Chebacco. I’ve made the crucial first step – ordering the plans from PB&F. I will probably build a scale model first. But before I do any serious work, I will need to extend my garage (a standard 19′ by 18′ double garage) by 6 ft. Hopefully that will happen as soon as snow melts!
I am interested in making the cabin wider and longer to make it more accommodating. Can you send a request out to the webzine – to those who have made similar modification, I would much appreciate any input, ideas, photos, etc.!
Regards
Waterloo, Ontario |
Chebacco’s for sale:
| SOLD! http://rockland.villagesoup.com//Community/Story.cfm?StoryID=23239 (ed)
—– Original Message —– > Richard, I am attempting to sell Samantha. If you know of anyone who might be interested, please inform them. I owe the city of Rockland a little in excess of $700 and would be happy to sell her for that amount. |
***
Life is Change – Richard Spelling
Well, a lot has happened since the last issue. Articles have been slow in coming, and I’ve been too busy to write anything. Apparently, everyone else has been too!
Finally got the new place set up, and was working on the shop and the car/boat port. Then, I must have driven over one of those surprise generators they bury right after those “dangerous intersection” signs.
There was a systems crash at work, and the newest backup for that system was two weeks old. They started going after the girl in charge of the system, and I spoke up and said, basically, “I was in charge of backups, here is what happened, it wasn’t her fault.”
So, they fired me instead.
I am now in the ranks of the unemployed. I’m sending out resumes, and trying to start up my budding business. However, I was caught flat-footed, as I had grown comfortable at this place. Out of some, perhaps misguided, sense of loyalty, I had stopped my usual practice of looking through the paper and sending out resumes to interesting jobs.
So.
If any of you folks have been holding back contributions to the webzine, now would be a good time…
***
hollow keel comments – Marty Clough
Hello Richard
Phil Bolger was kind enough to respond to questions I asked about the hollow keel on Chebacco. I thought you might wish to include portions of these two attachments in the next newsletter. My own Chebacco is covered for the winter ( cheap plastic tarps) with much work to be done before I get to the keel. Marston Clough (use my hotmail address which you already have- “cloughm@hotmail.com”
—————————————————————-
November 23, 2003
Dear Mr. Bolger,
I purchased my Chebacco plans from Dynamite Payson rather than directly from you (an option I wasn’t aware of somehow) so I understand you may choose not to comment, but I have a question about the hollow keel. Some of the builders seem to build to plans but many opt for a solid keel, built up various ways.
I would be pleased to build to the plans (especially after reading your comments about the Reiver) but I am concerned about marine growth on the inside of the box (the boat will sit on a mooring in Tashmoo on the Vineyard, where water temperatures and nutrients allow fast growth of unwanted stuff).
- Won’t barnacles and sponges and all sorts of growth occur on the inside of the box, possible creating
o Deterioration of the box
o A horrible smell when I store the boat in my backyard
- Other than building simplification, are there strong structural drawbacks to making a laminated solid keel?
My Chebacco still has a ways to go, but I am finding it an entertaining and challenging project. If you can comment, I would like to share your comments with the Chebacco.com website which has been a good source of continuing inspiration and support.
My brother Brad got me started as a Bolger-phile by purchasing a Gloucester Gull from Dynamite many years ago and car-topping it from Maine to the Vineyard ( he still has the boat more than 30 years later). I’ve built the Teal (my wife’s favorite) and Bobcat (“tiny cat” -with a Beetle Cat mast and sail) and look forward to your honesty in boats, books and Messing About.
Sincerely yours,
Marston Clough
Vineyard Haven, MA
————————————————————-
Phil Bolger responds:
“The first boat I did with a hollow, free-flooding keel was launched in 1972. I had the same concern, but in fact it did not happen. We took one side off after several years and found the plenum perfectly clean. We’ve done quite a few since and not trouble has been reported”
“The object was to avoid the shrinking and swelling of the components of a solid deadwood…”
“A solid keel or a skeg built up wholly of plywood would not have this problem; it would be that much heavier on the trailer.”
***
A Visit to the Port Townsend Wooden Boat Festival
From Chris Bennett with comments from Jamie Orr
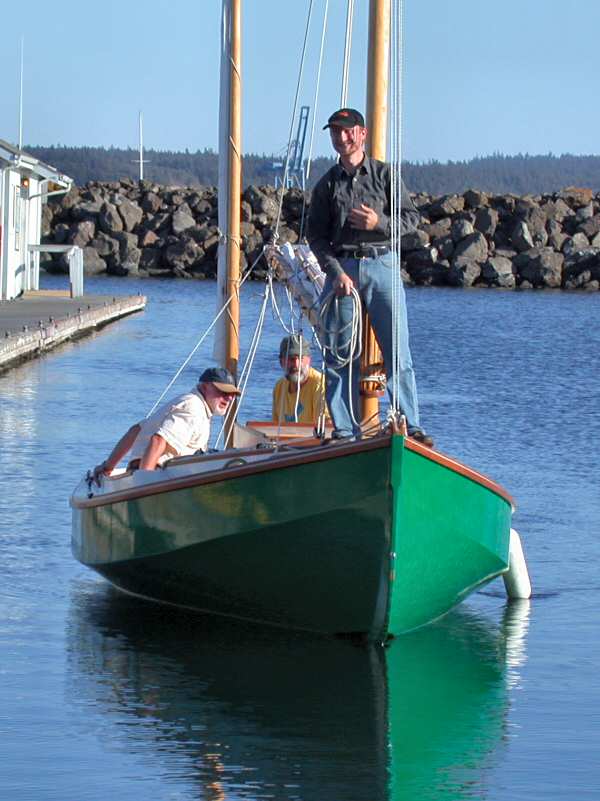 I’m still not clear on just why we chose to spend a night at anchor when we could have been in our warm beds, but have to admit it allowed an early start on Friday. The anchorage is a beautiful little cove, with good shelter, and I plan to visit it again sometime soon, this time with the family.We began our voyage on the evening of Thursday Sept 4, planning to cross the Strait of Juan de Fuca from Victoria to Port Townsend that evening. However the marine forecast advised of a small craft warning. Being in no mood for an uncomfortable wet trip, we retired to a nearby Chinese restaurant before sailing to nearby Chatham Island. We dropped the hook in 2 fathoms, set up the boom tent, and turned in for an early night. John Ewing took the cabin and Jamie Orr and I slept under the boom tent. Jamie’s boat, a Chebacco 20, named ‘Wayward Lass’ has cockpit floorboards that can be raised to create a comfortable sleeping platform and we spent the night under the stars listening to the wind blowing off the strait.
The next morning we sailed for Port Townsend. Fog, strong currents, and occasional tidal rips kept things interesting and we were glad to have a hand-held GPS to assist with navigation. The main hazard in a fog-bound strait crossing is ship traffic so we flew a radar deflector from the main flag halyard and kept a close watch for ‘rivets in the fog’.
This was the foggiest trip out of the four I’ve made to Port Townsend. Going over, at least it was clear when we started, but coming back we found ourselves in fog almost immediately. We carried on, which highlights the dangers of deadlines and steady jobs. This wasn’t a very good decision – there was no danger of getting lost, but there are several big ship lanes in the strait, not to mention tug and barge traffic, which I like even less.
After a few hours, the sun appeared and the wind died away so we motored until just off the entrance to Puget Sound where the wind began to pick up. We hoisted sail and turned the corner to Port Townsend. In the distance gaff rigged cutters, tall ships and graceful sloops criss-crossed the entrance to the port and we had a glorious sail amongst this fleet of classic wooden boats. We landed at the town marina fuel jetty and after clearing customs relaxed with a beer in the cockpit. Jamie’s friend John Kohnen joined us after securing his Jordan skiff Pickle (you may have run across John’s amazing nautical web site – ‘The Mother of All Maritime Links’). The evening was spent sampling local brew and blues music at the Port Townsend Brewery and enjoying fish and chips at a nearby “classic” eatery, before turning in for the night at our marina berth.
I don’t know how I’d survive Port Townsend without fish and chips at Sea-J’s. They’re right by the Boat Haven, and always seem to be open when I’m hungry.
Saturday dawned cloudy and threatening rain, but we soon forgot the weather in the excitement of attending one of North America’s best wooden boat shows. (Second only to the Depoe Bay Wooden Boat Show and Crab Feed!)
While Jamie and John met with some of their friends from Oregon and Washington, I visited the boats and listened to some of the speakers at the show. There were more than a hundred boats on display ranging from strip built kayaks and sailing cruising canoes through stout cutters such as the Pardey’s Taleisin to substantial sail training vessels. I admit to a bias toward the smaller boats, but despite this, there was much to keep me occupied. Sam Devlin (a boat designer and builder in nearby Olympia) had a number of boats on display including a newly designed 19 foot stitch and glue catboat – The Wompus Cat. I chatted with one of Devlin’s boat builders who has built the Devlin Egret for his personal use. This is a 15 foot rowing/sailing skiff that looks like a slightly beamy dory. It was the first boat that I built and I found it interesting to compare notes on the conversions he had made to improve her sailing and cruising capabilities. John Guzzwell’s Dolly was there, although her new owners, a Japanese couple, seemed a little embarrassed by all the attention. Dolly is based on Guzzwell’s Trekka, a 21 foot Laurent Giles design that Guzzwell sailed alone around the world in the 1950’s. Other boats of note included a beautiful Fox Island 22 designed by Joel white, two Lyle Hess cutters (sister ships to Lin and Larry Pardey’s famous Seraffyn), Carol Hasse’s beautifully maintained Nordic folkboat, and a gold-plater version of Ian Oughtred’s MacGregor sailing canoe.
The show’s speakers were equally interesting and I attended talks on cruising in small open boats, sail making, and rigging. Carol Hasse, based out of Port Townsend, was one of the founders of the festival more than 25 years ago and has built a reputation for crafting the world’s finest cruising sails. After listening to her detailed explanation of the differences between typical sails and those built for extended cruising, I came away with an increased appreciation of the art of the sail maker. From the presentation by rigger Brion Toss, I learned that you should not increase the size of your standing rigging in order to make your boat ‘stronger’. Doing so simply increases the strain on the boat because you need to use higher tension to correctly tune the thicker wire. From the small boat cruising talk, I learned that one should pay attention to the contour lines on a chart. In areas subject to tidal currents (such as the strait we had just crossed), closely-spaced contours indicate steep underwater slopes that can cause lumpy seas and tidal rips. On our return trip, we were to see this in practice as we crossed several of these areas, nearing Victoria. In the afternoon Jamie and the two Johns went for a sail in Wayward Lass to get a close up view of the schooner races. We met for supper and then wandered back to the festival where we took another turn around the displayed yachts before turning in.
It’s always fun to sail at Port Townsend, but the high point of my (and Wayward Lass’) day was passing Bryony, a 45 foot cutter – I must admit though, that she had a reef in her main, and as soon as she shook that out, she was gone! Watching the schooner race we stayed out of the way of the racers, but saw some (I think) non-competing schooners from very close as they overtook us — the Lynx, a replica 1812 Privateer (a topsail schooner of maybe 100 feet) went by to windward only a few feet away. Barlovento won the schooner race by so much, that I think they should offer another first prize for the “First Finisher after Barlovento”!
That night, Jamie’s new tarp was put to the test as rain and wind battered our shelter. The weather forecasts were misleading on the eve of our final day, predicting much stronger winds than actually occurred. We put off our planned 4 am departure based on these forecasts, but decided around 8 am that it would make sense to catch the remainder of a favorable tide. We departed under motor and the return crossing was uneventful, with conditions mild enough to permit a brew-up in the cockpit. We enjoyed a cup of tea as we motored with favorable currents for the first couple of hours. The remainder of the crossing was against a 1-2 knot current and the wind rose enough after lunch to give us a gentle sail into Oak Bay Marina. Jamie cleared us through customs and retrieved the tow vehicle. We were home by supper, tired, but content after a weekend fully immersed in sailing and wooden boats.
Juan de Fuca Strait is a big place, and the forecasts are usually pretty accurate, but they missed by a mile on Saturday night. However, we did get some rain squalls in the marina that wet the bottom of our sleeping bags. The rear of the shelter is wide open, which is fine at anchor, but in the marina, we can’t swing to face the wind. Luckily, most of the rain came in on Chris’ side!
Overall, it was another thoroughly enjoyable weekend at another Port Townsend Wooden Boat Festival. See you next year! (If the weather gods smile!)
***
Samantha – Paul Throber
In January of 2002 I moved to Portland, ME where I anticipated starting a new chapter in my life. A new job opportunity turned sour just weeks after I arrived. The same day I was fired I was offered another job that I accepted with a starting date in about ten days. I went skiing, relaxed and regrouped; thanking my lucky stars that fate had smiled on me once again. A couple of days later I came home and found a message on my phone from my new employer saying that he had decided not to hire me after all – lucky stars, my ass.
So there I was: unemployed, more than a little bit in shock and not in any state of mind to go out looking for another job. What to do? Driving north up the coast one day with my friend Susan, I talked about my long-held dream of building a boat, the Gypsy plans that I had bought many years earlier and had always found some excuse not to build. Now is the time, Susan suggested, I had the time and a bit of money that cried to be spent. It was like a revelation. The decision was made.
Within a few days I had rented some “indoor” space at a local boatyard and had started building myself a Gypsy. Little more than a month later I was out sailing on Casco Bay. Then I started thinking about another boat – something a bit larger that I could actually cruise in with a modicum of comfort.
I wanted a boat that was small, handy, affordable, and reasonably easy to build, A catboat was what seemed best to me – the most room for a short boat, shallow draft, simple rig and seaworthy. I bought plans for one of Witholtz’s catboats from Woodenboat, but was intimidated by the complexity of the construction and returned them. My next choice was Bolger’s Chebacco – which I felt confident I could build, as it is the same type of construction as the Gypsy. I ordered the plans and sails from H. H. Payson.
The Chebacco did not exactly fit my concept of what I needed – particularly I thought the cabin far too small for cruising comfort. In my opinion the standard Chebacco is really a day sailor that can be used for camp cruising. My solution was to lengthen and widen the cabin and to raise the cabin roof. I also raised the sheer by 4”. I eliminated the centerboard in favor of the keel shown on the cruising version of the Chebacco in “Boats With an Open Mind”.
Samantha is built entirely of common building materials: ACX plywood, spruce and fir. All of the wood and plywood were selected after much shuffling through the stacks – I would estimate that I rejected over 90% of what I looked at. For the plywood I looked for a good C side and for the least amount and smallest voids. For the solid wood I looked for good straight grain and minimum knots. I mostly bought 2 X12’s and 2 X 10’s and then ripped them to the desired dimension. This is quite easily done with a circular saw with a ripping guide. The result can be clear, quarter sawn lumber.
Where fasteners are used, they are sheet rock screws and ring-shank nails. The fasteners were almost entirely used to hold things in place until the epoxy cured. I used MAS epoxy for all gluing, filleting, fiberglassing and fairing.
All the outside surfaces of the hull, cabin and cockpit are sheathed in at least one layer of 6 oz.cloth. All joints have at least two layers of cloth on the outside and a layer of cloth or a 1 x 2 stringer on the inside. The stem and keel have four layers of cloth on the outside.
I left all the frames/molds/bulkheads in the hull and they are all filleted and glassed in place. There is a 2 x 4 floor screwed and epoxied to each frame and to the bottom panel.
The keel is solid and is made from 2 x 12 stock with ½” plywood cheeks. There is 150 lbs. of lead in the keel. The keel is epoxied in place, has 3″ screws down through the bottom panel on 3″ centers, is generously filleted to the bottom and the fillets are glassed with three layers of 6 oz. cloth.
I used Harken blocks, fairleads and cam cleats throughout. All the running rigging is ½” Dacron 3-strand. All cleats, pad eyes, etc. are stainless. Auxiliary power is provided by a 6 hp Tohatsu 4-stroke outboard that also charges the 80-amp hour lead-acid deep cycle battery.
Electrical equipment includes a VHF radio, navigation lights, a cabin light, a Garmin Etrex GPS, a Ritchie Navigator compass, a Sony Walkman CD player, and a cell phone.
The first construction I did was to build a strongback. I used two 20’ 2 x 6’s spaced 3’ apart with the ladder “steps” at the frame positions. I temporarily set this up on legs to use as a surface to build the spars and to scarf the hull panels.
The main mast I made of three layers of 1½” scarfed spruce with the scarfs staggered along its length. The mizzenmast, gaff and main boom I made of two layers of spruce. I shaped them with a circular saw, power plane and a belt sander.
I cut the scarfs for the plywood with the power plane and belt sander. I glued the scarfs in the following way: first a 4’ 2 x 6, then a piece of plastic sheeting, then the plywood sheets, another sheet of plastic, then a 4’ x 6” piece of ½” plywood. I then clamped this all together with two rows of sheetrock screws on four inch centers. The scarfs are reinforced on both sides with a 1’ wide piece of 6 oz. Fiberglass.
I laminated the stem pieces of ½” plywood and shaped them with the power plane and belt sander. I cut out the frames making numbers 1, 2, 3, 4, and 5 taller than they needed to be because I was still not quite sure how high to make the cabin roof – I wanted to get the hull turned over, mock up the seats and actually see where the top of my head would be. I set up the frames and inner stem on the ladder, cut the hull panels and assembled the hull – all quite straightforward except the forward section of the bilge panels. These I laminated of two layers of ¼” plywood as is recommended. This is good advice as its still a formidable challenge to coax these into the correct shape. This was the most difficult part of the construction of the boat. I glued the two layers together with epoxy thickened with wood flour and pulled the panels together with sheetrock screws on 3” centers. After the glue cured, I removed the screws and filled the holes. I backed the joint where the laminated section meets the ½” bilge panel with a 6” wide piece of ½” plywood.
I faired the hull, struck the waterline using a T-square, and applied the bottom paint. Ten friends helped me turn it over which made the job quick and simple.
I framed in the settees between frames 4 and 5. They are 14” high and there is a 28” wide foot well between them. Forward of and level with the seats is a V-berth. All the volume beneath the seats and berth is storage bins accessible through hatches cut from the top surfaces.
To provide clearance for my head while sitting I made the cabin roof 39” above the aft end of the settees. (I’m 6’ 5” tall.) The forward end of the cabin roof is 4” above the deck.
The cabin roof has the designed curvature and is ½” plywood. Frames 2, 3, and 4 are left in place with a depth of 3 inches at the sides and roof. These frames are solid beneath the seats and berth. The companionway hatch is 36” wide and extends from frame 4 to frame 5 – the sides of the opening are above the 90-degree waterline. I also put a small hatch, 1’ foot square, in the cabin roof between frames 1 and 2 for ventilation. Both hatches have double coamings.
The cockpit seats are deck level and the foot well of the cockpit is 14” deep. The cockpit coaming is 9” high.
I made the cabin windows from ¼” polycarbonate – two 6” x 12” elliptical windows between frames 2 and 3 and two 10” x 30” rectangular windows between frames 4 and 5, behind the seats. These are bedded in silicone on the outside surface of the cabin sides and screwed on 4-inch centers.
I installed the rudder, glassed and painted the boat and then it was time to launch – and none to soon as it was two days before I had to out of my apartment. So down the ramp and into the water she went. And as one of the men at the yard said, “She floats like a duck.”
It was the end of August, I was planning to sail south and I still had much to do – I worked feverishly wiring the boat, stepping the masts, rigging the boat, bending on sails, going on trial sails, fixing things that didn’t work right, building a dinghy (a Nymph) and then finally on the morning of September 10, 2002 I set sail and reached out of Portland harbor and onto the swells of the Atlantic. It was a fine sunny day with a moderate breeze.
Next: Sailing south
***
Boudicea gets ready to launch – Ed Heins
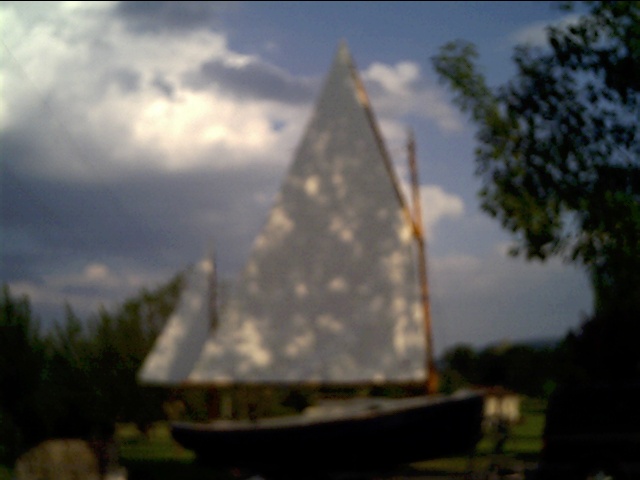
It sometimes seems like the final stages of my large projects go on forever……… Boudicea, the Chebacco that may yet be built, as you can perhaps tell by the poor accompanying photograph is getting very close to becoming a functioning sailboat. A sailboat, that is, as opposed to the garage ornament that she’s been for a majority of the past decade. Still, the closer launching comes, the more that seems to need doing. This past weekend, I managed to get the sails bent on for the first time, and after playing tag with the thunderstorms rolling through the Shenandoah valley, I finally got a calm spell lasting long enough to hoist, and do some adjustments to the rig. Aside from the feeling of accomplishment to see her dressed out in sailcloth, it was an opportunity to appreciate the work of the folks at Bhondell. I think the leech planking on the main sail for instance, adds quite a traditional look and hopefully will be as functional as it is pretty. Since I’m a couple hours from any sailing water, I’m now deep in the minutia of details that are as frustrating as they are important to have done. There’s the stand up block for the mizzen rigging that was lost in shipping, the reefing system that sure as God made little green apples I’ll need because I can count on it blowing up a gale on launch day, and a method to secure the spars for transport. I should make a better set of main hatch boards but she’ll float without em. Seems as though the tasks just keep on coming. Nevertheless I can see the end of an era looming nearer.
Current plans are to launch her late this month probably at a very small lake here in the local area just to be sure she keeps the water on the outside. At the same time I can tweak any launching issues that might arise without having to drive several hours to discover launch problems. Then, I think the Chesapeake or the James River beckons.
Any Virginia Chebacco sailors who fancy a spring messabout please let me know.
***
New Chebacco goes down the ways – Mike Haskell
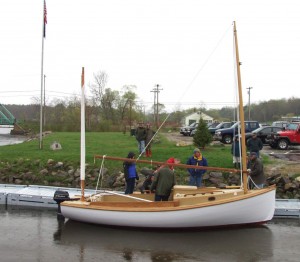
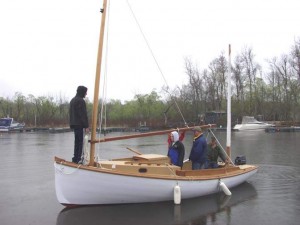
On a rainy, nasty May day, Carruss went into the waters of Merrymeeting Bay. The planning and discussion for her construction had begun in the summer of 2002 when Russ Dyer and Mike Haskell combined their sets of Chebacco plans to construct a strip-built soft chine Chebacco. With Russ taking the lead, providing the money, materials and most importantly the heated garage, construction began in the winter of 2002. Mike took care of the lifting, tunking, heavy looking on and photojournalism.
Construction slowed during the summer of 2003. The hull was turned during the fall of 2003. Then back into the shop for final detailing through the winter of 2003 and spring of 2004. In April of 2004, she came back out of the shop for rigging and preparation for launch.
Construction notes—Carruss is fiberglass over pine strip Chebacco. Russ lofted her lines from a set of plans for the lapstrake version. Other construction details were modifications and combinations of the sheet-ply and lapstrake plans. Russ sewed her sails from the Sailrite Kits for the main and the mizzen. Her power will be supplied by a 6h.p. Evinrude Yachtwin.
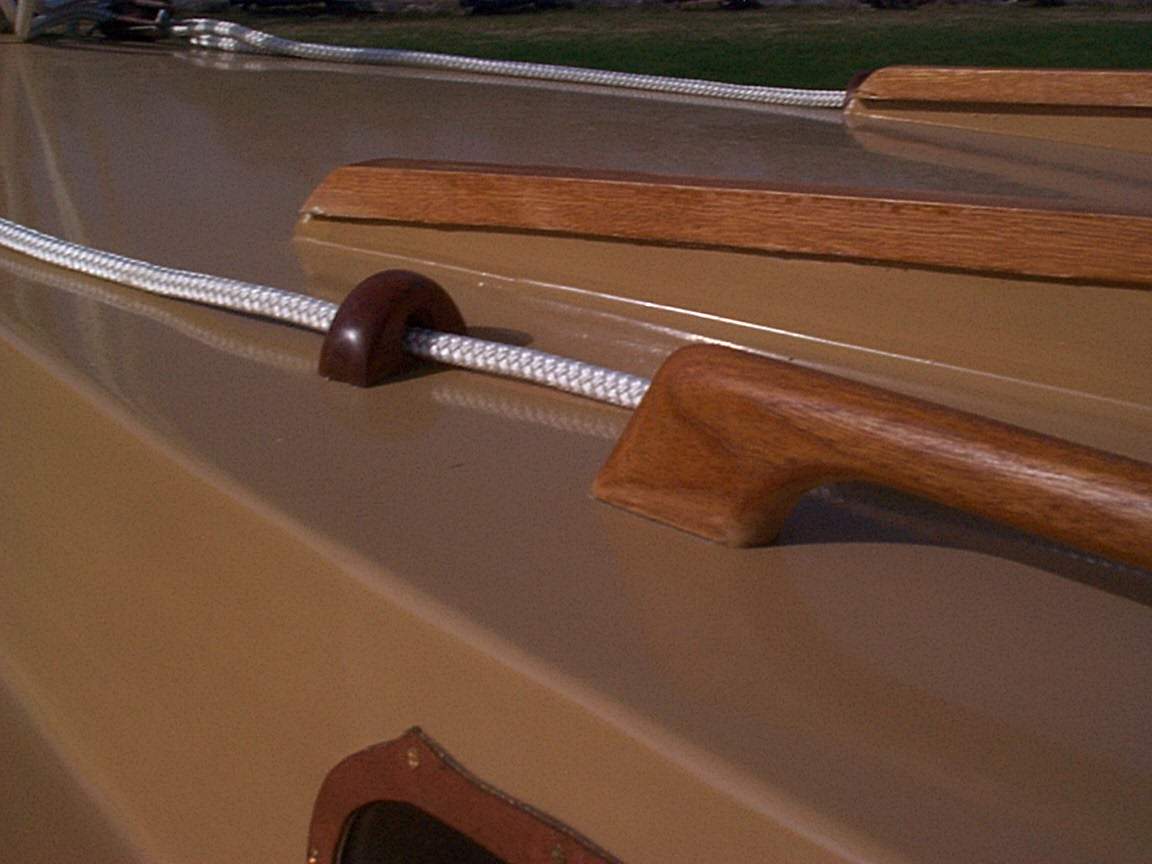
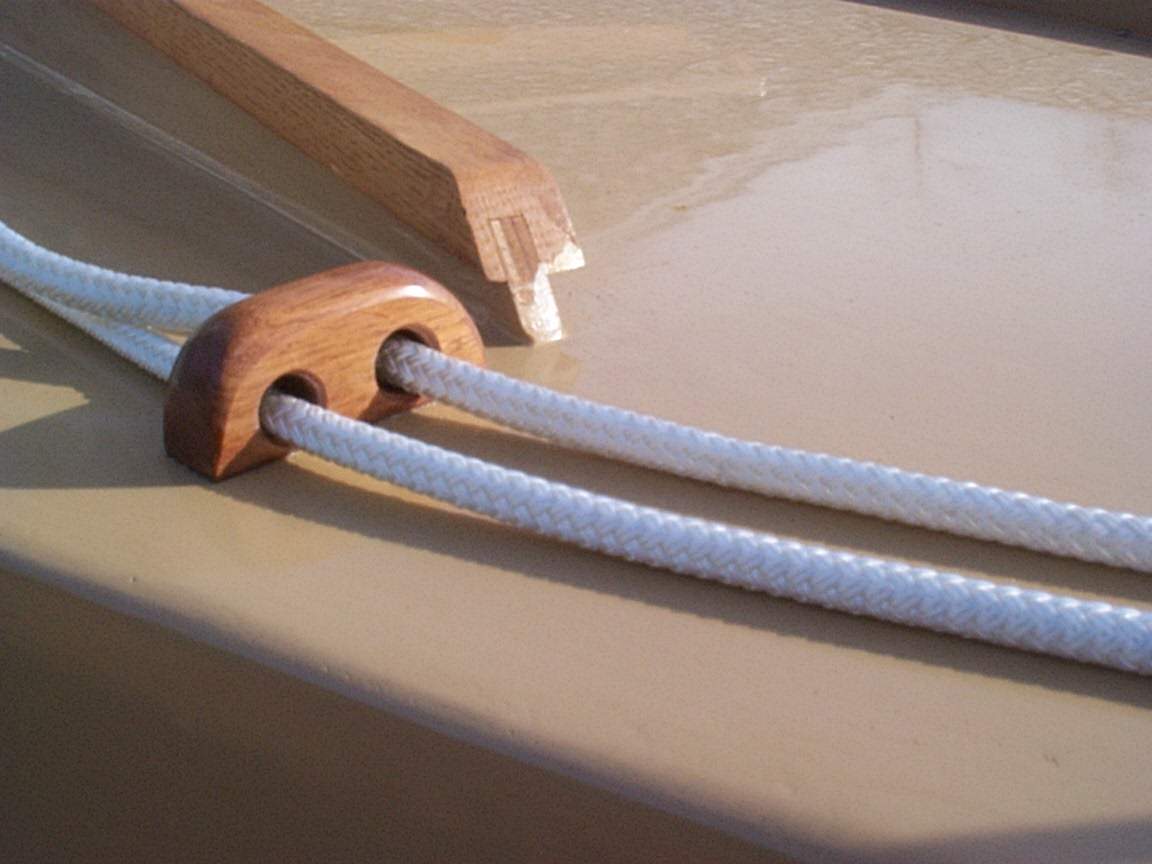
Some of the detail work that Russ fabricated. The chocks and line guides are hand-made rosewood—they are absolutely beautiful.
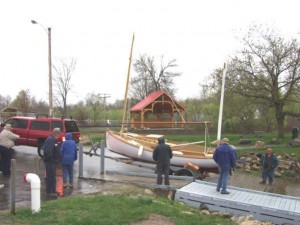
Rigged and backing into the Cathance River one of five tributaries of Merrymeeting Bay
On the water for the first time!!!
Her first cruise—across the river to the docks on the far side. There Russ will finish her outfitting.


