Chebacco News
Number 8, March 1996
Was Marc First?
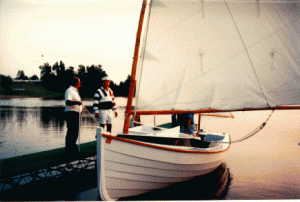
In Chebacco News #6 I opined that Peter Gray’s Gray Feather was the first amateur-built Chebacco to be launched. Mea culpa; Marc Lindgren of Minnesota has put pen to paper, pointing out that One Who Waits, his home-built lapstrake Chebacco hit the water in August 1994! This time, though, I’ll be more cautious and simply ask if anyone knows of an earlier one. Marc writes:
Dear Bill,
I’ll bet you are getting lots of letters in regard to the launching of the ‘first’ amateur Chebacco. Here’s some news for you. I launched One Who Waits, a lapstrake Chebacco, about a year and a half ago. On August 22, 1994 not only did I turn 40, but used the occasion to launch the new boat for the first time. We had a great party, with lots of well wishers present.
Construction began December of ’93. I know it was December because instead of doing the Christmas gifts in my shop I told my dear wife I’d do, molds were being cut and assembled. Setup and lining the ribbands progressed rapidly and before long strakes were being cut and glued. 1/2″ fir AC MDO (medium density overlay) ply turned out to be an okay substitute for the (much) more expensive material Phil suggested. Easy to scarf together with a hand power-planer. It seems very durable and doesn’t need fiberglass sheathing to avoid checking. All end-grain was coated several times. He recommended Tom Hill’s book on lapstrake canoes as an excellent reference to building this type hull. Laps were well primed with unfilled epoxy, glued with a cabosil/epoxy mixture. All fillets were epoxy/cabosil/microballoon. Smoothing the soft epoxy with a brush dipped in lacquer-thinner speeded the process. Much less sanding. Some galvanized sheet rock screws were used during planking as temporary ‘clamps’. I used a template cutter on the router to get the strakes out.
Hoisting the 4’X23′ planking stock definitely took two guys. An alternative to the router/ribband technique would be to utilize some cheap, thin ply to take the strake-shapes from the jig, tracing directly onto the planking stock. When I do another hull of this type this is the manner in which planks will be finished. Less lifting.
Turned the hull in April and began the interior work. Summer slowed the work somewhat. The long hours of winter-darkness lend themselves to concentrated building.
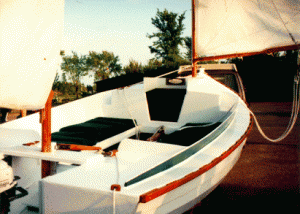
Spars are natural growth white spruce. My photos don’t show the forward hatch my son suggested we include. I’ll try to photograph the details and include them soon. Do the hatch! It doesn’t weaken the structure (if done properly) and makes the cuddy more inhabitable and interesting.
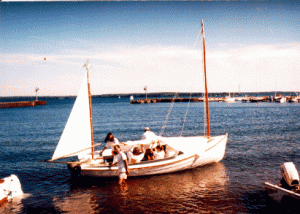
Took the boat to Lake Superior last summer for some big-water sailing. Didn’t go too far out but felt secure all the time. Prudently left harbor with a reef, ended the trip full sail and ripping along.
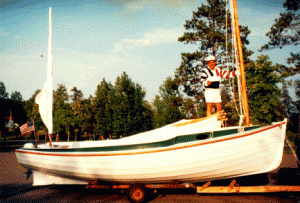
Part of the fun with this type boat are the engaging conversations that often occur. Comments heard include “how old is that boat”, “did you restore that” and “gee that’s a beautiful boat”.
I’d like to build another one this winter. Interested types call me for details.
Marc
Thanks for the news, Marc. I’m most impressed (and a little ashamed) that you started building about a year after me and launched less than a year later. Eighteen months on mine has still never had her bottom wet. Lots of useful tips there, too. It would be nice to hear more about the hatch arrangements. Here are some photos of Marc’s Chebacco:
Another Lapstrake Chebacco
Jerome McIvanie of Washington State sent me a photo of the lapstrake Chebacco-20 which he is building.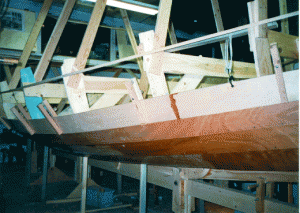

He writes:
A year ago I started building the Chebacco 20′, lapstrake hull. 1/2″ okume plywood and WEST System epoxy.
I’ve never built a boat before but with three years of reading and a couple of weekend classes at the Wooden Boat School in Port Townsend, WA, I decided I was ready. As you can see from the picture, I did it upright.
I am a machinist by trade, and have built most everything that is straight, flat and square. This has been a real challenge. The kind of thing I need help with is what kind of fastenings (size) and where to put them.
Again, I would like to thank Gil [Fitzhugh] for helping me to get started.
Jerome McIlvanie
If anyone has any opinions about fastenings, please let me know and I’ll include them in the next newsletter.
Booms and Downhauls
I wrote to Phil Bolger asking for advice that will be of general interest to Chebacco builders who are unused to gaff rigs with jawed booms. All rigs I’ve used until now (gunter, bermudan, standing lug) have required some kind of downhaul at the mast end of the boom, possibly in the form of a kicking strap or vang. It seems that such complications are not needed with the Chebacco’s rig. Phil writes:
Dear Bill,
I would not bother with a downhaul myself. A tight luff is not very important to a sail like this. No harm in it.
. . .
Phil Bolger
Some builders (Brad Story, for example) replace the boom jaws with a conventional gooseneck. Sister Krista’s Toulouma Too is like this (see Chebacco News #7).
Other Building News
Jim Slakov, of Sechelt, BC, Canada reports progress:
Thanks for the last issue; great as usual, and encouraging to see some finished products! I hope to be sending you some pics in the not too distant future. The molds are ready to assemble on the strongback, but work is keeping me from play lately, so progress is a bit slow for now. Congratulations on your nearly completed boat. When do we get to see some shots of her under full sail? I’m wondering if anyone will make their own sails? [See below!] I bought ‘The Sailmaker’s Apprentice’ but don’t know how I’ll feel about it when I get to that stage.
Thanks,
Jim
Jamie Orr (jorr@oag.aud.gov.bc.can), also of BC, Canada sent me an e-mail the other day that shows he has been thinking hard about arrangements for the sheet ply Chebacco-20 he is building:
My name is Jamie Orr, and I live in Victoria, B.C., Canada . . .
I recently started my own sheet ply Chebacco 20 and recognise some of the concerns and problems mentioned in your newsletter [#5]. I am also building outside, but at this time of year I am contending with heavy rain and (just lately) freezing temperatures. The plywood shows some tendency to warp after the pieces are cut out with the heavy moisture content of the air. However, brute force and ignorance will probably continue to save the day. Luckily I am using ‘cold-cure’ epoxywhich will cure down to 2 degrees Celsius (36F) and ignores the damp. I used this on a strip canoe recently and was very pleased with the result.
One of the questions raised in your newsletter was where to put the portable toilet. I haven’t any brilliant ideas, but wonder if it might sit at the back of the cockpit, under an athwartship addition to the seats, right up against bulkhead #6. It would have to be moved to use it in any sort of privacy, but there’ll be little of that anyway.
As for the anchor, I plan to use a Danforth for its ease of storage, and keep it in chocks under the floorboards. My boat will live on a trailer, so I don’t want to leave any equipment visible or too accessible to passers-by.
Speaking of floorboards, I also plan to fasten a 3/4″ by 3/4″ rail along the fronts of the cockpit seats , so that the floorboards can be lifted up and placed on these rails, level with the seats. The whole cockpit area will then be available for sleeping in or on undeer a boom tent. In any case, I look forward to reading your newsletter again. I would be interested to know how the cat-yawl rig handles – for example, how does it heave to, if at all, without lowering the main? [Any answers sailors?] I have found heaving to of great help, as my family is too young to help much, and I was virtually single-handed when we chartered last summer.
I think that’s enough for now . . .
So long and good sailing,
Jamie Orr
I drew Jamie’s attention to the other issues of Chebacco News, on the Internet, and he wrote back:
. . . Yes, I have a shelter. I have a large (20X30) plastic tarp over supports attached to the house. They are 16 feet long, attahced about 10 feet up, sloping down to 6 foot posts at the lower end. The tarp is held in place by 16 foot 1″X2″ battens screwed down to the 2″X4″ beams and posts. The working area covered is roughly 25 by 15 feet, but hte ends are open so the rain sometimes blows in. I have not attempted to add end walls because of the added resistance to the wind. When necessary, I cover the work with more plastic tarps.
Just lately we’ve had some freezing weather, so the work has gone from slow to dead slow. However, Victoria has Canada’s mildest weather so I hope to get the side panels and bottom set up over the Christams holidays. I’m looking forward to this as it will set the shape of the boat and I’ll be able to see what I’m building.
While the weather’s been bad i’ve been building (indoors) Bolger’s ‘Elegant Punt’ with my seven year old son Alan. I chose this design for its simplicity and because it doesn’t need any toxic resins. He’s enjoying it, although we’ve had to pause for lessons in basics, such as how to hammer nails.
I’ll keep in touch on the building. I expect it’ll be pretty slow here until March or April. I hope you and yours have a merry Christmas and a happy Hogmanay.
Jamie
Making your own sails?
Being a thrifty Scotsman, I decided to save myself a few hundred quid and make my own sails. There are a number of good books on the subject, but the one I’ve used most is a booklet written by Paul Fisher. This is called “Sail Making for the Home Builder” and can be bought for £7.50 plus postage/packing from Selway Fisher Design, 15 King Street, Melksham, Wiltshire, SN12 6HB, England, phone/fax +44 1225 705074, or 01225 705074 in the UK.
I bought 7 ounce sailcloth – a 30 metre roll which is about twice as much as I need but it is very much cheaper to buy a whole roll. US readers should note that British 7 ounce is about the same as US 5 1/2 ounce. The Brits measure weight for 36″ wide cloth; Americans for 28 1/2″ wide (an old standard width for broadcloth).
My wife, Sheila, sewed the cloths together on her ordinary domestic sewing machine. The only problem she encountered was that the mchine had trouble gripping the very stiff hard cloth; still, with care, it went together okay. We ‘broadseamed’ the leading edge of the sail back to 1/3 of its width, on the seam that passes through the tack and a couple of seams either side. This has the effect of giving the sail some shape, when combined with convexity of the luff and leach. Incidentally, we’re making cross cut sails with the cloths perpendicular to the leach. It is equally valid to make vertical cut sails with the cloths parallel to the leach. It’s important to find out whether your cloth is strongest along the warp, or the weft, and to keep the strong threads parallel to the leach.
Many sailmakers carry broadseaming back to 40% or more of the width, but we decided to make the curve shorter in order to keep the ‘powerpoint’ well forward and help counteract the weather-helm which is a tendency of most Chebaccos.
We’re currently ‘roping’ the edges of the sails and applying reinforcing patches at the corners. This is being hand stitched because of the large number of thicknesses the needle has to pass through. It’s easy enough work, though and quite therapeutic.
We’ll keep you posted on how the sails turn out. Even if they aren’t very good, we’ll be confident enough to unpick a seam and re-stitch it for better setting.
I should mention that we sewed the sails for our last two boats and both worked perfectly well, with no obvious problems.
Keep in touch!
Keep your letters coming. Send them to:
Bill Samson,
88 Grove Road,
West Ferry,
Dundee,
DD5 1LB,
Scotland
mctwbs@river.tay.ac.uk

