Pete Greenfield is the editor of Watercraft Magazine in the UK (watercraft-magazine.com) a magazine dedicated to small home build boats. In 2009 he recycled the moulds from a lapstrake Chebacco that Connie Mense had used to build her beautiful “Argo”. See the resources section under websites for photos of Argo. Peter wrote about his journey to build his own Chebacco (actually he is still writing about his journey, like so many boatbuilding journeys it is a long one!) in Watercraft Magazine and he has graciously given me permission to reproduce some of his articles.
This is the first one he wrote in the November/December 2009 edition:
Building the OUTDOOR BOAT
by Pete Greenfield
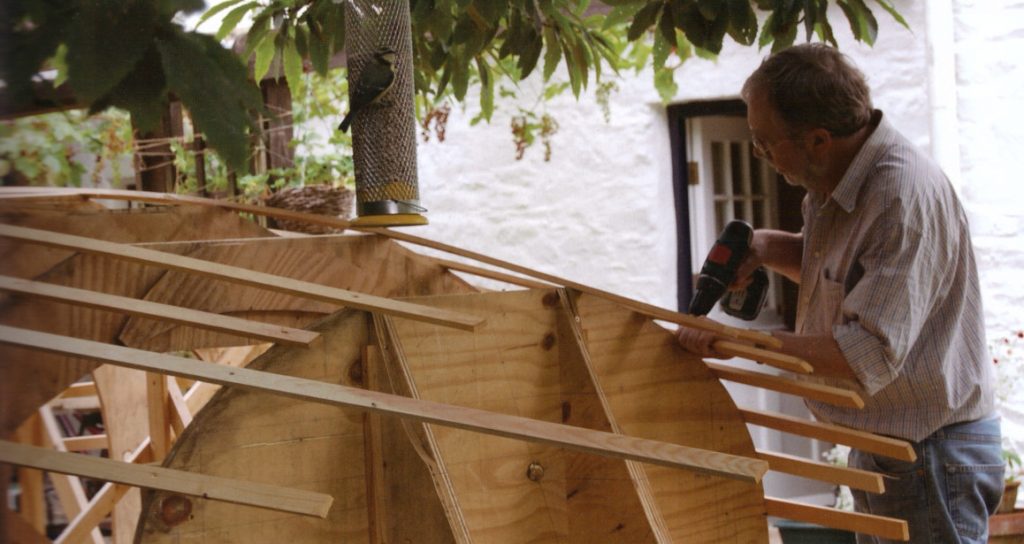
Underneath the spreading chestnut tree, the editor has recycled Connie Mense’s moulds to build his own Chebacco Boat. And the green-ness of the project doesn’t stop there. With photographs by the author and the resident twitcher.
Why do birds suddenly appear every time I go near the boat frame in our garden? The cat has only to purr from the depths of a duvet in a distant bedroom and they take flight instantly. But when I peel back the polytarp from the boatbuilding frame, every tit in Cornwall turns up to perch on it. I never liked that Hitchcock film. Worse, they’ve all been devouring the autumn’s raspberries, so my boatbuilding frame is beginning to look like a Crime Scene and – I kid you not here – a hungry-looking lesser-spotted woodpecker has also taken to visiting and I swear he has his onyx eye on my lining-off battens.
I’m quietly proud of my lining-off battens, not least because in the past, I’ve had problems with battens. Last time, they were fairing battens. A fairing batten is a length of small section timber which you lay across the erected inverted mould frames to check that they are …er… fair, meaning that you have set up the moulds so accurately that the batten takes up a suent curve, without humps or hollows, as it drapes across them. Needless to say, the fairing batten should not be so thin that it sags between moulds or so thick that it will not bend over them without resort to brute force. Equally, there should be no imperfections in the fairing batten – knots, kinks or badly made joints – which cause deflections, making it harder to check whether your moulds are really fair. Or, in the case of my previous ferro boat, really not.
You do not need lining-off battens for the monocoque hulls of ferro boats. You do need them when building a clinker planked wooden boat because they delineate the edges of the planks which are a major factor in the visual appeal of the boat. These clinker planks might look to the untutored eye as if they have straight parallel sides and are all of equal width but as Water Craft alumni will be aware, in reality such planks are frequently banana-shaped, sometimes S-shaped and the beamier the boat, the more curvaceous they need to be. Further, the illusion that the planks of the topsides are identical is created when the boatbuilder determines the shape of the garboard, the plank nearest the keel, which may well need to be a convoluted S-shaped banana with extra-wide ends…
But enough of GM crops… take it from me that when a shapely clinker hull is lined off so that the lie of every single plank from garboard to sheerstrake looks just right, it’s a work of art as much as craft and the tangible testament to the hand and eye of a real boatbuilder. Which is why, rather than mess it up myself, I decided to use the lining-off marks Connie had left on her moulds. But I still needed a full set of lining-off battens, all long enough to wrap around the hull from stem to stern, all knot- and kink-free. Fat chance of finding suitable timber in west Cornwall, I grumbled and went to the nearest builders’ merchant with little hope and less expectation.
Alas, dear reader, that I should have been so unjust! There at the Culdrose branch of the Travis Perkins chain, beyond the inevitable breeze blocks, pea gravel, drains and decking, huddled in the crepuscular cathedral of the timber shed, I found long lengths of straight grained and generally knot-free red pine in various sizes including a nominal 38 x 16mm, which they supply ‘Planed All Round’ at 34 x 11mm. Which is how, me buckos, a national disseminator of what Betjeman called ‘bungaloid growth’ came to determine that the lands – the overlaps of the clinker planking – on our Chebacco boat will be precisely 1 5/1 6″ (34mm) wide.
Unfortunately, however, the longest pieces TP could supply were around 15’6″ (4.8m) which meant proper joints would be needed; scarf joints which would not create kinks when the battens were bent to the hull curve. In the past, I’ve had problems with scarf joints.
The scarf joint, Grasshopper, is the boatbuilding joint. When one long length of timber must be made from two short ones, the shipwright cuts identical opposed tapers which mate together. Long tapers are required to get the largest possible ‘faying surfaces’ – the faces of the timber which will be glued together – which means the scarf needs to be at least eight times as long as the thickness of the timber being joined.
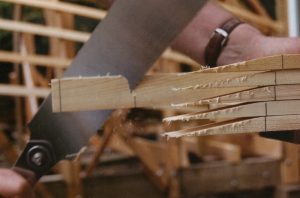
In the past, I would try to cut the taper with a tenon saw, the saw would invariably veer off-square and I would then need to plane vigorously to get a uniform incline, all too often creating in the process a speed-bump halfway along the taper. Planing down the speed-bump, I would start to get break-out at the feather edge. I would also start to get rather irritated.
So, Grasshopper, reach not for your western saw. Take up instead your Gyokucho Ryoba Kommane – yes, I had noticed that this running metaphor is crossing cultures, thank you – which has a 12″ (0.3m) double-edged blade, with rip teeth on one edge and crosscut teeth on the other. This gives the unique combination of a saw blade short enough to be used with some precision yet with rip teeth which are much better suited to a shallow diagonal cut virtually along the grain. Do not – at first; you will later – saw to the line; cut a little shy to allow for a couple of passes of the plane.
My other problem with scarfs used to come when I glued the two halves of the scarf together: all too often, as clamping pressure was applied the tapers would slide apart and sometimes go off at a tangent in the process.
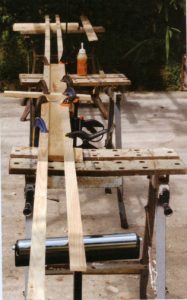
It was under the tutelage of Mr D Phillips at Falmouth Marine School that I learned to do scarfs properly. First off, you need a base to support the scarf while you glue it: a clean plank, as long as you’ve got, with a nice straight edge. About midway along the plank, square across two lines to show the extent of the scarf joint, then wrap this area in cling-film to prevent the job sticking to the base.
For quick jobs outdoors, I have found Gorilla Glue easy and forgiving to use, tolerant of low temperatures, quickly cleaned up and very strong once set. It’s a polyurethane, so no mixing is needed and it’s not only tolerant of damp timber, it likes it. So much so that you are advised to spread the Gorilla Glue on one of the faying surfaces – now you do remember what a faying surface is, don’t you children? — and paint the other one with water. The wetter you make this face the more the Gorilla Glue will foam u p as it sets; the foam fills crevices but does not act as a bonding agent on sloppy joinery.
So, my method when gluing scarf joints is to first clamp the piece of timber with the lower part of the scarf to the base, aligning it with the marked lines and the edge of the base and positioning the clamp well away from the action. Apply the Gorilla Glue to the taper. Wet the matching taper on the other half of the joint and lower this second piece of timber into place, again lining it up with the joint lines and the base edge and securing it firmly in place with a clamp well away from the joint. And it’s only when I’m sure the two pieces of timber are correctly aligned and firmly held in place that I wrap the topside of the scarf joint in more cling-film, add a scrap of ply on top to spread pressure and then clamp up the joint firmly. This way, I suffer from none of those old kinks and slippage; an important consideration at my age, Grasshopper.

5 thoughts on “Chebacco News 59 – Pete Greenfield’s Outdoor Boat”