Chebacco News 33 – February 2001
A New Chebacco Motorsailer
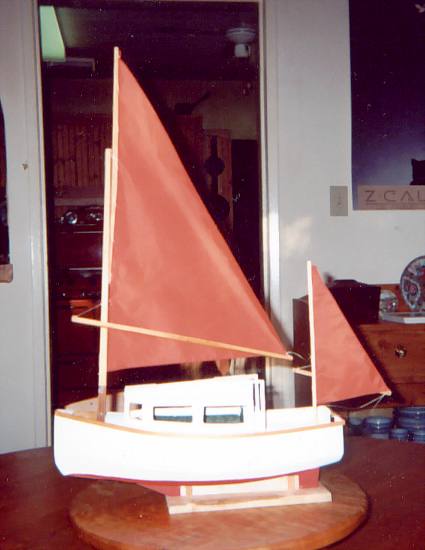
Bill and Beth McKibben of Sidney BC, Canada – the prolific builders of many Bolger boats, including the Breakdown Schooner and the Fast Motorsailer, are turning their thoughts to a Chebacco Motorsailer, and have built this model as their starting point. The keen-eyed among you will notice that they’ve raised the topsides a smidgen, and have used the Solent Lug rig in preference to the more usual gaff rig. It looks wonderful, and will make a great addition to the growing fleet of British Columbian Chebaccos.
A Swedish Chebacco
Björn Edström writes:
I have built a Chebacco 20 in sheet ply coated with epoxy and fabric
both in and outside because I used only 9 mm plywood on the whole
construction. The boat was launched in September this year, so far it
has only been one weekend sailing this year, the interior is not
completed.
Built: 1999 – 2000
Launched: September 2000
Name: WOODY
Owner/builder: Björn Edström, email: bjorn.edstrom@posten.se
Location: Stockholm/Sweden
I will send more pictures from the launching when the film is developed
Mary-Beth, Too
Dave Neder has made a great ‘gold plater’ job of his sheet ply Chebacco, “Mary-Beth, Too”. He writes:
. . . The mast is hollow. It consists
of a marine ply box section sheathed with Sitka Spruce and Red Oak at the
gaff throat position.
The tiller is from a 26′ “Lancer” sail boat. It was contributed by a
friend of mine. The coaming is made of ribbon stripe mahogany ply and
mahogany lumber. I cap all exposed ply edges and I built narrow hand rails
all around into the coaming. The drawings show flush sides, but since I
need a better grip, I added the rail.
The hatches are water tight. The out board motor’s gas tank is under the
port hatch. The motor will be old 9.9 Johnson from the “Lancer”. The 12
Volt battery is under the starboard hatch. Their centers of gravity are
equidistant about the centerline.
The cabin hatch cover is shown closed portions of the cover, trim and pen
boards are made of red oak. It is common here and I like to work with it.
The two cleats are for the peak and throat halyard.
I am going to trailer the boat. I have a wide choice of sailing lakes
including Lake Michigan. Lake Michigan is about twenty miles from my front
door. One comment about sailing on Lake Michigan; it is about 90% Ho Hum
and 10% sheer terror. Moorings in my area are filled up and expensive even
if you can find one for sale or rent.
I am presently building boom crutches to hold the masts and booms while
trailering the boat. I will send photos as things progress
Our goal is to sail this spring.
Regards Dave
Yet another Chebacco growing in BC!
Randy Wheating writes:
Hi Bill
It was my pleasure to have finally met you in person at the Port
Townsend Wooden Boat Festival last fall. I turned my hull over this
past June. I went the brute force method with the help of six friends.
Before the ‘flip’ I cut out a notch in the cross pieces of the strong
back. I added a little padding to the notches and when we turned the
hull we set the keel into these notches and there she stood – upright
for the first time! A little shoring up and leveling and the hull was
for me to climb aboard.
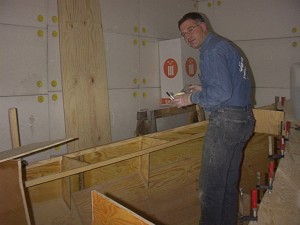
As you may be able to see from the attached photos, I have made some
minor alterations. I have increased the width of the cabin about six
inches per side – flush with the cockpit coamings. The cabin top was
raised two inches.
The forward bulkhead I made one inch thick (laminated two half inch
pieces of plywood) as this will be the main support for my mast
tabernacle. I cut a square hole, for no particular reason, rather than
the round one as shown in the drawings.
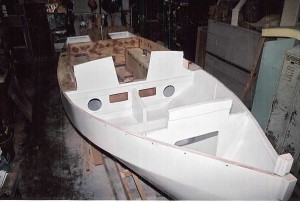
The space under the cockpit seats will be sealed with air tight
inspection hatches for dry storage and floatation.
I added an eight inch bridge deck and made some cut outs in the main
bulkhead, from the cabin, for extra storage.
Like Brad Story’s boats (I believe) the aft cockpit is not cut through
to the motor well. A one piece stern deck with port and starboard
hatches with cover this area. There will be a small access hatch in
this deck just forward of the rudder post that will just allow me to
drop a 3 gal fuel tank into this space. A second tank will sit just aft
of the mizzen.
The rudder and post are aluminum. I fabricated an epoxy/cloth/mat tube
just larger than the rudder post OD which was then bonded between the
hull and motor well floor. This should create a nice water tight
passage for the rudder post.
Since taking the photos I have temporarily reinstalled the original
forms into the cabin and have started on the cabin sides.
With luck I will get her into the water later this year.
As always I enjoy the CN and appreciate your fine work. You must come
back to the West Coast in a couple of years for a cruise when all four
BC Chebaccos are in the water!
Take care,
Randy Wheating
Port Moody, BC, Canada
Pete has flipped
You’ll remember Pete Respess’s ‘poor man’s laser level’ from the Chebacco News #32. Pete has now flipped his hull, and I must say that waterline looks fantastic!
Skip flips, too
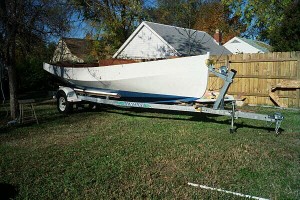
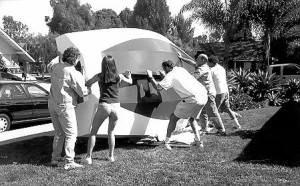
Skip Pahl, in Southern CA, has flipped his handsome sheet-ply hull. In case you’re wondering, about half of his helpers are on the other side of the hull!
Skip writes:
So. Cal.’s apparent “one-and-only” Chebacco is not dead, however, progress
has been mighty slow.
A few weeks ago we had our annual neighborhood block party, an event that
provided me with lots of horsepower for turning the boat. We kicked-off the
party with the boat turning and everyone was delighted to be a part of the
effort. They have been watching the building for nearly three years now! By
scheduling the turning early in the picnic (before the beer), we accomplished
our task without a nick or scratch.
A note about striking the waterline: Last year I found the world’s cheapest
laser level for $39.95 in the Radio Shack Christmas catalog. It produces a
fine laser line as well as the standard spot! I mounted the level on a piece
of plywood attached to the top of a camera tripod and then leveled the
platform north, south, east and west) with a mark on the cutwater were I
wanted the waterline to start. After the first arc gave me a series of dots
from the cutwater to midships, I rotated the level on its leveled platform
and marked dots from miships to stern. I the stretched 3M fine line (1/4″)
tape along the pencil marks and arrived at a clean and satisfactory
waterline. This is a good system if you don’t have a great deal of work space
around the boat.
Best wishes to all!
Skip Pahl
Carlsbad, CA
That’s all for this issue
Not a terribly technical one this time – just a showcase of the fantastic efforts that are going on around the world. It seems to me that the number of Chebaccos is growing at an ever-increasing rate, as of course, a beautiful design like this deserves.
Keep in touch, everyone!
Bill Samson,
88 Grove Road,
Broughty Ferry,
Dundee DD5 1LB,
Scotland
bill.samson@tesco.net

