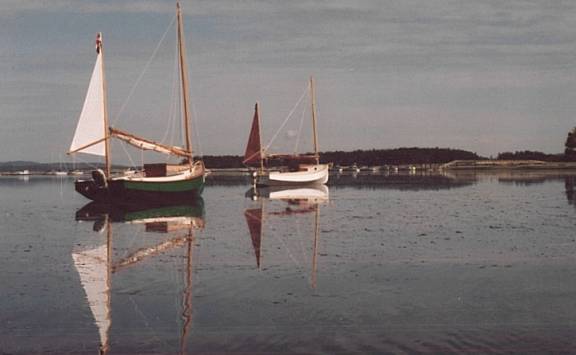
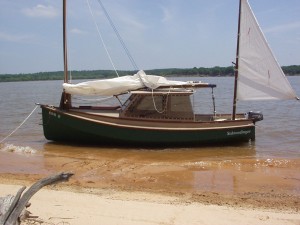
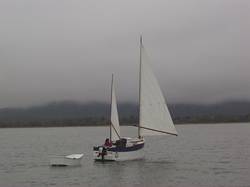
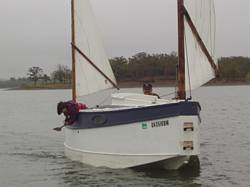
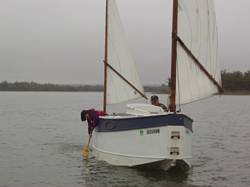
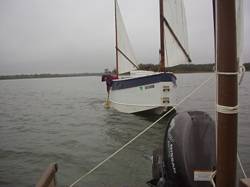
Chebacco News 46

News, questions, and boats for sale.

News:

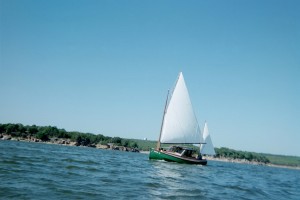
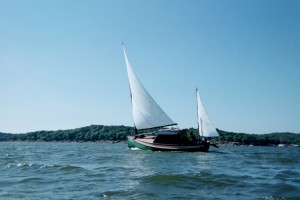
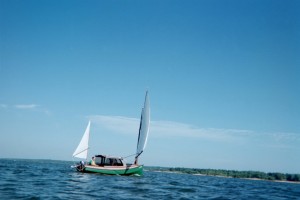
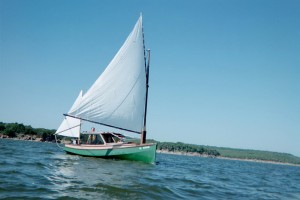
There will be a calendar! As soon as I secure a printer (person, not machine) to print small volumes of wall calendars, I will be printing up about 100 Chebacco calendars, for sale here, or maybe at Duckworks. The pictures will mainly be from this webzine. If your boat appears in the calendar,  you get one free! I think I have enough photos for the 2004 edition, but if you have good photos of your boat you want considered, send them in! The higher the resolution, the better.

Questions:

Chebacco’s for sale:

***

The Broughton Archipelago – Jamie Orr

With Wayward Lass in 2003

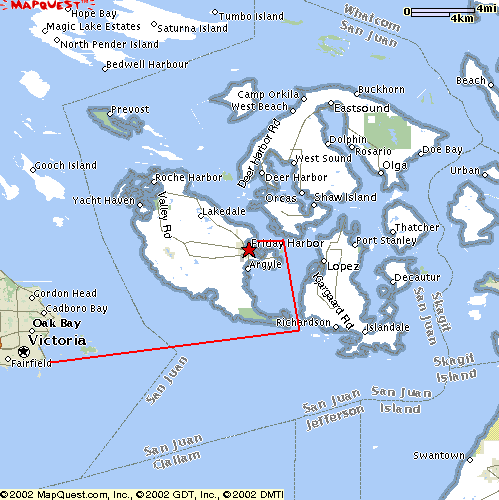
Sunday: We launched on July 27 from Telegraph Cove, a few miles south of Port McNeil, not far very from the northern end of Vancouver Island. This is just about at the top end of Johnstone Strait, just where it meets Queen Charlotte Straits. Telegraph Cove is on Johnstone Strait, but a mile out and through some small islands, you’re in Queen Charlotte Strait.

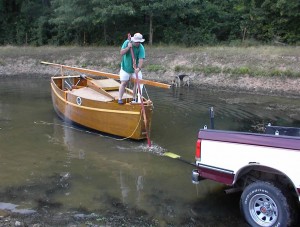
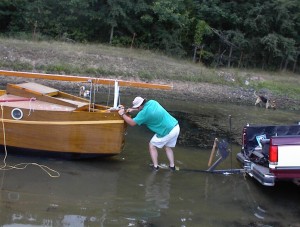
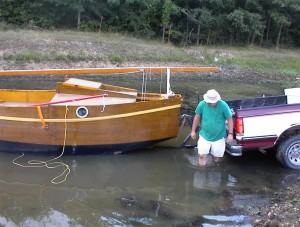
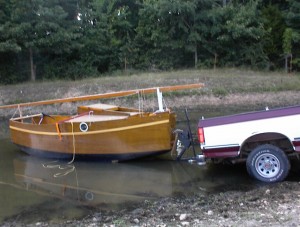
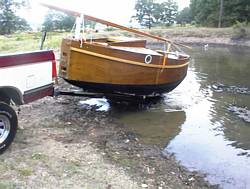
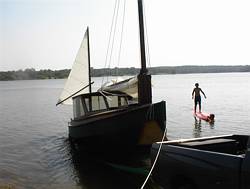
The tide was low, but we launched without problems,

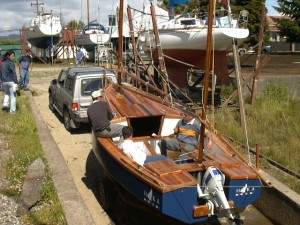
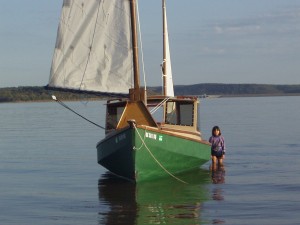
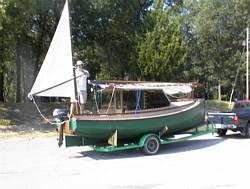
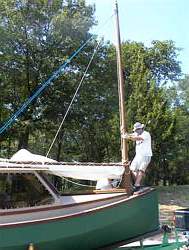
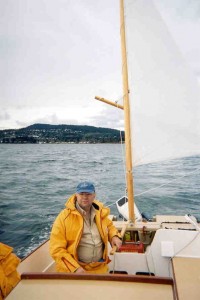
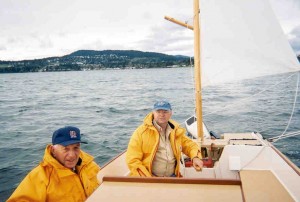
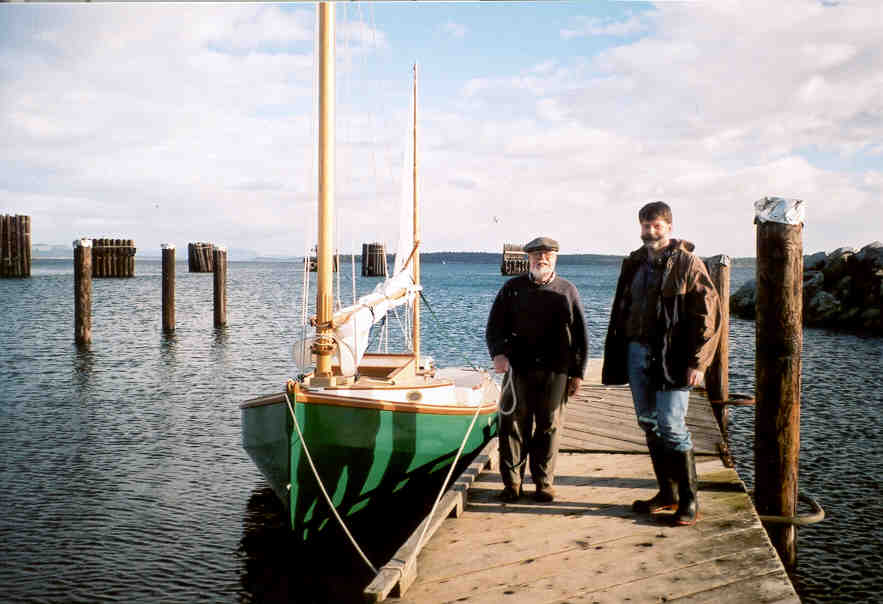
Here’s Dad beside the launch ramp at Telegraph Cove.

Here’s Dad beside the launch ramp at Telegraph Cove.

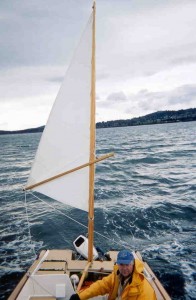
and we cast off at 9:10 am, getting the sails up as soon as we were clear of the cove. The sky was overcast, with a forecast for winds of 25 knots from the northwest in the afternoon – there was a small craft warning for later in the day.

The sun came out about mid-morning, and stayed out for the rest of the day. We had light to moderate northwest winds to start with, and were reaching at four and a half knots (by GPS) towards Retreat Passage to the northeast. We mostly used the GPS to tell us what the tidal current was doing to us, but I entered a waypoint to keep us clear of some rocks outside the entrance to Retreat. Around eleven we lost our wind, and after 45 minutes drifting southeast with the flood, we motored until one o’ clock when the wind came back from the west. We sailed and drifted up the passage and through the Fox Islands as the wind went up and down for about an hour and a half, then it steadied and we had a good run. By 3:15 we could see our day’s destination, Echo Bay (or at least the point that hid it.)

We docked at Echo Bay Resort, and bought a gallon of gas there. The folks there didn’t seem very friendly, despite a favourable write up in the guide. Maybe we didn’t spend enough – however, we had choices. At the end of the bay there is a small marine park, with a decent dock and toilets up in the woods – of course, there was also a notice that a cougar had been seen on the 23rd (four days before) and walking alone at night was not recommended! Our other choice was rustic Windsong Village Resort, which offered showers and inexpensive mooring – we eventually pulled in there, the showers being the clincher. The showers were free after a chat about boats and building Wayward Lass. I think the lovely young woman in charge was a fellow dreamer! We fired up the stove and celebrated our first day away with a fine spaghetti dinner, accompanied by a good red wine.

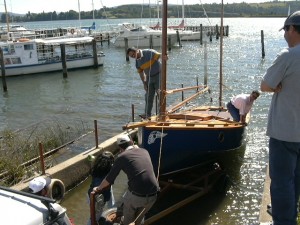
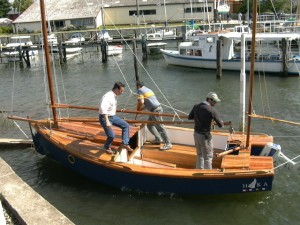
Wayward Lass at the Parks dock in Echo Bay. Echo Bay Resort is in the left, Windsong Village Resort is in the right of the picture.

Wayward Lass at the Parks dock in Echo Bay. Echo Bay Resort is in the left, Windsong Village Resort is in the right of the picture.

Monday: The sky was grey, the clouds reaching down to within a hundred feet of the water. No wind, so after a quick cup of tea and a granola bar we fired up Honda and left Echo Bay at 6:25. We didn’t stop for more breakfast because the ebb was only good for another hour or three, and fighting the flood would cut our speed in half. We wanted to reach the west end of Broughton Island, about 20 miles away, that night, with enough time to sight-see on the way. I made a note of the compass course to the entrance to Fife Sound since it looked a bit foggy outside, but we found it easily. Once inside the sound, we followed Indian Passage, inside the Benjamin Islands, along the south side, enjoying the shoreline view (rocks and trees!) We still had the ebb tide under us, as shown by a GPS reading of over six knots with the motor only at half throttle.

Looking west into Indian Passage.

Looking west into Indian Passage.

Once we left Indian Passage behind, we soon reached the end of the sound, with open water to port and the mass of Broughton Island to starboard. Since the flood tide would not slow us so much in the more open water of Queen Charlotte Strait, we took the time to look into nearby Cullen harbour on Broughton Island. Cullen Harbour is a natural harbour, with no development or people. Booker Lagoon, large and irregular, is reached through a very narrow entrance at the top of the harbour — the entrance is hard to see, as it takes a sharp turn to port right at the end of the harbour, and is less than 40 feet wide. I believe there are some fish farms tucked into the arms of the lagoon, but we didn’t go in far enough to see them. We just looked in and out again, which was good, because the incoming current was noticeably stronger on the way out – the tide had turned to flood, and it wouldn’t have been long before we’d have been stuck there until it turned back again.

Back in Cullen Harbour proper, we anchored for breakfast — only one other boat was anchored there, so we had a good choice of places. This was a porridge morning, so the cooking didn’t take long, and the dishes were soon rinsed and the thermos filled with fresh tea. We started to leave the harbour by a narrow route that exits half a mile west of our original entrance – but we didn’t get out. About half way through, the fog closed down until we couldn’t see more than a 100 yards with any certainty. Tree covered islands that were only 200 yards away were completely invisible. So we made a quick turn back to the harbour, and dropped anchor again. While we waited, we watched an older power cruiser, perhaps a converted fishing boat, come in and head straight for the entrance to Booker. No hesitation, just charged right in, gave a burst on the engine to make the turn, and that was that – some real local knowledge there! They also had their radar antenna turning, not a bad thing on such a day.

After a couple of hours, the fog was definitely lifting, and we took a second try at leaving, this time finding all the islands where they were supposed to be! A light westerly was blowing, so we got the sails up as soon as we were clear and started tacking to the west. And that was pretty well what we did for the rest of the day. Our destination was dead to windward, which was okay when the wind was blowing well, but about half the time it was very light and fluky. As we neared our goal, it steadied again and blew 12 to 15 knots, making Wayward Lass fairly fly.

To reach our anchorage on the northeast side of Dickson Island, we had to turn north between some small islets, and negotiate a rocky dogleg channel. After some discussion, we decided we could do it under sail. We scouted the entrances to two passages, and determined which one was the right one – there were a lot of very similar rocks and islets to confuse the issue. However, once we’d sailed past both entrances, we had no trouble identifying the one we wanted. We turned and ran down the passage, zigged, zagged, and there we were, at the entrance to our bay! However, we were now in the lee of the island and sheltered from the wind, so it took another ten minutes to tack up to the head of the bay. We celebrated by heating up a good stew, also brought from home, for dinner. With more wine, of course.

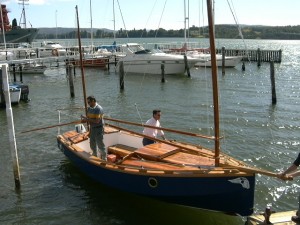
At anchor at Dickson Island.

At anchor at Dickson Island.

Tuesday: By 6:45, the water level was down about 12 feet, and our stern was only just afloat. We were taking Carter Passage today, and wanted to enter at slack tide, so again we postponed breakfast and had the anchor up early. It was very foggy, but we could follow the shore of Dickson until the other side of the channel (the one we came through the day before) was visible. We left the inflatable deflating on the cabin roof while we motored the short distance to Carter Passage – there was no wind, so sailing the wasn’t an option. In the event, motoring wasn’t an option either! The outgoing current was so strong, at full throttle we couldn’t make headway in the narrow part of the pass. Since the sides were lined with rocks, we didn’t try to turn to get out, but simply reduced throttle, and let Wayward Lass back down the channel, steering by ferrying across the current as needed. It felt odd, but it worked. Once out, we anchored and opened the thermos while we waited for the current to ease. Half an hour later the things looked better, and sure enough, Honda pushed us through with no further problem.

We needn’t have hurried. It only took an hour to reach the part of Carter Passage that dries out at low tide. It looked like a five-foot high rock wall, right across the passage – this must be why the guidebooks recommend entering at high water slack instead of low water?

This was what we saw when we arrived at the “wall”…

This was what we saw when we arrived at the “wall”…

…and this was what we saw five hours later.

…and this was what we saw five hours later.

It was obvious this was going to be a long wait, so we cooked and ate some pancakes, then I took the inflatable ashore for pictures and scouted the rocks. They extended for some hundred yards, but things weren’t as bad as they first appeared. A slightly more navigable channel ran diagonally across the rocks from the extreme north side at the west end, turning parallel to the shore and exiting the boulder field about three quarters of the way over to the south side. However, even this channel was high and dry for now.

A breeze kept the flies down and kept us from roasting in the sun, and as we watched, water started to flow through from the far side and gradually the level rose. It was a slow business, though, and even when we thought the level was high enough, we had to wait for the current to lessen. Altogether we waited for five hours, but the time passed easily enough. Finally, there was only a small swirl over the biggest rock, and we pulled up the anchor. Using the shore marks I’d noted earlier, I followed what I hoped was a clear route while Dad stood watch at the bow, and in half a minute we were through!

As soon as we were sure the current wouldn’t pull us back, we stopped to raise the sails, and sailed through the rest of the passage. We had a nice little wind behind us, that lasted until we reached Greenway Sound. There’s a sizeable resort there (called Greenway Sound Resort, appropriately enough), and since it was late in the day, we tied up for the night. We didn’t make use of the restaurant, although we were tempted, but we did buy a couple of huge ice cream cones. Our neighbor at the dock was from Portland, Oregon, and we swapped names, looking for common acquaintances. There was a bit of confusion over one of these, and for a minute I thought he said Larry Barker had died! If you’re reading this Larry, you’ll be really glad to know that it was a mistake!

Wednesday: The morning was overcast and cloudy (do we detect a pattern here?) as we cast off, just after 7:00. There was a gale warning posted for the area, but we only had a light west wind that carried us a mile or two down the sound before dying away to nothing. We drifted while we cooked up some porridge for breakfast, then motored, leaving the sails up, to Sutlej Channel, entering that about eight-thirty. The wind came back then, this time from the south, but we motor-sailed as we hoped to get through narrow Penphrase Passage before the tide turned. However, we reached Penphrase at 9:30, and found both wind and tide dead against us, so we dropped the sails and let Honda do all the work. We arrived at Echo Bay again just before 11:00, this time buying a whole gallon and a half of gas. Boating doesn’t have to be costly!

Fifteen minutes later, we were under sail, on our way Tribune Channel.
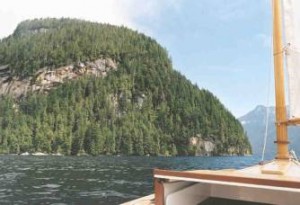
Tribune Channel – not many anchorages along here, the bottom drops off under water just as the land does above!

Tribune Channel – not many anchorages along here, the bottom drops off under water just as the land does above!

Part of the channel was beyond the limits of our chart, but from the guidebooks we could see that it was wide and straightforward, with no chance of our going astray. By 1:00 pm we were turning the corner at the most northern part of the channel – we lost the wind briefly, then it turned the corner too, and we had it at our backs once again. This was the pattern whenever we changed direction, the hills funnelled the wind along the channel. Our speeds were in the 5 to 6 knot range, and we sailed passed Watson Cove, where we had thought we might anchor for the night, at 1:30. The sun came out about the same time, so there was no question of stopping.

At 3:40 we reached Trafford Point, the most easterly point of Gilford Island. Our course was now west of south, and we lost our following wind. Instead of bending around the north side of the island, the west wind was now coming up from the south side, against us. We started tacking down the wide channel, but decided that we weren’t making enough progress. We wanted to stop at a small resort on Minstrel Island, several miles onward, but I think now that we let ourselves get too focussed on that – we could have had more sailing and saved ourselves some wet motoring if we hadn’t. But as it was, we furled the sails and started motoring into the wind. Viscount Island, near the southern end of Tribune, forms Sargeaunt Passage on the east side of the channel. We turned down here to have a look. Half way along we passed some narrows, with a nice little anchorage behind them – we could have spent a quiet night here, but didn’t stop.

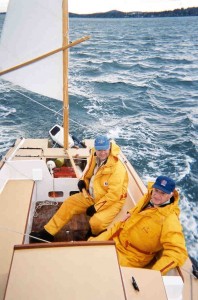
Coming out of Sargeaunt Passage into Knight Inlet, we found a good 25 knots of wind blowing up the inlet towards us (I see the log calls it a “bitch of a wind” – must be a technical description). Minstrel Island was about three miles away, dead to windward, on the other side of about a million white-topped waves. At first we were able to follow the north shore, but soon had to leave even that minimal shelter to cross the inlet. We tried throttling back to reduce the pounding, but our progress dropped to almost nothing, so we had to turn up the power again. We were wearing our waterproof, insulated cruiser suits, but spray coming over the bows regularly hit our faces and dribbled down our necks – and I’d neglected to change into boots, so my shoes were absolutely soaked. It took an hour and a half to cover those three miles, then another thirty minutes before we were tied up at Minstrel Island Resort. Feeling we owed ourselves a break, we slung our damp suits over the boom, and headed for the dining room for the only restaurant meal of the trip. (The cook was a Mayan Indian from Mexico, and the main course was a great chili, which we washed down with India pale ale, in the interests of multiculturalism.)

Thursday: This morning caused serious doubts about the weather. This was the wettest dawn yet, with a light but steady rain falling from heavy clouds. Although there was nothing stirring yet, strong winds were again forecast from the northwest, and just to round things off, the tide would be against us most of the day. As a precaution, we decided against taking Johnstone Strait, choosing the more sheltered Clio Channel, north of West Cracroft Island. We cast off at 8:15 and motored out through the Blow Hole, (a short, narrow passage named for its habit of magnifying any westerly winds blowing through it) into Clio Channel.

A wet morning at Minstrel Island.

A wet morning at Minstrel Island.

We then drove into Port McNeil to take care of some business, returning to Telegraph Cove two hours later.We made good time motoring down Clio, since the tide hadn’t yet turned against us, but when we reached the next passage, Baronet, we found a strong current running against us. We thought the current might be less in wider Beware Passage, one island to the north, so we turned and wove our way through a flock of rocks and islets. From Beware we passed into Indian Channel, (this is not the Indian Passage mentioned earlier) where we once again found ourselves under a blue sky! We stripped off the cruiser suits and enjoyed the sun through Blackfish Sound and all the way back to Telegraph Cove, arriving about a 1:15.

Back on board, we motored over to the gas dock to fill up. There was only one spot available to tie up, tucked inside a corner. I was daydreaming a bit, I guess, because I suddenly realized we were almost in the corner, and moving much faster than I liked (I prefer to put the motor in neutral and coast in, steering the last few yards with the rudder.) However, I was sitting on the port quarter, with one hand on the boat’s tiller and the other on the motor’s, so I was able to turn the motor, slip it into reverse, and give it throttle. The boat responded perfectly, and we finished stopped dead in the water, right next to the dock. I nonchalantly shut off the motor, stood up to take the stern line ashore, and promptly tripped over the coaming.

No, I didn’t quite go in the drink – my head and shoulders were on the dock, and my shins were resting (grinding, really) on the cockpit coaming. I pulled my two ends together, climbed onto the dock and limped over to the pump.

Once filled up, we headed out and turned west for Alert Bay, a sizeable community on Cormorant Island, arriving at the government dock there at 5:30. (The strong winds predicted earlier never did materialise.) We shared the docks with commercial fishermen, yachts and powerboats, not to mention the 110 foot topsail schooner Pacific Swift, carrying a cargo of teenagers on a “sail and life” training voyage. They were well equipped with water guns, and were giving them a good workout! We fell asleep that night to an evening singalong aboard the Swift.

Pacific Swift leaving Alert Bay.

Pacific Swift leaving Alert Bay.

Friday: The flood tide wasn’t due until noon, so we weren’t in a hurry to get away. We took a walk through “downtown” Alert Bay, then Dad went back to Wayward Lass while I visited the First Nation Heritage Centre. I spoke to a young carver working outside the door – he was working on a new totem pole and instructing an even younger carver in the art. I walked up the hill to see the Big House, where the local Indians hold all their community events. On the way back to the boat, I saw a good juxtaposition of old and new – a diesel powered aluminum launch towing a traditional dugout canoe. Unfortunately I had to switch lenses, and didn’t get a good picture.

The Big House at Alert Bay.

The Big House at Alert Bay.

After a last cup of coffee at Bill’s Café and Pool Hall (also does take-out pizza) we were on our way back southeast, past Telegraph Cove, bound for Robson Bight. Robson Bight is famous for the number of killer whales, or orcas, it attracts. They come in to rub against the gravel bars there, maybe to scrape off parasites, I’m not sure. A reserve has been established and recreational boaters are not allowed within the boundaries, although the fishermen still fish within them.

The bight is well inside Johnstone Strait, which has a well deserved reputation for rough water, so we paid close attention to the weather forecast. Sure enough, winds up to 20 knots were called for by evening, but based on our experience so far we discounted that a bit. We also noted that Boat Bay is located right across the Strait from the bight, and looked like it would give some protection from northwesters, so we weren’t too worried. However, since we didn’t know for sure, I pulled our 25 pound fisherman anchor from under the floorboards and assembled it. Once together, it took up a significant chunk of the cockpit!
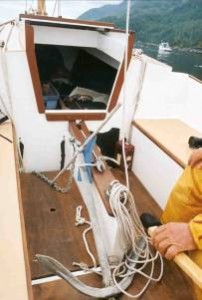
The big guy. I figure this will hold us in pretty nearly anything! Taken apart, it fits nicely under the floorboards.

The big guy.
I figure this will hold us in pretty nearly anything!
Taken apart, it fits nicely under the floorboards.

There is an official presence at Robson Bight. Parks workers and volunteers patrol to ensure that boaters don’t harass the whales – fishing boats don’t seem to bother them, partly because their engines and propellers turn at slower speeds than most recreational boats, and partly because the fishermen aren’t following the whales, but going about their own business. (Killer whales are able to avoid the nearly invisible nets because of their very sensitive sonar.) We were visited by two patrollers, both friendly and helpful, and the second one rafted up and chatted for awhile about the whales and his work. Doug was working for a private company contracted to the Parks Branch, and his job involved research as well as policing people like ourselves. He told us they had a camp established on the point beside Boat Bay, so we invited him to stop by the anchorage for a beer later.Since there was no wind again, we were motoring, probably a good thing because the Strait was choked with gillnetters. These boats set nets of 2 or 300 hundred yards in length, generally across the direction of the strait, and from the low cockpit of a Chebacco, it’s hard to tell which net is which. After some practice, we got better at picking out the orange buoys at the ends and figuring out which way each net ran – port or starboard across our path. While doing this, we were passed by the Gikumi, a big, comfortable whalewatching boat built almost 50 years ago for towing log booms. We thought he would find the best path around the gillnetters, so we followed him – this almost paid off in spades, when we realized he wasn’t only avoiding the gillnets, but was heading for a pod of whales in Blackney Passage, at the mouth of (appropriately named) Blackfish Sound. Soon after there were three whale watching boats following the whales, while Wayward Lass was following the whole circus – I could see the odd fin through the binoculars, but that was all. Unfortunately, these orcas were travelling about 5 knots, same as Wayward Lass, so we never caught up with them. Everyone finished up by the north end of the reserve around Robson Bight, but before we got there the whales had disappeared and two of the whalewatching boats had also left. We drifted around not far from the Gikumi, but didn’t see any more whale action.

After that, we restarted Honda and crossed the two miles or so to Boat Bay. We cut through a gap in the kelp beds to save going around Bush Islets, and anchored as close in to the shore as we could. There were already a number of commercial fishing boats anchored between the biggest island and the shore, but farther out, where the water was deeper. Doug came by in his inflatable a few minutes later and rafted up again. We’d scarcely opened our beers when there was a huffing noise, and an orca appeared just outside the kelp! We sat there in our front row seats while a pod of some 25 whales swam past.

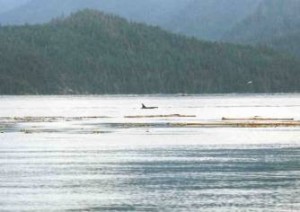
Killer whale (Orca) on our doorstep.

Killer whale (Orca) on our doorstep.

Doug put his hydrophone over the side and we listened to the whales through the speaker. He was instantly able to identify the pod as “A” Clan – each pod has its own distinct dialect. “A” Clan is a resident pod, with a home range, although they do move around quite a bit. Apparently these whales choose mates who do not speak the same dialect, thus ensuring that the gene pool gets stirred. He also told us that transient whales are generally silent, because they feed on marine mammals (seals, porpoises) and calling would give away their position. The resident whales feed on fish, and are quite vocal.

Enough natural history – besides, that’s about all I know.

We also talked about the weather, and the overly pessimistic forecasts. Doug told us this is not uncommon in the area. There are separate forecasts for each of Johnstone and Queen Charlotte straits, but these are long straits, and the forecasts cover large areas. Where we were, relatively near the ends of both, the wind is generally less than predicted, as long as it’s a northwest wind. He warned us that when the forecast is for strong southeast winds, we’d get them full strength, and had better find shelter as soon as we could!

We had a quiet night. All the fishing boats had bright anchor lights, and this made quite a scene once it got dark. We tried to take a picture of this floating “village”, but the results didn’t do it justice. We used the 25 pound anchor, since it was all ready, even though it was overkill. This is the first time it’s been wetted, and we found it wasn’t too hard to handle, at least we didn’t knock any paint off Wayward Lass.

Saturday: I woke up before six, and looked out the back of the cockpit cover. Something caught my eye in the kelp, so I took another look through the binocs and there was an empty kayak caught in the strands. Luckily I’d had our little inflatable out to visit the researchers’ camp the night before, and hadn’t deflated it. I jumped in and rowed over to the kayak, which was in perfect order, equipped with tow line, pump and spare paddle, all neatly strapped to the deck. There was no water in it, which made me think it had probably just floated away rather than capsizing – a quick scan didn’t reveal any dead, drowned kayakers, anyway!

I really didn’t want to give that kayak back to anyone, but one of the researchers had mentioned a kayak camp about a mile down the shore, so we thought it likely that someone there had neglected to pull it up above the high tide mark. However, we thought we’d let them worry about it while we had our bacon and eggs. While we were cleaning up after, one of the larger fishing boats pulled up its anchor and moved away, revealing a charter/tour boat behind, with a whole raft of kayaks tied alongside. This seemed an even likelier source of stray kayaks, so once we had our own anchor up, we motored over to see if they had lost any. Sure enough they had, so we turned over my find – Ouch! They were grateful, and asked if they could do anything for us in return, but since we were now homeward bound, we had to decline. We couldn’t even manage another cup of coffee so soon after breakfast.

We motored out through the same gap in the kelp, and started west. We had hardly gone any distance though, when we saw a pair of whales about 300 hundred yards away, just ahead of us and closer in to the shore. Thinking they were coming our way, and remembering the whale watching guidelines, I shut down the motor, but the whales were going west as well so they didn’t get closer. I restarted Honda, and carried on our way, which paralleled the orcas’ course, keeping them on the starboard bow. After a while, they started to pull away from us and I thought they were headed for Blackfish Sound. However, either these two, or a different pair, suddenly appeared closer to us, on a converging course. The guidelines say you should stop your engine and let the whales leave the area, but I felt that in this case, there wasn’t much point. The whales were faster than us, and they were the ones choosing to come closer. We had our own destination, and I thought that if we kept a constant course and speed, they could easily avoid us.

In the event, they pretty well ignored us. Our courses continued to converge, and I took as many pictures as I could. I had to guess where they were likely to rise next, set the focus to what I thought was the right distance, and sit with my eye glued to the viewfinder. A lot of the time I missed the picture by a fraction of a second.

They were coming closer, as I said, but it was still a surprise when the big bull (identifiable by the six-foot fin) surfaced immediately ahead of us, less than a boat length (20 feet) away! I heard him puff, but couldn’t see him properly – I had to settle for a snap shot of his fin sticking up above the cabin hatch. That’s about as close as I ever expect to get to a killer whale in the wild.

The two whales continued on their way, and we continued on ours, now slowly moving apart. I didn’t get any more pictures, but we did get several excellent views of them – once both rose together, we could clearly see the markings on the top half of their bodies – that would have been a prize-winner if I’d got it on film. I couldn’t really complain though, we’d had a fantastic sight of these powerful and intelligent creatures.

Here’s the best that I did get, using a 200 mm lens.

Close… This is a bull, note the tall dorsal fin.

Close…
This is a bull, note the tall dorsal fin.

Closer… The cow this time, with a shorter dorsal fin..

Closer…
The cow this time, with a shorter dorsal fin.

Closest! This is the bull, less than twenty feet from Wayward Lass. That’s the hatch cover in the foreground.

Closest!
This is the bull, less than twenty feet from Wayward Lass. That’s the hatch cover in the foreground.

That was about it. We dodged a few more gillnets, not so many as the day before, and we tried to sail, but the wind just wasn’t there and we took the sails down again after only a few minutes. We pulled in to Telegraph Cove well before lunch time – and not long after low tide. We had some fun recovering Wayward Lass because of that low tide. The end of the ramp drops off abruptly, and we couldn’t get the trailer in very far – the bunk for the keel was left 2 or 3 inches above the surface. We lined up the sloping forward part of the keel with the “U” of the centre bunk, and Dad held Wayward Lass there with the outboard while I hooked up the winch and started cranking. Once the keel couldn’t float out of the “U”, Dad shut off the motor and moved to the bow, to lighten the stern, then I proceeded to pull Wayward Lass right out of the water and up onto the trailer with the winch. However, I don’t recommend this, since I found after that I’d bent the steel frame of the winch, and may have to replace it.Then we drove home. It was a great trip (is there any other kind?) and I think we’re getting better at this. I’ll mention some of the things that made a difference – probably pretty obvious things, but it’s taken me this long to figure them out, so I’ll do it anyway.

We’re slowly improving our standard of living – we ate well, despite having only one meal ashore. I planned the menu carefully, and didn’t resort to canned stew – although we did take along home-made spaghetti sauce and stew. We carried a soft-sided cooler this time, freezing our spaghetti sauce, stew, juice and milk before leaving home. They didn’t stay frozen for very long, but everything stayed cool, at least. The milk lasted three days like this.

A thermos is an essential part of our cruising gear. We had the stove going every morning and night, and we refilled the thermos each time. This gave us hot drinks first thing in the morning and throughout the day – we find these take the sting out of cold wind and rain. We also made a habit of having a glass of wine before dinner – this made a nice finish to the day’s efforts. A two litre sack of Australian red lasted us the whole trip, and the sack was far more practical than bottles as it kept perfectly..

Once again we used the tarp over the boom – this did the job, but we had to hunch over in the cockpit. A Mark II tent was in build, but didn’t get done in time. This has since been finished and tested, and has greatly improved our accommodations, letting us sit erect like human beings!

That’s it for now. So long and good sailing!

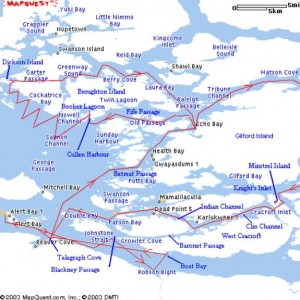
Where we went…

image032

By coincidence, Mapquest cuts off the same piece of the chart that we were missing. To show it here, I would have to make the chart too small, or lose some of the west side. So I figured if we managed without the eastern part of Tribune, so could you!

***

Mystery Cat-Yaw – a conversation

David Huckabee (dhuckabee@crs.loc.gov) has sent you the following article from the Camden, Maine VillageSoup.

I wonder, is this “abandoned daysailer” in Rockland, Maine a modified Chebacco?

THE MYSTERY OF THE DESERTED DAYSAILER – (09/09/03)

To read the complete article, click on the link below.
http://rockland.villagesoup.com/Community/Story.cfm?StoryID=17229

—————————–
Camden, Maine VillageSoup – All Things Community
http://camden.VillageSoup.com
thecrew@VillageSoup.com

—————————————————————————————-

Sure looks like one. I’d bet it’s Samantha.

—————————————————————————————-

I don’t see Samantha on the registry.  Has she been stolen?

—————————————————————————————-

It’s on the for sale page.

—————————————————————————————-

I just called his number and asked him if his boat was stolen.  When he
said no, I started to tell him that it might be in Portland, and we were
disconnected before I could complete my sentence.

—————————————————————————————-

Richard,

I talked with the Portland Maine harbor master this morning.  The
Rockland police have identified the owner as Paul Thober.  The harbor
master confirmed that the boat is Samantha.  He has tried to reach Paul
at the number in your the advertisement, but thus far Paul has not
responded.

—————————————————————————————–

Any updates?

—————————————————————————————–

Richard,

Not yet.  I’m in Washington, DC, where we are consumed with
Hurricane interest right now.  I plan to give the harbor master a call
when we get over the hysteria to see what is going on in Rockland ME.

David

——————————————————————————————

David Huckabee (dhuckabee@crs.loc.gov) has sent you the following article from the Camden, Maine VillageSoup.

Update on Samantha.

TIPS ABOUND, BUT VESSEL’S IDENTITY STILL A MYSTERY – (09/15/03)

To read the complete article, click on the link below.
http://rockland.villagesoup.com/Community/Story.cfm?StoryID=17356

—————————–
Camden, Maine VillageSoup – All Things Community
http://camden.VillageSoup.com
thecrew@VillageSoup.com
———————————————————————————————

Richard,

See the attached message from the editor of the community
newsletter regarding the status of Samantha.

David

++++++++++++++++++++++++++++++++++++++++++++++++++++++++++++

Hi David,

Thanks for the information.  I’ve passed it along to the local police
and harbormaster to help with their investigation.

If you happen to contact Mr. Thober again, have him get in touch with
Rockland PD (594-0316) or the Harbormaster (594-0312) quickly. Soon, the
boat will be sent to the city’s impound lot, where it will sit.

Don’t hesitate to contact me as well, if anything else comes up.  And
thanks again.

Tony Ronzio

Anthony J. Ronzio
Rockland Bureau Chief
VillageSoup.com/VillageSoup Times
207.594.5351 ext. 330 (office)
207.594-5481 (fax)
201.691.0643 (mobile)
aronzio@villagesoup.com

—–Original Message—–
From: David Huckabee [mailto:DHUCKABEE@crs.loc.gov]
Sent: Tuesday, September 16, 2003 9:59 AM
To: Anthony Ronzio
Subject: Mystery Cat-Yawl

Deary Anthony,

I too believe the mystery boat to be a modified Phil Bolger
designed cat-yawl, Samantha, owned by Paul Thober.  After reading your
story last week, I forwarded a copy of your article to the editor of the
on-line Chebacco newsletter (Richard Spelling) in Canada.  (See
https://www.chebacco.com )

He replied that the boat looked like the Samantha which had been
listed for sale on his web site.  (see text below) In the middle of last
week I called Paul Thober at the number listed in his advertisement and
asked him whether his boat had been stolen.  He replied “No.”  I then
told him that a modified Chebacco 20 had been found abandoned in
Rockland.  Before I could finish saying “Rockland,” our connection was
lost.  I don’t know whether he hung up, or we lost a signal.

After talking with the Harbor Master, who had obtained Mr. Thober’s
number from other sources, I was told that his office had not been
successful in reaching Mr. Thober.

The connection between the boat and Mr. Thober could be more easily
made once the boat is pulled from the water.  Most Chebacco 20’s have
been built with a shorter cabin, and more importantly, a combination
keel-centerboard.  According to Mr. Thober’s advertisement, this boat
was built with only a keel.  Very few Chebacco’s have been built in this
way.

David Huckabee
++++++++++++++++++++++++++++++++++++++++++++++++++++++++

—————————————————————————————-

Richard,

I was in Rockland, ME the week of Oct. 13-18.  I stopped in at the
Rockland harbormaster office and inquired about the boat.  It was still
on a mooring, but was scheduled to be pulled on the 18th.  Rockland now
has decided that the city owns the boat.  In six months they will
auction it off.

The Rockland city attorney was in Portland, ME on other business,
and stopped in at the previous owner’s last address.  He had moved,
leaving no forwarding address.  Also, the phone number listed in his
advertisement on your web site has been assigned to another person.

The mystery continues.  Since the boat was stripped of all
equipment, sails, etc., maybe the previous owner is intending to build
another boat.

David Huckabee

———————————————————————————–

K. Thanks. Will make an interesting story for the next issue of Chebacco, if nothing else! 🙂
***
Change and other horrible things ­- Richard Spelling
As many great changes in life do, this particular change started with the most trivial of things. It started with a ripped tarp. One of the occasional visitors who come to see my Chebacco was here, and we were putting the tarp back on the boat. It ripped, like the proverbial tissue paper. To many high energy photons would be my guess.
Now, this wasn’t one of those cheap plastic things, it was a birthday present from my mom, a nylon, Cordova, tarp from Northern Tools. Quite expensive, bought on the theory that I wouldn’t have to buy a cheap plastic tarp every year, if I had a good nylon one on the boat.. It didn’t last as long as the cheap plastic ones last.
This effect, officially called “The Richard Spelling Wastes Money” effect, is quite common around this part of the country, for some reason. I buy something cheap, to save money. Then, I buy something else, cheap, to replace the first cheap thing I bought, and eventually I wind up spending more on cheap crap than if I had just went out and bought the good stuff in the first place.
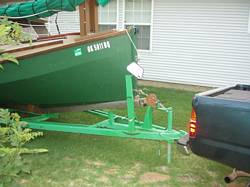
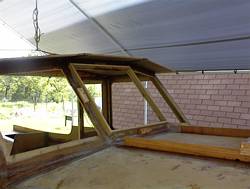
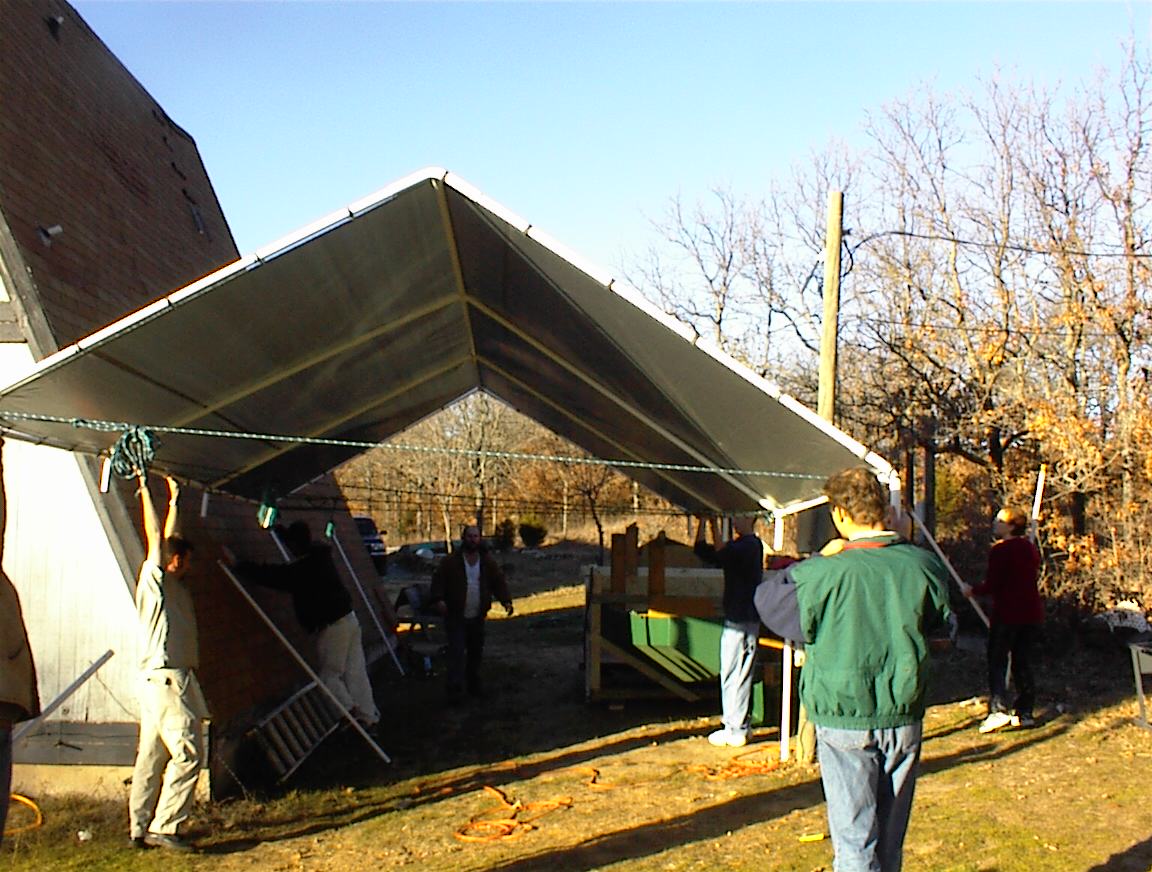
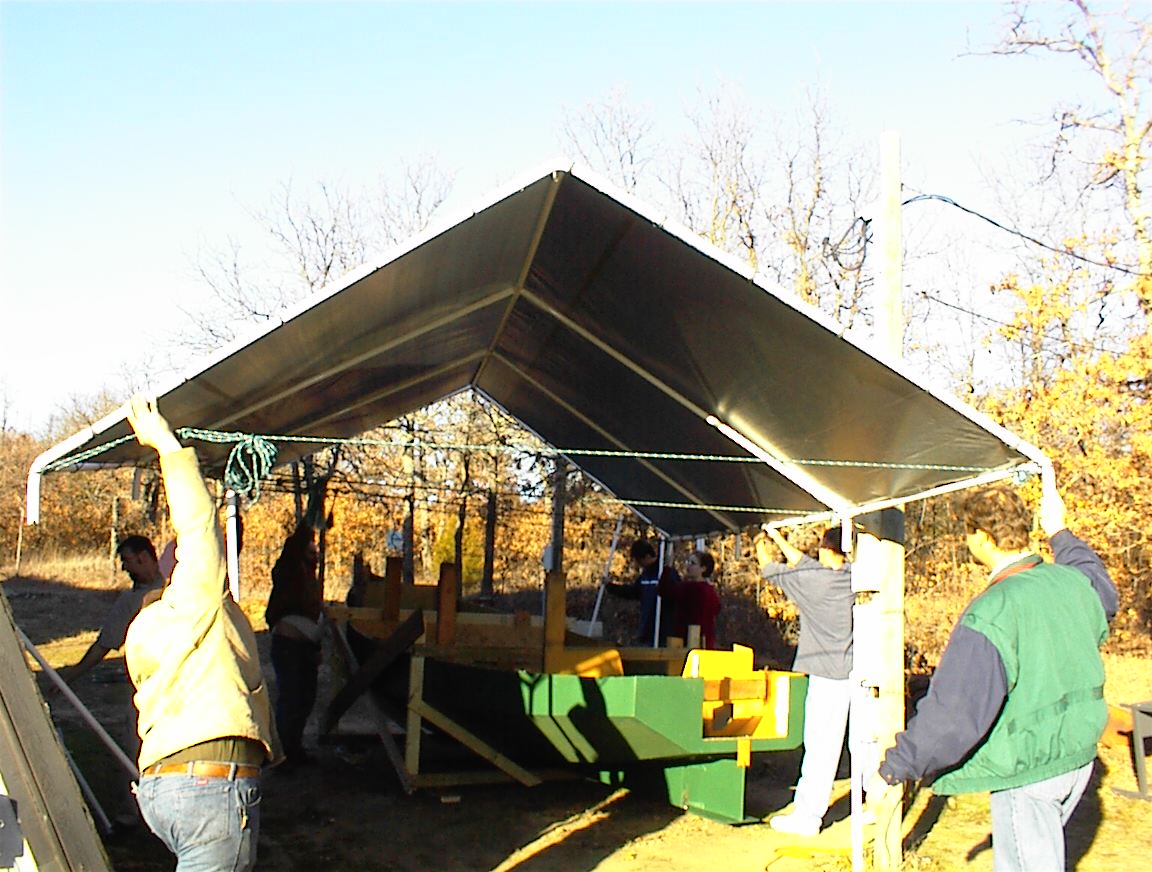
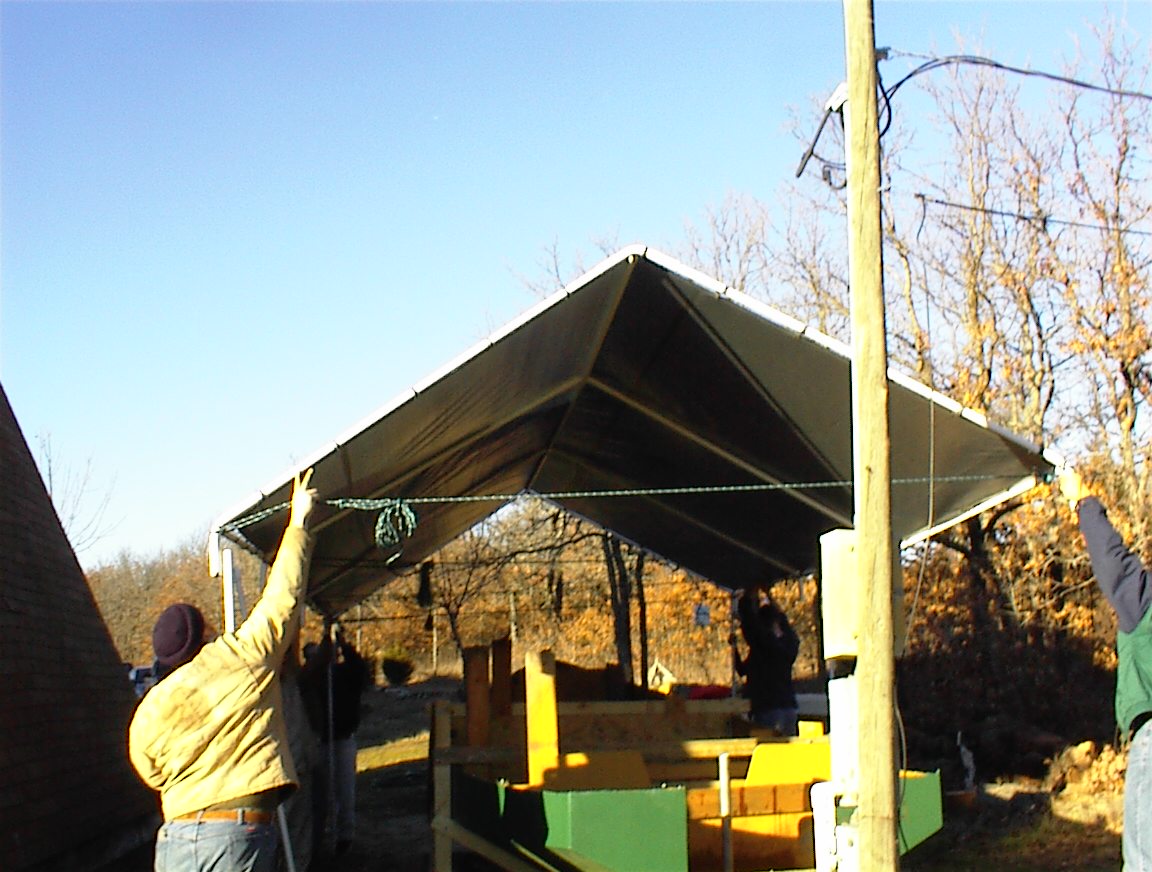
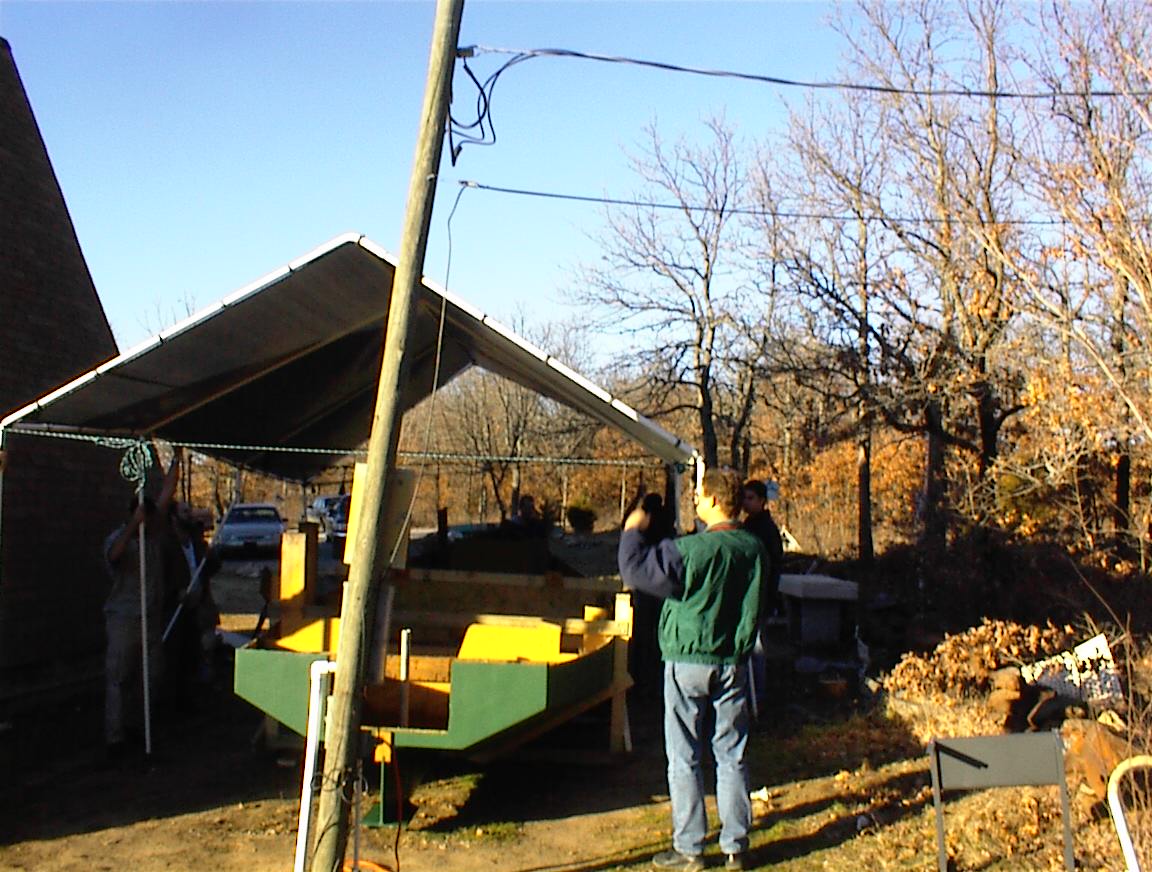
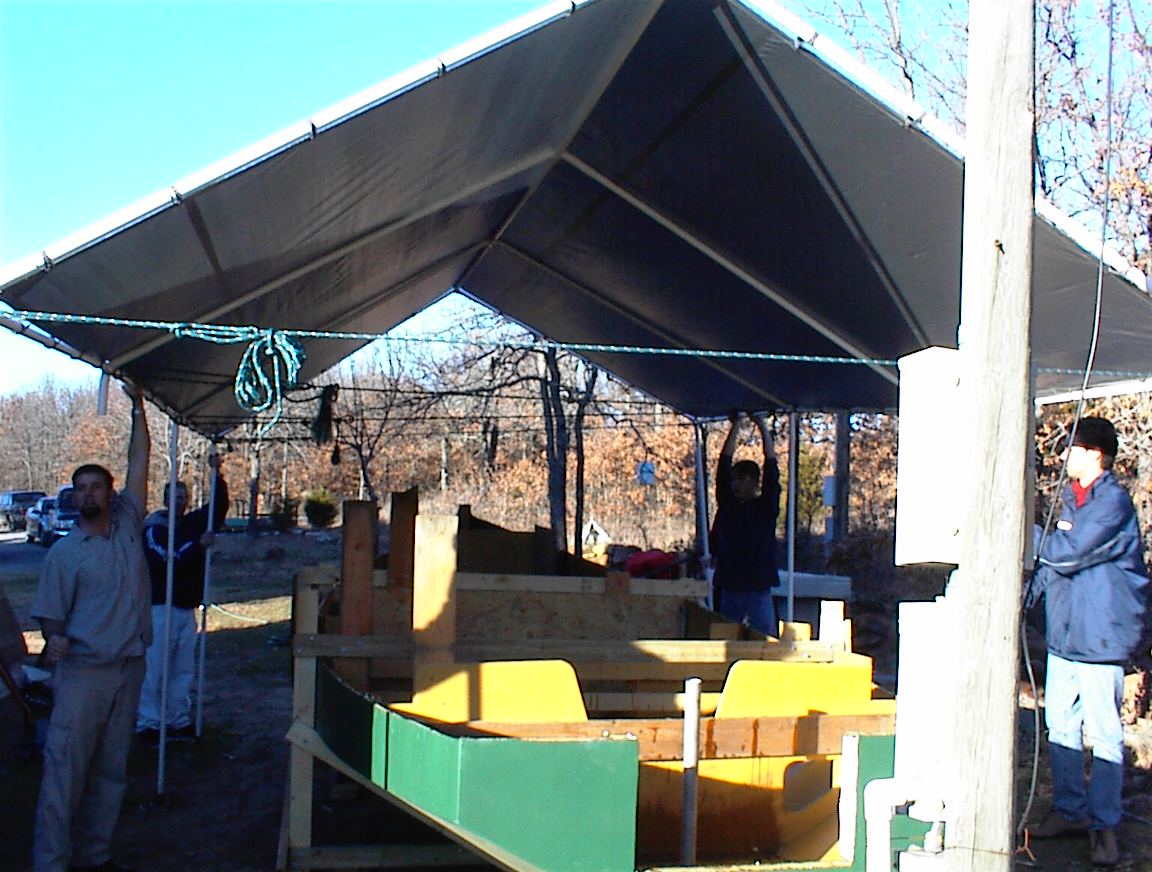
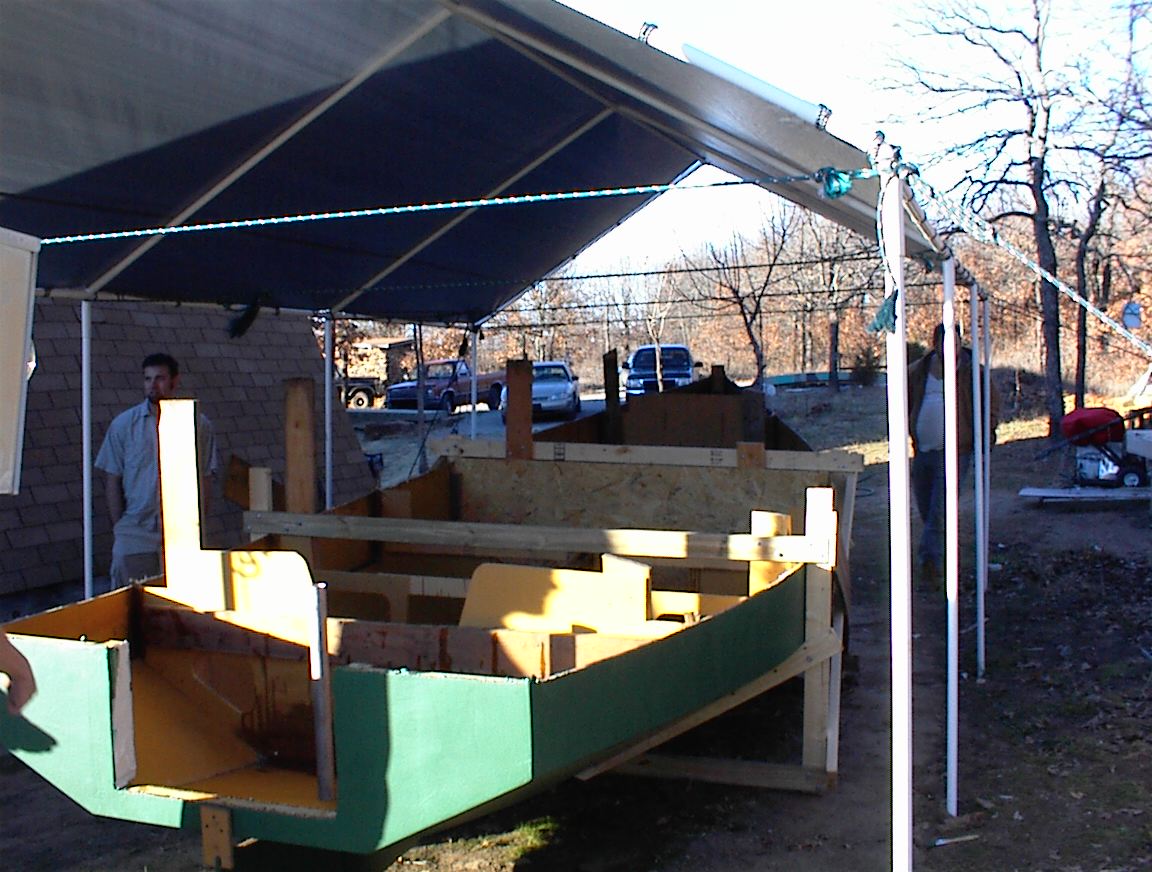
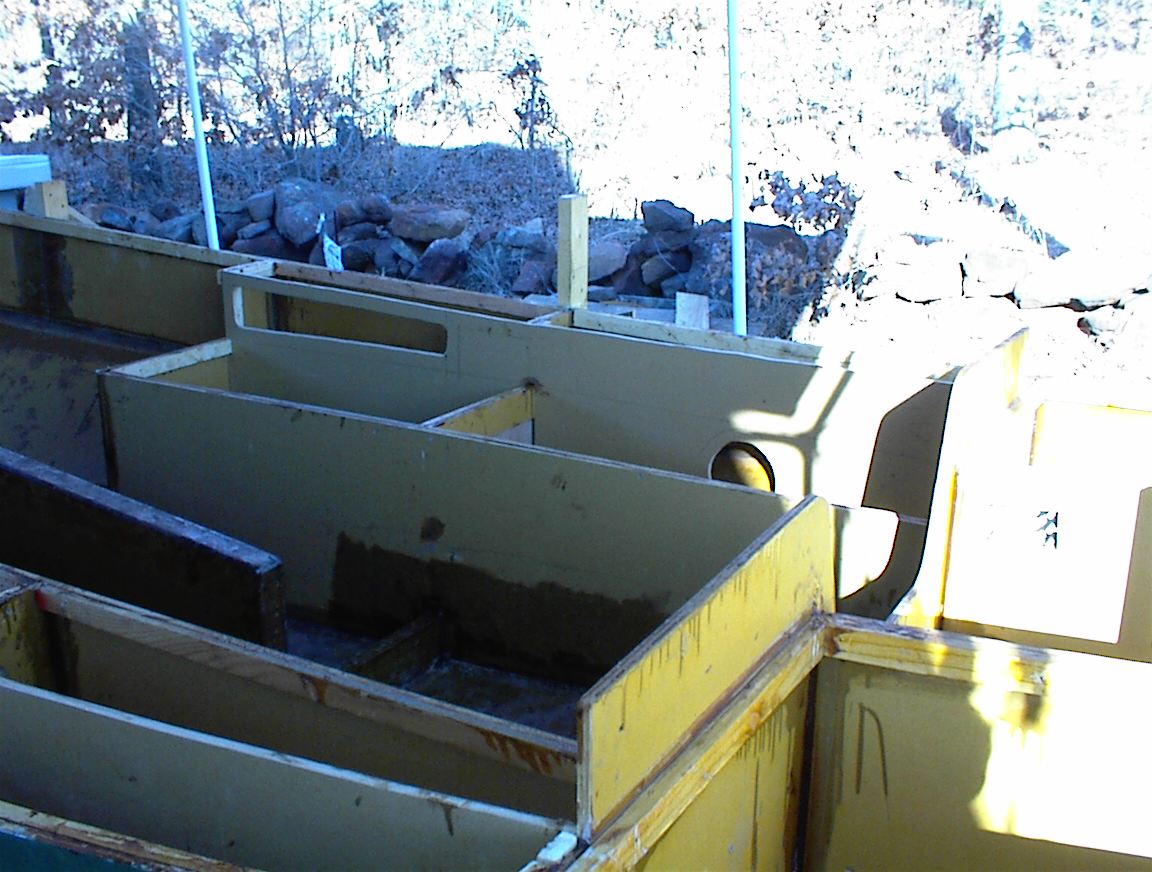
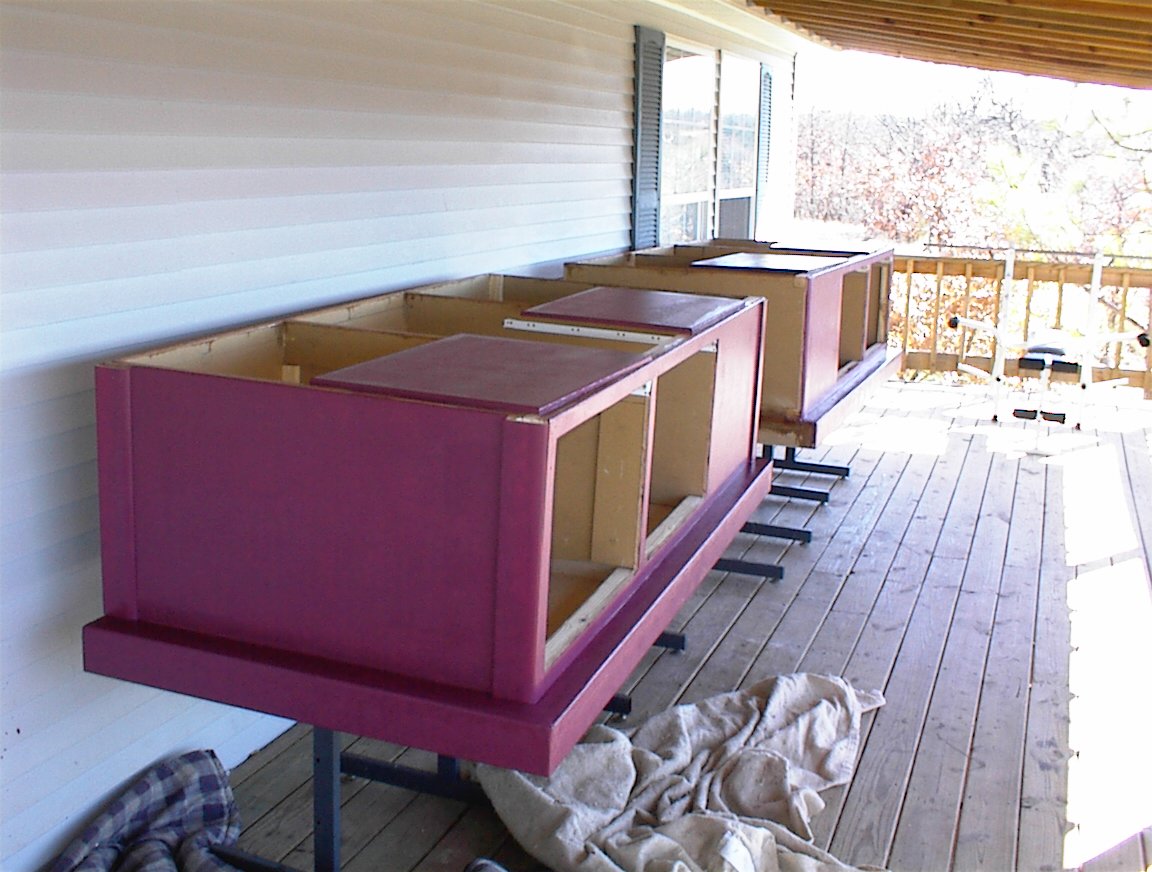
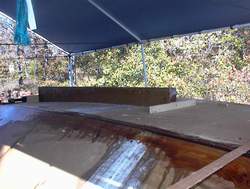
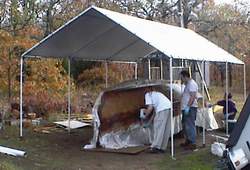
So. I decide that this very nice boat that I spent a years worth of blood, sweat, and tears building, needs to be kept out of the weather There are little 18×20 carports for sale all over the place in this part of the country, they sprout up like mushrooms, appearing from nowhere at used car lots and pawn shops and trailer shops. At least that’s how it seems when you start looking for them! So, for $595 I can have a carport to keep Schroedinger out of the rain.
But wait, theres more! My Chebacco is almost 8ft tall while it’s on the trailer, and the trailer and boat together are about 23 feet long, so I would need to add height and length to the carport. Also, if I’m going to have carport, I might as well park the truck under it. Then I’m not parking the boat in the middle, so I’d need the extended side walls to keep the wind from blowing rain sideways into the cockpit.
Of course, now we are considerably beyond the original $595. Well, if I’m going to spend THAT much, I should go the extra mile and just build an enclosed garage, so I can lock the boat up! But hey, if I’m going to do that, I should be able to lock the black truck up as well, so I’ll need a three bay garage. Oh, yeah, and the best place to put it requires I have two doors, so I can drive through the garage to access the back yard.
Now we are talking real money. Ouch!
So, what is my solution to this paltry financial dilemma? I have one. Can you guess what it is?
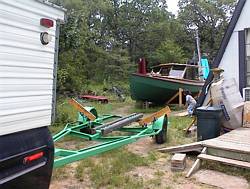
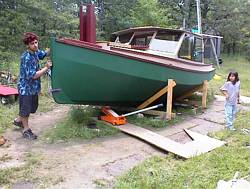
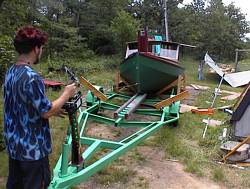
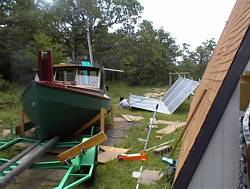
I’m selling the house, buying some land,  and putting up a huge shop/garage, and a small trailer house. Seriously. Guys at work think I’m crazy. Maybe I am.
However, this solution addresses several concerns, one being the proper storage for my boat, another being that I currently have two different shop buildings, and I get tired of walking a couple hundred feet every time I forget a tool. Also, there is the nagging desire to do something different. Build an underground house, or straw bale, or live in a log cabin, or a monolithic dome, or something. Also, there is the very small issue of having no mortgage. Let me say that again. No…. Mortgage…. What equity I have in this house will buy a very nice used trailer, outright. And shop. Or, I may buy an RV and live it in while I build a log cabin in the woods. Or something. Options. I have options again! Actually, the first thing I need to build is a shop, and a place to put my boat! A man must have priorities, after all!
***
Some pictures – Donna + Vincenzo
Dear Richard,
Several months ago Vincenzo promised to send you some photos for your calendar.Sorry it took us a while to gather them together.
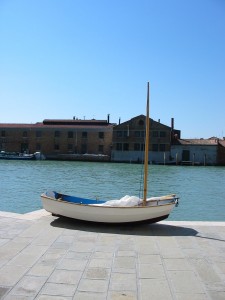
no. 37 is a photo of our nutshell pram, Sissy, ‘parked’ on the island of Murano.
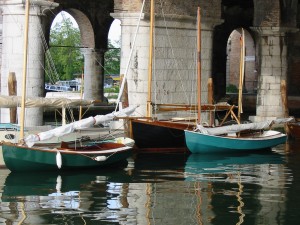
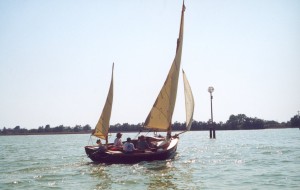
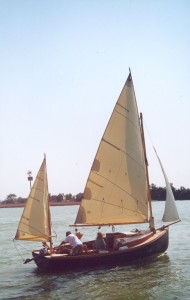
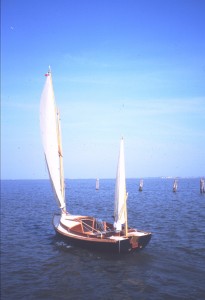
no. 104 shows our Chebacco, Kitty Hawk, with 2 Bobcats, moored in the Arsenale di Venezia.
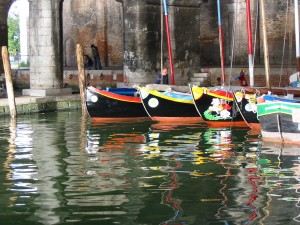
no. 105 shows traditional Venetian luggers (topi) in the Arsenale.
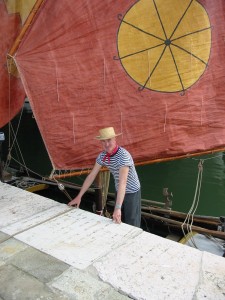
no. 118 shows our friend Luciano dressed in traditional fishing garb on his topo, ‘Mirko’.
no. 145 shows a 2 guys on an Ian Oughtred Granny Pram sailing in the Venice lagoon.
sisa1 shows ‘Sisa’, a traditional Venetian lugger (Sanpierotta) that belongs to the sailing club where we are members.
Donna + Vincenzo
IMG_0037 IMG_0104 IMG_0105 IMG_0118 IMG_0145SISA_1


***

Mary-Beth, Too – Dave Neder

Good Evening:

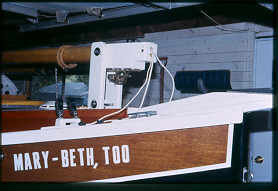
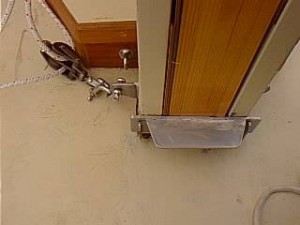
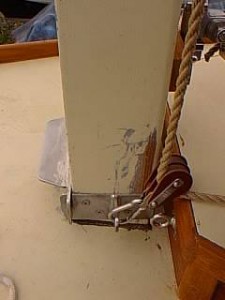
The mast base detail shows the cable and antenna lead exists.  My VHF antenna is mounted on the mast head.  The anchor light is also mounted on the mast head.  I also have a “machinery light” on the forward part of the mast approximately 18” above the highest location of the gaff jaws.


MASTBASEDETAIL

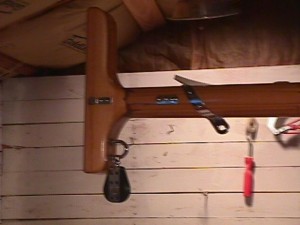
The tiller head is made of oak and self tapping screwed to the tiller post.
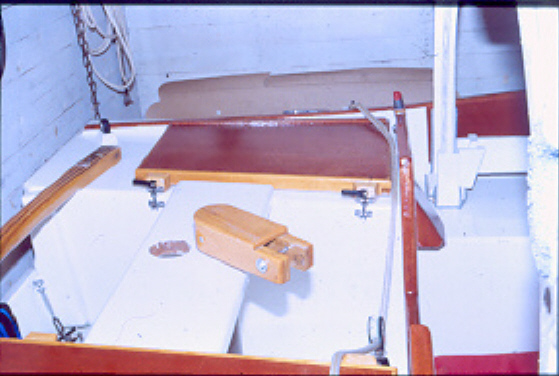
TILLER HEAD

The ventilator is photo cell charged.
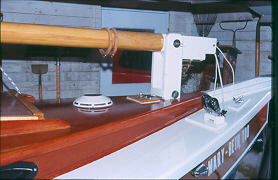
VENTILATOR

The sky was just too beautiful a picture to pass up.
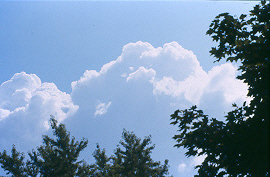
SKY

Regards

Dave Neder

***

Stealing Horses from the Barn and Back Again

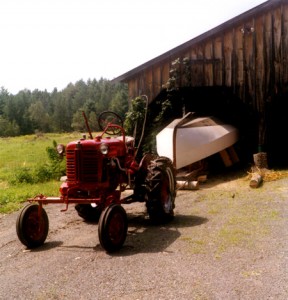
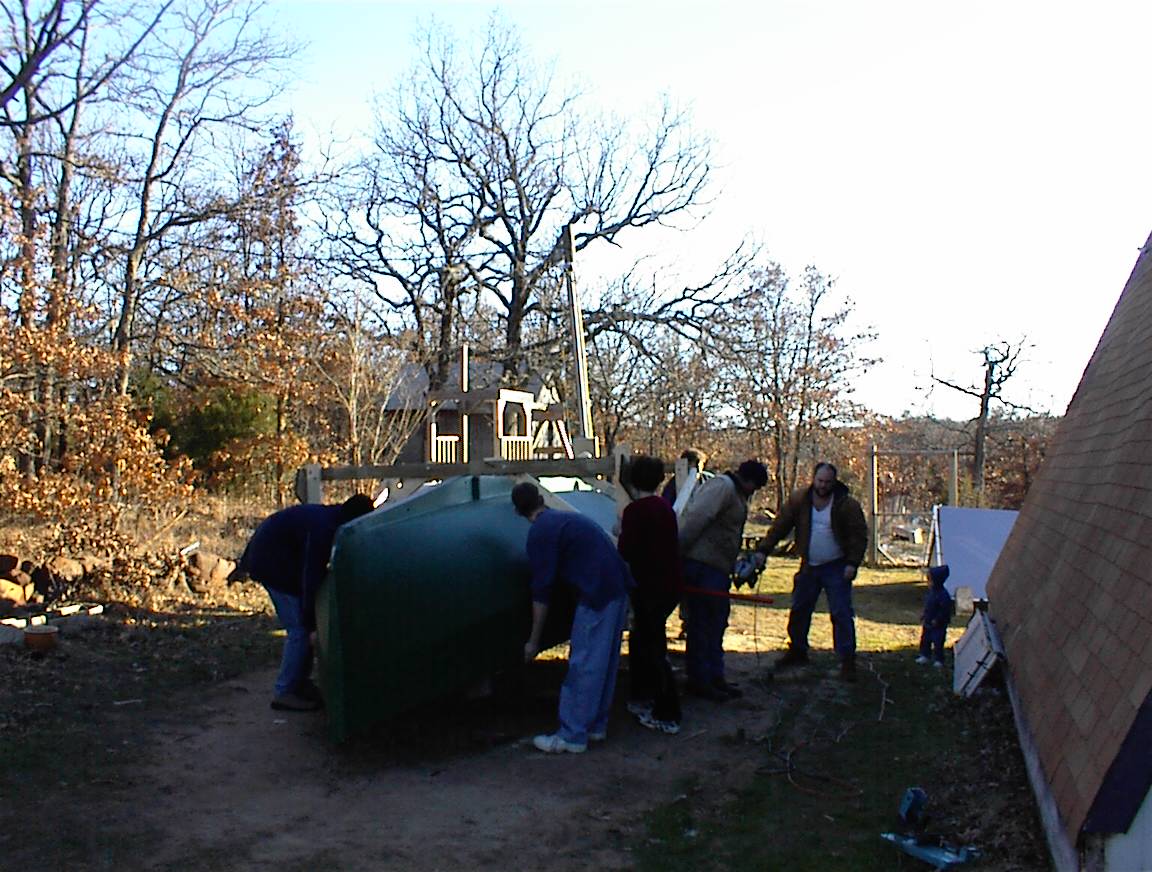
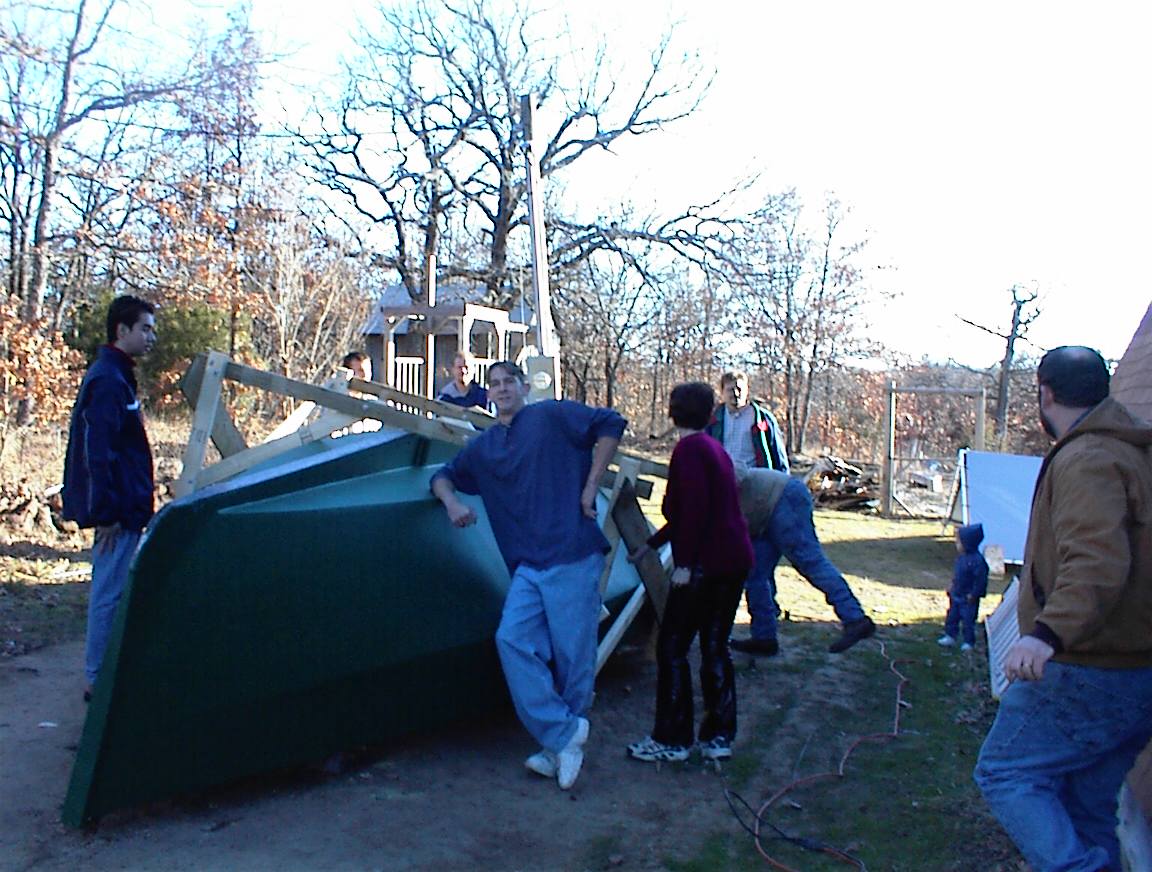
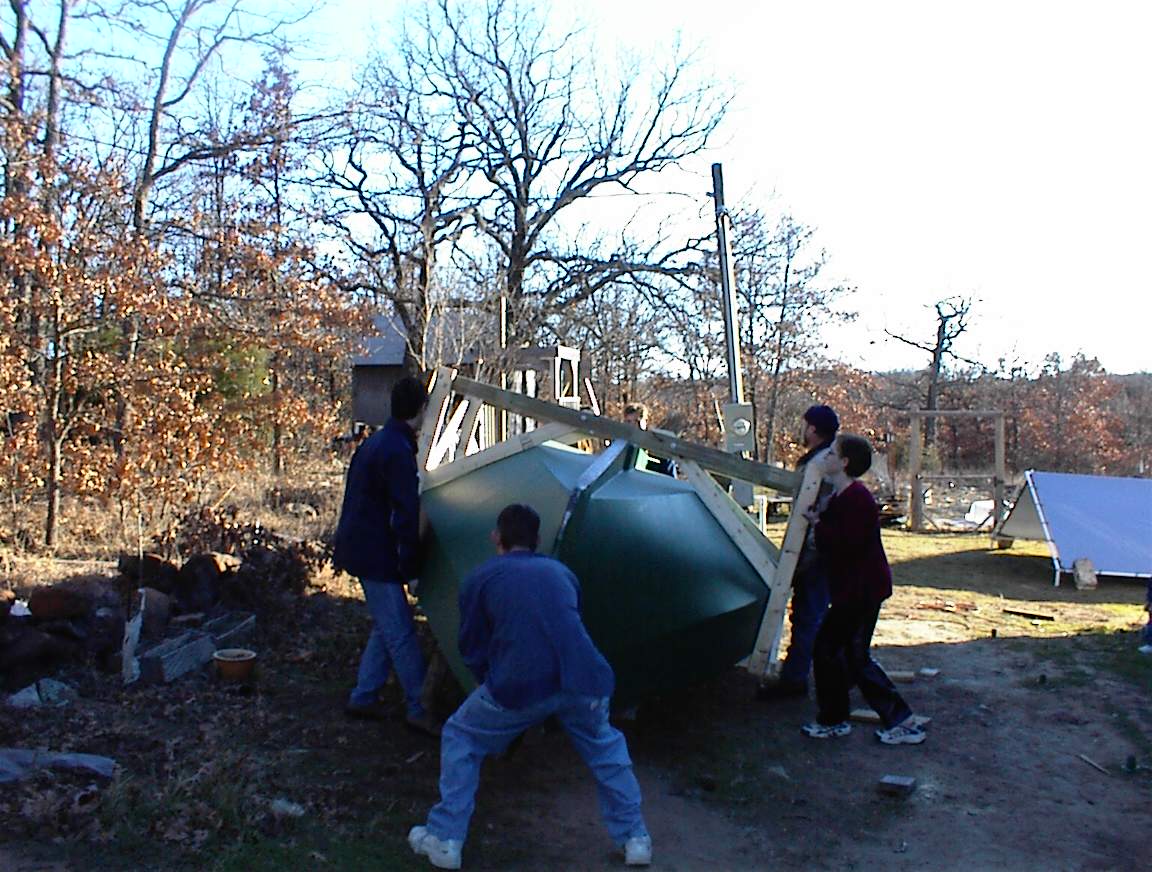
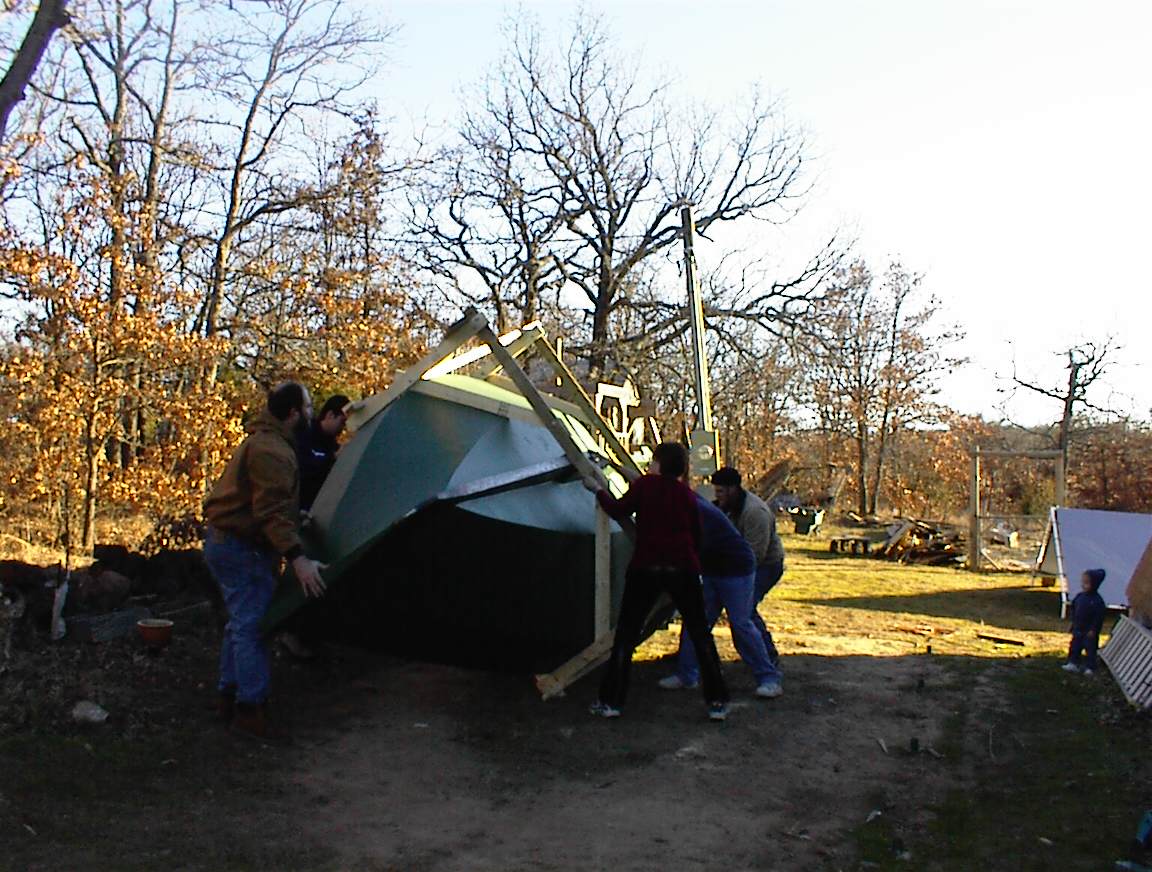
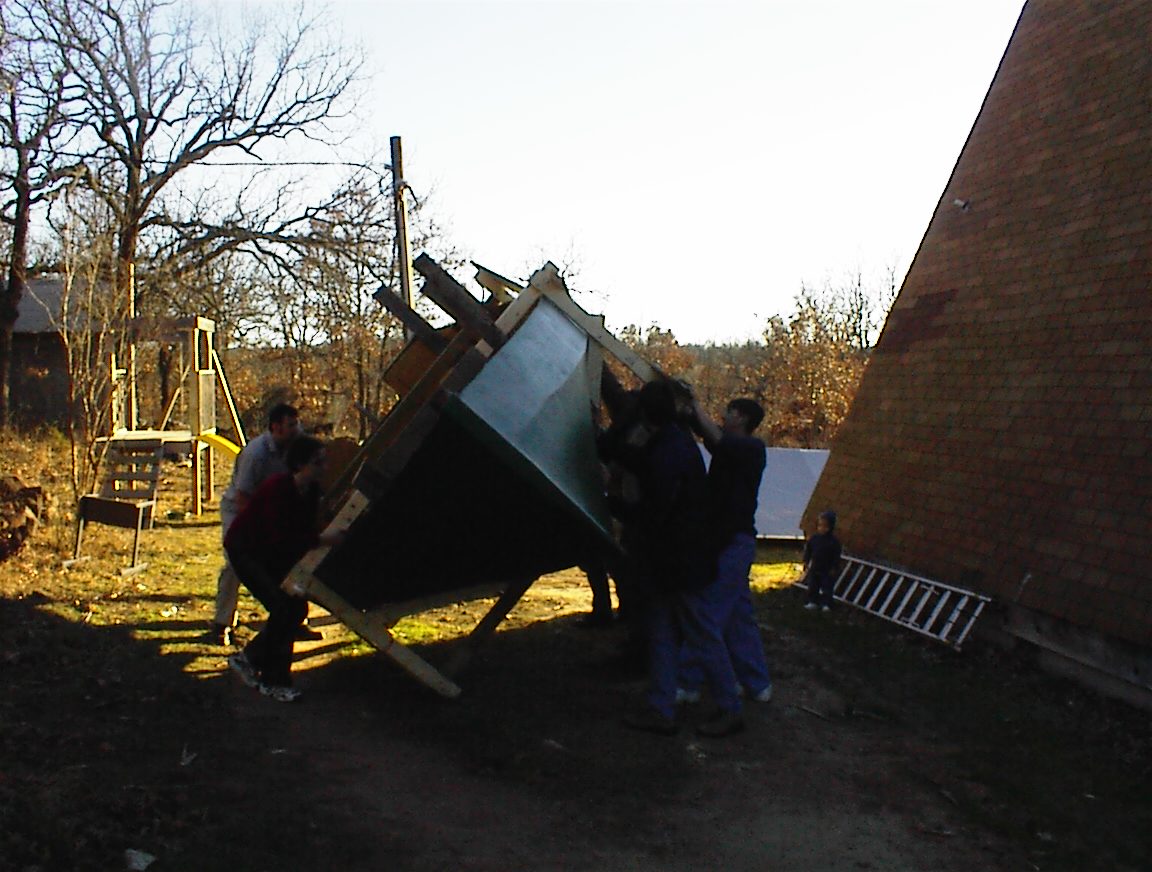
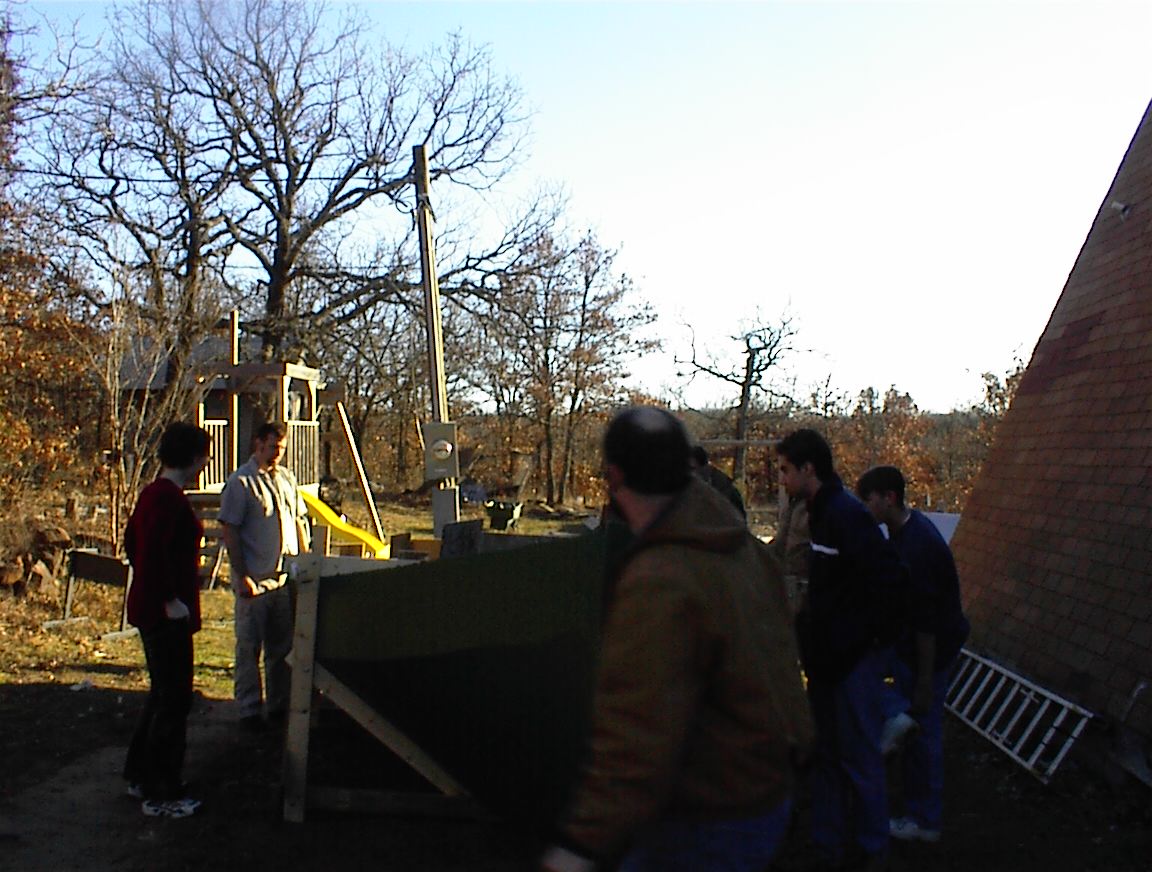
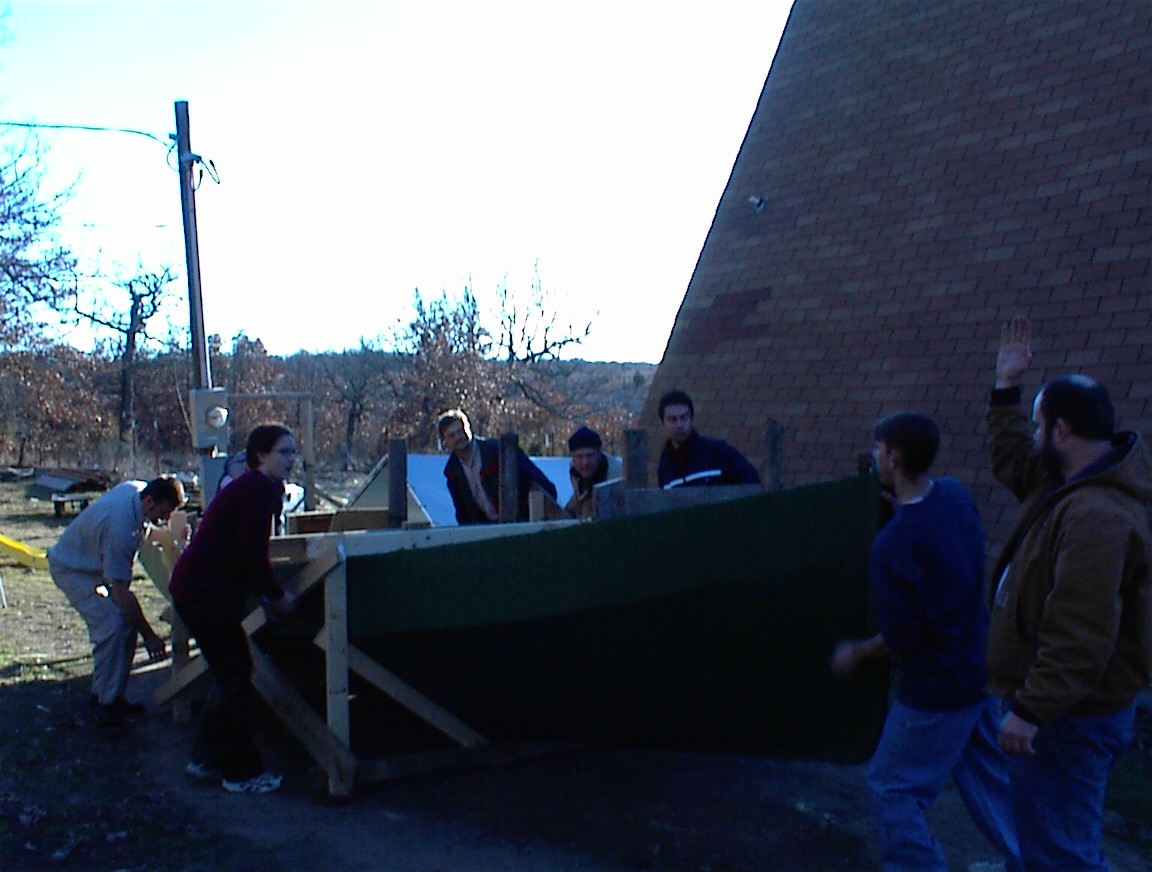
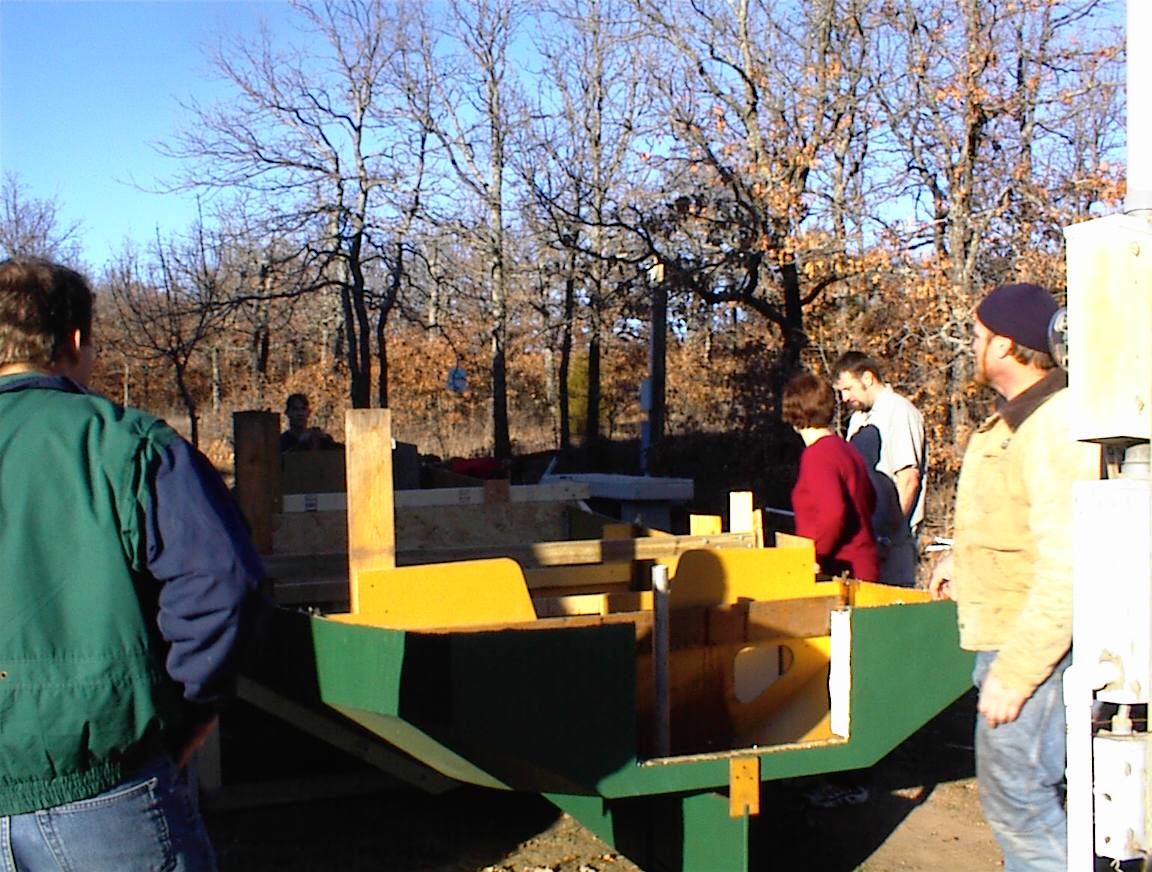
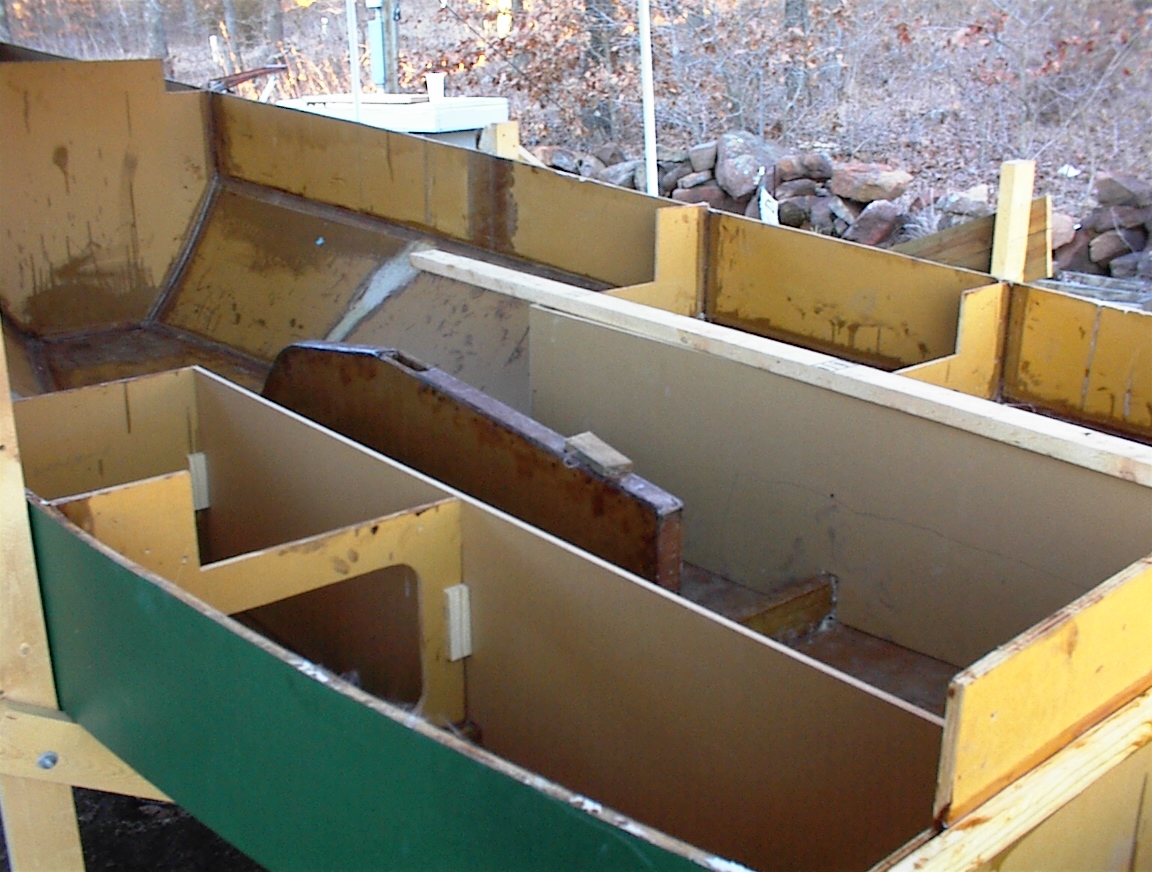
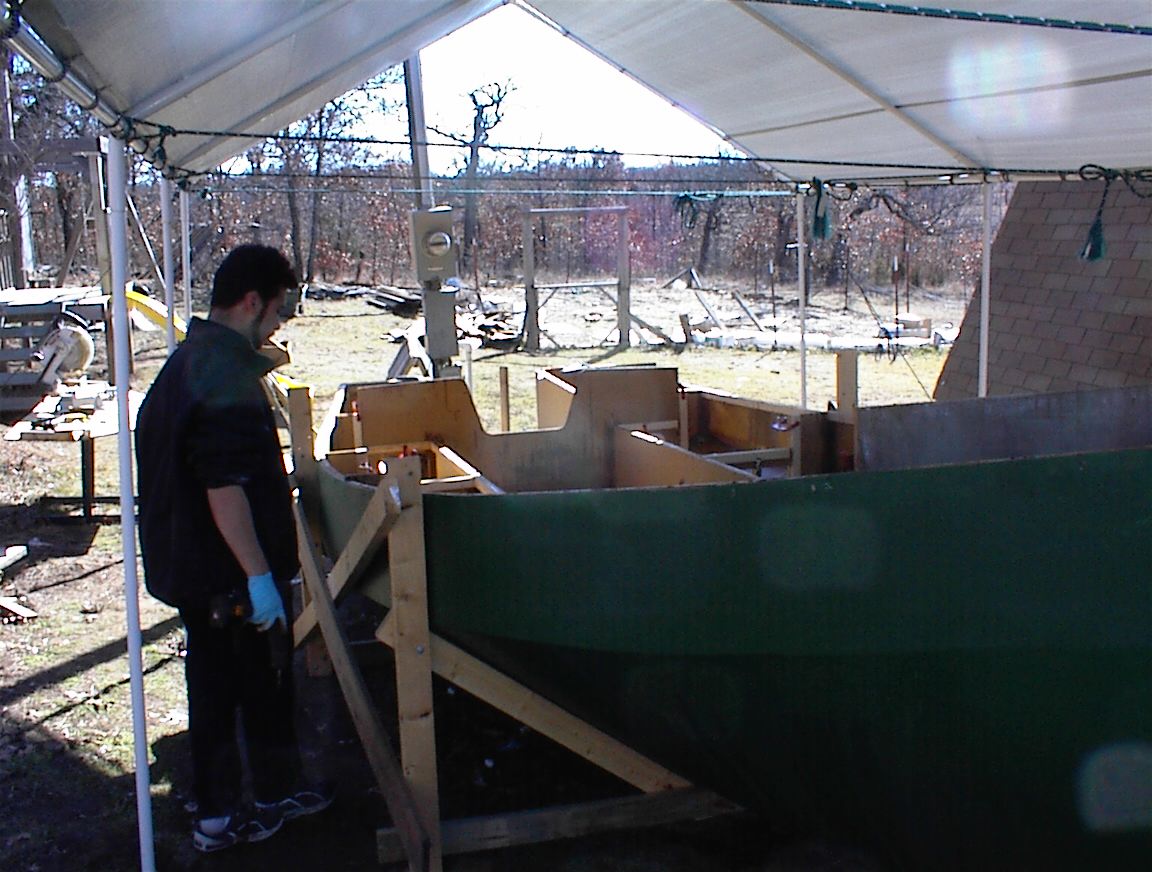
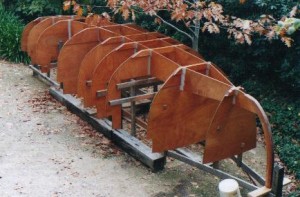
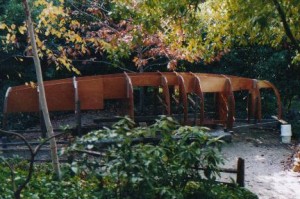
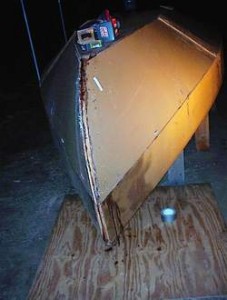
After a year upside down in the barn while we were overseas, Stealing Horses was ready to be flipped. We slipped birch logs under the strongback, and pulled her out with the tractor. A bit of washing was in order!

image001

Then, a few days later, a bunch of people came over early one morning for the flipping. The sheep were interested!

image003

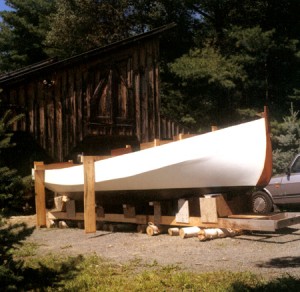
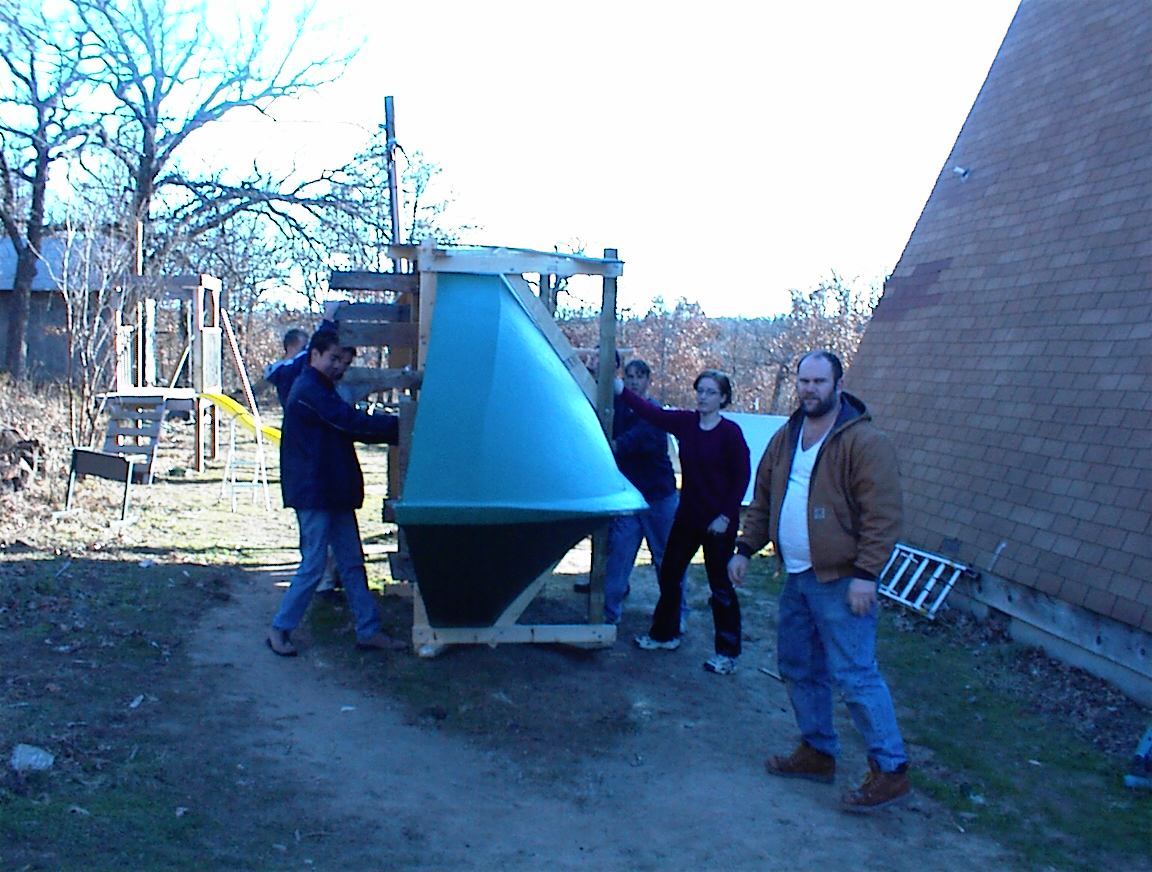
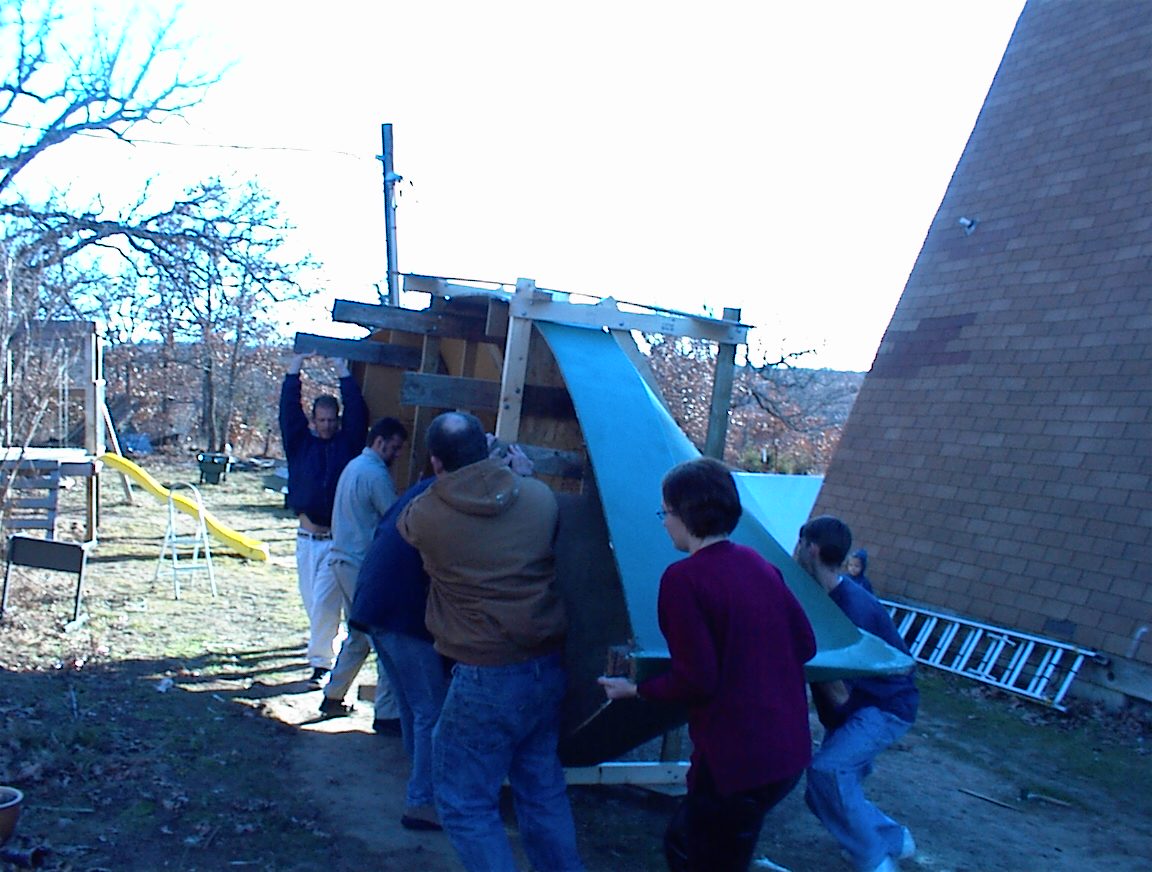
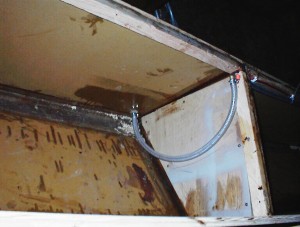
We bolted 2x4s across the boat at the transom and various bulkheads and molds, and connected most of these with a longitudinal 2×6 that was some 8” beyond the topside. This was the pivot for turning over on gravel. Then the boat was lowered down on to old tires.

image005

We had set carpeted seats for each of the mold/bulkhead locations and we then walked the boat back on the strongback. With not much effort we then nudged Stealing Horses back in the barn with the tractor, careful to not tip her too much. Will we make progress next season? Hope so!

***

An Interesting Quote – Randy Wheating

Hi Richard

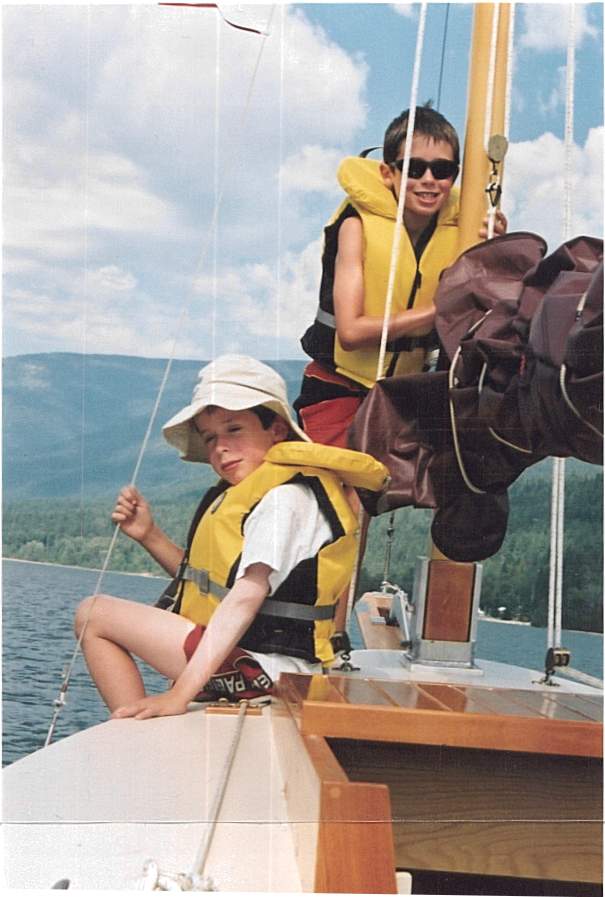
I forgot to add this photo with the earlier one.  My two boys, Jacob and Samuel, on Bluster.

boys_on_bluster

Randy Wheating

Hi Richard

I came upon this interesting quote by the American adventure writer Ernest Gann:

“A good boat should drink six, eat four and sleep two.”

I think our Chebaccos fit this description quite nicely.

Cheers,

Randy Wheating

Ps  I have attached a photo of our ‘Bluster’ beached on the east shore of Kootenay Lake, located in central British Columbia.  This area is known locally as Crystal Beach because it is the site of a turn of an early 1900s smelter and one can search for crystals in old mine debris piles along the shore.

Bluster_crystal_beach

***

KittyHawk under wraps – Donna + Vincenzo 


Dear Richard,


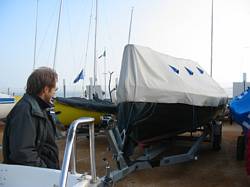
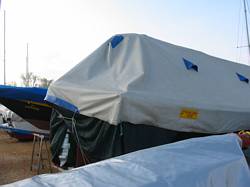
Attached are some photos of our Chebacco, KittyHawk, covered with her tarp and skirts. The tarp is made of heavy PVC and has six vents to allow air circulation (the blue triangles in the photos).  It was custom-made to fit snugly over the tabernacle and extends 20 cm over the rail. The most sun-exposed parts of Kitty’s black hull are draped with skirts made of cheap loosely woven plastic fabric. The tarp cost about $230 to make, but was worth it, because it protects the boat from the sun,  rain, dust, and ‘peeping toms’.

Buon Vento

Donna D’Agostino

Vincenzo Ciminale

tn_IMG_0470 tn_IMG_0472

***

Sidney Spit – Randy Wheating

Weekend Chebacco Rendezvous

Wayward Lass and Bluster

Sidney Spit Marine Park, BC

August 23-25, 2003

image002

On August 23, Lisa and I along with our two boys Jacob and Samuel (ages eight and six respectively) of Chebacco Bluster spent a wonderful three day cruise in the company of Chebacco enthusiast Jamie Orr and his wife Maureen aboard Wayward Lass.

We met at the public launch ramp in the town of Sidney, BC, located on the southern end of Vancouver Island. This involved an easy ferry crossing from the mainland for us and short drive for Jamie and Maureen.

This was the first overnight cruise for the Bluster crew so there was a fair bit of good-natured confusion but in due course we launched and were off. Loaded down with camping kit, food, water, etc., Bluster carried it all without trouble.

image004

Wayward Lass and Bluster motored together (no wind) across Sidney Channel then deep into the protected bay of Sidney Spit Marine Park. We rafted up to enjoy a cockpit picnic and a toast to our cruise. After lunch we sailed out of the bay to explore some of the surrounding islands for the afternoon. Later, back in the bay, we unloaded our kit. Lisa and the children slept ashore in the tent. The boat-in-only camping area (once a homestead) is a lovely grassy spot with overgrown hay fields and climbing trees. Our kids immediately met other kids and disappeared for exploration and adventures. Jacob asked why we had never come here before. I slept aboard Bluster, anchored just off the drying shallows. Jamie and Maureen slept aboard Wayward Lass using Jamie’s ingenious boom tent.

image006

The next morning we sailed out of the bay for a six-mile (or so) voyage to Portland Island (Princess Margaret Marine Park). We enjoyed some fair winds and the pleasant company of Jamie and Maureen. It is a novelty for us to be able to sail quietly along with another boat, close enough to converse. This is especially interesting in identical boats. Jamie’s experience and experimentation gave him a slight speed advantage so I made a point of keeping Wayward Lass in our wind shadow. We anchored for lunch at Portland Island then Bluster headed back to Sidney Spit (Jacob and Sam were busting to get back to the campground and there new friends there). Wayward Lass arrived back later in the afternoon. With the kids playing and the wives reading on beach Jamie and I took Bluster out for a short sail before the wind died and we motored back.

The final morning revealed precious little water under our keels (we knew we were pushing our luck anchoring so far into the bay). We quickly broke camp and I borrowed Jamie’s tender ‘Creamsicle’ to ferry our kit out to Bluster, now anchored in deeper water. Lisa and Jacob walked the two miles to the end of the Spit while Sam and I brought Bluster out of the Bay to retrieve them. But as they say, the sea can be unforgiving at times….we promptly ran aground on the mud bottom. Between paddling and hopping out to push Sam and I eventually found a channel and freedom from the bay. Wayward Lass, employing similar style and technique also managed to win the race against the tide. The virtues of a Chebacco’s shallow draft, light displacement and keel-protected motor were very appreciated.

We motor sailed back across Sidney Channel to the ramp where we soon had our boats back on dry land, strapped down and ready to drive back to our respective homes.

Many thanks to Jamie and Maureen for their company, guidance and patience.

A very memorable trip.

Randy Wheating

Port Moody, BC

Canada

image008

Chebacco News 45

News, questions, and boats for sale.

News:

Good morning Richard,

How are things going down in Oklahoma? I have attached a URL that describes the building of “Two Grumpy Old Men”

http://www.adventurequest-usa.com/New_Folder/chebacco.htm

All the best,

Mike Haskell, Founder/CEO
Adventure Quest-USA
8 River Road
Bowdoinham, ME  04008
207-666-8976

Questions:

I have a question that I have been pondering and was wondering if some of your readers could answer, specifically, what are the possibilities of coastal cruising the Chebacco or maybe island hopping in the Keys or Carib?
Thanks,
Hi Richard,

I’d love to have one or more Chebaccos sail into the Sept. Messabout in Kingston, perhaps yours.

Would you post the invitation in your Chebacco Newsletter for me? If so, please post the link to http://www.brucesboats.com as the Messabout figures prominently on the home pages with links to three pages on the event, and multiple pages about the area, navigation, the campground, etc.

Do you know who bought Bob Cushing’s Chebacco Motorsailor? I saw that once, it’s a very nice arrangement. So is the new cruising conversion.

Hope to see you and lots of other Chebacco drivers there.

Bruce Hector

Chebacco’s for sale:

Samantha is for sale.

Details:

20 foot sheet plywood Chebacco. Built summer of 2002. Sailed from Portland, ME to Beaufort, NC and back since.

This boat is a modified Chebacco – it varies from the design in the following ways: It has a shallow draft keel rather than a centerboard, the cabin is longer, wider and taller allowing a full length double berth and facing settees with a fold-down table. The cockpit is shorter by the amount the cabin is longer. She is gaff-
rigged.

The following equipment is included: Standard Horizon VHF radio, 80 AH deep-cycle battery, 6 hp Tohatsu 4-stroke outboard with alternator, navigation, anchor and cabin lights, 2 anchors with rodes, dock lines and fenders, Ritchey compass, 2 type III and 2 type V PFD,s, safety harness, ABC fire extinguisher, flare kit, and Nymph
dinghy.

She is located in Portland, ME at present and I could possibly deliver her – that would be negotiable.

This has been a very nice boat, but like many of us boatbuilding sailors I want to build another boat (probably some variation of Newfoundlander).

I am not sure what to ask for this boat. The bare boat may be worth $4000 and the equipment listed above is about $2500 new – plus the dinghy. How about $5500 for the whole package? Make an offer – nothing can offend me – the worst that can happen is I would say yes.

Paul Thober, 207 712 0381, leave a message and I will call you back.

Hi Richard,    My Chebacco Motorsailer is for sale   -It was shown in Chebacco news # 17 and 25   , built in 1997  and has had very little use so it looks like new and is available with or without motor and trailer. Price for boat
alone is 7500.00
Thanks, Bob Cushing       rbrtbobcat@aol.com      315-687-6776   located in
Cazenovia, n.y.
How’s it going?  I wanted to let folks know about my decision to sell my Chebacco.  I really love this Catboat but I love my girlfriend more and want to pursue that a while.  The boat is built exactly to Phil’s Specs.  The trailer was purchased new for $1,300 a couple of years ago and the 1997 Force five hp. Outboard was purchased new for $800 as well (it sat on the showroom a long time I guess).  The sails were purchased as a kit from sail-rite, the mainsail being sewn by a professional, and the mizzen sewn by me since it was small and manageable.  I launched this boat for the first time in April of this year and have taken one two week trip and several small day trips so far.  There are a few normal scratches on the hull and the spars but nothing out of the ordinary.  The hull is planked in Douglas Fir Marine plywood and the floors and roof framing are Douglas Fir.  There are a couple of floors made of Southern Yellow Pine and the trim is all White and Red Oak.  The sliding hatch was cold molded and then veneered on the inside and out with White Oak as were the drop boards – no sign of wear on any of these components.  All trim and spar varnish was Epifanes WoodFinish Gloss and it shows.

Bill Samson listed his for 4,500 lbs. Sterling which is approximately $6,500 I think.  I would like to ask $6,500 to start and see what happens.

Thanks Richard.

Pete Respess
Hopewell, VA

Lapstrake Chebacco 20

LOD: 19′ 6″
Beam: 7′ 10″
Draft: 1′ 0″
Sail Area: 176 sq. ft.
(Lots of wonderful pictures here -Ed)

Built by an experienced amateur. Over four thousand hours building time. The best of materials used. Finished with two-part polyurethane. Sprayed by a professional. Bright work finished with Norwegian varnishing oil (between six and eight coats).

Hull is built of 7 ply half-inch marine mahogany plywood; keel is built of same material, laminated to proper thickness.The keel is covered with double thickness of 11 oz. fibreglass cloth saturated with epoxy. 1/16 inch stainless steel was then attached to the bottom of the keel and up the stem as far as 22 inches above the waterline. Outside of boat is covered with 11 or 6 oz. fiberglass cloth which was then saturated with epoxy, then an additional four to five coats to allow for sanding to a mirror finish before painting. Inside has four coats of epoxy.

Spars are solid sitka spruce. Fittings are all top quality such as Harken or custom made of bronze or stainless steel.

Three sails (main, jib, and mizzen.) All lines, sheets and halyards ready to go. None of them ever used.

Custom made trailer with extendable tongue for easy launching. Elaborate supports that fit to cabin and aft cockpit bulkhead to hold spars for long distance trailering.

No O.B. motor. (4 to 5 HP would be suitable.)

The boat was completed Sept.2000 but ill health precluded launching and am selling the boat now for the same reason.

Price $12,500 USD

(See article in Wooden Boat – #107, Pg. 80)

Address:
George Cobb,
186 Gallagher St.,
Shediac, N.B.,
Canada, E4P-1T1

Email: gcobb@nbnet.nb.ca

 ***

Toothless gears and the Zen of boat building.

One day I took a transmission apart and fixed it.

That really doesn’t describe what happened, lets try that again.

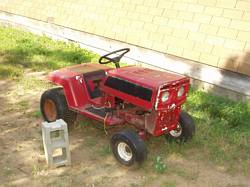
One Saturday afternoon I decided to fix up the old riding lawn mower a friend had given me.

tn_P1010022

This was a freebee, kind of a long-term project, no chance I would get it fixed in time to use it for mowing this year. At the time I was still intimidated by the engine, so I decided to start on the transmission. I was intimidated by the transmission too, but not nearly as much.

The temperature was just on the high side of warm, but the porch I was using as a table was in the shade and there was a gentle breeze blowing.

I start taking the transaxle off, bagging each part in Ziploc, taking my time, using wrenches instead of a socket and ratchet. I’m in no hurry, I have all afternoon to do this, and have no other pending plans.

There’s a young woman in the house watching TV. All is right with the world.

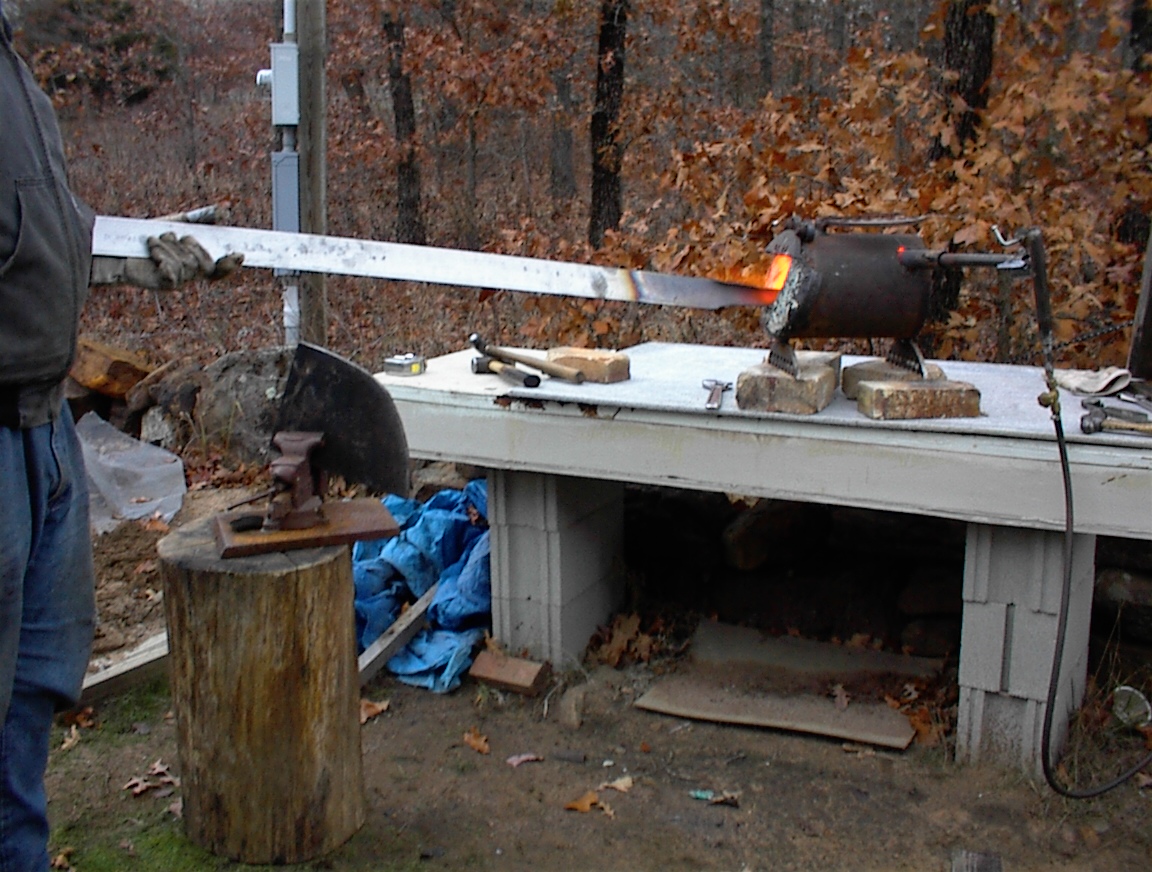
I put the transaxle in an old washtub, and fill it about half full of gasoline through one of the drain holes. After a little sloshing around, I drain the oil and gas into the washtub, to go into the barrel for eventual recycling, or use with an oil burner on the foundry furnace, I haven’t decided yet.

As I carefully and methodically pull apart this device I know nothing about, cleaning each part off before bagging it, I notice the birds are singing in the trees.

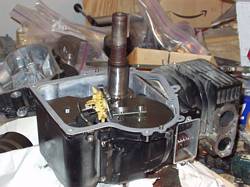
As I get it apart, I discover the reason it isn’t working. Three of the gears in the thing are missing teeth. The main drive gear is completely toothless. Ah, that would cause it not to work.

I finish taking it apart, and bag all the pieces.

Later that evening, I have a flash of brilliance, (hey, it happens occasionally), I Google “lawn mower parts”, and send an email asking for help identifying the transaxle to the top twelve hits. This is a saturday, but I get an immediate response from two of the victims.
One of these respondents had rebuilt “hundreds” of this exact model transmission, tells me what to check, what the rules of thumb are, which parts need replacing, what I can get away with not fixing, how to check this, that, and the other thing. I buy all my parts from him.

A very enjoyable day. Almost like building a boat.

OLYMPUS DIGITAL CAMERA

To misquote Zen, or Ben, or someone, or at least the Kung Fu master from an old western. “Revelation starts with the simple statement, ‘I don’t understand.'”So, that is the toothless gears part. Where does Zen, and boat building come in?

So, I find myself, now and again, working on something I have never worked on before, muttering the infamous words “I don’t understand.”

Then I poke at it and ponder over it till I *DO* understand. The light dawns. How simple!

What I like about building a boat is the problems. Not that I like all problems, mind you. For instance, the solution to the problem “How to get this pretty young woman to fall in love with me?” has always eluded me, and I suspect it always will. No, the problems I like are of the solvable, engineering kind. “How do I build a 20 foot tall mast out of 8 ft long boards?”, or “How do I sand this hull smooth without ending up in the hospital with back problems?”.

As with toothless gears and lawn mowers, the real joy of boat building comes from learning to do something you never thought you could do, that you have always been intimidated by.

I’ve built six boats, from disposable (which lasted 5 years before I gave them away) pirogue canoes, to 20 ft cabin cruisers. I’ve solved most of the engineering problems with building a boat. You know the ones, “How the hell am I going to get it out the door?”, and “How do you flip this huge thing over?”, as well as the construction problems, like “How do you make a round mast out of square
boards?”, etc.

I have moved on to machinery and small engines, which I have always had issues with.

tn_P1010025

Have I given up boat building, has it lost it’s challenge? No, not really. Lets just say I have graduated to the next level. I am having visions of Caspian Sea Monsters and Wings in Ground Effect…

And, now that I have overcome my engine anxiety…

Laters, Chebacco Richard

***

Depoe Bay 2003 – Jamie Orr

The 2003 Depoe Bay Crab Feed and Wooden Boat Show took place on the last weekend of April.  And a fine show it was!

Once again, Dad and I drove down to Oregon, pulling Wayward Lass behind us.  We started Thursday morning, catching the ferry from Vancouver Island then crossing the border at Blaine, Washington.  We stopped there at the Canadian customs office to have them stamp a picture of Wayward Lass, so we wouldn’t have any problems coming home.  Boats with motors under 10 horsepower don’t have to be licensed in Canada, so Wayward Lass has no numbers – this caused a delay in 2002 when the customs agent thought we were boat smugglers and we almost missed the last ferry home!

Our first stop was Seattle, to visit Chuck Merrell.  We met Chuck in 2000 at the informal Bolger boaters gathering at Port Townsend’s Wooden Boat Festival, and have kept in touch since.  We pulled off the freeway near Boeing Field, and followed Chuck’s directions to South Park Marina on the Duwamish Waterway, where he lives and is building Ace, one of his own “barrel boat bachelor pad” designs.  If you’re not familiar with Chuck’s website, go to http://www.boatdesign.com/ for his designs, his Bolger Micro page and other good stuff.

We caught up on the latest news over dinner, and inspected Ace, which is almost finished and looks like a snug home for Chuck, and Dumpster the cat.  Ace will be moored at South Park marina once she’s launched.  We considered spending the night in Seattle, so we could park the boat and trailer safely in the marina yard, but the thought of the morning rush-hour traffic changed our minds.  Instead, Dad and I drove for another hour, stopping just outside Olympia, the state capitol.

Next morning we reached the Columbia River at Portland just after 9:00.  Once across, we abandoned the interstate for the back roads, moving in a more or less south-westerly route through McMinnville to Lincoln City on the coast, just a few miles north of Depoe Bay.  This isn’t the fastest route with all its small towns and winding roads, but it made for an interesting morning.  We stopped for lunch in Lincoln City.  Dad had an excellent “Scottish soup with pieces of lamb”, (where I grew up it was called Scotch broth – is this the latest effect of political correctness?)  I had flatbread, with melted cheese and thinly sliced sausage that left my taste buds tingling.  The Blackfish Café — good place to stop, if you’re passing by!

We arrived at Depoe Bay about 1:30, and after a leisurely rigging-up, Wayward Lass slid into Oregon waters again ,and was left in the first empty berth while we took a look around.  We found that we were among the first exhibitors to arrive, but it didn’t take long before we saw a few familiar faces, and boats, including John Kohnen (Pickle), Terry Lesh (Toto) and John Ewing (Surf and Jon Junior).

By then we were thinking of our stomachs, so we arranged to meet at the Spouting Horn for dinner, and went along to our motel, the Troller’s Lodge, to check in before walking down to the ‘Horn for an evening of good food and better company.

I woke early the next morning, and couldn’t get back to sleep, so just after 6:00 I was down at the boat, pumping out the rainwater.  Between the trip down, and the rain overnight, the floorboards were floating.  Since it was still pretty wet outside, I wasn’t a fanatic about pumping, no mopping up the last drops!  The Coast Guard were awake, too, taking their 47 footer out into the bay.  I heard them come in again after a short time, so maybe it was just a training run.

Back to the Troller’s for a shower, then over to the Whale Watchers Café for breakfast.  Larry Barker joined us here, the three of us had plans to go “outside” for a sail after.  The Coast Guard was allowing boats over 16 feet to go in and out, the lowest restriction we’d seen, to date.

By the time we reached the harbour, the sea wall was alive with boats and boaters.  Depoe Bay is largely a dry land show, with most of the exhibits displayed on the sea wall overlooking the docks, but this year there were quite a few boats in the water as well.  Pat Patteson presented me with my Western Oregon Messabout Society burgee, with its coot emblem.  I’m not sure if the group chose that emblem deliberately, but it fits pretty well, so now Dad and I are officially “old coots”!  We took a few minutes to get the burgee hoisted, then and Dad, Larry and I fired up Honda and took Wayward Lass out of the harbour.

You have to remember that this is the third year we’ve been here, but the first opportunity we’ve had to get out on the ocean.  Depoe Bay doesn’t have a bad bar, as such, but the entrance to the harbour is a narrow dog-leg where the Pacific swell often makes getting in and out problematic, so we used the outboard generously to make sure the waves didn’t push us around.  Once out and clear, we put up the sails, and shut down the motor.

You should also know that there are some nasty reefs on either side of the bay, where the swell piles up and breaks.  We were fully aware of these, so didn’t stray from the safe line between the entrance and the bell buoy that marks the transition to open waters.  The swell was of a size I hadn’t experienced before, we were moving up and down some 10 feet every 13 seconds.  I have to say that I was somewhat intimidated by the combination of the swell and the lurking reefs (we didn’t have a chart).  This, on top of the horror stories we’d had fed to us over the last two shows made the old pulse run a bit faster than usual.  The boat, however, was perfectly at home!

We sailed out to the bell buoy on a close reach, the wind being pretty much from the southwest.  We noticed the swell was more regular and not so steep once we were past the bell buoy, which marks the end of the shallow area, more or less.  Once we tacked, the course back to the entrance was an easy reach, so we took advantage of that and headed in again – not very adventurous, I agree, but okay for a maiden voyage.  Being still very aware of the reefs, we turned into the wind to start the motor while still fairly far out.  Of course, the motor chose this opportunity to be awkward, taking half a dozen pulls to start.  I’ve noticed this before, that it’s slow to restart when it’s cooling down.  When fully warmed, or cool, it only takes one pull – maybe two on a bad day.

But it did start, so the sails came down and we motored back along that line between the bell buoy and the entrance.  Larry watched the back bearing while I watched the entrance – we didn’t always agree on the right heading, but the differences were small enough.  At the entrance it’s best to go in on the back of a wave, to avoid surfing, but with only five horses, it takes more practice than I’ve had.  There wasn’t any danger anyway – I don’t know where the swells went, but by the time they reached the entrance, the waves were small.  Honda pushed us easily through the dog-leg and we were back in the harbour.

Once we were tied up again, it was time to have a proper look at all the other boats, not to mention picking up our free coffee and doughnuts (just for bringing a boat along!) There were all kinds of good boats – a lot of great canoes and sea kayaks, in stitch and glue, cedar strip, and even some wood and canvas beauties.  The wood and canvas folks demonstrated how to steam bend white cedar ribs – made it look as easy as anything.  They also bent some oak stems later with less success, I saw the remains and it looked like they’d been defeated by bad grain in the oak.

Besides the paddling boats, some of my favourites were the Bolger light dories (of course), the 19 foot Bartender, Pat’s PK 20, a rebuilt 1948 Guernsey Falcon and a new dinghy, both lapstrake and built, or rebuilt, by the same exhibitor.  Dan Pence stole the show, though, with his just-finished Light Schooner.  He started by yuloh-ing over from the launch ramp, then dazzled us all sailing around the harbour.  The Light Schooner seemed to accelerate instantly with every puff of wind, and fairly flew along – spinning around on that big dagger board so Dan (ably assisted by his wife) never even hit the dock once!  An incredible boat indeed!

Chuck Gottfried was there with Tabby, his strip built catboat – 17 feet, if I remember rightly.  Chuck is currently building a Chebacco as well, so I must compliment him on his excellent taste in boats!  Unfortunately the Chebacco wasn’t far enough along to bring to Depoe Bay, but should be there next year.

Harvey Golden brought a couple of traditional kayaks, one of them without the skin so we could see how it was lashed together, and he also demonstrated his incredible Eskimo rolling techniques again.  Unfortunately I managed to miss most of this, but after the last time I ran out of superlatives anyway.  Harvey has a great website too, I don’t have the URL but a google search will turn it up for you.

There were other good boats there too, more than I can remember – I’ve been wishing I’d taken some pictures, but fortunately John Kohnen was there with his new digital camera, taking hundreds.  He’s posted a good selection at http://www.boat-links.com/DepoeBay/03/BoatFest-1.html, so go there to see them.

The weather was a bit unsettled on Saturday — one minute it would be bright sunshine, the next, rain would be pouring down, only to stop as suddenly.  However, it didn’t seem to bother anyone much, and by early afternoon it had straightened itself out and stayed sunny the rest of the day.  Which was good, because we were able to sit down in Wayward Lass for a while, and drink some of Chuck Gottfried’s beer.  Chuck introduced his brother Roland, and a few others soon came by.  In the end there were seven or eight of us in the cockpit, enjoying the good life!

Once we were all rested and refreshed, there was just time to check out one or two more boats before going up to Gracie’s B&B for the exhibitors’ reception, where they fed us finger food and a variety of Oregon wines.  Actually, I only sampled the Cabernet, but it was excellent.  A few exhibitors addressed the group, but the star turn was our hostess Gracie, who gave a great talk about Depoe Bay, the boat show, how good the food was at the Sea Hag, and sundry other local subjects.  About 7:00, the B&B folks needed the room back for their paying guests, so the party moved to various restaurants, to consume more food and drink, and continue the Great Boat Debate.

Next morning was dry, and promised a fine, sunny day – not only that, but there were no restrictions in force for the harbour entrance!  At all!  This was a mixed blessing to us, because we had to be on the road before noon, and its always easier to leave when its raining.  However, we looked forward to making the most of the morning.

Things semi-officially kicked off for the day with a lone bagpiper making sure no one overslept, then Dad and I went for another sail.  Except for being sunny, I don’t think things were very much different, but we knew what to expect this time, and were able to enjoy.  The wind was from the southeast, which meant it blew straight from the harbour mouth towards the buoys, giving us a good run out to the second buoy, that marks the 100 foot or 16 fathom (deep) line.  There were several sea lions sunning themselves on this one, they pretty well ignored us as we sailed around them.

We had to beat back directly into the wind, which was fading fast (not the swell though, it carried on going up and down like an elevator).  With the sun right behind the harbour, it was hard to pick out the bell buoy, but binoculars helped.  After a couple of tacks we reached and passed it, but by then there the wind was so weak that it wasn’t worth trying to sail closer in, so we started the motor again – only one pull this time.  We were fairly blasé about the entrance this time, but were surprised by the strength of the current flowing out with the ebb, just like a river.

We went straight to the launch ramp, and got Wayward Lass hauled out and packed up before going around to the sea wall again to say “so long” to the folks.  It was hard to be leaving early on such a nice day, but needs must, and all that, so just after 11:30 we pulled out for home, arriving there some 492 miles and12 hours later.

A great weekend – many thanks to Jack Brown and all his fellow organizers!  See you again next year.

***

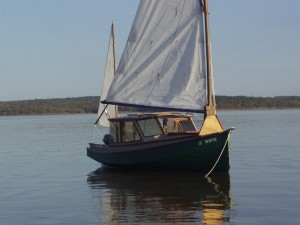
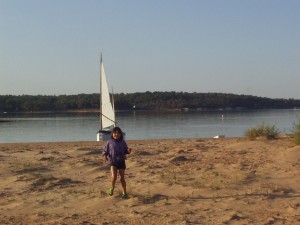
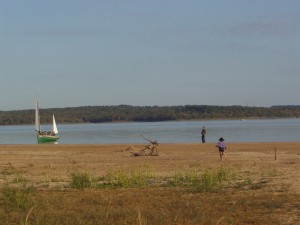
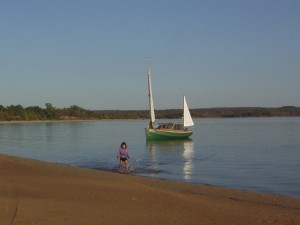
A Sunday at the lake.

We pulled into “Bear’s Glen”, small park next to hw 64 bridge. Bit more drive than my usual launching place, worse launching conditions, but it get’s you almost to the bridge so you can sail different parts of the lake. Main reason to have a trailer sailer is to sail in different waters, as we are doing today.

There was  a catamaran, probably a hobbie whatever, setting up in the only nice shaded spot, they had just got the mast up, two guys working on setting it up. “I’ll show them!”, me thinks. We pull up behind them, and with Brian and I working together we had the boat ready in 5 minutes, and pulled around them to launch. 30 minutes later we sail out of sight of the launch ramp, and they still hadn’t launched. Ah, the joys of a Bolger boat.

Tried teaching the boy to sail, and he did eventualy learn to keep the boat more or less going forward. Kind of like a snake goes forward. Though to tell the truth, it took me awhile to learn to hold a steady course in the puffy, unpredictable wind we have here in central Oklahoma, too.

Brian crashes below decks, and I set the boat up for self steering. The most memorable part doing 4 knots or so to windward, exactly parrallel to the shore, using both hands to put on sunscreen, watching the campers 100ft away on the shore. When trimmed right, the boat will adjust it’s coarse perfectly to the wind, head up in the puffs, fall off in the lulls. She sails OK in the light air we had, but Ze boat, Ze REALLY like’d ze wind.

Sailed up to the railroad bridge by Manford, probably about 10 miles, most of it beating to windward.

Ran back in force 3 winds. SWEET. Boat was trying to climb over the bow wave, was doing at least 7 mph. A 10 mile run back to the ramp, at least 20 other sailboats out by now. We are cooking along at just over hull speed, running wing and wing. Now, THIS is sailing!

Sailed up to the beach and had to answer the inevitable “What type of boat is that? Is is new, or old? You BUILT IT?”. At least this time it was a pretty girl asking the questions. I even tried to be friendly!

Yanked the boat out just as it was getting hot. Very nice day at the lake.

***

The Boat – David Lewis

So, this guy has a boat.  Well, he WILL have a boat. Right now he’s got a bunch of boards and screws and glue and stuff.

So, he’s gonna build himself a boat.  But instead he works on playing with the head of this strange female that’s living in his house.  She’s strange – did I mention that?  And he’s not sure how or why she came to be living in his house.  He just knows she’s there and she’s annoying.

So, he’d be building this boat if he weren’t fighting with her or playing with her or studying her or otherwise wishing he could do more to her but knowing that that would just be too strange.

So, when he finally gets tired of her and gets rid of her then he’ll build this boat.  And into it he will put all the strangeness he’s taken from her in his strange games.  And people will look at his boat and wonder.  Some will hate it, think it’s ugly, stupid and downright…bad maybe.  Others will say “cool” and go elsewhere or just shrug their shoulders and turn away.  Some few will stare at it for hours on end, wondering at the strangeness they feel oozing up out of this.  They will be drawn and repulsed at the same time. Depending on their character some will feel the need to possess and sail this boat and will offer large sums of money (which this guy will not accept) and maybe even consider stealing it (bad and dangerous idea).  Others will go home and lie awake at night shuddering at it’s strangeness, nightmares keeping them from rest.

So, someday this guy will build himself a boat.  And, to a very few, it will be known as, That Guy’s Boat.

So, The End.

***

lee

Okie Sailor Thoughts – Captain Lee

The other night I was sitting under the stars sipping some wonderful ale along with a couple of salty sailor types just bsing about life in general and the topic of Oklahoma sailing came up.  “Yes, I’m an Okie”, I said with a bit of proudness to it probably…”I grew up in Oklahoma and that is where I learned to sail”.  My fellow sailors stopped their drink at mid face and stared at me wondering just want kind of sailor I could be then?  “No water in Oklahoma”, they both replied.  Funny they should mention that.  Oklahoma PR states that there is more shoreline in Oklahoma than the East and Gulf Coast combined.  Of course, I added this tidbit of information and again, their drinks stopped half way to their mouths but this time, a different look on their faces as they felt I have now exceeded the boundaries of BS, I have crossed the line so to speak.  “It’s true,” I stated. And I proceeded to qualify my statement telling them of our lakes and river systems, not to mention the fact that Oklahoma has one of the greatest natural resources known to man, and that is wind.  The entire state could maintain itself on solar and wind generated systems if it would.  Unfortunately, it doesn’t.  But, that’s another thought.  With that kind of wind, and lots of water, we have some of the best sailors, some of the best sailing facilities not to mention regional regattas, etc, that any inland state could possibly have.  Again, they were floored, speechless and after a moment or two, I was bombarded with comments, questions, you name it and I found myself defending my stand on the state being the sailing state it is.

Anyone that sails Oklahoma knows what I’m typing about.  Ever sail Lake Hefner on a weekend?  Bumper boats.  Ever sail Tenkiller?  Grand?  Eufaula?  What about Texhoma, Kaw Lake, the Spavinaws?  Kerr-McClellen?  What wonderful sailing opportunities we have in Oklahoma.  What about the 100-mile race on Grand Lake?  That’s one way if memory serves.  The opportunity to sail in Oklahoma is remarkable, the wind ever blowing and rarely light, one can sail most the year.  And yes, maybe it’s a secret that Oklahoma has the shoreline that she has, that natural born sailors flourish there and at any given weekend, no telling how many thousands are actually trimming sail on an Oklahoma lake.  What a place to set sail at.  I miss it.

What I’ve learned from Oklahoma winds will follow me all throughout my sailing career and I make use of the knowledge I gained having learned in Oklahoma.  The winds, the cloud formations, the weather patterns there, all made me a better sailor, a more competent one in that I know how to predict weather patterns now.  I learned that in Oklahoma.  I’m not an ol’ salt per say.  I’m an Oklahoma sailor now taking her knowledge to the Chesapeake where I hopefully one day sail my 41 using my Oklahoma sailor education.  I don’t argue the fact that inland sailors are just as true to sailing as offshore people.  I know better.  I know the differences in heaving to in a storm rather than finding a cove to tuck into.  I’ve done both on an Oklahoma lake.  I’ve ridden out some good swells in the Gulf of Mexico and I’ve also handled some pretty good wave action on an Oklahoma lake where people approached me later on telling me all they saw of me and the boat as they crossed the dam was the boats spreaders.  Now, that’s some big waves out there, right?

What is all this comparison stuff about?  Who cares?  Does it really matter where one learns to sail?  Does it make a person less of a sailor just because they learned inland rather than offshore or in some big estuary?  I mean, really…. Who cares?  The fact that we all sail, we have that common bond, that thread that sailors have, means we are part of a unique lifestyle, a culture all it’s own, be it inland or seaside, who cares?  We all spread the canvass, we all have the same feelings regarding sailing itself or we wouldn’t be sailors.  We aren’t like the rest of the water people that stick a key in and go, that’s all fine and good maybe and requires little thought, little brain power and lots of money to stoke the engines.  We have our own qualities.  We appreciate the finer things that sailing allows us and that’s a fine payoff for taking the time and learning how to sail a boat.  Maybe we are more intune to the weather, the gentle movement of treetops catches our eyes more and we pay more attention to cloud types.  Is it possible that our senses are sharpened and honed more each time we go out under sail in that we pay more attention to wind changes, wind speed?  Are we truly more visual in that we detect the change of water color before the storm, the change of sky color as well?  Where did we learn that from?  Did we learn it from other sailors?  Or did we pick it up naturally as we became sailors ourselves, paying close attention to the elements around us?

Sailing inland offers so many advantages that there are too many to relate but what I’ve noticed is this, without my Oklahoma sailing experiences, there is no way I’d be out here taking on the Chesapeake or the Atlantic eventually.  Without my Oklahoma sailing background I wouldn’t be able to do any offshore racing that I enjoy on the Gulf of Mexico in the fall.  Oklahoma provided me the education I needed in confronting storms and storm sailing and because of that, I don’t panic on the high seas because I’ve already been there, done that, on an Oklahoma lake.

I don’t need to defend my stand on inland as opposed to offshore sailing.  It’s obvious to anyone that can tell the difference, that there really is NO difference in abilities just because one learned inland.  If you’re a sailor, you’re a sailor.  Period.  If you’re the type that sits on the boat and watches everyone else go out and come in, then, you’re not a sailor but maybe a wannabe.  Just don’t enter into the conversation stating that you know this and you know that because you have a 40 footer sitting on the biggest estuary in the world.  Who cares?  I don’t.  What I do care about is the fact that my roots to sailing were formed in Oklahoma.  I have no regrets.  And because of this, I’ll always be an Oklahoma sailor whether I wind up in Fiji or Belize, no matter.  And I am proud that I learned in that state where the wind constantly blows, where the weather is always changeable, the water cool and fresh, no jellies there.  I appreciate an inland sailor fore’ they make better offshore sailors having already experienced heavy stuff, scary stuff and possible catastrophe.  Lakes are minute seas surrounded by boundaries.  What do boundaries do?  Teach us, right?  Then, go learn on a lake before you hit the sea.  It’s an advantage and a good one at that.

Anyone can hold a straight course at sea.  Not just anyone can sail a mean scurvy lake that wants to take you down.  As the saying goes,  “Whenever your preparations for the sea are poor, the sea worms it’s way in and finds the problems”.

Captain Lee Allred
Of the good ship, Mintaka

***

Buodicea’s coming out – Ed Heins

The continuing saga of Boudicea, the Chebacco that would eventually be finished.

Way back in the last century, I bought an upside down Chebacco hull from Burton Blaise up in the wilds of Ontario.  At the time my plan was to spend one, maybe two summers fitting her out in the green mountains of Vermont and trailer sail her during summers in New England.  How times change…..  Two homes, two states and a half decade later I’m proud to say that the old girl is getting close to being wet for the first time.   Instead of the Green Mountains, she’ll be finished in the Blue Ridge Mountains, and instead of New England lakes, she’ll in all probability see more of the Chesapeake bay and maybe even Gulf of Mexico, but all thing being equal I’m thinking that’ll be OK with her.  I know it will be OK with her majesty, my bride of 13 years, as she’ll get another half garage out of the deal.  I’ll get to put a check mark in the finished project box and maybe for a year or so get off the chandlery’s Christmas card list.  But enough of that.

I named her “Boudicea” after the Queen of the Celtic “Icene” tribe from what’s now northern England.  Having  suffered the murder of her husband and rape of her daughters by Roman legions in about 50AD, in a testament to future British womanhood, Boudicea promptly raised an army of some 150,000 and beat Nero’s army like a drum for the next few years.  (My kinda girl.)  When finally surrounded and overwhelmed, she committed suicide rather than suffer capture herself.  A rather tragic tale, but I thought a suitable heroine to name a ship after.

At any rate, Boudicea came out of the shed for the first time sporting most of her paint, some of her trim and spars in the finishing stages.  She’s made from A/C fir ply with a layer of 3 oz glass and epoxy over the topsides and a couple layers of 5 oz glass on the hull/  The trim is red oak and the brightwork is finished with Sikkens Cetol Marine while the deck and hull  is Interlux Brightside, Hatteras Off White and Sapphire Blue respectively.  Bohndell cut what looks to be a great set of sails and with the help of Ebay and a credit card

I’ve almost got the hardware end of the project complete.

Yet to accomplish is a short bowsprit, toe rails, trim along the cabin top, moulding around the mast slot, slot cover,  running rigging, rudder / tiller mounting, and fitting of the centerboard……… I’ll stop now before I depress myself.  Needless to say there’s plenty yet to do.   Nevertheless, I’m thinking I’ll sail her by the end of August.  I may not have electrics and a finished cabin by that time but I think she’ll keep the wet on the outside.  I’ve sent up some pictures of this most recent state of the lady.  Next to come hopefully will be the pictures of Gin & Tonics at the launching ceremony.

Cheers y’all.

Ed Heins

New Market VA

tn_bow tn_cockpit tn_front tn_port_window tn_portside tn_stern

***

Some Pictures – Dave Neder

Attached are some photos of the “Mary Beth, too” just prior to moving her out of the garage where she was built and onto a trailer.

The tiller and some of the hardware and rigging were salvaged from a “Lancer 27”.  The hull material is marine Fur Plywood,  Red oak, Ribbon Strip Mahogany plywood and Mahogany lumber were used through out the rest of the boat.

The keel is covered with 5 layers of fiberglass and West epoxy.  The bottom and bilges with three layers of glass and epoxy.  The mahogany
sides 1 layer of 3 oz glass.

The spars are Sitka Spruce.  The Masts and Gaff are hollow.  The mast was built using the “Birds mouth” method of forming eight sides.
Starting with eight sides makes it a lot easier to round the mast.  Also it is very easy to build in the taper for the mast head.

The main boom was made solid for the weight to help hold the main down. The main is loose footed and draws quite well in light air.

Regards
Dave Neder

CABIN_HATCH CRIBBING HATCHES MAST_HEAD TILLER TRAVEL_CRIB

The attached pictures show a few construction details of “Mary Beth,too” Ibuilt assemblies such as the transom, center board house, stem etc. in my basement during the winter months and moved them to the garage and constructed the boat. The guests are my son and his family.
Regards
Dave Neder

CENTERBOARD_HOUSE CTRB_DHOUSE_BLKHD FWD_BULKHEAD GUESTS LOOK_AFT

The photo of bulkhead Nr 1 shows the tabernacle posts which are epoxy bonded to the bulkhead and keel. The photos of the aft portion of the cabin show the location of the switch panel and the safety equipment just inside the hatch. The equipment is offset to prevent tripping. Notice the paint with the flat and glossy surface.  The bright paint is one part polyurethane on the floor for wear.  The flat paint is a twenty year alkyd exterior house paint with a fungicide.  I pre-printed all of the bilges, flooring bottoms and insides of the partitions and bulkheads prior to final assembly.

We sailed “Mary-Beth,too”  quite a bit last year. Our sailing has all been on Pewaukee Lake ( 6 miles long by 1 1/2 mile wide) She is very happy on a beam reach, and self-steers when I set the mizzen properly. Heaving to and reefing is easy.  Center the mizzen and she sits nose to the wind. I have run all of the reefing lines to a point at the cabin hatch.  I learned some years ago not to go forward of the cockpit to reef the main during a squall on lake Michigan.

However, I have not even moved the boat out of the garage this year.  I broke a knee cap and put a two month crimp in everything.  August is
still young.

We enjoy the Chebacco web site.  Thanks
Regards
Dave Neder

BULK_HEAD_NR_1 CABIN_AFT_PORT_SIDE CABIN_AFT_STRBD

Chebacco News 44

Icebreaking – Richard Spelling

tn_P2230001

Well, woke up this morning, and there is six inches of snow on the ground. Guess that’s a sign I need to publish this issue!

Been kind of quite around here. Send pictures! Send stories! In particular, I know of one long cruise in the Chebacco “Samantha”… Send write up!Well, woke up this morning, and there is six inches of snow on the ground. Guess that’s a sign I need to publish this issue!

In this issue we have an update to “Chebacco Sailing 101, from the previous authors, some miscellaneous conversations, and some pictures of a Chebacco from Down South. Not “Down Under”, but South America! He even wrote me in spanish.

Coincidentally, I’m learning spanish, so I wrote him back in the same language. I’ll spare the regular readers the trails of automatic translation websites… (which translate “sailboat” to “boat of candles”…) I had originally planned on doing the whole issue in his native language, but I’ll do it in
english instead.

Ed Heins reports progress:

At long last it appears I’m able to report some progress on the chebacco garage ornament that’s been living about 25 ft away from this computer for the past 4 years.   Light at the end of the tunnel is looming larger as I should finish sheathing the topsides tomorrow and be done with the final fairing of the epoxy making ready for painting by the end of the month.  Boat name “Bodacea” has been selected and routed into an oak nameboard for transom mounting, and brightwork already started.  Electrics are in to the stern light and battery box, and should the mood strike tomorrow, I’ll get the flush mount running light mounts cut in.  Current plans are to paint it interlux dark blue on the bottom and hatteras off white on the deck to just below the rub rail.  Then a gold and red bootstripe should finish it off.  Opting for no waterline markings since the boat will live on a trailer for most of it’s life and the bottom will not be antifouled.
Just bought the power planer today, and plan on attempting a birdsmouth mast later this winter.

As does Mike Haskel:

Good morning Richard,

How are things going down in Oklahoma? I have attached a URL that describes
the building of “Two Grumpy Old Men”

http://www.adventurequest-usa.com/New_Folder/chebacco.htm

All the best,

Mike Haskell, Founder/CEO
Adventure Quest-USA
8 River Road
Bowdoinham, ME  04008
207-666-8976

Also had an interesting conversation on the origins of the name “Chebacco” with Edson White:

—– Original Message —–

Sent: Tuesday, January 14, 2003 8:39 AM
Subject: Re: Where did the name “Chebacco” originate?
Actually, I think it is a type of boat from England:
—– Original Message —–
Sent: Tuesday, January 14, 2003 8:30 AM
Subject: Where did the name “Chebacco” originate?
Richard:  I am a little curious.  I have password “chebacco”, and my son has “Chebacco-2”  Our “clam shack” on the ocean was named “Chebacco” back in the 1800’s!
Thus, (1) “Chebacco” is an Indian name, given to a river before the advent of the white man – at least up here in the northeast.
Is this also an Indian name prevalent in Oklahoma, and if so, do you know the meaning of the name?
                                                   
                                                                                                         Best regards,    Edson F. White

I’ve been able to sneak out a couple of times, weather permitting, and using nice tall rubber boots to retrieve the boat from the frigid water. Nothing really notable, except for the icebreaker session!

A friend of mine had come up to deliver half a boat, which is a whole other story. Part of the price was a sailing trip in Schroedinger. Luckily, the weather cooperated, and we had wind and temps in the 45 degree range.

We see some nice waves when we drive over the dam to launch the boat at the local state park, so I’m anticipating a nice brisk sail.

I setup the boat and we launch at the ramp, with only one other vehicle in the state park on this nippy January morning.

tn_P2230002

The new steps I cast for the boat work great! They make it very easy to get in when the bow is on the beach. (I’ve been doing machine work lately, when it’s to cold to sail.http://www.richardspelling.com/richardsfoundry/  )

I notice the water is calm in the bay where we are launching, I attribute this to the surrounding hills.

As I’m reversing away from the ramp, I idly wonder aloud what that filthy layer of scum is on top of the still water. “Oh, that’s ice” says my sailing
guest.

And I’m about five feet away, backing the transom and the expensive motor right towards it!

Can you say “quick turn”?

I take a good look, and guess what, there is NO WAY out from the launch ramp facility! There’s open, ice free water about 1/4 mile away, but there is no path to get to it!

Nothing for it but to put the 1/8″ stainless steel keel armor to the test. RAMMING SPEED! All hands brace for impact! Crunch!

About this time I’m wishing I had brought the camera!

At about half throttle, the keel rides up on top of the ice, and the weight of the boat breaks the ice, in true icebreaker fashion.

My greatest worry at this point is that I’m going to have to repaint the bottom!

We crunch through the 1/4″ mile of 1/2″ thick ice to open water, and have a nice sail. The only other homemade boat on the lake was out, so we sailed over to him and had a nice chat.

And guess what, when we retrieved the boat, we had to do the whole icebreaker thing again! Oh, my poor paint!

When I got off the boat at the ramp and looked at the hull, there was not a single scratch in the “deck paint” on the hull! Amazing, I was expecting at least bare fiberglass.

And interestingly enough, when I posted my tale on the Bolger egroup, two other people had ice stories, for the same day! We decided to officially dub that saturday “National Bolger Icebreaker and Porch Paint appreciation day”!

More when the weather warms up!

– Chebacco Richard

***
Sudamericano Chebacco – Gustavo Estévez F

Mr. Richard

Chebacco Sudamericano

A finales de Diciembre lancé mi bote (Chebacco con un toque de Goland
Gaffer) llamado Haka a las aguas en Valdivia, Chile (no es el fin del
mundo pero de aquí se puede ver). Hasta ahora no he tenido problemas.
Espero enviar pronto fotos navegando a toda Vela.

Saludos

Gustavo Estévez F. (gef@telsur.cl)

Sudamerican Chebacco

At the end of December I launched my boat (a Chebacco with a touch of Goland
Gaffer), called Haka, in the waters of Valdivia, Chile (it is not the end
of the world, but you can see it from here). So far I have not had
any problems. I hope that soon I can send you photos of the boat sailing under full sail.

Greetings

Gustavo Estévez F. ( gef@telsur.cl)

P1000045 P1000047 P1000048 P1000053 P1000054 P1000056

***

Pre-Christmas Sail – Jamie Orr

‘twas the weekend before Christmas…

And after thinking about sailing all week, I decided to go and do it, so on Sunday morning I threw all the warm clothes I own into the boat and headed for the launch ramp.

I drove to Cattle Point, on Victoria’s east shore – Victoria is right on the southeast corner of Vancouver Island – where there are two ramps.  The older one is narrow, with rocky sides, and faces northeast, while the newer one faces southeast.  Neither has very good provision for mooring the boat while you park or retrieve your trailer, but the new ramp has more room.  Because I’d packed up in a hurry last time, I spent a leisurely 40 minutes untangling lines and rigging up.  Cattle Point gets a lot of walkers, so I had several conversations as people stopped to ask about the boat.

The launch went smoothly, and Honda fired on the second pull – not bad since he hadn’t been running for a month or so.  I motored out until I was clear of the rocks, and had some room to drift, then put up the sails.  There was a nice little breeze from the northeast, and Wayward Lass moved along well. I wanted to explore the Chatham and Discovery Islands group, so I tacked upwind, thinking to have the wind behind me to avoid having to tack in the narrow channels between the islands.  It took a while to reach the north end of the passage I had chosen, and I was getting hungry, so I picked an inviting bay off the chart, and headed for that.  As I worked my way to the head of the bay, a group of kayakers came by, adding some colour to an otherwise wintry scene.

I anchored in about five feet.  There was a smooth beach only a few yards away, but most of these islands are Indian Reserve land, and landing is only permitted on the south shore of the most southern, Discovery Island, where a marine park fills that side.  Just as well, really, or these islands would be fully developed as well as private, being so close to Victoria.  As it was, it was like being miles from civilization, as I watched an otter catching and eating his lunch while mine heated on the stove!

After I’d finished and tidied up, I pulled up the anchor and set the main again.  I made sure the anchor was ready if wanted, since I expected some current and the wind was very light by now.  I set off south through the passage between the two larger Chatham Islands, with the wind behind me and against the current.  The deep channel is close beside the eastern island, which may be why the wind became very light and fluky – the island sheltered the channel too well!  I found myself still sailing gently about half way through, but no longer moving in relation to the land.  I used the canoe paddle for an extra boost until a gust came along to help, but it was all undone in the end.  After another spell of motionless activity, what little wind I had reversed itself, and I had to follow suit.

The current carried me back almost to the north end, where the “real” wind was still coming from the northeast.  It seemed to be a little stronger than before, so I turned to try again.  This time I stayed further from the shore, despite the shallow areas, and did a little better.  I managed to sail past my previous turning point before I had to resort to the paddle.  After another 40 or 50 yards, the wind took pity on me and came back.

I thought I was clear then, but found I couldn’t quite sail the course I needed to stay out of the shoals.  The current was still running, and the wind was still too light to allow much manoeuvring, so I decided to trust to our shallow draft, and turned inside a pair of rocks that were just ahead.  I wondered if this was really a good idea, standing with the tiller in one hand and the centreboard line in the other, watching the bottom go by only a couple of feet below.  If I hit some really shallow water and went aground, it was quite possible that the current would hold us there until the tide dropped, leaving Wayward Lass and I on the mud for the night.

However, just before reaching the keel, the bottom receded again, and we reached deeper water, moving out of the shelter of the islands as we went.  Once out in the open, we had a straightforward, two mile run to the ramp.  The wind was still light, but steady, and the gentle run made a nice finish to the day.  I was able to tie off the tiller and let Wayward Lass steer herself long enough to take in the mizzen, then about a quarter mile from the ramp, we stopped and I furled the main.  When I started the motor, the starting mechanism made some funny noises, but the engine ran alright, so I just made a mental note to look at it later.

We made a soft landing at the ramp, despite the following wind, and the recovery went as smoothly as the launch.  I tidied up a little more carefully this time, so that my next outing wouldn’t require untangling all the lines.

After a sail, I always run the outboard in fresh water to flush the salt out.  When I pulled the starter cord this time, I got nothing but funny noises, and the motor didn’t turn over. When I took off the cover, I discovered that a big plastic gearwheel had broken into four pieces.  Two were still more or less in place, until I pulled on the cord again to see what would happen.  (They popped right out.)   I was able to start the motor by winding another cord on the thing on top of the flywheel, but I’ll have to go to the shop for a new recoil gear.  I suppose the plastic gets brittle with age, the engine is about 17 now.

No matter, it was still a good day!

A few days later…

Dad, Catherine and I drove to the launch ramp in Esquimalt Harbour.  A fairly decent ramp and dock, and sheltered from the prevailing southeast wind.  We rigged Wayward Lass, then I backed down the ramp.  Hadn’t paid enough attention to a tree growing beside and over the ramp, and we brushed through it, getting a cockpit full of twigs, needles and cones!  However, we launched without problem, and got underway.

We motored out carefully, as there are rocks near the ramp, then got the sails up and headed for the open sea.  We caught a nice breeze and made good time to the south with a southeast wind (maybe a touch more easterly) pushing us along.  For a while we were gaining on a big ketch on the same course, but he eventually found his groove and started to open up the distance between us.  We’d been out for an hour or so by then, so made our turn for home.  Had a nice reach going back to the harbour – saw a smallish (thirty-something feet?) schooner come out and turn west, making a picture postcard scene.

Once back inside the harbour, we turned into the wind to furl the sails.  Esquimalt is a naval harbour, and boats are required to stay at least 100 metres from all naval property, including the ships.  We were over the minimum distance from the ships, but pointing right at them.  It may have been a coincidence, but the patrol boat came out from behind them in a minute or so, coming our way.  However, by then we had the main down and were busy with the sail ties, so our peaceful intentions were evident.

The motor started on the first pull – still using the “emergency” rope – and we motored in to the ramp.  Everything went very well, until I pulled the boat and trailer up the slope. At this point we ran into the same tree, but the branches must angle down-ramp, because although the main mast still got through all right, the mizzen hung up and broke off just above the partners.  This put a bit of a damper on the day, but it looked like it might be repairable, so I was mostly only ticked off at making such a dumb mistake.  D’oh!!

The aftermath.

Although I’m no mechanic, the starting gear didn’t look like a tough job, so I went down to the Honda dealer and paid the outrageous amount of $38 for a four inch diameter plastic gear!  The remains of the old one came out after undoing the top bolt, so that was pretty simple, but the new gear wouldn’t go on without removing the assembly completely, because of the need to mesh with the teeth on the flywheel.  To take off the assembly only meant undoing three bolts, but it took a while to find a socket that could reach them – I finally bought a nutdriver to make it easier.  Once I had the right tool it was all done in minutes.

The mast was a longer job, but not much harder.  The mast is made of two halves, glued up the middle.  One side had split when it broke, and resembled a two foot scarf.  The other side was broken pretty well straight across the grain, but there were a lot of spikes sticking out from either piece.  I decided the spikes would serve as finger joints and provide some strength when glued up in conjunction with the “scarf” on the other side.  I cleaned up the loose chips and straightened up some bent spikes, then carefully matched up the ends.  I pushed them together as much as I could, then used a mallet on the butt of the mast, ramming the joint as tight as I could.  I had to do this a couple of times, taking it apart and removing more broken chips each time until the thing fit properly.

Then I smeared thickened epoxy over all the broken area, matched up the ends and got busy with the mallet again.  Once everything was as tight as it was going to get, I put in a temporary nail so the ends couldn’t slip apart, and clamped the scarf firmly.  I gave it three days to cure, after that it was just a matter of cleaning up the epoxy that squeezed out, and putting a couple of “dutchmen” in where some small pieces of wood were missing.  I considered putting a fibreglass band around the “finger-joint” area, but decided it was strong enough without it.  We’ll see next time out.

Chebacco News 43

A very wet cruise in the CLC – Richard Spelling.

Weather forecast for my four day Eufaula cruise: Chance of rain: Thursday 100%, Friday 100%, Saturday 100%, Sunday 40%

Started the day Thursday morning with a three hour dash down the Muskogee Turnpike to Lake Eufaula, OK. The various websites make the claim “over 600 miles of shoreline and 102,000 surface acres”. Don’t know about that, but it’s so blasted big you have to buy two maps. The maps show distance from the dam (where we were planing on launching), with the largest numbers being in the 30’s. Looked like a good chance to try some GPS navigation and, if we got any wind, to determine the rough water ability of Schroedinger’s Cat. Maybe prep for a Gulf tour…?

Arrived a little after 11 am and there is no sign of any homemade boats or builders! I check my watch to make sure I have the date right. You wouldn’t think someone could make that mistake but I’ve been known, on rare occasions, to show up for work and wonder where everyone was at around 10 am on Saturday morning. Or, once, to show up for work at 8pm instead of 8am and wonder why it was getting dark…

Drive around the park for a bit. Site recon. There are two ramps, one secluded with what looks like waters that are protected from the wind, the other exposed on a lee shore. The exposed ramp was next to a camping area with a half dozen people there and was visible from the rest of the lake so I got the boat ready to launch there. Had my truck broken into on a secluded launch ramp once and I’m in no hurry to repeat the experience.

After an hour of poking around, setting the boat up, and launching it (usually takes only 15 minutes but I’m waiting on Tom & George) I decided they weren’t going to make it and set off motoring toward what looked like an interesting island north of the launch site.

Of course when I get halfway across the lake I see a big white Micro pull up at the launch ramp. Had to use the binoculars to confirm. Don’t know why they call them bi-noculars – never could look through them but one eye at a time.

Headed back and tied up at the dock. Itself an interesting experience as I had never tied up at a dock before.

Cell phone to the rescue: George was coming, but the exchange student they had with them was sick and George, Mary, and Olaf would be late. Was decided we would motor to the island north of the launch point and George would meet us there.

We were setting up Tom’s Micro at the turn-around on the ramp and were promptly bitched at by a park ranger for “parking” after we had been there for 15 minutes.

OLYMPUS DIGITAL CAMERA

OLYMPUS DIGITAL CAMERA

OLYMPUS DIGITAL CAMERA

We motor up and around Mud Creek, using the map and the GPS to confirm my initial guess of where the inlet to the river was. Couldn’t see it till we’re within a quarter mile, so this was a good test of my navigation skills.

Visibility was fine, it just looked the same as the rest of the lake! Was thinking we would motor around the island and scope out a nice protected bay to anchor for the night while we waited on George to show up.

Stopped for lunch before we got to the channel that makes the island an island and not a peninsula. Lunch was MREs – what I keep calling my “boat meals”.  MREs, the military edition ones, with the chemical heaters and the whole nine yards. Heated mine up on the stove and gave Tom the MRE heater to play with.

Alana wanted to play with Tom’s dingy, and I broke out the emergency paddle from S’ Cat. It’s about 2 1/2 feet long, not really much of a paddle for a 20 ft boat, but perfect for a 7 year old to play with. I call it my emergency paddle tounge-in-cheek because if my motor quits and I can’t sail my emergency propulsion system is really carried around in my pocket and is made by Nokia.

It developed that Alana can’t paddle a dingy. We didn’t find this out till she was about 15 ft from shore, and too scared to follow instructions. The funny thing being that there was a north wind that would have blown her back to the shore if she had just stopped trying to paddle! All her attempts so get back were keeping her away. She threw Tom the rope before I got the Chebacco started up and away from the shore on shallow water drive.

Shallow water drive is a setting on the Nissan 6 hp where the motor is kicked up about halfway.  Worked so-so in reverse but threw water in the air for 20 ft in forward! Cool!

Didn’t really need the shallow water drive at this point but the predicament gave me an excuse to play with it.

We find the channel back to the lake. Or it would have been a channel if the water was up about 10 feet more… <sigh> I ask Tom if he has a shovel so we can dig a canal 100 ft from the river to the lake… He doesn’t think it’s that funny. We decide to spend the night there.

It’s getting on time for George to show up so I head out at 1/2 throttle and 6 knots back the way we came to go find George. Start heading back towards the launch point and see what looks like a green and red Micro with the bi-(mono)noculars.  Decided there is no reason for me to go all the way over there, hoist the main so he can be sure to see me, and motor over to the lake side of the “channel”.

OLYMPUS DIGITAL CAMERA OLYMPUS DIGITAL CAMERA OLYMPUS DIGITAL CAMERA OLYMPUS DIGITAL CAMERA OLYMPUS DIGITAL CAMERA

Tom’s boat on one side of the cut, mine on the other.

Run aground 50 ft from shore in knee deep water. If the water was at the normal level (4 ft higher) this would be a really cool beach to swim and sail on.

Suggested if we want to get anywhere in the morning we should camp somewhere on the south side of the island so we don’t have the trip down Mud Creek from the “channel” to do first thing in the morning. Tom suggests we camp on the east side of the island so we both motor east and pick a nice spot sheltered from the wind.

First thing I do when we get there is go pee on “No Camping” sign…

I snuggle S’ Cat up into a narrow and deep part of the bay, and tie off with a couple of limb lines. Perfect – I can step from the cockpit to the land!

George shows up in a bit, and we talk and visit for awhile. George, Mary, and Olaf go back to the rec. area to spend the night in the camper. Mary doesn’t want to spend the night in the rain on the boat.

Water is calm all night; we are sheltered from the south wind that blows up in the morning and I sleep amazingly well.

In the morning I burn eggs for breakfast. Apparently the butane stove I have puts out too much heat even on the lowest setting for the thin backpack camping mess kit from Walmart.

In our little protected cove there is no wind at all but the tops of the trees are moving something fierce and the waves in Mud Creek are moving quite quickly.  Looks like lots of wind today. Good – will get a chance to check the sea keeping of CLC in bigger waves.

George arrives and we set off for the island by “Snug Harbor” that we picked out the night before as a destination for the day.

I’m towing Tom’s dingy. As you can see in the picture we are getting some pretty big waves now. I tend to overestimate the size of the waves so I kind of kept an eye on the dingy.  It never disappeared behind waves but got close a couple of times.

Some pounding as the front of CLC drops off of some of the waves and I’m throwing spray 20 ft to the sides occasionally.  Some water coming over the top but not too much. Occasionally water will wash up the back of the motor well but it doesn’t get into the cockpit.

Do not like towing a dingy.  I was making very little progress in these waves, plenty of wind, by only doing about 2.5 knots. I should be doing at least a knot or two more, me thinks, judging from my sailing in similar (if less intense) conditions. Wind kicks up even more, maybe force 4, and I pull a reef in.

Quite a lot of action but I’m dry under the dodger and do not at any time feel concerned about the boat, just annoyed the dingy is slowing me down when I could be making bigger splashes!

George heading back to the launch ramp after taking on water. Only picture of the big waves, I was a little busy...

George heading back to the launch ramp after taking on water. Only picture of the big waves, I was a little busy…

George has a regular 16 ft Micro.  He is plowing into the waves so much that the step holes in the front are flooding the bow well enough for water to start coming into the cockpit through the forward cabin vent!  He drops sail and motors back to the launch point.

I decide I want to beat upwind to get out of big waves and pick up some speed.  Good thing I do as Tom stays pretty much on the north side of the lake and rams four stumps on the trip to the island. He radios when he hits the first one and I swear up and down the map shows him in 45 ft of water.

Hmm… Big stump fields everywhere. Maybe that is what all these little red “>” signs mean?  Not on the legend though.

I leave the reef in even after the wind calms down and let the boat self steer as we continue to beat pretty much into the wind towards the island we picked out.

Island a bust. First off, it’s not an island and has no protected bays. We land on one small projection to keep the boats out of the waves and walk all the way around the “island”. The mud is sticky and gets over everything. There is trash, shotgun shells, ATV tracks, etc. all around and we decide this isn’t the place to spend the night.

Tom is taking on water from his stump ramming sessions so we head back toward dam.

I spend a frustrating five minutes trying to leave!  I can’t get off the blasted shore!  I pull in the dingy painter so it won’t foul the prop and back off the sticky mud with the motor in reverse.  Cut the engine and the wind blows me back to the mud! And I’m on the downwind side of the peninsula! The boat is  sailing UPWIND into the mud! I do this three times before I decide to back out 100 ft to open water under power.  Frustrating.

OLYMPUS DIGITAL CAMERA OLYMPUS DIGITAL CAMERA

Tom’s leak appears to have slowed down so we anchor in a rocky cove sheltered from the south wind. I’m scared of the rocks so I put out two anchors and two limb lines and we take down mizzens for a possible thunderstorm the NOAA man (machine?) was talking about on VHF.

A dingy is useful for something! (other than something for Alana to play with.  And slowing the boat down)  We use it to set anchor lines.

Tom cooks up a couple of pounds of shrimp for dinner and we eat it in the Micro in one of the brief periods of no rain.

Quiet night – slept like a log till the wind shifts to the north and we start getting some small wavelet action to wake me up.  NOAA radio says thunderstorms on a line from Macalester to Muskogee.  South of us and a north wind.  Maybe we’ll be lucky.  I go back to sleep.

OLYMPUS DIGITAL CAMERA

In the morning we have turkey ham for breakfast. Yum. Incidentally, my built-in icebox kept ice in the water bottles for almost a week.  Sweet.

OLYMPUS DIGITAL CAMERA OLYMPUS DIGITAL CAMERA

No wind so we motor back to dam site to see if George hung around or took off.  He’s not there and the showers are locked. Guess I’ll just have to keep making do with my “Leinweber” shower…

We look at the map and decide to spend the night a couple of miles from the dam in a place called Broken Cove.  We start off motoring but the wind soon picks up and we hoist the dacron.  I reject my first pick, the small island, as there is no shelter and it’s in plain view of a bunch of houses.  All the second choices on the west side of Broken Cove are rejected because I can see trees sticking out from half a mile away. We head for the east side and find a nice cove with water deep enough to get the boat noses onto the beach and raft up for dinner.

OLYMPUS DIGITAL CAMERA

Bazillian birds in the area but they get annoyed with the sailboats and leave.

Lunch is Raman with dehydrated chicken.  I boil the chicken and let it soak for 30 minutes but it’s still too hard to eat.  Guess if it takes 18 hours to dehydrate it will take more than 30 minutes to rehydrate.  Will try putting it in a bag with water in the icebox the night before next time.

OLYMPUS DIGITAL CAMERA OLYMPUS DIGITAL CAMERA OLYMPUS DIGITAL CAMERA OLYMPUS DIGITAL CAMERA OLYMPUS DIGITAL CAMERA OLYMPUS DIGITAL CAMERA OLYMPUS DIGITAL CAMERA OLYMPUS DIGITAL CAMERA OLYMPUS DIGITAL CAMERA OLYMPUS DIGITAL CAMERA OLYMPUS DIGITAL CAMERA OLYMPUS DIGITAL CAMERA

I lay down to read for a bit and Tom and Alana take the dingy out for a row. I decide to get up and take some pictures and what do I see but Alana ROWING the dingy back! This is the girl who couldn’t paddle two days before!

For dinner we have pasta and burritos thanks to the miracle of MREs.

After dinner we go out so Tom can sail a Chebacco.  He is very impressed.

You go to the trouble of making beds, and where do the kids sleep?

You go to the trouble of making beds, and where do the kids sleep?

Rains all night.  Humidity is horrible inside the boat.  Condensation on everything; especially the lexan windows. So much so that I don’t even need the curtains for privacy!  Sure clears your lungs out but would get pretty old after a week or so.

Breakfast of eggs.  Not burned this time – borrowed Tom’s iron skillet.

Sail away without using the motor in the morning on light winds, just for giggles. I poke around the bay, heeling the boat on one tack then the other so the bilge pumps can clean out under the floorboards.

tn_PA200058 tn_PA200060 tn_PA200061

Because we weren’t using the motors, got these pictures! (la la la…, what is that behind me? DIVE! DIVE!)

tn_PA200065 tn_PA200068 tn_PA200070 tn_PA200072

Shot of the fall colors in the hills.

Shot of the fall colors in the hills.

I beat upwind for about an hour on a starboard tack, boat tuned, mizzen steering the boat, sitting backwards in the cockpit enjoying the scenery. Sail to the dock in light air, running the last 100 ft under mizzen alone. Tom has motored in already and he grabs the boat.

Put up and do the turnpike dash home.

A very wet and enjoyable weekend.  Learned a whole lot about camping in the boat.

Chebacco Richard – https://www.chebacco.com http://www.richardspelling

***

Jamie goes to Port Townsend – Jamie Orr

In September, the nights are cool, the kids? go back to school, and thousands of wooden boat nuts converge on Port Townsend for the Wooden Boat Festival.

The Festival runs for three days, Friday to Sunday, but I have to earn a living, so it was already Friday morning when Wayward Lass left Victoria, carrying her own complement of boat nuts to the show. These being the usual, my dad and myself. The current tables indicated that a 10:00 am start would make best use of the tide, so we didn?t have to rush. I?d launched the night before to avoid any low tide problems at the ramp, leaving the boat overnight at the Oak Bay Marina. The shortest route from Victoria to Port Townsend is a straight line from Gonzales Point in Victoria to Point Wilson, two miles north of Port Townsend, and the marina is less than a mile from Gonzales. From point to point the distance is 26.7 (nautical) miles, from dock to dock we covered a bit over 30 miles.

We pushed off at five past ten, and motored out to Gonzales, where we put up the sails. There wasn?t much wind, but enough to keep the sails filled with the motor still running. As we got out into the strait proper, the wind improved, but still wasn?t enough to get us to Port Townsend by 6:00 pm, so we motor-sailed for the whole crossing. At 1:05, after three hours, we were some two miles past the mid-point, enjoying a warm sunny day. The wind, although it went up and down, stayed in the west so we had it on our starboard quarter the whole time.

At intervals we would sail through very definite ?eddy-lines? between different tidal currents. Often these brought different water conditions, and we?d move from whitecaps to no whitecaps or vice versa as we crossed the lines. The boost we were getting from the tide also varied, and our speed, measured by GPS, could rise or drop by over a knot at these lines.

The current was fastest near Vancouver Island, where it runs strongly around the corner into Georgia Strait, and again near Point Wilson, where it funnels into Puget Sound. As we approached Point Wilson, we were travelling at 11 knots over the ground, about twice what we would expect without the current. At Point Wilson we also had the best wind of the day, so we shut off the motor for the remainder of the trip. We sailed down to and around Point Hudson, where the boat show is held, and through a forest of boats anchored off the town. We were approaching the ferry dock, wondering when the ferry was going to leave, when it let loose a long blast on the horn. We made a fast gybe to get out of its way, and turned in a large circle that let us pass well behind the departing ferry.

Soon after, we stopped to take down the sails, then discovered that Honda didn?t want to start. This was a shock, as he?s generally totally reliable. However, after some drifting around, and some pointless fiddling around, Honda woke up again, and we docked at the Boat Haven at 3:50 for a total time of 5 hours and 45 minutes, a new record for Wayward Lass. (The motor problem did not happen again ? I don?t know what it was, although Alan Woodbury suggests we attribute it to a vapour lock caused by pumping cold gas into a still-warm motor. Sounds good to me!)

We had help at the dock, Jerome MacIlvanie was there to take our lines. Jerome had his lapstrake Chebacco at the show again, and happened to be at the Haven as we came in.

Here?s Jerome in his immaculate lapstrake Chebacco. This was, of course, taken at the show, not at the Boat Haven.

Here’s Jerome in his immaculate lapstrake Chebacco.
This was, of course, taken at the show, not at the Boat Haven.


And another shot showing some of the finishing detail. You can get as close as you like and It?s still immaculate.

And another shot showing some of the finishing detail. You can get as close as you like and It?s still immaculate.


Chuck Leinweber of Duckworksmagazine  was also there on the dock, and we all introduced ourselves to each other. Then I trotted off to call Customs and check into the country, and then I checked us into the Haven. We were assigned a mooring on the “linear dock”, a long (very long) dock that snakes out from the far end of the Boat Haven and back along just inside the breakwater. Chuck motored over there with us and helped us carry our gear back to the Harborside Inn, right beside the Haven. After we got settled in, Dad and I went across the road to Sea J?s Café for dinner, then back to the hotel for the rest of the evening.

Saturday morning, we were up and caught the first shuttle bus to the boat show, arriving just before nine. Once in, we lost ourselves in looking at the boats on display, in the water and out. I?m amazed at the time and effort people must put in to bring their boat to such a peak, and to keep it there. I try to look after Wayward Lass, but even so, the lines are getting more grey than white, the floorboard finish is wearing, and tiny scratches are appearing in the cockpit paint (that?s what landing on sandy beaches does!). Never mind the more obvious dings, from ramming docks or other boats! Anyway, I saw a lot of great boats on show, all of which I want to build right away. Right.

I want to say thanks to John Harris and his CLC crew for their unfailing courtesy and interest. We not only used their site as a meeting place again, but John relayed messages back and forth, helping everyone find everyone else! Thanks again, John. (And I really like your new Skerry design.)

Other web and/or Chebacco correspondents we saw this year, besides Jerome and Chuck, were Alan Woodbury, and his father-in-law Roger, James McMullen, John Welsford of New Zealand and Dave Lacombe. John is a designer with a wide portfolio for amateur builders. He is better known in New Zealand and Australia, but that is changing ? you can see (and buy) some of his work at Chuck?s website. As in past years, meeting and talking to other builders and sailors was the best part of the weekend.

Alan, Roger and James came out for a sail on Wayward Lass. Once again I was able to sit back and enjoy the sail, while others did all the work. (Something happened when I scanned this picture ? this is a mirror image, the boom should be on the other side!)

Alan, Roger and James came out for a sail on Wayward Lass. Once again I was able to sit back and enjoy the sail, while others did all the work.
(Something happened when I scanned this picture ? this is a mirror image, the boom should be on the other side!)

James is planning his own Chebacco, a lapstrake one with a whole slew of custom touches ? I?m looking forward to seeing it finished.

Some of us got out for a sail, hoping to see the schooner race from close-up again. We didn?t get a lot of wind, but enjoyed ourselves anyway. Jerome was also out, with Archie Conn, who visited Vancouver Island last spring for a sail in Wayward Lass ? he was thinking for a while about building his own Chebacco, (but he?s still searching for the perfect design), and we motored/drifted in company for a while. After it was obvious that the schooner race was a non-starter, we fired up the motor and idled around, looking at boats that caught our eye. Between Alan and James, we could identify most boats in sight, and an astonishing number of the people sailing them!

Alan sent me a copy of the Port Townsend & Jefferson County Leader ? that?s us there on the back page! James is sitting on the cabin, and Alan is waving to the rowing boat.

image008

Alan and Roger had a family gathering happening, and James had a ferry to catch, so we said goodbye after our sail. Dad and I went back to the boat show to see what else we could see. We eventually joined John Welsford and Dave Leblanc for a Mexican dinner ? Dave and the waiter helped the rest of us order. To round off the evening, we had a preview of one of John?s new designs, the new Pathfinder plans that will soon be available on the Duckworks site. As I mentioned above, you can buy a number of Welsford designs at Duckworks ? take a look sometime. (This is not a commercial, take it as a public service announcement!)

Dad and I weren?t sure, when we came over, whether we would leave on Sunday or Monday. The tide indicated an early start would be best on either day, leaving no time on the chosen day for boat show or other activity. While we would have liked to stay another day, the wind was very much in our favour on Sunday, and it seemed a shame to waste it. We also thought there was a chance that things would deteriorate on Monday ? we were wrong, but didn?t know that. In any event, at 6:55 am on Sunday we cast off from the Boat Haven dock, and motored out through all the anchored boats. It was overcast but not raining, with a light breeze from the south. Stopping the engine off Point Hudson, we put on the cruiser suits for warmth, which was just as well, because it was chilly out in the strait later, and we had some showers too.

Sailing from Point Hudson, we rounded Point Wilson at 7:30, and with wind and tide, measured speeds up to 9.7 knots. The wind held steady just over our left shoulders, and gradually increased over the next three hours. We had two other sailboats ahead of us, on similar courses, both of them sloops of 30 feet or more. We couldn?t keep up to them, but we came close for quite a while, especially with the nearer.

By 10:30, the wind was over 15 knots, judging by the whitecaps, and Wayward Lass was getting harder to steer. We hove to and took in one reef, which solved the steering problem. By then the effect of the tide was much less, and speeds were around 5 knots, except when we caught a wave and surfed it ? then we would hit the 7 knot range.

I mentioned bands of current earlier, separated by eddylines. We experienced these again, only with the stronger winds, the difference between bands was most obvious by wave size. On several occasions we were overtaken by a series of sizeable waves ? one of these felt as if it had just picked us up and thrown us forward. The GPS jumped from its reading of 4-point-something to 8.5 knots for just a second, then dropped back to where it started ? quite a feeling, that was!

We neared Victoria, on the southeast corner of Vancouver Island, when it was almost time for the tide to change. Around the time of the change, the current atlas shows a lot of smaller, circular eddies, and I think we were caught in one of these for a short time, as our speed over the ground dropped to 1.7 knots, despite the fact that we were still moving well through the water. Luckily we sailed out of this fairly soon, since the wind was dropping, and we were able to pass south of Discovery Island before the now-flooding tide could push us up the eastern side. Once past Discovery, we were almost home and needed to go north for the last mile anyway, so the north-flooding tide wasn?t a problem. With only a breath of wind, we sailed slowly between the breakwaters at Oak Bay, around all the docks and in towards the gas dock, then lost the wind completely as we turned for our final approach. This meant that I didn?t make the tidy landing I wanted, but we did manage to drift in without calling on Honda for a push. Canada Customs take calls from the phone at that dock, so we were able to officially re-enter Canada there.

Our time for the entire trip home was 6 hours and 5 minutes, just twenty minutes more than the trip over took, but this time we did it under sail. This was a first, since we?ve always used the motor on the crossing before, even if we were sailing at the same time. As I?ve said, we could have stayed over another day without weather problems, but we don?t feel badly after that great sail home. Although, come to think of it, Dad had a great sail home, not me ? he had the helm the whole way, I only got to hold it while he put on his boots, poured his coffee, and stuff like that! Still, I had a great passage, so I won?t complain.

See you there again next year!

***

Miscellaneous boat pictures – Richard Spelling

OLYMPUS DIGITAL CAMERA OLYMPUS DIGITAL CAMERA OLYMPUS DIGITAL CAMERA OLYMPUS DIGITAL CAMERA P9030001

Decided to try my hand at upholstery, and I’m to cheap to pay someone else. Recycled some 4″ foam I already had, bought some 2″ foam and vinyl online, and broke out the sewing machine I got in the divorce. Laying out the lines was a simple exercise in 3d thinking, and I simplified it and made the outboard sides of the bunks vertical instead trying to match the rotating angle of the bilge panels. As is, the 2 inch seat cushions fit perfectly in the gap beside the bunks to keep you off the plywood.

OLYMPUS DIGITAL CAMERA

Here are a couple of shots of the boat underway. These give you a good idea of the view forward, and a good idea of how much the boat heels under normal conditions. Doesn't normally go over much more, even with lots of wind.

Here are a couple of shots of the boat underway. These give you a good idea of the view forward, and a good idea of how much the boat heels under normal conditions. Doesn’t normally go over much more, even with lots of wind.


OLYMPUS DIGITAL CAMERA

Here I have the boat up on car ramps so I can take off the rudder to fix the leak around the rudder post.


OLYMPUS DIGITAL CAMERA

Three shots of me casting the silicon bronze hull number plates for the boat. HOT!

OLYMPUS DIGITAL CAMERA OLYMPUS DIGITAL CAMERA

Interior shot of the bunks in place.

OLYMPUS DIGITAL CAMERA

Couple of shots from the Conroe fall messabout. (before the camera died of dead batteries and stupidity)

OLYMPUS DIGITAL CAMERA OLYMPUS DIGITAL CAMERA

Chebacco News 42

On the Road Again – Jamie Orr

Being the further adventures of the good ship

Wayward Lass

in Clayoquot Sound (for chart, turn to the last page)

image002

Yes, Wayward Lass has been on the road again, this time to Tofino on the west coast of Vancouver Island, to explore Clayoquot Sound. Clayoquot is made up of a number of inlets, with three major islands, Meares, Flores and Vargas. Meares Island was the centre of considerable attention a few years ago, when logging and anti-logging interests clashed over clear-cutting on the island. Meares is also the most interesting island from another point of view, as it lies completely within the sound, and can be sailed around without venturing onto the open sea. Flores and Vargas islands guard the outer edge of the Sound, providing sheltered waters on their eastern sides.

Saturday

I was supposed to get away with my dad, Les, in June, but work kept me in Victoria for another month. We didn’t know it at the time, but this turned out to be a blessing – in the whole week, we were going to have lots of sunshine, almost no rain, and a good sailing breeze for part of every day. We arrived in Tofino about 3 o’clock on Saturday afternoon, after a five hour drive from Victoria, and launched soon after at the 4th Street Public Docks (shown in the “cover” picture) . We found parking for the van and trailer only three short blocks away.

We left the docks at 4:40 pm, and motored north for a short distance through Deadman Passage, with sand banks to port and rocks and mudbanks to starboard. I should note here that as we travelled, we frequently left one channel for another, with the tide changing between fair and foul almost as often. The tide was ebbing on Saturday evening – in Deadman it was on our starboard side, as we turned west in Heynen Passage it was in our favour, then when we turned north again to Maurus Channel it was dead against us.

About 8:30 we anchored in a small cove on the northeast side of Vargas Island. This was still close to Tofino, and turned out to be on a busy corner. While well sheltered from weather, it was wide open to the wakes from the numerous water-taxis and whale watching boats that passed the entrance every few minutes. These carried on until late – not a good recipe for a peaceful night!

image004 Wayward Lass at anchor in the morning, with Lone Cone (on Meares Island) in background

Sunday

Next morning was a bit quieter, and we cooked up bacon, eggs and toast for breakfast before the traffic got going. Then we got moving, under power since the wind wasn’t up yet – this was the general pattern for the week, no wind in the early morning, a bit in the late morning, a quietish spell then a good breeze in the mid afternoon, lasting until evening. Once out of our cove, we headed northwest to Millar Channel, where we turned north. Near the top of Millar, around noon, a light wind came up, so we put up the sails and stopped the motor. (About the same time, we saw the only porpoise we were to see on the trip.)

At the north end of Millar Channel, Obstruction Island splits the channel into two – the passage to the west is fairly straight, but Sulphur Passage to the east is a more interesting, winding around corners and islands. We thought we’d make use of the favourable wind and the last of the flood tide, not to mention our shallow draft (a great comfort at times!) and sail through this route. The wind became fluky and unreliable behind the island, but never totally deserted us. At the most eastern part of the passage, we were drifting more than sailing, but once around that corner, we could feel some air again, so were able to beat down the next leg and see our way between Obstruction itself and the last islet of the chain next to it. Once through, we were quite pleased with ourselves.

We now faced a long beat westward to Sydney Inlet. The tide was starting to ebb (having changed channels, we now had the ebb in our favour), but the wind was against us. I lost count, but I believe we crossed and re-crossed that inlet a dozen times, with the wind strength going up and down, and often changing direction due to the hills and valleys either side of the channel. We finally rounded the point and started south down Sydney Inlet. Unfortunately, by this time the ebb was almost done, and the wind had gone around to the south, following the line of the channel, leaving us still fighting for every inch. Our goal was Hot Springs Cove, just around the corner at the mouth of the inlet. After all our work we were determined to reach Hot Springs, and we passed up one or two inviting bays on the east shore of the channel. One of these had several kayaks pulled up on shore, and tents on the beach. Smart kayakers — it took us another hour to reach the final point, and then we just could not get around it. The wind was almost completely gone, while a strong current was coming around the point against us. We tried for a good hour, but were either pushed back into Sydney Inlet, or towards the rocks where the gentle ocean swell was breaking in a most ungentle way. In the end, it was Honda to the rescue, and we motored into Hot Springs Cove, arriving at the Parks’ dock 10 minutes later. During this short stretch, we had the only rain of the trip, a shower that lasted until we had the shelter up. Since Hot Springs Cove was our only pre-determined destination, we celebrated with wine and a spaghetti dinner, with an excellent meat sauce brought from home.

Our galley arrangements might be of interest. To start with, we don’t carry a cooler on board. It would be too bulky, and we couldn’t keep the ice long enough anyway. Our solution was to put the perishables under the floorboards in the cabin. We kept bacon and eggs for three days this way, and they were still good – we finished them by then so I don’t know how long they might have lasted. Hard sausage, butter and cheese were still good at the end of the week. There was a bit of mould on the cheddar, but we scraped it off and the rest tasted fine. Beer and soft drinks went under the floorboards in the cockpit, since a bit of salty water won’t hurt them. The rest of the “galley” went in two plastic storage boxes. These are convenient, and the soft plastic doesn’t mark the paint when they’re moved around. Our stove is a two burner camp stove that runs off one pound propane bottles. The stove goes under a cockpit seat and the bottle, once started, is stored in the cockpit, in the open space under the motor well.

Monday

The next morning, we were up bright and early (well, early anyway) and by 7:00 were on the trail to the hotspring itself. This trail is about 2 km long, and is boardwalk all the way, with lots of stairs up and down. The spring starts a few metres above the high tide line, the water first appearing as it falls over a small rocky cliff – I found this natural shower a little too warm to stand under. The hot water then runs through a series of rocky pools, cooling as it goes. These pools are more or less natural – some rocks have been re-arranged to better hold the water, or for comfort – but they’re still small, rocky pools in the end. The best has a gravel bottom, and is big enough for 4-6 people (depending how well they know each other) to sit comfortably. We were lucky in that only two other people were there when we arrived – what it’s like when the tour boats come in I don’t know! However, I’d hate to see it developed – for me, the appeal is in the unspoiled surrounding. Happily, since the point is a Provincial park, it’s likely to stay as it is for a while at least.

After our soak, we hiked back for some breakfast, then at 11:00 we left Hot Springs Cove to go down the outside of Flores Island. This route is open to the Pacific swells – nothing between us and Japan – so we were careful to get an up to date weather report from the VHF. Favourable winds were predicted later in the day, but as there was no wind when we set out, we started off motoring. Once we were clear of Hot Springs Cove, a light south-west wind did appear, but it wasn’t enough to make us put up the sails just yet.

image006 Next stop, Japan!

We thought we might be able to start sailing at Rafael Point, an hour away, where the coast falls away to the southeast, and we could hold a course without tacking. As we approached Rafael Point, I saw a puff of spray shoot up from the surface. After a second, I realized it was a whale spouting! Soon we were able to make out three or four grey whales. First the spout would appear, then the whale’s back would appear as it started to dive. Once or twice we saw a tail come briefly out of the water – just like on the postcards!

image007 Here’s the only picture we have of a whale – see the grey hump in the middle of the grey sea? The mist is the spout, several seconds old.

We were pretty thrilled, but didn’t hang about too long – we were still very conscious of being on an exposed shore in a not very big boat.

Instead, we got the sails up as planned, and managed to sail slowly down the coast, but the wind wasn’t really strong enough. – the rocking and pitching from the swell was making the gaff and boom thrash around, so eventually we dropped the sails in favour of motoring again. Passing an unnamed point two or three miles southwest, we saw another group of three whales, so we were well pleased with our morning.

South of Flores Island, we motored back into sheltered waters, eventually turning north again into Millar Channel, this time turning into smaller Matilda Inlet to dock at Ahousat, where we topped up the gas tank, and re-filled our 5 gallon water jug. We decided to stay the night there, and take advantage of the special at the cafe (sweet and sour meatballs.) There’s a sizable marine railway at Ahousat, and at high tide that night they were going to put a fishing boat back in and haul a 53 foot cruiser – a huge fibreglass beast. The cruiser had lost one of its propellers, but the owner had spare props and shafts aboard. I went along at 10 pm and watched the show. The operator of the ways, who also runs the store and everything else there, gave instructions to the cruiser’s owner and several other men on the cruiser as to where he wanted it placed in relation to the supports, then disappeared up to the winch end of things to fire up the engine and start hauling. It was a very smooth operation, finishing with the boat out of the water, but still overhanging it, so actual repairs were to start once the tide allowed. (I took a look in the morning, at low tide, and the two inch stainless steel shaft had snapped off cleanly, just outside the “A” bracket. I’m told this is not an uncommon happening with stainless shafts on big boats – just one of those things rich people have to cope with.)

image010 Wayward Lass at Ahousat, looking across Matilda Inlet to the Indian village of Marktosis

Tuesday

We ate breakfast at the café (moral decay setting in!) then took a look at the chart. Our decision was to go around Meares Island, particularly as both wind and tide should be in our favour for several hours. We fired up Honda and set off back down Millar Channel, but we fairly soon felt some wind and put up the sails. About then, one of Tofino Air’s floatplanes came along, not wasting much fuel on altitude – it was so low that it swerved around us rather than flying over! Soon after that, we left Millar behind, cutting inside both beacon and rocks at the point in order to avoid any extra distance in the light wind. (By watching the local traffic, fishing boats and water taxis, we got a good idea of where it was safe to cut corners.)

image012 Sailing close inshore in light wind.

On leaving Millar, we turned northeast, sailing between some small islands on the way to Cypress Bay. On the way, we passed Hecate Bay, which used to be a big centre for logging activity. There was a big chip barge and a tug moored in the bay, but it didn’t look like a lot was going on.

image014 Here’s Dad toughing it out in Cypress Bay

At the north end of Cypress we lost the wind, so were motoring as we passed through the narrow entrance to Quait Bay, which opened out into a sizable sheltered anchorage, with enough room for a hundred boats. There was a big floating resort moored on the northwest side, catering for sports fishermen, but we didn’t attempt to land there, instead continuing on around the bay then ducking out an even smaller passage to the east of the main entrance.

The wind returned nicely about this time, and we were able to sail eastward towards the narrows at the north end of Meares Island, getting through them just before losing the flood as well as 95% of the wind. We had thought, in our innocence, that on reaching the east side of Meares Island we would pick up the ebb going south, but found that the current was flowing the wrong way! Some study of the chart and the guidebook showed that the flood goes all the way up the west side of Meares Island, across the north end, then down the east side (where we now were) before turning up Tofino Inlet in a northeast direction. And of course the ebb goes back the other way. The tide also flows east and west through Browning Channel south of Meares, but Browning is narrow, so a lot of water takes the long way north around Meares. All of which is to say we blew it and didn’t get any help from the ebb tide.

We started the motor again, heading south and looking into Mosquito Harbour, which is much nicer than its name. Coming out we were able to use the local wind and sail a mile or two, but once clear of Mosquito Harbour, we lost the wind – all the bays we looked into had their own winds blowing out, but I’m not clear on just what causes these.

We by-passed the next bay, since we could see down to the end, and the wind was blowing strongly out of it anyway. At the southern end of our channel, we turned east towards Tofino Inlet, not noticing right away that the wind had come up behind us.

When we did notice, it was hardly worth putting up the sails, so we kept on motoring around into Island Cove, then into another, tiny cove on the south shore of that – absolutely no wind here. As we putted slowly in, getting ready to drop the hook, we saw a young black bear foraging his way along the shore. He stopped and sniffed the air when he heard us, but didn’t pay us much attention beyond that. We passed by about 20 feet out, then circled for some more pictures. He just kept working his way along, and by the time we had the anchor set, he was out of sight. Made a great end to the day.

This also made me realize that I have to invest in either contact lenses or a new camera. I have an old Olympus SLR, but when I focus the camera now, I’m also compensating for my eyesight, so the resulting pictures aren’t as sharp as they used to be!

image015 A young black bear on the shore of Island Cove

We also saw (and heard) an eagle spiral almost vertically down to the beach, but before he could do more than peck at something he found there, five crows arrived and started to verbally abuse him with great enthusiasm. The eagle took himself off, pursued by one particularly aggressive crow.

Wednesday

As was usual by now, there was no wind as we started off at 8 o’clock, so we were motoring as we got properly into Tofino Inlet, heading towards the Kennedy River. The chart indicates this should be navigable, at least at high tide, all the way to Kennedy Lake, but there are drying areas, as well as at least one bridge with no clearance indicated. As the tide was low, we settled for going up only a few hundred yards before turning downstream again. We also looked into Kennedy Cove next door, where some old pilings were all we could see left of a cannery that thrived (throve?) there years ago.

Continuing up the inlet, we looked into another cove, slipping behind some small rocky islands to come out the back door. Dad was steering while I watched for rocks from the bows – I could see a rocky ridge below us as we passed out of the bay, but it was safely under our keel.

image017 Here we are up the Kennedy River, looking downstream towards the river mouth

Travelling the rest of the way up Tofino Inlet was an enjoyable if uneventful trip, getting a little sailing when the wind appeared for a short time, but motoring most of the way. We’ve found that a lower setting on the throttle gives almost as much speed as a higher, but it’s a lot quieter, so it felt like we were loafing along. We passed several small islands, including two that together almost cut off the head of the inlet from the outside world.

My goal was to have a swim once we reached the far end of Tofino Inlet, as the guidebook said this was the warmest water in the area. Okay, that may be so, but the rest of Clayoquot Sound must be damn cold! Up here it wasn’t quite gasping cold, but I didn’t stay in long. Getting back in Wayward Lass, I used as a step a line strung between cleats at either end of the cockpit – something I’ve thought about for recovering a man overboard. When I stepped on it, the line swung under the overhang of course, but it still helped me get aboard by on my own.

image019 Here’s a view of the head of Tofino Inlet

Just about then, about 12:20, the wind came up, a healthy one at last – maybe 10 knots. We motored clear of the islands and got the sails up about 1:00, then started tacking back down the inlet – do I need to mention it was against us? No? Okay then, I won’t.

We crossed the inlet at least five times, working our way southwest. As we left the last of the bigger islands behind, it started to blow harder, and we started to take some spray

aboard – lots of whitecaps by now. By the time we were back down near the south end, it was well over 15 knots, so we ducked in behind a handy island at about 2:30, and put in a reef. Then it was across the inlet again to Grice Bay on one long, wet thrash!

At its western end, the inlet narrows considerably, feeding into the even narrower Browning Channel. and the wind was funnelling through these at an estimated 20 knots by now, so sailing through seemed unlikely to succeed. In which case, we thought we would motor through Grice Bay. This large bay is mostly mud flats, with a narrow channel winding south of a biggish island to join Browning Channel further west. We thought it might be a challenge keeping off the mud, but it turned out to be dead easy, since the tide was well up. We navigated down what we thought ought to be the channel anyway, to be on the safe side. It was a trouble free journey until some floating weed choked the cooling water intake on Honda. Luckily, it also caught around the prop, and the change in engine sound caught our attention. I stopped the motor and cleared away all the crud, after which it started again on the first pull.

Once out into Browning Channel, it was just one long plug into the wind. Since the tide was going with us, it was a wet plug as well, with a sizable chop thrown up by the battle between wind and tide. We pounded a bit, but didn’t have to slow down. With the favourable tide we managed over 6 knots a lot of the way. The eastern entrance to Tofino has a big submerged rock blocking the channel, and our (old) chart didn’t show any aids to navigation, but we thought we would give it a shot, rather than add a couple extra miles to go around. A good decision, since we found a pair of lateral buoys marking the channel in – these were very close together, no more than 25 feet between them, so I was glad we didn’t have to judge it by the kelp alone! These markers must be fairly new, since the guidebooks don’t mention them – our Waggoner guide is only 2 years old. We arrived at the 4th Street docks at 4:45, and downed a couple of pale ales to celebrate.

image022 Les Orr in Wayward Lass, at the 4th Street docks, in Tofino

These docks are mostly reserved for commercial fishermen, so are busy all day and a good part of the night, but about 20% of the space is available for pleasure boaters. We shared “D” finger with a couple of big sailboats headed (separately) around Vancouver Island.

Waggoner passes on a glowing recommendation for the Rain Coast Café. We went there and found that he’s absolutely right, but he forgot to mention that quality costs. Our visit left a large hole in my wallet, although it was unquestionably the best halibut I’ve ever tasted, and the peanut butter pie was right up there with it!

Thursday

The forecast for Thursday morning accurately predicted fog, but it cleared early at Tofino, so after a quick bite at the Coffee Pod Café, (which I recommend highly for good foodand for its prices) we cast off for Lemmens Inlet. Right off the bat the engine sucked in some green, hairy weed floating at the dock and had to be cleared. Once we’d done that, we paddled clear of the crud and re-started. Once you get past a couple of islands to the north of Tofino, Lemmens Inlet carries on straight north, trying hard to cut Meares Island in half. It doesn’t quite make it, but it does provide a great day of sheltered, fog-free travel. Motoring up it, we took the narrower western route when the passage divided, successfully getting around the north end of the island by scraping past what we think was an oyster farm moored just off the shore. We wanted to look into a small unnamed bay to see if it would do as a shallow water anchorage, but ran into some eelgrass (a new Kevlar variety, I think) that wound itself firmly around the prop. I pulled up the motor and worked at clearing the grass while Dad started paddling our way out of the weed patch. It’s funny, in 2 ½ years, I haven’t had a problem with weed, but in these last two days we were stopped three times by it. Once out and clear, we abandoned the bay, since it was on the wrong side of the eelgrass, and headed on up the inlet. The next bay along is known as God’s Pocket, and it’s a good sheltered anchorage. We poked into another tiny bay inside, (God’s Watch Pocket, perhaps?) that was just Wayward Lass sized for anchoring. There was one nasty rock to avoid near the entrance, but once we were in, it was almost as nice as our nook in Island Cove.

As we came out into the main part of God’s Pocket, the wind came up, so we upped sails and motor and sailed out of the bay, then right up to the end of Lemmen’s Inlet. We had a good run going north, where we turned and started beating back south. Since the flood was running later every day, and we were up to Thursday now, it was still running and we had that against us. However, the wind was reasonably steady, and we made good progress back past God’s Pocket, (showing off to the two big sailboats still anchored there) down to where the inlet narrows between the mud banks. The wind was lighter now, but steady, so we kept sailing. I got out the lead line, but found I wasn’t able to get good results – maybe I need more practice, or maybe we were still moving too fast. Anyway, we found we could see the bottom in time to tack, so we were able to avoid any embarrassment. Eventually we sailed right out of the bottom of the inlet, feeling very smug (again!)

We were now at the east end of Heynen Passage, and had to work to windward again to take Deadman Passage back to Tofino. (No matter which way we turned, we had the wind against us because it was being funnelled by the land, and we were travelling generally west.) The current was stronger now, and we were making slow progress. On the plus side, though, the water had covered the mud, so we crossed our fingers and took a short cut over the banks east of Deadman, on the wrong side of several rocks and islets – we could just nicely make our course on a close reach. We could see the bottom, about four or five feet down, but as our maximum draft with the centreboard down is only four feet, all was well.

Once through, it was still too early to quit, and as we were pointed at the channel leading to the open sea, (well, not quite open, one more biggish island south of Vargas still offers some shelter) we carried on past the town. Off the point on the northwest tip of the peninsula where Tofino is located, is another small island. This effectively blanketed our wind, and we bobbed around near the rocks for a while, but the ebb finally pushed us out to where the wind could reach us again. We sailed around to a nearby cove where we had been told there were mooring buoys and safe anchoring. Didn’t see any mooring buoys, (found out later they’d been removed) and the wind blew right into the bay, where some healthy (for surfing) rollers were beating up the beach. Nowhere I’d want to anchor, for sure. We worked up to windward a bit, then turned back towards town. We got stuck in the same wind shadow, but this time the tide couldn’t help. We finally got through when the wind picked up, and we had a royal run down the length of Tofino’s waterfront – got a big thumbs up from the guy on the seaplane float, I wish we could have had a photo from there too.

Since no one was at the loading/unloading dock at the end of “D”finger, and it was parallel to wind and channel, a landing under sail looked like a good idea. We don’t get to practice these much, (I think this was our first) I wasn’t sure of our turning circle, and we had a good stiff breeze behind us now, so I was somewhat shy of hitting the dock. As a result, the first attempt positioned us nicely parallel to the dock, but 10 feet away. We were able to keep turning, though, and circled, making the second half of the circle into two 90 degree turns and finishing stopped against the dock, just like we knew what we were doing. After we moved to an overnight spot, it was back to the Coffee Pod for dinner. (I hate to admit it, but every time we were at a dock at mealtime, we caved in and went to a restaurant – brought half our food home with us. Ate well, though!)

Friday

On Friday the fog finally caught us. It was thick and grey, and only a few water taxis were going out. I guess with radar, GPS and digital charts they can handle fog without much trouble. We had a leisurely breakfast (at the Coffee Pod again!) and did what chores we could find on the boat – not many left after five full days on board. Then we remembered that we had the van nearby, so we topped up Honda’s remote tank from the spare can, and took the can for refilling. To Uclulet, 30 miles away.

Rather than unhook the trailer, and wonder where to leave it, we pulled it along. The spare gas can fitted nicely in the “U” channel for the keel, and a bungy cord kept it there, so we didn’t have the smell of gas in the van – very convenient.

We actually filled up before Uclulet, but we carried on, right through the town out to the southernmost point – both Tofino and Uclulet are on peninsulas, one north and one south. Then we located a boat ramp for future reference – not very fancy, and expensive, but quite usable for Wayward Lass. We could see fog around parts of the inlet there too, showing that we weren’t missing any sailing, so we took time out for a coffee.. However, it doesn’t do to take chances, so we were soon back on the road to Tofino.

image024 Fog on D dock, at Tofino’s 4th Street docks.

As it happened, when we reached Wayward Lass the fog was definitely clearing, so we cast off right away. The tide was low, so we were careful to keep between the markers in Deadman Passage. There’s a dirty big sandbank on one side, and a dirtier big rock on the other to keep you honest, here. Once we had a clear course through, we got the sails up and worked our way through both Deadman and Heynen passages, and into Maurus Channel. At the point where we turned up Maurus Channel we ran into the fog again, however, we had the radar reflector to keep the water taxis off, and the GPS to back up our dead reckoning. Before the trip, I had entered waypoints from Tofino to Hot Springs Cove, in case of fog, and we were back on part of that route so these waypoints were ready if needed. We were in thickish fog for a mile or so, then we sailed out of it and left it behind. We sailed to the point beside our first night’s anchorage, where the tide and wind coming around the north end of Vargas Island met us head on, then started the motor, thinking of an “outside” trip around Vargas. However, a weather check told us that fog was still thick outside, and 25 knot winds were predicted for the afternoon, so we abandoned that idea. We’d been tossing it around for a couple of days, but between fog and higher winds forecast out there, we hadn’t tried it. I guess we were lucky to have had one great day outside the islands, never mind asking for more. Instead, we turned north for Cypress Bay and raised the sails again, planning to anchor for the night in Quait Bay. We now had the wind behind us, as well as the flood tide, so we were soon making good time, hitting 6 knots at times.

About mid-afternoon, I thought I’d try out the jib. This is shown as an option on the Chebacco sail plan, and I made one last winter. I haven’t had much luck with it, but haven’t used it much either. I decided that if I got all the strings just right, I could set such a small jib without leaving the cockpit. It took a couple of trips to the bows to get the strings set up, of course. At the beginning of the week I had put a line up to a block to use for this and/or the radar reflector, so at least I didn’t have to climb the mast! Finally, everything was ready. I put the sail on the cabin roof and started pulling the halyard and downhaul (there’s no stay, the jib is set flying.) It went forward and up as planned, but the sheets took the opportunity to wrap themselves firmly around the downhaul, and it took two more trips forward to sort this out. I should have kept a firm tension on the sheets as the sail went forward, I think.

While I was doing this, Dad sensibly kept us on a bit of a reach, rather than running straight downwind, so I wouldn’t get whacked by the boom if we gybed. However, it was getting to be time to gybe before we ran out of water. We noticed the lee-side mizzen sheet had caught in the pulled-up motor, so I loosened that and cleared it, then Dad started to put the helm over. However, I hadn’t pulled the mizzen sheet back in enough, because the mizzen sail suddenly swung forward in the cockpit with us! Dad put the helm back where it was, to stop the gybe. But the wind got behind the main anyway as we worked to clear the mizzen, and we had a lulu of an uncontrolled gybe. We saw it coming, so no one was hit by the boom or caught by the sheet, but the gaff finished up vertical, ahead of the mast on the windward side, with the mainsail wrapped around the mast to leeward and the boom cocked up at a jaunty angle! Luckily, we were able to gybe back and clear it all, and then gybe a third time onto our new course before we hit any rocks (remember why we started all this?) A fair bit of a schemozzle, but personally, I blame it all on the jib.

We sailed a while longer with the jib set, but it really is too close to the mainsail to work properly. So far it’s been a failure – other Chebacco sailors, Fraser Howell for one, have successfully used a jib, but only with a bowsprit, and I have no plans to add one of these at present. I’ll keep the sail anyway – maybe I’ll want it for a downwind run sometime when it’s blowing too hard for the main.

By now we were nearing Quait Bay. We took in the jib, with my patent “from-the-cockpit” method working smoothly this time, and chose our course to allow for the brisk wind, which of course promptly died. Dad still had the helm and he persevered, slowly working us into the entrance. At this point, we felt a slight breeze follow us in, and we kept that all the way to a nook at the far end of the bay, where we rounded up to anchor at 4:45. I didn’t drop the anchor immediately when we turned, as I wanted to back down a few feet.Wayward Lass, though, didn’t want to stop sailing, and forged ahead in the light air, even with the mainsheet slack – I guess the wind was light enough that the weight of the boom held the sail in position. So we anchored first, then furled the mainsail, then lifted the anchor off the bottom and backed down as first planned.

Ham with rice was on the menu, and I tried to follow my wife’s instructions for cooking the rice, but couldn’t make the stove simmer. Instead, I turned the heat right off after bringing the water to a boil, but this way the rice was taking forever to cook. To while away the time, I took in the mizzen, which had been left up, sheeted amidships. Right away, we started to sail around the anchor, even with the rode in the Jonesport cleat, leading directly over the bow. I put the mizzen out again, sheeted it amidships, and bingo! – we were head to wind again, dead steady. Then I added more water to the rice and boiled it into submission. We had the last of the wine to celebrate a successful cruise, and to distract us from the now soggy rice.

While we were anchored here, we saw a burst of bird life. An eagle snatched something out of the water and landed on a rock on shore to eat it, and a kingfisher also dove in for his dinner – didn’t see if he got anything, but he flew away and didn’t come back. We saw some divers (later identified as red-breasted mergansers) patrolling the water’s edge. They would put their beaks and eyes under water, then swim quickly along. One suddenly put on an extra burst of speed, and dove under. A second later it was on the surface again, flipping a fish around in it’s beak, then bang, the fish was gone. Evidently this was a prime spot for fish dinners!

Saturday

After a peaceful night, we were up early to take advantage of the ebb to get to Tofino. I’m not sure why, as we were motoring again and could have easily beaten the tide. Still, it’s the nautical thing to do, right? The forecast didn’t mention fog at all, but still called for winds of 20 knots on the outside, so the round-Vargas idea stayed dead. It was time anyway to get back to town, and get on the road home. To speed things along, we didn’t have breakfast, just grabbed a snack on the way.

As we travelled south, we passed a tug pulling a barge, loaded with a grapple and a grader, towards Hecate Bay, so maybe things aren’t as dead there as they looked. We also had a second sunrise as we motored along, as the sun climbed above a narrow but heavy layer of cloud in the east.

I was thinking that despite our early arrival at Tofino, we’d have to wait for the tide to bottom out, then rise a bit before we could recover the boat, since on such a low tide the water would be down to the end of the ramp. However, the tide behind us did it’s work well, we made 6 knots over the ground most of the way, on an estimated 5 knot throttle setting, and with this on top of our early start we arrived two hours before low tide. I hustled off for the trailer, and after several attempts managed to get it in far enough, without putting one wheel or the other in a hole. Then I went over to “D” dock where Dad was waiting with Wayward Lass. Usually I like to be ashore to guide the boat on by hand, particularly since I learned that the keel can hit the ends of the steel frame if it misses the centre bunk, but in this case I was too lazy to walk all the way back to the ramp. We both stayed aboard, and made a “hot” landing, luckily putting the keel right in its U-shaped bunk. Definitely more luck than skill, since the current was pushing us sideways at an unknown rate!

And that was the happy ending to an entirely satisfactory cruise of Clayoquot Sound. We hauled Wayward Lass out, unloaded and unrigged her, then before starting for home, stopped for a last breakfast at (where else?) the Coffee Pod Cafe.

image026

Life is good!

The Chart

When I read accounts of coastal cruising, I always want to see where they went, so I’ve attached a copy of the large scale chart for Clayoquot Sound. Brown indicates land, blue is water, and green is where it dries at low tide. I’ve roughly indicated our track in red. The numbers refer to places mentioned in the text. I’ve emphasized the shoreline, but haven’t attempted to show all the rocks and small islands. My hand may have slipped here and there, so if you know the area and something doesn’t look right, it probably isn’t. If you’re reading this on-line, it’s going to be small, but hopefully you can enlarge it enough to read the numbers and see some detail. If on hard copy, a magnifying glass helps.

image027

The chart is plagiarized from the Canadian Hydrographic Service chart number 3640. This is an old chart, (my copy of the chart is about 25 years old,) which was superseded when the hydrographic service changed over to metric charts. My apologies to the Service, along with my thanks for this and all the other excellent charts they produce.

***

Launch of Buster – Randy Wheating

Scan1 Scan10001 Scan10003

Hi Richard

Congratulations on the launch of your Chebacco.  Built and launched in
one year, that is light speed from my perspective.

I finally launch my Chebacco, Bluster, at the Stave Lake (one hour east
of Vancouver) public ramp on July 7th.  I have been puttering away on
this boat for over five years.  I still need to build the masts and
booms and I have purchased the Sailrite kit all of which will be next
winter’s project.  I am thrilled with the final results.  She handled
the five adults and two children easily for the inaugural one hour
cruise on a typically warm and rainy west coast day.

Bluster is a sheet ply Chebacco with a few minor changes:
The keel is laminated solid fir
Cabin top is raised two inches and the cabin sides pushed out to
line up with the coamings.
Transom is one continuous with a cut out for the motor
Motor well is slightly smaller (fits two 3 gal gas tanks)
Coaming is continuous along the aft section (no cut out)
Rudder and rudder post are welded aluminum
Mast to be deck mounted on a welded aluminum tabernacle; shrouds and
fore stay required
Plank style bowsprit with anchor roller and fore stay for jib

I splurged out and purchased a 5 hp Honda four cycle outboard motor
which I am very pleased with.  I purchased the optional ‘power prop’
designed for displacement hulls.  This prop gives me about 1/2 knot more
speed over the standard prop at all throttle settings.

On the weekend of July 13th  Lisa and I took Bluster out for her first
salt water and overnight trip.  We live close to the end of the Port
Moody arm of Burrard Inlet (the mouth of which is the city of
Vancouver)  We planned to travel the end of Indian Arm which is the
longest arm of Burrard Inlet, the end is about 30 km from Vancouver. We
launched at Rocky Point at 6:30 pm on Friday night and we were dropping
the hook around 8:30 pm in Bedwell Bay off Indian Arm.  I am new to
anchoring so I reset the anchor once and tested it before we tucked into
our cockpit candle light dinner.  We spent a fairly comfortable night
but awoke several time to check on things.  I noticed that Bluster would
dance around in the slightest of breezes (up to 180
degrees) not  on the anchor but just on the weight of the anchor line.
The large, heavy,  motor yachts  in the anchorage did not budge.   Maybe
the mizzen and centreboard would buffer this movement.  The night was
warm and the mosquitos  had a go at us.  Note to me – need a screen for
companionway opening.

Up at 7:00 and motoring away from anchorage by 7:45.  We cruised over to
the village of Deep Cove and tied up at the public wharf. Walked  into
town a found a cafe for a big breakfast.  After this in a warm but light
rain we motored north 18 km to the end of Indian Arm.  Stopped once to
brew up a coffee on my single burner hiking stove.

We motored steadily all day and the Honda (with standard prop at this
time) just purred along.  GSP gave us 5.5 knots at half throttle and 6.1
at full.  Even at a fast idle we moved along at 2.9 knots. Used
approximately 3/4 of the 3 gal gas tank for the entire cruise.  Lisa
thinks we should skip the sails as it will just complicate the fun and
she would lose her seat on the front of the cabin top.

Arrived back at the ramp around 3:30 pm on Saturday at an extremely low
tide.  No retrieval problems.

Since this trip we have been out for several day cruises with the
children (Jacob 7, Sam 5) for family fun.

I have attached some photos.

Thank you Richard for all the work in maintaining the Chebacco site.

Randy Wheating
Port Moody, BC
Richard Spelling wrote:

> Wonderfull looking boat. Looks like you spent the 5 years well.
>
> Why solid wood keel?
>

Years ago, when I was getting around to the keel, I had never heard of a hollow
keel and it seemed vulnerable in the case of groundings or trailering.  I also
had a supply of really old rough cut 2″ boards in my father’s barn that need a
purpose in life.  Through work (industrial fiberglass manufacturing) I had
access to some kevlar scraps that I used to encase the keel.

>
> Transom and aft deck looks good, why did you do it that way?

I though the original drawings were odd in that it cut away all but 2″ of  the
transom and then bolted a motor mount plank across the hole.  Therefore, after
much pondering, I went with the solid transom.  I needed to attach a little
wedge to the transom to get the motor angle right.  I recall Brad Story’s
version have a solid transom.

I also did not care for nor understand the purpose of the big cut away into the
motor well from the cockpit and then adding a plank for the mast/tiller so I
made this solid and added a little access hatch under the tiller to get at the
forward part of the motor well (through which I can slip a 3 gal Honda gas tank)

>
>
> BTW, love your floor boards. Look much better than mine. Pine?

These boards are the cheapest wood on the boat – scrounged from a lift on
utility grade 1×4 spruce we use for pallet building at work. I just cut to fit,
rounded the edges and varnished.  My plan was to replace with some nice fir
boards in the future but the pallet wood seems to look fine.

>
> Welded aluminum rudder post? 2″ I thought of doing that, but didn’t think it
> would be strong enough.
>

So far, so good.  I copied  Fraser Howell’s idea and I have access to an
excellent welder at work who could whip it up for me.  I fabricated all the
metal work (tiller bracket, chain plates, anchor roller mounts, fore stay
brackets) and had these professionally galvanized.

>
> Interesting, you are trading standing rigging for a simpler tabernacle, and
> a usefull jib. Let me know how it turns out. Don’t forget the compression
> load on your mast now.
>

I do not expect the standing rigging to be a big deal and I wanted a nice tight
fore stay for the jib.  The mast is actually to be cabin top mounted on an 1/2″
thick by 9″ tall hinge.  I laminated the forward bulkhead to 1″ thick to act as
a compression post.  Cut a square hole in it rather than a round one as per the
drawings.

>
> Don’t let Lisa convince you to loose the sails. There is something about
> flying along in silence with nothing but the wind pushing you that can’t be
> matched by motoring.
>

You certainly do not need to convince me.  I am busting to get sailing.  Lisa
has not really had any sailing experience to speak of so I am eager to share
this with her.  I have learned to go slow.  As they say:  “When the momma is
happy, everyone is happy.”

Cheers,
Randy

***

Miscellaneous boat ramblings – Richard Spelling

“It’s a Chebacco. No, it’s a yawl, not a ketch. Yes, I built it. Thank you.” Well, if nothing else I meet lots of people.

At least they don’t think it’s a fake boat!

You know, life is funny sometimes. I built this boat to take the family, and in particular the wife, out camping and sailing. The wife likes the boat, but she still left and took all the kids. Life is change, I guess. At least I got a boat out of the deal. Know any girls who like to build boats? More to the point, know any girls who like boat builders ?

Img22 Img20 Img16

Img10 Img04

Out sailing, some of the hard to get pictures of your boat sailing. Quite windy, put in a reef and went splashing through the big waves where the wind had a couple of miles to build up waves just after this. Beat to windward, run back and beat to windward again. Much fun, got water on the inside of the windows! (hatches were open). Ex 6 year old stepdaughter had a blast.

tn_DSC00001 tn_DSC00007

Hey! I want one of those. Picture of a powered parachute buzzing around. Right is a picture of the recycled electrical panel I made for the boat. Was a panel for some computer equipment I salvaged from the trash. Some 50 cent switches and fuses, and some holes bored on my homemade milling machine, and presto, switch panel.

DSC00004 DSC00005 DSC00006

Anchor well, anchor rode, and launching rope. Wedge under motor to give proper trim angle. I put this on because the back would dig in at full throttle, and I thought the trim was off on the motor. Back still digs in, I guess I’m climbing over the bow wave. No matter, when the motor is tilted up it rides lower with the wedge, less chance of water going up the exhaust and into the cylinders now. Also, you can’t pull the motor off strait up, you have to slide it off sideways now. And, there is a plate screwed on with with epoxy blocking the screwdriver slots on the soft brass screws to prevent sideways sliding. Theft prevention. Right is battery charger.

tn_P9020001 tn_P9020002

Foam and boards to go on the seats and the berths. Going to try my hand at upholstery. Note clean empty living room. One advantage of being single again, I can work on boat stuff in the house!

tn_P9020005 tn_P9020006

Prototype of hitch mirror. Doesn’t work, moves and gets out of alignment due to the wonderful roads here in Oklahoma. Thought was to let me see the hitch in the rear view mirror for hooking the boat up singlehanded. Designing Mark II now. Right is a picture of the storage areas under the berths.

DSC00008 DSC00009 DSC00010

Here we are launching a friends Micro in Grand Lake so we can work on the trailer without jacking the boat up. This is so we can take both boats out sailing.

DSC00011 DSC00012 DSC00013

DSC00015 DSC00016 DSC00017

DSC00018 DSC00019 DSC00021

DSC00022 DSC00023 DSC00024

OK, I lied. It wasn’t Grand Lake.

DSC00025 DSC00026 DSC00027

Modifications to the trailer to fix the lights, and to encourage it to sink…

DSC00028 DSC00029 DSC00030

David: “I’m not going in there!” Me: “It’s not like it’s a sewer or something!”

DSC00031 DSC00032 DSC00033

DSC00034 DSC00035 DSC00036

Me: “Yuk!”

tn_DSC00037 tn_DSC00038 tn_DSC00039

Hint: Do not drive an old trailer with 8 inch wheels in a rocky field with holes deeper than 8 inches, you will break leaf springs. Right is emergency repairs.

tn_DSC00040

Micro goes back in it’s barn. I guess we are only taking one boat out.


***

—-Original Message—–
From: Richard Spelling [mailto:richard@spellingbusiness.com]
Sent: Monday, March 25, 2002 10:52 AM
To: Mike Haskell
Subject: Re: Request in next newsletter

Sure, no problem. Maybe we should ask them to register so
everyone has thier email addr?
Put the side decks on, and started the mast this weekend.

—– Original Message —–
From: “Mike Haskell” <mike@AdventureQuest-USA.com>
To: <richard@spellingbusiness.com>
Sent: Monday, March 25, 2002 9:45 AM
Subject: Request in next newsletter

Good morning Richard,

When you complete the next newsletter, would you put in this request:

To all Chebacco lapstrake builders. My name is Mike Haskell and
I plan to start building a lapstrake Chebacco in the summer of 2002. By scouring past articles in the Chebacco News, I have deduced that the following may have, or have built or are building lapstrake Chebaccos:
Marc Lindgren
Allan Bell
Bill Parkes
Bill Meier
Jerome McIvanie
George Cobb
Gil Fitzhugh

Would each of you be willing to respond to me off list. I’d like to have your e-mail addresses, so that I can contact you to see whether or not I can pick your brains as I get into this project. Gil, since you and I have already correspnded, you need not contact me again–I have your address and you are currently at the top of my “When I Need Help Call______” list.

Thank you to all who respond–and there is a prize. If you ever get to Maine, stop by Bowdoinham, we’ll go sailing or kayaking, and I’ll treat you to a bowl of the best lobster stew you’ve ever eaten.

Sincerely,

Mike Haskell

Mike Haskell, President/CEO
Adventure Quest-USA
Leadership That Gets Measurable Business Results, Guaranteed!

Forging Business Leaders Who
-Create Effective Work Teams
-Increase Productivity
-Deliver Measurable Business Results
mailto:mike@AdventureQuest-USA.com
http://www.AdventureQuest-USA.com

Chebacco News 41

Trailering (trailing?) the CLC – Richard Spelling

Lots of contributions this issue, thanks everyone.

AF2 Entropy was stolen! It was waiting in the parking lot for the new owner to take it for a sail, and someone decided if it was left in the parking lot for over a month, it must be abandoned, and took it home! And, it was sitting with seven other boats! Can I build them good or what? The guy who took it tried to register it, and the Colorado DMV said “emm, wait a second here”. Turns out he is a boat builder, and couldn’t stand to see the boat sitting in a parking lot not being used! He’s contacted the rightful ower and is trying to buy the boat.

Well, I’ve been working on the CLC for over a year. It’s done. I really don’t know how someone spends 5 years or so working on a boat project. Not to say I can’t see how one could take that long, but I can’t see how anyone could stand to work on one that long, and not feel that they had to get DONE, NOW, ERRR.. Probably just my impatience.

Made up a trailer, an interesting exercise. Solicited advice from all of the registered Chebacco owners, then went ahead and did it my way anyway! Like any good project, I had a list of requirements, things I’d learned from previous trailers, or from other people.

1) I wanted road wheels. Large, car sized tires are supposed to travel better, they turn slower and span bumps that smaller tires drop into. Important on the good roads where I live.

2) I wanted a low slung trailer. Drop axle, frame bent in the middle for a keel. I wanted the boat to sit as low as possible on the trailer and still clear the wheel wells.

3) I didn’t want a trailer 7.5 or 8 feet wide. The boat would fit on this trailer better, but there are a lot of turns you can make without hitting things with a narrower trailer. I don’t mind if the boat is a bit wider than the trailer, it’s up in the air and will clear most things a wider trailer would run into.

4) I wanted a ramp on the front for the keel to sit on. I’ve had issues with having to lift the front of the boat up to get it onto cross bunks when retrieving. I wanted to be able to just winch the boat onto the trailer.

I had an old power boat trailer sitting in the back that fit all of the these criteria, a little modification and I was in business.


We launched on a Saturday morning, hot and sticky, winds 10-15. Wonderful day for sailing. Took a long time friend of mine, David, the two smallest kids Paul and Alana, and my son Brian.

It’s really quite amazing how quick this thing is to setup. Without hurrying, and never having done it before, I had the boat in the water 10 minutes after arriving at the ramp. Remove boat tie down, remove light bar, unstrap masts, step and unfurl mizzen, hoist mast, back into water. That simple.

I need to come up with a solution for getting into the boat when it’s on the trailer, even if it’s just a couple of well placed handholds. However, the boat is suprisingly easy to get into with the nose on the beach. I was pleasantly surprised, you can put the nose on the beach, and step on shoes dry. Side walking around the pilot house to the cockpit, the boat tilts till the chine digs in, then stops dead.

Motored away from shore with the brand new Nissan 6hp. Very sweet, idling it moved us as fast as the trolling motor would move the AF2 flat out. The trim is off, I made the motor mounting board flat to the transom, so the rear of the boat digs in about 4 inches when the motor is pushing, even at the max down setting on the motor. Will make an 11 degree wedge and fix that right up. We motored out to the center of the lake at half throttle (still breaking motor in), then hoisted the main.

We had a nice breeze from the south by southwest, perfect for heading to the hiway 64 bridge. Set on a beat to the east. Boat was pointing good, it would tack through 90 degrees with no problems at all, but I didn’t push it. After we rounded the point across from the local sailing club, I started experimenting with self steering.There was a trivial amount of weather helm, 5 degrees or so. This was easily trimmed out by hoisting the centerboard a bit. Look Mom, no hands!

It was hot and sticky, but there was lots of breeze off the bottom of the main, coming through the hatches. The kids lounged about in the cabin while David and I played sailor. The boat is rock steady, and at no time was I concerned about capsizing. Which was kind of the point of building this one. You change sides when sailing, buy only so you can see what the sail is doing, your crew and passengers can stay where they want. In the puffs it heels over and kind of squirts forward.

I made the stove and john with semi flush lids, so people could sit on them. I made the cabin doors open inwards, and put catches on them. This had the effect of making the whole boat feel like one big cockpit, you could easily talk to the people in the cabin, and they had a comfortable place to sit with an unobstructed view.

We sailed up to the bridge, then turned around and started running back. The water is up quite a bit right now and I don’t think I could have made it under the bridge without dropping the mast, which I wasn’t in the mood to do on the first outing. The main doesn’t twist any more than the AF2 main did when running, even though there is no vang on the CLC.

We reached and ran all the way back to the boat ramp on the failing afternoon breeze. The boat didn’t even seem to notice the two unintentionally flying jibes. The wind is quite shifty around here, and has a tendency to shift 90 degrees without warning, especially coming back into the cove I launch from.

Sailed the boat up onto the beach, reaching with the centerboard up. A wonderful first sail, and I’m very happy with the boat!


Now, to the pictures.

tn_1DSC00001tn_1DSC00003 tn_11DSC00007

On the left, we are putting on the motor mount board and the partner for the mizzen. You can see the trim masked off to recieve stain and varnish. Center I am vacuum bagging the tiller. I asked on the Bolger group if you could vacuum back Titebond II glue. I got a lot of replies arguing over the creep tendencies, and the relative strength of Titebond II vs epoxy, etc. Nobody bothered to mention that you can’t cure an air dry glue in a plastic bag…! Had to take it out and clamp it without the bag. On the right is my vacuum pump. I’m slowly learning, instead of spending $100 on the parts to fix up some old compressor, I bought this vacuum pump/compressor on ebay for $30. It pulls about 15 inches of mercury (about 7 psi) of vacuum. The manufactures website says it has a rating for continuous use at a pressure of 30 psi, so I should be able to just leave the thing on during the entire bagging process.

tn_1DSC00004_3 tn_1DSC00005 tn_1DSC00006

Left is a picture of the fancy mast locking gate. Similar to the gate that held the mast in on the AF2, simply a piece of 1/4″ stainless steel and a couple of 3/8″ bolts. On of the holes is slotted, and there is a wing nut on that side. Center is a picture of the floorboards going in. Have since added hinges to the outermost 4 boards, so I can access the bilges for cleanup.

tn_1DSC00008 tn_1DSC00009 tn_1DSC00010

Left is a shot of the UHMW poly bearing plate for the rudder. Holds it down and keeps it from rubbing against the boat. Right is a picture of the Lexan going on. Ya, I know, I said I was using plexiglass. Well, it cracks if you look at it wrong, or drill to fast, and the tint looked HORRIBLE. The Lexan is almost impossible to break, and I should have used it to start with.

tn_1DSC00011 tn_22DSC00014 tn_222DSC00012

Left is a picture of the forward sliding hatch. Right two are the raw material for the boat trailer. Note the fancy $15 welding cart.

tn_2DSC00001_2 tn_2DSC00004_2 tn_2DSC00005_2

How do you figure out the clearances for your bunks? emmm. Ah HAH. Template!

tn_2DSC00007_2 tn_2DSC00008_2 tn_2DSC00009_2

Another $15 welding cart, little helper, and temporary winch post. Note that the bilge boards, the ones that hold the boat upright, are just clamped on (with GOOD clamps) at this point. The will have to be tweaked with the boat on, and the carpet on them. Also note the nice roller arrays. Destroyed EVERY ONE of these rollers putting the boat on… Sigh, wired some carpet covered plywood over the roller axles and am trying to forget about it…

tn_2DSC00010_2 tn_2DSC00011_2 tn_2DSC00012_2

Getting ready to load boat. Not the high tech pulling attachment. Actually, this is high tech. I’ve learned though hard experience that there is this little thing called “leverage”, and that winch posts need to be short and stubby, and pull on the bottom of the boat. This is pulling on 4 turns of 5mm spectra line, going through a 5/8″ hole drilled in the solid wood of the stem. The line is almost as strong as steel, and would rip the front of the boat off before breaking. The 1/2″ stainless U bolt is for if I ever need a tow, and makes a nice solid attachment for an anchor line.

tn_2DSC00013 tn_2DSC00014 tn_2DSC00014_2

On the right we are backing the trailer up to the boat. To the left of the right hand picture is my pair tree which condescended to give us a single pair last year. For it’s generosity, I didn’t cut it down to get the boat out.

tn_2DSC00015_2 tn_2DSC00016_2 tn_2DSC00017

Didn’t feel like spending the time or money to rig something up to lift the boat up for rolling the trailer under it, so we winched the boat onto the trailer. On the left we are moving the front of the boat over to line up with the trailer, right two we are just starting to winch it on. We took our time, took lots of breaks, and checked clearances often. Took about 4 hours for the entire operation.

tn_2DSC00018 tn_2DSC00019 tn_2DSC00021

Crank, crank. Remember what I said about leverage? We almost pulled the heads off of two 3/8″ carriage bolts, and started to pull two welds apart. Of course, if our rollers hadn’t disintegrated on us, and we hadn’t been dragging the keel over a bunch of steel axles… Center, we are about to remove the forward half of the building cradle. Jack is under to lift boat for adjusting the set on the trailer.

tn_2DSC00022 tn_2DSC00023

Front cradle removed, aft bilge support posts on trailer keeping the boat from tipping over now.

tn_2DSC00024 tn_2DSC00025 tn_2DSC00026 tn_2DSC00027 tn_2DSC00028 tn_2DSC00029

Cradle gone. Temporary aft bilge support boards screwed in place. Center Brian is unscrewing the board that was holding the centerboard up. Right, on the trailer and ready for tweaking.

tn_2DSC00030 tn_2DSC00031 tn_2DSC00033

Final, stubby, winch post. Right is a picture of the forward keel ramp and support.

tn_2DSC00034 tn_2DSC00035

More pictures of the keel ramp. Pictures of the bilge supports in the back. No way the boat can slide off backwards now, has to float up and over the aft bilge support boards first.

tn_2DSC00036tn_2DSC00037tn_2DSC00038

Idea! Teach teenager to weld, so he can crawl under the boat trailer and weld braces on. Am I smart or what?

tn_3DSC00001_3 tn_3DSC00003_3 tn_3DSC00005_3

Mast going on, right is the fancy, high tech, attachment system for my center window.

tn_3DSC00006_3 tn_3DSC00007_3 tn_3DSC00008_3

Light board. Technically, I probably could have just put reflectors on the back of the boat, and left the lights attached to the trailer. However, the smokeys around here have a tendency to give you tickets if they even THINK you are outside the law. I could quote statutes at them, but…. Center, light board is attached. Payed extra, bought LED, submersible, trailer lights. If they save me a ticket for a burned out light bulb, they will pay for themselves. Right is the parts for the gaff saddle. The geometry says it needs to turn 90 degrees on a 4 inch radius to fit under the mast when folded, fit against it when hoisted, and fit perpendicular when down.

Of course, I made my tabernacle to short, so the gaff won’t fit under the mast when folded… not sure what happened there. Not a big deal to pull it off and tie it to the side, though.

tn_3DSC00009_3 tn_3DSC00010_3 tn_3DSC00011_3

Decided on ply laminations for the saddle, instead of spending the time and effort to do one up of steamed oak or whatnot. I’m toying with redoing the gaff hollow and extremely light, which will require a new saddle anyway. Next to the saddle on the tablesaw are the castings for the gooseneck for the boom. It’ll be stainless turing in aluminum, but I’ll keep it oiled and hope corrosion doesn’t screw it up two bad.

tn_3DSC00013_3 tn_3DSC00014_3 tn_3DSC00015_3

Castings after machining, jaws with sides attached. Vacuum bagging the thing.

tn_3DSC00016_3 tn_3DSC00017_2 tn_3DSC00018_2

Nice thing about vacuum bagging is it pulls all the glass down to the odd corners. Right, David and Alana inspecting the boat on launching day.

tn_4DSC00019_2 tn_4DSC00021_2 tn_4DSC00022_2

Stepping the mizzen. Hoisting the mast. I have to pull and close the gate at the same time because the lazy jacks are lifting the boom and gaff up.

It didn’t sink! To the right, native swimming and playing with a canoe. On the boat ramp. Next to the sign saying “Don’t swim in boat ramp area.”

tn_4DSC00023_2 tn_4DSC00024_2 tn_4DSC00026_2

Me at the helm, motoring out. Passengers in the cabin. Note the reefing and halyard lines.

tn_4DSC00027_2 tn_4DSC00028_2

Reaching back to the ramp. Note the passengers napping in the cabin. Lots of room, cool in the heat. Also note the two access ports to the anchor bay. Thrifty Marine finally came through with the deck plate there were sending me to “make up for” the $18 order I had to threaten them to get shipped.

All in all, I’m very happy with the boat, and I think the trailer turned out wonderful. I have since hooked up the solar panel and the lights, and we are taking the boat out on the 4th to watch the fireworks at the lake.

– Chebacco Richard.

***

The cruising season is OPEN! – Jamie Orr

Hi Richard

Wayward Lass kicked off her 2002 cruising last weekend with a short trip to Friday Harbor, on San Juan Island, part of Washington State.  If you go to http://www.mapquest.com/, enter Friday Harbor, WA, in the search box, then click on “big map”, you should get a good view of the area.  In fact, if you draw a line from the bottom left corner of Vancouver Island, to the pass between the islands below Friday Harbor, draw another line from that pass north, then west to Friday Harbor, you will have our route over, exactly.

fridayharbor

Three of us were travelling over to an afternoon of Scottish country dancing in Friday Harbor — my wife Maureen, our friend Anita and myself. The forecast for Haro Strait to the east was good, with light to moderate winds, the one for Juan de Fuca to the south was not so good, strong winds were forecast, a small craft warning for later in the day.  (Our track took us right along the line where the two Straits touch.)  Since we would be there by noon, I decided we could go ahead, but I had some reservations about the trip back on Sunday, as the Juan de Fuca outlook was for stronger winds.

We got away from Oak Bay Marina at 7:15 am, pushed along by our 5 hp Honda. There was quite a tide moving around the end of Vancouver Island, and it was kicking up a few waves.  However, once past Discovery Island, visible on Mapquest just under the “a” in “Victoria”, it quieted down and we turned into the wind to put up the mainsail.  Unfortunately, the wind wasn’t strong enough to fill the sail with the motor running, and we needed the motor to meet our deadline, so after a few minutes we took it down again.

The south end of San Juan was hidden in fog.  I had a course plotted on the chart, with allowance for the tide pushing us south, but also had waypoints entered on the GPS — I went with the GPS, keeping the chartwork for backup. Traditionalists will be pretty disgusted so far, what with using both engine and GPS.  That’s a shame, because that’s pretty well what the trip over consisted of.  I will say that our planning was sound, in that we avoided the small craft warning, but we hit some big waves south of San Juan, resulting in some pounding.  Maureen was napping in the cabin, and got some air time off some of the waves.  Luckily, what little wind there was threw the spray the other way, so we stayed dry and enjoyed the mini-rainbows. After the turn north through the pass, we got a good boost from the tide, making good speed to Friday Harbor.

Once there, we landed at the customs dock and phoned the office.  Since Wayward Lass and I are in the system already, we were able to clear over the phone, so were free to go and arrange a berth for the night.  The we all went off to the dance and a barbecue after.  Later, Maureen and I slept aboard while Anita was billeted with a local dancer.  The marina is big, and was noisy in the evening, but quieted down after dark and we had a good night’s rest.  I recommend it as a well run place, but it’s kind of like living in a floating city.

Next morning, there was a small craft warning for the eastern end (our end) of Juan de Fuca, but Haro was still just fine.  Being on the cusp, as it were, I didn’t know what to expect once through the pass at the bottom of the islands, but thought we’d better go and see.  If it was too rough, I could always come back and put my passengers on the ferry.  We set off at 8:45 so as to arrive at the pass at 10:00.  We needed to go through before the tide turned, but didn’t want to catch the strongest part of the ebb because we’d be fighting it once we turned west.  As we approached the pass, we were all dressed for the worst, but as we came out into Juan de Fuca, we found ourselves enjoying a sunny summer day.

There was a nice south east breeze, so we put up the sails, and stripped off all the foul weather gear.  I guess Juan de Fuca is a big piece of water, and our little corner was well away from any stormy weather.  We planned to hug the shore to work our way north before crossing Haro Strait,so that the ebb would not carry us to the south, and  this worked very well, we found an eddy that helped us on our way for about 6 miles along the San Juan shore.
(We went north about level with the printed “Gordon Head” on the Vancouver Island shore before we crossed.)  When we finally struck out into the Strait, the ebb came from slightly behind us, and we made an excellent crossing.  We motor-sailed until I was sure of making the northern entrance to Oak Bay, then shut down the motor and enjoyed the quiet.

The northern entrance, Baynes Channel, and I don’t get along very well — again I found I was fighting the tide there.  I’d misjudged the turn so we had to start the motor again to get in, but after such a good crossing, I could live with it.  Once at the marina, we called the Canadian customs, who also cleared us by phone.

A good start to the season — sunshine and only a few waves.  I know from personal experience that that stretch of water can be very uncomfortable, so I was relieved not to have to fight our way home.  The plan is for Maureen to keep enjoying these little trips, and only be exposed to rougher weather once she is at home on the water — wish us luck!

PS  I hope the reference to Mapquest helps — let me know if it did or not.
Thanks.

***

Chebacco Sailrite – Fraser Howell

Here is a picture of Itchy & Scratchy wearing her new Sailrite main.
This sail differs slightly from the stock sail. It is loose footed, with
an extra 6 in. round in the foot, the draft is slightly less, and the
maximum draft is slightly further forward. The sail sets well. The boat
tacks through 90 degrees, beats faster with less weather helm. The
sailrite kit was well assembled, and the directions were clear. The
thing went together in about 30 hours, almost all with a standard home
type sewing machine.

itchy2

The deepest draught is 8%, 30% aft. The previous sail had 6 hard seasons. It was rarely reefed. max draft was increased quite a bit. Windward ability was severely reduced. The weather helm is now greatly reduced. I go upwind with the board fully down. The old sail needed about 10 degrees of weather helm, the new one, 5 or less. Hit 9 mph on a broad reach by Garnin E trex. maintained 7-7.5 in winds just shy of whitecaps.
Glad you are keeping up the newsletter, it is still a good read.
cheers
Fraser Howell

***

I get my kicks from Champlain – Phil Mead

I had planned Father’s day weekend with my son, Adam. We were going to sail
his boat, a Capri 14.2 I purchased used and refinished for him, but the
weather washed out our plans. Since I was dying for a sail, it seemed like
a good time to go solo aboard Legacy. Naturally, it decided to keep raining
like mad, but I was determined to go fair weather or foul, so I headed
north from Concord along I-89 to Mallet’s Bay on Lake Champlain. I have a
Shore-Land’r trailer with the widest allowable wheelbase and it tows and
launches the boat beautifully. Since I wasn’t fully rigged-up, I spent the
first two hours under my stepped mast bending on the main to the gaff and
attending to various details. It continued to pour until evening then
stopped like someone shut off a faucet. I decided to chance a quick evening
sail because I’d not been on the water with Legacy since last fall.

Legacy was wonderful in the very light evening airs, she ghosted along with
such a nice little gurgle under her hull, she had me singing.(I think the
gurgle sounded better!).

Mallet’s Bay is really two bays. A small inner bay and a much larger outer
bay. The bay is formed by a motor causeway to the north and an abandoned
train causeway to the south. Father’s Day dawned with heavy clouds but only
very light rain. The wind piped up nicely from the south, so I decided to
sail (without mizzen) the outer bay area. When I set out, I was the only
sail on the horizon. despite the relatively moderate conditions. Later a
couple of larger boats, 30-35 footers joined me.

I took a long, broad reach north past beautiful sandstone and limestone
cliffs that dropped straight into the harbor. I think the Chebacco’s are at
their finest on these points of sail. With only half the center board down,
there was very little tendency to yaw. I was really boiling along and past
a number of trolling fisherman, so I estimate I was making about five
knots. As I neared the northern causeway, white-caps were appearing so I
decided it was time to turn about and beat my way back. Champlain kicks up
a lot of short and choppy waves but the full keelson breaks them up nicely
and really reduces the slamming on the flat bottom. I had little trouble
going to windward despite the absence of the mizzen although I’m sure it
would have driven her better. There was a slight tendency to stall if I
tried to point too high so I let her back off on her own then “cheated”
upwind when it gusted. A couple of the gusts caught me when I was sitting
on the lee side, but once that chine hits the water she really doesn’t want
to go over any farther. At no time did I fear a capsize.

The launch ramp ( the Vermont Fish and Game maintain wonderful ramps and
they are free!) was on the south shore so I beat my way in as far as it was
safe to, then found a small cove to drop the main. Here’s where I found out
I wasn’t as spry as I use to be. Running up to the foredeck made me glad I
didn’t do any cabin modifications, but I think I’ll bring all the running
rigging back to the cockpit before I set out alone again. I managed to
avoid any collisions with the cliffs or any the the many, many boats at
anchor and got safely back to the slip. I actually love the part where I
take Legacy out of the water and I think I’ve found a nifty way to do this
without assistance. I simply tie on a long mooring line to the Jonesport
cleat and the aft cleat and walk it on the the trailer standing off to one
side. She’s so light she floats to within a foot or so of her resting
position on the trailer.The rest is easy.

I hope to make Lake Michigan Legacy’s next big lake adventure. I’m trying
to talk Frank (my father the builder) into a longer cruise. He doesn’t
think he’ll get his 22′ double-ender, Song of Ruth (a strip built design)
in the water this year and wants to sail with me. Frank is busy building a
small pulling boat for my sister, so I may have trouble getting him out of
the shop and onto the boat, but I don’t think he’ll really be able to
resist. Good sailing to you all, Phil

***

Take one homemade boat – Pat Spelling


Take one homemade boat, a little wind, 2 adults, one teen and two children, pop and junk food and you get one relaxing Saturday evening—even if you DON’T like to sail.


It was my first voyage out on Schrödinger’s Cat, Hubby’s new Chebacco boat.  It was the second sail for the boat itself.  We attracted the usual admirers as we put the boat in the water.  I have noticed that homemade boats never fail to attract favorable attention, no matter what they look like.  Anyone who knows me knows that I am NOT a fan of sailing.  I never could figure out how to sail and fish.  Those ropes get in the way every time and periods without wind make me want to climb the walls, or the very least jump overboard and swim to shore.  But tonight we were blessed with a nice steady breeze.


I like the design of the Chebacco in many ways. They say that people choose pets that look like themselves. Well, I think that the Chebacco looks like Richard in many ways.  It has a sort of scowl to it.  Hubby has a square face and his eyebrows meet and that is the effect of the front windows.  The Cat is wide, yet low and sleek, something his last boat, Entropy was not.  Entropy was not a bad boat, though at times it reminded me of a floating casket.


I do have to admit that sailing in this vessel was a pleasure. For one thing, the passengers are no longer ballast!!  I can now enjoy a book while I ride.  The seats are comfortable and the cabin enjoyed natural ventilation. When we launched the temperature was 90 degrees and yet we stayed cool.   The last boat had a flat bottom and the continual pounding made conversation all but impossible.  This design has a flat bottom too but the pounding was minimal.  I also appreciated the spaciousness, even with five of us, we were never crowded.


Now, being married to a absolute boat nut, I hear about boats in every sentence except when this man is sleeping.  I have seen more than my fair share of boat designs.  I have been asked to give my opinion on many designs.  My hubby is an optimist. Hoping that I might be bitten by the “boat bug”.  I haven’t,but I am not blind and I do appreciate good design.  I am grateful that Susanne Altenburger has added some style to the otherwise bland box designs that are out there.  While I probably won’t be the first to suggest that we go sailing, I probably will enjoy the times that we do all go sailing now, thanks to this new cool cat,Schrödinger’s Cat that is!!


-Pat Spelling

***

For Sale – Sheet ply Chebacco

How’s it going?  I wanted to let folks know about my decision to sell my Chebacco.  I really love this Catboat but I love my girlfriend more and want to pursue that a while.  The boat is built exactly to Phil’s Specs.  The trailer was purchased new for $1,300 a couple of years ago and the 1997 Force five hp. Outboard was purchased new for $800 as well (it sat on the showroom a long time I guess).  The sails were purchased as a kit from sail-rite, the mainsail being sewn by a professional, and the mizzen sewn by me since it was small and manageable.  I launched this boat for the first time in April of this year and have taken one two week trip and several small day trips so far.  There are a few normal scratches on the hull and the spars but nothing out of the ordinary.  The hull is planked in Douglas Fir Marine plywood and the floors and roof framing are Douglas Fir.  There are a couple of floors made of Southern Yellow Pine and the trim is all White and Red Oak.  The sliding hatch was cold molded and then veneered on the inside and out with White Oak as were the drop boards – no sign of wear on any of these components.  All trim and spar varnish was Epifanes WoodFinish Gloss and it shows.

Bill Samson listed his for 4,500 lbs. Sterling which is approximately $6,500 I think.  I would like to ask $6,500 to start and see what happens.

Thanks Richard.

Pete Respess
Hopewell, VA

SmithPointlight

***

For Sale Lapstrake Chebacco 20

LOD: 19′ 6″
Beam: 7′ 10″
Draft: 1′ 0″
Sail Area: 176 sq. ft.

(Lots of wonderful pictures here -Ed)

Built by an experienced amateur. Over four thousand hours building time. The best of materials used. Finished with two-part polyurethane. Sprayed by a professional. Bright work finished with Norwegian varnishing oil (between six and eight coats).Hull is built of 7 ply half-inch marine mahogany plywood; keel is built of same material, laminated to proper thickness.The keel is covered with double thickness of 11 oz. fibreglass cloth saturated with epoxy. 1/16 inch stainless steel was then attached to the bottom of the keel and up the stem as far as 22 inches above the waterline. Outside of boat is covered with 11 or 6 oz. fiberglass cloth which was then saturated with epoxy, then an additional four to five coats to allow for sanding to a mirror finish before painting. Inside has four coats of epoxy.Spars are solid sitka spruce. Fittings are all top quality such as Harken or custom made of bronze or stainless steel.Three sails (main, jib, and mizzen.) All lines, sheets and halyards ready to go. None of them ever used.Custom made trailer with extendable tongue for easy launching. Elaborate supports that fit to cabin and aft cockpit bulkhead to hold spars for long distance trailering.No O.B. motor. (4 to 5 HP would be suitable.)The boat was completed Sept.2000 but ill health precluded launching and am selling the boat now for the same reason.Price $12,500 USD(See article in Wooden Boat – #107, Pg. 80)Address:
George Cobb,
186 Gallagher St.,
Shediac, N.B.,
Canada, E4P-1T1
Email: gcobb@nbnet.nb.caPhone: 506-532-0007

Chebacco News 40

Intro and more building the CLC

aDSC00008_2Well, I’ve sold my AF2. Entropy retired to a happy home in sunny Arizona. Pays for the outboard on the CLC. Interestingly enough the buyer, according to his friend (who we delivered the boat too), has an occupation of “rich kid”. I think it’s neat that he could afford any boat in the world, and wanted my homemade one!

Looking very much like a boat.

The standard thing that people said when I was building the AF2 was “how are you going to get it out the door?” The standard thing people say about the CLC is “It looks like a boat”. As you can see from the pictures below, it does look like a boat. Just not a sailboat!

Windows, what to do.

I finally decided to go with Plexiglas/acrylic instead of Lexan/polycarbonate. Decided to do my own tinting instead of paying the extra for the tinted acrylic, not sure I saved any money, and in the long run may need to redo all the windows. However, they would be easy to switch out, in that event.

Battery adventures

Well, the money I saved by going with the Sam’s Club golf cart batteries turned out to be not any money at all. I have this bad habit of doing that, I’ll do something to save money, and wind up spending more then if I had just gritted my teeth and did it right to start with. Have to work on that.

When I was installing the batteries I noticed acid leaking from on of them when I moved it to the boat on the hand truck. Not good for a sailboat (even one that looks like a power boat) that the batteries would leaks when tilted. Decided to get the West Marine version of the golf cart batteries, even though they cost twice as much as the Sam’s batteries, on the theory they wouldn’t leak. Two weeks after I placed the order, West Marine still didn’t have them. Canceled, and paid twice as much again, for MK gel sell batteries with the golf card form factor.

bDSC00004_9 bDSC00005_6The Westco Battery guy said “they probably double stacked them”. Right on the side of the box it said DO NOT DOUBLE STACK. (not really a box, more a cardboard half cover for the batteries)Then, when they came, one of them had a smashed in center cell. With some encouragement http://www.westcobattery.com/ sent a replacement. When it arrived, it was three! I originally had complained because a couple of the bolts were missing. Apparently they sent two new batteries then. Then when I convinced them the cell was smashed too much, they sent a replacement for that. Swapped out the bad one and sent the three back. (on their dime)

Interestingly, the shipping guy was having a cow that I would claim the batteries were damaged. I told him it was between him and WestCo. He put the three batteries on the hand truck to haul them up the driveway, and guess what, only two would fit.  So, he stacks the third one on top. Is that “double stacking?”

bDSC00004_4 bDSC00018
I remember a conversation with a guy who had built a very pretty wood and epoxy boat about the size of the Chebacco. He said he had used 10 gallons of epoxy and I remember asking “why so much?” I hope Larry at Raka likes me; I stopped counting at 30 gallons…boat epoxy, and more epoxy

mast, titebond

tn_mDSC00003_4 tn_mDSC00001_7 tn_mDSC00001_6
Left hand picture here we are clamping the spacer boards on the mast, Made the mast hollow so the wires for the anchor light would have a place to run. Right show the sanding crew hard at work.Here are some pictures of the mast. On the left I’m using pallet wrap to pull some of the wrinkles out around the transition from square to round. Primitive vacuum bagging, without the vacuum or the bag.

tn_mDSC00001_4 tn_mDSC00003_7 tn_mDSC00001_5

Decided I would laminate the other spars with TiteBond II instead of epoxy, save money, and it’s still stronger than the wood. Need lots of clamping pressure with TiteBond, every “C” clamp I have is in this picture. Someone on Yahoo suggested there might be “creep” problems using TiteBond. Don’t know about that, they aren’t under constant load. Just have to wait and see what happens.tn_mDSC00001_13 tn_mDSC00012_3

Nice picture of the scarphs for the mast. Bottom of the mast is doug fir, top is red cedar.

Going to redo the gaff hollow ala birds mouth, gaff to plan is a bit heavier than I like. Also, decided the other night to scarph up plywood scraps, so this should be an interesting stick. Then again, I may save that for a latter project, and just use the stick as is for now.
motor, mounting board

Motor is in, rather heavier than I thought it would be, though it’s probably right to spec. Will worry about installing the alternator kit later. Actually, could have waited to buy the motor, can’t put the motor mounting board on yet ‘cuz it would block easy access for getting into the boat. Made the mounting board out of sheathed plywood instead of oak, will put a 1/4″ aluminum plate for wear resistance. Also, I’m putting wedges under the mounting board on the back of the boat, instead of making mounting brackets ala plans inside the motor well.

Camper Works

Sad to say I had (and am still having) a bad experience buying something online. I bought a porta potti from a place called “Camper Works”. After 4 weeks it still hadn’t showed up. I started sending them emails, which were ignored. I started calling them, and they kept giving excuses. I finally got disgusted and canceled the order, and ordered from a place called “Camper World”. The Thetford 135 from Camper World showed up in a couple of days. Then, a couple of days later, the one from Camper Works showed up! It had been shipped THREE DAYS after I called and canceled the order. I shipped it back, and the guy said he would send a check….

Well, I haven’t gotten a check back. I guess I’m going to have to call Discover Card and do a charge back.
thriftymarine

Had a similar experience with Thrifty Marine. They have such good prices on their Bomar hatches that I ordered some more deck plates from them. A trivial order, $18, but I paid promptly and expected the hatches to be shipped. 6 weeks later they hadn’t been, and emails were not being responded to. Had to call, and kept getting excuses. “I’ll ship them first thing in the morning”.

Finally had to send an email threatening to report them to Paypal for fraud. This got my hatches sent, for some reason. Owner said he would “make it up to me” on my next order. Needed another 10” round hatch for the front, asked how much. He said he would ship it gratis on Wednesday (neat, that would make up for the hassle!), but it’s been three weeks…

I’ve added a warning on the “resources” page, buy from them at your own risk.

Trim

tn_trDSC00003tn_trDSC00004tn_hDSC00003_12
Splurged on the trim for boat, figured if I spent this much time and money on the boat, I would like some trim that looked good. Bought about 12 board feet of Honduras mahogany. Expensive wood, almost as much as teak, could probably have got lots more red oak for the same price. As it is, I’m going to get some mahogany stain and put it on, make it look even redder.

tn_sDSC00009_2 tn_sDSC00008 tn_sDSC00001
Here are some pictures of the berths. I made access holes in the berth tops instead of having the whole top pull out ala plans. Stronger structurally, and looks better I think.


tn_dDSC00013tn_dDSC00015tn_tDSC00014

Here are some picture of the seats going together. Note alcove and ventilation hole.

tn_tDSC00003_14tn_tDSC00004_11tn_tDSC00005_8tn_tDSC00007_6

Some pictures of the tabernacle.

tn_cDSC00001_15 tn_cDSC00004_10 tn_cDSC00009_4

Scraping paint runs, faster than sanding. Laying out cockpit coaming. Note that the only joints on the boat that are not stitch and glue are where I fastened something to a closed compartment and couldn’t access the bottom. This requires a LOT of tape, but I have NO end grain or plywood edges exposed for water to get in.

tn_cDSC00001_12 tn_dDSC00004_3 tn_dDSC00004_13
The forward hatch will be sliding; the rest of the hatches will be hinged. Bought hatch hinges but they don’t work like I expected, and I think I’m going to sell them on Ebay and use treadmill belt and bungee cords for the hatch hinges.More pictures of the coaming going together, some pictures of the deck. To the right, picture of the sliding hatch on the forward deck. Also not to plans, plans showed a narrow hinging hatch.

tn_dDSC00005_2 tn_dDSC00005_3 tn_dDSC00006_2More sanding, and another picture of the forward hatch.

tn_dDSC00006_3 tn_dDSC00007 tn_dDSC00007_7Top hatch being “stich and glued” in with cleats and clamps. Note the profile of the deck on the right. Plans show a rounded curved deck. Decided that a stitch and glue hard chine deck would look better and go with the rest of the boat.

tn_dDSC00009_5 tn_hDSC00001_2 tn_hDSC00003_13Some pictures of the pilot house. Kind of looks like a tank or something, eh?

tn_hDSC00001_14 tn_hDSC00003_11 tn_hDSC00003_12More pictures of the pilot house.

tn_hDSC00004_12 tn_hDSC00005tn_hDSC00004_2

tn_hDSC00005_7 tn_hDSC00005_9 tn_hDSC00006

tn_hDSC00006_6 tn_hDSC00008_5 tn_hDSC00008_6

Note the rag tied to the rope. Only took me about half a dozen times running into the rope to put the rag there. I guess I’m a slow learner.

tn_hDSC00009_6 tn_hDSC00010_6 tn_hDSC00010_7

tn_hDSC00010_8 tn_hDSC00011_3tn_hDSC00012_4

Redhead says it feels “creepy” inside the pilothouse. No windows yet.

tn_hDSC00013_3 tn_iDSC00001_3 tn_iDSC00003_2Side decks give plenty of room for walking. Starting to work on the icebox. Laying out the panels for marking.

tn_iDSC00003_3 tn_iDSC00005_4 tn_iDSC00006_4 tn_iDSC00007_3 tn_iDSC00008_3 tn_iDSC00010_2
Icebox going in. Offset top so cabin/cockpit bulkhead won’t span the lid. Right I’m foaming the extra spaces out.

tn_iDSC00011tn_iDSC00012_2tn_iDSC00014_2

More icebox work, center picture is the compartment for the potti.

tn_iDSC00015_2tn_iDSC00016tn_iDSC00017

Board holding down the styrofoam, expanding foam, well, expands, so it was trying push the rest of the styrofoam up. Stuck the pieces together with 3M spray adhesive.

tn_vDSC00001_8 tn_vDSC00003_8 tn_vDSC00004_5

My experiments into vacuum bagging. Bagging the aft mast step to make sure the glass sticks down to the wood on all the odd corners. Without bagging I would have hat to do it in several stages, and do a lot of sanding. With bagging I can do it all at once, and only need to scrap off the creases left from the bag.

-Chebacco Richard

***

LED lights, take two:

The other day I received an email from Ken James about LED lights and regulators.

This is nothing strange, every time I write an article on how to do something, someone will pipe up, “you know, there is a better way”.

Which is as it is should to be, I suppose. Peer review and all, certainly makes for a better end product. For instance, talking to various people has convinced me that the best way to power LED’s is though current limiting, and not a fixed voltage regulator. Not to say that the fixed regulator won’t work, but there is an easier way. Or, maybe it isn’t even an easier way, in some circumstances, but it removes the complicated and expensive voltage regulator and replaces it with a cheap IC at the light locations.

Anyway, I had built the prototype (mark 3) LED anchor light the other day using current regulator IC’s from National Semiconductor, some resistors to set the current limit, and some bright white 5.6 candela LED’s from BG Micro.

Then I get this letter from Ken James. “Several years ago, over ten now, I had the idea of using leds for nav lights. Retired from the USN, went sailing a bit, then started building led lights. Been at it ever since. Solved all the problems you have encountered, including many you haven’t discovered yet, from what I read on your web site 😉 . So now I sell the lights, atwww.deepcreekdesign.com.”

Funny the people you meet online.

It was actually the high price of the LED lights at Deep Creek that decided me to make my own!

And you know what, after exchanging 16 or so emails with Ken there, I’ve come to the conclusion I probably didn’t save a whole lot of money making my own lights. But, like homemade boat building, that is not really the point.

For instance, Ken pointed out that with the 20 degree spread of my BG Micro LED’s a boat would have to be hundreds of feet away to see the anchor light. Seems you need a 60 degree vertical spread to be “legal”. Not that I was too concerned with being legal, but I was kind of concerned with getting run into…

So, to make an anchor light with 20 degree 5.6 candela LED’s I would need:

360/20= 18 LED’s to make a circle of light. But, since they need 60 degrees of vertical spread TOO, I would need three rows of the 20 degree LED’s, so I would need 18*3 or FIFTY FOUR of those LED’s (which are showing up everywhere and Ebay for about $2.50 each for some reason). Since I really only need 4.2 candela for 2 mile visibility (Ken’s numbers) I would need (4.2/5.6)*54= 40 of the expensive little buggers. There is $100 in LED’s right there. Plus circuit boards, regulators, etc, I’m just about at what Ken charges for his light!

<sigh>, story of my life.

But wait, he doesn’t use 40 LED’s on his lights, now what is going on here?

Well, firstly Ken uses a “pulse regulated driver”. This means he uses a high efficiency switching regulator, and drives the LED’s with pulses of electricity. This gets more “visibility” with the same power output.

Also, Ken uses surface mount LED’s with an output of .66 candela. You are thinking that this is quite a bit smaller than the 5.6 candelas of the LED’s I was playing with. Well, you must understand that candelas is a measure of brightness, and not total light OUTPUT. His small surface mount LED’s only put out .66 candelas, but they put them out in a fan of light 140×60 degrees.

Let’s see, that is .66 candelas at 140×60, or 5544 candela degrees (is that even a measurement?)

And, 5.6 candelas at 20×20 is 2240 candela degrees.

So, he is using LED’s that are about 2.5 times as efficient as well.

Could I make one using his LED’s? Yes. Nichia sells to the public, but not cheaply. Bought a couple of dozen NSSW440 surface mount white 60×140 LED’s, and used 18 of them for my anchor light. Here is a picture.

Incidentally, if you want to use the surface mount LED’s, you will need a board. I’m considering selling a kit for these lights. If you are interested, email me.

Well, if I can’t save money making my own anchor light, at least I can save money by making my own LED bicolor light then!

Maybe, maybe not. Ken pointed out that if I’m not careful I would have “zone overlap”. That is where the beam from the colored LED’s overlap and from directly in front of the boat people would see a white light… not good. He was even kind enough to mention ways to get around this problem.

I could certainly build a cheap bicolor light. Would it be as good as the professionally hand made ones at Deep Creek? Probably not. Would it be safe to go sailing with? Probably.

Am I going to build my own lights? You are damn straight. Life, like sailing, is not about the destination, but is about the trip. Making my own LED anchor lights has turned out to be very good learning experience. In the process I have made new friends, learned quite a bit about electronics, and added the skill of etching circuit boards to my boat building skills.

If all you are wanting is efficient lights for your boat, you should buy them from Ken. His are well engineered and come with a warranty.

If you want the learning experience of making your own lights, or just want to tinker, you should make your own. Ask me questions, I’ll be happy to help you out.

-Chebacco Richard

***

Hi Richard

No earth shaking events to tell you about, but we had a visit from Bruce Hector on Saturday, and got out for a nice little sail with him.  We managed
some good speeds for a designed waterline of around 18 feet, which other builders might find encouraging — we exceeded the theoretical hull speed
for that waterline by about half a knot, by GPS.  We did that with and against any tide there was, so they were honest numbers.

We also tried out the optional jib, at least to windward, which folks might find of interest.  All the votes aren’t in yet, but it looks like anyone
thinking of sewing up a jib might also think of adding a bowsprit.  I like my Jonesport cleat too much to take it off just yet so I’m going to keep
playing with the jib on other points of sail.

I have a couple of pictures of Bruce on board — there are still a few shots on the roll to use up, but will do that and get them developed by the start
of next week.  No idea how they will turn out — I forgot the camera, so I bought a one-use Kodak.

Cheers,

Jamie

Hi Richard

Finally got these developed.  Only snapshots, but much better than I hoped for with a disposable camera.  Pity the photographer isn’t more skilled.
I’m sending all I have of Bruce, you choose which you want to use.  None of them look too wild, or show any spray flying, because I waited until we were
on a nice stable reach before to using the camera.

So how’s S’s Cat coming along?  I’ve been cleaning up some old epoxy snots inside W.L.’s cabin — they’ve only been there for two and a half years!  I
didn’t attend to them at the time because I wanted to get launched, then there was always some other reason not to fix them.

Been giving some thought to storage for cruising gear, too.  Last year we mostly used the cabin for storage, not sleeping, but I’m trying to keep a
lot of stuff out of the living area by using the space under the seats and up by the mast.  I might add more storage type hammocks under the side decks
too — we have one each side right now, and they’re great for small stuff. I went to great lengths thinking up the perfect galley box for all the
kitchen stuff, but when I made a mock-up of corrugated cardboard, I decided that I preferred the current Rubbermaid bins.  I may still make up a
mini-version to keep thermos flasks and cups to hand but not underfoot.  I guess this (storage) may be one reason why two-footitis is such a common
boater’s disease?

Gotta run,

Jamie

BruceHector1 BruceHector2 LesOrrandBruceHector1 LesOrrandBruceHector2

***

Around James Island

As Randy Wheating noted in the last “Chebacco”, it’s good to see visiting boatbuilders and/or boatnuts from other parts of the world.  This weekend I had a visit from another builder – not a Chebacco builder (yet) but a Micro fan.  I thought it was my duty to point out how he had strayed from the path of righteousness, and how better than to take him out in the One True Boat, a Chebacco?

Bruce Hector, of Kingston Ontario, was visiting family in Vancouver, and caught the early ferry over to Vancouver Island on Saturday, April 6, to say hello and see Wayward Lass.  This ferry lands at Schwartz Bay at the north end of the Saanich Peninsula, only 2 or 3 miles from Sidney, where we often launch.  I drove out with the boat and met him at the Safeway parking lot there, then we picked up my dad, Les, and headed over to the boat launch at Tulista Park.  We rigged up in about half an hour, and left the dock about 9:30 am  with a good south wind, something between 10 and 15 knots, I think.  A small craft warning was posted, but the highest winds forecast were 20 knots, sometime towards evening, so they just barely qualified for the warning.  Once clear of the dock, breakwater and other obstacles to navigation, we put up the sails and let out the sheets to reach eastwards towards Sidney Island at well over 5 knots (motoring, we top out about 5.5 knots).  Once near the island, we decided to turn upwind to make it easier to return, so we tacked and headed back over Sidney Channel.  However, between reaching earlier, and the wind veering round a bit to the west, we couldn’t do much better than go back the way we’d come, even when close-hauled.

Also, the wind had picked up a bit, maybe a steady 15 knots and a bit more in the gusts, so we stopped to put in a reef once we got a bit away from Sidney Island.  The mizzen did its usual job of keeping her head to wind while we tied in a single reef.  Bruce pointed out that the shore was getting pretty close by the time the sail was peaked up again, so we got under way before finishing the reef points – these are mostly to keep things tidy anyway, the tack and clew rings take the strain.

After getting well back to the west, nearly in line with the westward side of James Island, we tacked again and were able to free the sheets slightly as we went into the channel between Sidney and James Islands, on James Island’s eastern side.  Once well into the channel, James Island cut off some of the wind, but we kept moving, if a little slower.  As we approached the south end of James, the wind was maybe 15 knots again.  When we thought we could weather the south end of the island we tacked, but found the wind had gone even farther round to the west, and we couldn’t sail the course we wanted.  While we were discovering this, the wind blew us back onto the starboard tack, so we continued on with that, close-hauled this time.

In what seemed almost no time at all, we were far enough over to turn north again, this time easily aiming for the channel between James Island and the Saanich Peninsula (Vancouver Island).  As we sailed up the channel, the wind became freer, so our beat turned into a reach again, this time on the port tack.  The wind was lighter again, so we took out the reef in the main, and tried putting up the jib.

This is a new sail for Wayward Lass, it’s shown as an option on the sailplan, and this only was its second time out.  I can’t say it’s a great success – in fact, I would say it’s a waste of time trying to sail to windward with it.  Without a headstay, it’s hard to get the leech tight – but even when it’s reasonably tight, the sail is too close to the main.  If the sheet is pulled in enough to stop the sail flapping, the jib backwinds the main.  If the sheet is loosened to where the jib doesn’t spoil the wind for the main, then the jib flaps. Maybe there is a theoretical point where everything works, but we couldn’t find it.  Experiments will continue.

Once we stopped fooling with the jib, and had the full mainsail drawing properly, the GPS hit 6 knots several times, even though what little tide there was, was against us (it had shown just over 6 knots on the southern leg.)  The wind would not have been more than 15 knots (estimated.)

Sidney was coming up fast by now.  It was only around 1:00 pm, but we were all getting a bit cold, so decided to quit while we were still having fun.  The mizzen came into play again, keeping us head to wind while we furled the main – the GPS reported 1.8 knots in reverse at this time!  From the time we stepped off the boat until we were in the van, ready to go, only about 20 or 25 minutes passed.  We drove up to Robin’s Donuts, but couldn’t find parking for the van and trailer close by, so carried on to Dad’s place.

We finished off the last thermos of tea, along with some of Dad’s home-made oatcakes and jam while we talked and looked at Bruce’s boat photos – he owns a houseboat, has built a Nymph, Diablo, Pirogue and most of a Micro so far, not a bad variety at all!  He someday hopes to build a plywood aircraft carrier to accommodate an ultra-light STOL plane — that’ll be one for the album, not to mention the TV news and a few headlines!

What with the early start and very cooperative wind, Bruce was able to get away in time for the 3 o’clock ferry back to the mainland.  I hope he enjoyed his trip to Vancouver Island and around James Island.  That was probably the best sail we’ve had ourselves out of Sidney.  Good wind, (but not too much,) we all had good protection from the spray, lot’s of good food and drink (thanks for the beer and sausage, Bruce!) and the reef lines didn’t get tangled.  What more is there?

Chebacco News 39

Intro and flipping the CLC

A lot has happened since the last issue of Chebacco. I’ve finished the armor for the keel, flipped the boat, and am now working on the inside. Pictures and annotations below.

I had the bright idea (I thought) of offering Chebacco plans for sale on this website. I’ve had a couple of “where can I get these from” requests. I know that PCB&F have been burned by this in the past, so I was going to take my lead from Chuck Lienweber and Jim Michalak, and offer only the convenience of purchasing online, for a small fee and the credit card costs. I would take an order with Paypal, and fax something to PCB&F saying “send plans to so-and-so, check is in the mail). I faxed PCB&F with the idea.

Susanne called me and discussed, at length, this subject. “Why can’t they just send us a check?” seemed to be the gist of it. I did mention that JM’s plans sales have DOUBLED since Chuck started offering them online, but she didn’t seem interested.

Anyway.

There are now 20 boats in the registry. Wonder what the percentage is that aren’t registered? I think it’s traditional in statistics to use the SWAG method and just make up a number. Therefor, I degree that for every 1 boat registered we have 9 boats not registered, making the total number of Chebaccos something like 200…!

I’m hosting a messabout at the local lake here in the muddy waters of Oklahoma. Link to the left.

Jamie has two article in this issue, and I have two as well. Come on guys (and gals?), send in those articles. And pictures, lots of pictures! I understand that not every boat builder is a writer, but a few words and some pictures would be appreciated by all the readers. (Plus, pretty soon you will get tired of the pictures of me building the CLC!)

In this issue, I also have an article on the electronics for the CLC. I’m selling the LED regulator I made for the LED’s on my boat as a kit, so if you are wanting to play around with these super efficient and almost indestructible lights for you boat, you should buy one!

Also in this issue, I’m putting online an Adobe PDF file compiled by Mike Haskell. This is basically the entire Chebacco website, compiled and searchable! It is a 21mb download, so if you have a slow connection you might consider letting Google do your work for you and doing “site:chebacco.com something to search for” at their website. Or, buying the CD from Chuck . No longer available for download from the Chebacco.com site

Anyway, (again)

Here are the boat pictures

1DSC00001_3 1DSC00003_3 1DSC00005_2

Here is a friend of mine I enlisted to help with the metal work. I wanted the front half of the keel to be armored to take groundings. Mike here has a home forging setup, while I have a home casting setup. Here you see him prepping the 1/8″ stainless steel keel armor for forging.

1DSC00006_2 1DSC00007 1DSC00008_2

I could have just cut it off, but I wanted it to wrap up and around the cutwater, sort of like an icebreaker keel. Here Mike is forming the part that wraps around the cutwater. Note the forge made from a freon can, sitting on my sandbox.

1DSC00009 1DSC00010 1DSC00011Almost done, doing some trimming with Mikes heavy duty grinder, and doing the final fitting to the boat. On the right you see where I have attached the keel strip with a bunch of countersunk stainless screws and lots of epoxy.

2DSC00001_6 2DSC00003_5 2DSC00004_4Here is me working on the rudder, drilling the holes to attach the stainless to the rudder itself. I made the front of the rudder a bit wide, but some trimming with the flap wheel on the grinder and you can barley notice.

2DSC00005_3 2DSC00007_3 2DSC00009_3Here the rudder is in the middle of the sanding operations, and to the right it is attached to the boat. On the top of the right photo you can see the UHMW bushing that the rudder turns on. Under the top rudder support I’m going to put another bushing, with a flange fitting on the rudder post. I’m hoping the rudder will bear only on the UHMW poly and no on the wood and glass of the hull.

3DSC00004_6 3DSC00005_5 3DSC00006_5Lift, scoot, tip, lift, scoot, tip, etc. I learned from my mistake with turning (and dropping) the last boat. I built a frame around this one, lots of handholds, and with the frame it would sit on the side without being held. Made it into a two part operation.Here we are commencing the turning operation. We jacked up one side, and cut the “building legs” off, then let it down. One of the girls wanted to invite a bunch of friends over for barbecue, and I said it would be ok as long as they helped flip the boat. (We didn’t tell them till they got here. hehehehe) The designated camera person was late comming out with the rest of us, so I didn’t get any pictures of the canopy coming down.

3DSC00007_5 3DSC00008_5 3DSC00009_53DSC00010_33DSC00011_33DSC00012_2Over she goes! Didn’t drop this one. We are adjusting it to be centered on the canopy, and level (at least side to side, I made all the panels square with bulkheads, which are canted a bit. It’s not level front to rear, but that doesn’t affect anything) “NO! Don’t put a block under the rudder!”

Final tuning and adjusting.3DSC00013_2 3DSC00015_2 3DSC00016_2

Starting to move the canopy back in. Much to big for one person to carry, but doesn’t weigh much.Turning crew inspecting the boat. Yes, I know the power pole is slanted. It’s been that way as long as I’ve owned the property. Doesn’t seem to cause any problems.

3DSC00021_2 3DSC00023_2 3DSC00024_23DSC00025_23DSC00026_23DSC00027_2Six people hold the canopy, six more insert poles. Makes me glad the girls have so many friends!

3DSC00028_2 3DSC00030_2 3DSC00039Final tweaking, and tie the canopy back down.

4DSC00001 4DSC00003 4DSC00004The left two are pictures of the centerboard interior bracing. The CLC doesn’t have the bracing on the top of the centerboard case that the regular Chebaccos do. Notice the several layers of tape and generous use of epoxy putty. And, yes, I did cut the drain holes on the wrong side of the board. It will be under the floorboards, and the only issue will be small triangular area between the berths that won’t drain back. But, since the cabin is closed, doesn’t have a bilge pump anyway, and this will be covered by the floor boards, I’m just not worrying about it.

To the right you see the through hole for the rudder, and the aft well substructure. There would have been closed off spaces inside this structure for moisture to gather. The MDO and pressure treated is pretty good stuff, but I cut ventilation holes anyway. I’m putting two small deckplates on the bulkhead in the left of the picture. I know the plans call for this to be open, but I want the added floatation if the cockpit is ever flooded.

4DSC00005 4DSC00008 4DSC00001_2When I was building this section, I really noticed the lack of pictures of this particular construction detail on the web. Hence, you see lots of these pictures here! In the right two photos I have installed the walls to the aft floatation/storage boxes, and the framing for the motor well floor.

4DSC00003_2 4DSC00003_4 5DSC00006In the left photo I’m attaching the sides of the “seats” (which will also be the head ad galley). Attached them to cleats on one side, taped the other, pulled the cleats, and taped the remaining joint.s Center photo is my new power tool. He does a pretty good job, I can turn him loose on something and do something else myself. Very handy to have around, I would suggest you buy one. On the right you can see the framing for the top on the ground tackle compartment. I’m going to cover this over and put a Bomar hatch from Thrifty Marine (see resources) in. Rain and spray proof.

DSC00004 DSC00003 DSC00001Here you see pictures of the storage compartments I’m building. Not on the plans, but in a 20ft boat you can’t have to much storage. The compartment behind the seat will be accessed by opening the seat hatch, opening the deck plate covering the round hole, and reaching through the hole. Not the easiest access, but I’m thinking of storing light dried goods in there, maybe bread, that kind of thing.

The other storage area will be accessed through a hinged door over the galley and behind the head. For light dishes and toiletries, respectively.


You can see the layer of light glass on the bottom of the side of the seat, to protect against standing water in the cockpit.

5DSC00001_4
***HEY, how did that picture get in here? This is the new bed I made the wife for the anniversary. It does show how boat work spills over into regular life. This was built in two halves, out of some of the spare 1/2″ MDO from the boat. Two halves so it would be easy to take into the bedroom. The lip around the top was filleted and glassed, so it would take the strain big people and little cats getting into bed.

Hi again, Richard

The weekend before last, Dad and I took a drive over to Bill McKibben’s place to say hello and see his modified glass-house Chebacco.  It’s going to
be BIG!  He’s going for comfort in the interior, raising the sides a foot over the already higher (I think) designed sides.  When the cabin goes on,
it’ll be big enough for full standing headroom!  There’s a vee berth going into the bows, with a galley along the port side, and a head compartment, I
think.  Also there will be quarter berths under the (shortened) cockpit seats.  Bill thinks more ballast will be needed to offset the added weight
up high, and is considering modifying the keel, and/or carrying inside ballast, maybe extra drinking water in portable containers.  There’s
certainly lots of room.

Picture_No_1

Bill’s braver than most.  The hull is from the Chebacco offsets, so the underwater shape is as designed, but for the topsides he’s working from the
model he made (Chebacco News #33, Feb 01), and the interior is in his head.  He says its all an experiment, but I think he’s pretty well
thought it out.  The model looks good and extra ballast should make it stable.  Beth said she prefers the fast motorsailor, since it will take them
home in a hurry if the weather turns sour, but Bill is quite keen on the new, slower boat.  It’s modelled after something he saw in Desolation Sound,
a power boat hull and cabin converted into a motor-sailor, with davits added for a substantial dinghy as well.  Bill says it combines everything he wants
into a tidy package.  The boat that inspired him was about 25 feet, and Chebacco is only 20, but I don’t think that’s going to stop him.  Including
davits.

Picture_No_2

Bill’s model looks good, so once the ballasting is worked out, the full size motor sailor should turn out well.  I’ve attached some pictures of the
progress to date — unfortunately I couldn’t get far enough away to show the whole boat at once, as it’s under shelter.  The frame at the stern may be
converted into support for the davits, or could be removed, Bill is still pondering that one.

Picture_No_3

Bill’s plans for moving the hull out of the shop may be helpful to someone  else — he is leaving the keel off, so he can put rollers under the hull and
just push it where he wants it.  Then he’ll add the keel once he’s got the boat clear of shop, yard, flowerbeds, and so on.

I hope I haven’t misrepresented anything here — if I’ve got it wrong, Bill, my apologies.

***

Tom_and_Jamie

Hi Richard

I had a visit from fellow Chebacco builder Tom McIllwraith (from Halifax) on January 12.  He had occasion to visit Vancouver, and dropped in on a couple
of wet coast Chebacconists while he was in the area.  On the weekend before, he called on Randy Wheating to check on progress of Randy’s (as yet
un-named) sheet ply Chebacco, then last Saturday he caught the ferry over to see Wayward Lass.  Tom’s not a stranger to Chebacco sailing, having been out a few times with Fraser Howell in his strip built Itchy and Scratchy.

Tom’s done a lot of thinking about modifying his boat to make it slightly less Spartan in accommodation.  As well as angling the coamings for lounging
in the cockpit, he’s thinking about making the cabin wider – in line with the cockpit sides, I think, — and just a bit higher.  He and Randy had a
good discussion – here’s what Randy had to say:

“I spent a couple of pleasant hours on a rainy Sunday afternoon with Tom in the boat “shop”.

It never fails to give me a neat feeling to meet a kindred spirit, from across the Straight, country or world that has laid awake at night or
pretended to be attentive at a meeting while puzzling over some obscure Chebacco detail in his mind.  It is really a pretty small club when you
think of it.

Tom and I swapped many ideas and modifications until the moment of truth when we each confessed to our biggest “oops”.  That is, a mistake that
has passed the point of correction.”

(I’m not including any “oopses” here – I’m sure every boat’s got one or two, but when 99.9% of people look at a boat, they see only the big picture, not
the details.  Good thing, too. — Jamie)

I have to agree with Randy about the kindred spirit part.  Since I got involved in building and sailing Wayward Lass I’ve met a whole raft of
interesting people, and have learned a lot from them as well as enjoying the chat.  The internet and this newsletter are great tools for this, of course,
but the personal visit is still king.

Tom and I hoped to go for a sail, but when we took a look at the Strait of Juan de Fuca, just after he arrived at the bus depot, it was a mass of big
whitecaps – no way!  The marine forecast was still showing gale warnings, although things were supposed to ease later.

We headed to my place, and had a solid session of boat talk, climbing around Wayward Lass.  After that, and a bite of lunch, I phoned my dad up in
Sidney, about 15 miles north and around the corner from the Strait.  He obligingly went for a short walk, and phoned back saying that it didn’t look
too bad, the racers were out and he hadn’t seen any reefs in their sails. So we hooked on the trailer and drove to Tulista Park in Sidney, my
favourite launch ramp.  Dad came out to see us off, and for Tom’s benefit, I timed the rigging-up, from stepping out of the van to getting back in for
the launch.

Rigging up took 28 minutes on this occasion, a bit over the average, but not a whole lot.  I’ve only once come close to 15 minutes, when I’d put
everything away properly the time before.  This time, we started with a disorganized collection of ropes and sticks.  I’d only laced on the mizzen a
couple of nights before, not very well as we found, and all the ropes were just dropped in the after lockers.

Honda started on the second pull, and after an interesting 180 between the pilings, thanks to the wind, we headed out.  The wind was pretty well from
the west, straight off the shore, so we put up the sails right away and shut down the motor.  I’d put them away with a reef still tied in on Boxing Day,
and we left that in.  Because we would have to beat back to the ramp, we took a quick turn to windward, just to see how strong the wind really was –
no problem, the single reef was enough, maybe 20 knots of wind, but not much wave action because of the wind blowing away from the land.

We headed easterly, towards Sidney Island, with its mile long spit and friendly lagoon, on the other side of Sidney Channel.  The mizzen wasn’t
very helpful while running – with a strong wind it tends to push the stern around.  However, I kept it up because it helps us heave-to so nicely.

After a while, we became aware that the wind was picking up.  The way home was now patterned with white, and looked quite different.  We turned to
windward again — and gave up any thought of going all the way to the spit. We’d have had a very long beat home if we’d gone on.  Wayward Lass was
sailing well, but going against the waves threw up some heavy spray.  Tom got into the Cruiser suit, but not before he soaked up some of that spray.
Going to windward in these conditions, I was glad to have a second body for ballast – he kept the worst of the spray off me, too!

It was wet, but we made good progress.  However, after a long tack to that brought us near the shore, but still quite a ways north of the ramp, there
were a couple of very strong gusts.  These challenged our favourite designer’s assertion that nothing short of “hurricane force winds or heavily
breaking seas” will tip a Chebacco.  Rather than chance becoming the first Chebacco ever to capsize, I let the mainsheet run free, and we hove to for
the second reef.  The only other sailboat in sight at the time was a biggish one (40 feet?), and it was reefed down too.

Tom must have wondered if I really knew what I was doing.  The reef lines (pendants?) for the second reef were still in the cabin.  I got them out,
and tied the tack down quickly enough.  However, to get the foot tight enough it was necessary to rig the clew reef line properly, from boom to
reef ring back to boom then pull it tight to the cleat.  Meanwhile we were sailing merrily backwards at about 3 knots, away from our destination.  I’m
not entirely sure why, but every time I was about to tie off the end of the clew reef line, after all that leading here and there, the bows would swing
off the wind and the boom would fly out to the side.  I eventually got the reef tied, but it was a real circus there for a few minutes.  I think the
mizzen luff and snotter weren’t tight enough, as the wind was making bags in the sail – also I had to pull the boom inboard to run the clew line through
the ring, rather than letting the boom fly loose.  Bottom line is have your reefing lines rigged before you need them!

Wayward Lass was fine again with the two reefs in.  I estimated the wind at 25 to 30 knots at this point, no idea what the gusts reached.  Take this all
with a grain of salt if you want, it’s only a guess.  The waves were much less than they would have been if the wind hadn’t been off the land, since
they couldn’t build up on such a short fetch.  I poured Tom a cup of tea and put it down beside him (he was steering now) but it promptly went into the
bilge.  Tom very nicely said he was too occupied to drink it anyway.  I poured a cup for myself, but it was full of salt spray almost immediately,
so I gave it up too.  Not too long after, I suggested that we’d had all the fun we could take for the day, and since it would take quite a while to work
our way up to the ramp, we might start motoring.  Good old Honda started again without complaint, and it was down sails and home.

Tom assured me he’d enjoyed the afternoon (I hope you weren’t just being polite, Tom.)  I enjoyed it myself, despite feeling like an idiot at times –
out of practice and very disorganized.  Another time we’ll suit up completely at the start, and rig all the reefing lines too.  Oh, yes, and I
won’t leave cups of tea unattended!  Still, it’s got me all fired up again, and I’m planning some more sailing as soon as we stabilize a couple of new
projects at work.

I see I’ve got a bit carried away talking about the sailing (again! – call it a character flaw.)  I really meant to concentrate on Tom’s visit,
because, as Randy pointed out, it’s great to see Chebacconists from other parts of the country (world?).  It was fine meeting you, Tom, and I hope
anyone else coming out this way will call, and maybe we’ll get them out for a quick one too.

Tom, I also hope you’ll will write up your building experiences and tell us about what modifications you decide on, and let us see some pictures.  The
world can’t have too many Chebaccos!

Jamie Orr

***

There once was a man, who spent much more money than he should have, to have LED lights on his boat. This is the same man who decided he HAD TO HAVE a CNC router, built one from scratch, then used it twice.
Anyway, for no particular reasons, other than I thought it would be cool, and I wouldn’t have to worry about leaving the anchor light on all night, I decided I MUST HAVE lights on my boat that were based the new, ultra efficient, bright white LED’s.
I bought my LED’s mainly from http://www.bgmicro.com/, They run, according to the spec sheet from Nichia, at 3.6-4v and output 5600 mcd (mili candela, whatever that is) in a 20 degree fan.
I had originally planned to have eight of the lights, masthead, forward red, forward green, aft, two cabin lights, and two reading lights. Also, I had planed to run 12v to the lights, and do the voltage conversion there. Red and Green lights would be using red and green LED’s.
I read everything I could find on LED flashlights, and LED lights. There is a lot of information on the ‘Net on the subject. A lot of it worthless. One site recommends using a 7812 voltage regulator and three of the LED’s in series (so each gets 4v). Bought eight of these, the next day someone pointed out that the specs for this regulator require the input be about 3v over the output voltage. I.E., I couldn’t run it off a 12v batt and get a consistent 12v out of the regulator.
So, I had the bright idea of using the 7808, which puts out 8v, and having TWO of the LED’s in series. When the eight of these arrived I wired one up on the breadboard and presto, I had light! Wired eight of the LED’s up, and left them on. When they say “bright white” they mean it, had eight spots behind my eyes for hours before I decided I needed to wear shades to play with these things.
I left the 8 LED’s running and had supper. Afterwards, I discovered that THREE of the things had burned out!. What the BLEEP!?!
Some carefull checking determined that with the two in series, the voltage drop over one would be, say 3.9v, and the drop over the other would be, say, 4.1 v.
So, I figured I needed to drive the blasted things with EXACTLY 3.6v. There is a problem with this, this is apparently an odd voltage, there is no “78036” or whatever. So, I decided to make my own variable voltage supply, one for each light, and go to town. Bought, again, eight, LM317’s, and associated resistors and whatnot. Wrote a spreadsheet to calculate the values for the resistors so I could have the thing put out 3.6v. Wired it up. Plugged LED’s in and they were DIM! A little checking and it turned out that any kind of load on the thing and the voltage would drop…. Net research showed other people having the same issue, but couldn’t find a solution. Still a mystery there.
Time to step back and think about this. Maybe I should just have one voltage regulator, and wire 3.6 v to the switches, and out to the lights. I could do some kind of current regulator, but I wanted the simplicity of running the same voltage out to whatever light I wanted, and just hooking up as many LED there as I needed. Dug and dug and dug. Found a national semiconductor manufacturer who has a wonderful website with all kinds of information on it. They sell an IC that looked like, with a little work, it would make a wonderful regulator for the boat! (about this time I’m thanking someone for the VoTech electronics I took as a kid, back in the day)
A little soldering, a magnifying headset, some tweezers. Presto, one central, efficient, source of 3.6 volts for the LED’s lights on my boat!
BTW, I’m selling a kit to put these together. Kit price is $75, follow instructions at the “store” link to the left.
The kit uses a surface mount board the manufacture sells, with all the regulator components on it. The board comes from them fixed at 12v, and I use a magnifying headset, tweezers, and a pointy soldering iron to change it to work as a variable voltage source, to get 3.6v for the LED’s. The kit includes an etched board to mount the manufactures board on (as a daughter board) and all the hardware needed. I’ve removed the 2.7k itty bitty surface mount resistor and connected a wire to go to the variable resistor on the “mother” board.
DSC00005 DSC00006 DSC00007
As you can see in the pictures, I’m using a nice fancy, bulkhead mount enclosure. Got this, and lots of other neat stuff fromhttp://www.allelectronics.com. Give them a look see, they have neat stuff!
After all this, I discovered that the bright red LED’s I was going to use for the red bow light wouldn’t work at 3.6v. They go dim and get hot.<sigh> I guess I’m putting white LED’s in the colored fixture.
tn_1DSC00006_2 tn_1DSC00007_2 tn_1DSC00008_2
Here are some pictures of the masthead light with and without the cover. I bought the Series 25 fixtures from Boaters World, the price was reasonable, and I wouldn’t have to make them.
PCB&F writes (what does it say when you start referring to people by their initials?). The designer of the Chebacco light cruiser, Susanne Altenburger’s (who just denied that the Chebacco was “her” boat, in a rather LONG phone call), writes that you should use “two 6V deep-cycle batteries capable of around 215 Ah at 12V”. Now, were am I going to find those things? Nothing in the marine stores, nor in the auto shops. Can’t buy them online, the shipping would kill me. Walking through Sam’s club one day, but what do I see on the way out but a 6V, deep-cycle, 215 Ah, GOLF CART battery! Yippee! And, the things only cost $45 each. Nonstandard size, though. Will have to make my own box for them.
 3DSC00009
A 32watt, flexible, solar panel will top off the batts, and keep them topped off when the boat is in storage mode. I could have saved quite a bit and went with a hard panel, especially as it is going to be mounted on to of the cabin and there is no danger of it being walked on. However, the hard panel were looking awful heavy. 33lbs for some of them! So, I decided I needed the flexible, light weight ones.
There is a story here, these things were going for around $300 on ebay, and everywhere I saw them. Caught one on ebay with a buy-it-now for $240. GOT IT. Hurrah! Saved money!
Then, I was discussing solar panels with my friend Chuck, and he said he got his from here: http://www.solar-electric.com/.
Guess what, they had my panel too. FOR $187!!! AHHHG!
Then, when writing this article, I looked again and found the flexible panels at the above URL for $296. Huh? Read the description for the $187 panels. It appears that these are basically the flexible ones, in a frame. Same technology, but added weight of an aluminum frame and a galvanized steel backing! They weigh 10.6 lb, where the flexible one weights 4.7 lb. So, for an extra $53 I purchased a reduction of 5.9lb in the weight of the panel. Will it make a difference? Maybe, maybe not. But, any weight I can save above the CG counts!
Will put a clear window in the tarp that goes over the boat so the batts charge in when the boat is in storage, as soon as I figure out a cheap way to do this. May use the storm window sealing kits from the Home Despot or something.
Anyway, a 6.5 amp SunSaver charge controller will make sure I don’t overcharge the batteries, and I’ll get the 5amp alternator option when I get the motor.
2DSC00001 2DSC00003 2DSC00005_2
I had originally planned to run conduit for the electrics, but as you can see in the picture, I didn’t. I decided they would take up two much space, and instead ran the wires as shown. I was carefull to pre-run any wires that would be in closed compartments.
Here you can also see the plumbing for the bilge pumps and the drain for the built in icebox. I went from the pumps directly to 1/2 flexible tubing, to try to minimize the drain back when the pump is off. The bulkhead and there’ll fittings I made myself, from scratch!
Nice to have your own homemade foundry and machine shop!
***

(So, I guess only people in Australia can build 25ft Chebaccos… Looking good Simon! -Ed)

G’day Richard , a couple of pics of the boat .

Cheers Simon.

MuddyMay01 MuddyProfileMay01

Chebacco News 38

Hello Richard:


I want first to thank you for continuing Bill Samson’s work in editing the Chebacco News. I have learned a great deal from this newsletter and appreciate very much Bill’s work on behalf of Chebacco builders.


In his very helpful description of the building sequence for the sheet-ply Chebacco 20, Bill describes how he installed the two hull side panels by suspending them from the ceiling while he fitted them. Since I am building outdoors and do not have a ceiling, I had to find another solution.


My approach, therefore, was to cut out six small jigs out of scrap plywood (I actually used the cutouts from the bulkheads.). These were screwed temporarily to bulkheads # 1, # 4, and # 6 as shown in the diagram below. The side panels were then dropped into the slots, three on each side, and I was able to take my time in positioning the panels. When the epoxy fillets were complete on one side of the bulkhead and the panels were permanently fastened at bow and stern ends, I removed the jigs and made the fillets on the other side of each bulkhead.


Side Jig 2

I found this to have been very easy and I hope that it might be of use to others as well.


Regards, Tom McIllwraith

Halifax, Nova Scotia

***

Hi Richard,

Thanks for the nice job on the last issue of chebacco.
Here are the pictures of blocks and tabernacle fitting
that you requested.

block1.jpg 1 block2.jpg 1
Blocks are made out of locust with a brass sheave spinning
on a 5 mm brass pin (Fig. Block1.jpg).  They run nice and smooth
as long as the hole in the sheave is a bit larger (e.g. 5.25 mm)
than the pin. As I mentioned before, I made patterns
by magnifying the drawings in the “Riggers apprentice”
by Brion Toss. I also fitted the block on the centerboard
case with some kind of slotted tongue (Fig. Block2.jpg)
to jam the sheet, a home-made simple substitute for a camcleat.
taber1.jpg 1 taber2.jpg 1 taber3.jpg 1

The stainless steel fitting for the tabernacle was “invented” and made by
my friend Roberto Ginetto. There is a U-shaped part that goes around
the back and sides of the tabernacle. This part is screwed onto the tabernacle.
The front part is removable (Fig. taber1.jpg) and goes on the u-shaped part
like a “fence”. The U-shaped part also has “ears” (Fig. taber2.jpg) to attach
the double turning blocks for the throat and peak haliards (starboard side,
Fig. taber1.jpg) and topping lift + jib haliard (port side, Fig. taber3.jpg).
As you can see, things are still a bit scratched and unfinished around there
but the whole thing works well and is very easy get on and off single-handed.

Let me know if you need more explanation or other info.

Cheers,
Vincenzo

Do you have any close up pictures of the hinge on your tabernacle?

Also, I notice you have the forward section closed off. What is the distance from the hing to you locking mechanism?

How do you raise the mast? You use the jib line as a forstay, do you use it to hoist the mast?

It appears your mast is rounded up top, but square on the bottom. It is square up to the double reef position of the gaff?

Have any closeups of your gaff saddle?

Hi Richard,

It is very easy to raise the mast, I just stand on the cabin roof and walk it up, it takes only a second then to block it with the metal fence. I do not use the jib haliard as a forestay or to raise the mast, although I guess that could be done.

The mast must be rounded all the way above the hinge point, otherwise the gaff jaws will not be free to swing around when hoisting or lowering sail (acting as a wrench around a bolt) and might bust at the first gust of wind! So, the mast is left square only in the part that goes into the tabernacle.

I will take close-ups and measures over the weekend.

Buon vento,
Vincenzo.

Richard,

the distance from the pin of the hinge to the bottom of the locking mechanism is 67 cm.
The width of the steel plate of the locking mechanism is 6 cm.

I made the curved gaff jaws epoxying 2mm oak lamination to a final thickness of 24 mm
(see attached pictures)

gaff1 gaff2 gaff3

Cheers,
Vincenzo

Did you use the 1 inch stainless steel rod described in Chebacco News 18 for the pivot pin?
I’m thinking of going a little thinner, to have less of a hole in the mast.
Did you do any kind of reinforcement for the hole in the mast?

The round plate with the three screws, this is the bearing plate for the pivot pin? Are all the mast forces taken by this plate, or is it a loose enough fit that the mast forces are taken by the box section of the tabernacle?

PCB&F says: “Since we know of no widely available source for them any more, we are proposing a ‘home-made’ gooseneck. It uses two stock ‘heavy duty’ SS gudgeons to accept a 1/2″ SS eyebolt which then connects via another ‘undersized’ bolt loosely to two SS tangs that are screwed to the forward sides of the boom; there should be enough freedom for the boom to move any which way, including twist from the sheet-pull. ”

I was never sure what exactly they were saying. It looks like you have a 10 inch or so long, 1/2″ thick  rod between the upper and lower brackets (gudgeons?) on the tabernacle face. I can’t see, but I’m assuming you then have an oversized eyebolt that slides up and down over this rod, is attached to the front of the boom, and acts as your gooseneck?

I used 1 inch bronze rod for the pivot pin.

To avoid having the pin bearing directly on wood, I screwed steel plates
(with a 1 inch hole for the pin), one screwed to the side of the mast, the
other to the side of the tabernacle, so the forces on the pin should mostly bear on the steel plates. The plates you see in the pics are just plywood plates that prevent the bronze pin from working its way out of the hole.

You are exactly right about my gooseneck. The pin is 12 X 30 mm stainless steel. I made it so long with the idea of rigging a downhaul to tension the luff. However the throat halyard is enough to give plenty of tension, and the sliding up and down of the boom is just a useless complication when hoisting or lowering the sail. I am going to cut that rod!
Pics of gooseneck details next weekend.

Vincenzo.

***

From: “Bill Samson” <bill.samson@tesco.net>
To: <richard@spellingbusiness.com>
Subject: New Chebacco growing on Vancouver Island . . .
Date: Sunday, November 11, 2001 2:41 AM

Hi Richard,

Just had these pics from Bill McKibben via Chuck Merrell of his ‘glasshouse’
Chebacco Motorsailer that’s coming along well.

Bill has raised the topsides a little more than is shown on the plans, but
(I think) kept the overall height the same.  You remember the pic of his
model on one of my last Chebacco Newses?

Anyway, Bill would be delighted if you included one or two of his pics in
your next issue.

Cheers,

Bill Samson

>Speaking of pix, the attached just came in from B&B for the NW Chebacco.
>Will put them on his web page.  They were taken in Aug and September.  I
>have a hunch he’ll have it complete by sometime next summer.  BTW, that
>green foliage, higher than the cover in Picture #1 is Beth’s corn crop from
>last summer.  I had some they brought down.  Delicious!
>Chuck
>NWCheb01 NWCheb02 NWCheb03 NWCheb04 NWCheb05

***

Hello Richard!  A short note with 3 photos for your next Chebacco e-zine, the main purpose being to show how I’ve tried to build a Chebacco over the summer.  As cold weather now comes over the Massachusetts hills here, I’ll soon be forced to close down boatbuilding work although I’m hopeful that an Indian Summer will come about to allow the finishing of the hull and flipping.  Even in snow I’d flip her!

Stealing Horses Keel
Photo 1 shows the keel on top of the bottom panel.  It was my assumption that it would be much easier for me to work at placing the keel without the bilge panels in place.  A step ladder under the bilge panel space allowed closeup work, to see into the centerboard slot, to work on finishes such as they are.

 Stealing Horses Bilge Panel

Photo 2 shows Stealing Horses with her bilge panels in place.  The front 8 feet is composed of 2 layers of 1/4″ plywood with the first brought into shape with Spanish windlass action, and the second secured with a buttering of thickened epoxy and many sheetrock screws forcing the outer to the inner panel per Jamie Orr’s earlier description of how to do this.  The aft sections of the bilgepanel are 1/2″.  A brass half-oval strip extends over the inner stem, awaiting the outer stem for attachment.  The strip along the forward keel, along both centerboard cheeks, down the aft keel but shy of where the rudder post attachment will be placed.

Stealing Horses Xynole

Photo 3 shows the bilge and topside panels covered with xynole cloth prior to wetting out.  The keel and most of the bottom has, as the photo shows, been cloth-clad and coated with epoxy laden with graphite.

At this time — late October — the large xynole sheets have been wetted out and received 3 coats of fairing compound which cured just before the cool weather.  Now the job of sanding the hull is sporadically underway.  The outer stem–composed of built up planks of rosewood–has been lag-screwed and epoxied to the inner stem.  The lagscrews are recessed into the inner stem and set in bedding compound.  By the way, Jim Slakov (who built an exquisite lapstrake Chebacco) suggested to me one of his embellishments: that a small wood wedge be eventually epoxied to the inner stem to hold the mast at an intermediate stage when raised.  The idea is to stand in the cockpit and raise the mast to this point (contingent on one’s height and muscle power), and then to leave it semi-raised and secured by the rachet effect of the wedge while climbing to the cuddy roof to complete the job.

I’d like in what remains of this building season to get the hull sanded and the waterline scribed to the hull–I’d like of course to do more like paint and flip–but I’d settle for this.  Soon I’ll be forced to unscrew the ladder strongback of the boat forms from the ground stakes that level it.  The coming frost will of course heave these stakes and I’m concerned that the hull not be stressed so I’ll let it float atop frozen ground.  Then an accurate waterline will be impossible.

Semi-gloss marine enamel was bought for a 2-coat job above the waterline (to be placed about 2″ higher than the design waterline) with the graphite-laden epoxy coming up from the bottom.  Kirby Paints was kind to test their various paints and primer on a sample of my plywood/my epoxy to see how to proceed (no primer was deemed necessary).

For those considering a sheet plywood version of the Chebacco the following is a list of major materials and their sources that I’ve used:
1.  Meranti marine plywood (LS 6566 grade) from Noahsmarine.
2.  Locally grown spruce, encapsulated in epoxy.  Some island-grade rosewood brought back from the South Pacific some time ago.
3.  Xynole cloth from Defender instead of fiberglass cloth because of a concern for puncture and abrasion resistance.  Xynole, however, absorbs epoxy like a blotter.
4.  Epoxy, fillers, and fiberglass tape from Raka Epoxy.
5.  Fasteners from Jamestown Distributors and Hamilton Marine.  Hamilton sells a nice through-bow silicon bronze eye bolt for pulling the boat to the trailer. I went to Jamestown for silicon bronze ring nails and screws, bedding compound.
6.  Sails, sewn over last winter, from Sailrite kits.
7.  Kirby traditional marine paint for the topsides / bilgepanels that are above the waterline.

Cheers, keep warm,

Dick Burnham

Stealing Horses stem paint

Here is our Chebacco with 2 coats of oil-based Kirby semi-gloss white on her.  The outer stem is as yet unfinished but we plan to sand it down and to varnish it.


Dick Burnham

***

Hi Richard

New email address  – ‘rwheating@telus.net’

Apologies for not thanking you sooner for your work on the Chebacco News.

I live in the same corner of the world as Jamie Orr.  He lives on Vancouver Island and me on the main land.  My Chebacco has been in the works since 1995 (!)  I was searching for just the right boat project (my first) when I read the Chebacco article in the Wooden Boat magazine.  However this would be a test of my dedication as my wife and I were just starting our family which I was to discover dramatically cuts into ones free time…
My boys are now seven and five and I am able to pick up the pace so to speak.  Just tonight I have done the final tidying up and dusting in preparation for spray painting my boat.  Mine is the standard sheet ply variety Chebacco with some modifications such as raising the cabin two inches and widening it out to the coamings.  I have also gone with a one piece ( a la Brad Story) transom with drain holes.  The forward bulkhead I doubled in thickness (to one inch) to allow me to mount the mast, using a tabernacle, directly onto the cabin roof.   I have some ideas for the tabernacle but would be very interested in other CB readers experiences with this.
Hope to launch this before January and then spend the spring on the trim  and spars.  Thanks for the sail info.  I will likely go with the Sailright kit.
I will send along some photos in the near future.
Thanks again,

Randy Wheating
Port Moody, BC
Canada

***

Sanding the CLC

Everyone has been saying that this will be a cold winter. To which I have invariably replied “NO, it will be a mild winter, so I can finish the boat!”. And you know what? With the exception of a couple of days of snow, it has hardly gotten below 50 degrees yet… spooky.

DSC00029 DSC00032 DSC00033

These are pictures my homemade power long board. To the left, I have just disassembled the inline air sander I bought from Harbor Freight. Center is where I have made up some small mounting blocks, and countersunk some 1/4″ flat head screws in it. To the right, I am gluing the blocks to the sanding board with some 5 minute epoxy. Note that the blocks are attached to the sander during this operation, this is the only way to make sure they are glued exactly the right distance apart, so they fit on the slide of the air sander perfectly.

DSC00034 DSC00035

After testing my setup on the boat, I realized the slide on the sander was some kind of plastic, and bent all out of shape when the board was forced to follow the curve of the hull. What you see in this picture is a 1/4″ x 1″ length of cold rolled steel, used to keep the slide stiff and reduce the wear. Still got some wear using the sander, and had to return it to the store. I’m not sure it was all related to my setup though, as I’ve had this exact type of sander before, and had the same problems with it. I’ve since ordered a Campbell Hausfeld air sander from HF. They had it in the catalog for $16.99, about $40 less than I could find it anywhere else. The card in the mail said it was back ordered, and I can’t find it online any more… Not sure if it was a typo or what, but it appears they are going to send it to me.

To the right, you see where I have taken the sanding pad and used glass tape to strengthen the attachment of the spacer blocks to the board. The sandpaper was attached to this board with contact cement, 3M Super 77 spay adhesive. Application of the heat gun on high while pulling the paper off made changing to a new sheet a breeze. I used 36 grit paper, the kind that worked with the inline sander. At about $7 for a box of 25 at the local HF. Went through two boxes.

DSC00030

On the left here I am squaring up the rudder assembly, and on the right it is set aside for the epoxy to set up. I used three layers of the 2″ tape I got frommarsales1@aol.com I bought five 50 yard rolls of 2″, 6oz tape from him for $35, you might email him and see if he has any more. The tape is a satin weave and doesn’t wet out as easily as some of the more open weaves. You have to pre-wet your surface, then apply your tape, then wet the outside. Give capillary action a few minutes to work the epoxy in, then work any remaining bubbles out with your thumb. This tape is a bit more work than a more open weave would be, but well worth the saved money.

I make the rudder a bit thick for the post, so I trimmed it down some with a flap wheel on the angle grinder. Also, I flared the aft end on both the blade and the wing down to a finer point than on the plans, in an attempt to save a bit on drag.

DSC00001 DSC00003 DSC00004

Here you see the centerboard case going in. In the picture on the left I have just dropped it in, I had to cut a notch out of the board you see to get it to drop all the way down. Center is a side view, and right is a view of one of the cleats used to hold it. If you look in the picture, you will see that the cleat only has one screw. This is to allow the case to be levelled from underneath, before tape and epoxy is added.

On the right you can see a one of the bilge panel spices, still covered with the remnants of the wax paper used to keep the clamp board from sticking. I later went back with a wire brush on a drill and got this off.

DSC00003_2 DSC00005 DSC00006

On the left you see the crew applying glass and epoxy to the hull. This was a major operation, glassing the entire hull with 6oz cloth. Made more interesting by it being in the 60s, and by my being out of slow set epoxy. We only had one pot start to cook off on us, and I was able to dump and spread it before it had smoked too much.

Center you see a good shot of the cloth hanging off. In the future I may try to trim closer to the hull before applying the epoxy. I wasted quite a bit of glass here, as after it gets a few runs of epoxy on it, about the only thing you can do with this stuff is throw it away.

On the right, you will see where it looks like I spiced onto the back of the keel. This is caused by me splicing onto the back of the keel. Measure twice, cut once. Then cut again. Also note the brown under the glass. I used the last of my slow cure hardener to spread wood flour and epoxy over any sections that weren’t exactly smooth, so the glass would lay even. I learned on a previous boat not to use phenolic micro balloons under the glass. They aren’t very strong in tension, and I had a section de-laminate on me during sanding. This boat is being made as strong as I know how to make it, so the only putty under the glass is wood flour based.

DSC00007 DSC00008 DSC00009

The left two shots show a good view of the cutout for the motor well. Also, note that the glass is folded over twice on the transom, and right under where the rudder will be. This required a bit more work faring the hull, but the added strength may come in handy some day.

DSC00010 DSC00011 DSC00012

More shots of us desperately spreading epoxy and chasing bubbles, before the epoxy set up.

DSC00024 DSC00025 DSC00026

The two pictures on the left are of the stem after it is attached. I agonized for days over whether to finish it “bright” or not. finally, looking at the pictures I have in the Chebacco News issues showed that most people were painting over it. In addition, I REALLY wanted to cover it with a layer of glass. So, it is made up of cutouts of plywood, laminated together. Notice the radial lines on the stem? This is where I broke the belt on the hand power planer, and had to use the chain saw to finish the carving… <grin>. The stem had a liberal coat of putty applied to the bottom and then was attached top and bottom with a couple of temporary screws. After the putty set, a little sanding was done, then more putty, and a couple of layers of glass cloth went over the whole assembly. This coming Saturday a friend is coming over to help me forge a piece of 1/8″ stainless steel to the shape of the cutwater, so the keel armor will extend from the bottom up and around the cutwater! Should be very cool.

DSC00027 DSC00028 DSC00031

On the right we have applied a coat of glass bubbles and wheat flour as a faring compound. Notice the line starting halfway up the bilge panel next to the transom? This is where the bottom and the bilge layers of cloth overlap. I have two layers of glass over the bottom chine to add to the strength.On the left, I’m attaching the cheek plates over the centerboard case. I broke with tradition, and foil shaped them in the best bolger tradition, with the flare on the sides and bottom matching. Hopefully this will reduce some of the turbulence caused by this protrusion of the keel.

This notched trowel process took a LOT of epoxy. More than glassing the hull! Oh, well, it allows me to fill in the low spot, and will give a smoother hull. Helping to decrease resistance and turbulence.

DSC00001_2 DSC00003_3 DSC00004_8

This is the boat after MUCH sanding. The girls decided they would volunteer to sand the boat instead of buying me a birthday present. Their mistake! <evil grin>. I only had them sanding for a couple of weeks… They did a wonderful job, though. The odd color scheme is my attempt to vary the color of each successive layer of filler. No reason, I had the pigment and though I’d experiment.

On the left we are just starting to apply the leftover Interlux barrier coat primer from another project. I put a little of the green pigment I had left into the white primer, and it turned the yucky blue you see. We turned the boat into a swimming pool! I didn’t have quite enough for the entire hull, but that’s ok. I experimented with the paint, and it stuck to unwashed, unsanded, smooth epoxy with no qualms. Even stayed on after a couple of days in the dishwasher, and hardened up nicely after a couple of weeks.

On the right, you see the hull with paint on it. We are putting it on in many thin layers, to avoid runs. In this picture we still need a couple of layers of paint. The green is a color I got from mixing three gallons of various shades of green deck paint purchased at the local close out store. At $2.88 a gallon, I bought 12 gallons, even before testing on the epoxy!

Anyway, that’s all for now, next issue I’ll have pictures of the forged armor for the keel, and pictures of the boat turning, currently planned for some time in January. Also, I’ll show how I figured out the welding of stainless steel on a cheap wire feed welder.

Richard Spelling

From the muddy waters of Oklahoma.

Chebacco News 37

Building the CLC.

I’m building the Bolger Chebacco, Light Cruiser edition. Or, CLC. I have a Michalak designed AF2, but the wife doesn’t like going sailing in it. She has specific complaints; she doesn’t like changing sides during tacking, it’s too hot when I like to take it sailing, when the wind is calm and the water is smooth. She may have a point here, and the electric motor on Entropy, while it moves the boat around, is pretty slow. She likes to go sailing when the wind and waves are kicking up, but this is when I get anxious about the AF2 being capsized, and when we are pounding annoyingly into the waves.
So, AF2 “Entropy” is for sale and CLC “Schrödinger’s Cat” is born.
The CLC has a pilot house for shelter in the rain, permanent hard dodger for shelter from wind and sun. The boat is 7.5ft wide, and according to the designer it would take “hurricane force” winds to knock it over. The basic boat is self righting up to 90 degrees, and should be even better with the pilot house. The hull is well proven, and handles sweetly in rough water. Even the roughest lakes in OK should present no challenge. The CLC has two bunks, a head, and a small camping style galley, so we should be able to go camping in the boat for a weekend, assuming we can stand each other for that long.
She has a folding mast to make trailering simple and quick. I can setup Entropy in 15 minute, and take her down in 20. This includes tying the sail onto the mast. The folding mast on the CLC should knock at least 5 minute off both ends of that. Also, the CLC has a dedicated slop well on the centerline aft for a motor. Lots of money is designated to buying a NEW outboard, that will start on the first pull, and will push the boat at hull speed. So, even if there is no wind, I can leave the mast folded and we can go motoring!
I’ve decided to take my time on this one, though the wife swears I’ll be done by Thanksgiving, the the response from my sailing buddy when I told him I was taking my time was “ya, right”. Do I have a reputation or something?
I’m using 1/2″ MDO for the boat. It’s about as good as you can get without spending three times as much and getting marine plywood. It is even argueable that it is better than some marine plywood, as the paper face will prevent checking in the plys that would let water in. Here is a picture of a piece that spent three months in my dishwasher. It’s in absolutely perfect condition, and you can’t even tell it’s been soaked with hot water a couple of times a day for months. Quite amazing, actually.

DSC00008_3

Everyone asks, “do you need to take the paper off?”. No. The paper is stronger than the wood. Test joints made by myself and others, using the Payson/Carnell fiberglass butt joint technique, always break in the wood layer, by ripping the wood fibers apart. Never in the paper, in the epoxy, or in the glass. Here is a picture of a test joint tested destructively.

DSC00009_3

Here are a couple of pictures of the making of the 24X8 panels for cutting the topside out. There is a backing block of 1/2″ ply behind the joint, which the clamping block you see screws into. I’m using wax paper to keep the epoxy from sticking to the boards. This is problematic, it sometimes gets glued very good to the epoxy, and takes a wire brush on a drill to separate! Sometimes, though, it pulls right off. Go figure. Will be using polyethylene from now on, it doesn’t stick at all. My garden is in the background, where I grow cardboard boxes.

DSC00012 DSC00013

I put a layer of light glass cloth, 1.34oz, on the parts of the boat where rainwater might collect, before the boat was assembled. This is to seal the wood in that area and prevent rot. I also glassed the centerboard case inside and out, and coated the centerboard with graphite loaded epoxy for reduced friction and abrasion protection.  I’ll be glassing the insides of the stub keel, and the insides of the rudder post housing, as well as the slop well. The ground tackle compartment got a coating of limestone loaded epoxy as well as the light glass, but I may go over this will graphite loaded epoxy as well.
Here is a picture of the bushing I made out of UHMW poly for the centerboard to pivot on.This is 10 thou bigger than the pin, so there is a loose enough fit that the centerboard will bear on the case and not the pin when under side loads. It was turned on the lathe to be a press fit into the centerboard, and notches were cut out of the flat sides of the bushing with a hacksaw. It was hammered into the hole cut in the board, then the notches were filled epoxy and wood flour, and the whole assembly glassed over. The holes for the pin were cut later.

DSC00009_2

Here is a picture of the bearing plate for the centerboard pin. This is designed to take the load from the pin and distribute it to the wood in the centerboard case. There are extra layers of glass reinforcing the wood under this plate.

DSC00006_3

Also, the design modifications for the CLC remove the bracing from the top of the case provided by bulkhead 4. So, I will make sure that the 2x boards surrounding the case both outside on the keel and inside under the floorboards are securely fastened to the centerboard case, to transfer side loads to the hull.
Here are the watertight hatches for the boat. These are Bomar hatches, which I got for a WONDERFUL price from http://www.thriftymariner.com . From West Marine they would have cost $450. I got this whole box of hatches for $134. You should all buy something from this guy to help keep him in business! The hatches on centerline will be of the sliding type built by myself. They will be rain and spray tight, but would leak if immersed. But, they are on the centerline, so I can get away with them not being airtight.

DSC00010_3

Here I am adding reinforcement and biaxial cloth to the transom. I’m making this boat as strong as I know how. This reinforcement is in case I ever want to test with a 15 hp motor, and to be able to not worry about the motor bouncing off on the wonderful roads here in OK.

DSC00003_4

Here are the bulkheads, centerboard, and centerboard case, cut out and waiting to be assembled outside.
DSC00004_4 DSC00005_4 DSC00007_3
Here I’m laminating up the stem out of 1/4″ plywood. Bill Samson recommended laminating out of scraps of 1/2″ ply. I tried that, but couldn’t get them to take the bend without cracking. As it was, I had to get the 1/4″ wet for it not to crack. Realized a couple of weeks later he meant to laminated it SIDEWAYS, with piece already cut to the shape, and not to bend the pieces. Duh.

DSC00001_3

I ‘m using a cheap shelter from Harbor Freight to keep the sun and rain off the boat. I’m hoping for a mild winter. I added rope bracing and tied the corners down. It seem to stand up the wind pretty good so far, we’ve had gust to 40mph, and it barely moves. I also drilled and pinned the assembly together, so there is more than just the tarp holding it together!
DSC00010_2 DSC00011_2
Here are the bulkheads and forms setup outside under the shelter. I didn’t build a strongback for the boat, though I toyed with the idea. The topsides have alignment lines on them, and putting legs on one of the forms and one of the bulkheads allowed me to screw the topsides on and have a self supporting structure. The rest of the bulkheads were installed, then legs added to carry the load, and everything carefully leveled. The bottom was installed, next, and the stem trimmed to size.
DSC00001_6 DSC00003_7 DSC00004_7 DSC00005_6
The bilge panels were laminated in place, using thick paper to take the shape off the assembly. There are a few gaps, and it needed a little trimming, but epoxy covers most screw ups, and makes craftsmen of us all. The forward fg butt joint clamping blocks were left in place while the bilge panels were twisted into shape, to prevent any possibility of the joint coming apart under the extreme stress of the twisting..
DSC00001_4 DSC00001_5 DSC00004_6
This took a LOT of force, I wound up having to use three high tech ropes in the spanish windlass mode to get the thing bent. I was seriously supprised the ply didn’t snap!
DSC00003_5 DSC00004_5 DSC00005_5
I plan on leaving the ropes in place till I have the chine jointed filleted and taped on the outside, and filleted and taped on the inside forward of bulkhead one. Also, I will fillet and tape the forward sections of bulkhead one that intersect with the bilge panels. Hopefully, then, when I pull the ropes, the panels won’t move much!
I could have done it the recommended way and laminated up two layers of 1/4″ ply, but I’m not sure it would have been any easier. I would have had to drill a couple to four hundred holes to clamp the boards together properly for lamination, and would have had to make a 1/2″ – 1/4″ fg butt joint. Plus, I wanted to see if the ply would break when I bent it!
Today I sanded off the excess epoxy putty form the “spot epoxy” phase, and glassed the chines, as well as the front of the bulkhead one/bilge panel joint.
I realized a couple of days ago that my back always complains when I do a lot of hand sanding. Harbor Freight had an inline air sander one sale for $29, and it is wonderful! I did have to make a couple of field modifications, the exhaust is wet (even though I have a dryer on the air line), and it was spraying water on the place where the paper clamps to the sander. This was causing the paper to get wet and tear off way before it was used up. A couple of deflectors solved that problem. I’ve even come up with a way to convert the thing into a power long board, for faring the hull! I’ll post pictures in the next issue of Chebacco.

DSC00001

***

Hi Richard

Just got back from the Port Townsend Wooden Boat Festival in Port Townsend,
(where else?) Washington.  This year, for the first time, a Chebacco was in
the show.

Jerome McIlvanie has done an absolutely beautiful job on his lapstrake
version (see Chebacco News 28, October 1999.)  Both the boat and finish are
immaculate, and the varnished hatch and cabin doors (doors, not drop
boards!) are the icing on the cake.  I wish I could send you a picture, but
I didn’t think to take one – too dazzled, I guess!  John Kohnen was there,
though, with camera in hand, so maybe he would forward one for the Chebacco
page, if asked.  Maybe Jerome will send in a write-up on his building
experiences as well, it would be very worth-while.

Wayward Lass was in Port Townsend again, but she was down in the “other”
marina.  We’ve had a lot of small craft warnings, and Friday was no
exception, but the strong winds (up to 25 knots) weren’t expected until the
afternoon. When I left the dock at 6:05 am, there was no wind at all, and
there wasn’t enough to make sailing worthwhile until 7:30.  Once the sails
were up, I left the motor going in order to cross before the small craft
warning came to pass.  I’ve never motorsailed before, it’s always been one
or the other – but it worked well, with the speed over 6 knots most of the
time.

My new Garmin 12 GPS keeps me on track as well as giving me the exact speed
over the bottom.  It told me the tide sweeping down between the San Juan and
Canadian Gulf Islands was pushing me over 20 degrees off course, and made
adjusting for this a breeze.  It also provided added peace of mind when the
early morning fog advanced to meet me in the middle of the Strait, dropping
visibility to a couple of hundred yards.  These handheld GPS units are great
little helpers — I had my compass course, and expected the fog to lift
shortly anyway (it did), but still….

I rounded Point Wilson, 2 miles north of Port Townsend, at 11:40, and shut
down the motor.  I had a great sail down to Point Hudson, where the town is,
pulling ahead of a bigger boat, who was still motoring (their main was up,
but sheeted right in, while the wind was behind us.)  Once around Point
Hudson, I sailed close past the entrance to the Festival at the Point Hudson
Marina, and on down the shore between all kinds of boats, both anchored and
sailing around.  Decided it was too good to stop, so I gybed and went back
to Point Hudson for another go round.

Saturday was the day the BolgerList guys were to meet.  We mostly got
together at the CLC booth (met John Harris of CLC there), then moved over to
the café for cinnamon buns – but they didn’t have any this year!  Tragedy!
Still, we managed.  Those present were John Kohnen, Derek Waters, John
Ewing, myself, and Miles, whose last name I didn’t get – sorry, Miles.
Afterwards, we went down to see Jerome’s boat, and found Alan Woodbury
there, with his father in law, Roger.

Did the docks then – my favourites were Jerome’s Chebacco (we need a name
there, Jerome) and a Lyle Hess Renegade, the design that Serrafyn was built
to, I believe.

We met up again at Wayward Lass about 1:30, and went for a sail – John,
John, Alan, Roger and myself.  (Derek had his family, and Miles was off to
hike the Olympic Mountains with his wife.)  Alan took the helm and we headed
out past Point Hudson, then over to watch the schooner race.  We had a good
view of the start, then followed the race down to the first buoy.  On the
return leg, we saw Jerome on the water and sailed over to say “Hi”.  The
wind had about dropped by then, and he was just taking down his sail as we
approached.  Still looked great, though.

We also saw a Martha Jane, owned by Bennett from California – the boat’s
name was Steadfast.  She looked good, and Bennett told us he’s sailed her
all over, including Florida and the East Coast.  Although we were going in
similar directions from time to time, we didn’t get into a head to head
race, so we can still both hold to our conviction that our boat is superior!
I will say, though, that the lug sail looked very impressive.

That was about it for boat showing.  Jerome, Alan, John Kohnen and myself
had dinner together at the little café by the Boat Haven – good fish and
chips and great milkshakes!  After that we went our separate ways.  I was
worrying about the weather for the next day, so I tuned in to the weather
channel on VHF.  It sounded like the forecast was improving, but it was
still expected to blow hard again in the afternoon – and in the morning I
could expect to lose 2 knots to the tide.  Gradually the conviction grew
that the best time to head home was right then, even though it would take
most of the night, and I still had some stuff I wanted to do first.

Anyway, I left the dock at 10:30, with my battery operated nav. lights
duct-taped to the masts.  Even before I reached Point Hudson I was getting a
lift from the tide – 6 knots at half throttle.  I rounded Point Wilson at
10:55, and 20 minutes later I was making 8.7 knots over the bottom!  (Normal
motoring speed is about 5.5 knots.)  It was almost a windless trip, except
for a bit of breeze in the Point Wilson area, so I didn’t have the sails up
at all.  It was chilly, I was glad of the Mustang Cruiser suit, with hat and
gloves on as well.  After the fog on the way over, I had bought a radar
reflector in Port Townsend, and I was glad of it as I passed three big
freighters in the dark. I saw the lights of each in the distance, but
couldn’t tell what they were until they were about a quarter of a mile away,
when they suddenly materialized out of the gloom and became these huge
ships.

I reached the Customs dock in Victoria’s Inner Harbour at 4:18 in the
morning, called in, then got my head down for a couple of hours before
making breakfast and heading to Fleming Beach and the launch ramp.  A great
night’s trip to end a great weekend.  If I’ve missed anyone or mispelled
their name, I apologize.  See you all again next year.

Jamie

***

Hi Richard,

here are some pictures of our newborn
chebacco “Kitty Hawk”.

Cheers,
Vincenzo

kittyhawk1 kittyhawk2 kittyhawk3

Hi Richard,

thanks for you nice message. I made the wooden blocks out of black locust
using drawings on “the rigger apprentice” by B. Toss as templates.

The tabernacle has worked well, so far. As I had mentioned, I did not like
the original turnbuckle system to hold the mast, and replaced it with a
steel fence-like piece (I will try to take a picture of it).

Yes I did leave room for the gaff between boom and the folded mast and, just
like you plan to do, I keep the boat under a tarp with the sail and rigging
attached with the mast folded down.

The sails were made by a professional sailmaker (veleria Zadro in Trieste)
that is one of the few in this country to know how to cut a gaff sail. Thanx
for your suggestions about the sails. I will try to increase the draft on
the main by playing with the halliards and the boom out haul, and see if that
improves things. Zadro refused to cut the mizzen dead flat! Any way I am now
trimming it flatter than it looked in those early pictures. I am also
experimenting the mizzen with a conventional boom instead of the sprit.

The aft hatches are made as in the plans and they seem to be good enough to
keep rain and spray out; of course some water would get in case of capsize
or if swamped by a big wave.

I will try to send you details of the blocks and tabernacle.

Yes, things around the back of the cockpit and the motor/slop well are
indeed a bit different than in the plans. I will send you pictures of the
details. Anyway, the idea was to make the cockpit self-baling when the water
reaches the level of the seats; So there is an oval cut at that level in the
back of the cockpit that drains in the slop well that has the round drainage
holes that you noticed. These holes serve the double purpose of keeping
things in the slop well and of accepting some rubber flaps (not yet on in
the picture!) mounted on the stern that would act as valves. The flaps are
needed only to prevent BIG waves coming from astern from spilling water in
the well (and in the cockpit!) while letting water go in the opposite
direction. At some point I will have to do some sort of swamp test to verify
all this!

Ciao,
Vincenzo.

***

When I came to Tulsa for flight school I owned a 14′ O’day Javelin sailboat. I
brought it along. On October 31st, 1987 my roommate and I decided to go
sailing. It was in the 80’s, which was un seasonal for that time of year. The
water, however was pretty cold. He had never been sailing. I had sailed a
little, but no formal lessons.

Background: The last time I sailed in Ohio before coming to OK it was a wild
time. A highschool buddy and I took the boat up to the lake. When we got there
a big thunderstorm was approaching the lake, and all other boats were leaving.
We looked at each other and said “What the F***”. We put the boat in the water
and rigged it. By the time we had the sail up it was raining cats & dogs. We
started out of the boat launch and the gale force winds hit. Man did we have
the time of our lives! The bow was cutting through the waves like we were at
sea! She was hiked over and water was running into the cockpit area from the
low side. Water was POURING from the mainsail onto us. It was an awesome time!
(I/we didn’t realize how STUPID that was!)

Back to OK… My roommate and I got the boat out onto Keystone with no
problems. We had sailed around for about an hour. Then we noticed a storm
developing to the south. (Little side note here… an Ohio storm does not
equal an Oklahoma storm .. unknown to us..) I announce “Hey, no it’s gonna get
fun!” LOL!!! Boy was THAT an understatement!!! The winds were so strong out of
the south that I reefed the mainsail quite a bit, and dropped the jib
altogether. I was getting frightened. (Did I mention that I swim like a
ROCK!?) I started back towards the boat launch, but of course it was to the
south. Directly into the wind. My buddy (who had never sailed before) kept
telling me to put the sails all back up and lets have fun. I finally listened
to him. We started tacking back and forth to get to the boat launch.

It was on the third or fourth tack when the wind shifted drastically and with
great force. It grabbed the mainsail and “jibbed” it. (It took it from one
extreme to the opposite side all at once — and fast!) The momentum took the
boat right over. We capsized in a heartbeat.

Both of us clammered up on the bottom of the boat. At first it was funny. We
were laughing. Then I heard her taking on water. The lifejackets were neatly
stowed in the cuddy cabin. Nice, eh? I tried swimming under and getting them,
but my feet keep getting tangled in the rigging. (Did I mention that I swim
like a ROCK!? LOL!!) It had “full floatation”, but it had taken on so much
water that we were unable to keep it “righted” each time we tried.

At the time of capsizing we were only a couple hundred feet from the launch.
By this time the wind and current had blown us out into the middle of the
lake! (Did I mention that I swim.. Oh yeah..never mind) All day long we had
not seen ONE person on the lake. My buddy made a very brave move, which I
still appreciate to this day. He decided to swim for shore from the middle of
the lake! It was horrible to watch. Each time his head would go below a swell
in the water, I thought he had drown! I was standing on the bottom of my boat
yelling for him all the way! I know he couldn’t hear me with the wind, but I
had to do something. It seemed like he swam forever. When he finally made it
ashore, he was dead tired. He waved to me. Then he limped up the hill and out
of site looking for help.

Ok.. now it gets funny. After my friend’s ordeal.. this Bayliner with 4 dudes
partying goes by! I scream.. they come over and I get on their boat. I tell
them to let my sailboat sink because I don’t care anymore! They were great
about it and lashed it, still capsized, to their Bayliner. When we got to the
launch I notice that it had banged the side of their boat up pretty bad. I
don’t think they noticed since they were so stoned. LOL! My buddy finally
comes back over the hill and I am standing by my car! LOL!! Poor guy!

Final side note. After getting it onto the trailer I could not pull it until
enough water drained out to get the trailer fenders up off the tires. It took
2+ hours to drain! LOL!!

That night we treated ourselves to a steak dinner. We had our picture taken
with our waitress. I still have that photo, and the memories. What a great
friend!

Ok.. I’m all mushy now. 🙂

That’s my Keystone story.
Keith