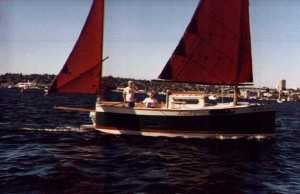
Chebacco News 15

Chebacco News

Number 15, May 1997

[This issue of Chebacco News can be seen (in glorious colour) on the World Wide Web at: http://www.scotland.net/users/wbs/chebacco]

Our Website

Those of you who surf the World Wide Web will have noticed that Chebacco News is now at a different URL from previously. Formerly, I put CN on my web pages at work, in the University of Abertay Dundee. I now have a private web page, funded by yours truly.

There are two reasons for this – firstly, my employers could see that I had interests outside of work – a grave mistake in this age when workaholism is assumed to be the norm – secondly, I plan to retire later this year and my work pages will disappear anyway!

The downside of the new site is that I’m rationed to 1/2 megabyte of web space, so I’ll only be able to show one issue at a time, so the happy state of having the entire collection of Chebacco News’s on the web is to be no more.

To keep new readers happy, I can now offer earlier issues of Chebacco News as ‘bound’ (i.e. stapled) volumes. The two volumes are issues 1 though 6, and issues 7 through 12. If you’d like either (or both!) of these, the cost is $10 for each volume, including surface-mail postage, or £7 in British funds. Add two more dollars (£1.30) for air-mail. Please send cash only – it costs me a fortune to cash an overseas cheque. Commission for converting cash is much less.

News, enquiries etc should be sent to me:

Bill Samson,

88 Grove Road,

West Ferry,

Dundee,

DD5 1LB,

Scotland

Email:- wbs@sol.co.uk

Gil Fitzhugh ‘fesses up . . .

Gil Fitzhugh has been reflecting on his experiences of building a lapstrake Chebacco hull:

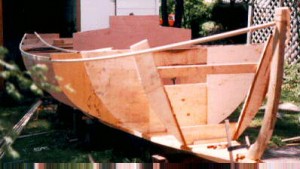
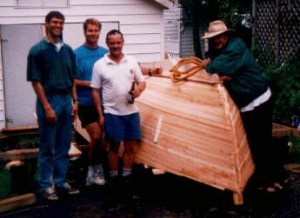
It’s true confessions time. Many of your newsletters have passed on information on how I was building my Chebacco, with the goal of helping those who hadn’t started yet to get off their duffs and get cracking. It has increasingly been occurring to me of late, that many of the techniques I used were suboptimal. Not wrong; I do have a nice hull. But I could have built it much more efficiently. But, if I’m ever misguided enough to build another glued-lap plywood boat, here are some of the things I would do differently.

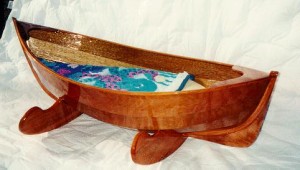
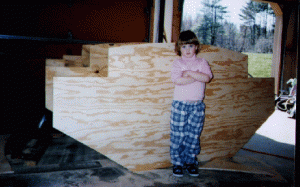
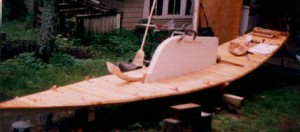
1. The Tom Hill approach is one I wouldn’t do again. It uses a series of battens to define plank lines. Tom’s boats aren’t particularly curvy; it makes sense to use battens to help shape the planks. But a lapstrake Chebacco is a pretty curvy boat. Since I disagreed with Phil Bolger’s plank shapes, I lofted my own. Then I cut molds to duplicate my lofted planks. Having done so, I didn’t need Tom’s technique to define my planks. I could have taken them direct from the molds. This is what I did when lofting the cradle boat, and as you can see it worked fine:

ch144

Gil Fitzhugh’s cradle boat – based on Iain Oughtred’s ‘Whilly Boat’ design

I used Iain Oughtred’s plank lines in defining my molds. There are no plank lines specified in the lapstrake Chebacco. You can use Tom Hill’s battens to come up with nice lines, or you can loft them. You don’t need both.

2. Having abandoned Tom’s battens, you can set up all the permanent bulkheads as molds (either substitute molds or extras, depending on where they fall). When you lift the hull off the building frame, the temporary molds are left behind and the bulkheads stay with the hull. This saves many months of fitting out. I suspect that’s the way sheet-ply Chebaccos are built [that’s right – Bill] ; no reason not to do likewise for lapstrake.

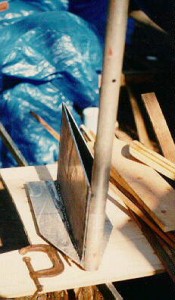
3. Using drywall screws to hold the planks togetherwhile the epoxy sets up is easy and effective while you’re doing it, and a monumental pain later. Some of the screws break off and have to be removed by brute force. All those zillions of holes have to be plugged and smoothed on the outside, and the ones in the cuddy have to be smoothed on the inside, too. All this takes forever and yields no job satisfaction. A better way is to make up a batch of plywood plank clamps, like this:

clamp

They can be made tight with a wooden wedge or two at the open end. I starte out to use them on the Chebacco, but the presence of all those Tom Hill battens meant the opening had to be quite wide and the closed end rather thin. When I tried to tighten the clamps with wedges, they bent at the closed end instead of pulling the clams together at the open end. So I gave up and went to drywall screws. I gave up too soon. I should have used heavier clamps. In the cradle boat, with planks of 1/8 inch luan ply, my clamps were scraps of 12mm occume ply from the Chebacco. They worked fine, and left no holes. If I’d taken the time to glue together two or three thicknesses of lumberyard ply for the Chebacco clamps, they’d have been plenty strong enough.

I’m grateful to Gil for sharing his learning experience with us. After all, it’s better to stand on the shoulders of our predecessors, than to start from ground level.

Story Chebacco-20 spotted at Maine boatshow

:

John Harris, of Chesapeake Light Craft, MD sent some email:

Neat show; I’d swear there was as much interesting stuff as at the WoodenBoat Show. Just crammed with wooden boats of all shades and an acre of boat-stuff vendors.

Brad Story was there with a lapstrake Chebacco 20. Marvelous finish and detail. (Were those NUTS and BOLTS holding the laps together?) I talked with his wife a little; she said they were going to try to ease out of big boat one-offs and concentrate on marketing the Chebacco as a production boat. I’ll be very interested in how that works out; they’ve already sold nine and are doing some nice advertising.

We left on Sunday after a mandatory stop at the LL Bean and Patagonia outlets.

Cheers,

John C. Harris

A new Sailing Pirogue from PCB & F –

John Harris also reports that he has built the prototype Sailing Pirogue – a new design from Phil Bolger & Friends. This pirogue is 11’6″long by 2′ beam. Drawings of this fun boat are available from Phil Bolger & Friends, 29 Ferry Street, Gloucester, MA 01930. Phil writes:

The plans of this design are on two sheets of 8 1/2″ x 11″ typewriter paper, rough but demostrably adequate. If somebody wants a set, we’ll charge US$25.00 for them, mostly “handling”, i.e. nuisance.

peero

John Harris’s prototype Bolger Sailing Pirogue

Progress with Sheet Ply Chebacco:

Hi to All,

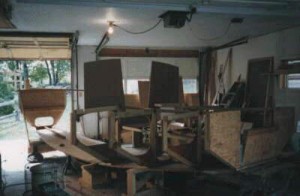
I’ve been making some, but somewhat slow progress. I’m building a sheet-ply Chebacco, and I’m building it in my garage. my progress to date…

cut-out my bulkheads and molds (I guess I’m very luckyto be living so close to ‘Boulter’ (plywood and specialty woods and materials, an excellent company and resource – Boulter Plywood Somerville Ma 617-666-1340)

I built my support structure (less than 2 feet to spare) in an effort to keep things straight, I stretched a wire from front to back and permanently mounted it near the

cieling over the boat centerline. On the wire I have a weighted string that I can slide along over the construction and verify the centerline alignment of individual

elements or the underlying structure, which gets hammered on occasionally. I also shot several areas of the floor/structure with spray-paint, to make it more noticeable

if my structure gets shifted.

I’ve cut-out, but not yet laminated the inner-stem

The transom is not yet reinforced or on the structure.

I have plenty of work ahead of me, and the expenditure of funds is at the rate that is hardly noticed (but the progress is certainly noticeable…if slow) which is

my general plan, small expenditures of money, over long period of time. (besides, I have only a little bit of either of those resources).

I do have some questions for the general Chebacco-building

population…

I’m trying to decide, whether to build the centerboard/case and install/mate with the bottom panel, at bottom panel phase of hull construction (soon in my case) ???

And I’m not clear on the intent, on the plans for the thru-hull-section for the rudder post…

is it lined with an appropriate sleeve for the post to wear/rub against, or is it epoxy-coated (specialty additives) for the stressful life of supporting the twisting and turning of the rudder?

Does any preparation for this area happen while upside-down in the hull stages?

By The Way, My garage is now adorned with a large framed color print of ‘Sylvester Ghosting In’, which was featured on a previous ‘Chebacco News’, (Bill, I hope that’s

OK) it’s beautiful and right smack-dab in front of my wife’s parking space in the garage…she still has use of her side of the garage…and we’re both enthused

by the artwork.

Jim Stewart mailto:stewarj1@polaroid.com

#2 Stewart Farm Rd.

Atkinson NH 03811

Regarding the hole for the rudder stock, the way I built my Chebacco all the wear is taken by a pintle (gudgeon?) at the bottom end and a steel plate with a hole in it on the oak ‘slab’ at the top. The hole itself is epoxied and painted, but doesn’t seem to get any wear. Some builders fit the CB case at the same time as they fit the bottom to the hull. I cut the slot later, and inserted the CB case before making the keel. If I was doing it again, I’d fit it at the same time as the bottom – much less hassle!

More questions on construction:

Here’s another email question and answer session between Burton Blaisbblais@EM.AGR.CA – and myself

Hello Bill:

Is it sailing season yet in Scotland? We’re nowhere near it here – it’s still snowing out there!

Three weeks until the moorings are laid. I was out in my Payson Pirogue at the weekend. First time on the water this year!

Anyway, I wonder if I might pester you with yet another request for tips on building my Chebacco. I’ve pretty well finished cutting and sorting out all of the parts & components for the centreboard and its case (all I need to do now is to fiberglass the inside surfaces of the case before putting the whole together – I’m waiting on this for warmer weather and for my shipment of RAKA marine epoxy – yes, despite my recent controversial query to the Bolgerlist folks about the possibility of using vinyl ester, I still intend to use epoxy for my Chebacco). In anticipation of the hull asssembly process, I wonder if you could give me your opinion on the following details:

1) For the inside surfaces of the centreboard case, will fiberglassing with epoxy provide sufficient protection?

That’s what I did and it seems OK. I understand that Brad Story epoxies a layer of Formica on the inside of the CB case – should save a lot of bother!

2) After cutting out the hole in the centreboard for the lead ballast, did you first epoxy the inner edges of the plywood to protect it from the water, or will this interfere with the “adhesion” of the lead? Perhaps it would be better to pour the molten lead in first, let it solidify, and then seal the surface thoroughly with epoxy?

Yes – I epoxied AFTER pouring the lead. It seems fine so far.

3) For the framing, floors, deck beams and carlins, what type of lumber should I use? Can I get away with using carefully selected spruce or white pine, or do I absolutely need stronger wood ( such as oak)? I’m assuming that the main function of the deck beams and carlins is to support the deck, and not to play a major role in the structural strength of the entire hull itself.

I used reclaimed white pine – liberally coated with epoxy and well painted – seems fine. If I’d had unlimited resources, I’d probably have gone for mahogany or Douglas Fir. The carlines themselves add little to the strength of the boat – they effectively extend the glueing area for joins between panels.

4) Again, what are the options for lumber for the keel cheeks?

If you can get oak, that’s probably best – but be careful, It doesn’t glue well, so back up your joints with S/S bolts. I used construction-grade fir (‘red deal’) which epoxies well but is more easily damaged than oak.

5) I seem to recall reading in your published building sequence that fort the bilge panels you are recommending two plys of 1/4″ plywood, rather than 1/2″, due to the twist in the panel near the bows. Unfortunately, most lumber in Canada is sold in metric sizes, and while we can find 1/2″ plywood readiliy enough, the closest to 1/4″ that I can find is actually thicker at about 8-9 mm. Therefore, if I go the route of using two plys of the thinner stuff I will actually end up with a bilge panel that is considerably thicker than 1/2″ , and which will not be flush with the other 1/2″ panels. Therefore, I may have no choice but to use the 1/2″ plywood for this job. Do you have any experience with this, or any tips on how I might be able to use this thickness and still get the correct twist in the panel ?

I can get 6mm ply here, which is pretty close to 1/4″. I should point out, though, that in fact I made the bilge panels out of 1/2″ (12mm) ply but you need a bit of brute-force to get the panels bent into position. I used strategically placed clamps and twisted ropes (‘Spanish windlass’) to coax them into position.

Sorry to bother you with so many questions, but you are simply too valuable a resource not to use! Many thanks in advance for all your help.

Regards,

Burton

Delighted!

Bill

Photo from Nova Scotia:

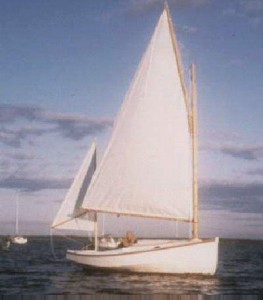
I found this image of Fraser Howell’s strip-planked Chebacco-20, ‘ITCHY’, on the World Wide Web. Unfortunately, the image has suffered somewhat in the transfer! If you can get onto the web, the URL is http://Fox.nstn.ca:80/~swbans/photo.html where the image is much clearer. Fraser tells me he’ll soon be sending some other images. Watch this space!

fraser

Fraser Howell’s strip-plank ‘Itchy’ scoots along.

That Tasmanian Chebacco:

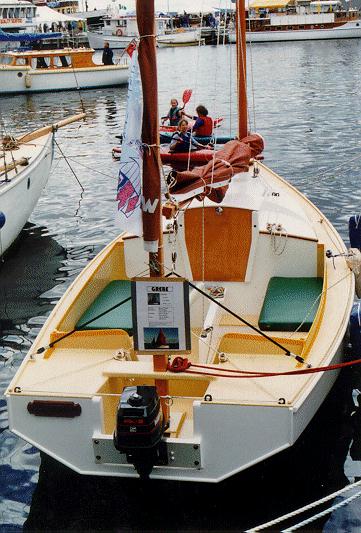
A number of you have written or emailed me asking for more details of the Chebacco that appeared on the fromt page of Chebacco News #14. Colin Hunt, who took the photos, takes up the story:

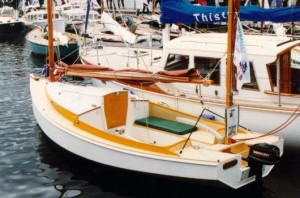
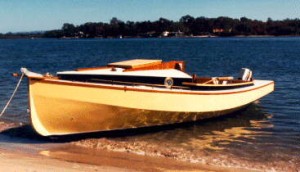
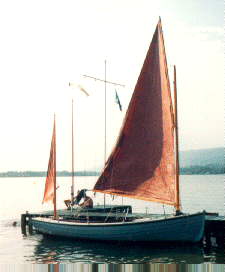
. . . as I wandered around the docks there it was – ‘GREBE’ – a chine built Chebacco launched last summer by Bruce Tyson of Port Sorrell in Tasmania. This craft is magnificently built and finished, and when I finally caught up with Bruce he described her as a very user-friendly boat. She was built according to the plans with no ballast and a 5hp motor.

ch143

GREBE

Colin also tells me that he has built a ‘Bobcat’/ ‘Tiny Cat’/ ‘Instant Catboat’ (surely a 12 foot boat doesn’t need all these names). He mentions that construction is very like that of the sheet ply Chebacco. I hope Colin sends some photos for a future issue.

And Finally . . .

When we first started this newsletter I wondered if it would survive as far as a second issue. I’m frankly flabbergasted at the amount of information we’ve disseminated. We seemed to have hit the market at just the right time when the first home-built Chebaccos were starting to appear. The World-Wide-Web has also been a tremendous help in reaching new Chebacchisti (- Gil Fitzhugh coined this word -), particularly through Chris Noto’s Bolgerlist, and Tim Fatchen’s Light Schooner home page.

Thank you all for your news items, past, present and future – Keep ’em coming!

Bill Samson

Chebacco News 14

Chebacco News

Number 14, March 1997

ch142
Colin Hunt spotted this beautifully finished Chebacco at the Wooden Boat Festival in Tasmania. It was built by Bruce Tyson of Port Sorell in Tasmania. This must be the most Southerly Chebacco!

We hit the posh mags:

Some of you may have come across the excellent new magazine devoted to boats and boatbuilding – ‘Water Craft’ – which is published by the legendary Pete Greenfield. You’ll recall that Pete started ‘Classic Boat’ and ‘The Boatman’, which recently amalgamated. ‘Water Craft’ is his latest venture – a bi-monthly mag with a very strong bias towards boatbuilding (unlike some other mags which seem to be committed to reviewing the latest millionaire gin-palaces).

I phoned Pete a couple of months ago, asking if he’d like to publish an article on the Chebacco boats. He looked at a draft article and agreed to commit himself to publishing a major article on the Chebacco and its construction. Phil Bolger and Gil Fitzhugh have both contributed to the article, which will be illustrated with lots of photos of ‘Sylvester’ at various stages of construction. The article is due to appear in Water Craft number 3, to be published on 17 April 1997.

Subscriptions to ‘Water Craft’ (six issues) can be had for £16.50 (UK) or £20.00 (rest of the World) from:

WATER CRAFT,
Pete Greenfield Publishing,
Gweek,
Helston,
Cornwall,
TR12 6UE,
UK

Some Questions about Chebacco Building:

Dr Burton Blais of Ontario, Canada, has recently started building a sheet-ply Chebacco-20. He wrote to me with a list of questions which, I believe, are of general interest, so here they are, along with my initial responses to them.

1. What is the best way to set up a construction platform for assembling the hull? I am thinking of two parallel 20’ long 2×4 or 2×6 rails (straight and carefully levelled), with the frames and molds set at proper distances along the rails. I’m not sure about the best way to adjust the heights of the frames and moldsto produce the correct arrangement for assembling the sides, etc. . .

I used 2x6s, as you suggest. I reckon 2x4s wouldn’t be stiff enough, at 20’long. These were set up about 30” apart like a ladder with ‘rungs’ corresponding to the positions of frames and molds. The frames and molds were lightly attached to these to allow some adjustment to fit the topsides panels when these were attached. Gil Fitzhugh used a plywood ‘box girder’ for his strongback and this worked very well, too.

2. Exactly how does one go about affixing the stem cap solidly to the hull – is it bolted to the stem? If so, how is it bolted? (I presume this goes on after the sides and bilge panels have been attached to the stem).

Yes, it does go on after the sides and bilge panels are attached. I fixed mine with longish woodscrews in deeply countersunk holes. Really, the glass sheathing should make it strong enough without through bolting.

3. For the hollow keel, the plan mentions something about drainage holes, but I’m not sure that I understand what is meant here . . .

The hollow keel sections are free-flooding, and so need to be carefully coated with epoxy inside and out. Each hollow section is roughly triangular in shape, so I drilled a 3/4” hole through the plywood (on one side only) at each corner of the triangle. I did this, too, on the hollow rudder. Some builders have made the keel solid and I don’t think there’s any harm in that. For amateurs with limited woodworking facilities, however, the hollow built-up keel is easier to build.

4. For the plywood rudder, exactly how did you affix yours to the rudder post so that it holds strongly (e.g. even when there is pressure against the rudder)? Also, how did you affix the tiller to the post?

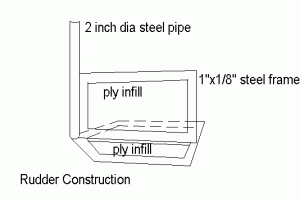
I strayed a little from the plans, in this case, because I happened to have some 1” dia steel rod for the rudder post, rather than the 2” dia pipe specified on the plan. I welded two, three inch long ‘prongs’ onto the post, which locate in holes in the frame at the for’ard end of the rudder. The whole lot was then sheathed in glass and epoxy and is very strong. The tiller is made with steel ‘cheeks’ in way of the post. A tightly fitting stainless bolt goes through both cheeks and the post. This would certainly be easier to get right with a 2” post. Play in this joint can be most irritating when you are sailing, as I found to my cost. I fixed the problem by drilling out the holes and using a larger size bolt.

5. Exactly how does one remove the two molds once the hull and cuddy have been assembled (do the molds not become entrapped within the structure?)? Does one simply ‘hack’ them out?

Yes.

6. Do you recommend installing styrofoam for positive floatation and if so, where should it be placed?

I haven’t installed any in ‘Sylvester’, on the grounds that she’s a wooden boat and would be quite buoyant, even when swamped. Some owners put in 2 or 3 hundred pounds of internal ballast, and the case for buoyancy would be considerably greater in these boats. If I were to install some, I’d put it under the side decks and under the benches.

Burton later emailed me with an account of how he is going about the construction of his boat:

As you know, I am still very early in the building process, and am very much a novice, and so I fear I won’t have much interesting material to relate. However, I’ll tell you a little about what’s happened so far in my Chebacco building enterprise:

First, I should indicate the type of workshop facilities and tools I have to work with. I built my small workshop several years ago to suit my modest woodworking needs and the Canadian climate – the entire building (which is insulated against the cold -it can get to -30 C here in Jan. and Feb.) is only 12′ X 20′ , and much of the space is taken up by benching and work stations set up along the walls. Despite this, I did manage to build a 15′-long Bolger Gypsy in this space last winter. However, the experience taught me that I would need a larger, less encumbered space to build the 20′-long by 7.5′-wide sheet ply Chebacco. Thus, last Fall, I completed construction of a temporary 12′ X 30′ shelter behind my shop. This is built of a 2 X 3 spruce lumber frame covered with a blue polyethylene tarp (this is an inexpensive woven tarp commonly available in North American hardware stores). In spite of the sunshine and strong winds in our area, I hope that this tarp will last through to the end of next winter (1997-98), when I expect to have my Chebacco completed (or nearly completed – a lot will depend on the availability of funds, and other circumstances). Thus far the tarp seems to be holding up well through the worst of our winter, although its getting a little slack in places (I must remember to see about tightening it so it doesn’t flap too badly in the wind).

As for my workshop tools, I have what I consider to be most of the basic woodworking tools (at least, the necessary equipment for my other woodworking passion, furniture building): e.g., 10″ Delta table saw (this is the inexpensive table top model, with a carbide-tipped blade – this saw doesn’t owe me anything, having given me much service over the past 8 years), a small Delta bandsaw, a scroll saw, a compound miter saw, a router, a lathe, and of course, a skilsaw, a jigsaw and a a belt sander. But my real gems are couple of really nice Stanley handplanes and an old cross-cut saw I found in an antique shop! So armed, I proceeded to tackle the problem of building a sheet ply Chebacco…

At this juncture, I should point out that I am trying to build my Chebacco as economically as possible, yet aiming for a good quality boat in the end. I should state that, as I live at least 10 miles from my intended cruising grounds (the St. Lawrence river, near Morrisburg, Ontario), my Chebacco will spend most of her life on a trailer under a tarp (as does my Gypsy right now). This fact does influence my choice of materials. For plywood, I am using construction grade 1/2″ fir 5-ply (good one side). Now, I know that there are many critics of construction grade plywood in the boatbuilding world. However, marine grade is simply not an option for me because of its very high cost in my area ($90.00 CDN a sheet for marine fir plywood!!). I have contacted the Canadian plywood association, who inform me that all plywoods maniufactured in Canada these days, whether marine or construction grade, uses the same types of waterproof adhesive. The main difference appears to be in the quality of the plies, finishing and the number of voids (the latter factor being of crucial importance to the boatbuilder). I have searched far and wide in the lumber yards of eastern Ontario, and have found that there is considerable variation in terms of quality from one dealer to another. I have learned that there is some pretty terrible plywood on the market these days (both marine and construction grade), and that one has to have a very discerning eye in chosing either type. After searching, I have found a supplier who stocks what I deem to be fairly good quality construction plywood. After much cutting and handling so far, I have found this plywood to have few voids, and these are very small at that! I think that this material will suit my purpose very well. I do plan to use epoxy resin for the fiberglassing, and indeed, intend to fully encapsulate all plywood parts as other Chebacco builders have done. I believe that this (and proper regular maintenance of the boat once in use) will be the main factor in ensuring the longevity of my boat. Now, for epoxy, I did consider going the popular route of WEST System or EAST System products. In my area, the cost of these is roughly $120 (CDN) per gallon. However, recently while surfing the net I came across a company in Florida, Raka Marine, which sells a 2:1 marine epoxy at discount prices. I figure that even after taking into consideration the currency exchange rate and shipping charges, this product will still cost about half of what I would pay for the more popular brands. Anyway, I am going to try it out, and perhaps later next summer will be able to report on how the stuff works. As for the actual construction process, right now I am limited by cold weather. I have been doing whatever I can in my small heated workshop: thus far I have cut all of my frames and molds, assembled the transom and its framing, and put together the stem and stem cap. By the way, knee pads are an absolute necessity for laying out frames, etc., on the plywood – I wish I had thought to get a pair when I built my Gypsy! For cutting the frames and molds I used both a skilsaw and a jigsaw, as necessary. It is very difficult to cut a nice smooth curve with a jigsaw, and I may have to do some planing and epoxy puttying later (note that, since most of the side and bottom edges of the frames will be set in epoxy putty and taped to the inside of the hull at the assembly stage, a slightly “wobbly” edge should not be too critical).

I laminated my stem and stemcap using the 1/2″ ply and epoxy (not the Raka marine stuff, which I haven’t ordered yet). The result was the ugliest looking two pieces of wood I had ever laid eyes on! The stem is laminated from seven pieces of plywood cut with the jigsaw, and boy, talk about multiple wobbly edges! However, I persevered, and began be cutting a bevel on the stem to start giving it its proper final shape. At first this posed a problem: my jigsaw blades were too short for the job, and I broke two bandsaw blades trying to feed the stem through. At last, I was able to do a decent and quick job of it using my trusty cross-cut saw. The final surface and proper bevel were achieved with a blockplane and the beltsander. The aft curvature was worked with a combination of a drawknife and the belt sander. For the stemcap, which is laminated from 5 pieces of ply, tapering was achieved by laying the piece on its side and going at it with a blockplane, followed by smoothing with the belt sander. The result are a rather handsome stem and stemcap, if I do say so myself!

With all of this done, now I am beginning to attack the centerboard and its case…

Well, that’s pretty much all I have to report for now. As you can see, its not much in the way of accomplishment yet. Hopefully when Spring arrives in two months I can get some serious work done. Incidentally, I do intend to try making my own sails, when the time comes, as you have done. This will save me a considerable amount of money, but more importantly, I will learn something new.
Best regards,
Burton


News from Germany/Connecticut:

Bill Meier emailed me with an update on progress:

Dear Bill and other Chebacco newsletter readers, In spite of the fact that I haven’t written in probably more than a year (or has it been two years), I have been faithfully reading the newsletters and dreaming. My building plans were put on hold last Spring when my company offered me a one year assignment in Cologne, Germany. The opportunity to live and travel in Europe outweighed the boatbuilding schedule so the family and I packed up and moved. Recently, however, the rather damp and drizzly Rhein valley weather has driven me to spend my weekends reading boating books, magazines and newsletters to the point that I can think of little else but my lapstrake Chebacco, sitting patiently in my garage, waiting. The glowing reports by Frasier Howell of the Chebacco’s sailing performance have made the wait agonizing. The hull of my boat is completely planked, the CB trunk and bulkheads are installed and the cockpit is about half done. I didn’t know that there was/is a Bolgerlist newsgroup so I decided to vary from the construction drawings on a few points. I won’t know if the decisions were right for me until the boat is in the water for a while, but I thought I’d share them with you.

I decided to build a solid keel rather than the plywood sheathed one in the plans. I was concerned about the longevity of plywood, especially when moisture got into the structure and stayed there. I wanted a unit that could be easily replaced (i.e. not epoxied to the hull) in a few years. What I came up with after determining the price and availability of wood was to use douglas fir 2x6s laminated horizontally with plenty of 3M 5200 and bolted to the CB trunk and floors with bronze rods. The whole assembly including the bolt holes were given a good soaking in some Cuprinol I had left over from a previous project. For abrasion resisistance I used a 1x6x18ft hickory shoe that the local lumber mill gave me for free.

Was it worth it? I do know that it took quite a bit of work to get the shape right (with skil saw and hand planes). My work log is back in the States but I remember it being at least two and probably three solid weekends of work. It appears to be stable (not twisted or otherwise deformed) so far. I’m not terribly confident about the longevity of fir even with a Cuprinol bath but at least it won’t delaminate and I can replace it without too much difficulty.

All of the other timbers that will be in contact with the water, except the stem, are of white oak and are glued to the plywood with 3M 5200. I did some epoxy joint tests with my batch of white oak and was not pleased with the results. The 5200 seems to be fine, however, as long as it isn’t overclamped. The inside of the CB trunk has a layer of 6oz fiberglas cloth saturated with West epoxy. After the cloth was bonded to the wood, I filled the weave with two coats of epoxy thickened with West copper-based thickener to inhibit marine growth. The stem and all of the other dimensional lumber above the water line is ash, also glued with West epoxy.

The other point on which I deviated from the plans was to widen the cabin (slightly?) so that, in plan view, the cockpit coaming is a continuous, smooth extension of the deckhouse line. That leaves a side deck of about 1ft, which is on the narrow side but, as I remember, no worse than some other similarly sized boats I’ve sailed.

I’m essentially a novice with planking so I worked slowly and carefully to get the lines right and the scarphs well distributed and smooth. I worked the scarphs with a sharp hand plane (my trusty Record jack plane) and found it to be fast and easy to get a straight 8:1 bevel. I found no need for jigs or other special setups. I cut the plywood plank stock with a skil saw, leaving about 1″ extra on both the top and bottom for final fitting on the boat. The curves were gentle enough that a thin kerf carbide blade worked very well. A few passes with a hand pane were all that were needed to produce a fair curve on the completed plank.

Well, that’s where I am at this point. This week I was mulling over some of the rigging details when I found Chebacco News #13 on the Internet and decided it was time to report my progress?? and ask a few more questions:

I am concerned that, as drawn, the mainsheet will be right in the middle of things and will make it awkward for guests to move from side to side. How has it worked out for you? I’ve seen similar sized (18ft.) catboats and some classic gaffers with the sheet attached only to the aft end of the boom and cleated to the aft of the cockpit but I’m not sure that the Chebacco boom is rigid enough for that to work. If people have found the layout to be a problem, does anybody have an alternative that has been successful?

As far as the topping lift(s) is concerned, I was thinking about running two so they would help to control the gaff when lowering the main and so I could use the windward one to keep the boom up when running free. What is the experience of the group?

I, too, will be going for the low-tech boom jaw approach and I’d like to know what you’ve done to keep the boom jaws down? Is the boom heavy enough to stay put or do you need a line to keep it down and control luff tension?

Thanks for all your work coordinating and putting together the newsletter. I am enjoying it immensely both as a sounding board for design / construction ideas and for reports of on-the-water experiences. If anyone would like to contact me directly, I can be reached via e-mail at 71742.107@compuserve.com and usually by the Deutsche Post at:
Achenbachstr 135
40237 Duesseldorf
Germany

Regards,
Bill Meier

I’d like to reply that I’ve never found the central mainsheet to be in the way, though the end does tend to get ‘in your feet’, but this is the case with any mainsheet arrangement.
I like the idea of a topping lift either side of the mainsail. I must try to figure out how to add one without too much extra hardware.

The weight of the boom is certainly enough to hold the sail flat in any conditions I’ve encountered. I suspect a downhaul wouldn’t be worth the extra trouble.

Wanted – A Chebacco boat:

Douglas MacCoy emailed me to ask if I knew of any Chebaccos for sale –

Family interested in acquiring a used Chebacco boat, basic version. Please contact Doug MacCoy, 1089 NW 83rd Drive, Coral Springs, FL 33071, USA, or by e-mail at 70253.113@compuserve.com. Phone 954-345-6483.

And Finally:

Sorry about the shortage of photos in this issue. I do have some that have been sent in, but haven’t got around to scanning them yet. I’ll save them for next time when I may not have so much text!

We’ve had an issue dominated by Chebacco coustruction. This is pretty interesting to most of our readers, but most also like to hear sailing yarns, too. I know that it isn’t sailing season in the Northern Hemisphere, so how about some of our Southern Hemisphere readers giving us some stories? OK – I know you’re too busy sailing . . .

News, views, photos etc to me

Bill Samson,
88 Grove Road,
West Ferry,
Dundee,
DD5 1LB,
Scotland.

wbs@sol.co.uk

Chebacco News 13

Chebacco News

Number 13, January 1997

ch131
‘Sylvester’ ghosts home at sunset.

Taped Seams – How many layers?

A couple of readers contacted me recently about the taped seams of the sheet-ply Chebacco. In essence they were asking how many layers of glass are needed on each side of the joint. I asked Phil Bolger for his advice. He replied:

. . . two layers of tape inside and out, including the overall sheathing outside (which is highly recommended), is entirely adequate, and that the second layer on the inside is not critical. Dynamite Payson’s experiments with a single layer inside and out suggest that the veneers will let go before the tape does, but we did break a single- taped joint at the tape in half-inch plywood. These joints are not very highly stressed oncce assembly is complete.

Cruising version of the Chebacco 20

You’ll remember that I canvassed opinion some time ago about possible demand for a cruising version of Chebacco with raised deck and more accommodation so as to be suitable for more extended cruising than the original Chebacco. Phil writes:

On the cruising version of the Chebacco 20, we have done no more than think about it sporadically, and probably won’t do more on it on speculation. If there was enough interest for a group to club together and raise among them US$1000 to commission it, we would be stimulated to give it the attention it should have to be worth doing at all.

If anyone is interested in being part of such a group and (hopefully) coordinating it, please write to me so that I can put you in touch with each other. My address is given at the end of this issue of Chebacco News.

Bob Cushing’s high-sided Chebacco

ch133
Transom and bulkheads are in place on the keel and bottom

ch134The ballast keel and bottom are constructed first

Bob Cushing reports progress on the construction of the first high-sided Chebacco-20 – the ‘Glass House’ version. He writes:

I am starting on the sides now and expect to be done and in the water with it this spring. I am not a sailor so this will be my learning boat. I may try and get a look at some regular Chebaccos before attempting the rigging of mast, sails etc. as I am a complete novice at that.

The plans are quite good, as Phil’s always are but much of the building details are up to the builder. Expansions are given for the bottom panels but not for the bilge panels (- those are fitted and sized by hand). Actually I think it is easier to just back an approximate sized piece of ply up to the side and bottom panels and using a fairing stick trace the pattern out right from the boat bulkheads and then double- check against expansion measurements.

I am using a mixture of woods and plywoods. AC fir and MDO plywood. The MDO (medium density overlay) was tested for myself and another builder by Gougeon Brothers (the WEST System guys) as to strength of epoxied joints and it tested fine – just as strong as regular plywood epoxy joints. Framing is mostly Douglas fir with some oak and basswood.

I will keep you posted on progress. Feel free to post my address for others who have queries –

Bob Cushing, 5998 East Lake Road, Cazenovia, NY 13035 USA
b.cushing@csss-a.cv.com

Bob also sent me a photo of a very nice Microtrawler which is for sale with or without outboard and trailer. Enquiries to Bob at the above address, please.

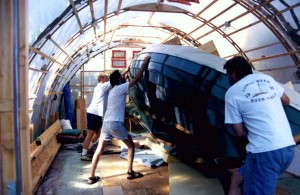
Lapstrake Chebacco is turned over!

ch137 Jim Slakov and friends turn over the hull

Jim Slakov, of Sechelt B.C., Canada recently turned over his lapstrake Chebacco’s hull. He’s progressed a lot since then:

My Chebacco is coming along fine; today I fit the cabin sides, which are 1/2” cherry (as are the sheer planks, coaming seatback, and all the wood trim in general, including the outer stem). I made short deck-beams, dovetailed into the carlin, to hold things in place before the decking was glued and screwed on. So far the mid bulkhead is in place, and the foredecks, and cabin sides; I’m beginning to see why you call these big dinghies. My neighbour calls it a hippy-boat, I thnk that’s a compliment, what? I’m opting for the mast slot rather than a hatch and will probablyy refer to ‘Gray Feather’s mast boot and mast hatch when the time comes.

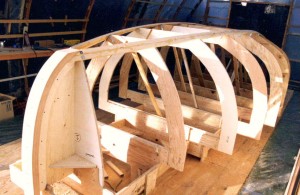
Jim also sent a picture of the moulds. Notice that he uses chine logs, rather than the epoxy/glass fillet specified in the drawings –
ch138
Jim Slakov’s moulds, showing chine logs.

Sechelt is the only town in the world with two Chebacco News readers in it! Jim tells me that Garry Foxall, also of Sechelt, helped with the turnover. Garry is planning to build a sheet-ply version this winter.

June Bug – a perfect tender

ch132
Bill Samson happily rows ‘Tweety Pie’ – ‘Sylvester’s tender
Some issues ago I reported that, on Phil Bolger’s recommendation, I was to build a June Bug as tender to ‘Sylvester’. I completed ‘Tweety Pie’ some weeks ago and am very pleased with the result. She rows smartly, is manoeverable, light (just over 100 pounds), and very stable – important in a tender where non-sailor guests are to climb on and off the boat.

If, like me, you plan to keep your Chebacco out on a mooring in open water, and need to row against tides to get there, then the June Bug is perfect. If you plan to build one as a tender, be sure to make the gun’ls good and strong; they take a lot of beating when coming alongside in a chop. Mine were a bit skinny (rather thinner than specified on the plans) and I subsequently had to beef them up.

As well as using the ‘Tweety Pie’ as a tender, I’ve also enjoyed rowing her for pleasure in the Tay Estuary – sometimes with a passenger. She’s at her most enjoyable in calm water; her flat bottom pounds noisily in a chop, though progress is little impeded.

Instuctions for building the June Bug appear in Dynamite Payson’s book ‘Build the new instant boats’. Full scale plans can be bought from H.H. Payson & Co, Pleasant Beach Road, South Thomaston, ME 04858, USA.

A successor to Black Skimmer

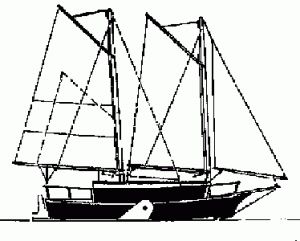
Those of you who haven’t yet committed yourselves to building a Chebacco may well be interested in Phil Bolger & Friends’ design #639 – a sharpie schooner of about the same size as Black Skimmer. #639 is 23’6”x7’1”x1’2” with a schooner rig similar in layout to that of the Light Schooner (or ‘Scooner’). Lateral resistance is provided by leeboards. Interestingly, Scottish designer Iain Oughtred was reported in Classic Boat magazine as having Black Skimmer as one of his top ten favourite designs of all time. When Phil discovered this he wrote:

It’s a little ironical that the plug for BLACK SKIMMER (long a favourite design of ours, too) comes just as we finally produced a design to supercede it; about the same size, but with a schooner rig, water ballast, and a ‘Birdwatcher’-type raised deck, to be more seaworthy, more roomy and easier to transport by road trailer. The new design, first of a class, we hope and think, is well along in construction.
sharpe3
Profile of the Black Skimmer Successor
[ Thanks to Chuck Merrell for this scanned image]
[If you want to order plans you can get them from Phil Bolger & Friends Inc., Boat Designers, PO Box 1209, 29 Ferry Street, Gloucester, MA 01930, USA.]

Rigging a Chebacco-20

Those of you who are building a Chebacco-20 and have little or no experience of rigging a cat-yawl may be interested in how I did it on Sylvester.

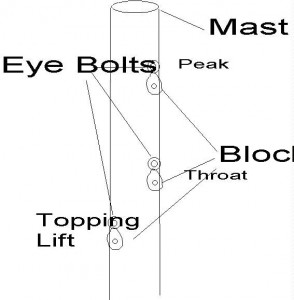
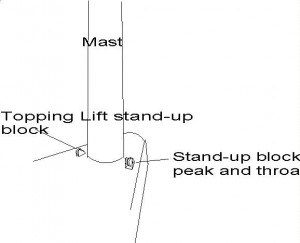
At the mast head three blocks are needed – one for the peak halyard, one for the throat halyard and one for the topping lift. I put three stainless eye-bolts through the mast head, as attachment points for the blocks. The eyes for the peak anad throat halyard blocks are on the aft side of the masthead, and the eye for the topping lift block is on the port side. The blocks were all of the fixed eye/becket type, 1 3/8” x 7/16” for the topping lift, and 1 3/4” x 1/2” for the halyards. You can spend a lot, or a little on such blocks, depending on whether you want plain or ball-bearing. I went the low cost route and used Barton plain blocks , ST2 and ST3.

ch135
At the partners, where the mast goes through the cabin roof, I put upright blocks on the cabin roof to turn the halyards and topping lift , allowing them to be led back to the cockpit. A single upright block was used on the port side for the topping lift, and a double on the starboard side for the peak and throat halyards. These were 1 3/4” x 1/2”, Barton UB3 and DUB3 respectively.
ch136

I put 6” horn cleats on the cabin roof either side of the companionway hatch, one to port for the topping lift and two to starboard for the halyards. One refinement worth including is three little plastic fairleads to lead these lines past the hatchway slides, which they would otherwise foul.

I used 1/2” braided line for the halyards and 3/8” for the topping lift.

The main sheet arrangement is best described by following the sheet from its attachment to the becket of a fixed eye/becket block (Barton STB4) which is lashed to the clew end of the boom. From there it travels through a fixed eye block (Barton ST4), which is shackled to the rope horse and then back up through the block at the clew end of the boom. From there it goes for’ard to another ST4 block lashed to the boom just above the end of the centreboard case and then down to a Barton 522 stand- up block and swivel with camcleat which is bolted to the top of the centreboard case.

The main sheet is 1/2” braided line.

The mizzen sheets lead from the sprit-boom end, one either side, to fairleads at the port and starboard quarters, on top of the aft buoyancy tanks either side of the outboard well. From these fairleads they come for’ard to camcleats on top of the buoyancy tanks within easy reach of the helmsman.

That’s all there is. If you go the economy route, like me, it’ll probably cost about £150 ($225) for the fittings mentioned here. I must say that these fittings have been perfectly satisfactory, so far. Going the luxury route with, perhaps, ball bearing fittings by Harken, you could probably spend three or four times that much.

One of the great things about the Chebacco is that it has so few fittings – no winches are needed, no shrouds; a delight to Scotsmen of whatever nationality!

‘Toulouma Too’ for sale:

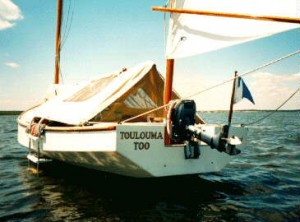
Sister Krista is reluctantly offering her Chebacco for sale. Reasons for the sale are that she needs more space and amenities due to expansion of crew numbers, so she is upgrading to a larger boat. Here are the details: For Sale: 20-ft Bolger Chebacco cat yawl, plywood version built by Brad Story, 1991. Excellent condition (top-sides and deck painted Spring 1996). Kept under 80% cover. 4hp Yamaha 1991. Extras (all new, 2-3 years old): Origo alcohol stove 2 (4” thick) custom-made sleeping cushions (1996) cockpit tent with screens porta-pot flag staff and flag Call: 609 461-0658 evenings, Monday through Thursday 609 698-1863 evenings, Friday, Saturday and Sunday
News, enquiries etc should be sent to me:

Bill Samson, 88 Grove Road, West Ferry, Dundee, DD5 1LB, Scotland
Email:- wbs@sol.co.uk
1

Chebacco News 12

Chebacco News


Number 12, November 1996

[All issues of Chebacco News can be seen (in glorious colour) on the World Wide Web at: http://www.tay.ac.uk/mcsweb/staff/wbs/chebacco.html]

image2
Bill Samson’s ‘Sylvester’ impersonates the Chebacco News logo

The first ‘Glass-house’ Chebacco?

Bob Cushing (b.cushing@csss-a.cv.com) emailed to tell me that he is building the high- sided Chebacco motorsailer, dubbed the ‘glass-house version’ by Phil Bolger (Boats with an Open Mind – pages 225-227). As far as I can tell, this will be the first to be built to this design. Bob writes:

I have started building the highsided Chebacco motorsailer – have the bottom, ballast keel and rudder built and some of the bulkheads. I will be turning it rightside up shortly and starting to install the bulkheads, stem and sides.

Bob also mentions that he has built the Microtrawler (currently for sale!) and the Fast Motorsailer (both described in BWAOM). He hasn’t added the sailing rig to the Fast Motorsailer, yet, but is so pleased with its performance under power, he may not add it.

Lapstrake Chebaccos

Gil Fitzhugh reports steady progress on his lapstrake Chebacco. He is currently fitting out the hull:

The forward bulkhead is in, the aft one is cut out and the hidden one at the backend of the centerboard trunk is spiled. The aft bulkhead has a pretty top that I wanted to cover with a curved strip of laminated mahogany – two tight bends one way and two the other. It worked, but what a job! Bulding boats is duck soup. Building yachts, on the other hand . . .

I just hope, that with all that loving care and attention Gil is lavishing on his Chebacco, he can screw up the courage to dump it in the water when the time comes!

Gil also tells me that he is seriously thinking about putting on a bowsprit and jib, following the glowing report from Fraser Howell in the last issue. He has put a substantial breasthook into the hull so that a short bowsprit can be bolted through the deck and breasthook.

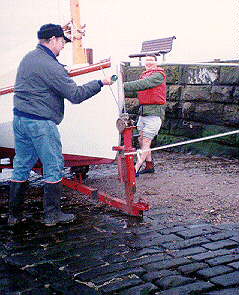
Another lapstrake Chebacco builder, Jerome McIlvanie, of Yakima, Washington reports that he built his hull right side up, turned it over using the pulley and ropes method (see Chebacco News #1) for painting. He then plans to turn it back over to finish it off.

Yet another builder who has decided to build the lapstrake version is George Cobb, of New Brunswick, Canada. He writes:

I won’t have building space for another 2-3 months. In the meantime I have completed the lofting and am well along on the spars. I would like to hear whether anybody has used a gooseneck on the boom and its merits and drawbacks as compared to gaff jaws.

I went for a sail in Fraser Howell’s boat three weeks ago. The winds were light but it was still a very enjoyable sail. I especially enjoyed nosing up to a beach and going ashore.

George Cobb

If you use a gooseneck on the boom you’ll be in good company, George. Sister Krista’s ‘Toulooma Too’, built by Brad Story (see Chebacco News #7) has a gooseneck. It certainly looks very neat and works well. I used jaws on my boom because I like low-tech things that are easily fixed, wherever I am. The only slight advantage of jaws is that the height of the boom above the deck can be adjusted using the throat halyard – but this is no big deal.

Another sheet ply Chebacco?

I am sometimes accused to being rather biassed towards the sheet ply version of the Chebacco. OK – I fess up! (- you’d think I was an American or something -) I am biassed. So it gladdens my heart to hear that another one is about to start taking shape. Garry Foxall, of British Columbia, writes: I am going to build the sheet ply version, although Jim Slakov’s [a lapstrake version] is so pretty it makes me want to do that instead. However, I have a number of other projects that must be done, and I think that the sheet ply one will be faster.

I hope to begin cutting out bulkheads and temporary frames this month. December is when I hope to begin the actual construction.

Jim Slakov lives a few miles away. He turned his hull over in the early summer and is now working on the centerboard trunk. He is a cabinetmaker by trade and his workmanship is beautiful. It makes one feel envious.

Garry.

Chebacco a tad big for you? How about a Catfish Beachcruiser!

John Tuma, of Fremont California has launched his Catfish Beachcruiser (a recent Bolger design). He has called it ‘Catfish Lounge’, in view of the astonishingly spacious cockpit/cabin. John writes:

The hull form is similar to the sheet ply Chebacco . . .

The particulars:
LOA 15’1”
Beam 6’6”
Draft 15”
Trailer weight ~800 lbs
Displ (sailing) ~1000-1200 lbs
Sail area 139 square feet

She has a long, shallow keel and no centreboard, giving an uncluttered interior. The deck is raised to the height of the top of the coaming and there is a narrowish walkway down the centre which forms the cockpit when sailing, and can be easily covered over at night to give sleeping accommodation (rather like the Birdwatcher, but less extreme). So you get a huge cockpit and huge sleeping accommodation, too.

image1
John Tuma’s ‘Catfish Lounge’

John emailed me to say:

The Lounge offers commodious seating, occasionally excellent dining, and often an excellent view. Performance to windward is not as slow as I first thought. I had my sailmaker join me for an afternoon on the Oakland Estuary, and we played with the various controls. Throat halyard tension was improved with the addition of a 2-to-1 purchase, and greater luff tension improved windward performance in light airs. In heavier conditions or with a lightly loaded boat the increased luff tension tends to induce weather helm. I did not expect the rig to be so sensitive to tuning, so now I feel I’m learning about sail controls all over again.

I’ve also found the lounge to be sensitive to loading. Four adults and two children can fit without trouble, but the boat doesn’t sail well with that much weight (at least not when chips and dip are more important than weight placement). Very slow to get going, and slow downwind. The increased momentum made tacking in light airs easier, the deeper profile reduced leeway. However, I’ve been having fun with the sideways motion, and a downwind dock can be taken by stalling the boat and sliding in sideways. I do have to be careful though, as the same thing would happen on a lee shore. I have also found that the Lounge likes to be sailed on the bilge panel, and flies on a reach when that far over. Is the same true of the Chebacco?

John

It certainly is! The downside is, though, that the greater the heel, the greater the weather helm. On balance, I like to sail my sheet ply Chebacco with a little heel, but not with the gun’l under! Sailing singlehanded, as I often do, this can mean taking in a reef earlier than when I have a crew to sit on the weather bench.

First, the model . . .

James (Skip) Pahl, of Carlsbad, California, writes:

I’ve just started my 3/4” to 1’ model. The hull is done and today I’m beginning the post-turn-over interior work. I am hoping the model comes out looking as sweet as the one you built. [Aw! Shucks! – B.S.] It might give courage at the office during a week that seems an unnecessarily long interruption to one’s time on the water.

I was fascinated by Fraser Howell’s recent comments about his bowsprit and jib, and wondered if his Chebacco points higher than those with cat rigs or might require reefing later since the jib tends to relieve the weather helm when the main is overpowered. Also, I’d like to learn how he installed the bowsprit. It seem to me that, with a careful job of tapering the spar, it could look great with the 19th century lines of the boat.

I’d also be grateful for your thoughts about using plastic laminate on the interior or the centerboard trunk and of using an aluminium plate for the centerboard.

Skip

Well, Fraser, some of this is for you to look into. Formica-lined centreboard trunks have been used successfully by boatbuilders for a long time now. I only wish I’d heard about it before spending days glassing the inside of my trunk! I’d be very wary of an aluminium centreboard. Made to the same thickness as shown on the plans, it’d be very heavy and would probably need a winch to raise it. A thinner one would need a narrower trunk and might get bent and jam up. You’ll recall that Fraser laminated a central core of aluminium in plywood, giving the same weight/density as the lead- weighted plywood centreboard of the plans (see Chebacco News #11).

Skip also emailed Gil Fitzhugh and myself asking how to fit the carlins and cuddy sides. Gil replied:

. . . there are floors at roughly stations 2 3/4 and 3 3/4. After they and the inwale are in place, you can tie the carlin to those floors and inwale with string, or wires and turnbuckles, like this –

carlin

By adjusting the tension on the strings you can pull the carlins into a fair curve relative to the sheer in both profile and plan view. Note that the top and inside faces of the carlin, to which the deck and cuddy sides will be fastened, are unobstructed. After you’ve fastened the deck and cuddy sides to the unobstructed faces of the carlin with screws and epoxy, the carlin ain’t goin’ noplace, never again . . .

My own approach is rather cruder. I left in the temporary molds 2 and 3, and used these to determine the shape of the carlins. Once the cuddy sides and side decks were fitted, I crawled into the cuddy with a handsaw and chopped the molds up so they could be removed. Untidy, but it works!

Professional advice available

Bill Buchholz has recently returned to the USA from Finland, where he supervised the building of a modified Chebacco at the boatbuilding school in Hamina. Bill has kindly offered to provide advice to amateur builders of Chebacco. He can be contacted at Apache Boatworks, RFD 4517, Camden, ME 04843, USA, phone 207-236-8048.

Weight aft, Mizzen Sails and Mast Boots

Peter Gray of Queensland, Australia refers to Jamie Orr’s query about weight at the back end of the Chebacco. He writes:

I was concerned about this with Grey Feather. The rudder was built of steel-

pgray1

so instead of the Oregon mizzen mast weighing 12 kgs I used a second hand windsurfer mast costing $50 and weighing 2 kgs. I got the sailmaker to sew a sleeve in the mizzen sail to go over this. It works really well. I also have an 8 hp Johnson outboard weighing 27 kgs. I have found this combination of items works well (weight and function).

pgray2

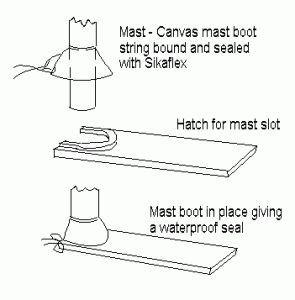
About the mast slot and sealing it – this was also of major concern to me as I don’t like water in the hull. I made a hatch cover for the slot and a boot for the mast.

pgray3

Grey Feather went to the Brisbane (Down by the River) Festival on August 23-24. This was a celebration of the 150th year of Newstead House, house of the Governor of Queensland, Australia. The house is on the banks of the Brisbane river. Incorporated with these celebrationswas a heritage and vintage boat show. Gray Feather was part of this and was met with great enthusiasm

Peter Gray


And Finally . . .

Please keep your news coming; whether about sailing or building or even just dreaming. This is your newsletter and we can all benefit from each others’ experience. For the first time, in this issue, I have devoted some space to a Bolger boat which isn’t a Chebacco – John Tuma’s Catfish. Please let me know whether I should occasionally discuss Bolger designs which might be alternatives to Chebacco, or whether I should stick strictly to Chebaccos.

Happy building, sailing, modelling, dreaming, . . .

Bill Samson,
88 Grove Road,
West Ferry,
Dundee,
DD5 1LB,
Scotland.

w.samson@tay.ac.uk

Chebacco News 11

Chebacco News

Number 11, September 1996

[This issue of Chebacco News can be seen (in glorious colour) on the World Wide Web at: http://www.tay.ac.uk/mcsweb/staff/wbs/chebac11.html]

Another launching!

Fraser Howell, of Nova Scotia, sent me the following message on 22nd July 1996:

Hello Bill,
I launched a week ago and have been out every day but one. It is the biggest dinghy around. She sails well, dry in all conditions so far, and easy to handle. We’ve had winds up to 25 kt and I’ve had up to 3 guests on board. In anything greater than 15 kt a crew adds welcome weight. I went out today, by myself to try it out with just the mizzen and the jib. It was surprisingly fast, approaching hull speed in 15 kt with no strain anywhere. Under full canvas there is some weather helm in higher winds, but I think the jib may be reducing this a bit. So long as the heel is kept to 15 degrees or so it tracks straight. I haven’t had any success getting her to self steer, so I may add a mechanism to hold the tiller.

I have no problem keeping up with or overtaking cruiser types up to 28 or 30 feet and can tack through slightly less than 90 degrees. The racier types are faster at this stage but I’m just beginning to learn how to handle her. She really moves with the 9.9 hp Johnson. I haven’t measured the speed but it sure is trying to plane under full throttle.

The beginning of a long partnership.

Fraser Howell

[Regular readers will recall that Fraser’s hull is strip planked – the first Chebacco to have been built in this way.]

He updated this on 31st July:

Hi Bill,

Your newsletter has been an important source of information and encouragement. I may not have selected this design without it. I’ve been sailing now for three weeks, and am in every way satisfied with the design. On Friday I leave for the first real ‘voyage’, 45 nm to a place called Mahone Bay where there is a wooden boat festival. Chebacco is easy to handle, fast, stable and handsome.

I think the jib and bowsprit are worthwhile, mostly because they allow neutral helm through sail trim (- I can induce lee helm by easing the mizzen). I find a significant speed improvement at neutral helm. I sheet the mizzen at a point further forward than the plan, and am often adjusting the mizzen sheets.

I like the fact that everything is manageable, Yesterday I was talking to the owner of a 22′ Brewer-designed cat. His mast weighs 300 lb! My solid sprice mast is exactly 40 lb.

Next time I get film developed I’ll send more pictures including the trailer. The boat is very easy to launch and retrieve from this rig.

Cheers,

Fraser Howell.

Fraser sailed the 45 nautical miles to the Wooden Boat Show at Mahone Bay, Nova Scotia. When he got home he send me the following report:

Got back today. Great boat !! Stable. Easy to handle, and quite fast. I slept on board (3 nights). It was a little cramped. We would beach on an Island, explore, cook etc. and then retire to the boat. The bowsprit extends 14″ past the cutwater, following the sheer. It does nothing for the appearance of the boat, but I would not be without it. I don’t hang an anchor off it, I just use it for the jib.

We were cruising at 3 – 4 kt in winds of 10 kt or so, endlessly. On any point of sail, except wing-on-wing-on-wing the boat was tuned to self-steer fairly well (I was able to read). My procedure was to set the main and jib for the wind, and this included the out-haul , then set the mizzen for neutral helm. We wandered 10 or so degrees either side of the compass course. I kept the cb at approx 50 deg to the keel, except for downwind, when I raised it. It all worked. The boat is very sensitive to all of the adjustments, and when “in the groove” suprised some big boats. Mostly it is just satisfying to sail.

I think I could use a bigger jib, 50 sq ft.

Fraser Howell

Bill visits Bill (and ‘Sylvester’)

Bill and Mary Parkes, of Mechanicsburg, PA, were visiting relatives in Scotland during July and spent a couple of days in Dundee, with Bill and Sheila Samson. I (Bill Samson) had been in hospital for abdominal surgery a few days before they arrived, but with the assistance of my sailing buddy Donald McWhannell we were able to put ‘Sylvester’ (my sheet ply Chebacco-20) through her paces. Bill Parkes is planning to build a Chebacco and was keen to find out how it performed. We sailed the 8 miles or so up the Tay Estuary to Balmerino – the site of a mediaeval abbey on the South side of the river.

I fear I took advantage of my fragile state to do a creditable impersonation of Captain Bligh (another Bill) – “Peak up that gaff!”, “Scrub off that weed before we set off!”, “You’re pinching her!” . . . Nevertheless a good day was had by all and Bill Parkes was even more convinced that the Chebacco was the ideal boat for him.

A User-Friendly Arrangement

I had an e-mail from Jamie Orr about possible ways of arranging stowage, how to make the cuddy watertight and other matters of general interest. Jamie’s questions are preceded by ‘>’ signs, as per e-mail convention. The same message went to Fraser Howell.

>Now that you are both sailing, I have some questions about how to make
>Chebacco is as “user friendly” as I can.

>It sounds as if the mast slot is a useful item
.

I can’t imagine getting the mast up single-handed without it.

> Have either of you had any
>problem with leaks around the slot from rain or spray?

Nothing drastic. My main source of leaks is water running down the mast itself
since I haven’t fitted a boot yet. As I keep the boat on a mooring, the slot
cover is held in for the season by 10 screws. I put a little silicone sealant
around it to stop leaks. Clearly, this’d be less convenient if the mast was
taken down after every sail.

> How does the slot
>affect the boot or other seal around the mast/deck join?

It’d make life difficult IF you have a boot. The design of Chebacco means,
however, that water running down the mast collects for’ard of bulkhead #1 and
doesn’t get on your sleeping bag. I sponge that area out every few weeks.
Note that the plan doesn’t show limber holes for bulkhead #1. I’m not sure
whether this is intentional, but it helps to keep water out of the sleeping
area.

> While we’re at
>it, do either of you have a good idea of how to get a quick and easy seal on
>a mast that is put in and taken out every sail? I may be a little paranoid
>about this, but a deck leak caused a major problem in our first sailing
>holiday — being cold and wet is acceptable on deck, but not in your bunk!

See above. I noticed that the Dave Montgomery Chebacco at 29 Ferry St.
Gloucester has duct-tape around everything. It’s not very elegant, but is easy
to put on and rip off every time.

>How do you find the storage? I know it’s a daysailer, but I plan to load up
>the family and camping supplies for weekend voyages — and even for
>daysailing, its nice to keep wet and dry gear apart. Did either of you put
>in the hatches in the after deck? (Your pictures may have shown that, but I
>often can’t get pictures on screen.) I am toying with the idea of putting
>lockers in the cockpit seats — these would probably leak in heavy rain, so
>would drain into the cockpit. I would keep them shallow ( 3 – 4 inches) so
>that they do not interfere with the ventilation shown in the plans. There
>would also be dry storage in the bows if I can get a good mast/deck seal.

I didn’t put hatches in the after deck. I did buy some plastic screw-in
hatches but decided to hold off putting them in until I feel the need for
space. Sister Krista’s Chebacco DOES have hinged rectangular hatches on the
after deck. She keeps things like fenders and life jackets in them. I notice
she doesn’t batten them down when sailing! On the other hand, the volume under
the seats of her boat is completely sealed, so there’s no lack of buoyancy.

The under-seat volume on my Chebacco is accessible from inside the cuddy – I
built EXACTLY according to Phil’s drawings. There’s LOADS of space there – I
keep an anchor and a couple of fenders at one side and a pair of 8-foot oars
and sleeping mat at the other. I’ve also put net ‘hammocks’ under the side decks
in the cuddy and these hold lots of odds and ends. I keep a toolbox and water container
in the cuddy, which can be moved to the cockpit at night. The far end
of the under seat space can be got at with a boathook! I keep my main anchor alongside the
foot of the mast ahead of bulkhead #1. It’s used so seldom that it isn’t a
hassle for me.

>How is the cockpit for lounging around? Do the cockpit coamings make good
>backrests? I thought about sloping them back a few degrees, but that cuts
>down the seat and/or side deck width, as well as complicating building. (I
>won’t comment on the wisdom of departing from the plans — the Bolgerlist is
>covering that quite well at present!)

I find that the cockpit built according to plans is fine, apart from the need
for a cushion on long cruises! I went sailing with Bill Parkes when he visited last
week and I stretched out on one side for a snooze while Bill helmed!
The drawings of the lapstrake version DO show sloping coamings, so it’s
up to you. Sister Krista’s boat has vertical backrests that stop at deck level and
sloping (3/4″) mahogany coamings above that. So you really lean on the coamings,
which stand proud of the seat back.

>Finally (for now) what is your experience with the weight of the motor and
>fuel in the motor well? I asked Phil Bolger about this, and he recommended
>a light motor, and suggested an electric would be powerful enough.
> Presently I am planning on a Honda 5 hp four stroke at about 60 pounds dry,
>plus whatever fuel I can carry in the well, and still sail well. The well
>is also a possibility for the anchor, but the weight is getting up there
>then. Fraser, you have a 10 hp — does the weight affect your performance?

The weight of my 4HP Mariner is negligible in terms of trim. In fact she trims
an inch or two down by the head even when the motor is there. Trim is perfect
once I am aboard and sitting at the tiller. Thinking about it, your engine, fuel and
anchor together weigh less than a crew member.

>I’d like to see discussion of this sort of thing in the Chebacco News.
> While I reserve the right to make my own mistakes, I always like to hear
>how others have dealt with the minor problems that crop up. For example, I
>will eventually want to build a tender, so your experience with these would
>be good to hear — I plan to ask about tenders on the Bolgerlist as well as
>there appears to be a wealth of experience, not to mention opinion, among
>the list members.

I’ve almost finished my June Bug and will report on its performance in a future
Chebacco News. Mind you, the perfect tender is a function of where you are
sailing. I need to row a couple of hundred yards out into an estuary which is
frequently rough and has strong tidal flow so I need something stable which
moves fast under oar. Clearly a Shoebox would not work for me.

>Thanks for “listening” — looking forward to your comments in the News.

>Jamie Orr

Jamie sent the same message to Fraser Howell. Here’s what Fraser had to say:

Hello Jamie; That slot is not worth sealing, at least not for me as I’ll be raising and lowering regularily. I put in a sliding cover that matches the mast diameter. Rain, no spray, yet, comes in, and is held in the forward area by the bulkhead. I sponge it out as required. For storage under the cockpit seats I installed the 8″ Beckwith (sp) circular hatches, at about $20 ea. That is big enough for tent, sleeping bags, extra life jackets etc.

The difference between a 10 and 5 hp engine is not great, 20 lb or so. a full gas tank for the 10 hp is another 50 lb – but to store gas, where else but far aft. I don’t know for sure what affect the bigger engine + gas tank has, but the boat does not seem sensitive to those kinds of weights. It also is not sensitive to the jib, but I’m not sure yet. Outboard power-wise 5 hp will do well. When I go more than half-throttle I dig in – at full throttle I almost plane. (maybe I do plane, a bit,I haven’t measured the speed)

I considered angling the backrest as well. I almost did. I haven’t spent enough time in the boat to be sure one way or another.

The boat is very easy to launch, recover, and trailer. It is lighter than it looks. Despite that, I lost it off the trailer into it’s cradle. It came off the trailer as fast as the winch handle could spin, collapsed the cradle, and hit the ground. It hit rudder first, digging in several inches. I dug it out, propped it up, and found – no damage at all ! Aluminum !

The reason I hauled it out was that after a week in the water the centerboard was sticking. I found that the plywood cheeks had completely delamiated from the core. Aluminum !

I’ve glued it all back with sikaflex and through-bolted it. Ready to relaunch by Saturday. For a tender, while at the moor I use a Bolger cartopper.

Fraser Howell

News of another Sheet Ply Chebacco

Jim Stewart of Cambridge, Massachusetts, sent me an update on the sheet ply Chebacco he is building:

Hi Bill,

This is a test of getting info to you, through email. It is more for education of me, than testing new and exciting technologies.

Progress on my sheet-ply Chebacco has progressed a small amount more than shown in the pictures. I have finished construction of my support structure. Vacation time is taking me away from home, and Boat-Construction. My wife, Cathy, and our 2 children, Jimmy and Megan all went together on a sailing lesson, while we were vacationing on Martha’s Vineyard. A truly excellent place, for all things boat-related, and one-heck-of-a nice place in general. Well we all enjoyed the sailing, Cathy had the instruction, I watched the kids, the kids enjoyed the whole thing. I’m getting materials ready to start on the stem, and I’m thinking ahead to scarfing together my first large piece, the topsides.

I’ve really enjoyed all your work on the Chebacco News. I love all the pictures, they convey a great deal of information, and hopefully My boat looks half as good as Sylvester.

I hope you can decipher the images! I’m going to look at those cabin roof curves again…!!!

Jim Stewart

js1
Bulkheads and Moulds for Jim Stewart’s Chebacco.

Lapstrake Chebacco – Spiling in the bulkheads

Gil Fitzhugh has started spiling in his bulkeads. Here’s what he says:

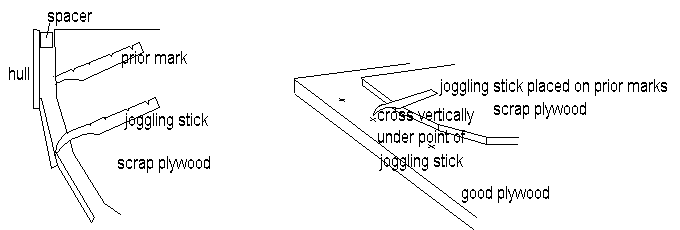
Spiling is a lot easier, though no less time-consuming, than I thought it would be. My joggling stick is about as low-tech as you can get. I cut it from a paint stirrer, and it looks like this:
ch11diag

The hook on the end helps it get into the angles between the lapped strakes. I did the forward bulkhead first. I had some scrap ply I clamped into place, used the joggling stick, transferred the points onto the good plywood (or onto mylar film first, then onto the plywood) with an ice pick (another favourite low-tech tool).

Gil tells me that the notches in the joggling stick help to locate it accurately against the marks when transferring the shape onto the good plywood. If, like Gil, you use the building molds as the ‘scrap plywood’ at this stage, they may well be full of holes and other obstructions, so you may only be able to get a partial mark with the joggling stick or may have to use the stick upside down and the notches are particularly useful for identifying the correct orientation for the stick. Gil goes on:

Put a pencil dot on the good plywood at the point of the joggling stick every time you’ve aligned the stick with marks on the board. Then connect the dots . . . you should end up with a pretty reasonable representation of the inside of the boat. Even so, the fit isn’t perefect. I find I have to trim off pieces of the bulkhead with a sharp chisel. Sometimes I end up with too much clearance, but not by a huge amount. I’ll probably just trowel in a wad of thickened epoxy, and declare victory!

Chebacco News 10

Chebacco News


Number 10, July 1996


‘Sylvester’ hits the water!

ch101
Bill Samson names ‘Sylvester’
Your editor’s sheet ply Chebacco-20, ‘Sylvester’, hit the water for the first time on 6th May 1996. This is the first Chebacco to be launched in the UK and is now nodding at her mooring in the Tay estuary, here in Bonnie Scotland. “Why ‘Sylvester’?” I seem to hear you say. (Or, possibly, “What a bloody awful name for a boat.”) Since the Chebacco is technically a cat yawl, and catboats are almost non-existent on this side of the pond, I decided to call her after a well-known cat. My tender, when launched will, of course, be ‘Tweety Pie’. I’ll now bore you with some excruciating detail.

It’s always been a worry to me that she might not get out of the garden. I’d made models and tried it out with them, but it was never clear that it’d get around the dogleg by the garage. I planned to hire a crane to lift it over the garage, but when the crane arrived, it was 4” too wide to fit down the drive. After a couple of nights tossing and turning I got a rusty old dinghy trailer, with collapsed suspension, and moved bits of it around so that the Chebacco might fit. She did fit, and was even nose heavy when I put some junk up for’ard in the cuddy. She JUST made it past the garage (an inch to spare) with help from my glamorous assistants, Sheila and Esther. Since the trailing arrangement didn’t quite meet the letter (or even the spirit) of the law, I decide to launch when traffic was minimal – at 5 am. Three friends, Louis, Donald and Paul were mad enough to get up at that ungodly hour to help. I trailed her down to the harbour (just a mile from home) without incident, at 5 mph. I drove back home for the tender (a very heavy 15 foot skiff) and spars, sails, outboard etc. The mast was raised (Phil’s slot works well) and gaff, boom, mizzenmast and sails were put in place. Everything was raised on shore to make sure the ropes weren’t tangled up.

ch102
Sails up on dry land.

She slipped quietly into the water and we moored her in the harbour temporarily:

ch104
Moored in the harbour at Broughty Ferry, Scotland

We then motored upriver to my mooring (which had been prepared previously) hooked her on and nervously left her to it.

First impressions:

Several of you have asked me “What about the weather helm?”. I am happy to assert that it hasn’t been a problem for me. I’ve been out sailing in ‘Sylvester’ nine times to date, in conditions ranging from flat calm to force 5. Weather helm only becomes noticable when she heels a lot. When I’ve had a crew sitting on the weather side with me this has never happened. Sailing single-handed she begins to heel uncomfortably under full sail at about force 4 and the answer is either to spill wind or take in a reef.

On the wind she points high and makes good progress to windward. I’ve sailed in company with ‘Wayfarer’ dinghies and do as well as them to windward, and somewhat better off the wind. I’ve even sailed alongside a 25 foot (heavy) Bermudan sloop and did better in a force 2/3 wind. I daresay the sloop would have done better in a heavier blow.

For the record, my mainsail has maximum draft about 30% back from the luff and the mizzen is cut dead flat.

Downwind, some concentration is needed in heavy weather to keep her running straight. Her performance is exhilarating when surfing down good sized waves! She has little or no tendency to roll when in a dead run. Gybing is straightforward and gives me no anxiety (even when it is accidental). On the wind, she tacks like a dinghy; with no tendency to stick in irons.

A New Chebacco?

Phil and Susanne wrote to me a few weeks ago:

How much interest do you suppose there would be in a “cruising” version of the Chebacco, with a longer cabin, a shorter cockpit, and a raised deck for more space inside and more reserve buoyancy? . . . It seems offhand to be workable without major changes in the class.

My own view is that the ordinary Chebacco-20 suits me nicely. A nice big cockpit for lots of folk daysailing is worth more to me than a seldom used roomier cabin. On the other hand the big cockpit is a pain in that it isn’t self draining and so I need to fit a cover over it whenever I leave the boat on its mooring. Room in the cabin is adequate for a short-arsed individual like me though I can see the attractions of more head-room and possibly room for cooking, reading charts, permanent potty site and so on. Nevertheless, if I was starting over I’d still go for the sheet ply Chebacco-20.

In order to quickly sound out a sample of Chebacco fans, I sent an email to some of you for your reaction. Here are some of them, in no particular order.

Gil Fizhugh writes:

I think Phil’s proposed cruising Chebacco would be an improvement.

The main drawback of the 20-foot Chebacco now is that they’re awfully cramped for those of us who aren’t “short arsed” [Gil is quoting my own description of my stature back at me – B.S.]. Joan used to enjoy camping. She hasn’t done any since she’s known me because I’m turned off by the whole idea. I’ve thought it might be fun to spend a night in the Chebacco once in a while, dry under the roof and with a potty close to hand. I wouldn’t have to lug my sleeping and cooking accommodations to where I was going to use them, on my back. But the Chebacco cabin is going to be awfully tight.

If the 25-foot plans had been available when I started, I probably would be building it now. I presume the materials would cost 30% or so more, including a bigger engine. Spread out over the number of years I’m managing to fritter away on this project, that’s not a big deal. (If I had to add 30% in a lump sum on top of the already high cost of having a Chebacco commercially built, it would be a very big deal indeed!) The 25-footer has the reserve buoyancy and enough cabin space for two tall people to be comfortable – well, almost. There remains one major problem with the 25-footer: it’s beyond the size and weight that can comfortably be towed by an ordinary car. My boating suddenly gets much more expensive if I have to buy, feed and maintain a Ford Explorer for 100% of my driving, because the Subaru can’t do the job in the 5% of my driving that’s done with a boat on the back end. Not many family cars weigh 2 1/2 tons and have 6-liter V-8’s any more.

So the proposed boat would be roughly a 20-footer with the cabin space of the 25, the sacrifice being a small cockpit instead of a small cabin. This would be a 2-person boat (or singlehander) all the time, because daysailing with more than two adults in a little aft cockpit would put too much weight in the tail, wouldn’t it? Still, if I were starting over, I think I’d prefer such an option – a boat well- balanced for sailing and camping for two, rather than great for sailing for six but cramped for camping for two.

I’m curious about what Phil means by a “cruising” version. If he just means one that’s comfortable for more than one night on board, the proposal is an improvement. But what’s the extra reserve buoyancy for? I hope my boat will be adequately buoyant for sailing in Maine, Cape Cod, the Chesapeake, . . . Is the new one to be an offshore boat? Through the Gulf Stream to the Bahamas? Still an unballasted gunkholer? I shall try to open my mind so Phil can pour his genius in.

Best regards,

Gil

Fraser Howell writes: Bill, I agree with you. I like Chebacco as a “camp cruiser”. I don’t like the boxy version of the Chebacco that was shown in P. B.’s latest book, although I have been thinking about a self-bailing cockpit, but that would be a later modification.

Brad (NADER2@delphi.com) says:

This sounds like a good idea to me at least. I think if I could only have one boat I’d rather daysail a cruiser than cruise a daysailer.

Jamie Orr writes:

. . . my first reaction is “no thanks”. I think this is because the current version is close to my idea of the perfect boat. Any design is a host of compromises, and I like the choices already made. These are (not in any order of preference):


  • Trailerable – light with no ballast, shallow keel, not more than 20 feet overall.
  • Shallow draft for ease of landing on interesting beaches, islands.
  • Big cockpit – that’s where most of the time is spent – I won’t give that up.
  • Simple to rig – no standing rigging certainly meets that one!
  • Simple and relatively inexpensive to build.
  • A place for the crew to get out of the rain. I feel the boat already has the ability to cruise if helped
  • out by a boom tent or tent ashore. If two can cruise comfortably for 10 days in a 16 foot canoe, a
  • Chebacco should be palatial, even for four. (Mind you, the raised deck sounds like it could be a good
  • idea.)
  • Good looking – the lines caught my eye back in 1991, and I still find them attractive.


Right now I’m still building my Chebacco, so most of my likes and dislikes are based on prejudice, not experience. We like camping, so a minimal approach seems right. Otherwise for serious cruising I would probably look for a larger boat altogether. In that case I would go the whole hog and look for an enclosed head, galley arrangements, and four berths below. I would probably charter a boat like that once a year, and keep the small boat for daysailing the rest of the year.

If I was to dream about a cruising Chebacco, I would abandon the 20 foot limitation – how about a 30-footer with the same proportions and sail plan – maybe an inboard engine, a self-draining cockpit if it could be done while keeping that sheerline . . .

Of course, I’d have to dream up some added cash, too.

Jamie Orr

Bill Parkes says:

What prompted PCB to propose the cruising Chebacco idea? It strikes me as an excellent notion. I very nearly fell for the glass-house version. There is, I think, more cockpit space than I would ever need in the Chebacco-20.

What is he proposing?


  • conventional plywood or lapstrake?
  • long ballast keel (like the glass-house version)?
  • a cabin configuration like the 25?


Happy sailing!

Bill,

Harrisburg

So there we have it. We await developments with interest . . .

Who’d be a boat designer?

Chuck Merrell of Seattle reads Chebacco News. He lives aboard a ‘Jessie Cooper’ that he built himself and is thinking of getting into the boat design business. Reading his letter makes me appreciate what Phil has to put up with! Now read on . . .

Hi Bill,

Having inserted a toe into the idea of the design business (after telling myself I’d never do it), I’ve grown to believe that Phil’s policy of having an unlisted phone number might be a stroke of genius. Ted Brewer also went through an un-listed phone period lately.

As late as yesterday, I had a meeting with a potential dinghy plans customer, and the conversation went like this:

Him: “Gee, that’s a neat design, I’m gonna build one . . . but whatja put that keel on it for? I’d build in a centerboard if for no other reason than the trunk would support the athwartships seat for my girlfriend, and other seats so I could haul me and two others to the beach from my cruiser, you know drink beer, toss a shrimp on the barby–all that.”

Me: “Well, the idea behind this dink is that it is to be sailed primarily by oneperson, and you’re supposed to sit on a cushion with the inside of the boat uncluttered so you could move around and it would be easier to sail–not to mention lowering the center of gravity by sitting in the bottom on a soft cushion.”

Him: Well, it looks pretty light . . . but I’ll bet that if I put my 25 horsepower Evinrude on the transom that sucker’d really really fly, maybe twenty or twenty five huh?”

Me: ” Not really, the bottom of the boat is designed for sailing speeds, and the aft sections are prismatically correct for lively go-fast performance and helm stability particularly on a down wind run.”

Him: “How fast is “go-fast”?

Me: “Well, even though the boat is only seven and a half feet long, you could probably get six, seven knots under good conditions.”

Him: “God, that’d take forever to get from where I anchor in Mystery Bay to the store for a beer run. Maybe I just ought to just buy a Livingston. They don’t row very well, or sail very well, or tow very well, but they’ll handle three grown-ups (!?) and two racks a’ beer with three or four inches of freeboard, and still make 20 knots with my 25 Evie. Still . . . those Livingston’s are pretty pricey . . . I bet I could build yours for a hundred bucks if I could get the plans for ten bucks or so, whadda ya say”?

Me: (Mentally filling out an Employment Application for the shoe store down the street) “Well, actually, I don’t really think this is the boat for you, but why don’t you ask about Livingston’s at the office. I think they have a couple used ones you could get really cheap”.

Him: (Heading for the door) ” Wow! Really? Terriffic! Great! Glad they sent me over! They told me you really know what you’re talking about! Hey, gotta check that out . . . maybe a lee board, you know one of those snap on kind like on a Livingston might be better than that keel, though. I know about this design crap. I been ‘bashin’ the Sound since you were in diapers. Catch ya later!”

**Fade To Black**

Bottom line: I’m not sure that hostile criticism from those in the diaspora stands up especially in reference to a “trial baloon”. The war waging inside me right now is: “If I were going to do this stuff for profit, should I (like 95% of the other designers) meet plan buyers at the door with sheep shears, suffer the inevitable lumps with aplomb and have a much better looking exchequer at years end?

Chuck

Photos from Australia:

Peter Gray has sent me some photos of Gray Feather, which is now fully rigged. He reports that he is very happy with her sailing performance, especially in heavy weather.

ch107
Gray Feather as a swimming platform?

ch108 Peter has put a box for the anchor under the side deck.

Stop Press: Peter entered Gray Feather in the Sandgate Gaff Vintage regatta and was placed 7th out of 19 boats (on handicap).

And from Canada . . .

Fraser Howell is making excellent progress with his strip-planked Chebacco. She’s strip planked in half inch fir, with 1/8” ash veneers epoxied over the strips and sealed in epoxy:

ch109
The coachroof is strip planked and veneered

ch1010
Fraser’s strip-planked hull has been veneered with ash

ch105
Fraser’s rudder is welded up in aluminium

Stop Press (27 June) – Fraser plans to launch any day now!

And finally . . .

That’s all for this time. You may have noticed there’s been a longer gap than usual since last time. I can really only print what you send, and since there’s been little news, I’ve not had much to put in. PLEASE send me your news to ensure bumper issues in the months to come.

Bill Samson, 88 Grove Road, West Ferry, Dundee, DD5 1LB, Scotland. w.samson@tay.ac.uk 1

Chebacco News 09

Chebacco News


Number 9, May 1996

[This issue of Chebacco News can be seen (in glorious colour) on the World Wide Web at: http://www.tay.ac.uk/mcsweb/staff/wbs/chebacc9.html]

More from One Who Waits

In the last issue Marc Lindgren told us about the hatch he built into the cabin roof of his Chebacco-20, One Who Waits. He has sent me a bunch of photos of the boat which will be of particular interest to builders of lapstrake Chebaccos.
. ch91
Marc spiles the shape of the main bulkhead

ch92
The cabin top showing the hatch

ch94
View of hatch from inside the cabin

ch95
Another view of the cabin top

The hatch certainly makes an attractive feature on Marc’s Chebacco. Builders will, of course, need to make up their own minds whether a hatch is more important than the mast slot of the drawings, since you can’t have them both!

Weather helm . . .

Phil Bolger sent me the following letter:

A couple of owners have found their Chebaccos so balanced that the mizzen needs to be shaken to avoid too much weather helm. Not all have this; it may be a quirk of sail draft. But there would be no harm in opening the mainmast partner as far forward as the taper of the trunk allows, so that the rake of the mast can be reduced if it proves to be desirable. . . .

[I wonder whether sail makers realise that the Chebacco Mizzen is more of a steadying sail than a driving sail, and as such it needs to be cut dead flat – a straight luff and no broadseaming. Clearly a full mizzen would provide a lot of drive that would exaggerate weather helm. Another possibility that strikes me is that, if your mast partner is in place and you are loath to start sawing, the mast step is quite easily adjusted to bring the rake of the mast forward, though with slightly less effect than an equivalent adjustment to the partner. – B.S.]

‘Jib-booms and bobstays!’

. . . well, not exactly, but Phil explains:

We have an inquiry about a bow-sprit. If intended to be used close-hauled, it should be very short and very stiff, or else have a bobstay. We tend to think it not worth the complication. A flat-cut reaching spinnaker, single-luff type, guyed out on a pole, would add more performance but the question of added clutter remains. Rather than make a drawing for this, we’d suggest trying it out with a borrowed genoa jib of appropriate luff length, on a makehift pole to suit. Exact size and shape aren’t critical. P.C.B.

[If you are unclear about how a reaching spinnaker should be rigged, Phil’s AS29 design has this feature and you can look at the drawings in Phil’s book ‘Boats with an Open Mind’ for further details. – B.S.]

News from British Columbia

Jamie Orr writes:

Bill,
Just a quick note to let you know what’s happening (or not happening) in lotus land.
[‘In’ joke – B.S.]

I had a quick visit from Fraser Howell at the end of February. He had his photographs along, although they weren’t quite up to date – he has finished veneering, but the photos didn’t show that. I was impressed by his adaptation of building method to suit his materials on hand.

I guess it’s true about white oak beiong hard to glue. Just this weekend I noticed that the joints in my stem are letting go. The stem is made up of eight pieces of 1/4″ thick white oak. These were soaked, pre-bent together over a form, taken apart to dry, then glued over the same form using epoxy thickened with microballoons. The work was done before the low temperature arrived so I am guessing the failure is due to the white oak. I knew its reputation, but hoped that epoxy would handle it. Another possible factor was the pressure needed to hold the wood to the form, it may have squeezed too much glue out the edges. Chalk one up to experience.

Luckily, I had put in screws every six inches or so, alternating from front and back, after the glue dried. These should help to hold the shape in for now, but I think I will replace them with bolts, with as much epoxy as I can work into the cracks, before I leave it.

I’m still working on the centreboard and case, not pushing too hard as I’d like some warmer weather before epoxying the pieces of the hull together. We’re still getting frost some mornings, which makes it cold for around here.

I’m looking forward to the next edition of Chebacco News. I hope that I’ll have something to contribute by Summer. How do I print the photographs? Do you work right off ordinary prints? I’ll try to get some decent shots of my work-in-progress, although the shelter restricts what can be done.

Jamie

Good point about photos. Yes, ordinary prints are what I work from. I just scan them in and ‘paste’ them into the document. Some of you have commented that photographic quality in Chebacco News isn’t quite up to the standard of National Geographic; but then neither is my equipment!

Also- good point about white oak. I experienced this on my last boat and would never use it in a glued situation again.

Still in British Columbia, Randy Wheating in Port Moody has news of his sheet ply Chebacco:

My boat is progressing slowly and surely. I amattempting to pre-build as much as possible before getting into the assembly stage as she will be going together in our two car garage – diagonally, as the garage is 19 ft in length. The bulkheads, molds, stem, transom, centerboard and trunk are basicall completed to date.

The Chebacco News and letters from other builders have been an invaluable resourse for me. Here are my latest questions and comments:

1. Samuel Devlin’s “Devlin’s Boatbuilding – how to build any boat the stitch and glue way” is an excellent reference manual for anyone undertaking the building of a Chebacco. It is comprehensive without being wordy and is available through The Wooden Boat Store.

2. I was a little apprehensive about dealing with the molten lead for the centerboard ballast. A few issues ago there was a letter to the editor of the Wood Boat magazine which I thought dealt with this nicely. It was suggested that the 6 inch square hole be filled with a thick mixture of lead bird shot and epoxy. No melting or pouring lead and bird shot is readily available. I plan to try this out and will let you know how it goes.

3. One of Samuel Devlin’s suggestions, which I have incorporated, is to line the centerboard trunk with countertop laminate. This creates a smooth, tough, waterproof surface that allows the board to slide freely.

4. Phil’s plans show a support surrounding the pivot hole of the centerboard. Is this necessary? If so, what is used? Could a recessed epoxy/cloth patch be used? Is a similar support required on the trunk? I plan to epoxy a short piece of 1/2 inch PVC pipe into the board and trunk to act as a bushing for the 1/2 inch SS rod (from a 6 inch bolt) pivot. Does this sound workable?

5. Would it be sensible to substitute hte lower cost polyester resin in areas such as sealing the underside of panels and the inside of the hull while using the stronger and more costly epoxy for areas where great strength and durability is required such as joints, laminates, the outer hull etc.? This could reduce the costs considerably but would the quality be compromised? In my research I have found builders who use only polyester resin (i.e. Harold Payson) and others who use only epoxy.

6.After drawing out the outlines for the main bulkhead onto the plywood and finally getting a feel for the true size of the cabin I decide to expand the cabin sides outwards about four inches to align with the cockpit seat backs “catboat style”. There is some loss of deck but the additional room would be worth it. As the master of a completed Chebacco, what do you think of this plan?

7. On the topic of space below, I have been thinking cbout installing a hinged mast step on the cabin top over a beefed up bulkhead. This would require the tabernacle, two back stays (fixed) and a forestay (detachable). The advantages would be no mast boot required, access to more usable space in the forward cabin area, shorter mast to build and handle and easier mast stepping. The disadvantages are the stays (but I plan to run the optional jib anyway) building the hinge itself (I have never seen any articles or books on this). I have seen this rig on boats of similar size and would greatly appreciate any input on this matter.

I’ll try to address some of Randy’s questions here, but I must admit to being flummoxed by some of them and would be interested to hear your views:

1. I haven’t read Sam Devlin’s book yet, but I do know he produces some superb craft by the methods he describes.

2. I guess the bird shot/epoxy mixture will be a little less dense than lead. A mathematician into sphere packing theory could maybe give you an exact figure. Anyway, what I’m suggesting is that the six inch square hole may need to be slightly enlarged to give the same weight.

3. I believe that Brad Story once lined his trunks in the same way. I’m not sure if he still does. Brad?. . .

4. What I’ve done is to apply an epoxy/glass patch. It remains to be seen whether this is adequate. One consolation is that if not, the centerboard is the easiest part of the boat to replace! I like the idea of the PVC bushing, though.

5. No, no, a thousand times no! My reasoning is that epoxy forms a much more effective moisture barrier than polyester resin. To get the full benefit of this (and it’s a benefit well worth having) each part should be totally encased in epoxy – inside and out. (That’s the epoxy people’s propaganda, anyway.)

6. If you sit inside a Chebacco’s cabin, you’ll find the most comfortable position (at least for a 5’7″ guy like me) is to sit athwartships with your back leaning on the inside of the hull and head under the side deck. So, unless you do away with the side decks altogether, I guess you’ll get little benefit in terms of space gained. You might want to look at Phil’s drawings of the Chebacco-25 in ‘Boats with an Open Mind’ to see how a Chebacco might be built with no side decks.

7. I’m stumped here. I seem to remember that Peter Gray was planning to have mast shrouds on ‘Gray Feather’. Peter? . . .

You tell ’em Peter!

Colin Hunt, of Victoria Australia, kindly sent me a copy of the “Australian Amateur Boatbuilder” magazine (a great mag; I wish we had the like in the UK) which has an article about the Chebacco in it. The reviewer reports that “there are none on the water here, yet.” Readers of Chebacco News know, of course, that Gray Feather was launched in Queensland Australia last year. I’ll stick my neck out, again, and affirm that this is the first Chebacco to be launched South of the Equator. Perhaps Peter Gray should have a quiet word?

Colin is planning to build a lapstrake Chebacco-20, modifying the design to make the cabin 2 feet longer and the cockpit that much shorter. He also asks about ballast. Since he’s a new reader he won’t have seen earlier discussions on ballast. The long and short of it is – some do, some don’t. ‘Toulouma Too’ carries 300 pounds of lead ballast under the floorboards at the aft end of the cabin. Most people don’t bother, since the Chebacco has such a lot of form-stability. So far, (touch wood) none of us has heard of a Chebacco giving anyone a fright.

Financial aspects of building to order and other thoughts . . .

John Gearing of Clifton Park NY (just north of Albany) has sent me a couple of thought provoking Emails:
I stumbled onto [Chebacco News] last night during my first session of cruising the internet. I had heard of your newsletter in WoodenBoat, but I had never got around to writing you. In fact, I have been a Chebacco fan since I first read about the design in Small Boat Journal. I always thought it was sad, or perhaps a commentary on our times and economy, that Brad Story was never able to build the boat commercially for a price the market would support. The major lesson of the WB story about the three versions of the Chebacco, in my opinion, was that it takes about the same amount of time to build the boat, no matter which method one chooses. One can’t help wondering whether jigs and other production aids could cut the labor costs, but then you get into the old “chicken and egg problem” of financing the creation of an assembly line without firm orders in hand. But how do you get orders if you don’t have a production method that keeps the cost reasonable? As I recall, Brad Story had plenty of requests for information about the boat (the market was there) but very few orders (price too high). Once upon a time I suggested to Jon Wilson that a builder could build a run of boats by subscription, using the down payments made by buyers as leverage to get funding for setting up production. At the time I wasn’t sure which boat design might attract enough interest to make such a plan feasible, but now Chebacco comes to mind. I’m going to give this some more thought and will let you know if anything concrete develops. They are such great little boats . . .

and . . .

A few years ago the US boating magazines (I think it was SAIL) had an article on “trailer sailers”. Of course they were of designs not to my liking but I was impressed with a couple of things:


  • they came complete with trailer;
  • and the average cost of the lot was about $11,000.


This was at the time a new Chebacco would have run about $18,000 sans trailer. I keep reading in SAIL and its ilk how there are booming sales in these 20 – 23 foot trailerable boats because they are so convenient, and because one can avoid slip fees. It seems to me that this kind of boat could really open up the sailing world to a lot of folks who don’t live on a body of water but do live within a few hours drive of one. I’ve watched people look at wooden boats and their eyes light up at how beautiful the boats are. It used to be that there was a widely held opinion, no doubt assisted by those who build in fibreglass, that wooden boats were maintenance nightmares while fibreglass boats were maintenance free. We all know by now that no boat is maintenance free and that a properly designed and constructed wooden hull is quite competitive with ‘glass from a maintenance standpoint. In sum, there seems to be good reason to believe that there is a healthy market in the US for a Chebacco-type vessel.

Upon re-reading the above paragraph I realise that I may sound a bit preachy and that I am perhaps guilty of “preaching to the choir”. I don’t mean to go on and on over this, merely to add my small voice to that of the choir . . .

Well – John has given us some challenging thoughts there! I’d be glad to print your responses to his ideas.

Further news and thoughts:

When I started on this issue I wondered if there’d be enough material in the winter season when we Northern Hemisphere dwellers don’t do much building, but we’ve managed to fill this little newsletter with some novel, thought-provoking stuff. I guess Chebacco fans are at the intellectual end of the boating spectrum!

Meanwhile, our little community grows apace – over 40 of us now plus the many who read Chebacco News on the internet.

Keep your news, photos, thoughts, dreams . . ., no matter how outrageous, coming to me:

Bill Samson,
88 Grove Road,
West Ferry,
Dundee,
DD5 1LB,
Scotland
Phone: (+44) (0)1382 776744 Email: mctwbs@river.tay.ac.uk 1

Chebacco News 08

Chebacco News


Number 8, March 1996

ch82 ‘One Who Waits’

Was Marc First?

In Chebacco News #6 I opined that Peter Gray’s Gray Feather was the first amateur-built Chebacco to be launched. Mea culpa; Marc Lindgren of Minnesota has put pen to paper, pointing out that One Who Waits, his home-built lapstrake Chebacco hit the water in August 1994! This time, though, I’ll be more cautious and simply ask if anyone knows of an earlier one. Marc writes:

Dear Bill,
I’ll bet you are getting lots of letters in regard to the launching of the ‘first’ amateur Chebacco. Here’s some news for you. I launched One Who Waits, a lapstrake Chebacco, about a year and a half ago. On August 22, 1994 not only did I turn 40, but used the occasion to launch the new boat for the first time. We had a great party, with lots of well wishers present.
Construction began December of ’93. I know it was December because instead of doing the Christmas gifts in my shop I told my dear wife I’d do, molds were being cut and assembled. Setup and lining the ribbands progressed rapidly and before long strakes were being cut and glued. 1/2″ fir AC MDO (medium density overlay) ply turned out to be an okay substitute for the (much) more expensive material Phil suggested. Easy to scarf together with a hand power-planer. It seems very durable and doesn’t need fiberglass sheathing to avoid checking. All end-grain was coated several times. He recommended Tom Hill’s book on lapstrake canoes as an excellent reference to building this type hull. Laps were well primed with unfilled epoxy, glued with a cabosil/epoxy mixture. All fillets were epoxy/cabosil/microballoon. Smoothing the soft epoxy with a brush dipped in lacquer-thinner speeded the process. Much less sanding. Some galvanized sheet rock screws were used during planking as temporary ‘clamps’. I used a template cutter on the router to get the strakes out.
Hoisting the 4’X23′ planking stock definitely took two guys. An alternative to the router/ribband technique would be to utilize some cheap, thin ply to take the strake-shapes from the jig, tracing directly onto the planking stock. When I do another hull of this type this is the manner in which planks will be finished. Less lifting.
Turned the hull in April and began the interior work. Summer slowed the work somewhat. The long hours of winter-darkness lend themselves to concentrated building.
Spars are natural growth white spruce. My photos don’t show the forward hatch my son suggested we include. I’ll try to photograph the details and include them soon. Do the hatch! It doesn’t weaken the structure (if done properly) and makes the cuddy more inhabitable and interesting.
Took the boat to Lake Superior last summer for some big-water sailing. Didn’t go too far out but felt secure all the time. Prudently left harbor with a reef, ended the trip full sail and ripping along.
Part of the fun with this type boat are the engaging conversations that often occur. Comments heard include “how old is that boat”, “did you restore that” and “gee that’s a beautiful boat”.
I’d like to build another one this winter. Interested types call me for details.
Marc

Thanks for the news, Marc. I’m most impressed (and a little ashamed) that you started building about a year after me and launched less than a year later. Eighteen months on mine has still never had her bottom wet. Lots of useful tips there, too. It would be nice to hear more about the hatch arrangements. Here are some photos of Marc’s Chebacco:

ch83ch84

ch85ch86


Another Lapstrake Chebacco

Jerome McIvanie of Washington State sent me a photo of the lapstrake Chebacco-20 which he is building.ch81

He writes:

A year ago I started building the Chebacco 20′, lapstrake hull. 1/2″ okume plywood and WEST System epoxy.
I’ve never built a boat before but with three years of reading and a couple of weekend classes at the Wooden Boat School in Port Townsend, WA, I decided I was ready. As you can see from the picture, I did it upright.
I am a machinist by trade, and have built most everything that is straight, flat and square. This has been a real challenge. The kind of thing I need help with is what kind of fastenings (size) and where to put them.
Again, I would like to thank Gil [Fitzhugh] for helping me to get started.
Jerome McIlvanie

If anyone has any opinions about fastenings, please let me know and I’ll include them in the next newsletter.

Booms and Downhauls

I wrote to Phil Bolger asking for advice that will be of general interest to Chebacco builders who are unused to gaff rigs with jawed booms. All rigs I’ve used until now (gunter, bermudan, standing lug) have required some kind of downhaul at the mast end of the boom, possibly in the form of a kicking strap or vang. It seems that such complications are not needed with the Chebacco’s rig. Phil writes:

Dear Bill,

I would not bother with a downhaul myself. A tight luff is not very important to a sail like this. No harm in it.
. . .
Phil Bolger

Some builders (Brad Story, for example) replace the boom jaws with a conventional gooseneck. Sister Krista’s Toulouma Too is like this (see Chebacco News #7).

Other Building News

Jim Slakov, of Sechelt, BC, Canada reports progress:

Thanks for the last issue; great as usual, and encouraging to see some finished products! I hope to be sending you some pics in the not too distant future. The molds are ready to assemble on the strongback, but work is keeping me from play lately, so progress is a bit slow for now. Congratulations on your nearly completed boat. When do we get to see some shots of her under full sail? I’m wondering if anyone will make their own sails? [See below!] I bought ‘The Sailmaker’s Apprentice’ but don’t know how I’ll feel about it when I get to that stage.
Thanks,
Jim

Jamie Orr (jorr@oag.aud.gov.bc.can), also of BC, Canada sent me an e-mail the other day that shows he has been thinking hard about arrangements for the sheet ply Chebacco-20 he is building:

My name is Jamie Orr, and I live in Victoria, B.C., Canada . . .
I recently started my own sheet ply Chebacco 20 and recognise some of the concerns and problems mentioned in your newsletter [#5]. I am also building outside, but at this time of year I am contending with heavy rain and (just lately) freezing temperatures. The plywood shows some tendency to warp after the pieces are cut out with the heavy moisture content of the air. However, brute force and ignorance will probably continue to save the day. Luckily I am using ‘cold-cure’ epoxywhich will cure down to 2 degrees Celsius (36F) and ignores the damp. I used this on a strip canoe recently and was very pleased with the result.
One of the questions raised in your newsletter was where to put the portable toilet. I haven’t any brilliant ideas, but wonder if it might sit at the back of the cockpit, under an athwartship addition to the seats, right up against bulkhead #6. It would have to be moved to use it in any sort of privacy, but there’ll be little of that anyway.
As for the anchor, I plan to use a Danforth for its ease of storage, and keep it in chocks under the floorboards. My boat will live on a trailer, so I don’t want to leave any equipment visible or too accessible to passers-by.
Speaking of floorboards, I also plan to fasten a 3/4″ by 3/4″ rail along the fronts of the cockpit seats , so that the floorboards can be lifted up and placed on these rails, level with the seats. The whole cockpit area will then be available for sleeping in or on undeer a boom tent. In any case, I look forward to reading your newsletter again. I would be interested to know how the cat-yawl rig handles – for example, how does it heave to, if at all, without lowering the main? [Any answers sailors?] I have found heaving to of great help, as my family is too young to help much, and I was virtually single-handed when we chartered last summer.
I think that’s enough for now . . .
So long and good sailing,
Jamie Orr

I drew Jamie’s attention to the other issues of Chebacco News, on the Internet, and he wrote back:

. . . Yes, I have a shelter. I have a large (20X30) plastic tarp over supports attached to the house. They are 16 feet long, attahced about 10 feet up, sloping down to 6 foot posts at the lower end. The tarp is held in place by 16 foot 1″X2″ battens screwed down to the 2″X4″ beams and posts. The working area covered is roughly 25 by 15 feet, but hte ends are open so the rain sometimes blows in. I have not attempted to add end walls because of the added resistance to the wind. When necessary, I cover the work with more plastic tarps.
Just lately we’ve had some freezing weather, so the work has gone from slow to dead slow. However, Victoria has Canada’s mildest weather so I hope to get the side panels and bottom set up over the Christams holidays. I’m looking forward to this as it will set the shape of the boat and I’ll be able to see what I’m building.
While the weather’s been bad i’ve been building (indoors) Bolger’s ‘Elegant Punt’ with my seven year old son Alan. I chose this design for its simplicity and because it doesn’t need any toxic resins. He’s enjoying it, although we’ve had to pause for lessons in basics, such as how to hammer nails.
I’ll keep in touch on the building. I expect it’ll be pretty slow here until March or April. I hope you and yours have a merry Christmas and a happy Hogmanay.
Jamie

Making your own sails?

Being a thrifty Scotsman, I decided to save myself a few hundred quid and make my own sails. There are a number of good books on the subject, but the one I’ve used most is a booklet written by Paul Fisher. This is called “Sail Making for the Home Builder” and can be bought for £7.50 plus postage/packing from Selway Fisher Design, 15 King Street, Melksham, Wiltshire, SN12 6HB, England, phone/fax +44 1225 705074, or 01225 705074 in the UK.
I bought 7 ounce sailcloth – a 30 metre roll which is about twice as much as I need but it is very much cheaper to buy a whole roll. US readers should note that British 7 ounce is about the same as US 5 1/2 ounce. The Brits measure weight for 36″ wide cloth; Americans for 28 1/2″ wide (an old standard width for broadcloth).
My wife, Sheila, sewed the cloths together on her ordinary domestic sewing machine. The only problem she encountered was that the mchine had trouble gripping the very stiff hard cloth; still, with care, it went together okay. We ‘broadseamed’ the leading edge of the sail back to 1/3 of its width, on the seam that passes through the tack and a couple of seams either side. This has the effect of giving the sail some shape, when combined with convexity of the luff and leach. Incidentally, we’re making cross cut sails with the cloths perpendicular to the leach. It is equally valid to make vertical cut sails with the cloths parallel to the leach. It’s important to find out whether your cloth is strongest along the warp, or the weft, and to keep the strong threads parallel to the leach.
Many sailmakers carry broadseaming back to 40% or more of the width, but we decided to make the curve shorter in order to keep the ‘powerpoint’ well forward and help counteract the weather-helm which is a tendency of most Chebaccos.
We’re currently ‘roping’ the edges of the sails and applying reinforcing patches at the corners. This is being hand stitched because of the large number of thicknesses the needle has to pass through. It’s easy enough work, though and quite therapeutic.
We’ll keep you posted on how the sails turn out. Even if they aren’t very good, we’ll be confident enough to unpick a seam and re-stitch it for better setting.
I should mention that we sewed the sails for our last two boats and both worked perfectly well, with no obvious problems.

Keep in touch!
Keep your letters coming. Send them to:

Bill Samson,
88 Grove Road,
West Ferry,
Dundee,
DD5 1LB,
Scotland

mctwbs@river.tay.ac.uk

Chebacco News 07

Chebacco News

Number 7, January 1996

We have something of a breakthrough in this newsletter, in that it is mostly concerned with sailing a Chebacco. Sister Krista Mote has been sailing her Chebacco in company with her friend Sister Donna Marie in the coastal waters of New Jersey, for the past four years. Here is her story . . .

‘TOULOUMA TOO’ (1)

I recently had the pleasure of meeting Bill Samson while he was staying with Gil and Joan Fitzhugh. The following notes are an attempt to comply with his request to write about TOULOUMA TOO.
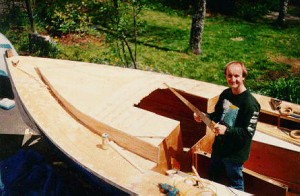
Before I set forth the joys of sailing a Chebacco, I’d like to briefly explain how we became acquainted. My brother’s children learned to sail on a beautiful Beetle Cat – TOULOUMA. Aunt Mary (that’s me) was their frequent companion, but they were eventually lured away by more exciting companions. Just around that time, Sister Donna Marie from California, came to live at our convent. After taking her sailing once, T knew I had found a kindred spirit. We had many joyful experiences camping in the Beetle Cat. I eventually complained that we needed more space and comforts to accommodate our increasing age and desire to cruise longer distances. Harry, my brother, said, “Look around.” What a great idea.
Growing up looking at wooden boats and later, camping in the Beetle Cat, develops an acquired preference for the way boats look; an attitude which may be considered snobbish by some. Needless to say looking for a boat to replace the Beetle Cat was a frustrating experience until Harry showed me a picture and article about the Chebacco. It was love at first sight, and the rest is history.
Now I’ll tell you about my Chebacco and what you might expect with yours. I guarantee you that you and your boat will develop a lasting friendship. The personification established by referring to boats as “she” will become more real as you discover and appreciate this boat’s unique personality. You may even find yourself “talking” to her. Example: I occasionally entertain a fanciful thought (only when a weeks cruise is inconveniently interrupted by an all-day rain or two) of a bigger boat with a cabin, standing room and accompanying amenities. The dream is quickly dismissed when morning dawns buoyantly sunny again, the huge white sail is raised and we’re off on another glorious adventure. I apologize to my dear boat and assure her that she is too beautiful, too agreeable, and too much fun to ever part with’.
“How do I love thee? Let me count the ways”-

SHE’S BEAUTIFUL: The fun of sailing a Chebacco is enhanced by echoes of ooh’s and aah’s as she catches the eyes and interest of on-lookers. We’ve been docked in line with a variety of impressive yachts. Boaters will pass by these lavish modern vessels and stop in their tracks to admire and ponder our Chebacco. We often remain in the background and enjoy watching people walking around her, examining every inch. Now and then other sailors will actually pursue us to offer their praises and inquire about her origin. She’s a conversation piece, and it adds to the camaraderie on the water.
SHE’S FAST: I do not consider myself a competitive sailor. My sailing skill does not measure up to the standards required for racing. However, I will confess that I frequently find myself secretly competing with other boats of the same size or slightly larger. I can usually catch up with, stealthily overtake or keep ahead… at which times TOULOUMA TOO is the “Cat that swallowed the canary,” and I, the proverbial grinning Cheshire. Going to windward this is not always so. Then I think about adding a jib. She’ll get you to your destination (when you have one) sooner than you may wish. After all, the fun of sailing is getting there.
SHE’S EASY TO SAIL: The joy of sailing a Chebacco is found in her easy handling. A child could sail this boat. She’s so easy, she’ll make a beginner look like an “old salt” in other words, a professional. She’s responsive even in a light wind and can be sailed efficiently with a double reef in winds ranging from 20-25 knots. If the center board gets jammed “up” you can use the mizzen to assist in coming about if need to. In Dan Segal’s article, “Chebacco 20: Evolution of a Civilized Daysailer” (see Wooden Boat: July 1991) – claimed – “With some tweaking, she will steer herself.” It is true. I have had fun experimenting with this and have perched myself upon the fore deck and watched her sail. Suspecting this could be dangerous, I’m intensely alert and only practice this manoeuvre far away from other boats.
SHE’ S COMFORTABLE: Even though the cuddy is small, it’s very accommodating for a couple of sleeping bags. You’ll be as content as two peas in a pod. We previously used air mattresses and are now replacing them with custom fitted 4″ foam sleeping cushions. The latter will take less space in the cuddy and eliminate our exertion in blowing up each night as air is-lost. Some time after the sun sets, we rig our cockpit tent and presto, instant additional shelter
seven1
Toulouma Too – showing boom-tent.
We sit on the floor, allowing plenty of head room as we rest our backs against a cushion .
seven2

seven3
We play cards, listen to a book tape, have a snack, and eventually say our prayers of gratitude. Sometimes we just talk as we’re rather silent during the day, not wanting to disturb the serenity of each tranquil moment. When we awake in the morning, everything that is stowed in the cockpit from the cuddy is nice and dry being protected from the cool night’s dew by our tent. When you have discovered that perfect anchorage” for the night, you’ll bless the mizzen for keeping you up into the wind, especially while rendezvousing with friends while moving in a curving motion is undesirable.
SHE HAS A SHALLOW DRAFT: Due to the shallow draft, we have the advantage of being able to explore alluring shorelines, shoal creeks, and coves. We can even beach her for a picnic if we choose. This wonderful feature provides us with the opportunity to witness nature “up close and personal.” For instance, one night during our last cruise, we chose an anchorage in two feet of water, about ten feet from the lovely picturesque shoreline of Island Beach State Park. As we lazily watched the sun set, we were suddenly joined by a beautiful red fox. He boldly trotted along the water’s edge pausing intermittently and indifferently looked us over. I guess we were more impressed with him than he was with us. This is the sort of delightful experience sailors with deep keels are denied. The next morning, we stepped off our boat and ventured along the same charming shore, observing nature’s opulence. Stepping off in four or five feet of water would not be nearly as convenient. In addition to the convenience of a shallow draft, is the fact of a relatively short mast. Due to the gaff rig, the mast is short compared to other boats of similar length (about 20′ minus the gaff spar). You will be very happy to discover that you can motor or sail under many bridges that others cannot.
SHE HAS STORAGE: There’s sufficient storage to certainly satisfy most sailors needs. On the other hand, storage may become just adequate depending on individual needs and the duration of the cruise. You may be forced to set priorities. Sister Donna Marie and I are gradually improving. However, we find that when we sacrifice one object, it quickly gets replaced with something else. For instance, we eliminated one or our two ice coolers and replaced it by an Origo alcohol stove which proved to be a great decision! We have learned to simplify our menu and get along with less clothing. Fortunately for we who sail in the back bays of New Jersey, there are many marinas equipped with showers. Yacht clubs are especially hospitable in sharing facilities.

Here’s where we stow it:
1. 1 can’t imagine stowing an anchor anywhere on this boat except on a bow sprit. I am forever grateful to Harry for identifying the need to do so, before she was built.
2. What do you do with wet wash cloths? Harry made me a beautiful little wood towel rack, fastened forward in the cuddy.
3. Wet bathing suits are stowed in the motorwell, so are gas and water.
4. PFD’s fowl weather gear, plus a variety of nautical non-necessities are readily available from the spacious lazerettes. [- there are hatches opening onto the chambers either side of the motor well (Ed.)]
5. Toiletries in an adapted spice shelf
seven4
6. Sleeping bags are stowed in the bow.
7. Pillows and sleeping gear in the hammocks. [- slung under the side decks in the cuddy. These are little hammocks – not for sleeping in! – BS]
8. Food and drink under the bridge, inside cuddy. [Toulouma Too has a bridge deck, providing storage at the aft end of the cuddy. Builders who have not included a bridge deck but have followed Phil’s plans to the letter will find adequate storage under the side benches, accessible from the cuddy – BS]
9. Docking lines, plus all kinds of little gadgets, weather radio, sun tan lotion, bug spray etc. are tucked away under the motor well in the cockpit. Oh yes, the first aid kit is under there too.
In conclusion, as a credit to the above praise, I need to point out the following: As a result of our (Harry and I) trial sail with Mickey (owner of a Chebacco in Massachusetts – 1990), Harry identified several alterations to be made before Brad Story built my particular boat. Brad was sent a list of requests pertaining to planking, framing, aft end of cockpit, centerboard, mast partner, stem, anchor sprit, rig, mainsail and mizzen. These mutations have made this “Cat” exceptional. All this added to the fact that it was built to purrfection by Brad Story. I might boast of having the most desirable “Cat” of the litter.
Observation: The “yachty” Chebacco pictured in news letter *3 April 1995 is TOULOUMA TOO. Actually, I think she is referred to as The Story 20.
For anyone who is curious about the origin of the name, TOULOUMA. My dear Uncle Gus suggested the name for the Beetle Cat after reading Alone in the Caribbean, by Frederick Fenger. The word TOULOUMA is from the Carib Indian language which means “pretty girl”. The Carib Indians are the people who live on the windward side of the Leeward Islands. Harry thought it was very appropriate for such a pretty boat.
PS Harry has a great respect for Phil Bolger’s work and owns a Shearwater. We had the pleasure of talking with Phil over tea after our sail in 1990. It was a charming and memorable experience.
seven5
Phil Bolger with Sister Krista on board ‘Resolution’.

‘TOULOUMA TOO’ (2)

Joan and Gil Fitzhugh went sailing with Sister Krista and Sister Donna Marie in mid-October. Here’s what they have to say:
Joan and I had a delightful sail with Sister Krista and Sister Donna Marie last Sunday. I’ll pass on my impressions, but remember that they’re from the standpoint of a very inexperienced sailor. . .
Sunday was overcast, cold and blustery. Wind was 10-12 kts near shore, 15-20 out in the bay, with higher gusts. Waves weren’t very high, maybe a foot, but the water was heavily wind-streaked and about a third of the waves had small whitecaps. As you know, Sister Krista’s boat was modified by adding 300+ lbs of inside ballast, and by raising the mast a few inches. As you probably didn’t know, her centerboard was jammed in the up position. She doesn’t know the source of the problem, but expects to have it corrected at the end of the month when the boat is hauled out of the water.
We motored out into the bay and raised the mizzen. The boat pointed itself into the wind and behaved docilely, while Sister Krista raised the mainsail, into which she had already tied a single reef. We whizzed off on a beam reach, with Sister Krista concerned that a second reef might be in order. After a while I took the tiller. The boat held course fine in a steady wind, with just a bit of weather helm, but I found the gusts a bit off-putting. (I hadn’t sailed anything in a year and a half, and had never sailed a yawl, so recognise that all my comments are filtered through my inexperience.) A puff would make her round up sharply into the wind. Considerable pull on the tiller would point her back on course, but with a lot more heel. Sister Krista decided a second reef was a wonderful idea! She sheeted in the mizzen and Sister Donna dropped the anchor (Barnegat Bay is shallow enough to anchor in most places). Tying in the reef was a non-event, since the boat is a pretty steady platform. With the anchor raised the boat was transformed. Very pleasant and non-scary, even in gusts.
I wanted to see how it would behave close-hauled. Answer: fine, though with the board stuck up we seemed from the angle of the wake to be making about 15 degrees of leeway. Even so, true upwind progress was possible, though slow. With the board unjammed I’m sure it would have been great. Coming about was easy if the mizzen was used for some steering help.
An easy intentional gybe soon had us surfing downwind at a rollicking clip. Then Joan sailed it and she, too, enjoyed it.
Since home was directly upwind, and since Sister Krista had plans for the afternoon, it was time to head back. After three or four long beats, it was apparent that a) home was getting noticeably larger, and b) it was nonetheless not doing so fast enough. Sister Krista got the sails down , again with no apparent heroics, and we motored in. The 4-horse was more than adequate to punch through the wind. The access to the dock was directly crosswind, and the drift was considerable, but the engine and Sister K’s tillerwork were able to get us in. By the way, Phil Bolger says that you can steer with the tiller and the motor will pivot appropriately, but I noticed that Sister K climbed to the stern and steered directly with the motor whenever we were under power.
All in all, Joan and I came away from this sail much relieved – a lot of our money and my time has been going into this boat with nothing but a belief that everything would be copacetic [I like that word; ‘US colloq.’ it says in my dictionary – BS]. Until recently we’d never even seen a Chebacco, let alone had a sail in one. We’re now persuaded that we’ve chosen a suitable design. We’ll gain experience slowly – I doubt our first few sails will be in as much wind as we had with Sister K – and, since our boat will live on a trailer, we don’t have to wait ’til end-of-season haulout to unjam the centerboard.
‘NENCIA’ News, too from Alessandro Barozzi, of Italy. In Chebacco News #6 there was a photo of NENCIA, his Chebacco without a cabin and with self-draining cockpit. I asked Alessandro how this worked and he wrote to me. [Inaccuracies are my responsibility, due to the shakiness of my Italian.]
Casavecchia has incorporated a self draining cockpit simply by leaving out the footwell and making a single bridge from the third station to the stern, resulting in what he calls ‘a party boat’; in fact I believe that half a dozen Japanese Sumo wrestlers could dance a minuet on it!
He also comments on the relative merits of lapstrake vs sheet ply he says –
I agree with you about the elegance of her lines, but I am convinced, having spent a summer with NENCIA, that in all probability the more practical version is the one you have made [sheet ply]. The clinker hull is too inclined to splinter at the least bump and I suspect that it is also considerably heavier.
I’m not sure I agree about the heaviness, since the sheet ply version is sheathed in glass and epoxy. He goes on to say that he is tempted to raise the freeboard of NENCIA and improve the accommodations and is thinking of how this might be achieved without sacrificing the aesthetic properties of his boat.

News from builders

Fraser Howell of Nova Scotia has e-mailed me to say that his hull is now painted with dark blue two-part gloss paint.
Bill Meier of Connecticut has started building his lapstrake Chebacco-20, upright. It will be interesting to hear how well this works out when compared with Gil Fitzhugh’s inverted technique. Bill writes –
As the leaves begin to fall I’m finally beginning to see some progress on the boat. I spent the better part of the summer on assorted parts but didn’t start putting anything together until September. As things stand now, the backbone and bottom assembly are set up, the molds are positioned and I have the plank lands marked. Since I’m building upright, marking off and fitting the first plank forced me to spend the last two weekends lying in sawdust and shavings on the concrete garage floor. This coming weekend I’ll do a final dry fitting and then permanently fasten down my first plank.
When I joined the bottom pieces I tried the technique of scarphing plywood by hollowing out a six inch groove along the joint and filling it with fiberglass matting and epoxy. My poor disk sander complained, the dust was everywhere and it took me three batches of thickened epoxy before I got a fair surface. I decided that it was more pleasant (as well as cheaper and faster) to cut the scarphs with a sharp hand plane so that’s my current strategy. Four down and twenty to go!
The only significant change to the construction drawings I’ve mad to this point is to build a solid keel. I was concerned about the durability and longevity of a hollow keel, so I agonized more than a few nights about alternative constructions. I wasn’t thrilled about working (or paying for) large pieces of white oak so I finally settled on the technique of building the keel from lifts sawn from construction grade 2×6 Douglas fir, which also eliminated the need for separate cheek pieces. The lifts were cut with a skil saw, fastened with 3M 5200 adhesive and 20d bronze ring nails, planed to final shape and soaked in Cuprinol wood preservative. I nailed from the bottom up so that I could plane the curved top surface. A hickory shoe was added to the bottom of the keel for those unexpected rocks lurking just under the surface. Three-eighths inch bronze rod will be used to fasten the keel to the hull at strategic points. I’m not completely happy with my choice of Douglas fir, but the boat will be kept on a trailer most of the time and I’m hoping the Cuprinol will keep it healthy for more than a few years.
Keep up the good work. I’ve been thoroughly enjoying the newsletter.
Regards,
Bill Meier

Gill Fitzhugh tells me that since he flipped his hull he is battling against rainwater getting under the tarp. He also writes –
I’ve been cleaning up the inside, especially forward of station 5 where the inside is visible. There’s a fairly simple way to clean up the joints between strakes, although old spilled epoxy is hard on cutting tools. It involves a rabbet plane . . .
He goes on to explain how the plane can clean up the epoxy runs at the plank lands. Gil also commends the plank bevelling technique shown in the November/December issue of WoodenBoat: –
Gee, I wish I’d known about that, or thought of it myself! Instead of temporary molds, I could have built in the permanent ones. With molds in place the rollover could have been done with three or four people. The result would have been more accurate and cheaper. And round battens with no twist? Brilliant! I’m impressed all over again by the potential for the human race when someone can create a quantum leap in simplicity and accuracy for what’s essentially a backyard process that’s been going on for centuries.

Gil also pointed out a transcription error (mea culpa) in his table of offsets –
The height of plank line EF at station 8 is 2.1.3, not 3.1.3. The other numbers are the ones I sent you.
I’ve now corrected my master copy, so if you’d like a fresh copy with the correction, please get in touch.

Roots . . .

Lofting takes Gil back to his days as an actuary –
I kind of enjoy lofting. It’s a bit like graduating a mortality table from raw data, but the result is so much prettier.
Hmmm . . . This takes me back to the origins of my own interest in woodworking; my father was an undertaker. . .

Keep in touch

I’ve had particular fun putting together this issue of Chebacco News and would like to express my thanks to all our contributors. Please send me your stories, views, opinions, challenges, insults, . . .

Bill Samson,
88 Grove Road,
West Ferry,
Dundee DD1 1HG,
Scotland.

e-mail – mctwbs@river.tay.ac.uk

Chebacco News 06

Chebacco News

Number 6, November 1995

Peter Launches!

Peter and Sandy Gray, of Queensland, Australia, have launched their Chebacco. As far as I can tell, this is the first amateur-built Chebacco to be launched. (If anyone knows this to be wrong, please let me know!) Congratulations to Peter for a great achievement.
six6
Gray Feather afloat in the Noosa river.

Peter writes:
Dear Bill,
Well, it has finally happened. Our boat was launched on 31 August 1995.
It was a beautiful morning on the Noosa river as our boat slid off its trailer and into the water. She sat exactly on the waterline and looked a picture. I stood back to take a photo of her but our camera wouldn’t work. At that moment a person walked down to admire her and after seeing that our camera didn’t work, he offered to take some photographs for me (- he was a professional photographer). After the photos were taken, Sandy and I boarded the boat and motored off down the river.
. . . the sails will come later. She has an 8 hp long shaft Johnson outboard. I estimate that she cruises at about 6 kts comfortably.

Bill travels and Gil flips . . .

I was fortunate to be in the USA on business at the start of October and took some time off to visit Gil and Joan Fitzhugh in New Jersey, and Bill and Mary Parkes in Pennsylvania.
Gil kindly timed the ‘flip’ (ie lifting his hull from the molds and turning it right way up) to coincide with my visit. A host of neighbours and relatives turned out for the flip and they were fuelled by generous quantities of grog and grub supplied by Gil and Joan. The flip went without a hitch – apart from participants having to dodge acorns falling from 100 foot high oaks around the boat. I was particularly impressed that the hull lifted off the mold without a murmur – no screws had been left in; no glue had stuck the hull to the molds.
Gil’s hull is beautifully fair – the product of more hours of sanding and filling than I care to imagine – and the plank lands are sweet and fair to the eye. Now for the fitting out . . .
six9
Gil Fitzhugh’s hull safely flipped and on its trailer.
Bill Parkes travelled from Mechanicsburg to assist in the flip. I went on to spend a couple of days with Bill and Mary. Bill is planning to build a sheet ply Chebacco. He has already built two Bolger boats – a Nymph and a Gloucester Light Dory. He took me rowing in the Light Dory on the Susquehanna river. Having rowed and admired it, I can understand why it is called Phil’s ‘ticket to Heaven’.
Sincere thanks to Joan, Mary, Gil and Bill for their kindness and hospitality to me during my visit, and particularly for allowing me to OD on boat talk with them!

Want molds for a lapstrake Chebacco?

Now that Gil Fitzhugh has completed his beautiful hull, he has a set of molds that are now surplus to his requirements. If you are planning to build a boat like Gil’s, you are welcome to take away his molds, free of charge, also saving yourself the hassle of lofting the lines full size. Gil would rather they went to a good home than put them to the torch. You can contact Gil at his home in New Jersey:
Mr Gil Fitzhugh,
Primrose Trail,
Mt. Kemble Lake,
Morristown,
NJ 07960

e-mail: joancarol@aol.com

phone: 201 425 9010

Chuck Merrell on Anchors

six10
‘Tomboy’

Chuck Merrell of Seattle lives aboard ‘Tomboy’, a ‘Jessie Cooper’ designed by Phil Bolger, and is currently finishing ‘Wonky’ a steel ‘Tahitiana’ ketch which he bought half-built. Chuck is a self-confessed anchor-obsessive and emailed me with the following observations in response to the chat about anchors and how to stow them in Chebacco News #5:
Hi Bill, I usually singlehand, and even if there is someone with me, I generally wind up doing most everything by myself anyway. Singlehanded anchoring is always a problem if you have to leave the tiller to drop the hook, especially on a boat like Tomboy. Wonky wouldn’t be such a bad problem, but anchoring from the bow still takes a thirty foot run from the cockpit to the front end and back.
On Tomboy, I keep the anchor permanently mounted on the stern, and keep the anchor chain in a bucket in the cockpit. (I use 30′ feet of chain). I have the chain shackled to the nylon anchor rode which is led back to the bow, through the chocks and cleated off. When I’m ready to anchor, I have made up a little quick release device that allows me to drop the anchor out of its mounts as the boat is moving forward. I hold the chain bucket overboard so the chain doesn’t flail against the boat as it runs out. The rode follows the chain and the forward motion of the boat digs the anchor in and turns the boat in line with the anchor, then it can be backed down and set and adjusted at my leisure. The system works great, and you don’t have to leave the tiller during any part of the operation. I’ve done it dozens of times, and never have had a mishap under power or sail, regardless of how hard the wind is blowing or what the conditions. The way I have the anchor mounted makes it very easy to deploy, and the anchor always stays put even in heavy weather till it’s time to let it go.
That brings up the subject of what kind of anchor to use. According to what you say, Phil has recommended a 25 pound Plow, or an equivalent Bruce. Phil as you know is a “belt and braces” man, particularly when it comes to anchors. In my opinion, a 25 pound plow is almost 3 X overkill unless your local conditions absolutely dictate the choice. This anchor is better suited to a boat weighing about 6,000 lbs, not a daysailer less than a ton. A 25 pound plow is about the smallest you can buy, and Phil probably recommended it because he figured any Scotsman worth his Haggis would want to spend the money at home with Simpson Lawrence. I don’t like to use a plow unless I have a bowsprit and winch. They are heavy, and it’s easy to bang the topsides and pinch your fingers. A 25 pound isn’t too bad, but on a pitching foredeck, my 45 pound can really smash a pinkie and make dents in the topsides or deck. (I’ve designed Wonky’s bowsprit and rollers to work in such a way that there is no way raising an anchor will bang into the hull regardless of the conditions. You’ll see when I get the pix developed and scan them to you.)
Bruce anchors are nice in certain types of bottoms, and they don’t foul easily, and will reset in their own length if they drag. But they’re pretty expensive, and in general don’t perform much better than a Danforth type, especially to anchor a light boat like the Chebacco. Danforths and Bruce anchors are roughly for the same type of bottoms, but the Bruce is harder to stow.
I think that I would use an 18 pound standard Hi Tensile Danforth (assuming that a Danforth type will work in your ground conditions) with 30 ft. of 5/16″ BBB chain as my working system on a Chebacco. One thing is, with that setup, you could sit around and wonder if the anchor was holding the boat, or could you just get by with chain only (just kidding). A 1/2″ nylon rode would be nicer to hand, but 3/8 nylon would be plenty strong enough. A Danforth can be made to hang on a flat vertical transom like the Chebacco has. If you use the natural design of the Danforth, the flukes will fall away from the boat when stowed, as well as deployed, and never cause marring. You can use a second 18 Lb Danforth on a Bahamian mooring arrangement if you anchor in the river. You can leave the anchor rigged and hanging in its bracket when you are tied to your mooring, or when trailering down the road. This is a good system if you ever really need to anchor fast.
For comparison, on Wonky which weighs 20,000 lbs, I have the following ground tackle: 50 Lb Herreschoff, 45 Lb Plow, I built the following anchors: 40 Lb Danforth type, Two 40 Lb large fluked folding Yachtsman anchors, 18 Lb. Kedge, 5 Lb Kedge. 200 ft of 5/16 Hi-tensile chain, 200 feet of 5/16 BBB chain (given to me as a gift), and a couple dinghy anchors. For storm conditions I would becue the 50 Lb Herreshoff and the 45 Lb Plow. For Hurricane I’d also put out everything else, and all the chain. For nylon, I have 600 feet of 3/4″ Guess you get the idea that I like anchors and feel that you can never have too many, huh?
. . .
Have a good weekend.
Chuck

Fraser’s stripper . . .

Fraser Howell continues to make astonishing progress on his strip planked version of Chebacco. He sent me a whole bunch of photos of which a small selection are included in this newsletter. The captions are supplied by Fraser.
six4
Here is the bottom, while fitting the CB case. The roughed out laminated stem is just beside the case. You can see that I built up the base of the stem where it will bear on the bottom. This stem enlargement made it easier to fit in a free-standing fashion. I fit it with a 1/2″ stainless steel post that passes through the stem enlargement and the keel ( – I had just broken a molar repaired in a similar fashion). You can also see some distortion of the bottom due to moisture. At this point the ‘boat’ went back into the shed, dried out and came back into shape. I then turned it over and applied the 1/4″ ash veneer in epoxy.

six5
Some time later, transom, main bulkhead, stem and molds ready to be aligned. You can just see the untrimmed edge of the bottom veneer.
six7
A successful rolling crew. I don’t know why the rest of them are smiling, I’m the only one with a beer.
Fraser’s other photos show details of the stripping process, scarfing of strips, breasthook and knee and various views of the hull. He writes:
I made the seat supports, after cockpit bulkhead etc. out of 5/8″ exterior ply. There are two partial bulkheads on each side to support the seat. I placed them at mold stations. This allowed me to use the mold profile rather than scribe them. The forward and after bulkheads were scribed to fit. All bulkheads were epoxy filleted and taped with 4″ wide 10 ounce cloth. I put in all that internal structure to stiffen the hull for the roll-over and hold the shape. Molds 3 and 4 were left in for the same reason.
Presentlly, I’m planing the 1/8″ ash veneers. I will lay them at right angles to the strips, stapled in thickened epoxy. I’ll then fair and seal the hull exterior to leave it through the winter . . .

‘Nencia’

Alessandro Barozzi sent me this photo of Nencia, his lapstrake Chebacco which has no cabin.
six8
‘Nencia’
I fear I must apologise for getting the builder’s name wrong. He is Casavecchia (not Casavecellia). I was also wrong when I described her as an ‘open’ boat. She is mostly decked, with a self-draining cockpit. She is certainly a most attractive boat and may give some of us pause for thought as to whether we really need a cabin, when she looks so good without one.
Alessandro has been out of action recently, with surgery to his right arm. I hope he makes a full and swift recovery so that he can continue to enjoy his sailing.

Bill Samson’s Sheet Ply Chebacco

My own Chebacco is now complete except for spars, sails, outboard and trailer.
six1
Bill’s Chebacco tilted to receive its centreboard and rudder.
The next two photos show the lower gudgeon (pintle??) for the rudder. This is made from galvanised iron. Note the nylon bush to take the downward thrust of the rudder.
six2
Galvanized gudgeon before fitting (Yes- I know it’s countersunk on the wrong side! In fact it is countersunk on both sides.)
six3
Gudgeon and rudder in place; bedded in liberal quantities of Sikaflex.

And Finally

This has been a great year for amateur Chebacco builders with Peter Gray getting into the water and Bill Samson hoping to follow soon. Please do keep in touch and let me have your news. Thanks to those of you who have sent me letters and photos as well as those who have sent financial donations to help keep this little newsletter afloat.
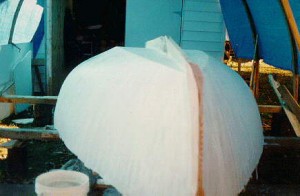
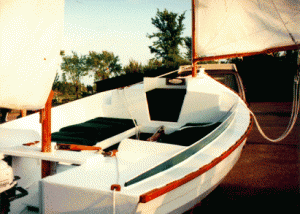
Bill Samson,
88 Grove Road,
West Ferry,
Dundee,
DD5 1LB,
Scotland

w.samson@tay.ac.uk

Have a Merry Christmas and a Happy New Year!