Chebacco News 05

Chebacco News


Number 5, September 1995

It’s time, once more, to report on Chebacco-related news around the world. The weather here, in the UK, has been superb – four weeks of continuous sunshine and counting! No excuses, then for lack of progress in outdoor boatbuilding.

We’re on the Internet!

As I mentioned last time, I was trying to get a World-Wide-Web page set up with Chebacco News in it. It’s there now. The address to connect to is:
http://www.tay.ac.uk/mcsweb/staff/wbs/chebacc4.html
for newsletter number 4, and

http://www.tay.ac.uk/mcsweb/staff/wbs/chebacc5.html
is this one.

Another internet ‘club’ that should be of interest is ‘Bolgerphiles’. If you’d like to participate, drop an email to
cnoto@freenet.scri.fsu.edu
who, in real life, is Chris Noto, of Sweetwater, Tennessee.
Some of you have already found Chebacco News on the net and have told me they don’t need me to send out the newsletter to them any more. This is fine, and saves on printing costs and stamps BUT all readers of the News should feel part of the ‘club’, whether they read the electronic version or get the paper copy in the mail. I’m interested to hear from you however you come to be reading this.

Anchors, toilets, mast jackets, . . .

Phil Bolger mentioned in a recent letter that he would favour a plough anchor – Bruce or Delta for example weighing 25 pounds or more with 200 feet of rode, for a Chebacco. I’ve had letters from a couple of you wondering if I had come across a good way to stow an anchor on board a Chebacco. To my mind the foredeck is rather small to accommodate a hatch, so although the anchor could be stowed up in the forepeak the dirty weedy thing would have to be brought through the cuddy, dripping on your nice floor or sleeping bag!
Personally, I don’t think the forepeak of a light displacement boat is the best place to hold anything heavy. The nearer the anchor and other heavy gear is to the centre of the boat, the happier I am. My plan is to keep the anchor(s) under one of the side benches, getting it in and out through the access hole from the cuddy through bulkhead 4, and the rode on the other side to balance things out. Admittedly, it will drip momentarily in the cuddy but this should be a minimal problem considering the short distance from the access door to the cuddy entrance.
Another possibility you may like to consider is to replace the ‘Jonesport’ cleat at the stemhead by a short bowsprit/cathead to support a plough anchor ready to drop at all times.
If you have any other ideas, we’d like to hear them!
Jim Slakov asked about the anchor, and also about where to keep a portable toilet. He also wonders if anyone has thought about how to arrange a mast jacket. Do you favour mast hoops or lacing for the luff of the mainsail? Again, let us hear your ideas on these or other matters of interest.

How much does it cost?

People embarking on the building of a Chebacco wonder how much it’s all going to cost. I’ve had a couple of letters about this and thought the answer might be of general interest.
The cheapest way to go is to use exterior-grade ply. In the UK this will set you back about £500 ($800) for the 22 sheets needed if you follow Phil’s drawings to the letter, including hollow keel and ply floorboards. The 10 gallons of epoxy needed cost £750 ($1100) in the UK, and the glass cloth £200 ($350). If spars are made from reclaimed wood the cost is negligible. Fittings vary a lot, but making as much as possible yourself (wooden cleats etc) you can probably get away with £200 ($350). The sails would cost about £600 ($1000) ready made, but you can buy the cloth to make them for £130 ($200). Paints and varnish (house paints) will cost about £100 ($160), giving a grand total (assuming home-made sails) of £1880 ($2960) very approximately.
Going the Rolls Royce route with Bruynzeel ply and pricey paints, top class sails and so on could easily set you back four times that much. A lot depends on whether you are building her to sail yourself for the foreseeable future, or are more interested in her resale value when you move on to your next boat.
My own approach was to try to spread the cost as much as possible, so as not to have to shell out too much cash at once. As a result, the ply I’ve used is of a very modest marine grade, but I’ve gone to town on the best paints and varnish (2-part linear polyurethanes) which, unlike the ply, can be bought as and when required. Hopefully, too, they’ll provide good protection for the ply, such as it is.
Depending on how you intend to sail her, you may want to buy a trailer ($1500 or more) and an outboard motor ($800, but second hand motors are often available much more cheaply).

We have a sailor!

At last, a Chebacco sailor (as opposed to builder/dreamer/. . .) has joined our ranks. Alessandro Barozzi of Valfenera, Italy owns a Chebacco built by a builder named Casavecellia. My Italian is very rusty (- it never was shiny -) but I gather from Alessandro’s letter that his Chebacco is the lapstrake version, rigged as per the plans, but built as an open boat, without the cuddy [Alessandro – please correct me if I’m wrong!].
He writes that members of his club describe her as ‘a poem – the most elegant boat on Viverone’s pond’. ‘Nencia’ (for that is her name) nearly came to grief in a ‘Valdostano’ – a powerful wind sxweeping down from Mont Blanc – when she broke away from her mooring and blew away towards the rocky lee shore. Fortunately, she ended up in a quiet corner, bobbing around with some black ducks and only a little scratch on the paintwork to show for her adventure.
Alessandro mentions that she has some weather helm, and is thinking about adding a jib to help her balance better. He also finds her slow to tack, but I suppose this is understandable given that she has a long shallow keel, unlike a conventional centreboard dinghy. Finally, he says that she sails well, with satisfying speed, even in the lightest wind. ‘
Nencia’ is Casavecellia’s second Chebacco. The first one he built was strip planked, Bermudian rigged, had an iron centreplate and an inboard diesel engine (if I understand the Italian technical terms correctly). Alessandro believes that it was a mistake to stray so far from Phil Bolger’s drawings, and made sure that his own craft was much closer to the designer’s intentions.

A Tender for a Chebacco.

As my sheet ply Chebacco nears completion I’ve started to ponder the practical aspects of sailing her. I’ll be keeping her on a deep-water mooring in the Tay estuary and may be a couple of hundred yards from the nearest launching slip for a tender. This can be a fair old distance to row when wind and tide are unfavourable. I wrote to Phil Bolger asking if a stretched ‘Nymph’ might be suitable. He replied suggesting that
[The June Bug] is the best tender design that I know of if you can live with its looks: fast rowing, quick to build, a good carrier and stiff to get into and out of (a weakness of Nymph). Weight about 100 lbs. They’re good sailors, but the rig is too much clutter in a tender.
I also asked him about how a Chebacco would row, if caught out in a calm with a busted outboard (or no outboard at all). He replied:
I imagine a Chebacco would row quite well with, say, nine-foot oars. They have little if any more surface than a Dovekie, which I’ve rowed many miles at three knots. Chebacco’s geometry would not be as good, and think out carefully where you will stow the oars! I would have a long paddle, actually probably a six-foot oar. . . . If you tow the 14-foot tender, you can row that . . .

Windward Performance

You’ll recall that Mark Raymer was considering building a Chebacco-25, but was worried about how well she’d sail to windward. Phil writes:
On the windward performance of the Chebacco-20, it is as good as the sails, which need to be cut with a good flow. Given that, they are close-winded and spirited. The 25-footer is no doubt undersparred for light weather, when she is supposed to use the engine without inhibitions. I’m most confident that she will give a good account of herself in any fair sailing breeze, and that the speed with which she can be rigged and unrigged will add more to her mileage than would a better drifting ability.

My own view is that close-windedness is a matter of what you’re used to, and whether you intend to sail in company with more close-winded boats. For example, I don’t think that Chebacco was ever intended to sail close-hauled with a heavily ballasted fin-keeled bermudian sloop with a bendy mast. I currently sail a 15 foot lug-rigged flattie. I’m always contented with her performance when I sail alone. I sometimes sail in company with racing dinghies like Wayfarers and Enterprises and while the flattie gives a good account of herself on a run or a reach, she’s soon left behind on windward legs. Having said that, I wholeheartedly agree with Phil about rigging time – I can be on the water and away 20 minutes before the racers, which makes up for a lot!
Thanks to those of you who wrote to me about this. I have passed your letters on to Mark.

Fraser’s Stripper

Fraser Howell of Nova Scotia is making excellent progress with his strip-planked Chebacco hull. He writes:
As of today the strip bottom is complete except for the veneer, which is next. I lost some time due to moisture. I was building upright, outdoors. We had some exceptional rains, and the pine strips had warped, mostly I think because of moisture from the ground, as it was under a waterproof cover, with no floor. I moved it to my shed a week ago , and happily the original dimensions returned (whew). Everyone who the bottom out of plywood was right. My method is not cheaper, and requires probably ten times more work. If there is an advantage it is that the final bottom thickness will be one inch. said to make
Given the bottom, here is the sequence I plan to follow;
1. loft and cut molds out of inexpensive plywood sheathing for every station, except transom and #5 which are made from good marine ply
2. make c.b. case, again from good marine ply
3. align the molds and stem on the bottom with the c.b. case inserted in #5, #6
4. brace the molds and epoxy the c.b. case and #5 together, permanently attach stem, #5 and transom to the bottom
5. strip plank the hull
6. turn it over, smooth the hull and apply 1/8″ veneer in epoxy
7. smooth the veneer layer, coat with epoxy
8. turn it back over . . .
I have laminated and roughly bevelled the stem, framed the centerboard case, and completed half of the molds. Having a great time. I got Bolger’s latest book, enjoyed ot a lot.
Looking forward to an exuberant description of the sailing performance.

Fraser also enclosed some detailed sketches of how things are to go together. I’m afraid they are a bit beyond my Microsoft Paintbrush ability, so I’ll summarise what they are about:
The c.b. case has a really neat frame – the for’ard part is made from a straight piece of wood, slit lengthwise several times by bandsaw, glue put in the slits and the whole lot bent to shape forming a strong, laminated member.
The strip planking is to start from the chine, with the first plank being glued to the edge of the bottom. Fraser has cut a set of little bevel guides from the lofting so that the edge is accurately bevelled to accept the first plank.
The strips will be scarfed on the boat with Titebond glue and galvanised finishing nails.
The c.b. case will be finished flush with the pine strips on the outside of the bottom and the edge grain of the ply covered by the 1/4″ ash veneer. The cheek pieces of the keel are made of solid ash and are through-bolted to the logs either side of the c.b. case inside the hull.
There is a mold at each lofting station – not just at bulkhead positions.
There are some photos later . . .

Gil’s Boat

Gil Fitzhugh is making good progress with his lapstrake Chebacco-20.
All the planks are permanently in place, and I’m sanding, filling, sanding, epoxying, sanding, . . . Maybe another couple of weeks and I can paint the hull. The I’ll dragoon some neighbors, ply them with beer and flip the boat. Working outside in the spring and summer gives new meaning to WoodenBoat’s euphemism about building from ‘organic materials’. There’s the bark, twigs, dead leaves and seed pods that land on the work. There’s the flies, spiders, inchworms (2.54 cm worms) [Gil’s practicing, in case ‘The Boatman’ asks him to write an article] that crawl on it. There’s gypsy moth larvae, that feast on leaves and excrete little pellets on everything. All this organic material gets caught in the crevices, or lands in wet epoxy, and leaves residue in the boat. Some of it is, at best, wood by-products. And some is two or three incarnations away from having recognisable vegetable origins.
How much of my $70/gallon epoxy ends up as sanding dust?

[Gil should count his blessings – epoxy costs £75/gallon on this side of the pond!]

And finally

Keep your letters and emails coming. These form the substance of this newsletter. Remember that what may seem obvious or mundane to you could light the way for someone else. Jim Slakov writes:
Keep up the great work: newsletter #3 was the best yet. Of special interest to me was Gil’s method of planking, and the pictures of the two Chebaccos. You wouldn’t believe how I obsess over every detail, especially Story’s version: I like a bit of wood showing, and his lower hatch slide-logs, although that extra height looks good in Bolger’s drawings . . .

Write to me, Bill Samson, with your thoughts, experiences, ideas, dreams, . . .
Bill Samson,
88 Grove Road,
West Ferry,
Dundee, DD5 1LB,
Scotland.
email: w.samson@tay.ac.uk

Photos
fh1
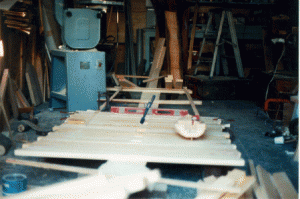
The bottom of Fraser Howell’s strip-planked Chebacco – note the screw caddy!
fh2
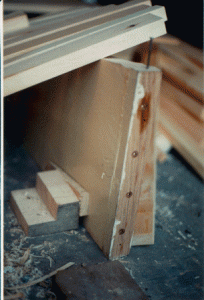
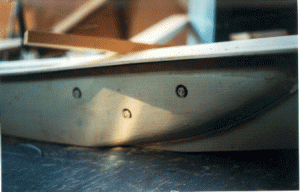
For’ard end of Fraser’s keel cheekpieces
fh3
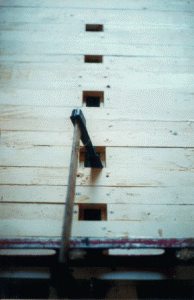
Aft end of keel

fh4
Planking in way of centerboard case

bs1
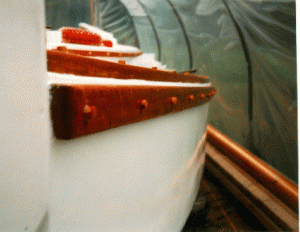
Bill Samson’s Chebacco – screw hole plugs to be trimmed.
bs2
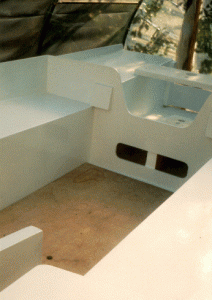
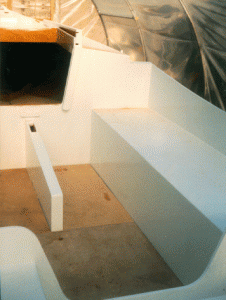
Bill’s boat, cockpit looking for’ard.

bs3
Bill’s boat, cockpit looking aft.

rudder1
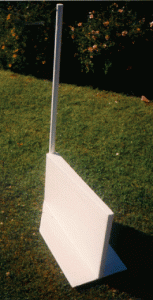
Rudder; post made from galvanised 1″ mild steel.

Chebacco News 03

Chebacco News

Number 3, April 1995

A Frequently Asked Question

Several of you have written to me asking for the address of your nearest neighbour, so that you can perhaps get together and chew the fat. My approach to this has been to contact the neighbour, and ask them to get in touch with the person making the query. That way, I’m not divulging people’s addresses without their permission. It would obviously save us all a lot of hassle if I were to send out an address list with the next newsletter. Those I have spoken to individually say they’d have no objection to this, but some of you might. If you don’t want your name and address to appear in the address list, please let me know right away. In the next newsletter I’ll publish the names and addresses of those of you who remain silent!

Surfin’ the Internet

Three or four of us have Internet addresses and communicate using eMail. It would even be possible for me to send out this newsletter (text only) this way. (I did try sending the last one, but the photos take up one helluva lot of space and the message arrives in lots of parts which are a hassle to reassemble.) Another possibility is that I could put it up on the World Wide Web complete with colour images; but I suspect that not many of us have access to web readers. Anyway, if you’re into the infobahn, my address is:

w.b.samson@tay.ac.uk

Let me know if you have any ideas in this direction.

“Boats with an Open Mind”

I recently got my copy of Phil Bolger’s new book (title above) which was published by International Marine of Camden Maine in November 1994. There’s a great chapter on Chebacco boats – the versions except the original cold moulded one, and including a “glass house” version with balasted keel, more freeboard and a huge cabin with glass sides – worth thinking about if comfort matters and you plan to sail in rougher than average waters. You can even steer it from inside the cabin! As well as this, there are another 74 designs, some old, some new. I must confess I devoured every word of it with great relish. Essential reading for all Bolger fans.

Lapstrake Construction

Last time I gave you a blow by blow account of how a sheet ply Chebacco could be put together. In order to redress the balance for lapstrake builders, Gil Fitzhugh of Morristown N.J. gives the following account of the method he is using for spiling and fitting strakes:

I’ve accidentally blundered into what I think is an easy way to determine plank shapes in glued lapstrake plywood construction. I haven’t seen this written up anywhere, so feel free to put it in the next newsletter. It assumes you are using a building mold the way Tom Hill does, in his book “Ultralight Boatbuilding”, with a series of ribbands to define where the planks go.

Unlike the Chebacco, Tom’s plans and molds are small. He uses 4mm ply, narrow enough to be clamped into place with C-clamps. He clamps some plywood in place and traces the shape from the back by tipping the mold. For me to do that in the Chebacco means getting under the mold between each pair of stations, tracing the shape onto cheap quarter inch ply, and spiling it onto solid gold occume plywood. The pieces are heavy and awkward and the process requires considerable agility. So, a better way.

1. Put the last plank, the one lying on the shop floor, in place on the boat. Mark off where the next plank will land and plane the bevel.
2. Buy, or scounge enough scraps of Mylar that you can tape together a long strip, roughly the shape of the plank, but wider. The joints between the pieces can overlap as much as you want and can be attached with masking or other tape, BUT THE JOINTS MUST BE FLAT. (- no wrinkles or bulges.)
3. Roll up your strip of Mylar, take it to the boat, unroll it and tape it over the space where the new plank will go. It only requires a few hunks of tape. The Mylar MUST LIE FLAT between the bevel of the previous plank and the next ribband. Since Mylar is dimensionally stable it doesn’t take compound curves, it will lie just as flat as the next plywood plank.
4. Standing in a civilised manner on the outside of the boat, make little marks every 4 – 6 inches along the bevel line of the prior plank, and the next ribband. If you want to do both sides of the boat use two different pencil colors.
5. Roll up the Mylar, take it into the shop and unroll it over the next piece of plywood. Using an ice-pick, prick right through the Mylar into the plank stock. Remove the Mylar, clamp a batten around the prick points, draw a line, cut with a saber saw, Voilà a plank!

When it’s time to do another plank erase the x marks and reuse the same piece of Mylar. After a while it’ll have a potfull of stray prick holes in it, but that won’t affect its usefulness one whit. If the plank shape changes as you move down (up?) the boat, you can untape your Mylar segments and put them back together again in a little different alignment. In between uses, roll the Mylar up and stick the end in an old coffee can – try that with 20+ feet of spiling board!

I find I can scarf up quite narrow strips of 12mm ply to get my plank blanks, by aligning them under the Mylar and jiggling them ’til they fit. Other than the garboards, which are wider on this boat, I find I can get two whole planks, a port and a starboard, out of a single 4 X 8 sheet. So it’s economical of material as well as time.


A Stripper Chebacco

Fraser Howell of Nova Scotia reports that he’s just started making a round-bilged Chebacco to the lines of the lapstrake version, using strip planking. Fraser has built a number of strippers, including canoes and a “Catspaw” dinghy, so he’s at home with the technique. He plans to strip plank the hull from half inch pine strips and then cover the lot with a diagonal layer of eighth inch ash (sides) and quarter inch ash (bottom). The whole lot will, of course, be epoxy coated.

Cockpit cover:

One of Chebacco’s great strengths is its huge, deep cockpit. Unfortunately, cockpits in boats of this size can’t be deep and self draining at the same time. A cover is therefore needed to keep the cockpit reasonably dry. If the boat is kept on the water, a cover going over the boom would seem to be the right sort of thing. Brad Story writes:

. . . the ones I’ve seen go over the boom, with snap-up cutouts for the halliards and topping lift. This way it serves also as a sail cover. This cover was secured along the edge of the deck with eye straps. These straps along the coaming would work at least as well. They’d cut down on the cover flapping – though they might chafe the finish on the coaming edge. The cover is over the cockpit only, (though a tail extends fwd and aft to cover the sail). It’s held onto the eye straps with a piece of cord thru eyelets in the cover – a little tedious to put on/take off, but strong and foolproof.

And Finally:

We depend on you to tell us what is of interest, so keep these letters coming. Even if you haven’t started building yet, you must have given some thought to where you want to do it. Will it be in a garage? Or a tent? Or out of doors? Let’s hear your thoughts on these and any other matters of interest.

My address is:

Bill Samson,
88 Grove Road,
West Ferry,
Dundee,
DD5 1LB,
Scotland.

Phone +44 (0)1382 776744 (Home)
+44 (0)1382 308611 (Work)
Fax +44 (0)1382 308877
eMail w.b.samson@tay.ac.uk

Stop Press

Peter Gray’s Chebacco nears completion. It will be launched in Queensland, Australia. Peter has used 9mm ply for the decks in order to cut down on high weight. He plans to install a 12V bilge pump to keep the cockpit dry. He has made his rudder stock from 2″ dia steel pipe which will be galvanised. The mainmast is made from Oregon pine. Will this be the first amateur-built Chebacco to hit the water? Watch this space!

Chebacco News 02

Chebacco News

Number 2, February 1995

Since Peter Spectre published details of the newsletter in WoodenBoat, the readership of this newsletter has almost doubled. Interestingly, practically all of the readers are builders of Chebacco – the only account I’ve had of her sailing performance was from Phil Bolger himself, of which more later.

So far, none of the readers (except for Brad Story) has completed construction of a Chebacco, and about half are still at the planning stage and haven’t applied saw to wood yet. This is a pity, because lots of us would like to hear about cruises that Chebacco owners have undertaken – these would be wonderful inspirational fodder to keep us going through the construction process.

A number of readers were disappointed in the quality of the photos in the last issue, so I’ve had them scanned into a computer and printed out in dot style, which photocopies much better.

I’d like to thank those readers who have sent me a donation to help cover printing and postage costs. For information; the (low volume) photocopying and postage involved in producing this newsletter costs me about $2 each.

Please keep your letters coming – even if they are only questions. Discussions of questions are likely to be of interest to more than one reader.

Bill Samson,
88 Grove Road,
West Ferry,
Dundee,
DD5 1LB,
Scotland.

The Question of Ballast

I’ve had a couple of queries from readers about whether Chebacco should be ballasted. Phil Bolger says:

“The Chebacco was meant to sail without any ballast. We have, and you can, experiment with the effects of ballast simply by noting the effect of various crew weight and placement. They are very good in rough water and forgiving in squalls and with prudent and skilled handling and not exceptionally bad luck would get over the North Sea, or the ocean for that matter; but by present day standards they are inshore and fair-weather boats.”

Brad Story told me, last year, that he didn’t see any need for ballast on the Chebacco, although he knew of one owner who had put in a couple of hundred pounds of it.

My own experiments with an eighth scale model of Chebacco (sheet ply version) indicate that she’ll self right from a ninety degree knock-down, but if she goes much further than that she’ll go all the way over. On the other hand, a capsized Chebacco floats very high and certainly won’t sink as many ballasted boats would. This is all academic, though, because there have been no reports of a Chebacco ever having capsized.

Sailing Chebacco

Phil Bolger writes:
“We had a good sail last week in a borrowed Chebacco 20; the last of the season as we’re starting to see ice. This one carries a stronger weather helm than I would prefer. It may be a quirk of her sail cut, or something, as there have not been any complaints about it, but if you have not yet completed the mast step and partners there would be no harm in allowing each of them to go three or four inches further forward. Another possibility is that we had her centerboard too far down, as there was no marking on the C.B. pendant to show where the board was.”

Building Sequence for a Sheet Ply Chebacco

Unlike many other of Phil Bolger’s tack and tape designs, there is no published building sequence for a Chebacco. One reader wrote that he’d be wary of starting on a Chebacco without something akin to Dynamite Payson’s “Build the Instant Catboat” book to guide him through the process. I hope this numbered sequence of steps, which are based on my own journal of construction, will help in some measure to fill that gap.

1. Buy plans – these are available from Dynamite Payson.
2. Get hold of Dynamite’s book “Build the New Instant Boats” which describes lots of useful techniques which are applicable to Chebacco.
3. I’d strongly recommend building an eighth scale model, using 1/16 inch ply. This will help to sort out any uncertainties you may have when reading the plans, without costing an arm and a leg if you make a mistake.
4. Get your plywood. I used 22 sheets of half inch ply. If you intend to laminate the for’ard end of the bilge panels, rather than twist the half inch ply, then make that 20 sheets of half inch and four of quarter inch. There’s something to be said, too, for laminating the cabin roof. If you do that you’ll need 18 sheets of half inch and 8 of quarter inch.
5. Choose your building site. It is undoubtedly best to build in a shed if one is available. I, and a couple of other guys have used a temporary polyethylene tunnel like the one whose plans can be had from Stimson Marine – although it might get a bit hot in warm climates. If the climate is warm, then you can build out of doors and throw a tarp over the boat when you aren’t working on it. You’ll need at least 3 or 4 feet all around the hull for comfort when you are working on it.
6. Set up your backbone. The style of backbone is up to you. I used a “ladder” made of two by sixes, with the “rungs” spaced to match the bulkheads/molds. I set this up on legs about a foot off the ground with packing under the feet to keep everything level – this is crucially important if you want to avoid building a twisted hull. Gil Fitzhugh of New Jersey is using a plywood box section backbone which is working very well.
7. Mark out the bulkheads and transom on the sheets of ply, following the dimensions given in the plans. It isn’t necessary to loft the lines as the dimensions on the plans are accurate enough. Marking out actually takes longer than cutting them out! I found that this was very hard on the knees and would recommend getting knee pads before you start. Incidentally, it’s a good idea to plan the layout of components on the ply sheets before you start, in order to minimise wastage.
8. Cut out the bulkheads and transom. The molds (2 and 3) can be made from what we in the UK call “chipboard” – could this be the same as US particle board? Most of the cutting out can be done with a hand held circular saw – the curves are pretty gentle. A sabre saw (UK “jigsaw”) can also be used but gives wobbly edges that need planing up. I used (masochist that I am) a hand saw – crosscut with hardened teeth – which got through the wood surprisingly quickly and without the nervous tension that always seems to go with handling power tools. Try it!
9. (Optional) You can pre-coat all your plywood components with epoxy after cutting them out. It’s much easier to get a drip-free coat on a horizontal surface than a vertical one. The downside is that all the gluing surfaces need to be roughened up and you’ll need to protect the epoxy from UV degradation until you paint it. It’s also a pain having to wait for this to dry before you get to the next stage.
10. Make the stem. I laminated mine from offcuts of half-inch ply (seven layers) glued side by side and liberally coated with epoxy. I cut the bevels on a bandsaw, making sure not to cut too deep. The final bevels will be determined once the stem is set up with the bulkheads and molds.
11. Before you set up the bulkheads it’s a good idea to glue on the one and a half by four “floors” on bulkheads 4 and 5 and the framing around the transom. I used a mixture of yellow (“pitch”) pine and construction grade fir for these. The plans give accurate instructions for bevelling the transom and its framing – do this now.
12. Following the measurements given in the lines plan, fix the bulkheads, molds , transom and stem to the backbone using simple battens and nails which will be removed later. Be very careful to line everything up accurately using a spirit level and double check the heights of the gluing surfaces for the bottom. I found a lot of fiddling was necessary at this stage. Once you’ve fixed on the topsides you are committed and there’s no going back!
13. Mark out the topsides and bottom on the ply, using a bendy batten to mark fair curves for their edges. This is vitally important for the finished look of the craft. Cut them out and join up the parts with butt straps as shown in the plans. Precoat with epoxy if desired, then roughen up the gluing surfaces.
14. Mark the positions of stem, molds, bulkheads and transom on the topsides and bottom.
15. Temporarily fit topsides to bulkheads using screws and cleats as necessary. An extra pair of hands helps here though it can be done singlehanded by suspending the topsides with string from the shed roof. Some fine adjustments to the bulkheads will probably be needed at this stage.
16. Once you are satisfied with the positioning of the topsides, glue them on and apply epoxy fillets. Notice that there is no need to bevel the bulkhead edges. The epoxy fills the gaps and, indeed, a stronger joint results.
17. Fit the bottom and glue it in much the same way as the topsides.
18. The next thing to do is make the bilge panels. No dimensions are given for these on the plans because the fine adjustments of the previous stages could result in significant variation in the bilge panel shapes. The panels are made a section at a time and then fitted, with butt straps being applied on the boat.
19. The shape of the bilge panel can be determined by laying a long sheet of wrapping paper (as stiff as possible) along the gap between topsides and bottom that the bilge panel will fill. The shape of this gap is transferred to the paper by rubbing coloured chalk along the edges. It is best to do this on each side of the boat separately, as there could be small differences. Notice that because the bottom and topsides are not bevelled, the shape traced will be too large by about a half inch. This can be trimmed away later as fitting of each panel progresses.
20. Mark out the shape of the front section of the bilge panel on a sheet of ply and cut it out. Fit this section starting at the stem and screwing on cleats inside to make it lay against the topsides and bottom, working aft, trimming it to size as you go. There is tremendous twist in this panel and I used a Spanish windlass (twisted rope) attached to a clamp at the aft end of the panel to pull it into position. There is a colossal amount of potential energy in this twisted panel so take care that it doesn’t accidentally come loose and decapitate you! I found that, with the plywood I was using, if I left it clamped in position for a day or so, the plywood took up its shape and had less tendency to spring back when further work was done. [Alternatively, laminate this section in situ using two layers of quarter inch ply.]
21. Glue front section of bilge panel into position, both sides, and apply epoxy fillets as necessary.
22. Fix butt straps to front sections of bilge panels. (This may involve trimming one of the molds.)
23. Fit and glue the other two sections of the bilge panels. They are easy peasy compared to the front section.
24. Tape all the joints, inside and out, with 4 inch glass tape. (I won’t go into details here – Dynamite explains it beautifully in “Build the New Instant Boats”.)
25. Fair the outside of the hull using a power sander ( – I like the dual action type – ) and a long sanding board with 60-grade paper on it. Fill all hollows and sand out all humps at this stage. It sounds straightforward but takes ages to do right. Any unfairness at this stage will stick out like a sore thumb on a glossy hull. BE SURE TO USE A BREATHING MASK AND GOGGLES WHEN YOU DO THIS – EPOXY DUST CAN BE VERY BAD FOR YOU!
26. You can now glass the outside of the hull, or wait until the centerboard case and keel are fitted before you do so. I did it at this stage because it is less fiddly.
27. Apply a layer of six ounce glass cloth (I used plain weave) to the outside of the hull, using about three coats of epoxy to fill the weave. Beware of drips, sags and runs! Dynamite’s book again explains the process very well.
28. This is a good time to make the centerboard case (and the centerboard). This is a straightforward bit of joinery and needs no special explanation. NOTE, however, that the case protrudes through the bottom of the boat to the level of the outside of the keel.
29. Fit the centerboard case to the hull. This is an awful job as it involves cutting the slot in the bottom and making sure it lines up accurately with the slot in bulkhead 4 and its associated floor. I used a combination of sabre saw, handsaw, abrasive disk and files along with a liberal sprinkling of four letter words as I was working inside the hull and sawdust, epoxy dust and glass dust rained down on me. Goggles are a good idea – I didn’t wear any and had to go to hospital to get a sliver of epoxy removed from my cornea at this stage!
29. The keel pieces, cheeks and outer stem can now be made and fitted. I stuck to the plans with built-up hollow keel (remembering the drainage holes). Brad Story and other builders have gone for solid wooden keel pieces – fir or oak. With my small scale woodworking equipment the built-up option was easier. I made the stem from two thicknesses of one and a quarter inch thick fir.
30. Glass the stem and keel.
31. Back to sanding and fairing. This shouldn’t be too bad if the last lot was done well. Again take precautions against inhaling the dust.
32. Once the hull has been sanded and faired it is a good idea to paint it so that there will be no worries about UV degradation of the epoxy. I used a white epoxy paint undercoat (Veneziani “Plastolite”) which was sanded, and fairing done where the paint (inevitably) showed up irregularities which had been hiding until now. I used a Veneziani polyester filler (rather like car body filler) which applied easily and sanded well. This was topped with a 2-part linear polyurethane gloss (Veneziani “Gel Gloss”) applied using a paint pad. The finish is unbelievably hard. I used the same stuff on a skiff five years ago and it hasn’t needed repainting, so I claim the extra expense of these fancy paints is worthwhile. Having said that, most builders use conventional marine enamel on top of the epoxy. So it’s up to you. The waterline needs to be struck at this stage. (You figure out a good way; I can’t.) The area under the waterline should be painted with antifouling. I put this straight on the epoxy. It could be better to paint the epoxy first with conventional paint and then antifouling paint – I don’t really know what is best. I used a long handled roller to apply the paint to the inside to the centreboard case.
33. Turn the hull over.
34. Fillet inside joints and glass tape them.
[Lapstrake builders are on their own up to this point – from here on in it’s the same process]
35. Add remaining floors.
36. Fit and glue inwhales.
37. Fit and glue framing for seats, carlines for decks.
38. Finish inside of hull with 3 coats of epoxy. Foam roller application is easiest. Watch out for runs!
39. Make decks, seats, outboard well panels etc. to fit framing – precoat with epoxy and then glue/nail in place.
40 . Make cabin sides and glue into position.
41. Add framing to tops of cabin sides and fair in preparation for cabin roof.
42. Cut out cabin roof and glue/screw in position.
43. Make hatch slides (I used fir) and glue/screw in position.
44. Add trim pieces to hatch opening and mast opening.
45. Make slides for washboard and fix.
46. Make hatch and washboard.
47. Cut ventilator holes in rear compartments and fix on clamshell covers.
48. Fix on “shelves” to support floorboards in cockpit.
49. Make and fix mast step.
50. Make floorboards – loose fit.
51. Glass decks and fair surface.
52. Paint.
53. Make spars; get (or make) sails.
54. Add fittings, cleats etc.
55. Rig her up and go sailing!